Create Amazon EKS Cluster using eksctl
 Nihal Shardul
Kubernetes has become the de facto standard for container orchestration, and Amazon EKS (Elastic Kubernetes Service) is one of the most popular managed Kubernetes services available. While you can manually create and configure an EKS cluster using the AWS Management Console or the AWS CLI, eksctl simplifies this process significantly. In this blog, we'll explore how to create a Kubernetes cluster using eksctl, what eksctl does in the background, its architecture, and how to set it up.
What is eksctl?
eksctl is a command-line tool that simplifies the process of creating and managing Kubernetes clusters on Amazon EKS. Developed by Weaveworks, eksctl is designed to provide a simple and easy way to work with EKS clusters. With just a few commands, you can create, update, and delete clusters, making it an invaluable tool for developers and operations teams alike.
Key Features of eksctl:
Cluster Creation: Create fully configured EKS clusters with a single command.
Node Management: Easily manage the worker nodes in your cluster.
Add-ons Management: Install common Kubernetes add-ons like the AWS Load Balancer Controller.
Cluster Upgrades: Upgrade the EKS cluster and its node groups with minimal effort.
Configuration Management: Use YAML configuration files for reproducibility and version control.
Setting Up eksctl
Prerequisites
Before you begin, ensure you have the following installed:
AWS CLI: The AWS Command Line Interface must be configured with appropriate IAM permissions.
kubectl: The Kubernetes command-line tool to interact with your cluster.
eksctl: Install
eksctlby following the instructions on the official eksctl GitHub repository.
Creating a Kubernetes Cluster
With eksctl, creating a Kubernetes cluster is straightforward. Here’s a step-by-step guide:
Configure AWS CLI: Make sure you have configured your AWS CLI with
aws configure. Enter your Access Key ID, Secret Access Key, region, and output format. Remember you would need IAM Role with below minimum permission,| AWS Service | Access Level | | --- | --- | | CloudFormation | Full Access | | EC2 | Full: Tagging Limited: List, Read, Write | | EC2 Auto Scaling | Limited: List, Write | | EKS | Full Access | | IAM | Limited: List, Read, Write, Permissions Management | | Systems Manager | Limited: List, Read |
Install KUBECTL: Install kubectl usin below command, to set up eksctl
 sudo apt-get update
 sudo apt-get install -y apt-transport-https ca-certificates curl gnupg
 curl -fsSL https://pkgs.k8s.io/core:/stable:/v1.31/deb/Release.key | sudo gpg --dearmor -o /etc/apt/keyrings/kubernetes-apt-keyring.gpg
 sudo chmod 644 /etc/apt/keyrings/kubernetes-apt-keyring.gpg
 echo 'deb [signed-by=/etc/apt/keyrings/kubernetes-apt-keyring.gpg] https://pkgs.k8s.io/core:/stable:/v1.31/deb/ /' | sudo tee /etc/apt/sources.list.d/kubernetes.list
 sudo chmod 644 /etc/apt/sources.list.d/kubernetes.list
 sudo apt-get update
 sudo apt-get install -y kubectl
You can check kubectl installed version using below command,

Install EKSCTL: Install eksctl using below command, to set up eksctl
 ARCH=amd64
 PLATFORM=$(uname -s)_$ARCH

 curl -sLO "https://github.com/eksctl-io/eksctl/releases/latest/download/eksctl_$PLATFORM.tar.gz"
 curl -sL "https://github.com/eksctl-io/eksctl/releases/latest/download/eksctl_checksums.txt" | grep $PLATFORM | sha256sum --check

 tar -xzf eksctl_$PLATFORM.tar.gz -C /tmp && rm eksctl_$PLATFORM.tar.gz
 sudo mv /tmp/eksctl /usr/local/bin
Once done, check if installation is completed using
eksctl versioncommand.Create a Cluster: You can create a cluster using a single command. Here’s an example:
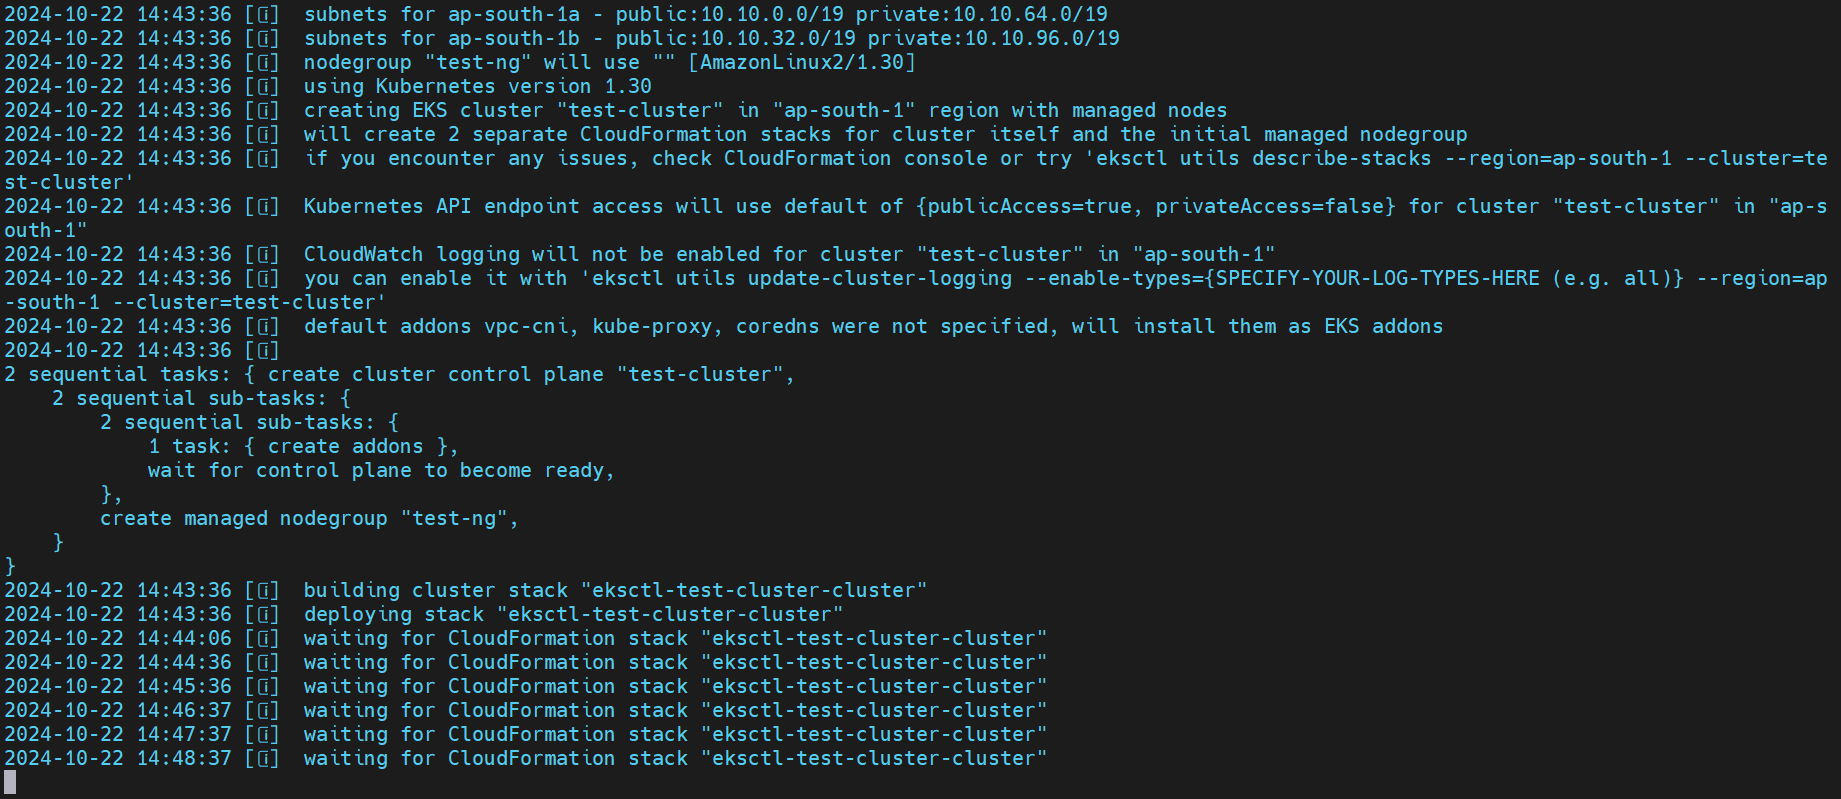
eksctl create cluster -n test-cluster -r ap-south-1 --nodegroup-name test-ng -t t2.micro -m 2 -M 3 --vpc-cidr 10.10.0.0/16This command does the following:
Creates an EKS cluster named
test-cluster.Deploys it in the
ap-south-1region.Sets up a node group name
test-ngwith min2and max3nodes.Create VPC range from
10.10.0.0/16Node type set to
t2.micro
Wait for Completion: The command will take several minutes as
eksctlprovisions the necessary resources in AWS. You can monitor the progress in your terminal.
If you want to update kubectl file type below command,
aws eks update-kubeconfig --region ap-south-1 --name test-clusterConfigure kubectl: After the cluster is created,
eksctlautomatically configures yourkubectlcontext. You can verify your connection with:kubectl get all
Using this command, you can get list of all resources
Deploy Application: You can deploy your application on EKS now. We will cover this in next blog.
Delete the Cluster: If you wish to delete the cluster later, use:
eksctl delete cluster --name test-cluster --region ap-south-1
What Happens in the Background?
When you run the eksctl create cluster command, several things happen under the hood:
VPC Creation:
eksctlcreates a Virtual Private Cloud (VPC) for your cluster, complete with subnets and security groups.EKS Control Plane: It provisions the EKS control plane, which is the brain of the Kubernetes cluster, responsible for managing the state of your cluster.
Node Group Creation:
eksctlprovisions EC2 instances for the node groups, ensuring they are properly configured to connect to the control plane.IAM Roles: It creates IAM roles and policies necessary for the nodes to interact with AWS services securely.
Cluster Configuration: The tool sets up the necessary Kubernetes resources, including ConfigMaps and RBAC settings.
Conclusion
Using eksctl to create and manage Kubernetes clusters on Amazon EKS is a game-changer for developers and DevOps teams. It abstracts much of the complexity involved in setting up a Kubernetes cluster, allowing you to focus on deploying and managing your applications instead of dealing with infrastructure. With its powerful features and straightforward command-line interface, eksctl is a must-have tool in any cloud-native developer's toolkit. Whether you’re spinning up a quick development cluster or managing a production environment, eksctl simplifies the entire process, making Kubernetes accessible to everyone.
Thanks.
Subscribe to my newsletter
Read articles from Nihal Shardul directly inside your inbox. Subscribe to the newsletter, and don't miss out.
Written by

Nihal Shardul
Nihal Shardul
Enthusiast Cloud and Security with expertise in AWS and DevOps. Proficient in Python, Bash, Git, Jenkins, and container orchestration tools like Docker and Kubernetes, I focus on automation and CI/CD practices. I leverage security tools such as NMAP, Nessus, and Metasploit to identify and mitigate vulnerabilities. Passionate about learning and collaboration, I thrive on enhancing cloud security and efficiency. Always eager to advance my skills, I aim to contribute to the tech community.