Containerizing a Flask Application with Docker: Rock-Paper-Scissors Game
 Manoj Shet
Containerization has revolutionized the way applications are developed, deployed, and managed. It allows developers to package applications along with their dependencies into containers, ensuring consistency across different environments. This blog post will explore the process of containerizing a simple Flask application a Rock-Paper-Scissors game using Docker. The focus will be on the Dockerfiles used in the project, providing detailed explanations and insights into the commands and structure.
Introduction to Flask and the Rock-Paper-Scissors Game
Flask is a lightweight web framework for Python that makes it easy to build web applications quickly. It is particularly well-suited for small to medium-sized applications and APIs, providing flexibility and simplicity. The Rock-Paper-Scissors game is a classic game that involves two players selecting one of three options: rock, paper, or scissors. The winner is determined based on the following rules:
Rock beats Scissors
Scissors beats Paper
Paper beats Rock
In this project, a Flask application will be created to allow users to play the game against the computer, which randomly selects its choice.
Project Structure
The project consists of the following components:
Flask Application: The main code for the game logic and web interface.
HTML Templates: The frontend interface for the game.
Dockerfile: The file that defines how to build the Docker image for the application.
Multi-stage Dockerfile: An optimized approach to build and run the application in separate stages.
Building the Flask Application
Before diving into containerization, the Flask application needs to be developed. Below is the basic structure of the Flask application.
Flask Application Code
The Flask application handles routing and game logic. The following code illustrates how the application works:
from flask import Flask, render_template, request
import random

app = Flask(__name__)

# Choices available in the game
choices = ["rock", "paper", "scissors"]

@app.route('/')
def home():
    return render_template('index.html')

@app.route('/play', methods=['POST'])
def play():
    player_choice = request.form['choice']
    computer_choice = random.choice(choices)

    if player_choice == computer_choice:
        result = "It's a tie!"
    elif (player_choice == "rock" and computer_choice == "scissors") or \
         (player_choice == "paper" and computer_choice == "rock") or \
         (player_choice == "scissors" and computer_choice == "paper"):
        result = "Winner!"
    else:
        result = "You lose!"

    return render_template('result.html', player_choice=player_choice,
                           computer_choice=computer_choice, result=result)

if __name__ == '__main__':
    app.run(debug=True)
Explanation of the Flask Code
Flask Setup: The app is initialized with Flask(__name__), allowing it to locate templates and static files.
Routing:
The / route renders the main game interface (index.html).
The /play route handles the player's choice, compares it with a randomly generated computer choice, and determines the game result.
Game Logic: The computer randomly selects "rock," "paper," or "scissors," and the outcome is determined by comparing the player's choice against the computer's.
Template Rendering: Results are displayed using HTML templates: index.html for the game and result.html for the results.
HTML Templates
index.html
<!DOCTYPE html>
<html lang="en">
<head>
    <meta charset="UTF-8">
    <meta name="viewport" content="width=device-width, initial-scale=1.0">
    <title>Rock Paper Scissors</title>
</head>
<body>
    <h1>Rock, Paper, Scissors</h1>
    <form action="/play" method="POST">
        <button name="choice" value="rock">Rock</button>
        <button name="choice" value="paper">Paper</button>
        <button name="choice" value="scissors">Scissors</button>
    </form>
</body>
</html>
result.html
<!DOCTYPE html>
<html lang="en">
<head>
    <meta charset="UTF-8">
    <meta name="viewport" content="width=device-width, initial-scale=1.0">
    <title>Result</title>
</head>
<body>
    <h1>Result</h1>
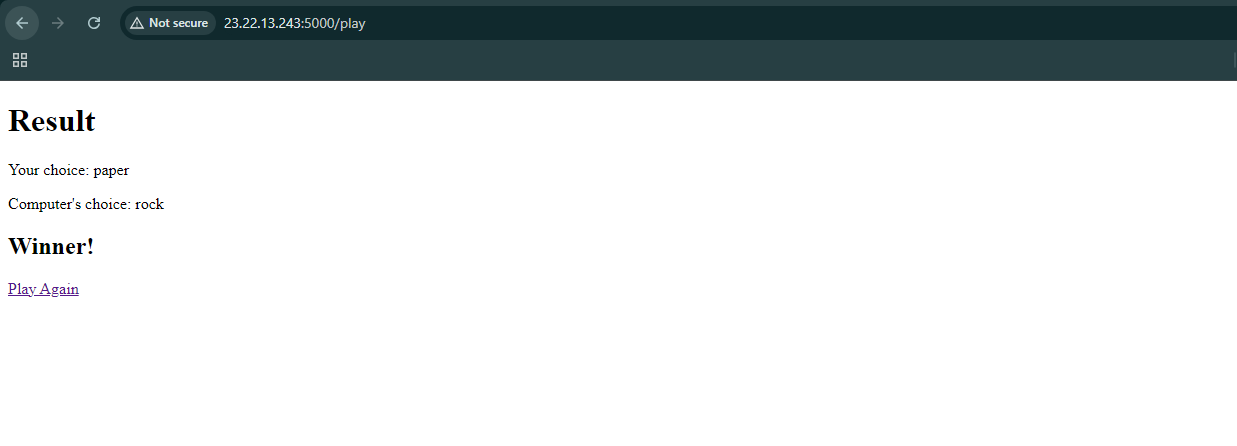
    <p>Your choice: {{ player_choice }}</p>
    <p>Computer's choice: {{ computer_choice }}</p>
    <h2>{{ result }}</h2>
    <a href="/">Play Again</a>
</body>
</html>
Containerizing the Flask Application with Docker
Containerization allows the application to be packaged with all its dependencies, ensuring it runs consistently across different environments. Docker makes this process straightforward. Below are the Dockerfiles used to build the application.
Dockerfile
The following Dockerfile will be used to create a container for the Flask application:
# Uses the official Python 3.9 image as the base for the container
FROM python:3.9
# Sets the working directory inside the container
WORKDIR /app
# Copies all files from the current directory on the host to /app in the containe
COPY . /app
# Installs Python dependencies specified in requirements.txt
RUN pip install -r requirements.txt
# Documents that the container listens on port 5000 at runtime
EXPOSE 5000
# Specifies the command to run the application using Python when the container starts
CMD ["python", "app.py"]
Explanation of the Dockerfile
Base Image: The Dockerfile begins with the FROM python:3.9 instruction, which sets the foundation of the container. This base image comes pre-installed with everything necessary to execute applications written in Python 3.9.
Working Directory: The WORKDIR /app instruction establishes the /app directory as the active working directory within the container. This means that all subsequent commands will be run in this directory.
Copying Files: The command COPY . /app transfers all files from the current directory on the host system to the /app directory inside the container, ensuring that the application files are available for use.
Installing Dependencies: With the RUN pip install -r requirements.txt command, the Dockerfile installs all the required Python packages specified in the requirements.txt file, preparing the environment for the application.
Port Exposure: The EXPOSE 5000 instruction tells Docker that the application within the container will listen for connections on port 5000 when it is running.
Starting the Application: Finally, the CMD instruction specifies the command to start the Flask application, ensuring that it runs automatically when the container is launched.
Multi-Stage Dockerfile
A multi-stage Dockerfile can help reduce the final image size and enhance security. The following is the multi-stage Dockerfile used in this project:
# Stage 1
FROM python:3.9 AS builder

WORKDIR /app

COPY requirements.txt .

RUN python -m venv /opt/venv && \
    . /opt/venv/bin/activate && \
    pip install --no-cache-dir -r requirements.txt

COPY . .
############################################################################
# Stage 2
FROM python:3.9-slim


ENV PATH="/opt/venv/bin:$PATH"

WORKDIR /app

COPY --from=builder /opt/venv /opt/venv

COPY --from=builder /app /app

EXPOSE 5000

CMD ["python", "app.py"]
Explanation of the Dockerfile
Builder Stage:
The build process begins with the full python:3.9 image. This image contains a complete Python environment, including the necessary libraries and tools required to run Python applications. Using a full image ensures that all dependencies can be easily installed during the build process.
A working directory /app is created within the container using the WORKDIR instruction. This directory serves as the main location for storing the application code. By setting a specific working directory, all subsequent commands are executed in this context, keeping the container organized.
The requirements.txt file, which lists all the dependencies required for the Python application, is copied into the container using the COPY instruction. This file typically includes libraries like Flask, requests, or any other packages the application needs. By copying this file first, Docker can cache the layer that installs dependencies, speeding up subsequent builds if the application code changes but the dependencies do not.
A virtual environment is created at /opt/venv using the venv module. This step is crucial for isolating the application’s dependencies from the system’s Python environment. Creating a virtual environment ensures that the application can run with the specific versions of packages it needs, avoiding conflicts with other projects or system packages.
The dependencies specified in requirements.txt are installed in the virtual environment using the RUN command along with pip install --no-cache-dir -r requirements.txt. The --no-cache-dir option is included to prevent caching of the installation files, which reduces the final image size. This command installs all the required packages within the isolated virtual environment, ensuring that the application has access to the correct libraries.
Finally, the application code itself is copied into the working directory /app using the COPY instruction. This step ensures that all necessary application files are included in the build, making them available for execution in the final container.
Final Stage:
A lightweight python:3.9-slim image is used to minimize the final container size. This image includes only the essential components needed to run Python applications, stripping away unnecessary tools and libraries that are present in the full image. Using a slimmer image enhances performance and reduces the attack surface for security.
The PATH environment variable is updated to include the virtual environment’s binary path (/opt/venv/bin) using the ENV instruction. This adjustment ensures that the container uses the installed packages from the virtual environment by default. As a result, when executing Python scripts or commands, the virtual environment’s dependencies take precedence over any system-wide installations.
The working directory remains /app, where the application will run. By keeping the same working directory as in the builder stage, the structure and organization of the container are maintained, allowing the application to function without additional configuration.
The virtual environment and dependencies built in the first stage are copied from the builder stage into the final image using the COPY instruction. This step ensures that the application runs with the same environment used during the build process, maintaining consistency and reliability in the execution of the application.
The application code is also copied from the builder stage to the final image using the COPY instruction. This guarantees that the application files are present in the final image, allowing the container to run the application as intended.
Port 5000 is exposed, which is the default for many Python web applications like Flask. This instruction makes the specified port available for external access, enabling users to interact with the application over the network.
The final command python app.py is set to run the Python application when the container starts. This command defines the entry point for the container, ensuring that the application is executed as soon as the container is launched.
This multi-stage Dockerfile structure enables the creation of smaller, more secure, and faster-to-deploy images by separating the build and runtime environments. The final image will only contain the essential files needed to run the application, improving security and efficiency.
Building and Running the Containerized Application
Once the Dockerfile is ready, the next step involves building the Docker image and running the application inside a Docker container. This process ensures that the Flask application can run consistently across different environments.
Building the Docker Image:
To build the Docker image, use the following command in the terminal from the project directory, where the Dockerfile is located:
docker build -t rock-paper-scissors-app .
Breakdown of the Command:
docker build: This command tells Docker to build an image from the specified Dockerfile.
-t rock-paper-scissors-app: The -t flag allows tagging the image with a name, in this case, rock-paper-scissors-app. This makes it easier to reference the image later.
.: The dot at the end specifies the build context, which is the current directory. Docker will look for the Dockerfile in this directory.
Once the build process is complete, you will see a success message, and the image will be available in your local Docker image repository.
Running the Docker Container:
After building the image, the next step is to run it inside a Docker container. Use the following command to do so:
docker run -p 5000:5000 rock-paper-scissors-app
Breakdown of the Command:
docker run: This command tells Docker to create and start a new container from the specified image.
-p 5000:5000: The -p flag maps port 5000 of the container to port 5000 on the host machine. This mapping allows access to the Flask application running inside the container through the host's port.
rock-paper-scissors-app: This specifies the image name to use for the container.
Accessing the Application:
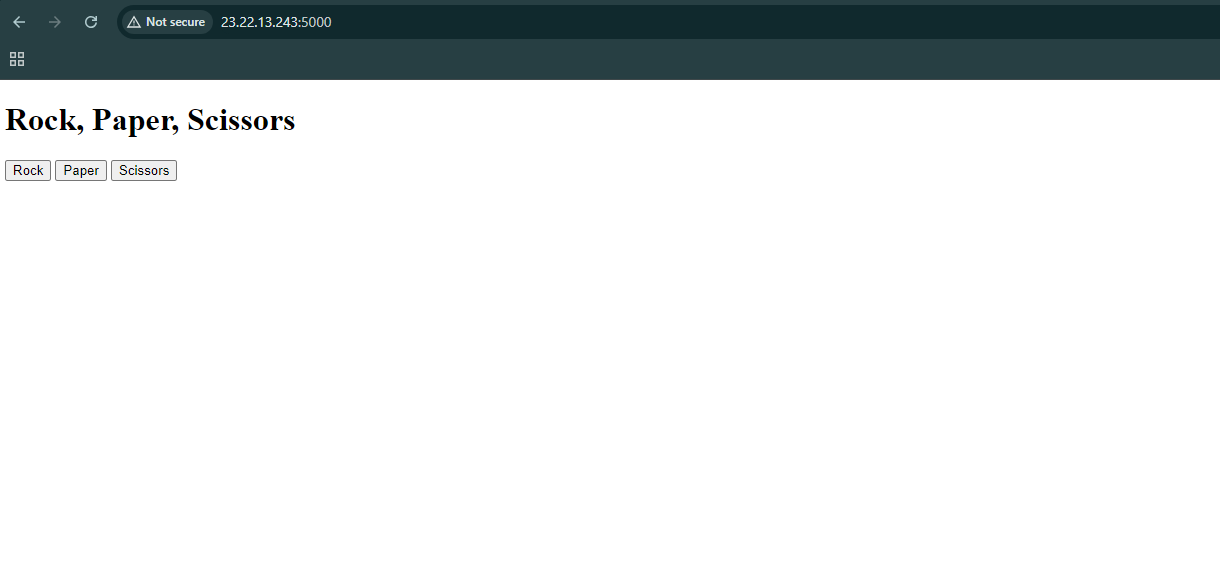
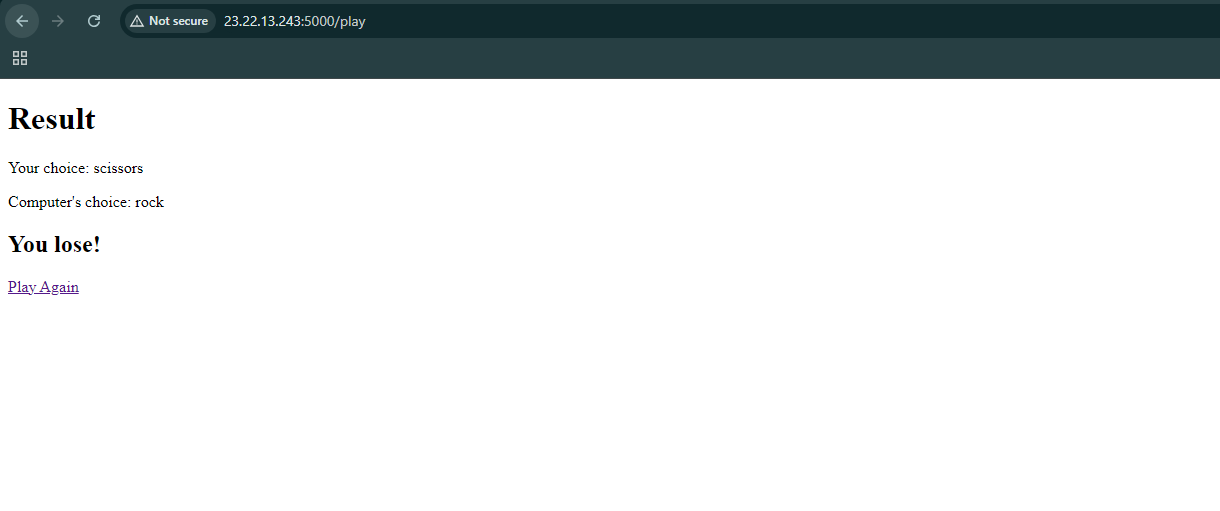
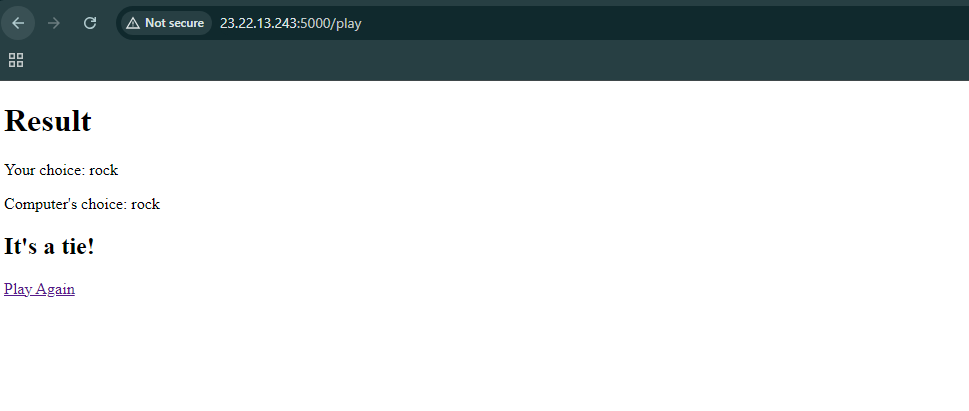
After executing the docker run command, the Flask application will be up and running. Open a web browser and navigate to http://<machine_ip>:5000. The Rock-Paper-Scissors game interface will be displayed, allowing users to interact with the application.
Conclusion
Containerizing applications using Docker has become an essential practice in modern software development, providing numerous benefits such as consistency, portability, and scalability. The journey of developing a web-based Rock-Paper-Scissors game with Flask and encapsulating it in a Docker container showcases the power of containerization in simplifying deployment and enhancing the development workflow. This blog has guided readers through the entire process, from setting up the Flask application and writing the necessary Dockerfiles to building and running the Docker container. By employing a multi-stage Dockerfile, the application benefits from reduced image size and improved security, allowing for efficient resource usage without compromising functionality.
Furthermore, readers have learned how to easily manage their containerized application using straightforward Docker commands. This knowledge empowers developers to create, test, and deploy applications seamlessly across various environments, ensuring that the application behaves consistently regardless of where it is run. As development practices continue to evolve, mastering Docker and containerization will be invaluable skills for any developer. With the Rock-Paper-Scissors game successfully containerized, the foundational concepts introduced in this blog can be applied to more complex applications and microservices, paving the way for a deeper understanding of container orchestration and cloud-native development.
Subscribe to my newsletter
Read articles from Manoj Shet directly inside your inbox. Subscribe to the newsletter, and don't miss out.
Written by
