Move data from "Source Container" to "Destination Container" in "Data Lake" - Step by Step Guide
 Arpit Tyagi
Table of contents
- Step 1: Create an instance of Azure Data Factory
- Step 2: Set up Linked Services
- Step 3: Create a dataset for both (source and destination)
- Step 4: Build the Data Pipeline by following the provided instructions.
- Step 5: Test and Debug the Pipeline
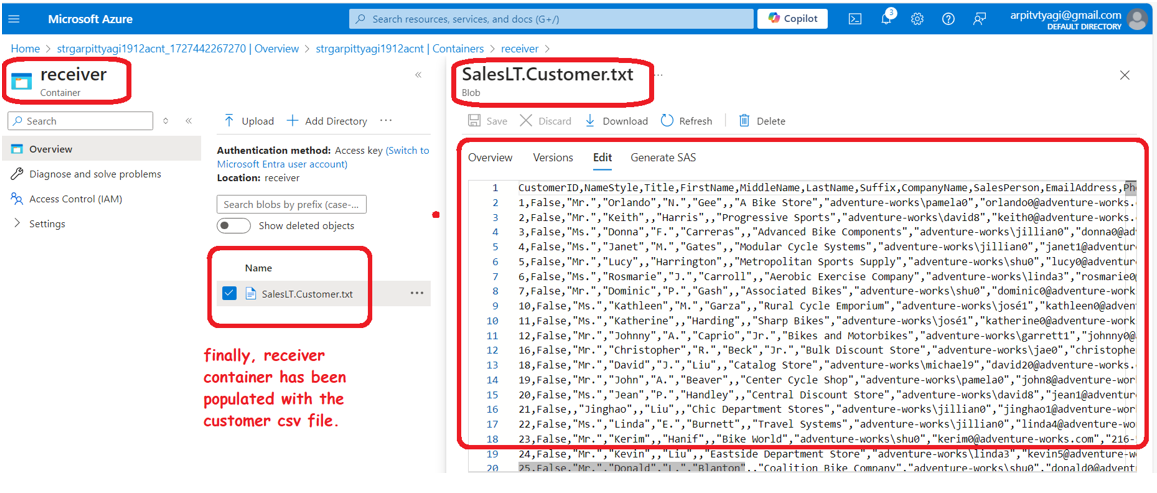
- Step 6: Verify the Receiver container and the exported file for accuracy and completeness.
Step 1: Create an instance of Azure Data Factory

Step 2: Set up Linked Services
As source and destination both are same (Azure Data Lake) so same linked service can be used.


Step 3: Create a dataset for both (source and destination)
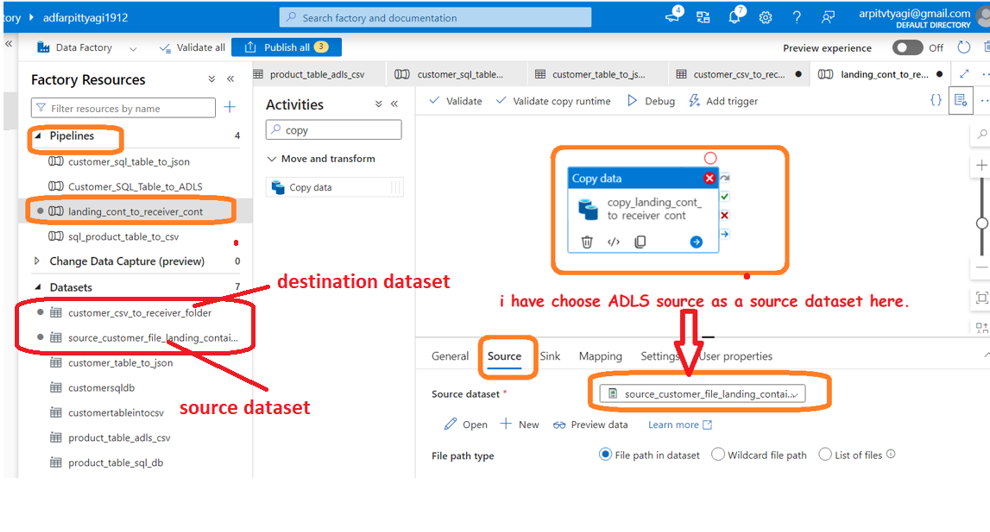
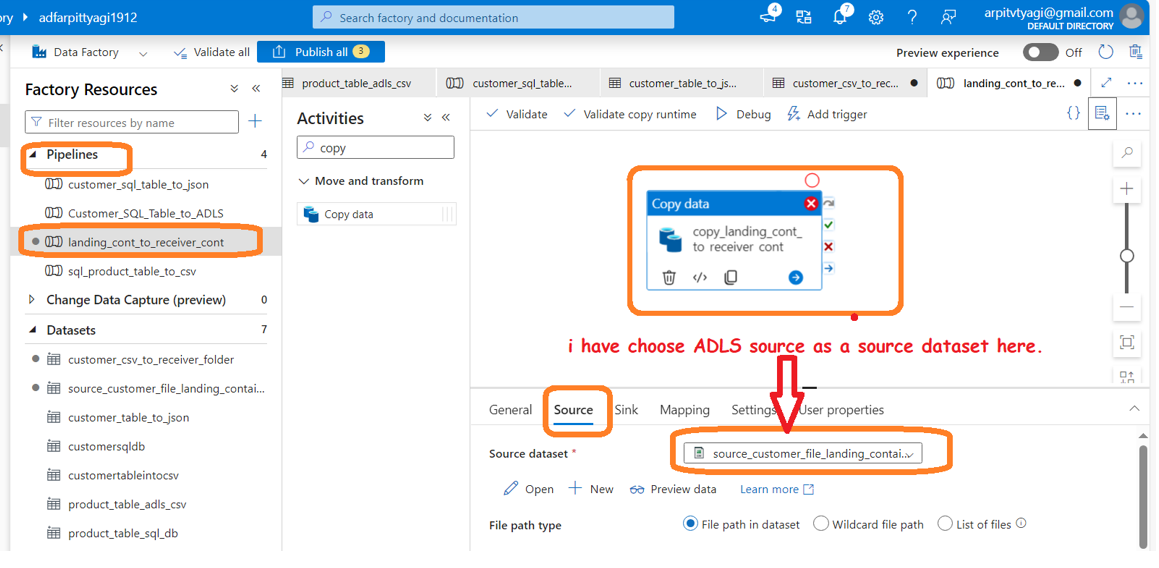
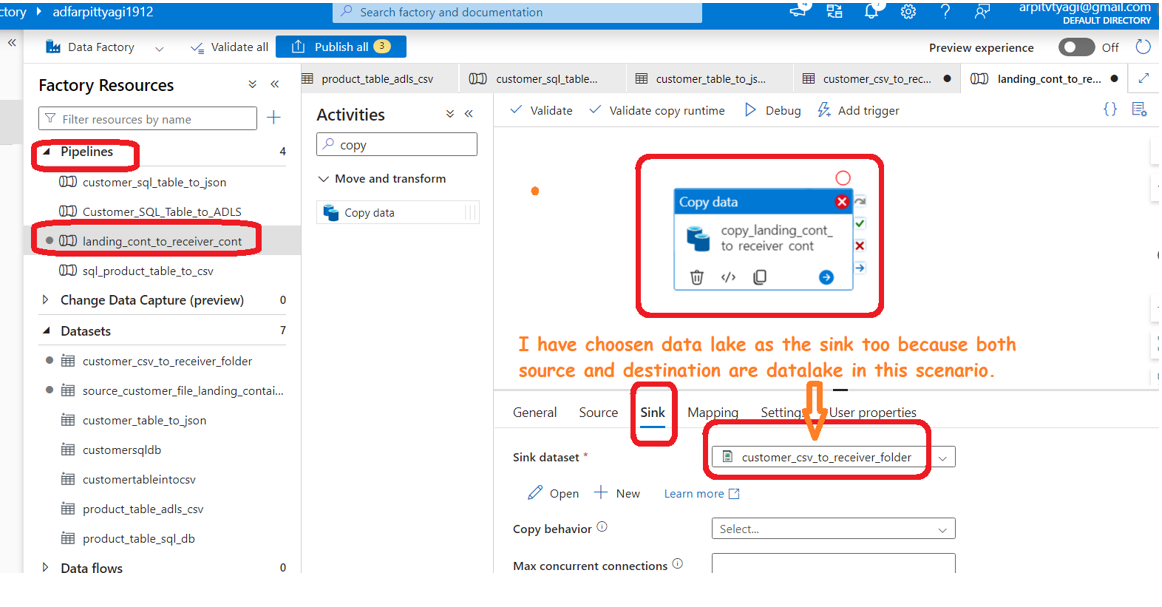
Step 4: Build the Data Pipeline by following the provided instructions.
Step 5: Test and Debug the Pipeline
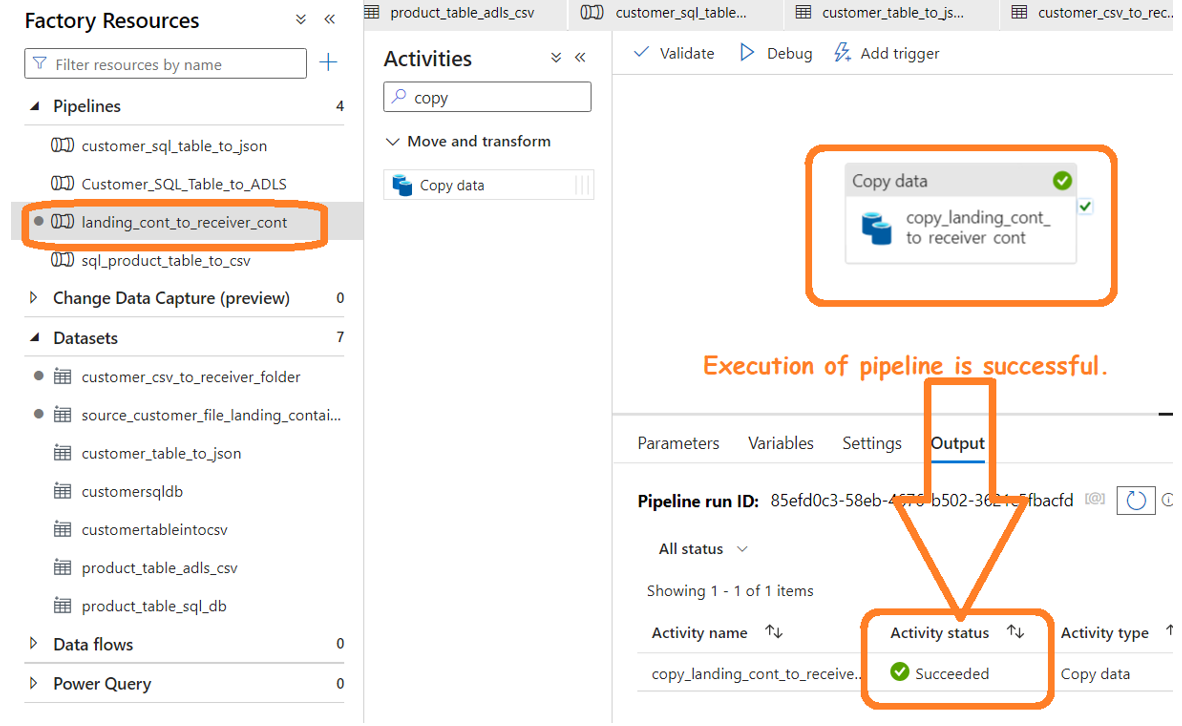
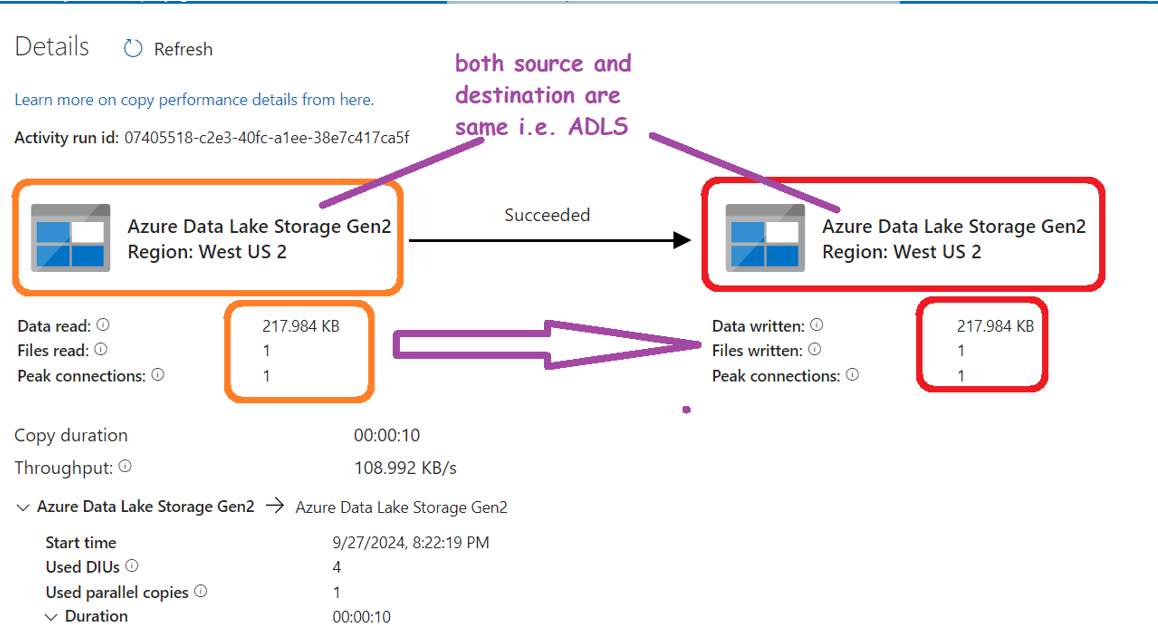
Step 6: Verify the Receiver container and the exported file for accuracy and completeness.
Subscribe to my newsletter
Read articles from Arpit Tyagi directly inside your inbox. Subscribe to the newsletter, and don't miss out.
Written by

Arpit Tyagi
Arpit Tyagi
Experienced Data Engineer passionate about building and optimizing data infrastructure to fuel powerful insights and decision-making. With a deep understanding of data pipelines, ETL processes, and cloud platforms, I specialize in transforming raw data into clean, structured datasets that empower analytics and machine learning applications. My expertise includes designing scalable architectures, managing large datasets, and ensuring data quality across the entire lifecycle. I thrive on solving complex data challenges using modern tools and technologies like Azure, Tableau, Alteryx, Spark. Through this blog, I aim to share best practices, tutorials, and industry insights to help fellow data engineers and enthusiasts master the art of building data-driven solutions.