Hands-on Guide to Setting Up Amazon S3 and SageMaker Data Wrangler for Feature Engineering
 Anshul Garg
In this tutorial, we will guide you through setting up an Amazon S3 bucket and using Amazon SageMaker Data Wrangler to perform feature engineering on a dataset. Follow along to get started.
Step 1: Create an S3 Bucket
To create an S3 bucket in your preferred region:
Go to the S3 service in your AWS account.
Click Create Bucket and enter a unique bucket name of your choice.
Select your desired AWS region and leave the remaining settings as default. Then, create the bucket.
Step 2: Upload Dataset Files
Once the bucket is created, upload the dataset files. The dataset used in this tutorial is available [here].
Open your S3 bucket.
Click Upload and select the following files:
bank-additional.csvbank-additional-names.txtbank-additional-full.csv
Upload these files to store the dataset in a central location for SageMaker to access.
Step 3: Launch Amazon SageMaker Studio
Navigate to the SageMaker service in AWS.
Open SageMaker Studio, selecting your existing user profile.
SageMaker Studio may take a minute or two to load.
Step 4: Launch Data Wrangler
Once SageMaker Studio has loaded:
Click Data > Data Wrangler Flow.
Select Run in Canvas
Data Wrangler within Canvas will take a couple of minutes to initialize.
Step 5: Load Data from S3
In Canvas> Data Wrangler:
Rename your flow to something meaningful, like "Feature Engineering."
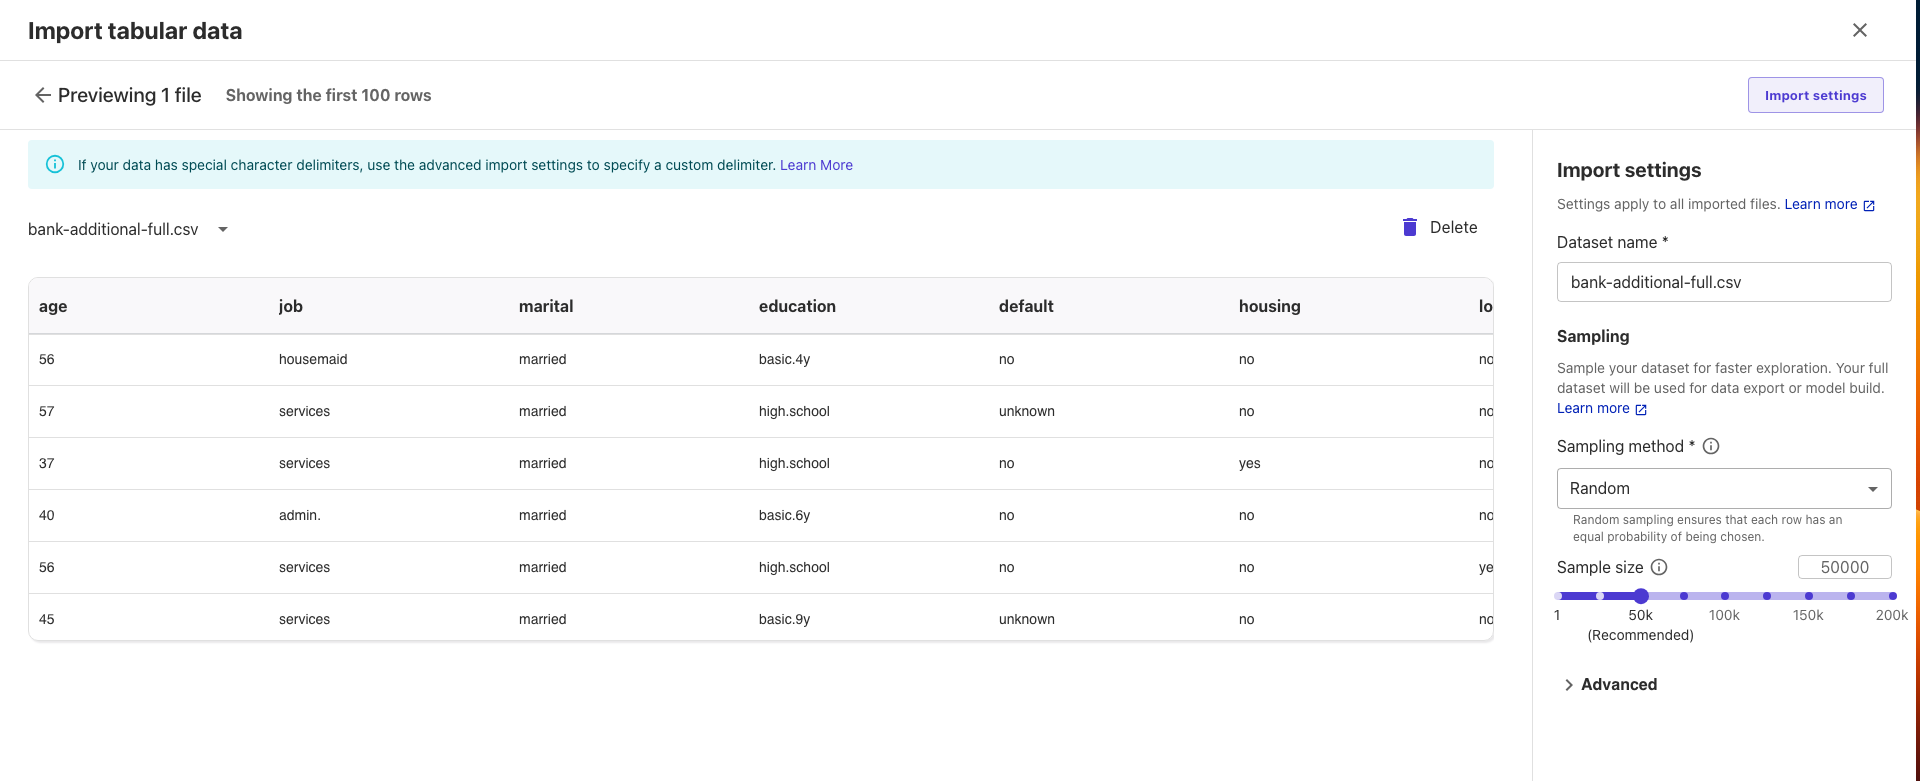
Click Import and Prepare > Tabular and choose Amazon S3 as your data source.
Select your previously created S3 bucket and choose the
bank-additional-full.csvfile.You'll now see a preview of the dataset, which contains columns with customer details such as age, job, marital status, and education.

Step 6: Review and Adjust Data
You can review the dataset's structure, including the data types for each column (e.g., numerical or categorical). Some key columns include:
Age: Numerical data
Job: Categorical data (e.g., admin, housemaid)
Marital Status: Categorical data (e.g., married, single)
Education: Categorical data (e.g., basic, high school)
Target Column (y): Binary data, indicating whether a customer subscribed to a fixed deposit (yes/no).
You can modify the data types if needed, but for this tutorial, we'll keep the default selections.
Step 7: Import Data and Proceed
Once you’ve reviewed the dataset, click Import to load it into Data Wrangler. You are now ready to begin feature engineering and further analysis.
Automating the Setup with Terraform
If you prefer not to set up the S3 bucket and SageMaker environment manually, you can use Terraform infrastructure-as-code (IaC) for automation. Terraform scripts for this setup have been created and are available in this GitHub repository: [GitHub Repo].
Prerequisite
Ensure Terraform is installed on your machine.
Set up your AWS account credentials using the AWS CLI. (You can refer to the official documentation here)
Steps
Open your terminal and navigate to the infra-as-code folder.
Run the following command to initialize Terraform:
terraform initPlan the infrastructure changes:
terraform planApply the changes:
terraform apply —auto-approveOnce completed, visit the AWS Console and proceed with the instructions from Step 3, as outlined in the referenced document.
This article guides you through creating an S3 bucket, uploading data, and using SageMaker Studio and Data Wrangler for feature engineering.
Subscribe to my newsletter
Read articles from Anshul Garg directly inside your inbox. Subscribe to the newsletter, and don't miss out.
Written by
