How to Build an AWS Translator: A Beginner-Friendly Tutorial
 Keerthi Ravilla Subramanyam
In this project, we will create a voice translation app that utilizes robust AWS services to bridge communication gaps between different languages. By leveraging AWS Lambda, Amazon Translate, and Amazon Polly, our app will process user input, translate it in real time, and provide audio playback in the selected language.
Imagine typing a message in one language, selecting a target language, and immediately receiving both the translated text and an audio version. This project demonstrates how AWS can handle language translation, enhancing accessibility and communication for all users.
Let’s dive into the process of building this voice translation app, where we'll explore each step and highlight the key AWS services that power our solution. Below is an overview of the architecture that underpins our application.
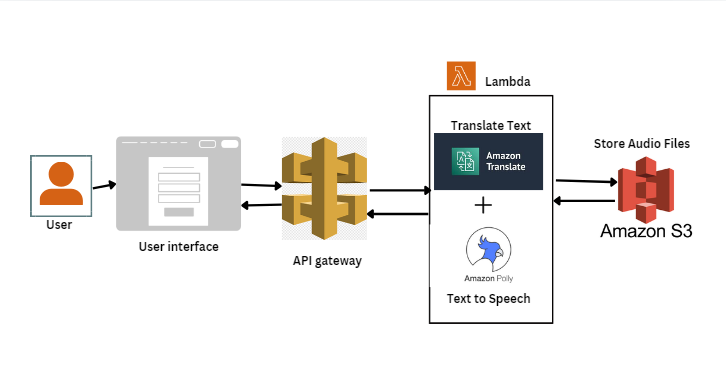
Key AWS Services
AWS Lambda: AWS Lambda, a serverless computing service, will efficiently handle backend processes like translation and text-to-speech requests, automatically scaling to meet demand and keeping our app responsive and cost-effective without the need to manage servers.
AWS Translate: AWS Translate converts input text from one language to another, supporting many languages for accurate and fast translations, and is integrated into our app to enhance communication and usability across different languages.
AWS Polly: AWS Polly converts translated text into speech, supporting multiple languages and voices, which enhances accessibility by allowing users to listen to translations, benefiting those who prefer auditory learning or have visual impairments.
Amazon API Gateway: Amazon API Gateway will expose the Lambda function as a REST API, enabling smooth interaction with your web app while providing a secure, scalable way to manage API requests, ensuring reliability and ease of maintenance with features like throttling, monitoring, and logging.
Tech Stack for Web
Frontend: HTML, CSS, JavaScript (or a simple framework like React for better UI).
Backend: AWS Lambda triggered via API Gateway.
Step-by-step instructions to build this app.
In this section, we will set up a Lambda function, an S3 bucket, and an API Gateway with a POST method to support our voice translation application. Let’s get started..,
Step 1: Set Up AWS Account
- If you don’t already have an AWS account, create one here.
Step 2: Create a Lambda Function
Log in to the AWS Management Console.
Navigate to AWS Lambda.
Click on "Create function".
Select "Author from scratch".
Function name:
VoiceTranslationFunctionRuntime: Python 3.x (e.g., Python 3.9)
Role: Choose "Create a new role with basic Lambda permissions".
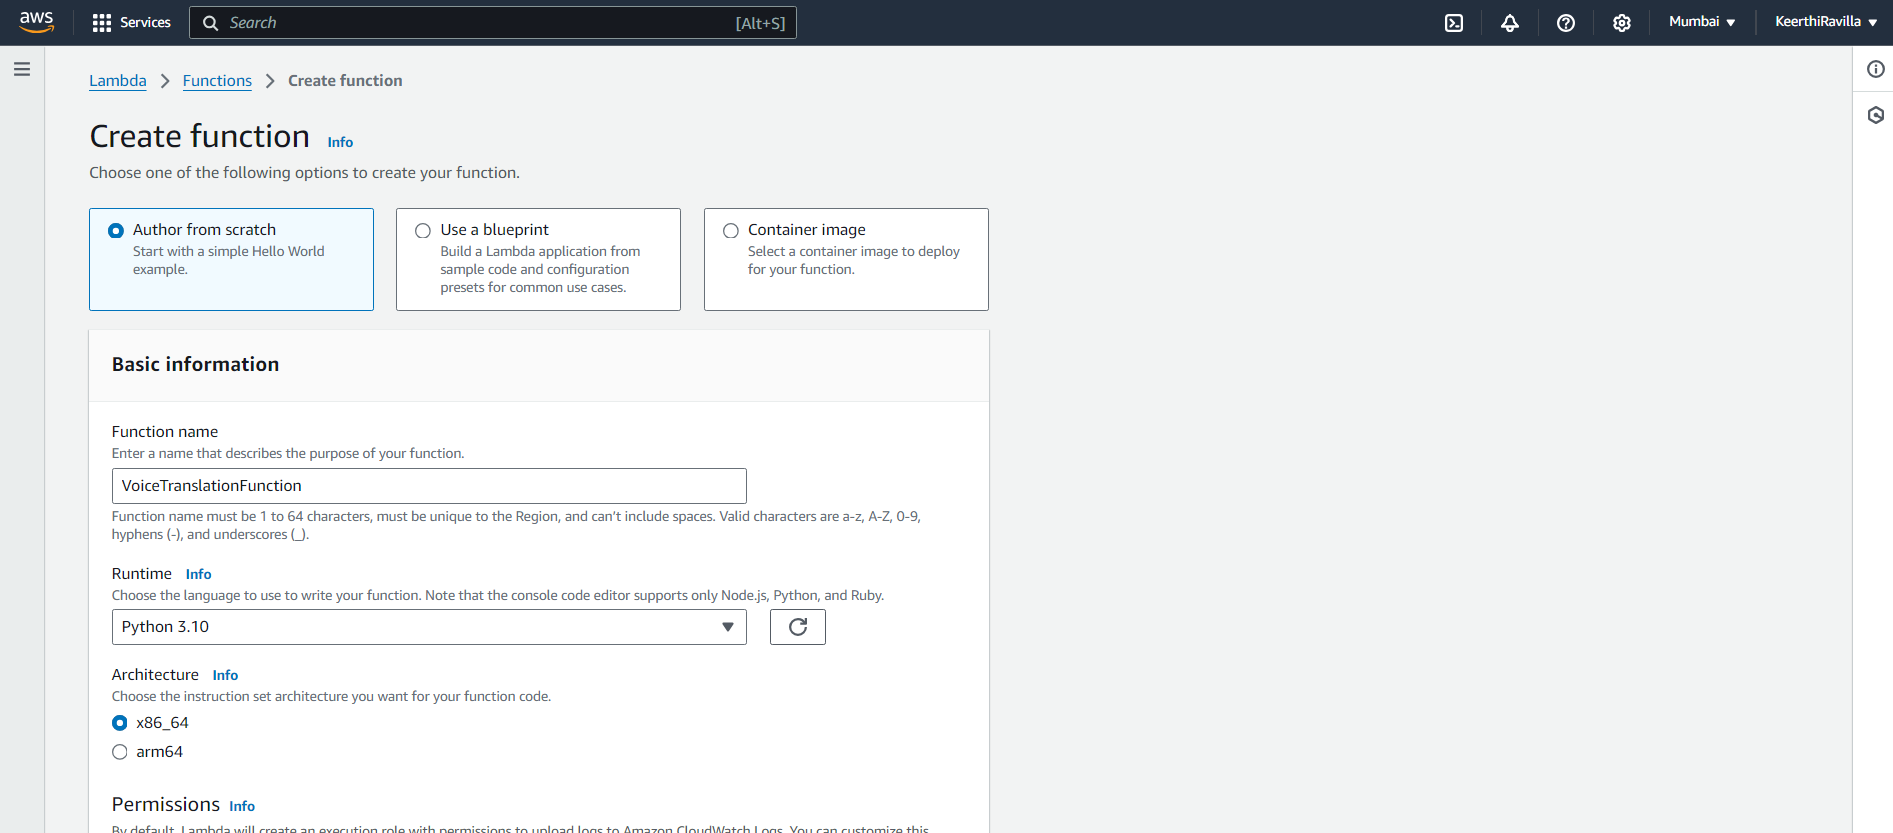
Click "Create function".
In the Function code section, you can replace the code with this lamba_function.py.
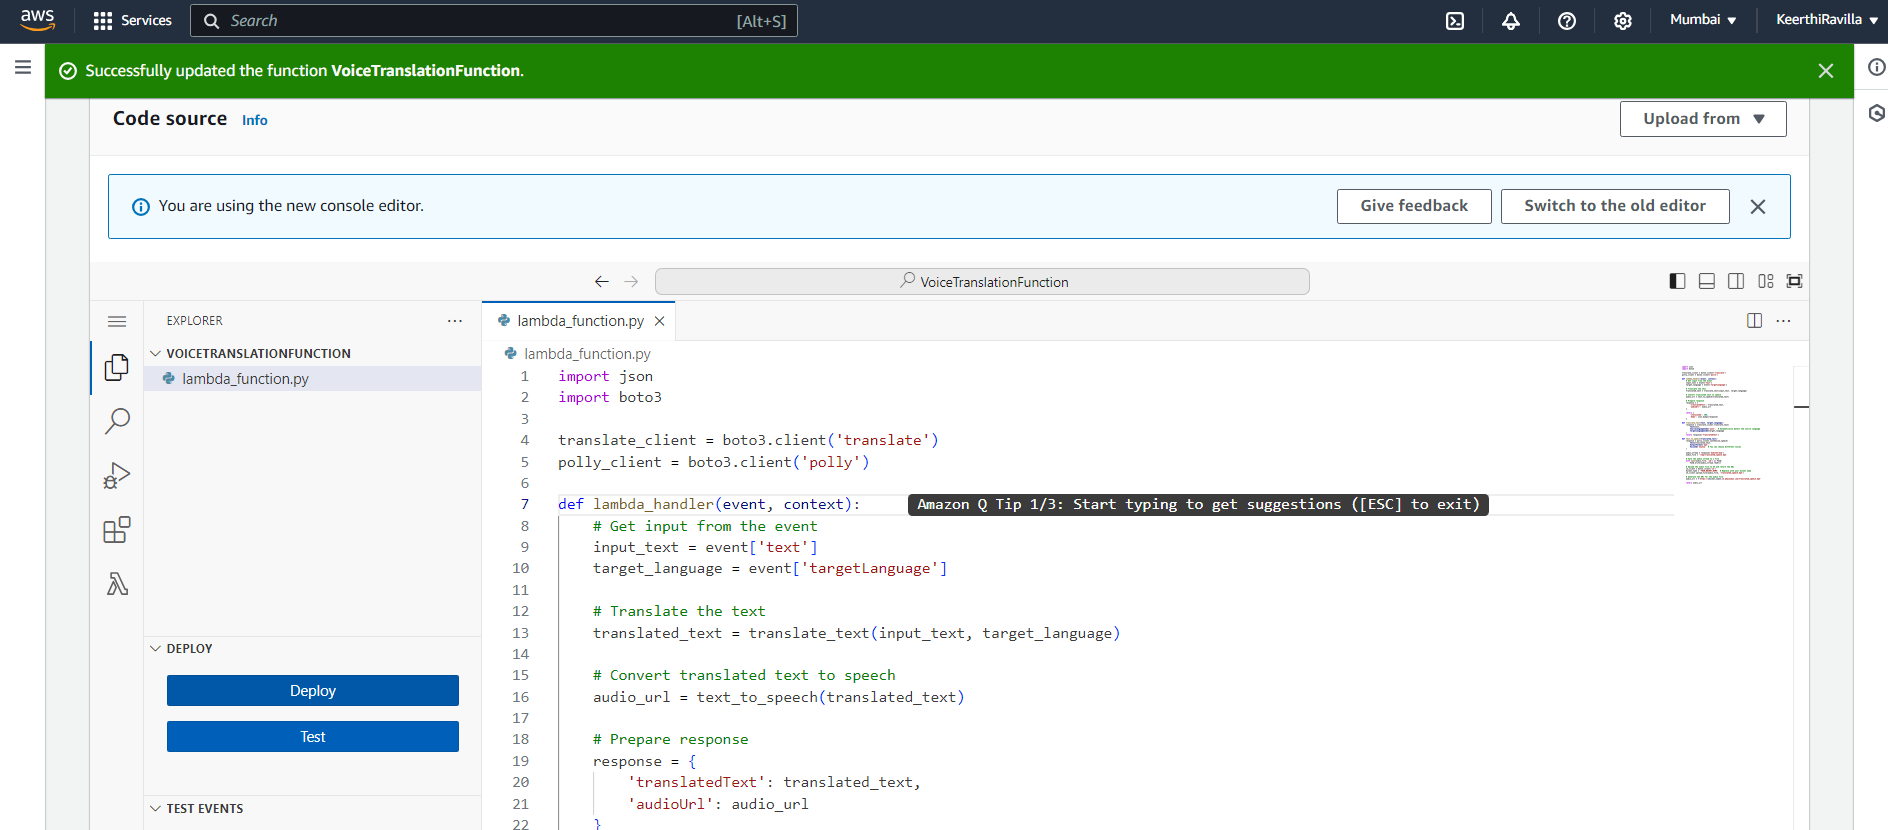
Click "Deploy" after editing your code to save the changes.
Modify Permissions:
Attach a policy to your Lambda execution role that allows access to AWS Translate, AWS Polly, and S3. You can create a custom policy using the following JSON and save it with the name
voicetranslationfunction_policy.{ "Version": "2012-10-17", "Statement": [ { "Effect": "Allow", "Action": [ "translate:TranslateText", "polly:SynthesizeSpeech", "s3:PutObject" ], "Resource": "*" } ] }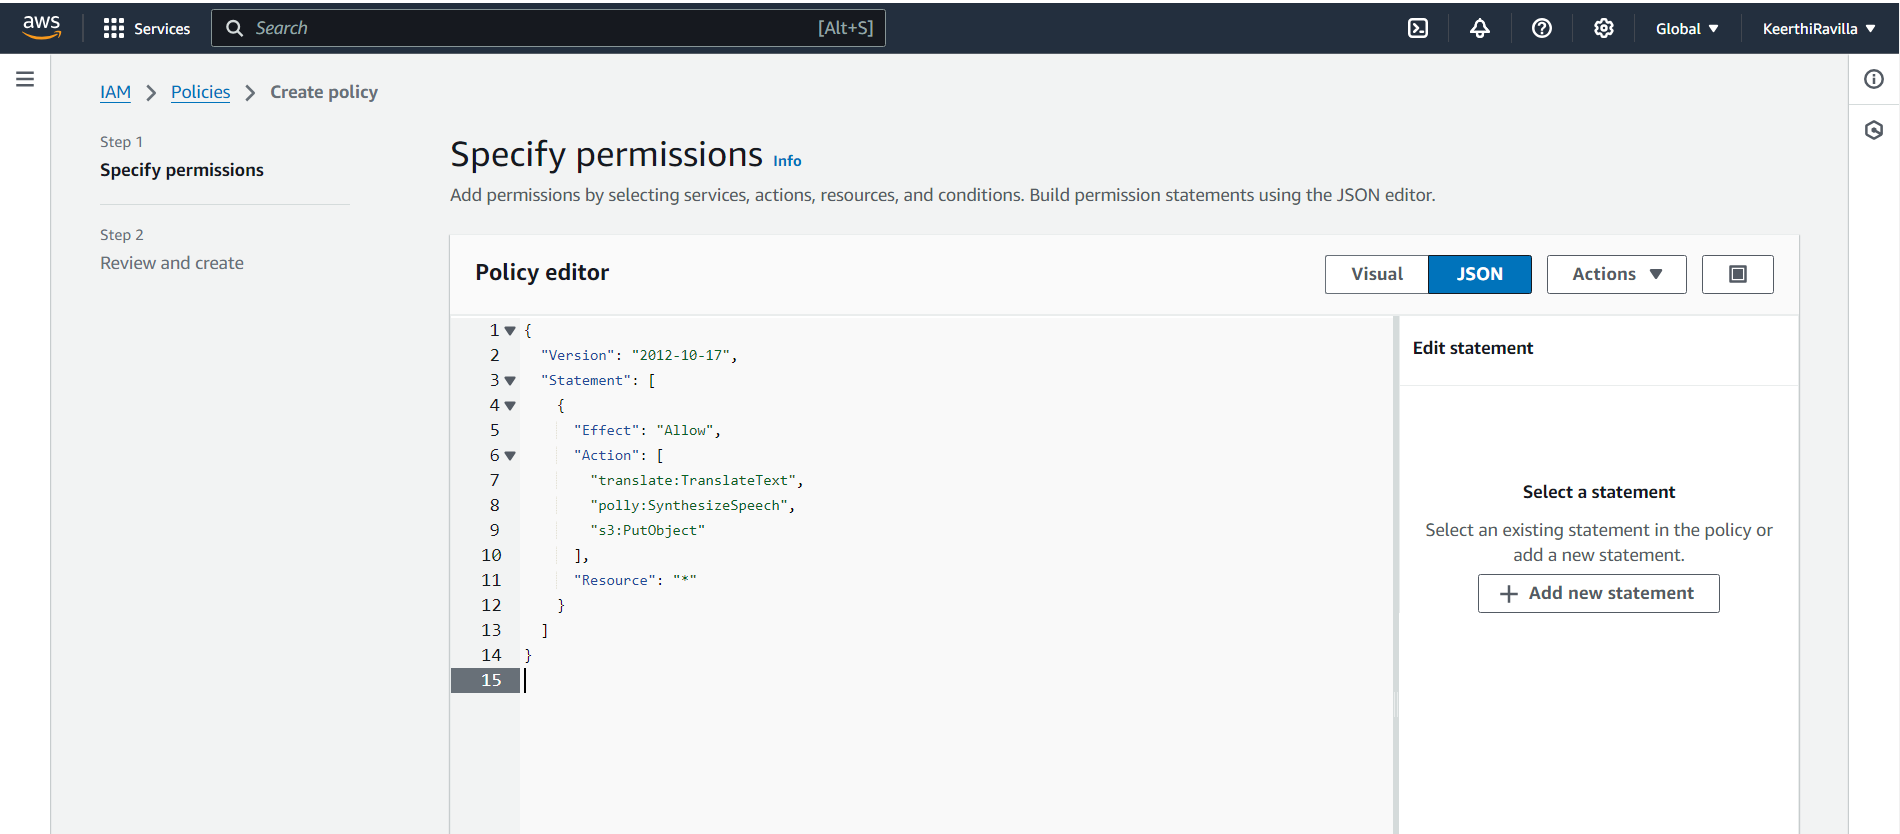
To create or attach policies to the Lambda function, navigate to the configuration section of your function and expand the permissions tab.
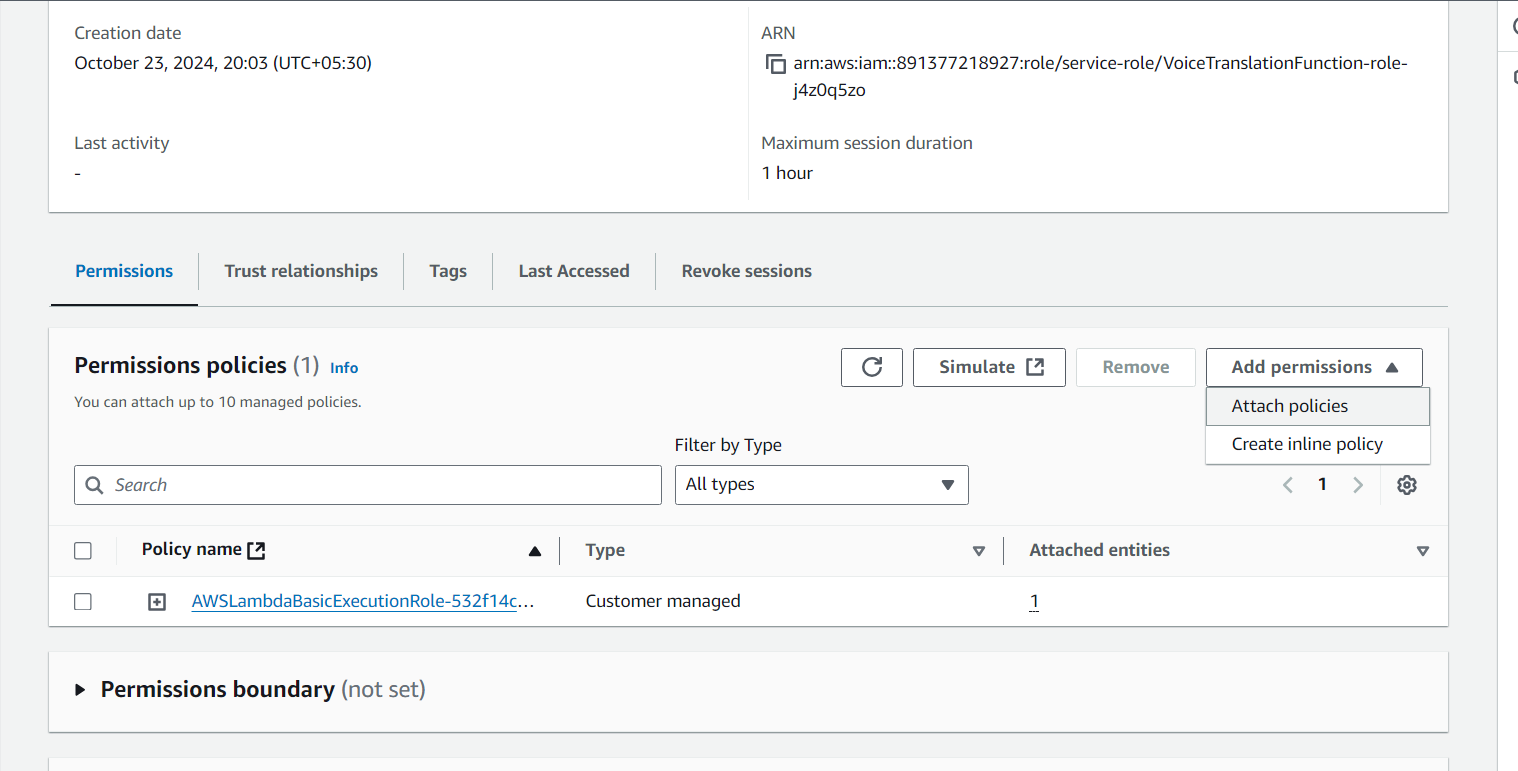
Look for policies, click on "Attach policies" and attach the
voicetranslationfunction_policyyou created.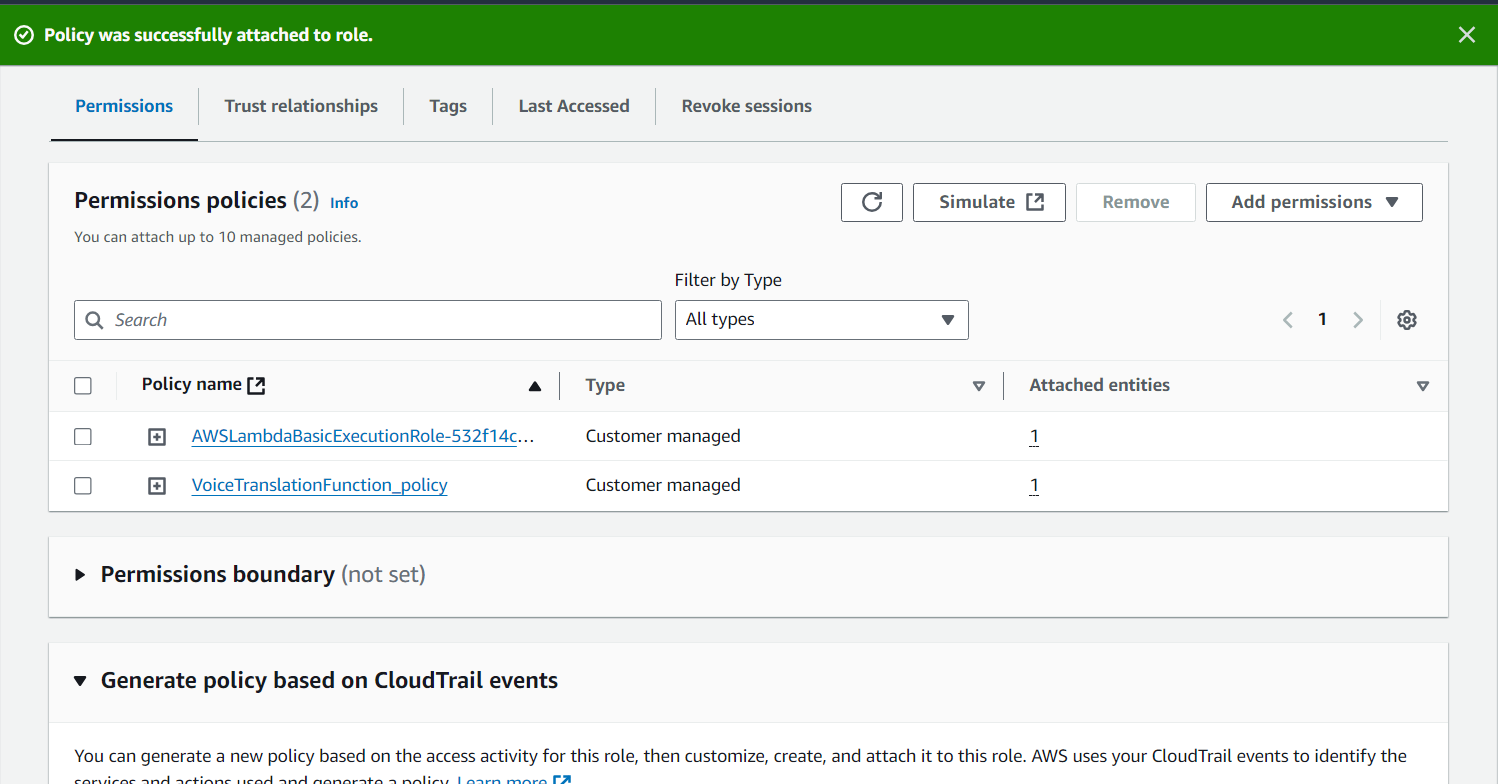
Step 3: Create API Gateway
Navigate to Amazon API Gateway.
Click on "Create API".
Select "REST API" and click Build.
Choose "New API", name it (e.g.,
VoiceTranslationAPI), and create it.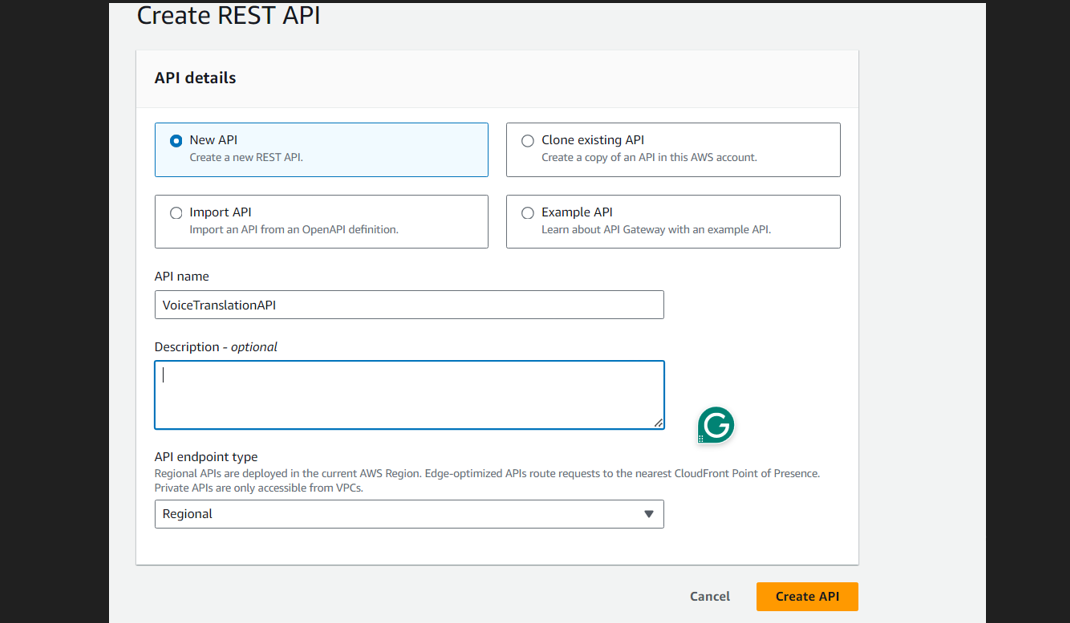
Create a Resource:
Click on "Actions" and select "Create Resource".
Resource Name:
translate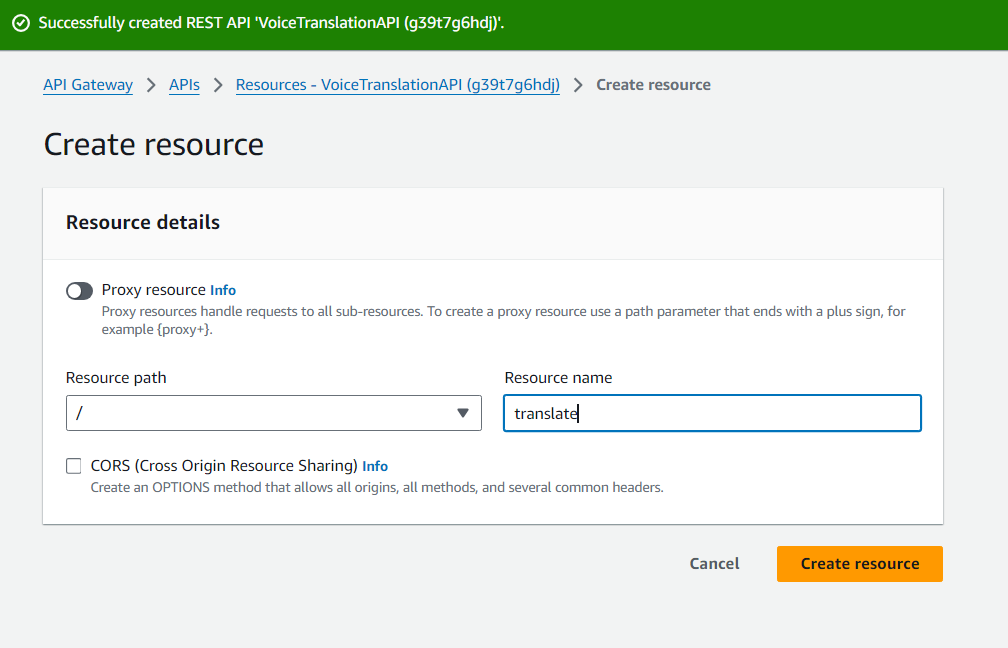
Click Create Resource.
Create a POST Method:
Select the
translateresource, click on "Actions" and choose "Create Method".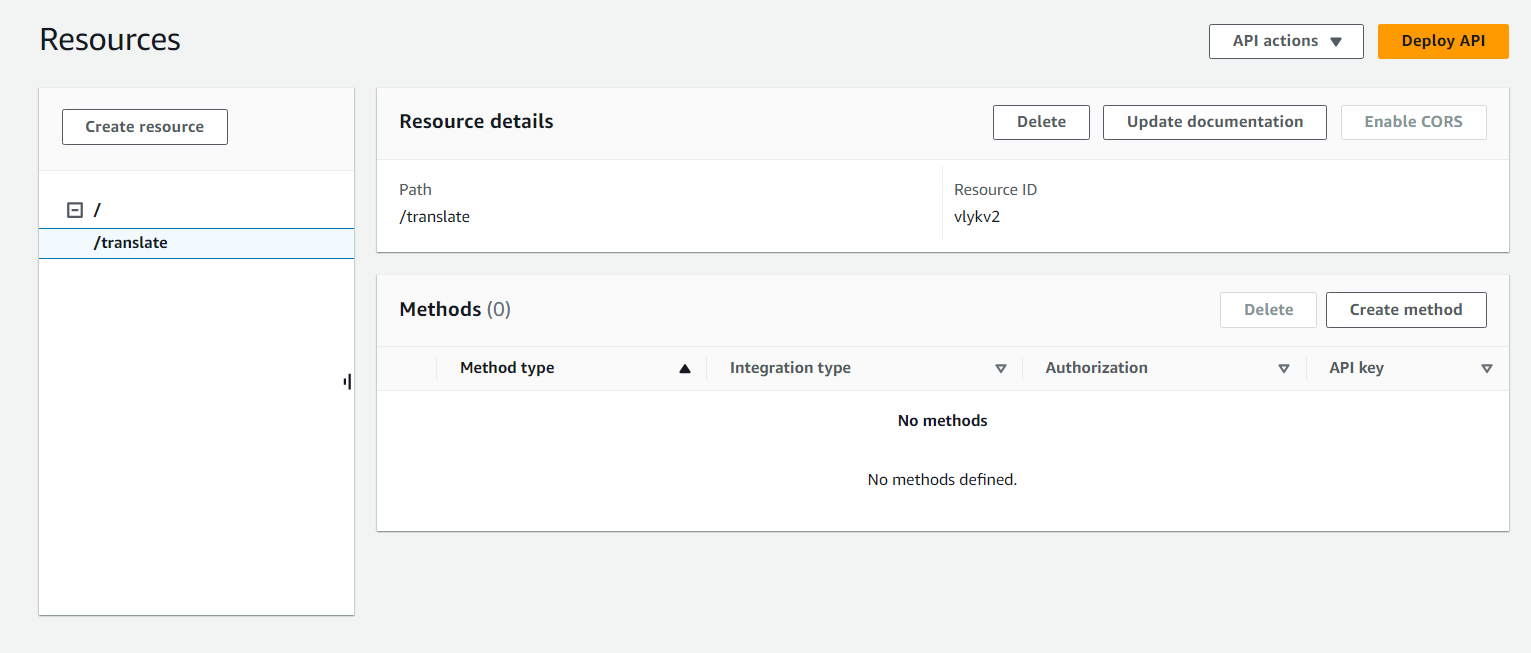
Select
POSTand click the checkmark.For Integration Type, choose "Lambda Function".
Select the region and enter the Lambda function name
VoiceTranslationFunction.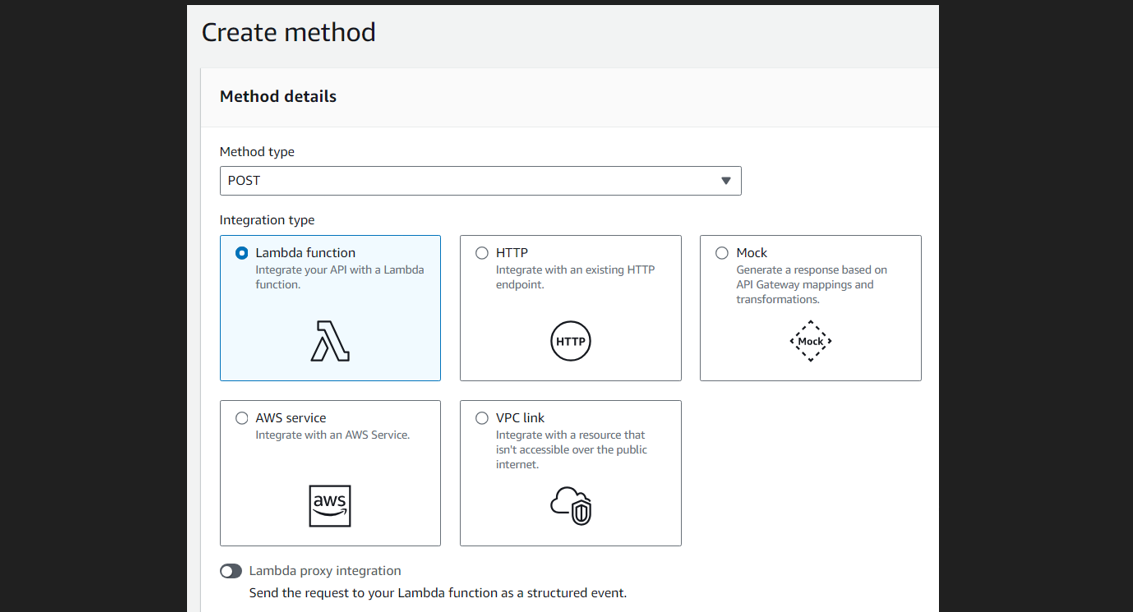
Click Save and then OK to give permissions.
Deploy the API:
In your API settings, enable CORS (Cross-Origin Resource Sharing) to allow your frontend to communicate with the Lambda function.
Click on "Actions" and select "Deploy API".
Create a new stage (e.g.,
prod) and click Deploy.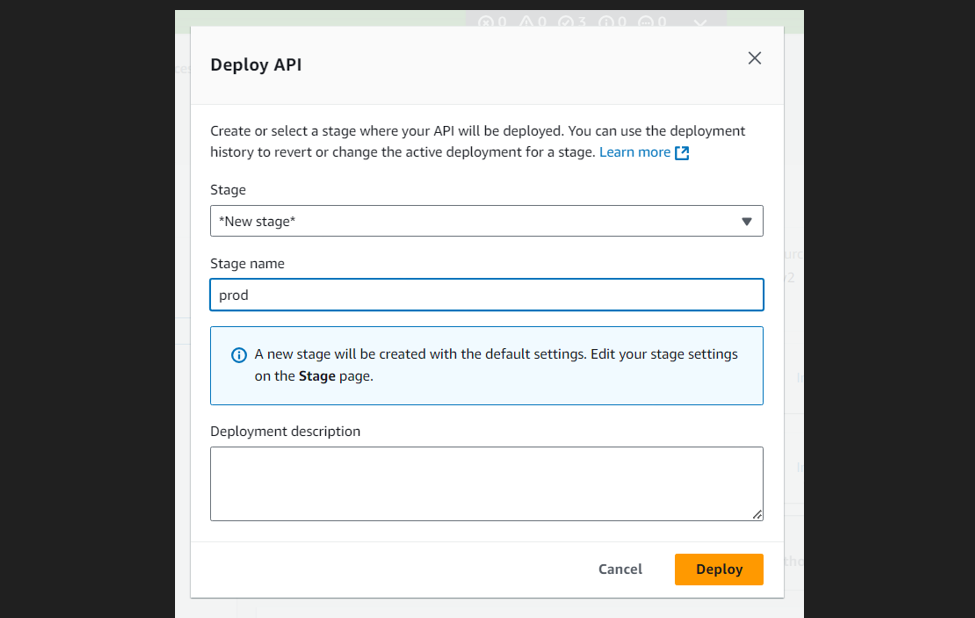
Note the Invoke URL this will be used in the web app.
Step 4: Set Up S3 Bucket
Navigate to Amazon S3.
Click on "Create bucket".
Bucket name: Choose a unique name (e.g.,
voice-translation-bucket-yourname).Leave other options as default and click Create bucket.
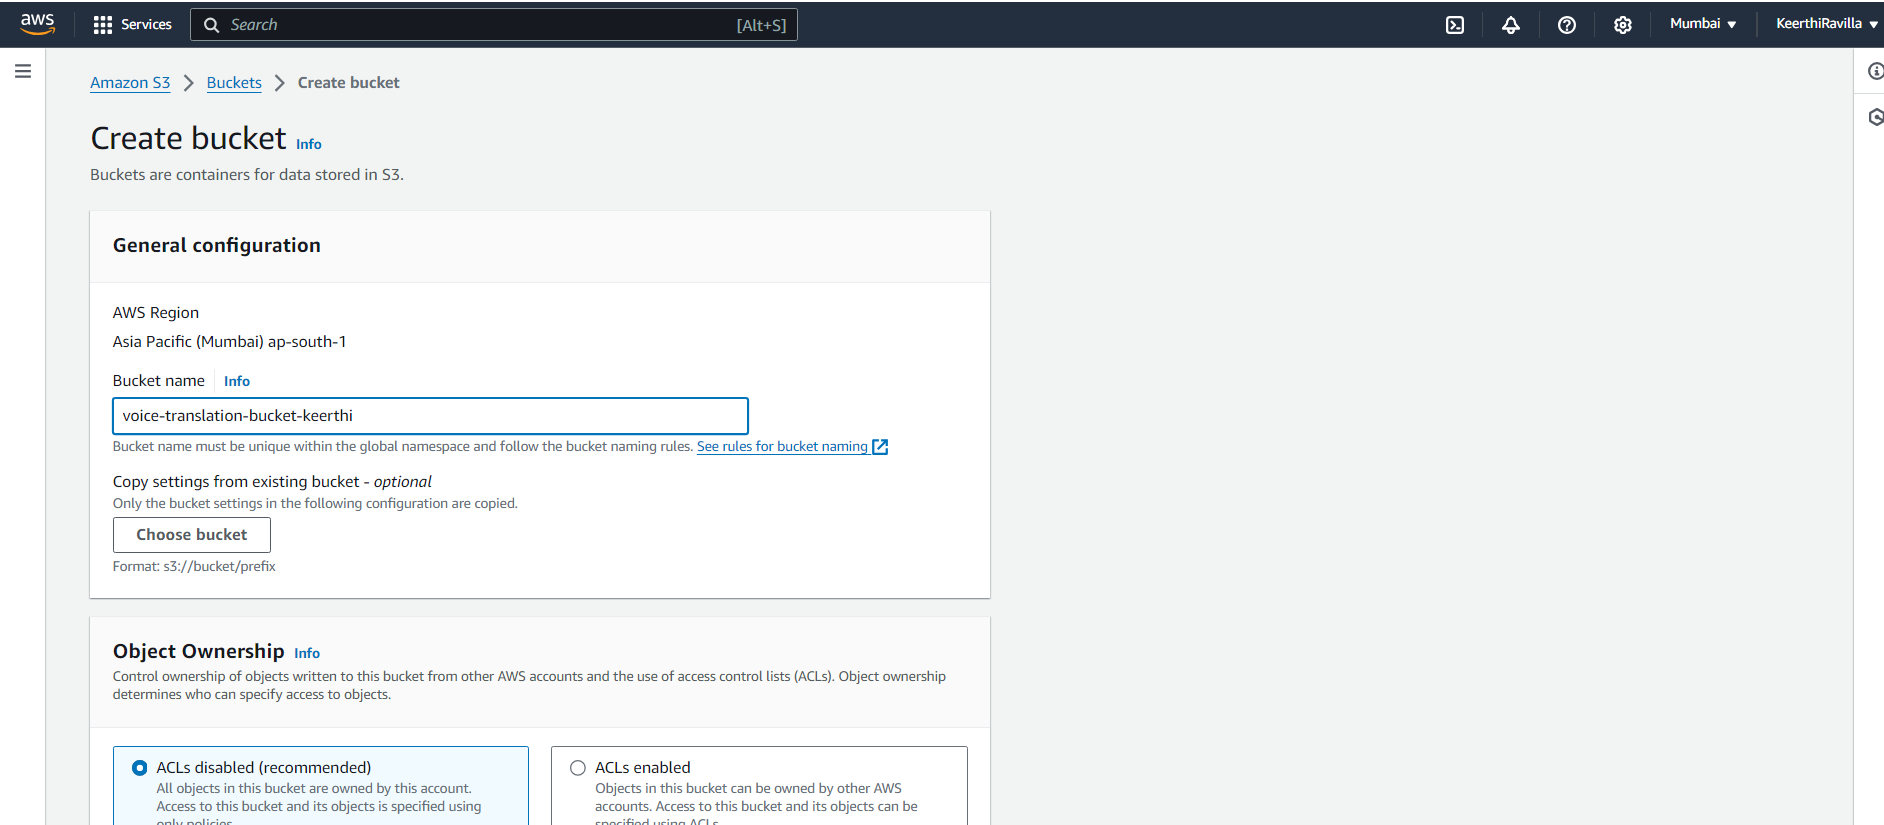
Set permissions:
Go to the Permissions tab of your bucket.
Uncheck the option Block public access and save changes.
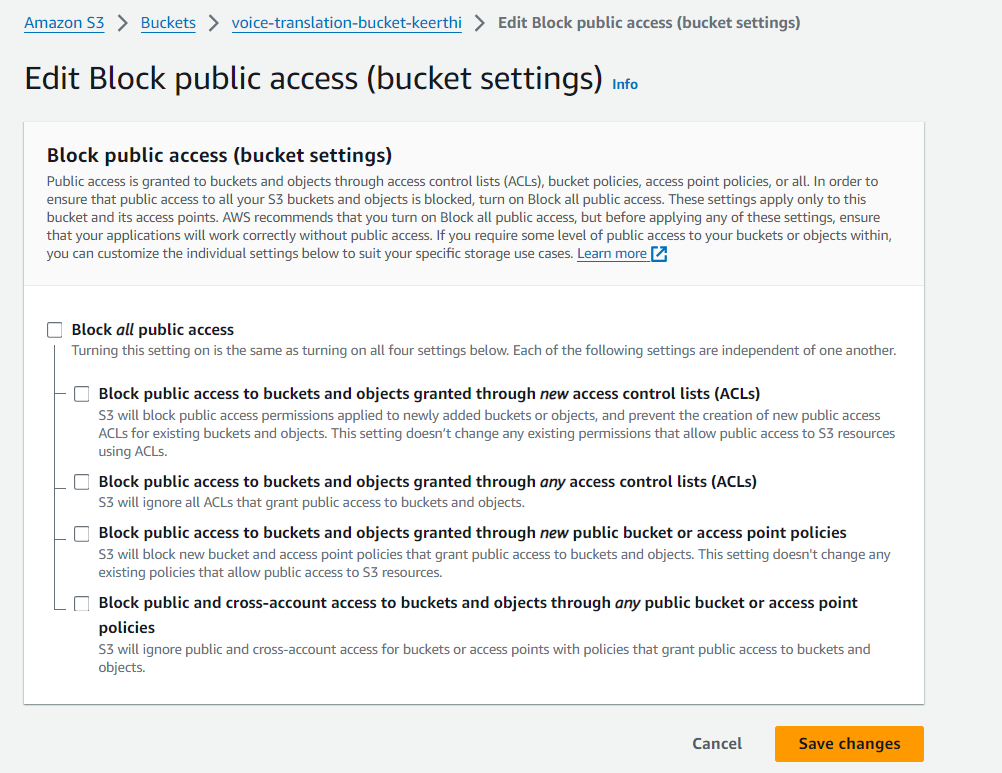
Under that section, you'll find the bucket policy, which you can replace with the JSON file below, making sure to change the resource to your bucket name and save it.
  {
    "Version": "2012-10-17",
    "Statement": [
      {
        "Effect": "Allow",
        "Principal": "*",
        "Action": "s3:GetObject",
        "Resource": "arn:aws:s3:::your-bucket-name/*"
      }
    ]
  }
Then, click on edit CORS configuration and copy-paste the policy below to allow your web app to access the audio files.
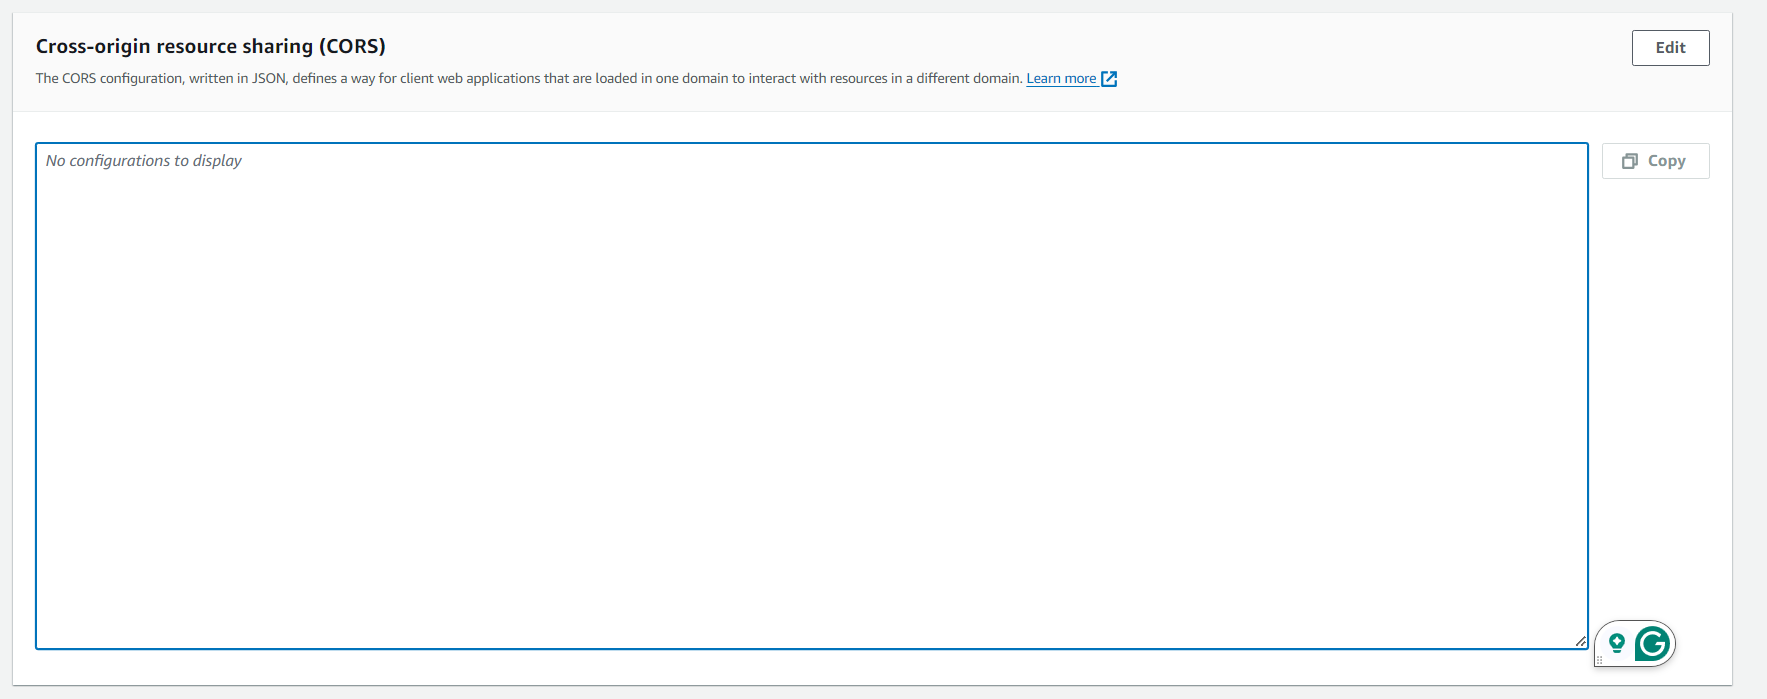
  [
    {
      "AllowedHeaders": ["*"],
      "AllowedMethods": ["GET", "PUT"],
      "AllowedOrigins": ["*"],
      "ExposeHeaders": []
    }
  ]
Step 5: Build the Frontend
Create an HTML file (
index.html) for your web app. You can use this index.html file for this project.Replace
YOUR_API_GATEWAY_URLwith the actual invoke URL from API Gateway.
Step 6: Host the Web Application
You can host the web app using Amazon S3:
Upload
index.htmlto the bucket.Enable public access and make sure the bucket policy allows public read access.
Click on the index.html file and click on the copy S3 Url.
Step 7: Test Your Application
Open the web app URL (from S3 static hosting).
Input text, select a language, and click on "Translate & Speak".
Listen to the translated text!
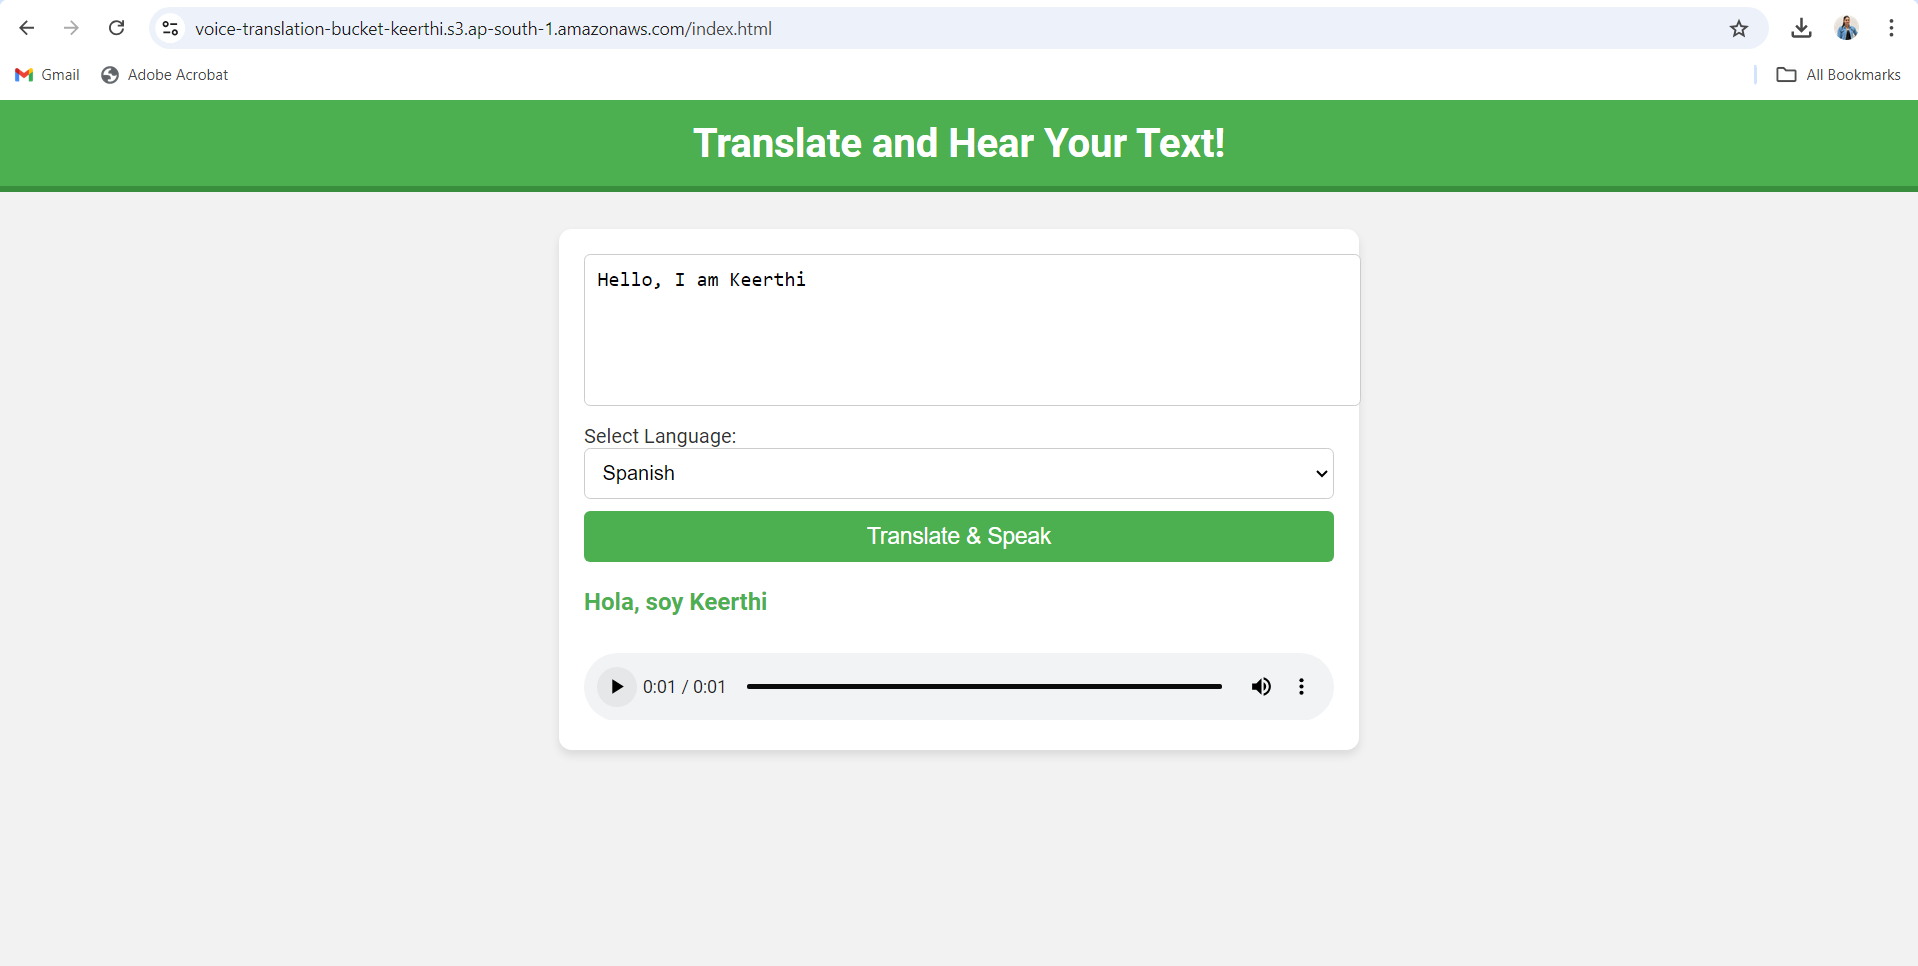
If you encounter any errors or unexpected text, recheck your configurations, policies, and URL replacements in the code.
Congratulations🎉, you have successfully created your own translator that can convert text into a specified language with speech. This project is a great example of how you can leverage AWS services to build powerful applications. If you enjoyed this project, be sure to check out our AWS series for more projects and insights on how to make the most of AWS tools and services.
Subscribe to my newsletter
Read articles from Keerthi Ravilla Subramanyam directly inside your inbox. Subscribe to the newsletter, and don't miss out.
Written by

Keerthi Ravilla Subramanyam
Keerthi Ravilla Subramanyam
Hi, I'm Keerthi Ravilla Subramanyam, a passionate tech enthusiast with a Master's in Computer Science. I love diving deep into topics like Data Structures, Algorithms, and Machine Learning. With a background in cloud engineering and experience working with AWS and Python, I enjoy solving complex problems and sharing what I learn along the way. On this blog, you’ll find articles focused on breaking down DSA concepts, exploring AI, and practical coding tips for aspiring developers. I’m also on a journey to apply my skills in real-world projects like predictive maintenance and data analysis. Follow along for insightful discussions, tutorials, and code snippets to sharpen your technical skills.