Setting up a React + Motoko project
 Benedicta Onyebuchi
Introduction
Are you new to Web3 development, learning Motoko, and struggling to set up your first project with Motoko? This guide will help you seamlessly integrate React with Motoko.
Just like Solidity is particular to Ethereum and Rust for Solana, Motoko is specific to the Internet Computer (IC) blockchain. Motoko is more approachable to developers with some background in object-oriented or functional programming (like TypeScript, Rust, or C#). The IC is a blockchain-based platform enabling developers to build entirely on the web without traditional cloud infrastructure.
How is Motoko different?
Motoko uses actor-based programming, meaning it processes messages in isolated states, allowing them to be handled remotely. This makes it great for building full-scale decentralized apps where both the backend and front-end run directly on the blockchain, while Solidity is more focused on handling transactions and tokens on Ethereum.
Getting Started with Development
Prerequisites
Before getting started, you should have:
DFX (Dfinity SDK) installed to work with the Internet Computer.
Node.js version 18.20.4 or higher is installed on your machine. You can install the latest version of Node.js with the tutorial on how to install Node.js
A local development environment (e.g. VS Code, terminal).
To install DFX, run the following command in your terminal (Linux, macOS, or WSL for Windows):
sh -ci "$(curl -fsSL https://internetcomputer.org/install.sh)"
Once installed, verify the installation by running:
dfx --version
This should display the current version of dfx installed on your system.
If you already have dfx installed and need to upgrade it, run:
dfx --upgrade
Step 1 - Creating a Motoko Project
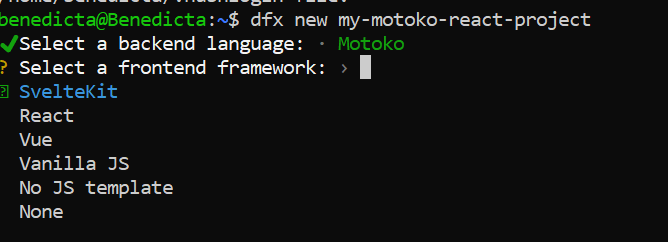
In the terminal or WSL terminal for Windows, create a new project by running this command:
 dfx new my-motoko-react-app
 # You can name the project whatever you want
Use your keyboard arrow key to select Motoko as the backend language.

After selecting the backend framework, dfx will prompt you to select a frontend framework. Use your arrow key to select React.

Finally, dfx will offer to enable additional features. You may want to enable Internet Identity if your project involves user logins etc. The feature allows for decentralized authentication. Enable Bitcoin (Regtest) if your project will interact with Bitcoin. Enable Frontend tests if you want to include automated tests for your frontend.

For this setup, we’ll skip these extras. Hit
Enterto continue.After selecting your frameworks and features, DFX will finalize the installation.
Navigate to the project directory
cd my-motoko-react-projectInstall necessary dependencies like React Router, Axios, etc.
Step 2 - Starting the Development Server
Run the project to confirm setup by running the command:
npm run start
You should see output like this:
VITE v4.5.5  ready in 442 ms

  ➜  Local:   http://localhost:3000/
  ➜  Network: use --host to expose
  ➜  press h to show help
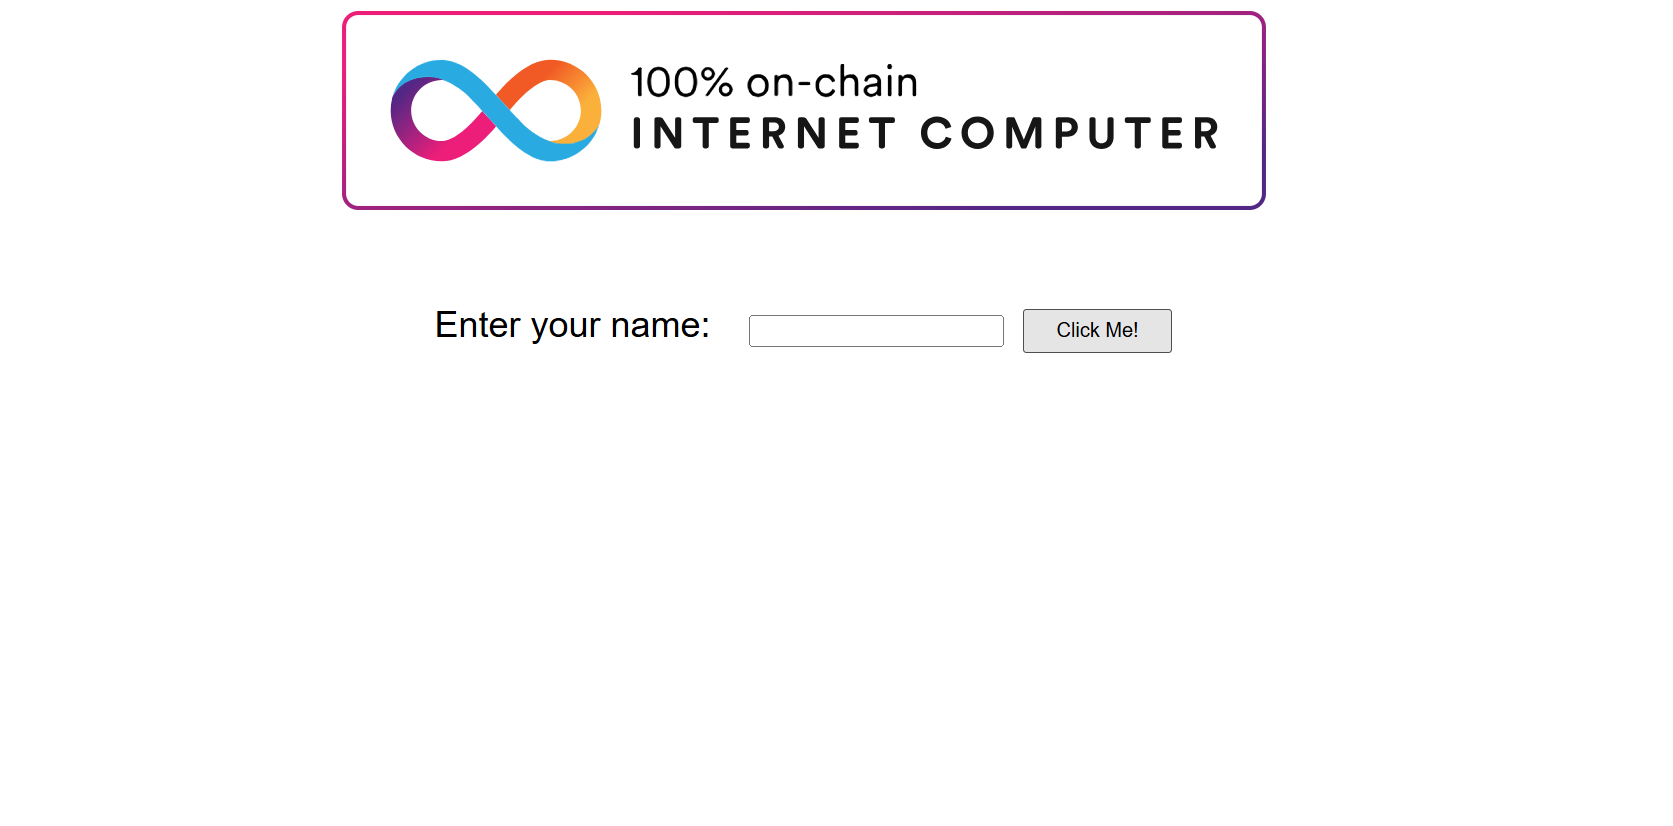
Visit http://localhost:3000/ in your browser to see the running app.

When you see this app running, you have successfully installed React with dfx
Step 3 - Building a simple Todo application.
Next, we’ll build a basic Todo app. Start by creating a new project:
dfx new Todo
During setup, select Motoko for the backend and React for the frontend. to create the foundation of your project.
Change into the project directory,
cd Todo. Runnpm run startto run the project. If you encounter a "Does this file exist?" error, follow the steps in the Troubleshoot section.Once you’ve successfully started the project, your file structure should look like this:

In the
Todo/src/Todo_backend/main.mofile, replace the existing code with:import Array "mo:base/Array";For this Todo app, we use an array to hold all the tasks. Motoko doesn’t have arrays built into its core by default, so we need to import them from the base library. The
Arraymodule provides us with the tools to handle and manipulate arrays, which we use to store and manage our Todo items.Next, we’ll add this code under the imported Array
 import Array "mo:base/Array";

 actor {
   var todos : [Text] = [];

   // to add a new to-do item
   public func addTodo(item: Text) : async Text {
     todos := Array.append<Text>(todos, [item]);
     return "Todo added: " # item;
   };

   // to get all to-do items
   public func getTodos() : async [Text] {
     return todos;
   };

   // to remove a to-do item by index
   public func removeTodo(index: Nat) : async Text {
     if (index >= todos.size()) {
       return "Invalid index!";
     };
     let removed = todos[index];

     let before = if (index > 0) {
       Array.subArray<Text>(todos, 0, index)
     } else {
       []
     };

     let after = if (index + 1 < todos.size()) {
       Array.subArray<Text>(todos, index + 1, todos.size())
     } else {
       []
     };

     todos := Array.append<Text>(before, after);
     return "Removed todo: " # removed;
   };
 }
Explanation of the Code
todos: This is an array that will hold our list of tasks. Each task is stored as text (
Text), which is similar to strings in other programming languages.addTodo(item): This function takes a new task (represented as a string of text) and appends it to our
todosarray.getTodos(): This function returns the current list of tasks stored in the
todosarray.removeTodo(index): This function removes a task from the list by its position (index). If the given index is out of bounds, it returns an error message. Otherwise, it removes the task at the specified index and returns a message confirming the removal.
To simulate the Internet Computer on your local machine, run:
 dfx start --background --clean // starts the IC locally in the background, wiping any previous deployments so you start fresh
 dfx deploy // deploys the canister locally
After a successful deployment, you’ll see something like this:
 Deployed canisters.
 URLs:
   Frontend canister via browser
     Todo_frontend:
       - http://127.0.0.1:4943/?canisterId=bd3sg-teaaa-aaaaa-qaaba-cai
       - http://bd3sg-teaaa-aaaaa-qaaba-cai.localhost:4943/
   Backend canister via Candid interface:
     Todo_backend: http://127.0.0.1:4943/?canisterId=be2us-64aaa-aaaaa-qaabq-cai&id=bkyz2-fmaaa-aaaaa-qaaaq-cai
Before we move on, a canister on the Internet Computer is like a smart contract but more advanced—it bundles both code and data (state). Unlike traditional smart contracts, canisters are designed to scale and easily interact with other canisters, making the development and management of decentralized applications (dApps) more efficient and powerful. You can learn more about canisters here
Visit the
Todo_backend canisterlink in your browser to interact with the backend canister through the Candid UI. The Candid UI is a built-in interface for interacting with your backend canister.
Now that we have our backend canister set up to handle Todo items, let's connect it to the frontend.
Inside your
src/App.jsxfile, import the backend like this:import { Todo_backend } from '../../declarations/Todo_backend';The
Todo_backendcanister is where the backend functions likeaddTodo,getTodos, andremoveTodoearlier defined are. These methods will be called by the frontend to interact with the backend.In the App.jsx file, paste the remaining code:
import React, { useState, useEffect } from 'react'; import { Todo_backend } from '../../declarations/Todo_backend'; const App = () => { const [todos, setTodos] = useState([]); // to fetch todos when component mounts useEffect(() => { fetchTodos(); }, []); // to get all todos const fetchTodos = async () => { const todosList = await Todo_backend.getTodos(); setTodos(todosList); }; // to create new todos const handleAddTodo = async (e) => { e.preventDefault(); const todoInput = e.target.elements.todo; const newTodo = todoInput.value.trim(); if (newTodo) { await Todo_backend.addTodo(newTodo); todoInput.value = ''; fetchTodos(); } }; // to remove todos const handleRemoveTodo = async (index) => { await Todo_backend.removeTodo(index); fetchTodos(); }; return ( <main> <img src='../public/logo2.svg' alt="DFINITY logo" /> <br /> <br /> <form id="todo-form" onSubmit={handleAddTodo}> <label htmlFor="todo">Create a to-do list </label> <br /> <div className="input"> <input id="todo" name="todo" type="text" /> <button type="submit">Add</button> </div> </form> <ul> {todos.map((todo, index) => ( <li key={index}> {todo} <button onClick={() => handleRemoveTodo(index)}>Remove</button> </li> ))} </ul> </main> ); }; export default App;The
fetchTodosfunction sends a request to the backend canister usingTodo_backend.getTodos()and updates the state with the list of tasks.To add a new task, we create a form that allows users to input a task. When the form is submitted, the
handleAddTodofunction is triggered. This function calls the backend’saddTodomethod and passes the new Todo item.To remove a task, each Todo item is displayed with a "Remove" button. When clicked, the
handleRemoveTodofunction is called, passing the index of the item to the backend’sremoveTodofunction. After the removal, we refresh the list of tasks.Finally, the app renders the list of Todo items stored in the state. We use the
mapfunction to display each task along with a "Remove" button. This displays the Todo items and allows users to remove tasks from the list with a simple button click.
Inside your
src/index.scss, replace the existing code with:body { font-family: sans-serif; font-size: 1.5rem; background-color: #121a2d; color: #fff; margin: 0; padding: 0; } header { background-color: #1f2937; padding: 10px; text-align: center; } h1 { margin: 0; } form { display: flex; flex-direction: column; gap: 0.5em; flex-flow: row wrap; max-width: 40vw; margin: 40px auto; padding: 20px; background-color: #1f2937; border-radius: 8px; box-shadow: 0 0 10px rgba(0, 0, 0, 0.5); } input[type="text"] { padding: 10px; font-size: 1rem; border-radius: 4px; border: 1px solid #ccc; flex: 1; } button[type="submit"] { padding: 10px 20px; margin: 10px 0; border: none; background-color: #3b82f6; color: white; font-size: 1rem; border-radius: 4px; cursor: pointer; } button[type="submit"]:hover { background-color: #2563eb; } ul { border: 2px solid white; width: fit-content; padding: 4px; } #greeting { margin: 20px auto; padding: 10px 60px; border: 1px solid #222; background-color: #1f2937; border-radius: 8px; text-align: center; } #greeting:empty { display: none; } img { max-width: 50vw; max-height: 25vw; display: block; margin: auto; }To test the full functionality, run the frontend:
npm run startThis will spin up both the backend and frontend locally. Now, you should be able to add, view, and remove tasks in your Todo list.
💡Ensure your backend canister is running. If it’s not, run the following commands to start the local replica and deploy the canisters:dfx start --background --cleanand thendfx deployVisit the frontend URL
http://localhost:3000and interact with the app
Congratulations!!!🎉 You have successfully connected your Motoko backend to the React frontend.
If you get stuck or want to review the full code, feel free to check out the source code for additional reference.
Troubleshoot
If you encounter an error when running npm run start such as:

This could mean that the necessary bindings between the front end and the Motoko back end haven’t been generated yet.
To resolve this:
Start dfx. Run:
dfx start --background --cleanThen, deploy the project locally:
dfx deployThis will create a
.dfxfolder and generate the necessary bindings in thesrc/declarations/folder.After deployment, restart the React app:
npm run start
This should resolve the issue, and your React app can communicate with the Motoko backend.
Conclusion
You have successfully set up a React + Motoko project and troubleshoot common issues. With this foundation, you can build dApps on the Internet Computer and explore advanced features like Internet Identity and Bitcoin integration.
Additional Resouces
To further enhance the learning and development process, here are some helpful resources:
Internet Computer Documentation - Official documentation for building on the Internet Computer
Subscribe to my newsletter
Read articles from Benedicta Onyebuchi directly inside your inbox. Subscribe to the newsletter, and don't miss out.
Written by

Benedicta Onyebuchi
Benedicta Onyebuchi
I'm Benedicta, a technical writer and frontend developer. I'll guide you through complex or simple programming concepts