A Step-by-Step Guide to Docker Volumes and Networks 🌐
 Dhruv Moradiya
🚀 Introduction
Welcome to Day 19 of the #90DaysOfDevOps Challenge! Whether you're new to Docker or just getting started in the world of containers, today's blog is designed to help you understand Docker Volumes and Docker Networks. Even if you're not from an IT background, don’t worry—we’ll walk through everything step by step, using simple terms and examples. 😄
By the end of this post, you’ll know how to:
Set up persistent storage using Docker Volumes 🗄️
Make containers talk to each other using Docker Networks 🌐
Create and manage multiple containers using Docker Compose 🛠️
Let’s dive in!
🗃️ What is Docker Volume?
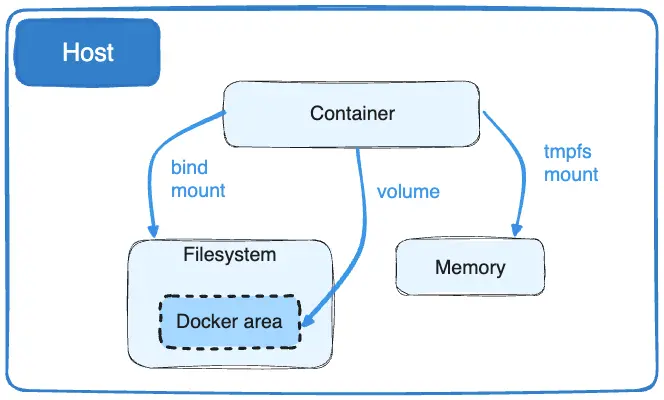
Imagine you have a box (which is your container) where your application is running. When you delete the box, all the files inside it get deleted too. Now, what if you wanted to keep certain important files safe outside of the box, so they don’t disappear when the box is removed? That's where Docker Volumes come in!
A Docker Volume is like a storage area that you can attach to your containers to store data permanently. It’s separate from the container, so even if you stop or remove the container, the data remains safe. You can also share the same volume between different containers, allowing them to exchange information.
Why Use Docker Volumes?
Keep Your Data Safe: Even if a container stops running, your data won’t disappear. Perfect for databases! 💾
Share Information Between Containers: If you have two containers (e.g., one for a web app and one for a database), they can share the same data using volumes.
Separation of Data and Application: You can keep the app in the container and its data in the volume, ensuring smoother upgrades.
🌐 What is Docker Network?
Imagine you have two different computers in your home: one for work and one for entertainment. Sometimes, you want them to communicate with each other, like sharing files. In Docker, Docker Networks are like virtual cables connecting containers, allowing them to talk to each other, just like computers connected to the same Wi-Fi.
Each container has its own isolated space. But when they need to communicate, you create a network that links them together.
Why Use Docker Networks?
Secure Communication: Containers inside the same network can talk to each other without exposing their details to the outside world. 🛡️
Isolate Services: Different parts of your application can be kept separate until they need to communicate through the network.
Connect to the Host: Docker Networks also allow containers to communicate with the host machine (your computer), enabling better control and flexibility.
📋 Task 1: Creating a Multi-Container Application Using Docker Compose
Now that we’ve covered the basics, let’s put them into practice. We’re going to create a multi-container setup using Docker Compose, which allows you to manage multiple containers with a single file. In this example, we’ll set up a web application and a database running in separate containers, but connected using Docker Networks.
What You'll Need:
Docker installed on your computer (if you don’t have it yet, here’s how to install Docker on window).
For Ubuntu users, you can install Docker using the following simplified steps:
  sudo apt-get update
  sudo apt-get install -y docker.io
This will install the
docker.iopackage, which includes everything you need to start using Docker.After the installation, verify that Docker is working by checking its version:
sudo docker --versionIf you want to run Docker commands without needing
sudoevery time, add your user to thedockergroup:sudo usermod -aG docker <username> && newgrp dockerA text editor like Notepad or VS Code.
For Ubuntu users, you can use text editors like Vim or Nano to create and edit files. If you're comfortable with command-line editors, run the following commands:
To open or create a file using Vim, type:
vim filename.ymlTo open or create a file using Nano, type:
nano filename.yml
Nano is more user-friendly for beginners, while Vim is powerful but has a steeper learning curve. Simply choose whichever editor you're most comfortable with.
Step 1: Create a docker-compose.yml File
A docker-compose.yml file tells Docker which containers to create and how they should interact with each other. Let’s create one!
Open your text editor and create a new file named
docker-compose.yml.Add the following content to the file:
 version: '3'
 services:
   web:
     image: nginx  # This is a web server container
     ports:
       - "8080:80"  # Map port 80 of the container to port 8080 of your computer
     networks:
       - app-network  # Connect to the custom network

   db:
     image: postgres  # This is a database container
     environment:
       POSTGRES_PASSWORD: example  # Set a password for the database
     networks:
       - app-network  # Connect to the same network as the web server

 networks:
   app-network:  # Define the custom network where containers can talk
Step 2: Running the Containers
Now that your docker-compose.yml file is ready, let’s run the containers.
Open your terminal (Command Prompt, PowerShell, or Terminal on macOS/Linux).
Navigate to the folder where you saved your
docker-compose.ymlfile.Run the following command to start both the web and database containers:
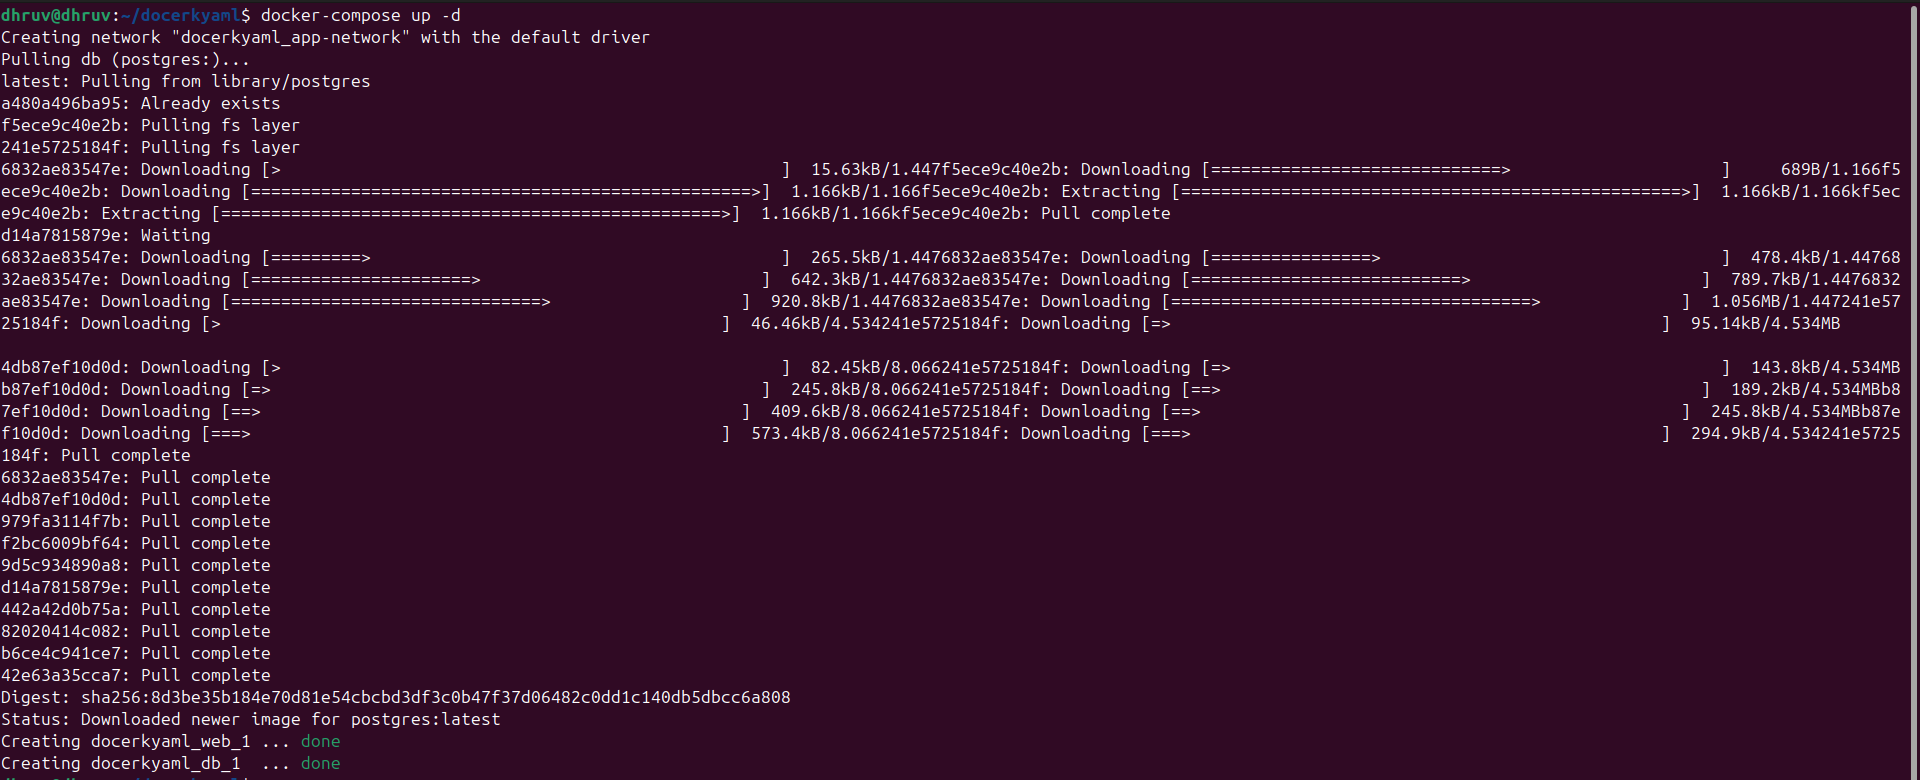
docker-compose up -dThe
-dflag runs the containers in detached mode, meaning they’ll run in the background.

Step 3: Check the Status of the Containers
Once the containers are running, you can check their status with:
docker-compose ps
This will show you which containers are running and their ports. 🎉

Step 4: Stopping and Removing Containers
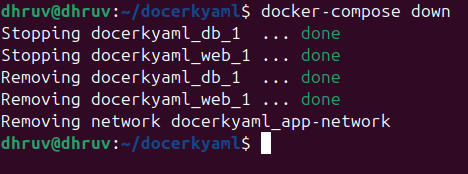
When you're done, you can stop and remove all the containers, networks, and volumes using:
docker-compose down

📂 Task 2: Sharing Data Between Containers Using Docker Volumes
Now, let’s create two containers that share the same data using Docker Volumes. This is useful when you want containers to access and modify the same files.
Step 1: Create a Volume and Containers
Run the following command to create two containers that will read and write to the same volume:
docker run -d --name container1 --mount source=my-volume,target=/app busybox sh -c "while true; do sleep 3600; done"
docker run -d --name container2 --mount source=my-volume,target=/app busybox sh -c "while true; do sleep 3600; done"
--mount source=my-volume,target=/apptells Docker to attach the volume (my-volume) to the folder/appin both containers."while true; do sleep 3600; done": This is a loop that runs indefinitely. It tells the container to sleep for 3600 seconds (or 1 hour) repeatedly. The command keeps the container alive and prevents it from exiting immediately, as it doesn't perform any task that would cause it to terminate.
Step 2: Write Data in the First Container
Let’s write some data into the first container and see if the second container can access it.
Write data inside
container1:docker exec container1 sh -c "echo 'Hello from Container 1' > /app/data.txt"Why is the Container Not Running?
using the
busyboximage, which is a minimal container that runs a shell command and exits immediately. Sincebusyboxdoesn’t have a long-running process by default, the container starts, completes the task (if any), and then stops.If you are facing any problems, here are some solutions:
When working with Docker, you might notice that some containers stop running immediately after they start. This can be frustrating, especially when you want to execute commands inside them. Here are two easy solutions to keep your containers running smoothly.
Option 1: Use a Long-Running Process 🕒
- To ensure that your containers remain active, you can modify your
docker runcommands to include a long-running process. One simple way to do this is by using a sleep loop. Here’s how:
docker run -d --name container1 --mount source=my-volume,target=/app busybox sh -c "while true; do sleep 3600; done"
docker run -d --name container2 --mount source=my-volume,target=/app busybox sh -c "while true; do sleep 3600; done"
- This command creates an infinite loop, keeping the containers running in the background. With this setup, you can easily execute commands in your containers whenever needed.
Option 2: Restart the Stopped Container 🔄
- If you prefer not to modify your
docker runcommands, you can simply restart a stopped container and run your commands. Here’s how:
Restart the Container:
docker start container1Run Your Command:
docker exec container1 sh -c "echo 'Hello from Container 1' > /app/data.txt"
This method allows you to work with containers that may have exited without needing to set up long-running processes.
Verify Container Status ✅
To check if your containers are running correctly, you can use the following command:
docker ps -a
This command will display a list of all your containers and their statuses. Make sure both container1 and container2 are in the running state before trying to execute commands inside them.
Step 3: Read Data in the Second Container
Now, let’s check if container2 can read the data written by container1.
Read data from
container2:docker exec container2 cat /app/data.txt
You should see the message: Hello from Container 1 🥳
Step 4: Clean Up the Volumes
When you're finished, list the created volumes using:
docker volume ls

To remove the volume, use:
first have to stop running container:
  docker stop container1
  docker stop container2
after remove all container:
docker container prune
now remove volume:
docker volume rm my-volume

📊 Wrapping Up
Today, we explored two key concepts in Docker that make your containerized applications much more flexible and scalable:
Docker Volumes: Keep your data safe and share it between containers, even after containers are removed.
Docker Networks: Connect containers so they can communicate securely and efficiently.
By using Docker Compose, we also learned how to manage multiple containers with a single file, making it easier to build and scale applications.
👇 What’s Next?
Go ahead and try out these tasks! Whether you're an IT expert or a complete beginner, Docker is a powerful tool that can simplify your development and deployment workflows. Let me know in the comments how your setup worked, and feel free to ask any questions. 😊
Happy Learning! 😄
Subscribe to my newsletter
Read articles from Dhruv Moradiya directly inside your inbox. Subscribe to the newsletter, and don't miss out.
Written by
