Create AWS Virtual Private Cloud (VPC) for your Resources
 Celestina Odili
Introduction
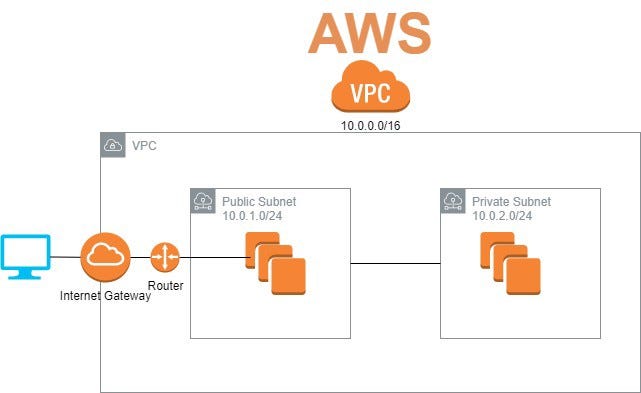
A Virtual Private Cloud (VPC) is a logically isolated network within the Amazon Web Services (AWS) cloud. It allows you to define and customize your own network space, including IP address ranges, subnets, route tables, and gateways same way in a traditional data center network but this time within the AWS cloud.
With VPC, you can control inbound and outbound network traffic by configuring security groups and network access control lists (ACLs). You can also use additional services such as Internet Gateway for internet connectivity, NAT Gateway for secure internet access for private subnets, and VPC Peering for connecting multiple VPCs.
VPC enables you to securely run applications, store data, and host services in AWS with high flexibility and control over your network configuration. Below are the steps to create a Virtual Private Cloud (VPC) in AWS management console:
Step 1: Log in to the AWS Management Console
Go to the AWS Management Console.
Sign in using your AWS account credentials or create a free account if you not have one.
Step 2: Navigate to the VPC Dashboard
In the AWS Management Console, search for "VPC" in the search bar and select "VPC" from the services list.
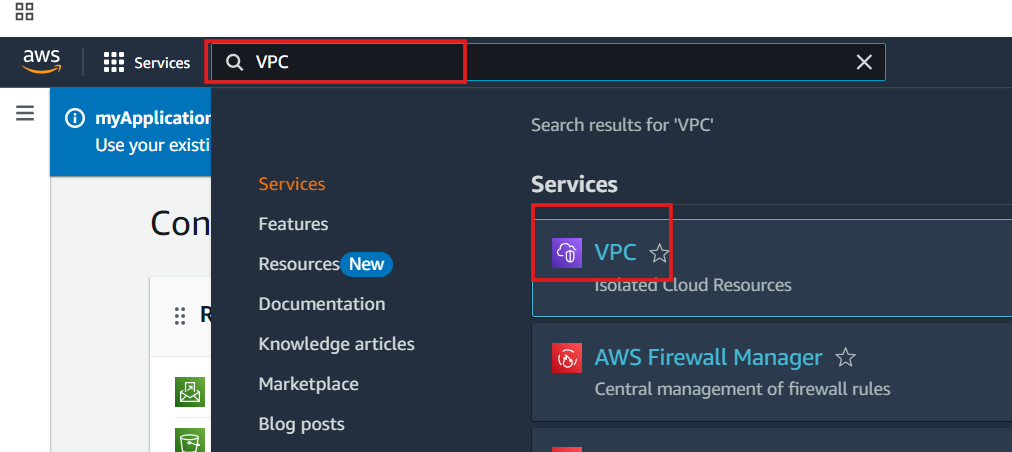
This will open the VPC dashboard.
Step 3: Create a New VPC
In the VPC dashboard, choose a region
Click the "Create VPC" button.

Configure the VPC Settings:
Select VPC and more
Name tag: Provide a name for your VPC (e.g., “my-project").
IPv4 CIDR block: Specify the CIDR block for the VPC (e.g.,
172.0.0.0/16). This defines the IP address range for the VPC.IPv6 CIDR block (optional): Choose "No IPv6 CIDR block" unless you want to use IPv6.
Tenancy: This option defines if EC2 instances that you launch into the VPC will run on hardware that's shared with other AWS accounts or on hardware that's dedicated for your use only. If you choose
Default, EC2 instances launched into this VPC will use the tenancy attribute specified when you launch the instance. on the other hand, if you chooseDedicated, the instances will always run as dedicated instances on hardware that is dedicated for your use. Select "Default" for standard usage or "Dedicated" if you want the instances to run on dedicated hardware.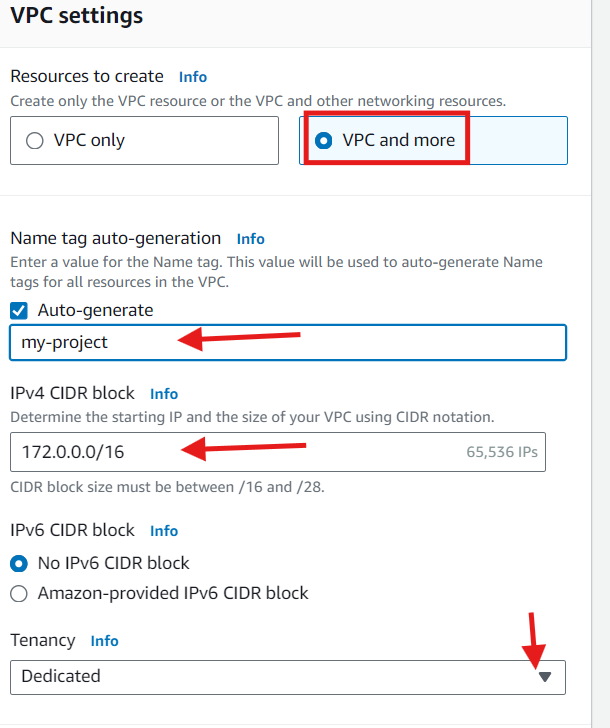
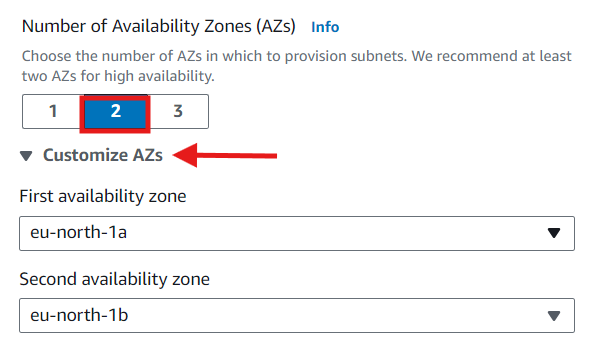
Choose Number of Availability Zones (AZs):
It is recommended that you provision subnets in at least two Availability Zones for a production environment. To choose the AZs for your subnets, expand Customize AZs. Otherwise, leave it at default chosen by AWS based on your region.
Configure your subnets:
choose values for Number of public subnets and Number of private subnets. To customize the IP address ranges for your subnets, expand Customize subnets CIDR blocks. Ensure they do not overlap.
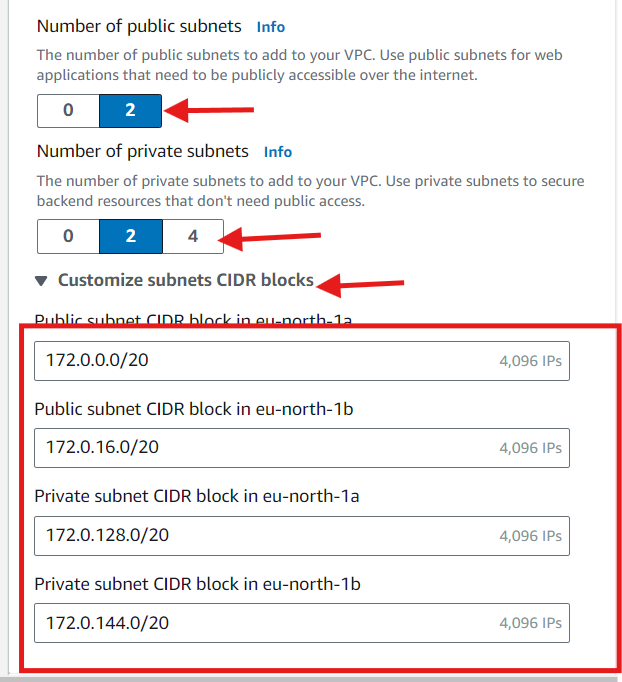
NAT gateways (Optional)
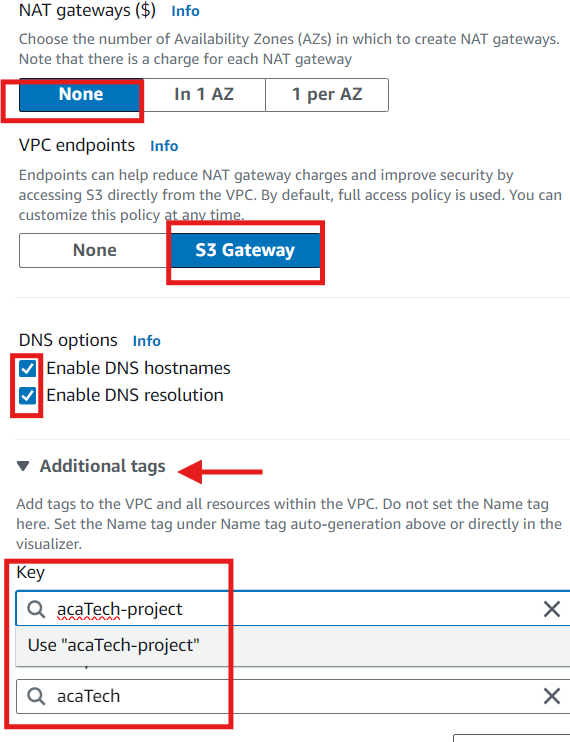
If resources in your private subnet need access to the public internet over IPv4, choose the number of AZs in which to create NAT gateways. In production, it is recommend that you deploy a NAT gateway in each AZ with resources that need access to the public internet. Hey! do not forget there is a cost associated with NAT gateways. See Pricing for NAT gateways.
VPC endpoints (Optional):
If you need to access Amazon S3 directly from your VPC, choose S3 Gateway. Tis will create a gateway PVC endpoint for Amazon S3.
DNS options (Optional):
Both options for domain name resolution are enabled by default. If your need is different, you can disable these options.
Tags(Optional):
To add a tag, expand additional tags, click on add new tag and enter a tag key and a tag value.
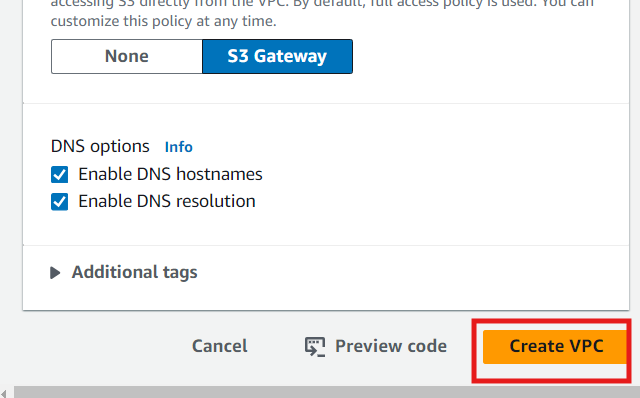
Click "Create VPC":
After configuring the settings, click the "Create VPC" button to complete the VPC creation.
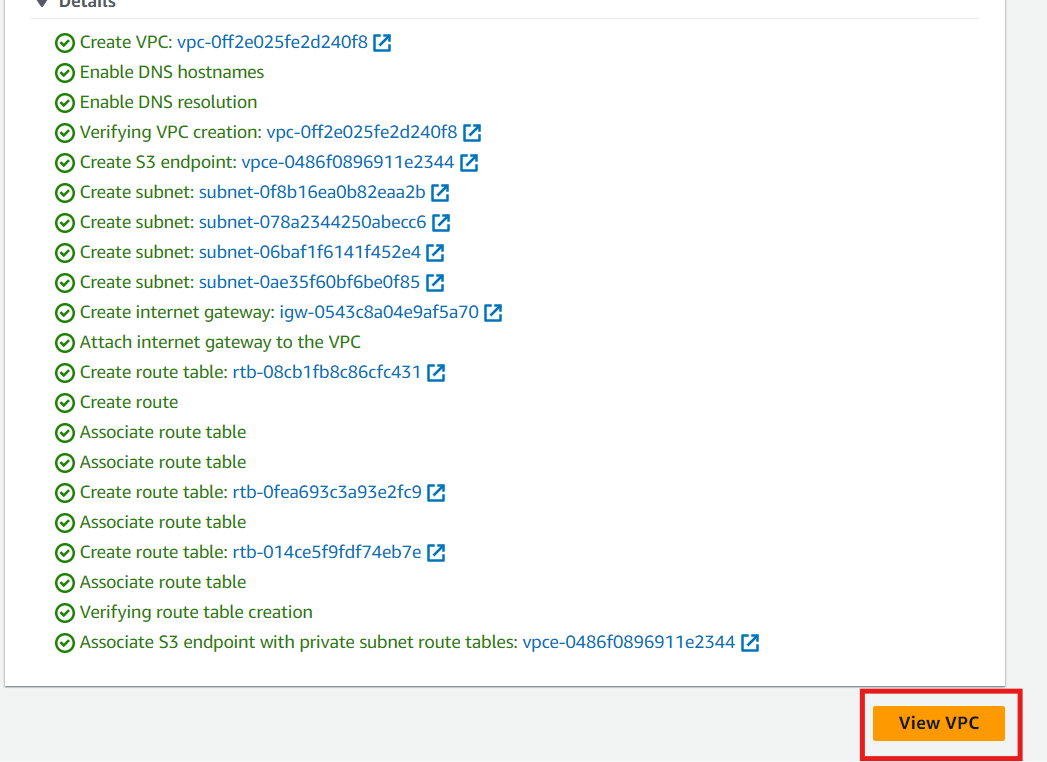
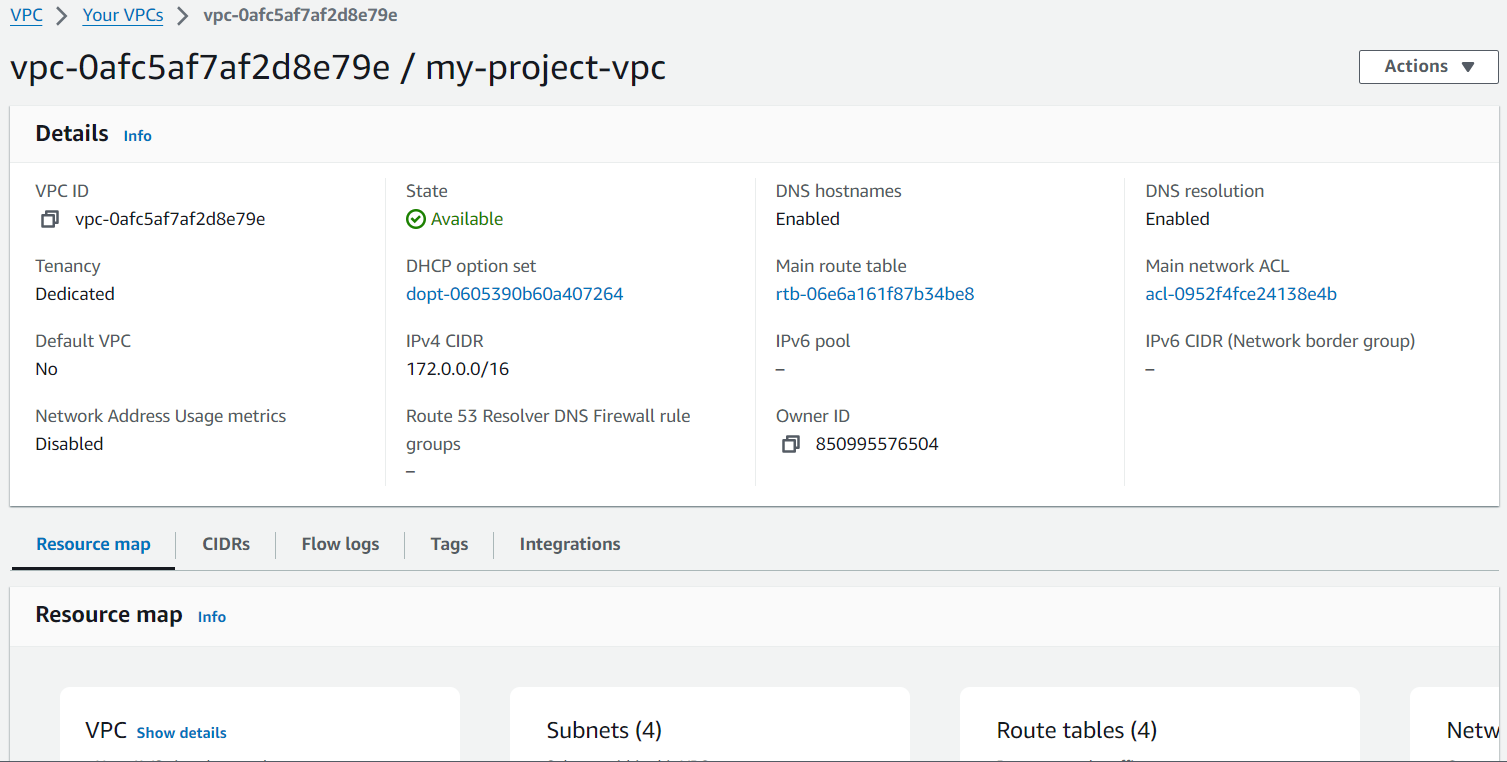
Step 4: View your VPC
And after successful creation of the VPC, click on view VPC to see the VPC detail page.
Subscribe to my newsletter
Read articles from Celestina Odili directly inside your inbox. Subscribe to the newsletter, and don't miss out.
Written by

Celestina Odili
Celestina Odili
Computer Scientist/ Cloud Engineer/DevOps Engineer / Technical writer