Introduction to Unit Testing in Node JS
 CodeChef-VIT

Photo by Cameron Venti on Unsplash
This blog explains with an example, how to do unit testing in node js. To know why we do unit testing or testing in general, visit this blog, Unit testing — why? by Corneliu Dascalu.
First I will give a brief introduction to unit testing then we will jump to the coding part.
Unit testing is testing the individual components(units) of the software. It is carried out by the developer during the development process. It tests the functioning of the individual components rather than the whole codebase.
Now I will start with the code. Initialise the node project with package.json file using the following command.
npm init --yes
The following is our index.js. We are creating the class employee which is being exported.
Now, we will write unit tests for the code in index.js.
Install mocha and chai as development dependencies. These are npm libraries used for testing. Mocha is a Javascript test framework and chai is an assertion library.
npm install mocha chai --save-dev
Create the index.test.js file. Change the test property inside the scripts section in package.json to “mocha index.test.js”
"test": "mocha index.test.js"
Now, we will write the test cases. We will use “describe” to group the test cases related to a unit and “it” is used to create a test case. We can declare describe blocks inside another describe block(i.e nested describe blocks are possible). There can be multiple it blocks in a single describe block. We use assertion methods provided by chai library to test the functioning of units for various test cases and values.
Documentation for assertion methods in chai library.
Here is the code for index.test.js. I have created some sample test cases. You will need to create test cases according to your need. The aim should be to test both the edge conditions and normal conditions where the code might break and change the code accordingly. Here I am not checking for all the possible test cases. I have just demonstrated for some cases.
To run the test script use the following command.
npm test
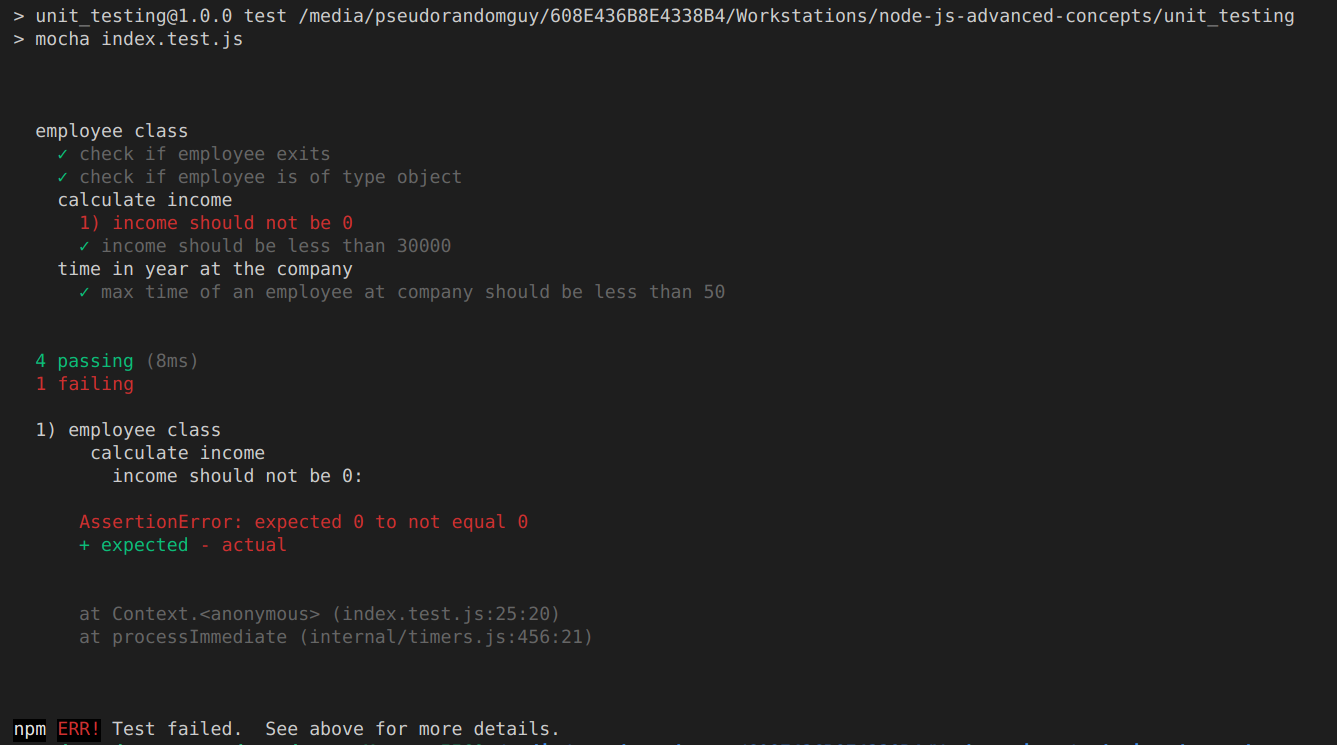
Here are the results.

As we can see from the results 4 test cases passed and 1 failed. Now the developer can change his code accordingly.
So, this was basic unit testing. Here the code is very small and we can check manually how much of the code is being tested (i.e code coverage). But for large codebases, it will be very difficult. We have an npm library called istanbul that calculates the code coverage for us.
Install istabul as a development dependency using the following command
npm install istanbul --save-dev
Now add the following line under scripts in package.json
"coverage": "istanbul cover _mocha index.test.js -x *.test.js",
"showcoverage": "xdg-open coverage/lcov-report/index.html"
package.json finally looks like this:-
Use the following command to show the code coverage in the console.
npm run coverage
Use the following command to display the results in the browser in a more interactive way.
npm run showcoverage
This blog is was a very basic introduction to unit testing. There is a lot more to it than this but I think these tools and methods will be really helpful to you.
Resources and References
Subscribe to my newsletter
Read articles from CodeChef-VIT directly inside your inbox. Subscribe to the newsletter, and don't miss out.
Written by
