Design to Code conversion using Relay
 Sandra Kuria

🚨Relay is no longer available for use as it was sunsetted on April 30,2025 :(
When you hear the word “Relay”, you may picture a track race where runners sprint as fast as they can to hand off a baton to the next teammate

In this article, we’ll discuss a different kind of Relay - one that could potentially accelerate your app development process!
Relay is a tool developed by Google that converts UI components in Figma to Jetpack compose code
It was announced during the Android Developer Summit 2022, It’s currently in alpha and has huge capabilities as a new technology. Relay mostly improves collaboration between designers, developers and even product teams. Designers can utilize the Relay for Figma plugin to document and package UI component designs, developers can then import the existing UI packages into their Jetpack Compose projects whereas the product teams can engage in continuous collaboration which enables the team to build more efficiently.
Installing Relay consists of three major steps;
Relay for Figma plugin
Relay for Android Studio plugin
Relay for Gradle plugin
The above plugins have to be installed separately *
But before we start, make sure you’re using Android Studio Flamingo or later, Jetpack compose version 1.2 or later & Gradle plugin v8.0 or later
Relay for Figma plugin
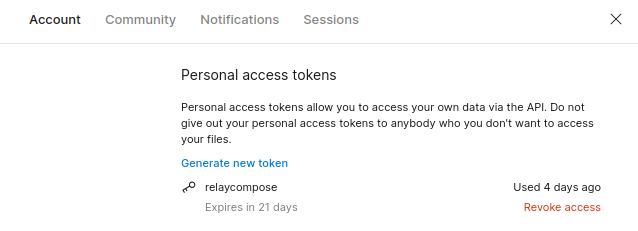
Create a Figma account, click on your profile icon and in the account section, select Generate new token in the ‘Personal Access Tokens’ section
Next up, create a new Figma design and add a frame. Right-click on your blank design and in the plugins section, select manage plugins and search Relay for Figma.


In our Figma document, we’ll create a simple login and sign-up button.
We’ll start off by selecting the rectangle in the bottom toolbar and placing it in the preferred position on your design page. Next, select the ‘T’ icon at the bottom toolbar and drag it inside the rectangle so as to add text to it.

In the right pane, you can change the background colour of the button, adjust the font size and many more. For this tutorial, I changed the background colour from the default grey to the colour below;

Now we’re done with the login button, feel free to customize it how you want!
Highlight the entire button, right-click and select group selection. Next up, copy the button again and paste it below. Edit the login text to ‘sign up’ and there we have it…two buttons
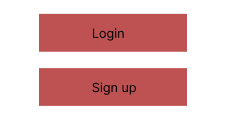
Next, highlight the entire design (the two buttons) and in the right pane, select ‘create component’

Now we have turned our design into a Figma component.

A figma component is a reusable design item that you can use across your project
When you edit the main component, all copies update automatically keeping everything consistent.
Now that we have turned our design into a component, let’s now use Relay to turn the component into a UI package.
Select the component and then right-click, go to plugins and select Relay for Figma. After that, the plugin will start and once the dialogue box pops up, select Get Started.
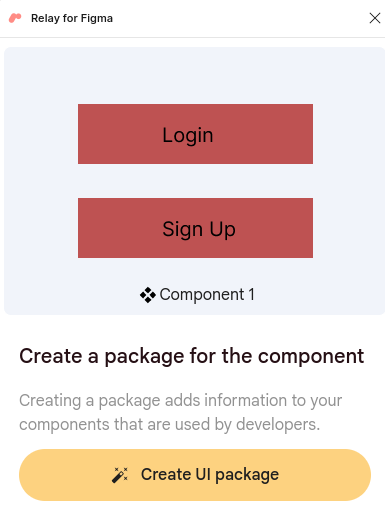
Click on Create UI package and the first thing we’ll do is to add parameters.
Parameters are added to adjust certain parts of a design without changing the original component
This makes components easier to reuse and when exported. The settings carry over into code thus streamlining the design-to-code process.
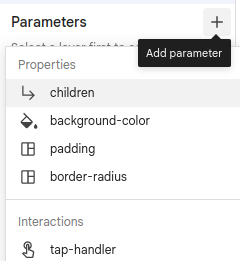
First, click on the login button and in the Relay window, click on the + sign and select tap-handler (since it will be a button). We can name it ‘onClickLogin’
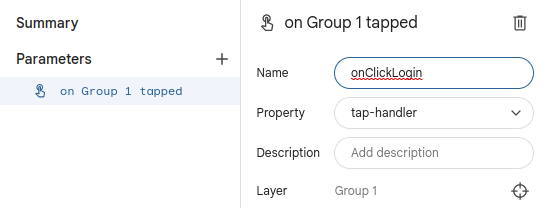
Select the second button, Sign up, add the tap-handler parameter and name it ‘onClickSignup’
We’re now done with our Figma design process!
Relay for Android Studio
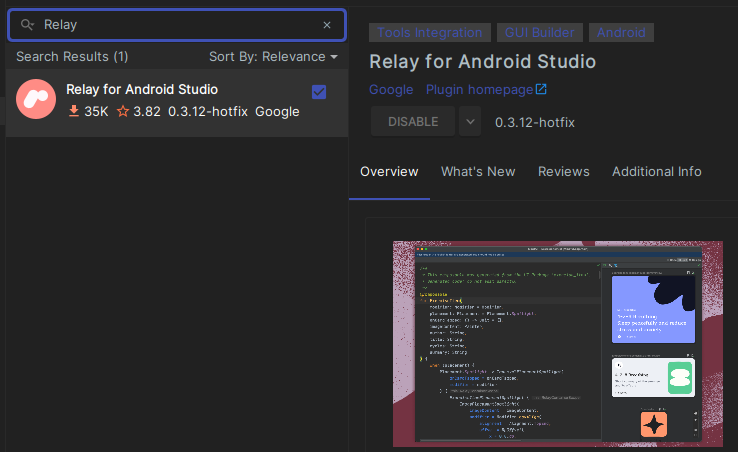
Open your Android Studio IDE and create a new Jetpack Compose project. Go to file and select settings. In settings, click on the plugins section and go to the marketplace. Search Relay for Android Studio, install the plugin and restart your IDE to activate the plugin.
Relay for Gradle
Once the IDE has restarted, open the module build.gradle file and at the top of the plugins section, add this line;
id ("com.google.relay") version ("0.3.12")
Click ‘sync now’ and Gradle will automatically download and install the plugin for you.
Design to code conversion
Now that our Android studio is ready, let’s get to the next step of importing our designs.
In the toolbar, click on Tools then select Relay settings. Go back to your Figma profile to copy the Personal access token that we generated earlier and paste it into Android Studio. Once you’re done, click ‘ok’ to finish up the process.
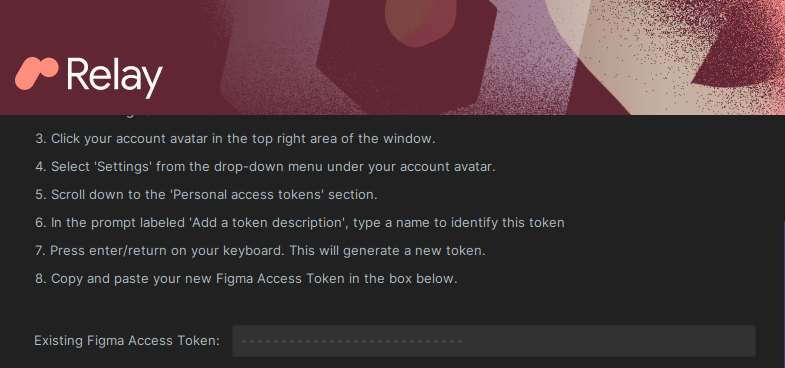
Now our token is set and ready, let’s import our UI packages.
In the toolbar, click on File → New → Import UI packages

You will then see this popup
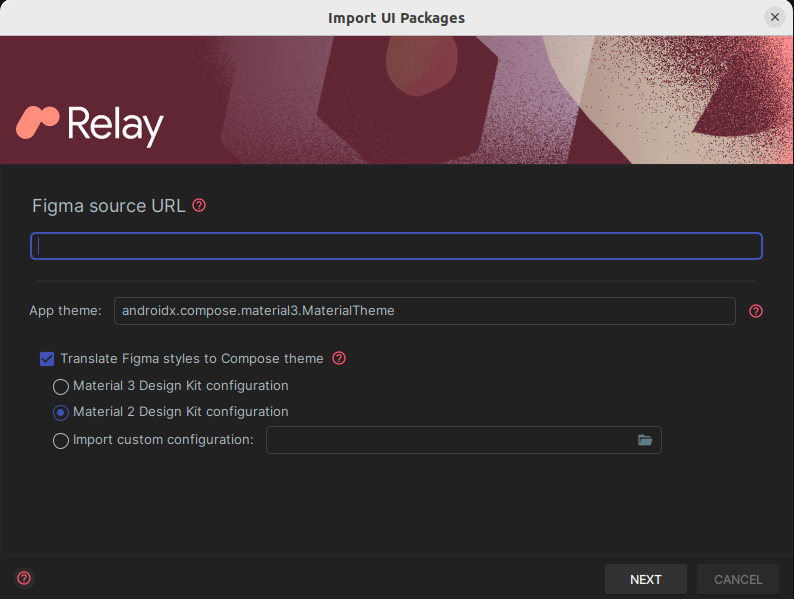
In the Figma Source URL section, go back to the Figma design document and click the ‘share’ button in the top right corner of the design toolbar. Then click on copy link

The link has now been copied into your clipboard, next, go to Android Studio and paste that link into the ‘Figma source URL ‘ section.
Also, select the ‘translate figma styles to compose theme’ and check the ‘Material 2 design kit configuration’ box then click next.
A style in figma is a set of design properties that can be consistently applied to multiple elements in your project
Relay will now be fetching the UI packages

Once the process is done, you will see our Figma designs.

Next, click Create.
You will notice that new files have been added to your project.
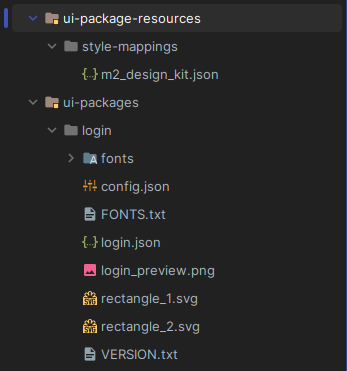
Next up, build your project

Switch from Android view to project view.
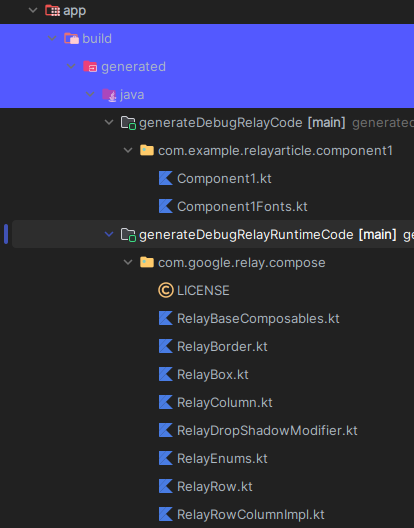
In the files, go to app → build →generated →java →generateDebugRelayCode[main] and click on the file to view the generated Kotlin code.
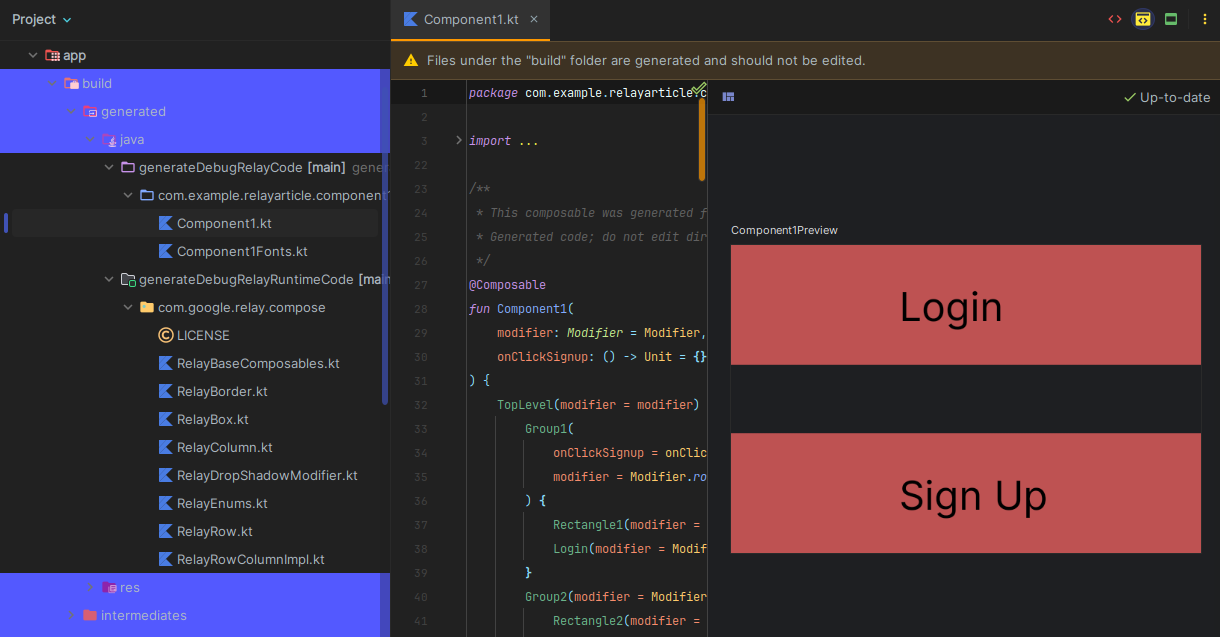
The code may look overwhelming, but don’t fret!
Next, we’ll incorporate the component into MainActivity.
class MainActivity : ComponentActivity() {
    override fun onCreate(savedInstanceState: Bundle?) {
        super.onCreate(savedInstanceState)
        enableEdgeToEdge()
        setContent {
            RelayarticleTheme {
                   Component1()
            }
        }
    }
}

@Preview(showBackground = true)
@Composable
fun GreetingPreview() {
    RelayarticleTheme {
       Component1()
    }
}
Run the program to see it live on your device!
Update UI components
In most cases, designs do change and one advantage of Relay is that we can update our designs with less hustle.
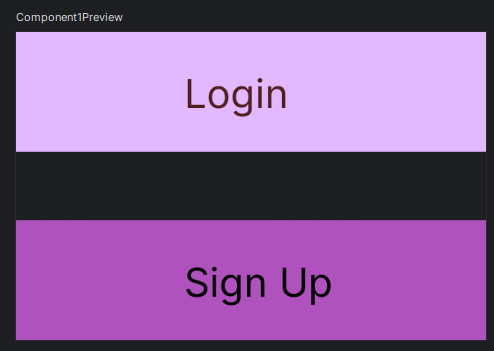
For instance, let’s change the background colour of our buttons to the design below.
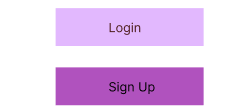
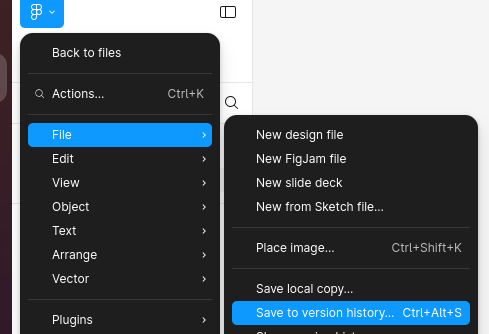
Once you have made the changes in Figma, click on File and select Save to version control history.
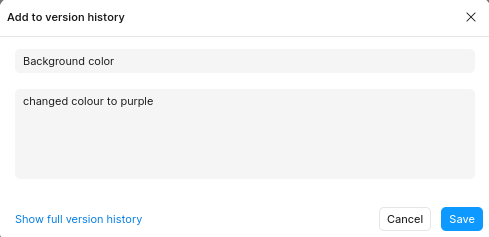
Describe what changed and click ‘save’
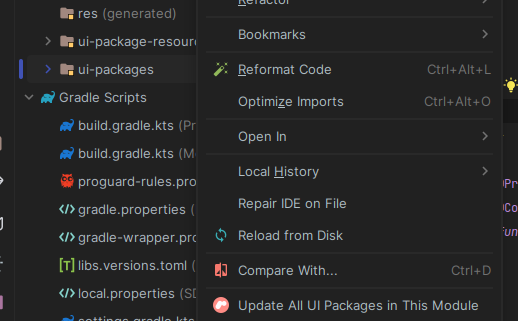
Right-click on the UI-packages folder and select ‘update all UI packages in this module'
You will then see your Figma designs being updated.

Once it’s done, build your project and run! You will then see the updated designs in the Android studio preview or on your device.
Common pitfalls
Generated code packages missing in Android Studio: In some cases, files may fail to generate in our Android Studio project. To fix this, right-click on the top-level folder and select ‘Reload from disk’

This way, the files that were not generated will now be generated into your project.
Deleting and undoing the deletion of UI packages: It is not advisable to delete and undo the deletion of generated files in Android Studio since they may not be restored properly. Instead, it is advisable to reimport the Figma version again so as to avoid this problem.
UI package naming: When naming your UI packages, start with a letter. Otherwise, Relay will generate compose code that does not compile.
Best practices
Understanding Relay’s workflow: As a collaborative tool, designers and developers need to understand what Relay can and cannot do. Designers should design with component-based thinking while developers should know how to integrate the designs into the code
Design systems alignment: Create Figma components that map directly to reusable components ensuring easy transitions through Relay.
Utilizing Relay’s annotation features: Ensure Figma designs have clear component variants(eg button states) so that Relay generates Jetpack Compose components with different states.
Implementing Version control for design and code: Make sure design files are version-controlled
Testing and validation: Once Relay generates the code, test the UI early to make sure everything translates as expected
You have reached the end of the article :) I hope you enjoyed it and discovered something new about this amazing tool.
Feel free to ask me any questions through my socials
See you in the next article, Ciao 👋
Subscribe to my newsletter
Read articles from Sandra Kuria directly inside your inbox. Subscribe to the newsletter, and don't miss out.
Written by

Sandra Kuria
Sandra Kuria
Android engineer | Google WTM ambassador | Lead-Firebase Kenya