Comprehensive Guide to Jenkins: CI/CD, Pipelines, and Multi-Node Cluster Architecture
 Jasai Hansda
Table of contents
- What is Jenkins?
- Getting Started with Jenkins Using Docker
- Jenkins Jobs: The Backbone of Automation
- Jenkins Pipeline: Automating with Code
- Build Triggers: Automating Builds
- Jenkins Single-Node Cluster
- Jenkins Multi-Node Cluster: Scaling Jenkins with Master-Slave Architecture
- Setting Up a Jenkins Multi-Node Cluster
- Conclusion
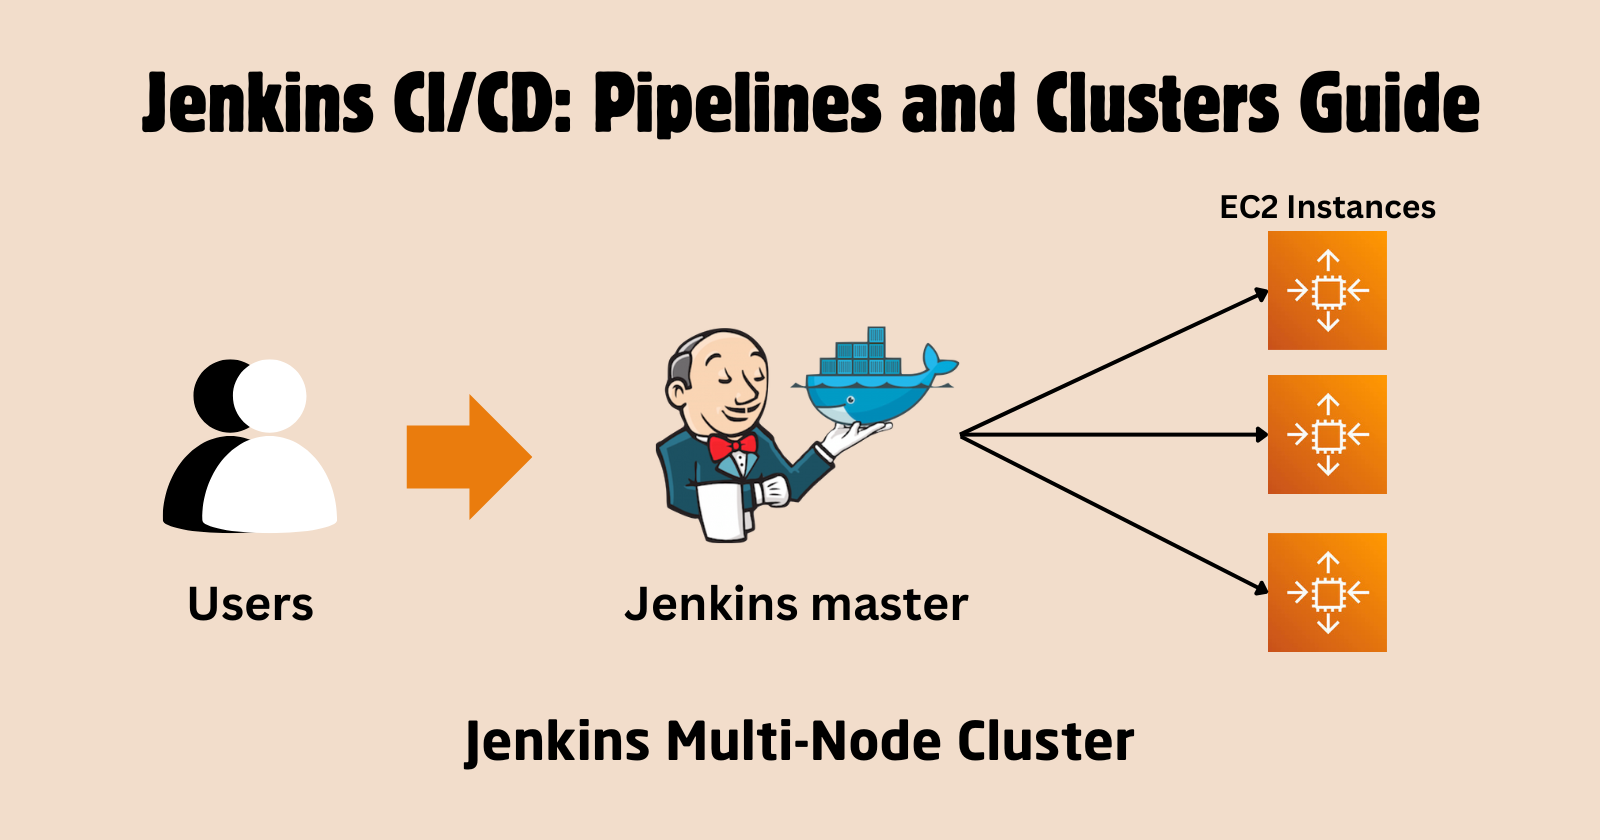
In today’s fast-paced software development world, automation plays a vital role in maintaining efficiency and consistency in the software delivery process. Jenkins, an open-source automation server, is at the forefront of this revolution. By helping teams implement Continuous Integration (CI) and Continuous Deployment (CD), Jenkins accelerates code delivery, testing, and deployment.
In this blog, we’ll cover:
What is Jenkins?
Jenkins Jobs, Pipelines, and Jenkinsfile
Build Triggers
Setting up a Jenkins Multi-Node Cluster
What is Jenkins?
Jenkins is a powerful automation tool that allows developers to automate parts of the software development lifecycle such as building, testing, and deploying code. It supports version control tools like Git, making it a key component in modern CI/CD pipelines.
Jenkins is highly flexible, thanks to its plugin architecture (most important), enabling seamless integration with other tools, cloud platforms, and technologies. Whether you’re automating a simple task or orchestrating a complex CI/CD pipeline, Jenkins is a go-to tool for DevOps engineers.
Getting Started with Jenkins Using Docker
Using Docker to set up Jenkins is a quick and efficient way to get started. Docker allows you to run Jenkins in a container, which simplifies the installation process and ensures a consistent environment.
Step-by-Step Guide to Running Jenkins with Docker
Step 1. Install Docker
- Ensure Docker is installed on your machine. You can download and install Docker from the official Docker website, or you can use this link to install docker in Linux.
Step 2. Pull the Jenkins Docker Image
Open your terminal and pull the official Jenkins Docker image by running:
docker pull jenkins/jenkins:lts
Step 3. Run the Jenkins Container
Start a Jenkins container with the following command:
docker run -d -p 8080:8080 -p 50000:50000 --restart=on-failure -v jenkins_home:/var/jenkins_home --name jenkins jenkins/jenkins:ltsThis command does the following:
-d: Runs the container in detached mode.-p 8080:8080: Maps port 8080 on your host to port 8080 in the container (Jenkins web interface).-p 50000:50000: Maps port 50000 on your host to port 50000 in the container (Jenkins agent communication).-v jenkins_home:/var/jenkins_home: Creates a Docker volume to persist Jenkins data.--name jenkins: Names the container "jenkins".
Step 4. Access Jenkins
Open a web browser and navigate to http://localhost:8080.
If using AWS EC2, you need to open port 8080 by editing the Inbound rules.

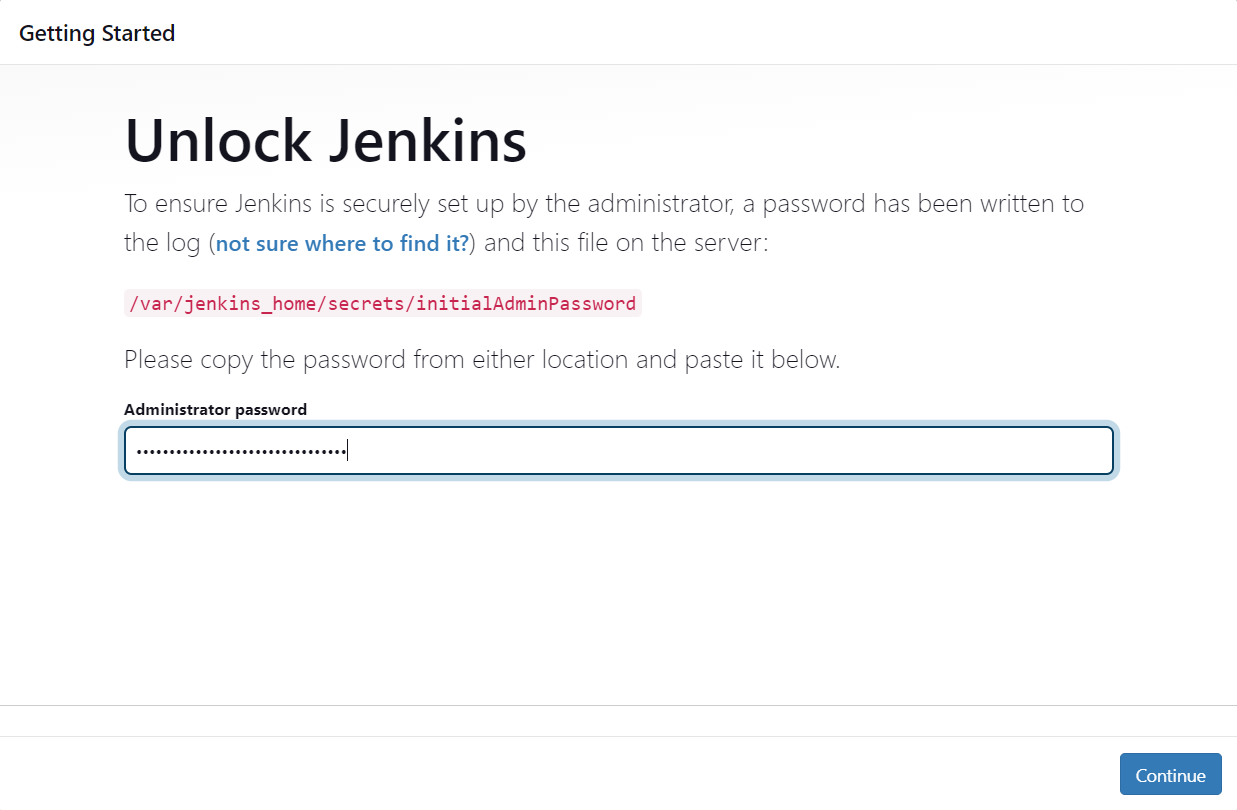
You will be prompted to unlock Jenkins. Retrieve the initial admin password by running:
docker exec jenkins cat /var/jenkins_home/secrets/initialAdminPassword
Copy the password from the terminal and paste it into the Jenkins setup page.
Step 5. Install Suggested Plugins
After unlocking Jenkins, you will be prompted to install plugins. Choose "Install suggested plugins" to get started quickly.

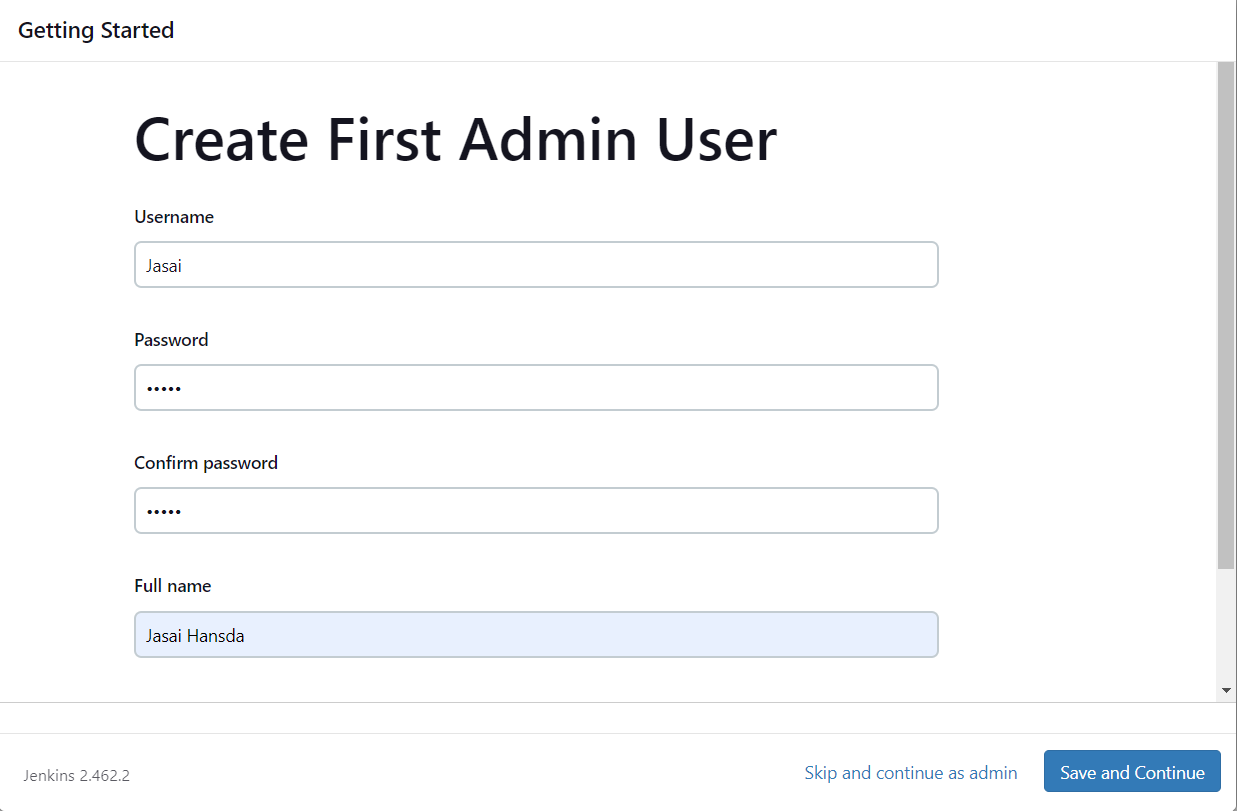
Step 6. Create Admin User
Follow the prompts to create your first admin user.
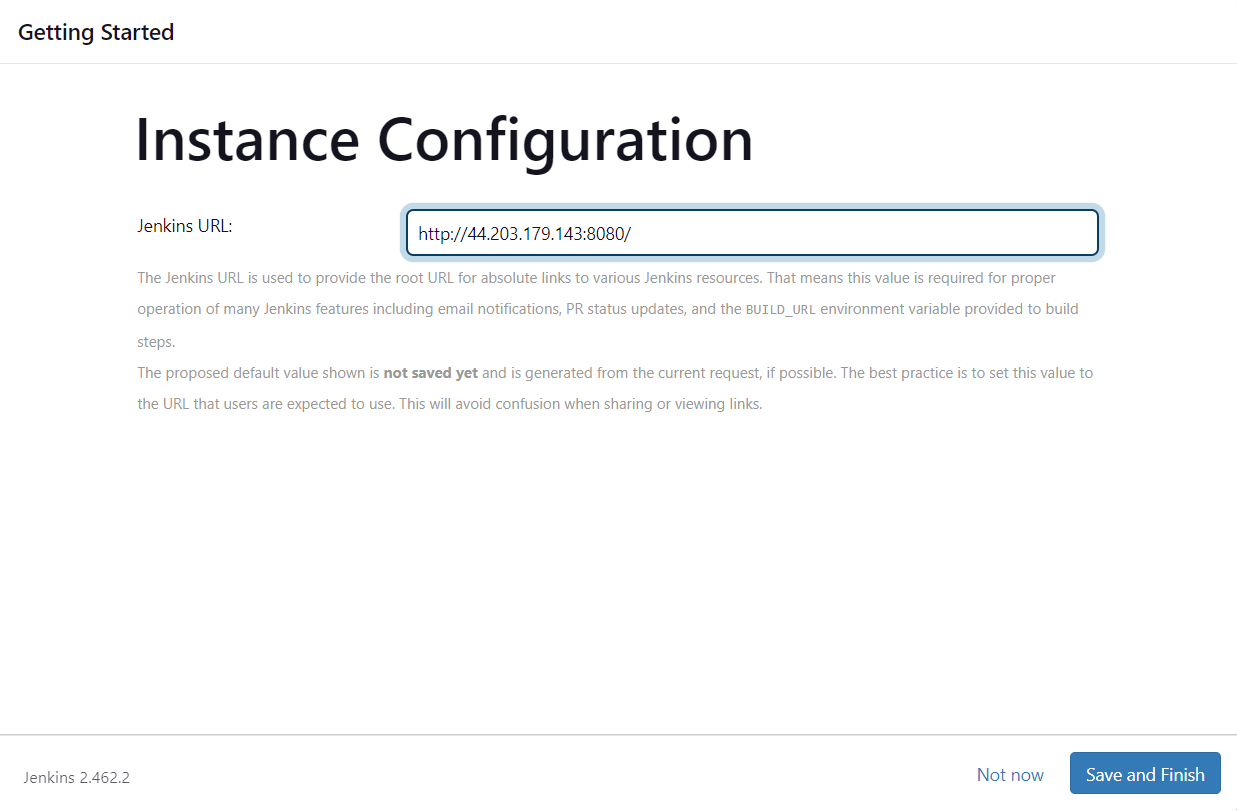
Step 7. Configure Jenkins
Complete the setup by configuring Jenkins as needed. You can now start creating jobs and pipelines.
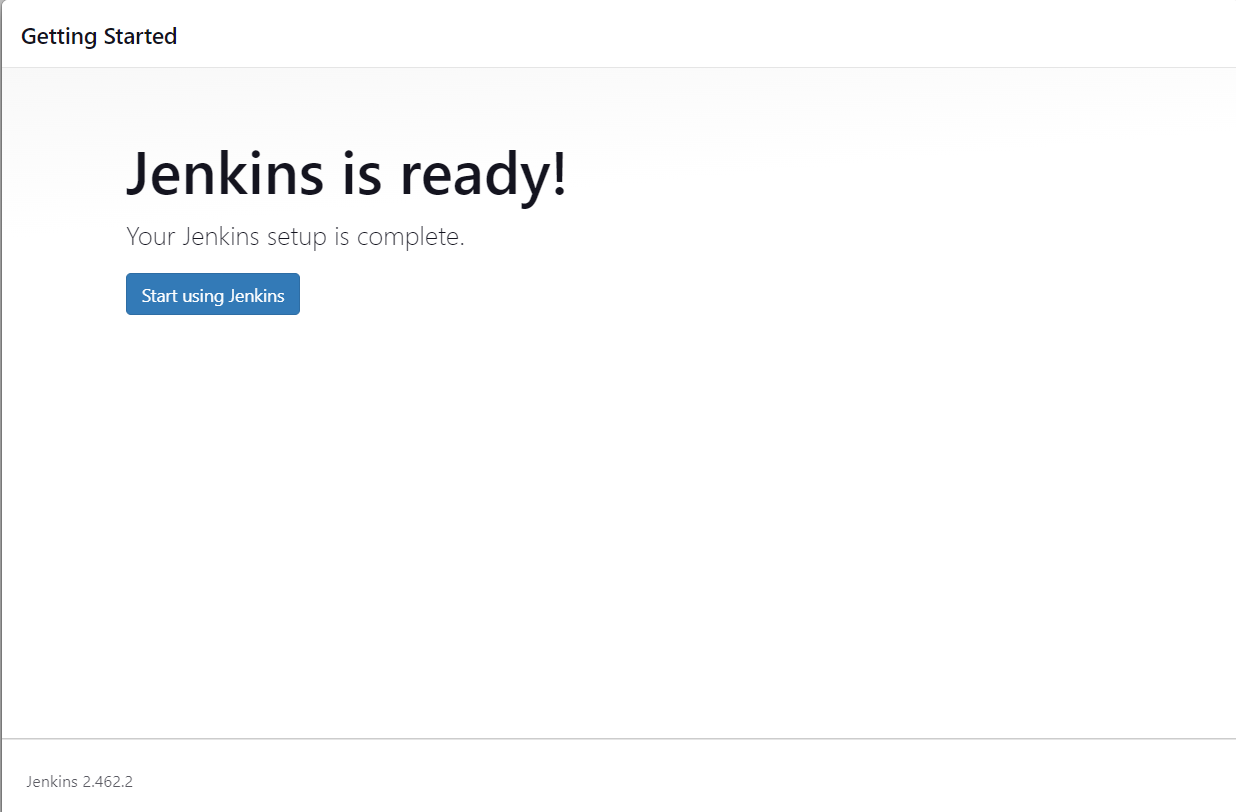
By following these steps, you can quickly set up Jenkins using Docker, providing a portable and consistent environment for your CI/CD needs.
Jenkins Jobs: The Backbone of Automation
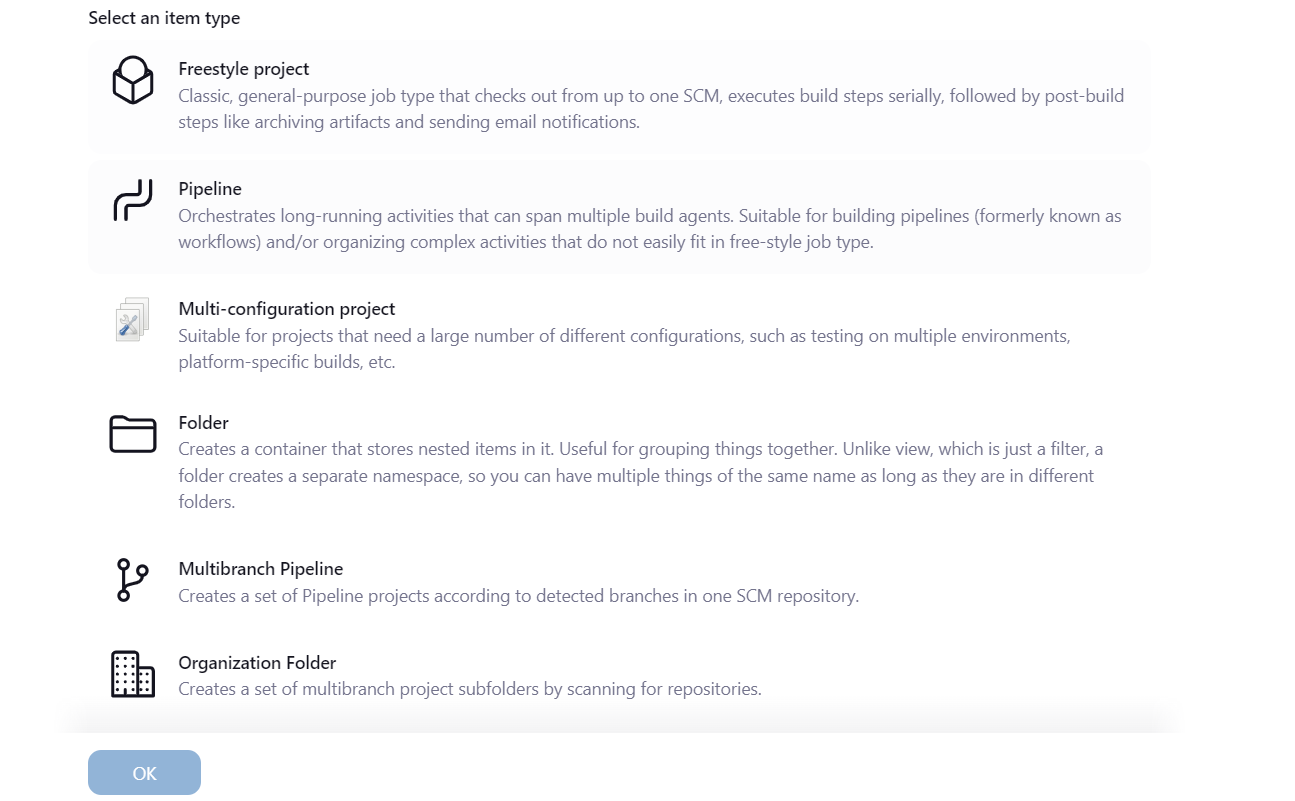
A Jenkins Job is a task that Jenkins performs. Jobs are the foundation upon which automation in Jenkins is built. Common tasks include pulling code from a Git repository, compiling code, running tests, and deploying applications.
Types of Jenkins Jobs
Freestyle Projects: These are simple Jenkins jobs that allow you to configure builds manually through the user interface.
Pipeline Jobs: More advanced than freestyle jobs, pipeline jobs define the entire build, test, and deploy process using a scripted or declarative pipeline.
Multi-Configuration Projects: These jobs allow you to run the same build in different environments or configurations, useful for testing across multiple platforms.
Folder: Organize jobs into folders to manage them more easily, especially in large Jenkins instances.
Multibranch Pipelines: Automatically create pipelines for each branch in a repository, perfect for managing large-scale projects.
Organizational Folder: Automatically create folders for each repository in an organization, simplifying the management of multiple repositories.
Jenkins Pipeline: Automating with Code
A Jenkins Pipeline is a series of steps Jenkins executes to automate software delivery. Pipelines provide a way to define complex automation workflows using a Jenkinsfile, which allows the pipeline to be version-controlled and part of the source code.
Types of Pipelines:
1. Scripted Pipeline
Scripted pipeline is traditional way of writing pipeline using groovy scripting in Jenkins UI.
Stricter groovy syntax
Each stage can not be executed in parallel in multiple build agents(Slaves) that easily.
Code is defined within a node block.
  // Scripted pipeline
  node {
    stage('Build') {
      echo 'Building....'
    }
    stage('Test') {
      echo 'Building....'
    }
    stage('Deploy') {
      echo 'Deploying....'
    }
  }
2. Declarative Pipeline (Jenkinsfile)
New feature added to Jenkins where you create a Jenkinsfile and check in as part of SCM such as Git.
Simpler groovy syntax.
Code is defined within a 'pipeline' block.
Each stage can be executed in parallel in multiple build agents (Slaves).
Jenkinsfile
A Jenkinsfile is a text file that defines the pipeline’s steps. It’s usually stored in the project repository and allows Jenkins to perform tasks like building, testing, and deploying code in a reproducible way.
Example Jenkinsfile:
  // Declarative pipeline
  pipeline {
    agent any
    stages {
      stage('Build') {
        steps {
          sh 'echo Building...'
        }
      }
      stage('Test') {
        steps {
          sh 'echo Testing...'
        }
      }
      stage('Deploy') {
        steps {
          sh 'echo Deploying...'
        }
      }
    }
  }
This declarative pipeline runs three stages—build, test, and deploy—on any available Jenkins agent.
Build Triggers: Automating Builds
Build triggers define when Jenkins should execute a job or pipeline. Automating builds based on various triggers helps ensure code changes are integrated and deployed in a timely manner.
Let’s explore some of the most common Jenkins build triggers:
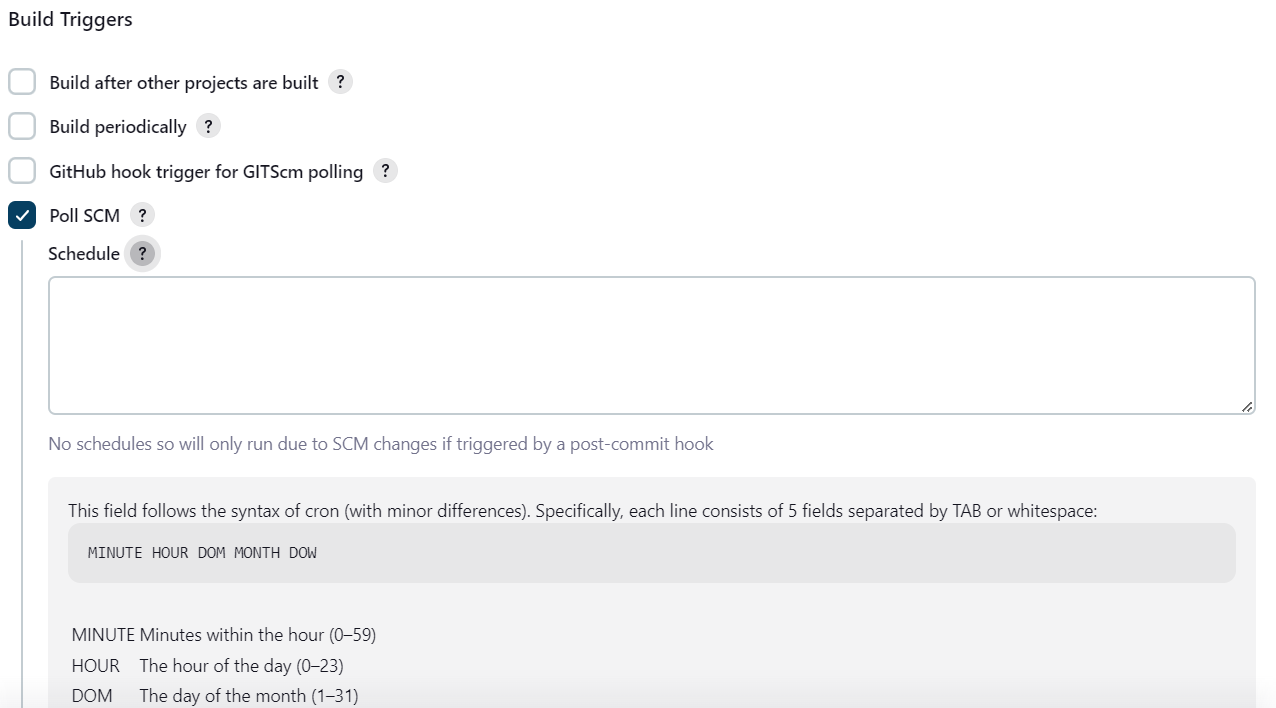
SCM Polling:
Jenkins checks the source code repository (e.g., Git) for changes at regular intervals. If it detects changes, it triggers a build. You can find this option in the "Build Triggers" section when configuring a job.
GITScm Polling:
Similar to SCM polling but specific to Git. Jenkins checks for new commits and triggers a build if any are found.

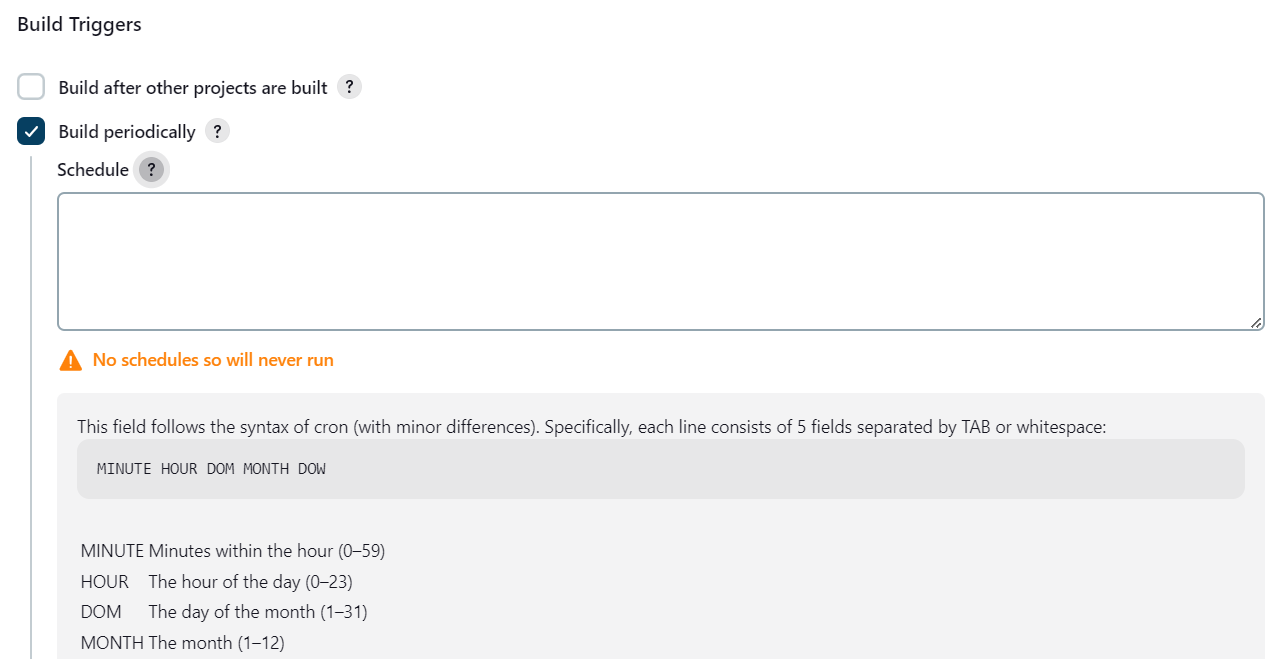
Build Periodically:
This allows scheduling builds using cron-like syntax. For example, building every day at midnight or every 5 hours. You can configure this in the "Build Triggers" section by selecting "Build periodically" and entering the desired schedule.
Webhooks:
Webhooks are set up in a Git repository (like GitHub) to notify Jenkins of changes, triggering a build instantly when there’s a new commit or pull request. To use webhooks, configure them in your Git repository settings and ensure Jenkins is set up to receive webhook notifications.
Steps for - Setting up GitHub Webhooks
Jenkins Single-Node Cluster
A Single Node Cluster in Jenkins refers to a Jenkins setup where both the Jenkins Master and the Jenkins Agent (worker) are running on a single node (i.e., a single machine or container). This setup is typically used for small-scale projects or for testing and development purposes.
In this case, the Jenkins master handles all job management, builds, and orchestration without distributing tasks across multiple agents or machines.
Jenkins Multi-Node Cluster: Scaling Jenkins with Master-Slave Architecture
As your software project grows, handling all the build, test, and deploy tasks on a single Jenkins server (master) can quickly become a bottleneck. That’s where the Jenkins Multi-Node Cluster (Master-Slave architecture) comes into play. This setup helps distribute the workload across multiple nodes (machines), improving scalability, performance, and fault tolerance.
Key Components of a Multi-Node Cluster
Jenkins Master: The master node controls Jenkins' operations, schedules jobs, and delegates tasks to slave nodes. The master doesn’t typically run jobs itself.
Jenkins Slave (or Agent): The slave nodes execute the jobs delegated by the master. They can be configured to perform specific types of tasks (e.g., Linux or Windows-based jobs) and can run jobs in parallel.
Benefits of a Multi-Node Cluster
Scalability: Spread the workload across multiple agents to handle more jobs in parallel.
Resource Optimization: Assign specific jobs to the right agent based on the OS, hardware, or software requirements.
Fault Tolerance: If one agent fails, Jenkins can still distribute jobs to other agents.
Setting Up a Jenkins Multi-Node Cluster
Here’s how to set up a Jenkins Multi-Node Cluster using a master-slave architecture.
Step 1: Install Jenkins Master
Set up Jenkins on a server (locally or in the cloud, such as AWS EC2).
This master node will manage the overall Jenkins operations and delegate jobs to the slaves.
Step 2: Prepare Slave Nodes
Prepare a Slave Machine:
Install a Java Runtime Environment (JRE) on the slave node.
  wget https://download.oracle.com/java/17/archive/jdk-17.0.11_linux-x64_bin.rpm
  sudo yum install -y jdk-17.0.11_linux-x64_bin.rpm
Ensure that the master can SSH into the slave node.
Add Slave Nodes to Jenkins:
Go to Jenkins Dashboard.
Navigate to Manage Jenkins > Manage Nodes > New Node.
Add the slave node and configure parameters like the remote root directory and number of executors.
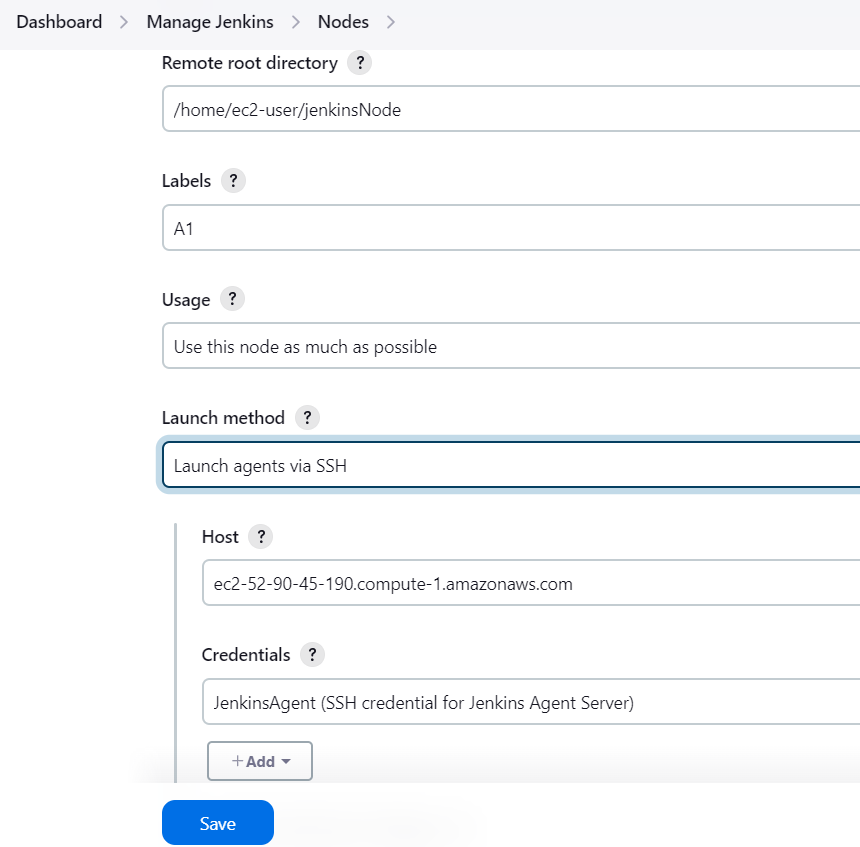
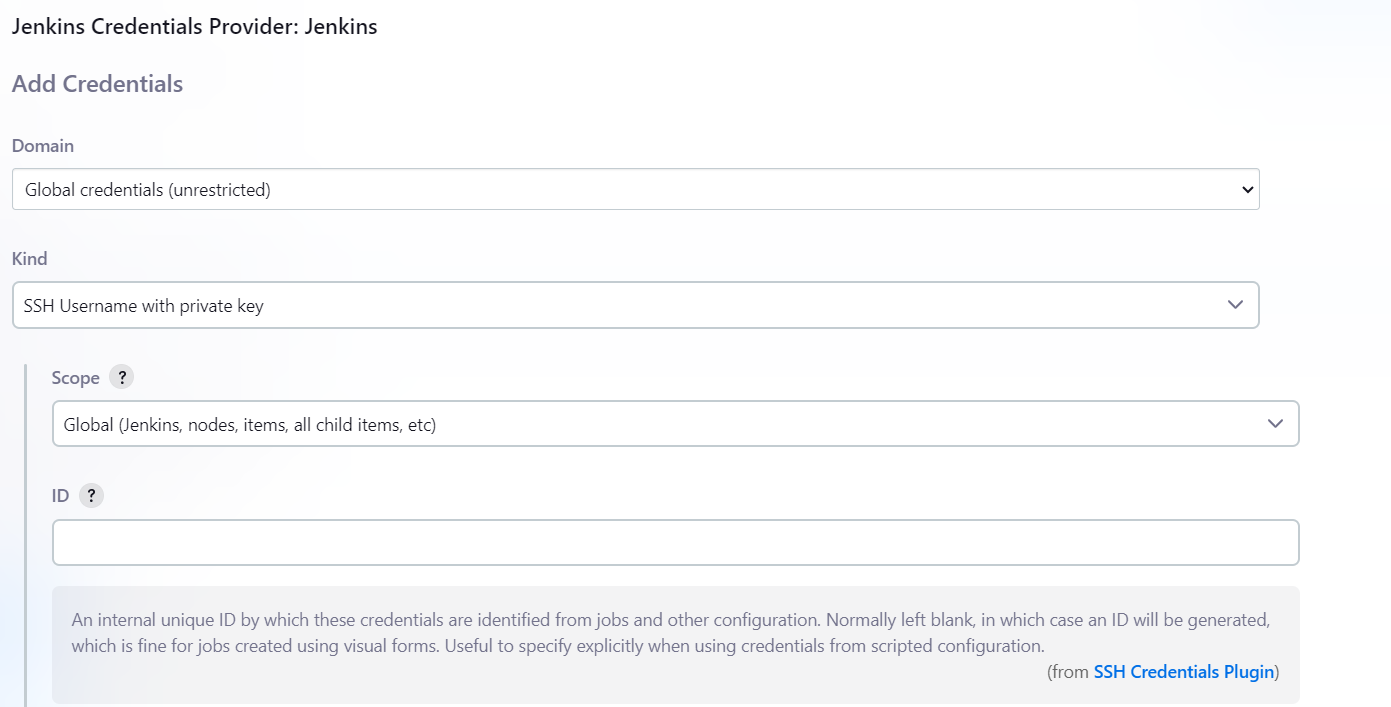
Set up SSH or another method for connecting to the slave node.
Check the newly created node

Run these commands on the slave node.


The agent has connected, but we might have a space issue like this (Let's fix it).

This issue isn't caused by Jenkins; it's due to limited storage in the /tmp folder on EC2 resources because it is being used. So, let's increase the space.
Check the disk space
df -h
To increase the size of the /tmp folder, use this command to edit the fstab file**.**
vi /etc/fstabThe original file looks something like this:

Add this line to the file and save it
tmpfs /tmp tmpfs size=4G 0 0
Now remount the /tmp file, and you will see the increased space.
mount -o remount /tmp
Space issue Fixed

Step 3: Configure Jobs to Run on Slaves
In the Jenkins job, go to the Build Environment section and set it up to run on specific agents using labels.

Jenkins will automatically delegate jobs to available nodes with matching labels.

Real-World Example: Multi-Platform Build Pipeline
Imagine you’re working on a project that needs to build software for both Windows and Linux platforms. You can configure a Jenkins Multi-Node Cluster where:
Windows Agent handles builds on the Windows platform.
Linux Agent handles builds on the Linux platform.
Here’s a sample Jenkinsfile for building on both platforms:
pipeline {
    agent none
    stages {
        stage('Build on Windows') {
            agent { label 'windows' }
            steps {
                bat 'build-windows.bat'
            }
        }
        stage('Build on Linux') {
            agent { label 'linux' }
            steps {
                sh './build-linux.sh'
            }
        }
    }
}
This pipeline runs builds on two different agents based on the platform (Windows or Linux), using platform-specific build commands (bat for Windows, sh for Linux).
Conclusion
Jenkins provides a flexible solution for automating software builds, testing, and deployments. It supports everything from basic jobs to advanced multi-node clusters, allowing you to create robust CI/CD pipelines. With multi-node clusters, Jenkins efficiently distributes workloads for high performance. By following this guide, you can build Jenkins pipelines, automate builds, and set up a multi-node architecture to enhance your CI/CD workflow.
Subscribe to my newsletter
Read articles from Jasai Hansda directly inside your inbox. Subscribe to the newsletter, and don't miss out.
Written by

Jasai Hansda
Jasai Hansda
Software Engineer (2 years) | In-transition to DevOps. Passionate about building and deploying software efficiently. Eager to leverage my development background in the DevOps and cloud computing world. Open to new opportunities!