Project 3 →Automating Application Deployment with AWS DevOps Tools
 Anas Ansari
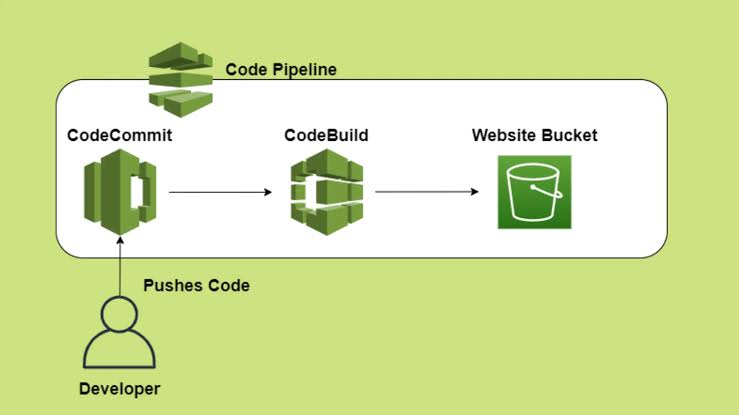
Completion Steps →
fetch a code from github by git clone ***************
Setup code commit repository on aws
push code to code commit using aws CLI
setup aws code-build for building code
setup S3 bucket for code storage
setup code deploy for deployment of code stored in aws S3
setup an EC2 in which you deployed your aplication
Setting Up AWS CodeDeploy Agent on Ubuntu EC2
create the deployment group and deploy the aplication
Setup code pipeline to automate whole process
Step 1 →
- git clone ****************
above command pulls your aplication code to your local that is need to pushed in aws code commit
step 2 →Setup code commit
- Go to aws console search aws code commit and create a demo repository
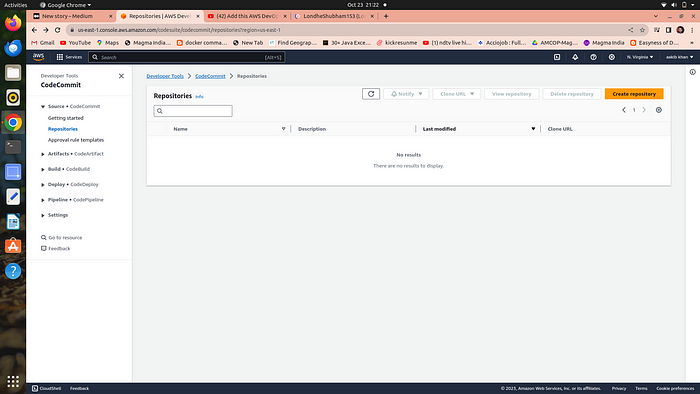
2. Provide necessary permission to aws code commit to use it with aws cli which needs to create an IAM user having a permission of aws code commit
3. search IAM and click on create user
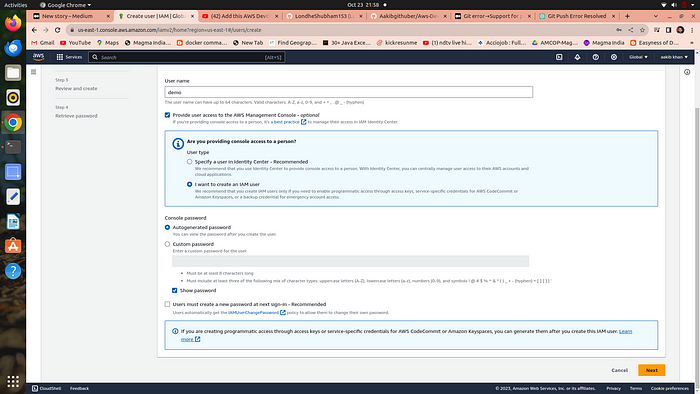
4. click next and create user
5. now you have to give permission to your user of code commit
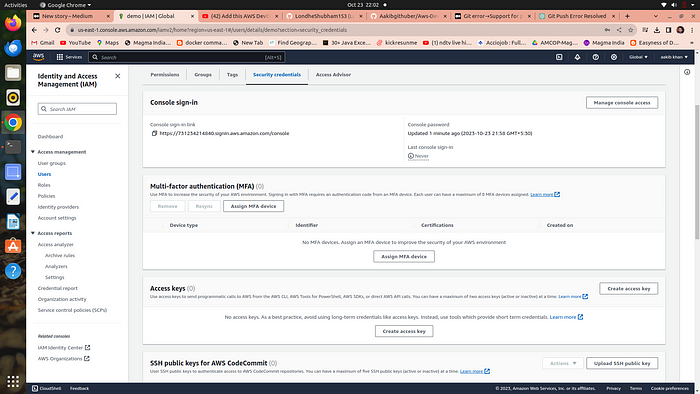
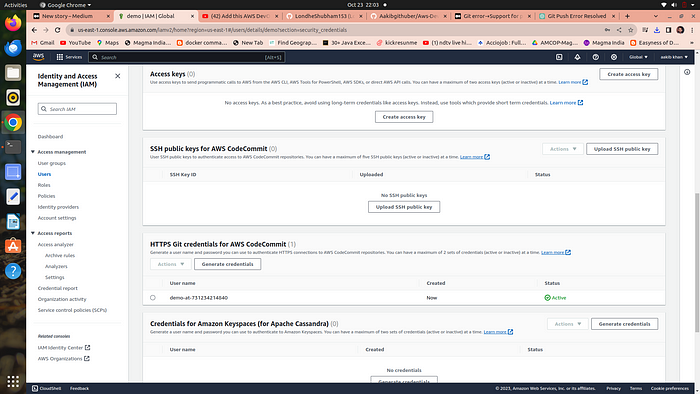
6 . click on user →security credentials →scroll down for HTTPS Git credentials for AWS CodeCommit →click on generate credentials and download csv.credentials file
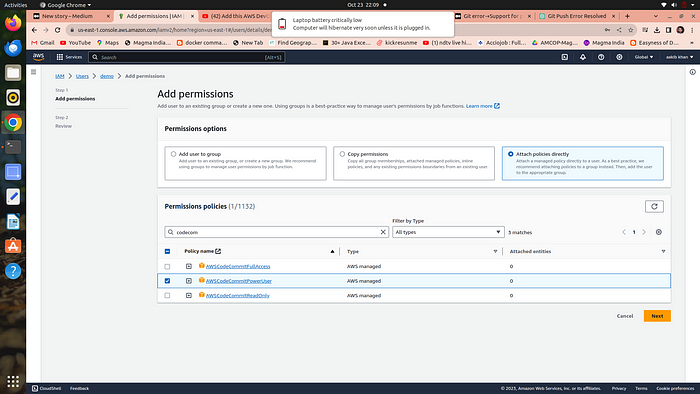
7. you also need to attach a policy called “AWSCodeCommitPowerUser”
go to permissions and then click on attach policies directly and search for above policy and click on add
your code commit repository is setup next move to step
Step 3 → push code to code commit using aws CLI
clone your code commit url and go to your terminal and run git clone <copied url>
it will ask you for username and password → give it to your code commit credentials that you generated

3. now you have to push all the cloned code of project repository to your code commit repository by commands
cd demo
git clone **********
git add .
git commit -m”new commit”
git push

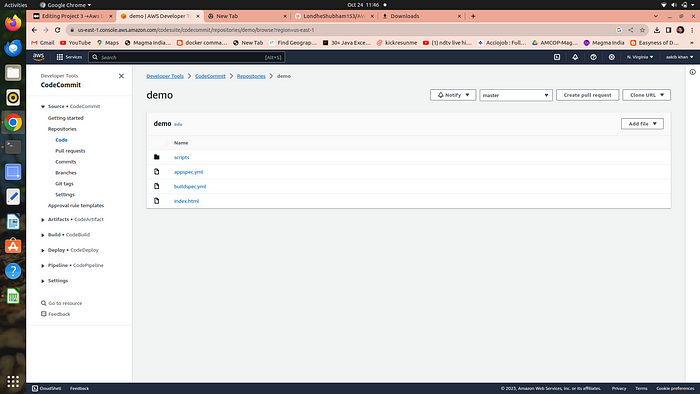
pushed code in code commit
Step 3 → Setup aws code-build for building code
go to aws console and search for aws code build
click on create project option
give a name to your project “demo project”
on repo option click on demo and branch to master
for OS choose ubuntu ,runtime to standard and image to latest version
buildspec file → it is a file which tells the code build what steps is needed when you building the code and we have already abuildspec file in code commit so “click on use a buildsepc file” option
click on create build project option and reamin everything as it is
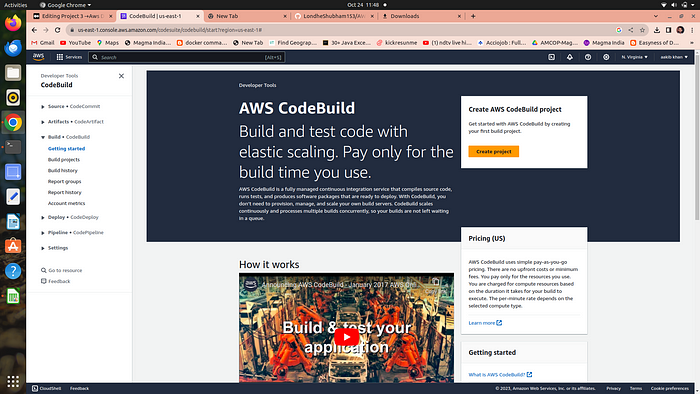
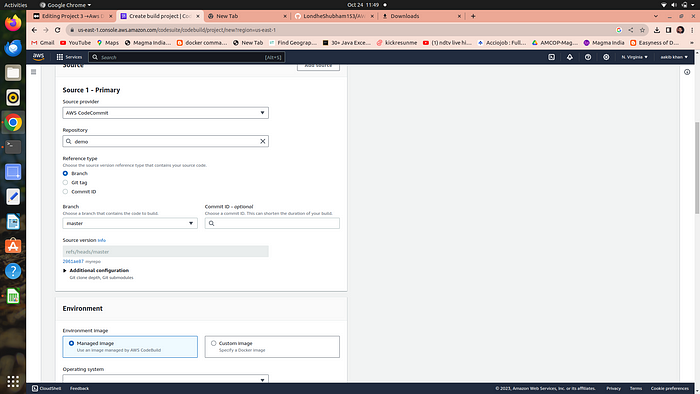
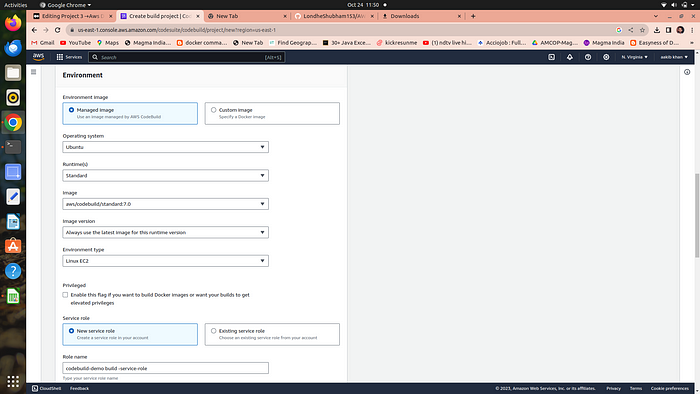
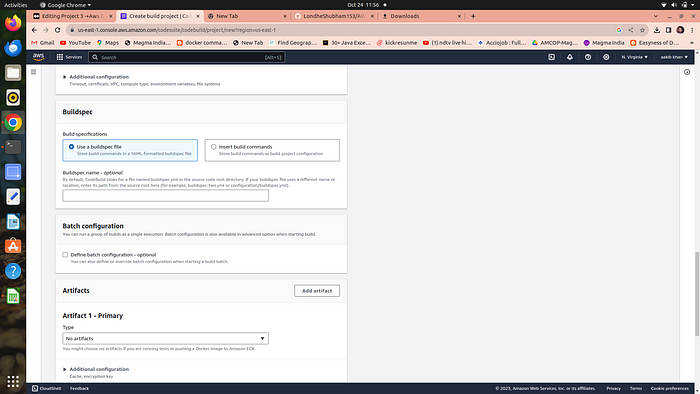
8. Now click on start build option
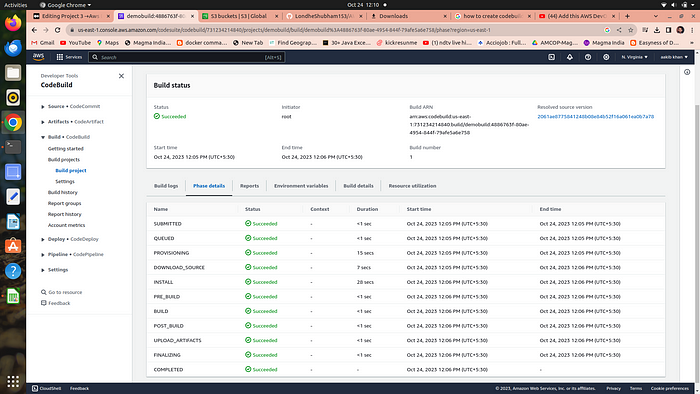
now you need to store this code in s3 which is further used by code deploy for deployment
step 5 →setup S3 bucket for code storage
go to console and search for s3 and create a bucket
bucket name should be unique globally

3. go to code build and click on edit →artifact →change no artifact to s3 and choose a bucket create in above step
4. and choose zip file for storage
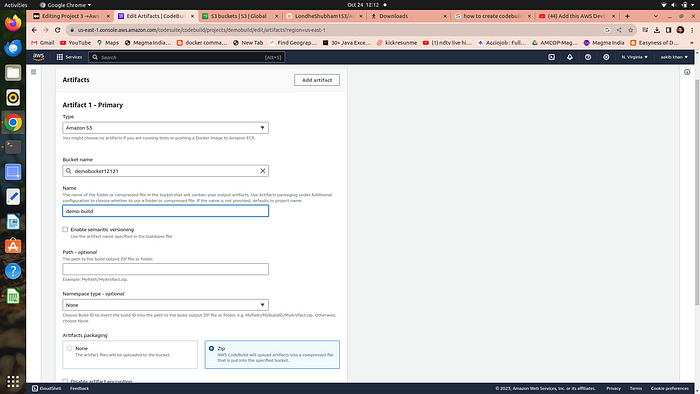
5. click on update artifacts and build again the same project with this extra step of artifacts
6. after building you will see that your code is stored in s3 bucket
now we have to move to step no.6
Step 6 →setup code deploy for deployment of code stored in aws S3 to an EC2
- go to console and search for aws code deploy and click on create aplication option
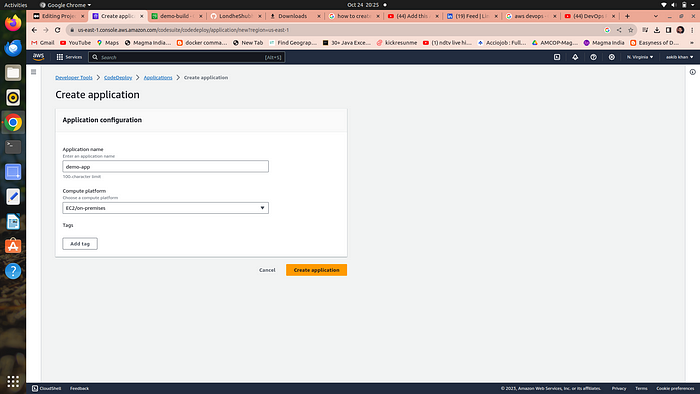
select ec2 in dropdown menu
step 7 → setup an EC2 in which aplication will running or deployed by code deploy
- go to ec2 and launch the ubuntu machine
create a aws ec2-service role
having following permission which helps ec2 to communicate with code deploy
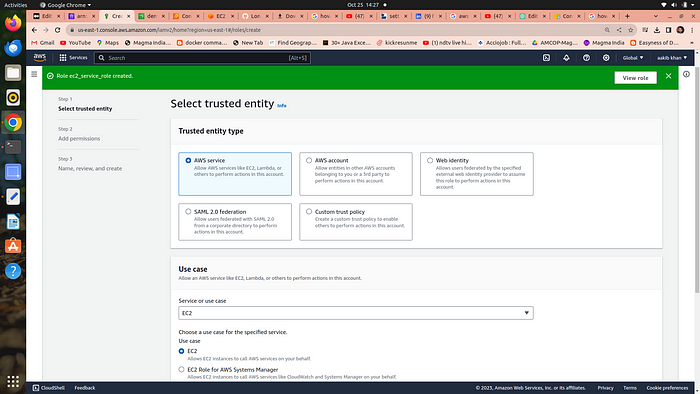
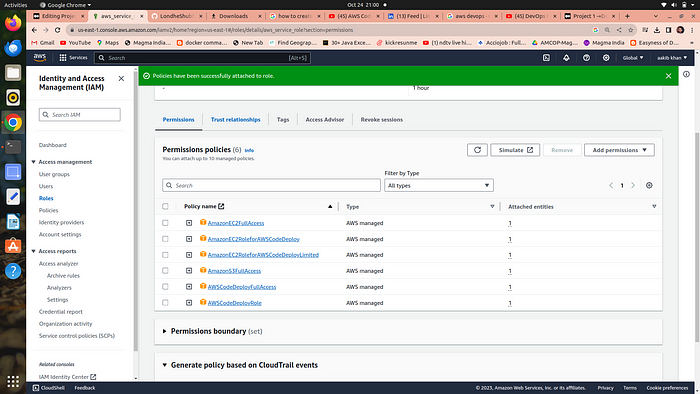
2. attach that role to your ec2 →actions →security →modify iam role
create a aws code_deploy_service_role
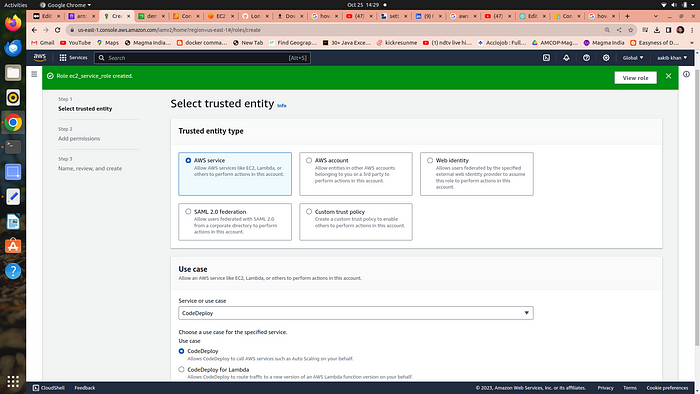
this role need to be attached on code deploy to allow it to make contact with ec2 and s3
step 8 →Setting Up AWS CodeDeploy Agent on Ubuntu EC2
In order to deploy your app to EC2, CodeDeploy needs an agent which actually deploys the code on your EC2.
So let’s set it up.
Create a shell script with the below contents and run it
connect to your ec2 and run following commands
sudo su
apt update
vim agent.sh
copy and paste the following code to in your file
#!/bin/bash
# This installs the CodeDeploy agent and its prerequisites on Ubuntu 22.04.
sudo apt-get update
sudo apt-get install ruby-full ruby-webrick wget -y
cd /tmp
wget https://aws-codedeploy-us-east-1.s3.us-east-1.amazonaws.com/releases/codedeploy-agent_1.3.2-1902_all.deb
mkdir codedeploy-agent_1.3.2-1902_ubuntu22
dpkg-deb -R codedeploy-agent_1.3.2-1902_all.deb codedeploy-agent_1.3.2-1902_ubuntu22
sed 's/Depends:.*/Depends:ruby3.0/' -i ./codedeploy-agent_1.3.2-1902_ubuntu22/DEBIAN/control
dpkg-deb -b codedeploy-agent_1.3.2-1902_ubuntu22/
sudo dpkg -i codedeploy-agent_1.3.2-1902_ubuntu22.deb
systemctl list-units --type=service | grep codedeploy
sudo service codedeploy-agent status
credit for this file →shubham sir blog
5. press →esc + : +wq →for exit
6. to run this file use the command →bash agent.sh
you have the following output
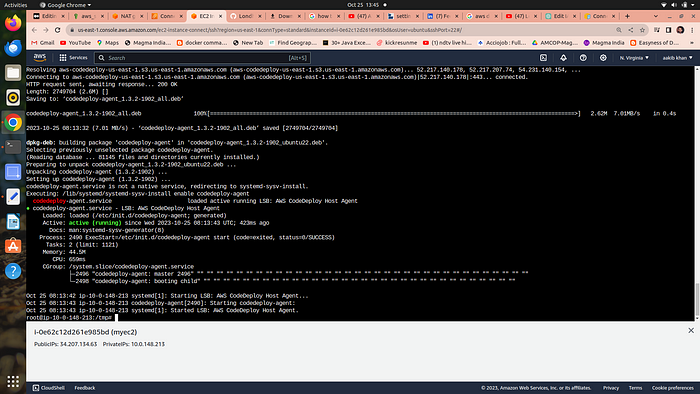
your code deploy agent is running
let’s move to next step
step 9 →create the deployment group and deploy the aplication
- go to your code deploy and create a deployment group
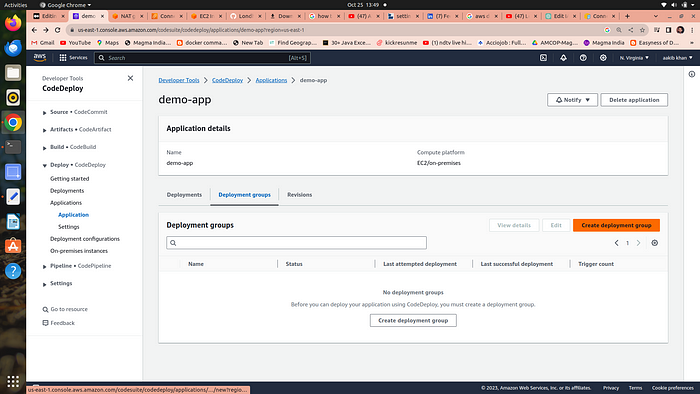
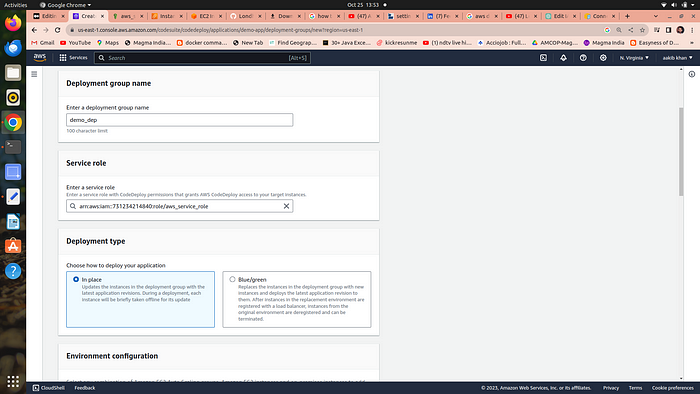
copy the srn of aws code_deploy_service_role or created above
2. choose in place in deployment type
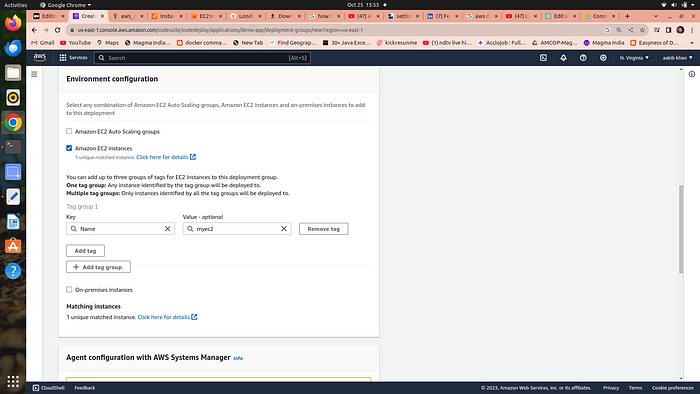
3. select ec2 instances →name →choose your ec2 in which code deploy agent is running
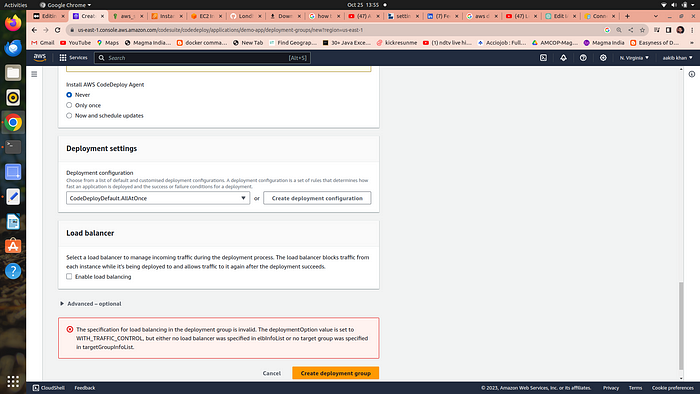
4. untick on enable load balancing option and never on install aws code deploy agent
and click on create deployment option you will see a follwing page
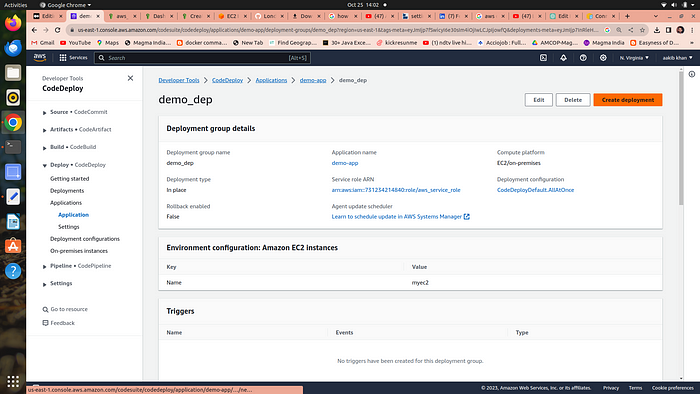
click on create deployment option following page appears
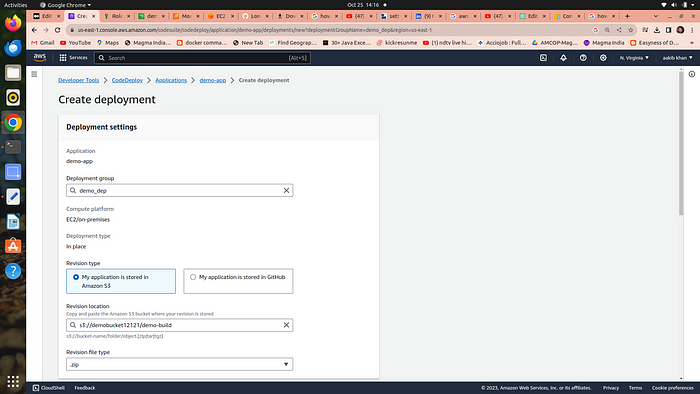
5. select the above options and paste the path of your build code that is stored in s3 just go to s3 and choose folder and copy s3 url
and then click on create deployment after a few seconds
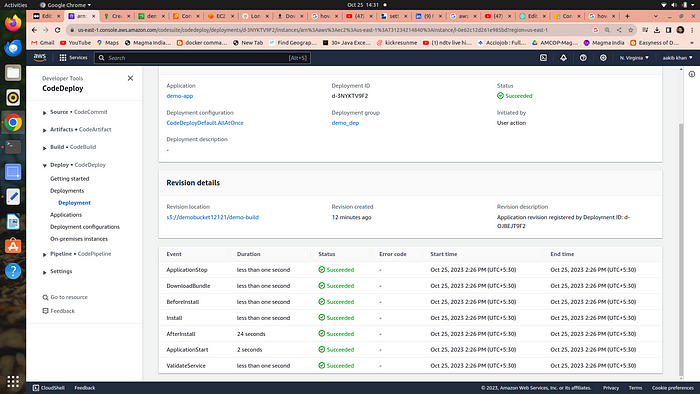
your aplication is successfully deployed
now go to your ec2 and click on your public ip you will see your aplication is running
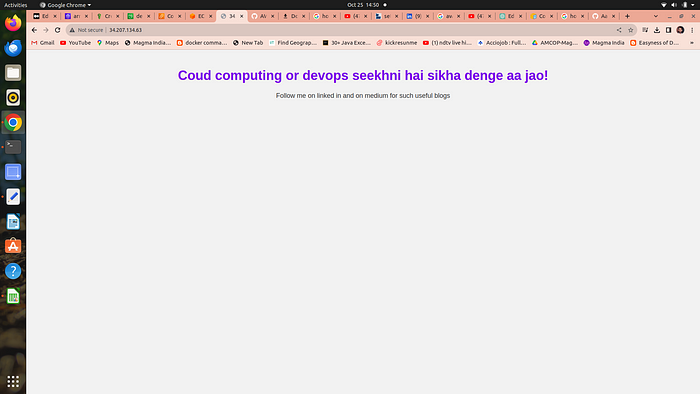
congrats you are devops and cloud engineer both at same time
Step 10 → Setup code pipeline to automate whole process
- go to your code pipeline and create a pipeline
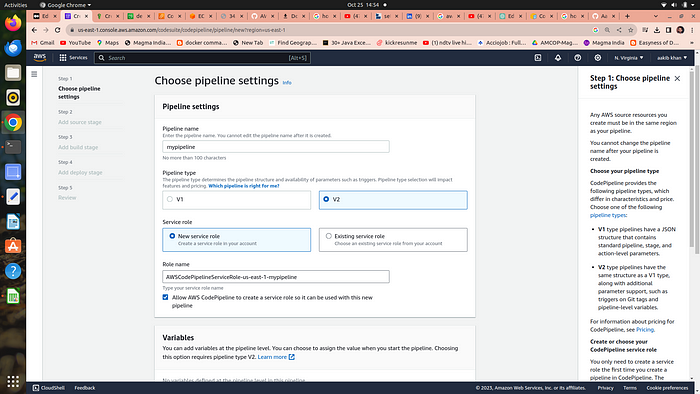
2. select pipeline type = V2
click on new service role →next step
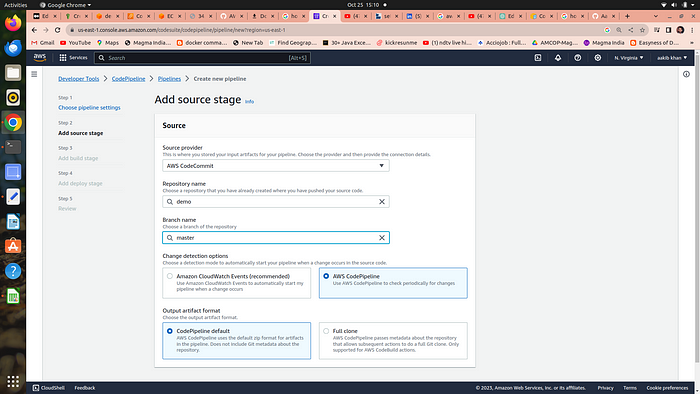
3. choose source = code commit
repo=demo
branch=master
choose aws code pipeline(this options immediatley triggerd pipeline whenever there is a new commit in a repo)
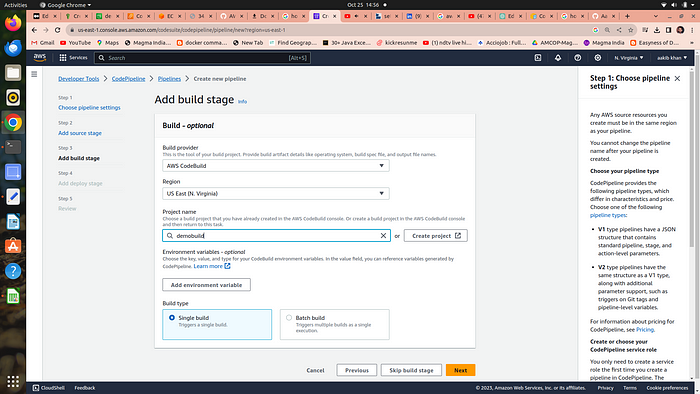
4. choose aws code build
project name =demobuild →single build →next step
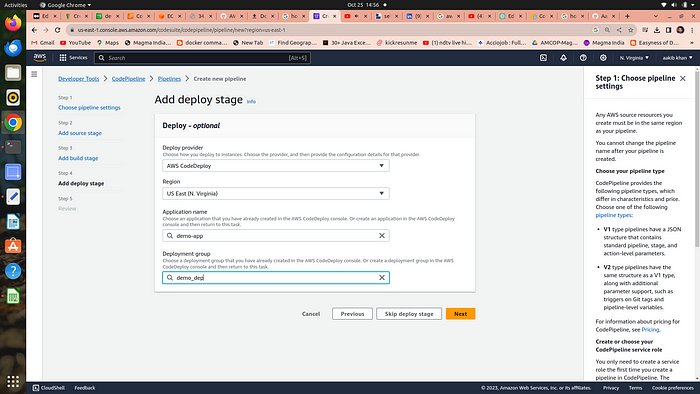
5. choose aws code deploy
aplication name = demo app
deployment group=demo_dep
next
6. review and pipeline and start it
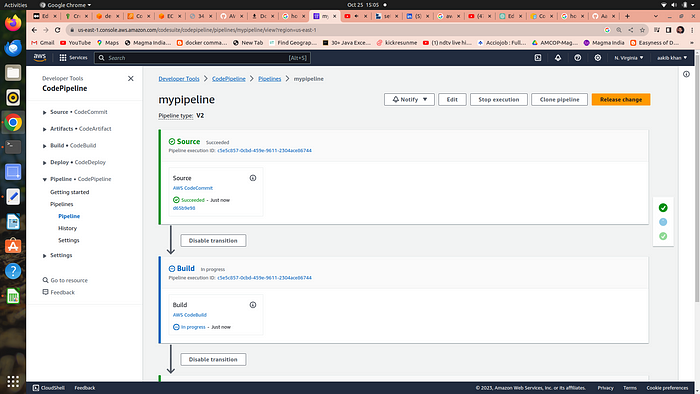
7. for checking if it triggers or not whenever i commit make some changes in file and now the result is the following image
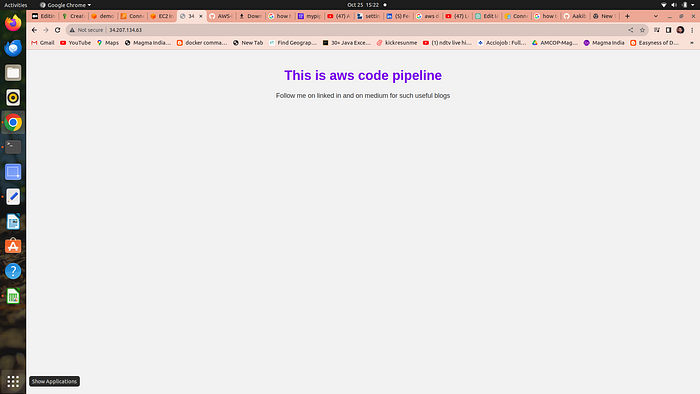
yes it is working.
Conclusion:
Deploying applications using AWS DevOps tools involves a series of well-defined steps that streamline the process from code development to deployment. By leveraging AWS services such as CodeCommit, CodeBuild, S3, CodeDeploy, and CodePipeline, developers can automate and manage the entire lifecycle of their applications efficiently. This approach not only enhances productivity but also ensures consistency and reliability in deployments. As a result, developers can focus more on innovation and less on the complexities of deployment, ultimately leading to faster delivery of high-quality software solutions.
Subscribe to my newsletter
Read articles from Anas Ansari directly inside your inbox. Subscribe to the newsletter, and don't miss out.
Written by

Anas Ansari
Anas Ansari
A passionate DevOps Engineer who enjoys sharing his thoughts with others and learning from them!