Creating and Managing Docker Containers: A Practical Guide
 Hemanth Gangula
In this article, we’re diving into Docker containers! We’ll break down how they’re managed, show you how to run them in both foreground and background modes, and guide you through creating and managing containers step-by-step. It’s all hands-on, so by the end, you’ll be ready to work confidently with Docker containers.
Welcome to Day 6 of our Simplified Docker Series! If you’ve been keeping up so far, you’re likely already comfortable with Docker files and images—two essential parts of the Docker process. By the time we wrap up today, you’ll have a clear understanding of Docker containers and feel ready to dive into the next steps on your Docker journey.
What is a Docker Container?
A Docker container is a lightweight, portable, and self-sufficient unit that encapsulates an application and all its dependencies. This means that everything needed to run the application code, libraries, environment variables, and configuration files—are bundled together in a single package. Containers are built from Docker images and can run consistently across different environments, making them ideal for development, testing, and production.
Example:
Imagine you’re developing a web application using Node.js. Instead of worrying about whether your application will work on another developer's machine or a production server, you can create a Docker container that includes your Node.js app, its libraries, and all required configurations. Once packaged into a container, you can easily share it, ensuring that it runs the same way everywhere—be it on your local laptop, in the cloud, or on a colleague’s computer.
Creating a Container :
To create a Docker container, we first need a Docker image. Remember what we covered earlier? It’s pretty straightforward! You can easily spin up a container using this command:
docker run -d -p <port>:<port> <image_name>
Just replace <port> with your chosen port number and <image_name> with the name of your image. It’s that simple!
Managing Containers:
Before we create our container, let’s double-check that Docker is installed on your system. If it’s not already set up, no worries! For Ubuntu users, I’ve got a handy automated shell script that will make the installation a breeze.
docker --version

If you’re using a different operating system, just head over to the official Docker documentation for step-by-step guidance. It’s all there to help you get up and running smoothly!
Grab a Docker Image or Use Your Custom One :
Let’s dive into creating and managing Docker containers! To kick things off, let’s pull the Nginx image from Docker Hub. You can think of Docker Hub as a gigantic library filled with pre-packaged software just waiting to be checked out. Just run this command in your terminal to grab the Nginx image:
docker pull nginx

This will download the Nginx image to your machine But hey, if you’ve built any images from our previous articles, feel free to use one of those instead of Nginx! Just make sure that the port settings align with your custom image.
List Docker Images:
Once the image is pulled, it’s a good idea to double-check that everything is in order. You can do this by running:
docker images

This command lists all the images you have on your system. If you see your Nginx (or any other image you decided to use) in that list, you’re ready to roll!
Creating a Container
Now that we’ve got our image, let’s bring it to life by creating a container. It’s as simple as flipping a switch! When you run the image, you’re essentially activating that pre-packaged software. Here’s how to create your Nginx container:
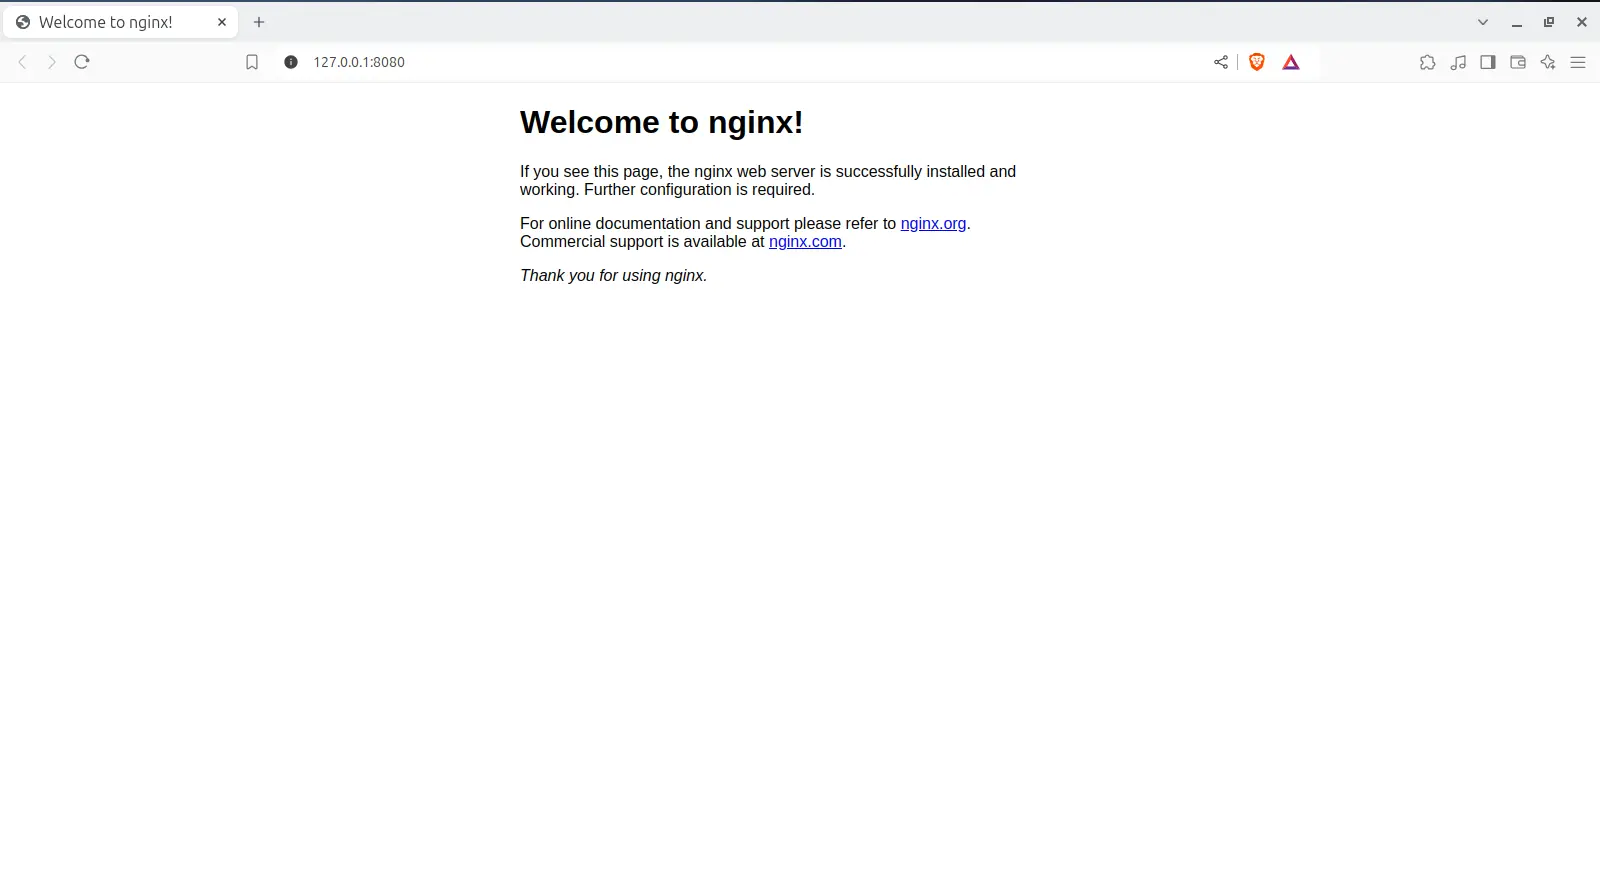
docker run --name my-nginx -d -p 8080:80 nginx

Let’s break down what this command does:
--name my-nginx: This gives your container a friendly name—“my-nginx.” Easy to identify to list the containers (optional)-d: This flag runs the container in detached mode, meaning it will run in the background. It’s like starting a movie and then leaving the room; you know it’s playing even if you’re not watching it right now.-p 8080:80: This part maps port 8080 on your host (your computer) to port 80 on the container. So, when you visithttp://localhost:8080in your browser, you’ll see what Nginx is serving up!

And just like that, your Nginx container is up and running! 🎉
Checking the Running Container
Want to see your active container? You can easily check by running:
docker ps

This command will show you all the containers currently running. If you spot "my-nginx" in the list, then you’re in business!
-a : list all the containers including Stopped containers
Stopping a Container
Need to take a breather? You can stop your container whenever you like with this command:
docker stop my-nginx

This command gently pauses your container, kind of like hitting pause on your favourite show.
Starting a Stopped Container
When you’re ready to jump back in, you can start your container again with:
docker start my-nginx

This command gets your container back up and running, like resuming that show you paused earlier.
Removing a Container
Once you’re finished with your container and want to clear some space, you can remove it with the docker rm command. Just make sure it’s stopped first, and then run:
docker rm my-nginx

This command tidies up your system by removing the container. Think of it as cleaning up after a fun party—you had a great time, but now it’s time to put things back in order!
Running Containers in the Background vs. Foreground:
When it comes to running your Docker containers, you’ve got two main options: in the background or in the foreground. Each choice has its benefits, so let’s break it down and see how they fit into real-world scenarios!
Running Containers in the Background
If you want your container to operate quietly behind the scenes, you’ll want to use the -d flag, which stands for "detached mode." Think of it like starting a playlist and letting the music play while you focus on other tasks. In production environments, this is especially useful. For example, when you deploy a web server like Nginx, you want it to keep running without any interruptions, even if you’re not actively monitoring it.
Here’s how you’d do it:
docker run -d --name my-nginx -p 8080:80 nginx

With this command, the Nginx container fires up and runs in the background. and it returns output as container ID. You can go about your business in the terminal, and when you’re ready, just hop over to your browser and check out what it’s serving. This setup is perfect for production servers where you need reliable up-time without constant supervision.
Running Containers in the Foreground
Now, if you want to get hands-on with your container, running it in the foreground is the way to go. This is where the -it flag shines. The -i stands for "interactive," and the -t means "terminal." Together, they allow you to dive into your container's terminal, where you can start running commands just like you would on a local machine.
For instance, if you want to explore a basic Ubuntu container to test something or run a script, you’d execute:
docker run -it ubuntu
Once you run this command, you’ll be dropped right into the Ubuntu terminal. It’s a fantastic environment for testing because you can monitor everything happening in real-time.

However, it’s important to remember that this isn’t a full-fledged Ubuntu operating system; it’s just a base image. Think of it like a lightweight version that lets you play around without all the extra baggage.
Keep that in mind as you explore—this container is great for testing, but it won't have all the features of a complete OS!
And here’s a neat trick: when you’re done, if you hit Ctrl+C, the container will automatically stop. No need to issue a separate command to shut it down. This behavior is particularly useful during development and testing, where you might want to run a series of commands and then quickly exit without leaving any processes hanging.
In a Nutshell
Use
-dfor background operation, especially in production settings, where containers need to run uninterrupted while serving traffic.Use
-itwhen you want to interact directly with your container, making it ideal for testing and live log monitoring. Plus, you can easily stop it with Ctrl+C when you’re done!
Both options have their place depending on your workflow. So, whether you want your container to work quietly in the background or you’re eager to explore and test, Docker has got you covered!
Conclusion
In this article, we’ve journeyed through the essentials of creating and managing Docker containers using key commands like docker run, docker start, docker stop, and docker rm. We also highlighted how running containers in the background with the -d flag can help keep things tidy, while the -it flag allows for interactive sessions to see everything in action.
By mastering these concepts, you’re well on your way to harnessing Docker's full potential, making your application development and deployment smoother and more efficient. Happy containerizing!
Wrapping Up: Understanding the Basic Docker Flow
With this article, we’ve successfully wrapped up our journey through the basic Docker flow we touched on in Day 3. We’ve taken a closer look at Docker’s components, giving you a solid understanding without diving too deep just yet.
This foundational knowledge is crucial as we prepare to explore specific topics in greater detail in our upcoming articles. So, get ready for more exciting insights into the world of Docker!
Practice makes progress; each command you run brings you closer to mastery.
Subscribe to my newsletter
Read articles from Hemanth Gangula directly inside your inbox. Subscribe to the newsletter, and don't miss out.
Written by

Hemanth Gangula
Hemanth Gangula
🚀 Passionate about cloud and DevOps, I'm a technical writer at Hasnode, dedicated to crafting insightful blogs on cutting-edge topics in cloud computing and DevOps methodologies. Actively seeking opportunities in the DevOps domain, I bring a blend of expertise in AWS, Docker, CI/CD pipelines, and Kubernetes, coupled with a knack for automation and innovation. With a strong foundation in shell scripting and GitHub collaboration, I aspire to contribute effectively to forward-thinking teams, revolutionizing development pipelines with my skills and drive for excellence. #DevOps #AWS #Docker #CI/CD #Kubernetes #CloudComputing #TechnicalWriter