Unity Multiplayer | 2 players per device in a game (Pt. 2, simple split-screen)
 Esteban Maldonado
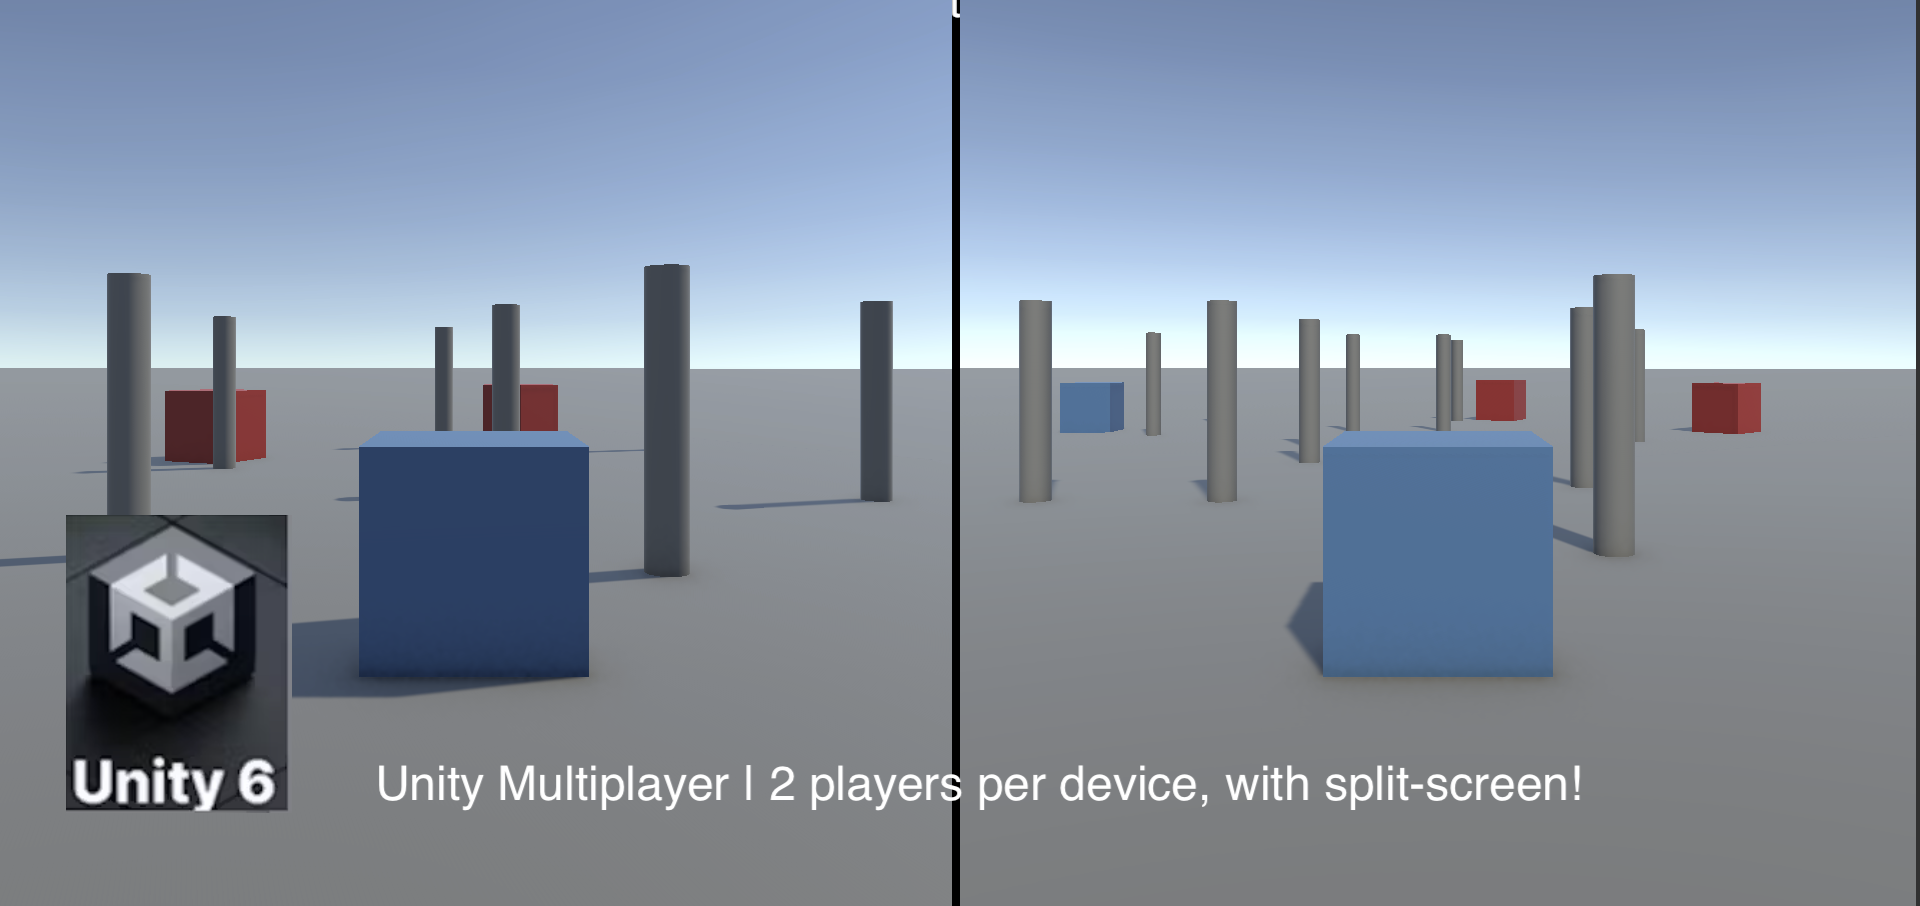
Our goal today
In my previous article, we went over how easy it is to have 2 players join a multiplayer session from 1 device, each using a separate set of keyboard keys for movement input, and here’s how that looks:

The 2 blue cubes are owned and controlled by the left screen(device 1), and the 2 red cubes are owned and controlled by the right screen (device 2)
For every device, using this simplified solution, the 2 players share the computer keyboard, using different sets of keys for movement input. The 1st spawned player object is controlled using the WASD keys, and the 2nd spawned player object is controlled separately by the arrow keys.

This is an interesting result, because you can have 2 players joining from 1 device, but we currently just have 1 static camera. What if you wanted to give each player their own point of view (POV) of the world? What if you’d like to let each player go and explore on their own?
Following the progress we made in the previous article, we’ll go over how to achieve this (a simple solution):
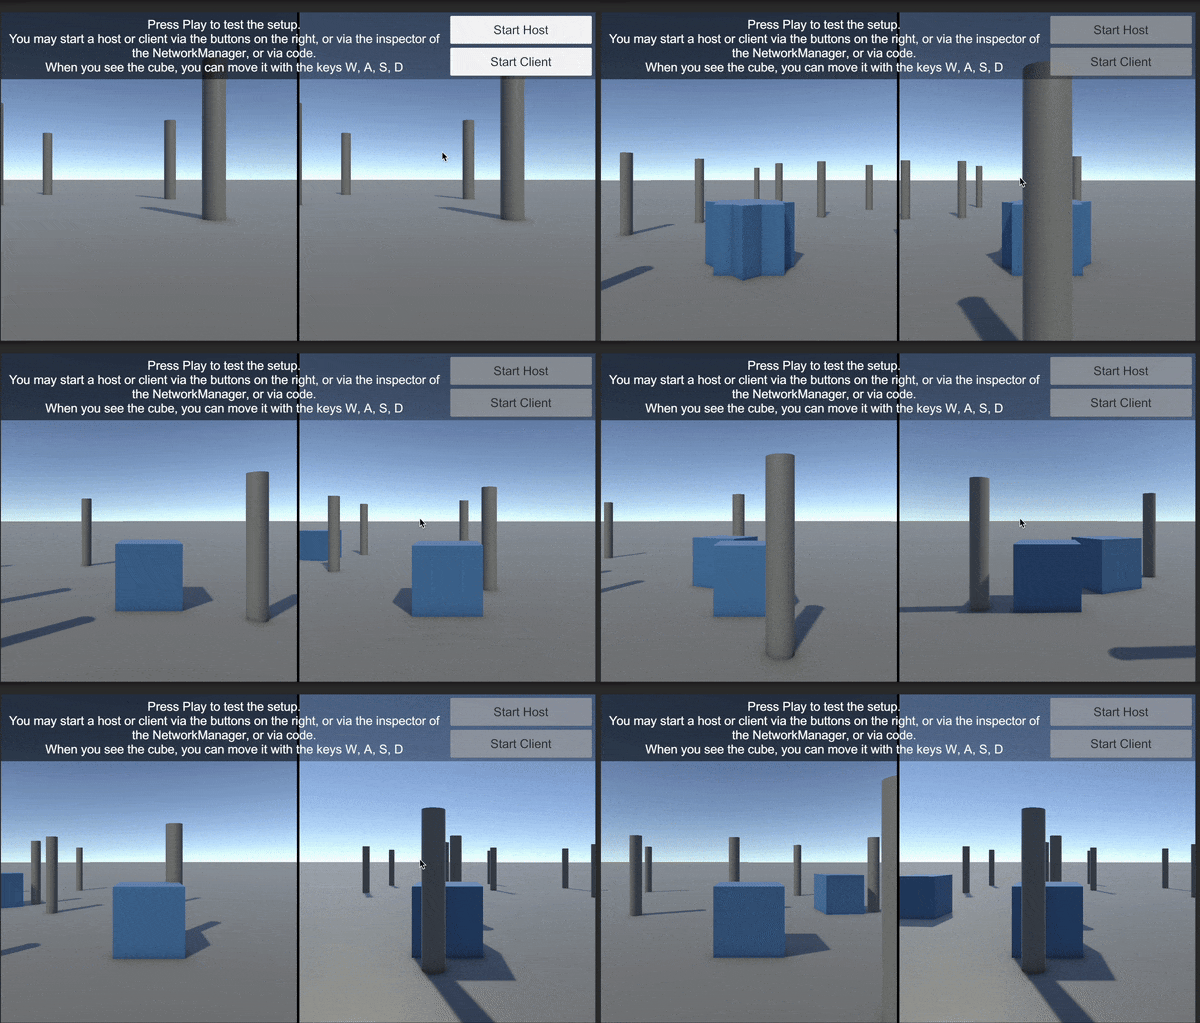
Each player will have its own camera that follows their player game object
Adding a 2nd camera
Continuing from where we left off, let's start by adding a second camera to our scene. Right-click in the scene hierarchy, and select the Camera option:
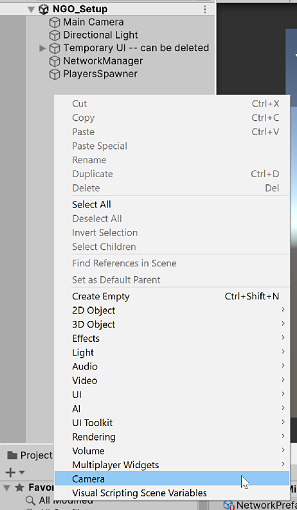
Call the new camera something related to Player 2, like shown below:

Sharing the screen with 2 cameras
By default, Unity adds the Main Camera object, which uses the entire space of the window screen space. We can have the 2 cameras share that space by adjusting the viewport rect values of each camera. Let’s first adjust the main camera, which will be used by player 1:
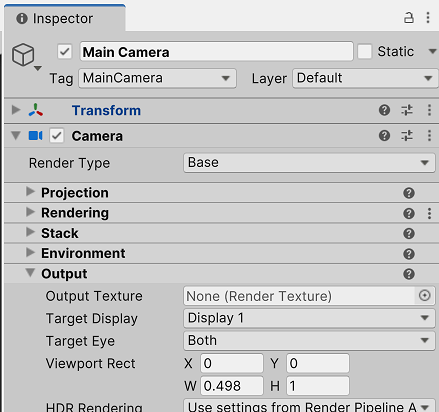
Note that what we’re changing here is the width(W) parameter to 0.498. This means that the camera will use almost half of the window screen space, but it’ll still use the entire height(H) of it, leaving it at a value of 1.0.
Let’s adjust the viewport rect values on the P2 camera as well:
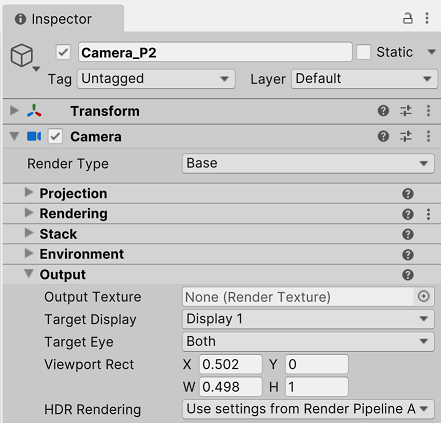
Now we’re changing the starting X coordinate at 0.502, and also changing the width(W) parameter to 0.498. This means that the 2nd camera will start rendering at roughly the middle of the screen space, and render its output to the 2nd half of the window. It’ll also use the entire height(H).
First test with the 2nd camera
Just as an quick initial test, let’s give the following position values to the 2 cameras.

Play the scene for a bit, and we’ll see that we’re already making good progress by confirming that we’re drawing the scene from 2 POVs. We’re left with this little black bar in the middle which is unused window screen space, but it’s just so you can easily see the division of the 2 screen portions. You can further edit those rect values for whatever effect you’d like:
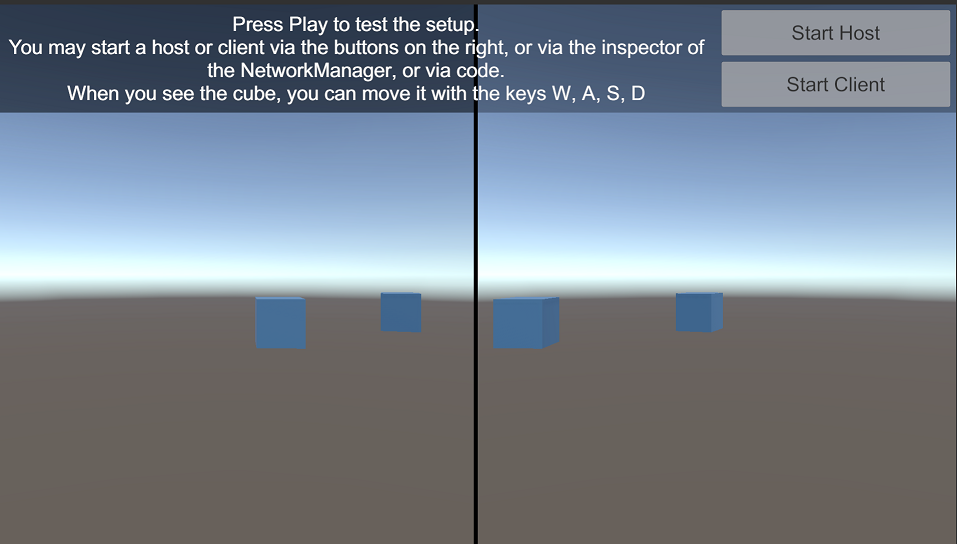
We’re seeing double! But that’s expected for now 😂
Improve the player object movement
Like I showed at the beginning, we had just 1 camera, and the player objects can be moved, but they’re always facing one direction (the +Z axis). Let’s give the player objects more freedom, by being able to rotate around the Y axis, and also move.
Player 1
Let’s first modify the default player prefab, which was provided by the Multiplayer Center’s Quickstart content:
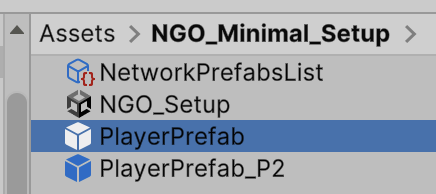
Let’s first remove the default client movement script:

And let’s now add a new script to handle the modified movement with the simple rotation:
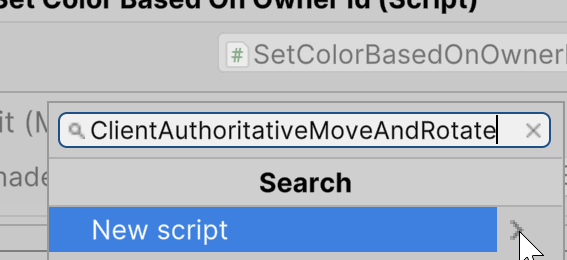
Copy & paste the following code into the new file:
using Unity.Netcode;
using UnityEngine;

public class ClientAuthoritativeMoveAndRotate : NetworkBehaviour
{
    [SerializeField]
    private float rotationSpeed = 100f;

    [SerializeField]
    private float movementSpeed = 5f;

    private void Update()
    {
        if (!IsOwner || !IsSpawned)
            return;

        float movementMultiplier = movementSpeed * Time.deltaTime;
        float rotationMultiplier = rotationSpeed * Time.deltaTime;

        // Rotation (left or right around Y-axis)
        if (Input.GetKey(KeyCode.A))
        {
            transform.Rotate(Vector3.up, -rotationMultiplier, Space.Self);
        }
        if (Input.GetKey(KeyCode.D))
        {
            transform.Rotate(Vector3.up, rotationMultiplier, Space.Self);
        }

        // Movement (forward or backward)
        if (Input.GetKey(KeyCode.W))
        {
            transform.position += movementMultiplier * transform.forward;
        }
        if (Input.GetKey(KeyCode.S))
        {
            transform.position += -movementMultiplier * transform.forward;
        }
    }
}
It’s really not that different from what we had. All we’re doing is using the side movement keys to rotate around the Y axis. Here’s how it’ll look in the inspector:

Player 2
For player 2 it’s basically the same, but we’re not removing its script, just updating it. Remember, we’re still using the arrow keys for P2 movement and rotation:
using Unity.Netcode;
using UnityEngine;

public class P2clientAuthoritativeMovement : NetworkBehaviour
{
    [SerializeField]
    private float rotationSpeed = 100f;

    [SerializeField]
    private float movementSpeed = 5f;

    private void Update()
    {
        if (!IsOwner || !IsSpawned)
            return;

        float movementMultiplier = movementSpeed * Time.deltaTime;
        float rotationMultiplier = rotationSpeed * Time.deltaTime;

        // Rotation (left or right around Y-axis)
        if (Input.GetKey(KeyCode.LeftArrow))
        {
            transform.Rotate(Vector3.up, -rotationMultiplier, Space.Self);
        }
        if (Input.GetKey(KeyCode.RightArrow))
        {
            transform.Rotate(Vector3.up, rotationMultiplier, Space.Self);
        }

        // Movement (forward or backward)
        if (Input.GetKey(KeyCode.UpArrow))
        {
            transform.position += movementMultiplier * transform.forward;
        }
        if (Input.GetKey(KeyCode.DownArrow))
        {
            transform.position += -movementMultiplier * transform.forward;
        }
    }
}
Again, we’re talking about a simplified version of this solution.
And same as the before, this is how it’ll look in the inspector:

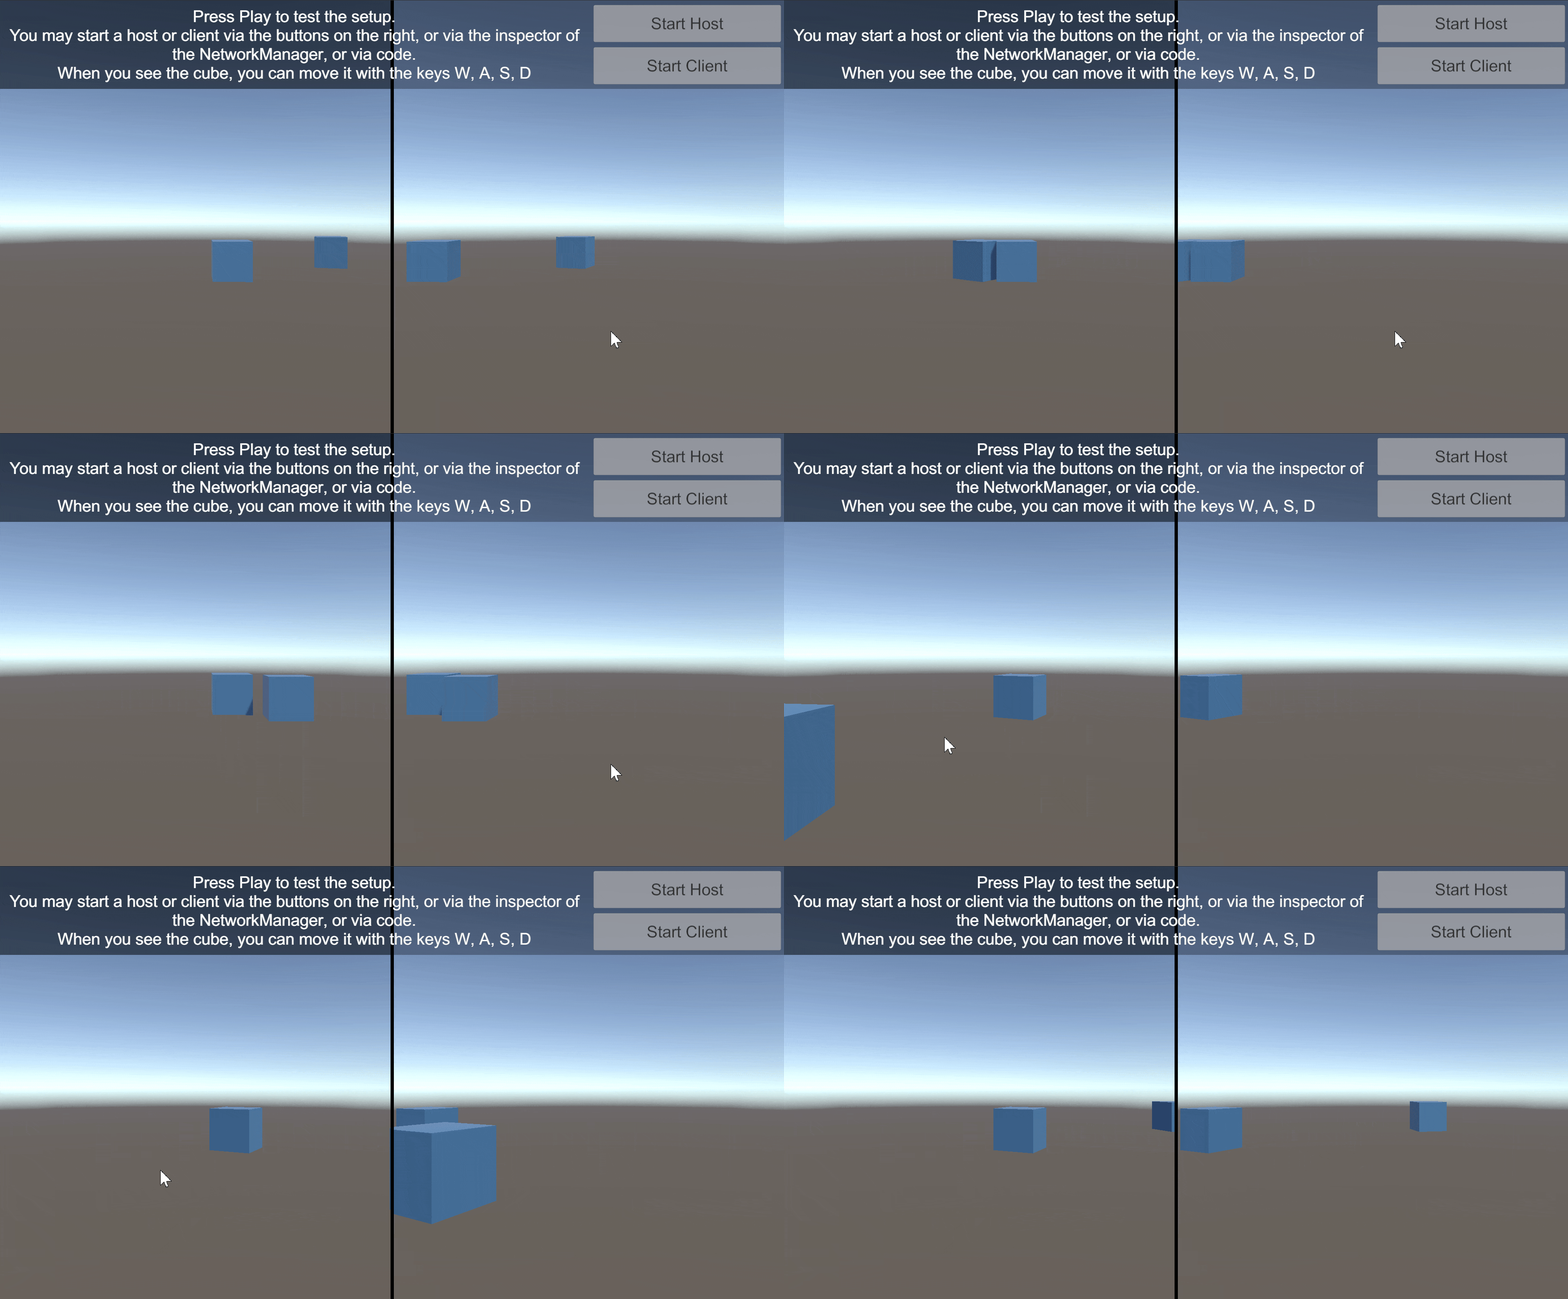
And here’s a preview of the updated movement. Although we added a simple modification, our player objects have much more freedom to move around:
Assigning cameras to each player
Adding a few details to the scene
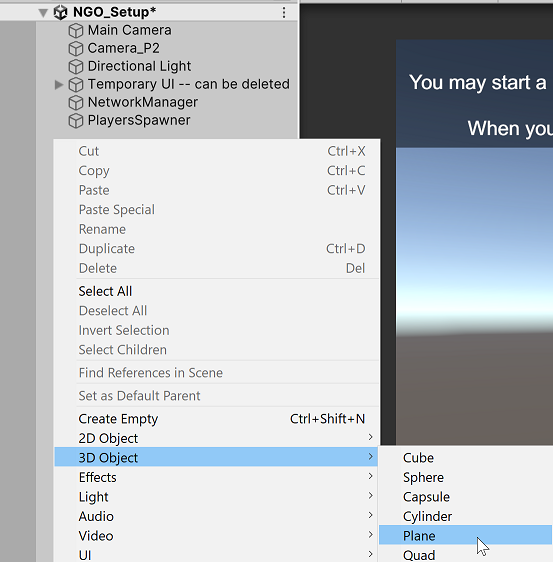
This is technically an optional step, but it’s good to test camera bindings in a scene with more geometry in it. Let’s first add some details to our world. Add a plane 3D object, which will act as a floor:
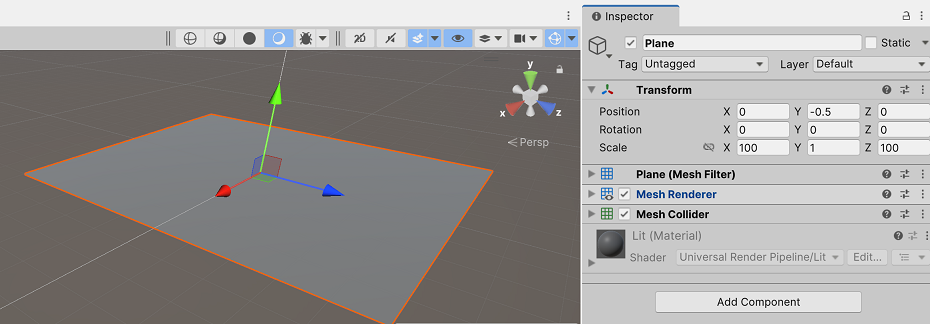
Resize the plane with these transform values so that it covers a larger area:
Let’s add a new empty object in the scene hierarchy to be the parent of a few more shapes we’ll add:

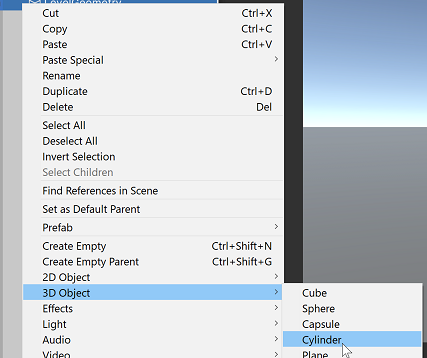
Attach a few cylinders to simulate something like a forest:
Keep copying a few of those cylinders around. No actual requirements here, it’s just a way to see that we’re indeed moving around a more detailed scene:
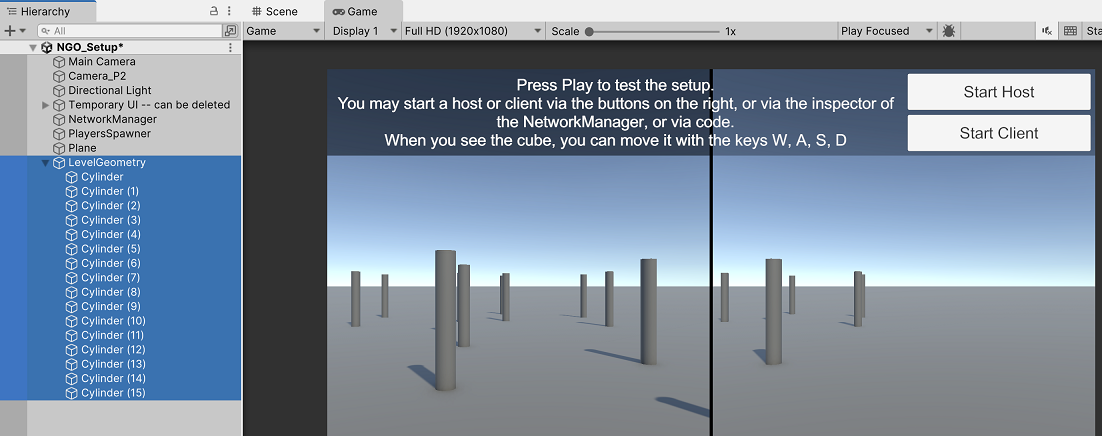
Let’s bring in Cinemachine!
In order to have the cameras follow the players, we’ll use this great package for camera effects called Cinemachine, provided by Unity:

This package is simply awesome! I highly recommend exploring more with it beyond what we achieve today.
Cinemachine Brains
We need to add a Cinemachine brain component to each camera. These components are the ones that manage what output to show, and what cameras to use:
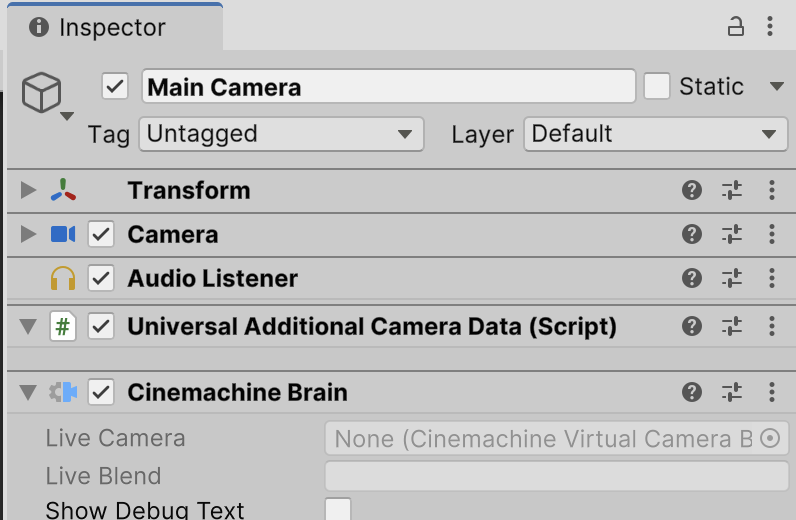
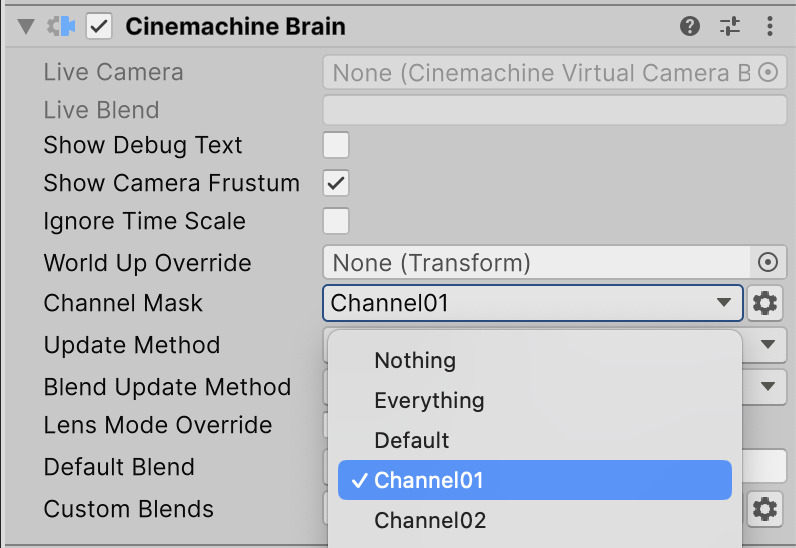
One useful aspect about Cinemachine is that you can use different output channels for different cameras in the scene. We’ll be using Channel 01 for player 1, and Channel 02 for player 2:
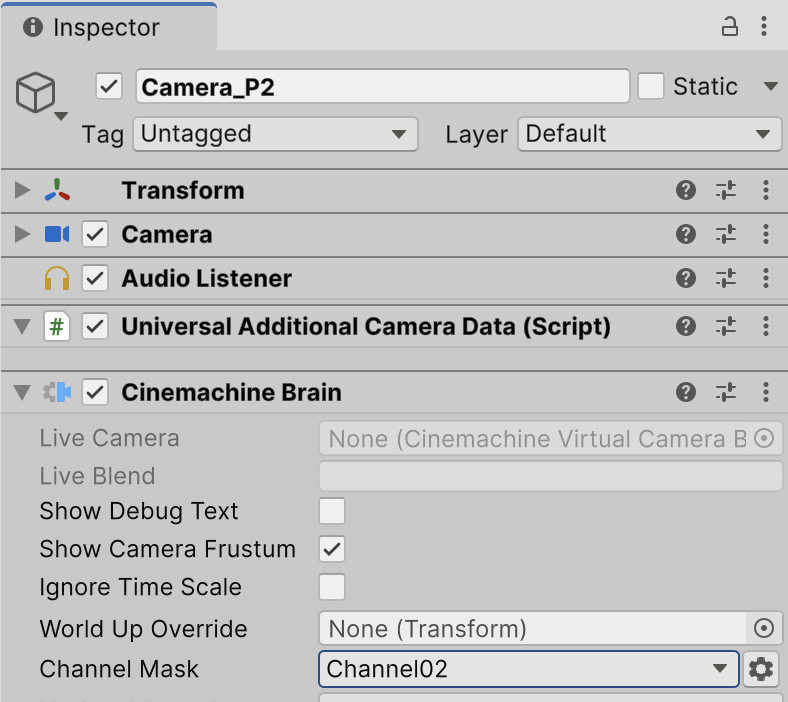
Add a Cinemachine brain as well to 2nd camera, and set its channel mask to Channel 02, like so:
Create the virtual cameras
Although what Cinemachine uses is the Camera objects to render the world, the positioning of the camera and other effects are applied by Cinemachine cameras (also known as virtual cameras). Let’s start by adding a new empty object that’ll hold the 1st virtual camera:

And let’s add the a Cinemachine camera component:
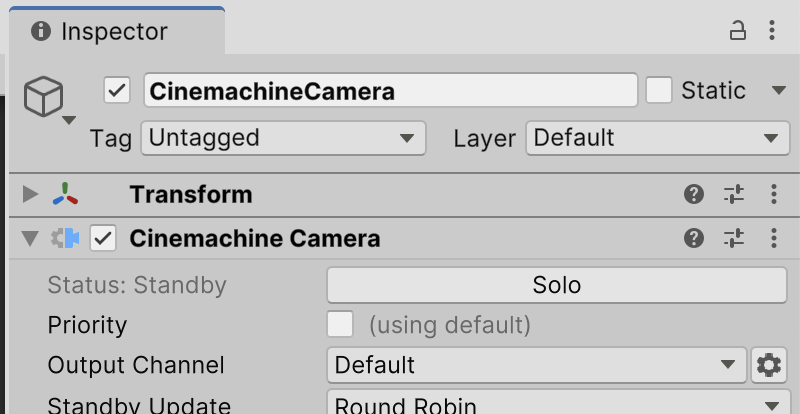
And just like we did with the 1st Cinemachine brain, we’re going to use the same Channel 01 mask:

Lastly, add this component that will complement the virtual camera, and make the real camera follow the player using a 3rd-person POV:
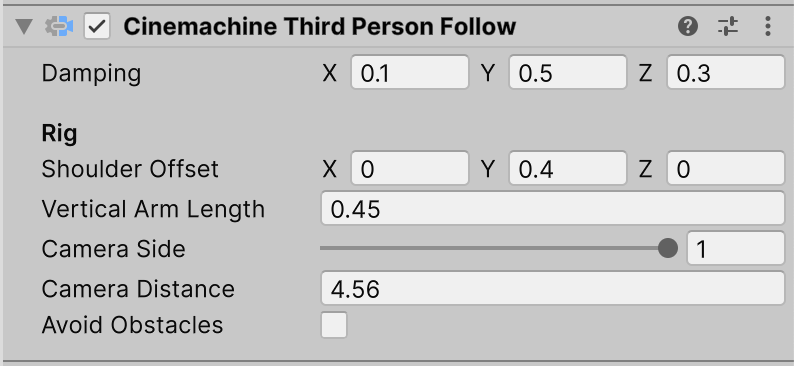
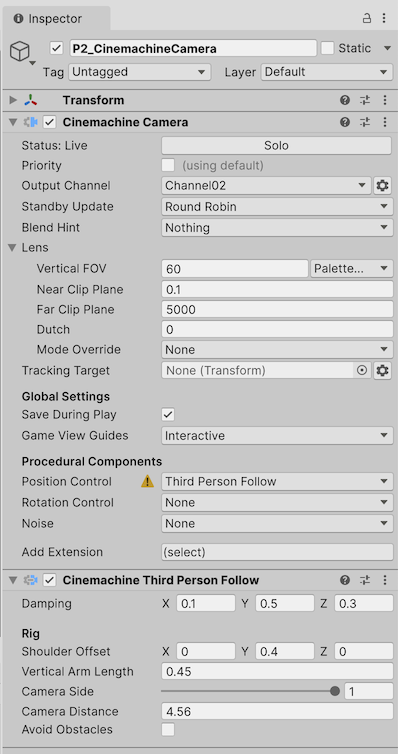
Repeat the steps to add a 2nd Cinamachine camera for the 2nd player:

Add the same 2 other components that we added to the 1st virtual cam. Notice though that we’re using Channel 02 as output:
Binding the cameras to each player object
We’ve now setup our use of Cinemachine, and now we need to tell each virtual camera what player to follow around. We’ll do this at runtime using code when the players get spawned.
We’ll need a new empty game object to handle this camera to player assignment:
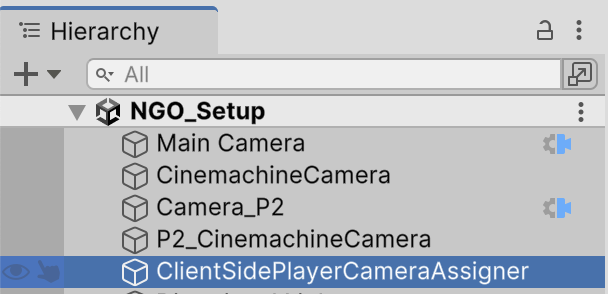
And let’s add to it a new script to handle this logic:
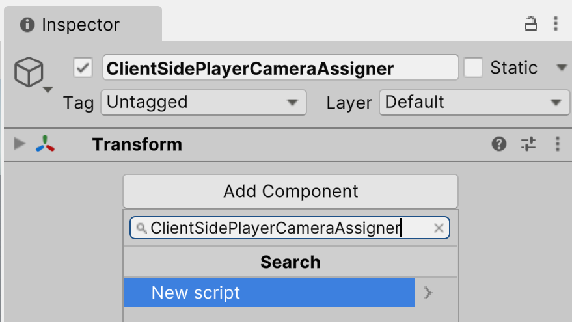
Copy & paste the following code to the new file. The code contains a singleton class that holds information about the 2 cinemachine cameras in the scene, and assigns the appropiate camera based on whether it’s Player 1 or Player 2:
using Unity.Cinemachine;
using UnityEngine;

public class ClientSidePlayerCameraAssigner : MonoBehaviour
{
    [SerializeField]
    private CinemachineCamera m_p1VirtualCamera;

    [SerializeField]
    private CinemachineCamera m_p2VirtualCamera;

    public static ClientSidePlayerCameraAssigner instance => s_instance;

    private static ClientSidePlayerCameraAssigner s_instance;

    private void Awake()
    {
        if (s_instance == null)
            s_instance = this;

        else if (s_instance != this)
            Destroy(this);

        DontDestroyOnLoad(this);
    }

    public void AssignPlayerToCameras(
        Transform spawnedPlayerTransform,
        bool isPlayer2)
    {
        TiePlayerToCinemachineCamera(
            spawnedPlayerTransform,
            isPlayer2 ? m_p2VirtualCamera : m_p1VirtualCamera);
    }

    private void TiePlayerToCinemachineCamera(
        Transform spawnedPlayerTransform,
        CinemachineCamera cinemachineCamera)
    {
        cinemachineCamera.Follow = spawnedPlayerTransform;
    }
}
And here’s how it should look with the serialized fields filled out in the inspector:
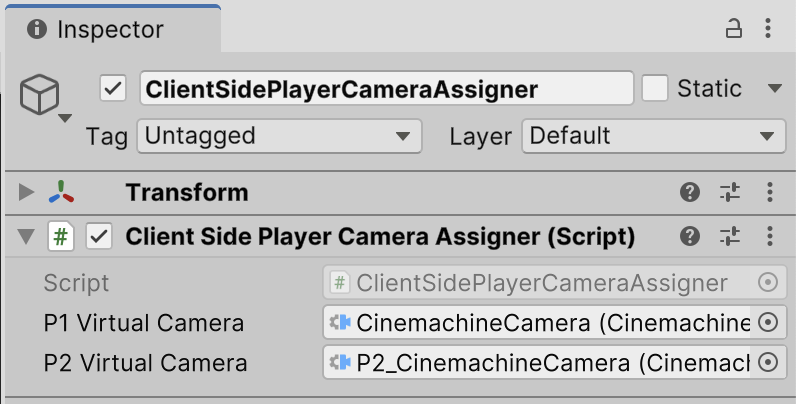
Calling the camera assigner
Lastly, we need to apply a quick update to each player movement class we added earlier, in order to use the camera assigner class. We need to make sure we’re running this extra code from the client-side, and to the player objects that we own:
using Unity.Netcode;
using UnityEngine;

public class ClientAuthoritativeMoveAndRotate : NetworkBehaviour
{
    ...

    public override void OnNetworkSpawn()
    {
        base.OnNetworkSpawn();

        // We need to make sure we're updating from client side and
        //   on the object that the device actually owns
        if (!IsClient || !IsOwner)
            return;

        ClientSidePlayerCameraAssigner.instance.AssignPlayerToCameras(
            transform,
            false);
    }
    ...
}
Note that we’re taking advantage of the OnNetworkSpawn event which gets triggered for every network object that gets spawned. We need to also make sure that we’re assigning virtual cameras to player objects controlled on the client-side, and owned by the device where it’s running from, that’s why we use that mix of the IsClient and IsOwner flags, provided by the Netcode for GameObjects package.
Here’s the updated movement class for player 2:
using Unity.Netcode;
using UnityEngine;

public class P2clientAuthoritativeMovement : NetworkBehaviour
{
    ...

    public override void OnNetworkSpawn()
    {
        base.OnNetworkSpawn();

        // We need to make sure we're updating from client side and
        //   on the object that the device actually owns
        if (!IsClient || !IsOwner)
            return;

        ClientSidePlayerCameraAssigner.instance.AssignPlayerToCameras(
            transform,
            true);
    }

    ...
}
And here we go! With that final change we’ve now reached our established goal! Now our 2 player objects have their own cameras showing their POV:

And here’s the same solution working for all 4 players (2 per device!):

Conclusion
Same as I mentioned in the previous article, this is also a very simplified solution of the problem. For this article, I wanted to show that on a very basic level, you can indeed have 2 players with 1 camera each, join a multiplayer session from 1 device.
Modifications and improvements to this solution can include:
Using rendering layers to optimize what is rendered by each camera.
Additional Cinemachine camera effects, perhaps even for cutscenes!
Making sure that other objects don’t obstruct the player’s POV when trying to beat a level or fight an enemy.
Lessons learned
Remember - All aspect of the visual side of multiplayer development go in the client-side of the code (for the most part).
Take advantage of the available Cinemachine channels to show multiple outputs!
The
IsOwnerflag definitely comes in handy to make sure that you’re updating from the client POV, and on the correct object that you own!
Please let me know what you think!
What kind of multiplayer game would you make now that you know how to implement this feature?
Have you used Cinemachine before? With maybe some crazy effects?
Can you think of how you’d apply this solution to 3 or 4 players per device?
🎉🎉🎉 Happy building! 🎉🎉🎉
Subscribe to my newsletter
Read articles from Esteban Maldonado directly inside your inbox. Subscribe to the newsletter, and don't miss out.
Written by

Esteban Maldonado
Esteban Maldonado
👋🏾 Hello! 👋🏾 My name is Esteban and I love video games and learning about making games. I'm sharing here my progress as I build up my skills and learn new technologies.