Pushing Your Docker Images to Docker Hub: A Step-by-Step Guide
 Hemanth Gangula
In this article, we're look into the world of Docker registries and, more specifically, Docker Hub, Docker’s native place for storing and sharing images. You'll learn the steps to upload and publish your images on Docker Hub, opening doors for collaboration and easy deployment.
Welcome to Day 7 of our Simplified Docker Series! If you’ve been following along, you’re likely feeling confident with Dockerfiles, images, and containers. Today, we’ll make it easy to learn how to push an image to Docker Hub. By the end, you’ll be ready to share your images with the world and excited for the next steps in your Docker journey. Let’s jump in!
What is Docker Hub?
Docker Hub is a cloud-based service where you can store, share, and manage your Docker images. Imagine it as a central hub for developers, where you can find and pull images to use in your applications. It offers both public and private repositories, so you can collaborate with others or keep your images safe and secure. With Docker Hub, sharing your work with the community or deploying applications across different environments becomes a breeze. It’s an essential tool in your Docker toolkit!
Think of GitHub as the place for your code files, and Docker Hub as the home for your Docker images.
Project Creation (Skip This If You Have an Image):
Alright, let’s start with creating our Docker image! For today’s demo, I set up a simple Python Flask application and built an image for it. If you haven’t created Docker images before, no worries—we’ll go through the basics here.
Build the Docker Image
In your project directory, run:docker build -t <image-name> .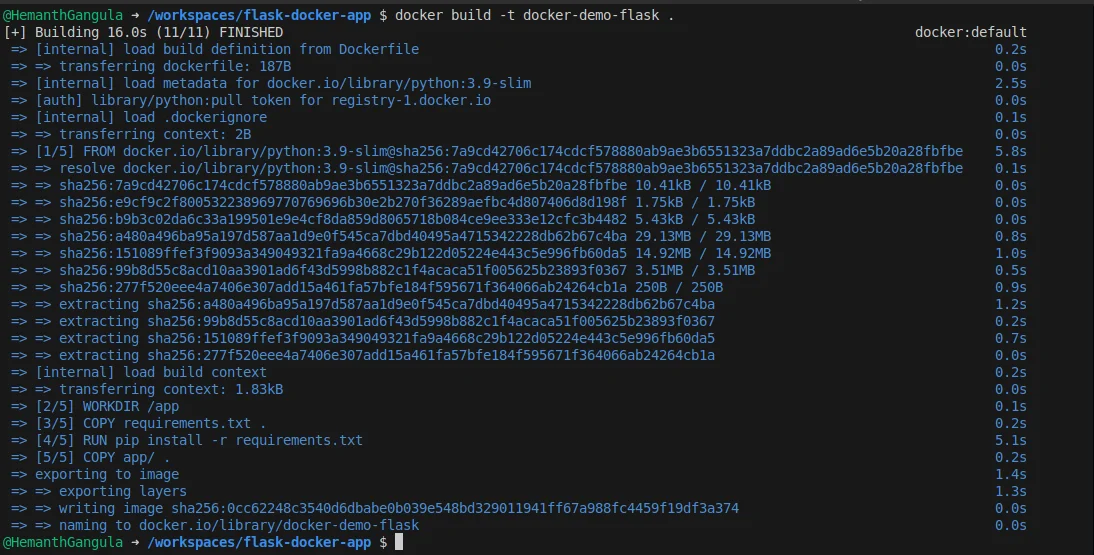
Just replace
<image-name>with a name that works for you.Check Your Image
Make sure the image was created by running:docker imagesRun and Test the Image
Let’s test it out to ensure it’s working:docker run -it -p <host-port>:<container-port> <image-name>
Replace
<host-port>and<container-port>with your chosen ports.
If everything looks good, we’re ready to push the image to Docker Hub!
Getting Set Up on Docker Hub
If you don’t have a Docker Hub account yet, go ahead and sign up. Once logged in, it’s easy to push your image—whether it’s on your local machine, VM, or GitHub Code space. Here’s a quick overview of the steps:
Create an Access Token
Log in to Docker Hub from the Terminal
Create Repository
Tag Your Image
Push the Image to Docker Hub
Let’s go through each one!
Step 1: Create an Access Token
If you’re already logged into Docker Hub on your browser:
Click your profile icon in the top right and choose Account Settings.
Scroll down to Security, then select Personal Access Token.
Enter a description for your token—something easy to remember, like "Docker Push Token."
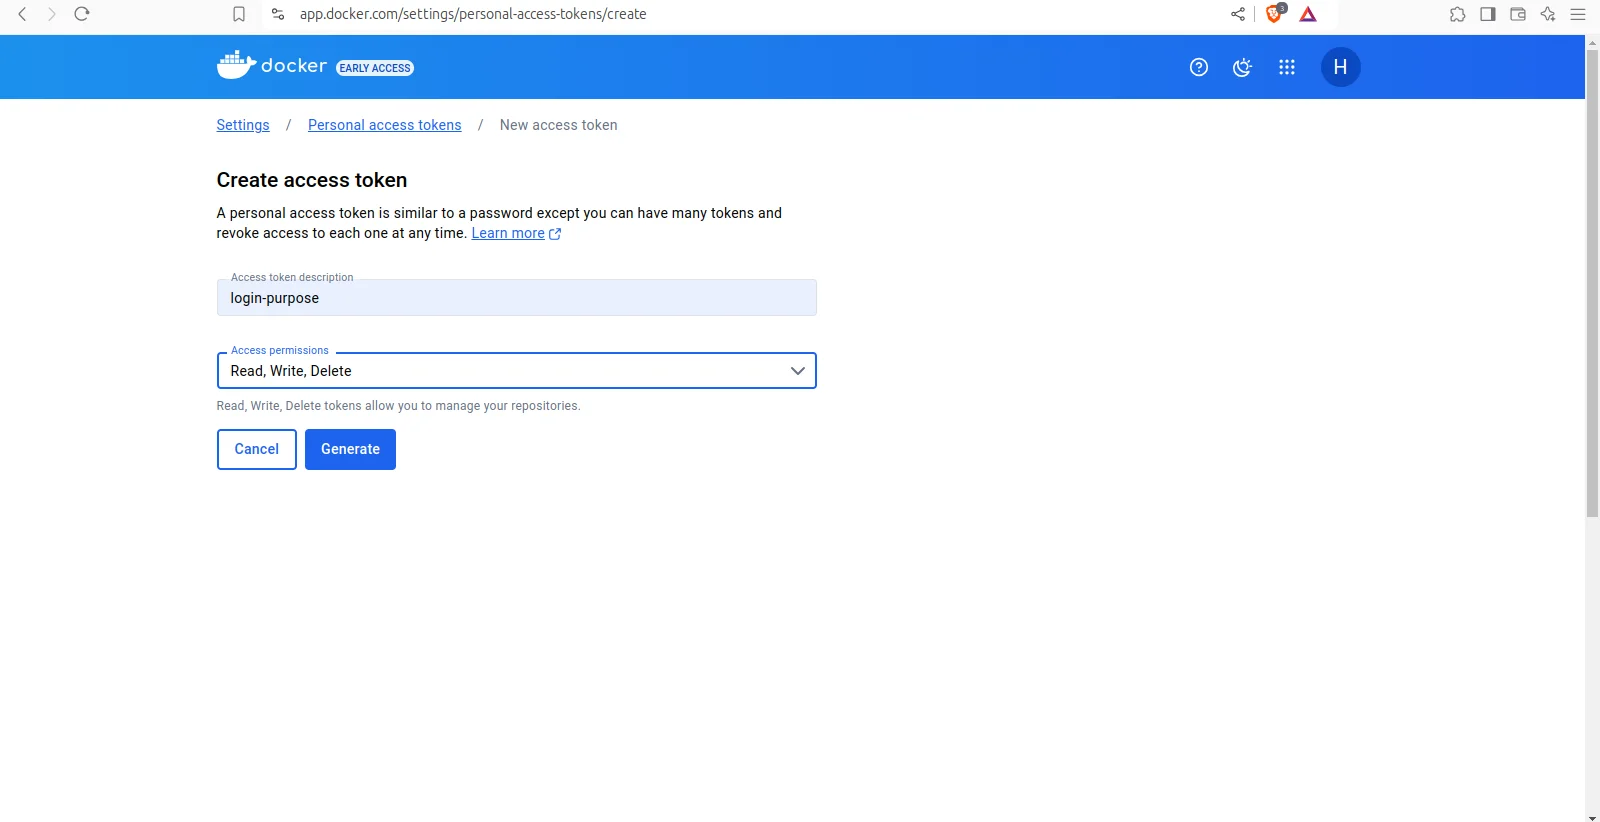
Under Access Permissions, set it to Read Write and Delete.
Click Create, hold on the screen.
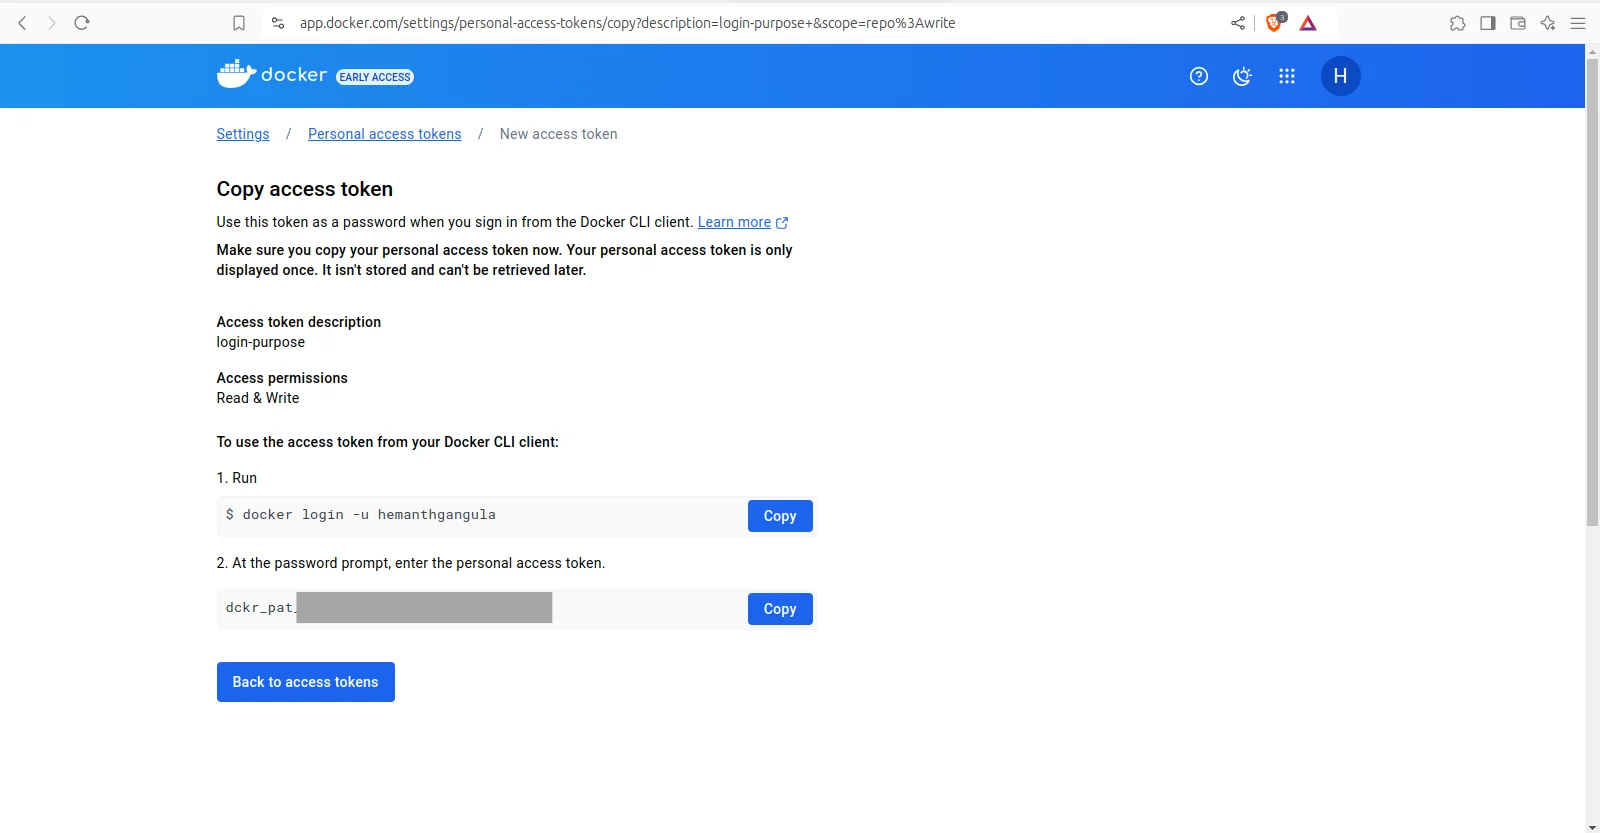
Step 2: Log in to Docker Hub from the Terminal
Logging in is a breeze! Open terminal Just grab your access token, paste it into the terminal when asked, and hit Enter. (Quick tip: Don’t worry if your password doesn’t show in the terminal—it’s hidden for security!) Once you’re all set, you’ll see a friendly "Login Succeeded" message.

Step 3: Repository Creation
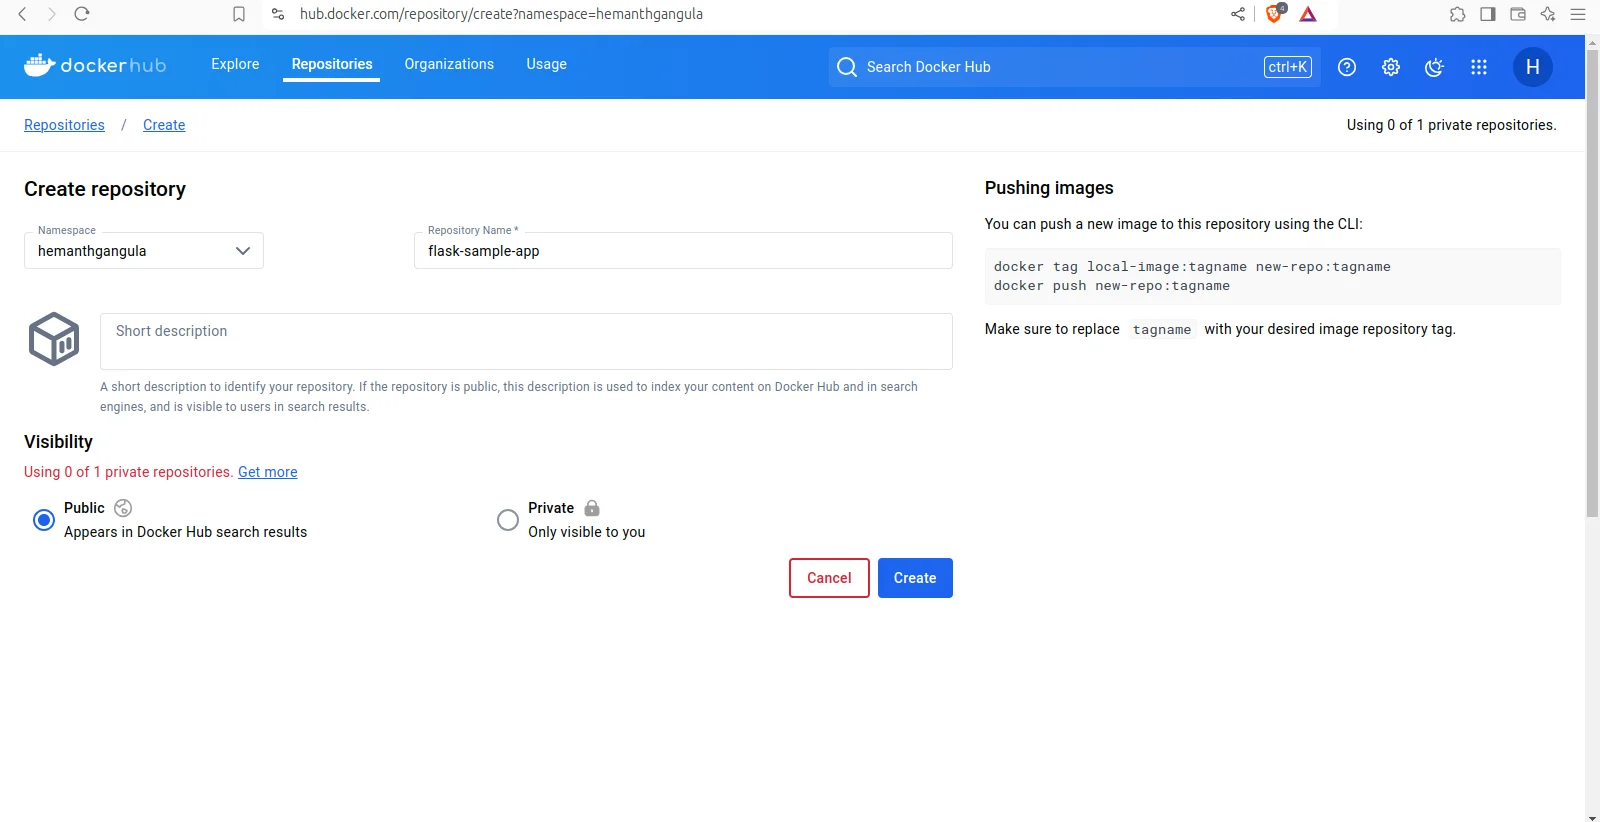
Now, let’s head over to Docker Hub! Once you're on the Docker Hub website, look for the top menu and click on Repositories in the upper right corner. Next, hit the "Create Repository" button.
You’ll need to provide a name for your repository—just make sure there are no spaces in it. Adding a description is optional, so feel free to include one if you’d like. Once you’re done, click on Create.
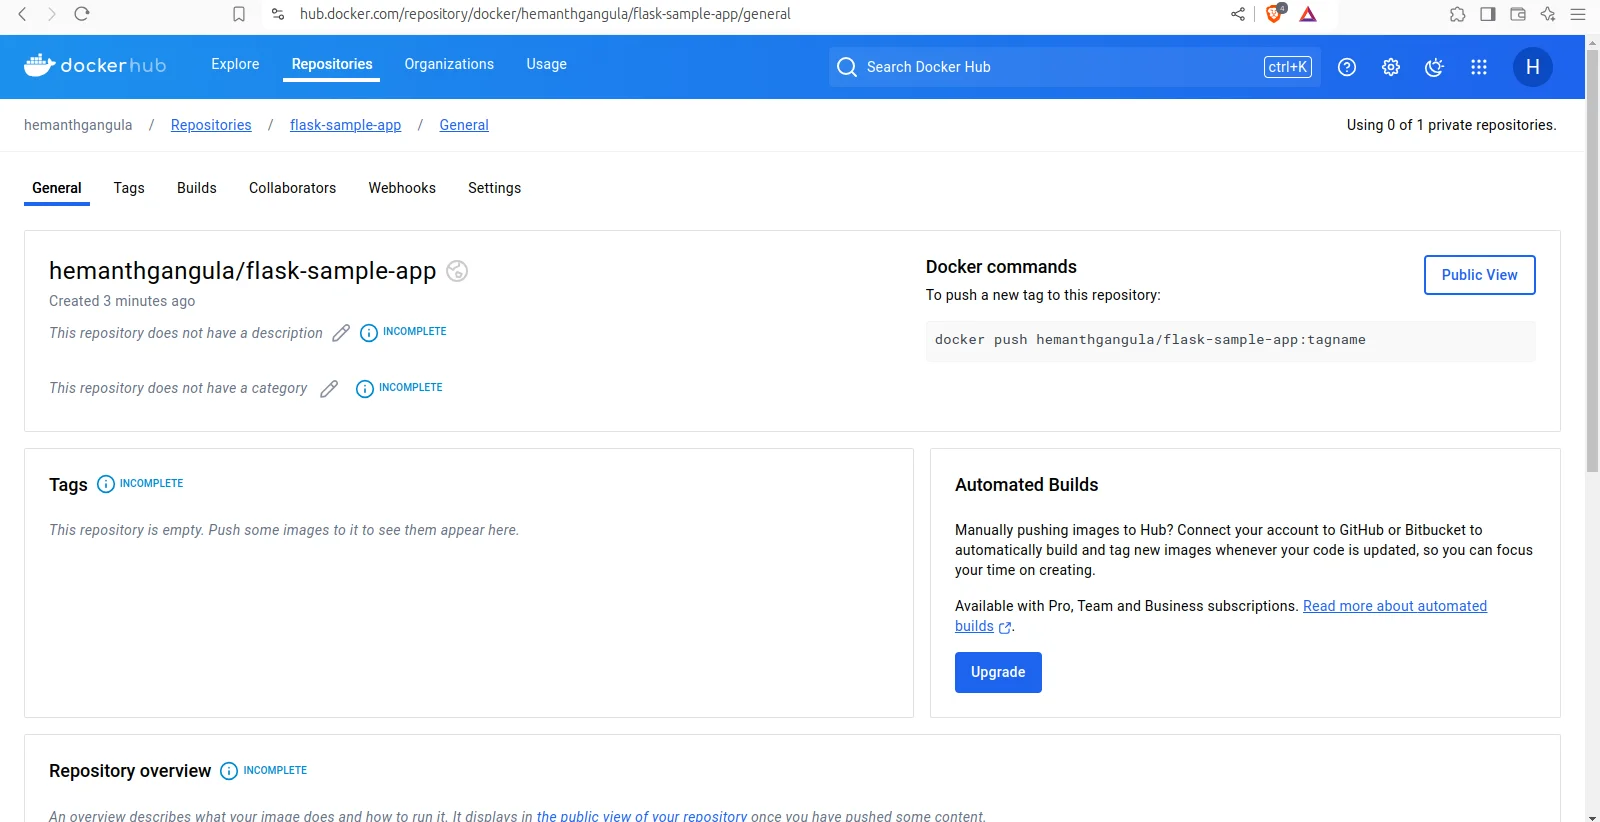
After your repository is created, you’ll see a confirmation along with a Docker command on the left side to help you push your image. Keep this handy!
Step 4: Tag Your Image
Now, let’s jump back to the terminal and check if your image is available. Great! It’s time to tag your image with the name of your repository.
Tagging is simply replacing the existing name of your image with your repository name while keeping the original image intact. It might seem a bit tricky at first, but hang in there!
Run the following command:
docker tag <existing-image-name> <username>/<repository-name>:<tag>
(The default tag is "latest.")
<username>/<repository-name> :copy from step 3

After you run this command, you’ll have a second copy of the image created with the new name, but it will still share the same image ID. This way, you can easily push it to Docker Hub!
Step 5: Push the Image to Docker Hub
Great news—we’re at the final step: pushing your tagged image to Docker Hub!
First things first, let’s ensure you’re logged in. Run the docker login command to make sure everything is in order.
Once you’re all set, simply run this command to push your image:
docker push <username>/<repository-name>:<tag>

After you hit Enter, Docker Hub will take care of compressing your image and storing it in your repository. And just like that, your image is up and ready for others to see and use! Congratulations on getting this done! 🎉
Open your repository on Docker Hub and refresh the page. You’ll see your image displayed along with the tag!
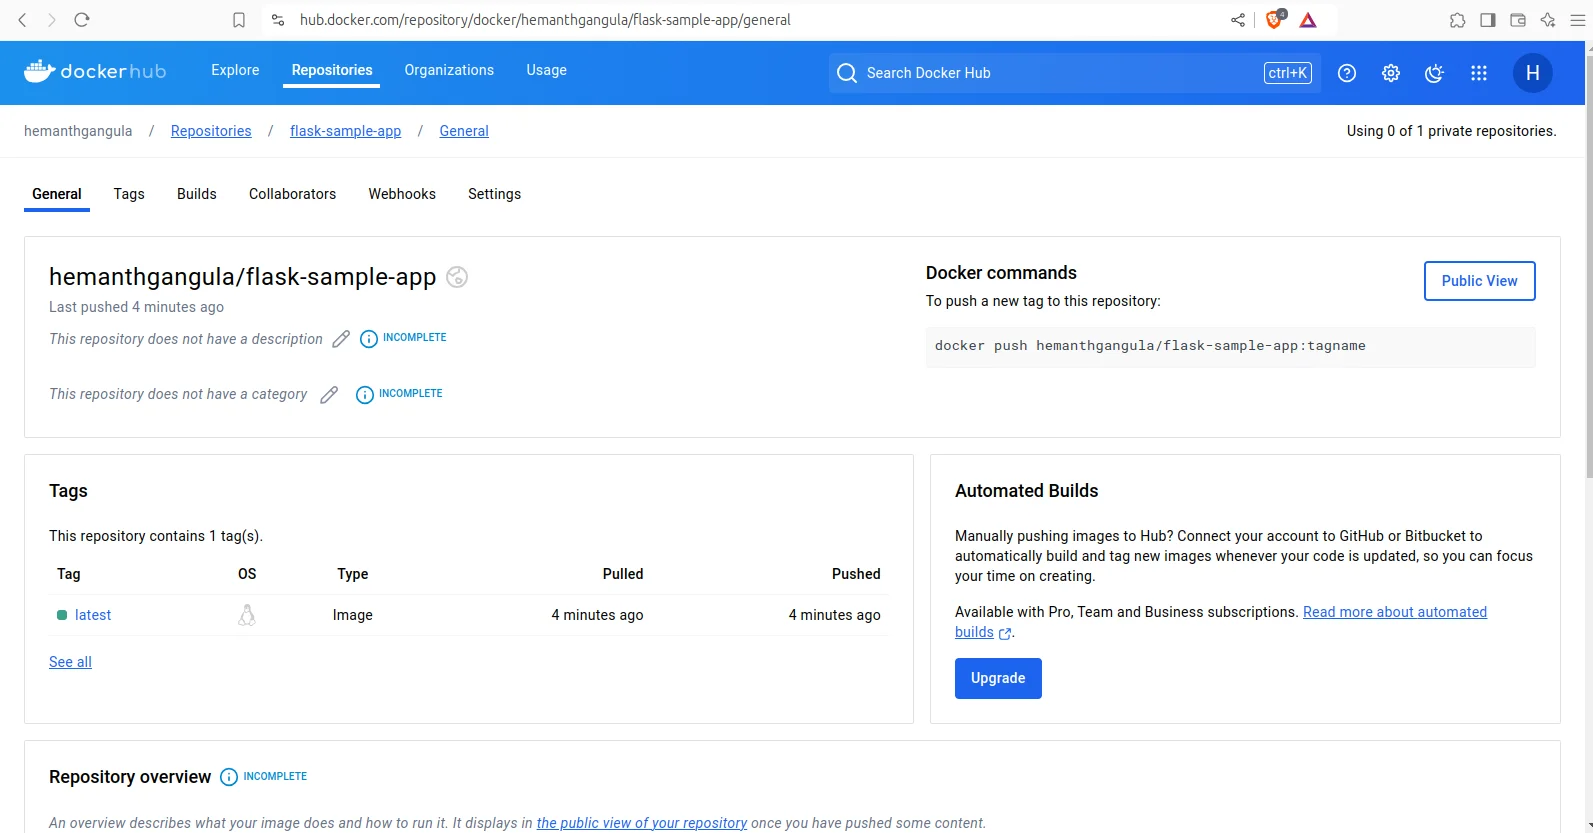
Awesome! Your image is now live on Docker Hub! Just click on the public view, and you’ll see the pull command pop up. Feel free to share this command with anyone—once they have Docker installed, they can easily pull and run your image on their system. How exciting is that?
Conclusion
That’s it for today! If you run into any problems, don’t hesitate to leave a comment below. We’ve covered how to push an image to Docker Hub, and I hope you found it helpful. Happy Dockering, and see you next time!
Every great journey begins with a single step—keep pushing forward, and the possibilities are endless!
And that’s it! Your image is now live on Docker Hub, ready for the world to see or for you to deploy anywhere. Nicely done! 🎉
Subscribe to my newsletter
Read articles from Hemanth Gangula directly inside your inbox. Subscribe to the newsletter, and don't miss out.
Written by

Hemanth Gangula
Hemanth Gangula
🚀 Passionate about cloud and DevOps, I'm a technical writer at Hasnode, dedicated to crafting insightful blogs on cutting-edge topics in cloud computing and DevOps methodologies. Actively seeking opportunities in the DevOps domain, I bring a blend of expertise in AWS, Docker, CI/CD pipelines, and Kubernetes, coupled with a knack for automation and innovation. With a strong foundation in shell scripting and GitHub collaboration, I aspire to contribute effectively to forward-thinking teams, revolutionizing development pipelines with my skills and drive for excellence. #DevOps #AWS #Docker #CI/CD #Kubernetes #CloudComputing #TechnicalWriter