📝 Access Control List Cơ bản 📝
 Nguyễn Tài Nguyên
🔍 Access Control List hay ACL là gì ?
ACL - Access Control List: thường được được gọi tắt là
Access Listrất thường được sử dụng trong các hệ thống mạng để kiểm soát luồng dữ liệu vào ra và quản lý quyền truy cập vào các tài nguyên mạng.ACLgiúp xác định xem dữ liệu từ một địa chỉ IP hoặc một giao thức cụ thể có được phép truy cập hoặc truyền tải trên mạng hay không.Có 2 loại ACL, tuỳ vào mục đích sử dụng mà người quản trị sẽ áp dụng một cách hợp lý:
Standard ACL: Chỉ xét địa chỉ IP nguồn. Thường được sử dụng để hạn chế truy cập cơ bản vào một mạng hoặc một phần mạng.
VD:
deny 192.168.2.0 0.0.0.255.Extended ACL: Cho phép quy định chi tiết hơn, bao gồm cả địa chỉ IP đích, giao thức, và số cổng.
VD:
deny tcp 192.168.2.128 0.0.0.127 192.168.4.0 0.0.0.255 eq 23.
💻 Xây dựng mô hình
- Mô hình sẽ được xây dựng như hình dưới:
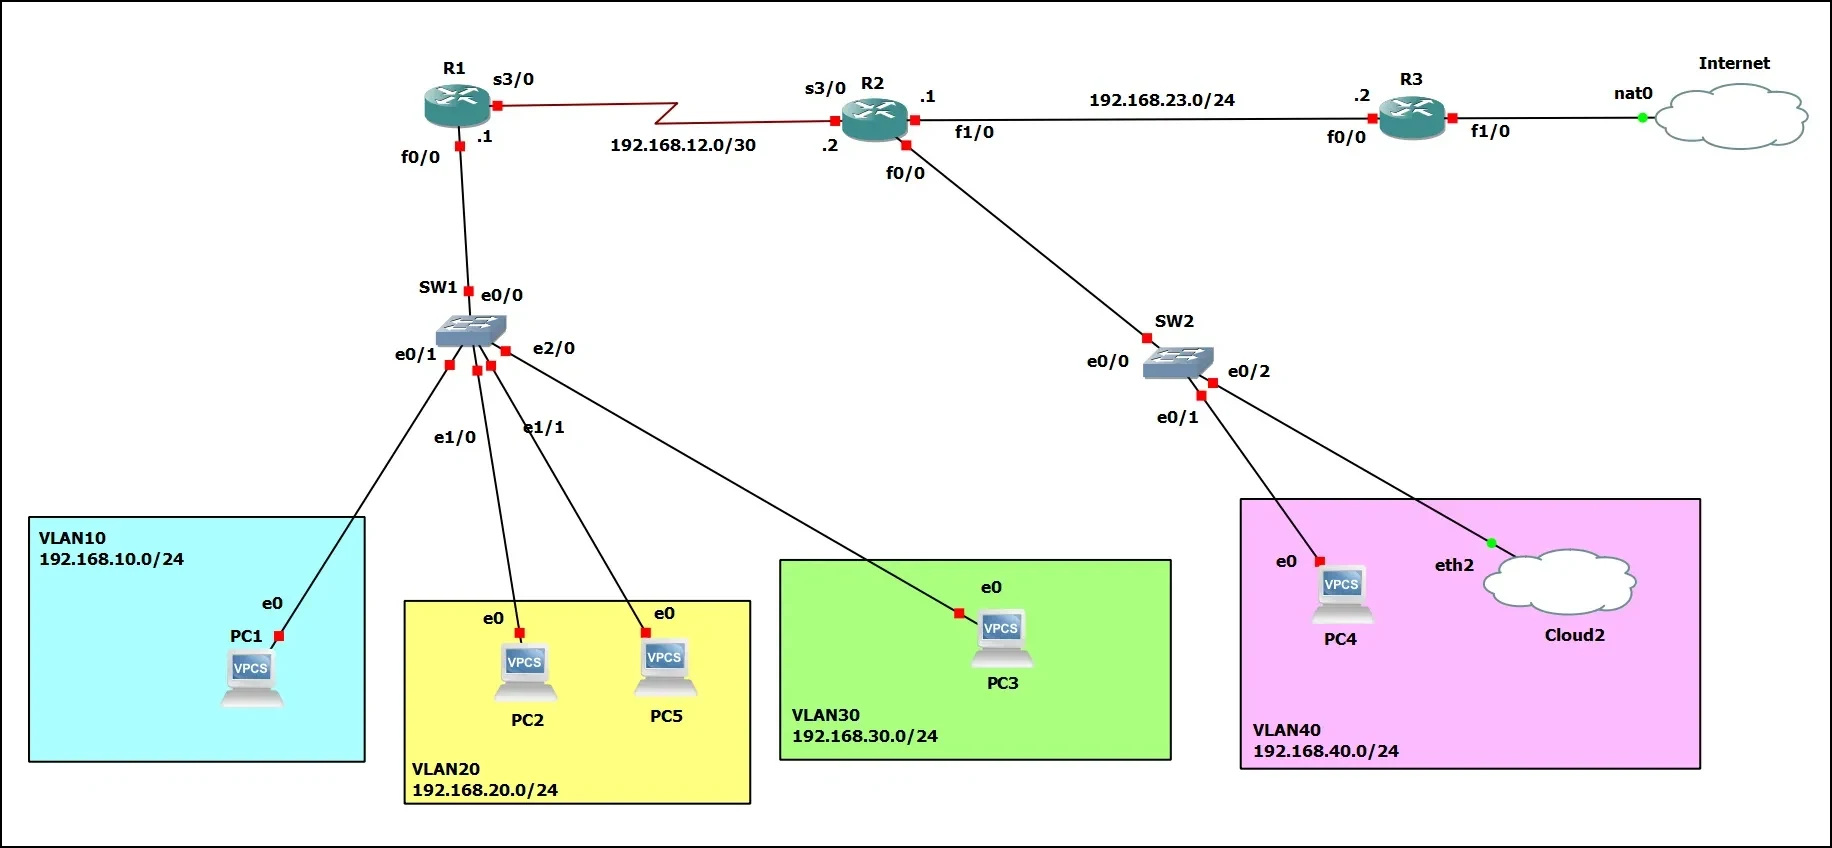
Mô hình này sẽ bao gồm 4 VLAN được phân chia như sau:
Switch 1 (
SW1) chia 3 VLAN:VLAN10:
192.168.10.0/24(e0/1 - e0/3)VLAN20:
192.168.20.0/24(e1/0 - e1/3)VLAN30:
192.168.30.0/24(e2/0 - e2/3)
Swtich 2 (
SW2) tạo 1 VLAN:VLAN40:
192.168.40.0/24(e0/1 - e3/3)Ở VLAN40 có sử dụng thêm một máy ảo Windows 10 để mô phỏng rules ra Internet.
Router 1 (
R1) chạy DHCP và cung cấp IP cho VLAN 10, 20, 30. Sử dụng định tuyến OSPF.Router 2 (
R2) chạy DHCP và cấp IP cho VLAN 40. Sử dụng định tuyến OSPF.Router 3 (
R2) là Router biên, sẽ kết nối với Internet và cho phép mạng nội bộ giao tiếp với Internet. Sử dụng OSPF cho mạng nội bộ.
🛠️ Bắt đầu triển khai
Switch SW1
- Chia VLAN.
SW1#configure terminal
SW1(config)#vlan 10
SW1(config-vlan)#name VLAN10
SW1(config-vlan)#vlan 20
SW1(config-vlan)#name VLAN20
SW1(config-vlan)#vlan 30
SW1(config-vlan)#name VLAN30
- Thay đổi mode của các Interfaces e0/1-3 thành
access.
SW1(config)#interface range e0/1-3
SW1(config-if-range)#switchport mode access
SW1(config-if-range)#switchport access vlan 10
SW1(config-if-range)#no shutdown
SW1(config-if-range)#exit
- Thay đổi mode của các Interfaces e1/0-3 thành
access.
SW1(config)#interface range e1/0-3
SW1(config-if-range)#switchport mode access
SW1(config-if-range)#switchport access vlan 20
SW1(config-if-range)#no shutdown
SW1(config-if-range)#exit
- Thay đổi mode của các Interfaces e2/0-3 thành
access.
SW1(config)#interface range e2/0-3
SW1(config-if-range)#switchport mode access
SW1(config-if-range)#switchport access vlan 30
SW1(config-if-range)#no shutdown
SW1(config-if-range)#exit
- Thay đổi mode của Interface e0/0 thành
trunk.
SW1(config)#interface e0/0
SW1(config-if)#switchport mode trunk
SW1(config-if)#switchport trunk allowed vlan 10,20,30
SW1(config-if)#no shutdown
SW1(config-if)#exit
- Ở các dòng Switch cũ, đôi khi chế độ encapsulation sẽ được đặt là auto, nên sẽ có dòng thông báo này khi bạn đặt mode trunk.
SW1(config-if)#switchport mode trunk
Command rejected: An interface whose trunk encapsulation is "Auto" can not be configured to "trunk" mode.
SW1(config-if)#
*Oct 27 14:56:06.125: %CDP-4-DUPLEX_MISMATCH: duplex mismatch discovered on Ethernet0/0 (not full duplex), with R1 FastEthernet0/0 (full duplex).
- Trong trường hợp có thông báo này thì chỉ cần gõ lệnh sau:
SW1(config-if)#switchport trunk encapsulation dot1q
Sau đó gõ
switchport mode trunknhư bình thường.Tiếp theo bật chế độ portfast trên tất cả các cổng Access của Switch.
SW1(config)#spanning-tree portfast default
- Về cơ bản thì SW1 đã cấu hình xong.
Router R1
- Đặt IP cho s3/0: Ở đây là
192.168.12.1/30. Bạn có thể thay đổi tuỳ theo bạn muốn.

R1#configure terminal
R1(config)#interface s3/0
R1(config-if)#ip address 192.168.12.1 255.255.255.252
R1(config-if)#no shutdown
R1(config-if)#exit
- Cấu hình IP và đặt VLAN cho các Sub-Interfaces.
R1(config)#interface f0/0
R1(config-if)#no shutdown
R1(config)#interface f0/0.10
R1(config-subif)#encapsulation dot1Q 10
R1(config-subif)#ip address 192.168.10.1 255.255.255.0
R1(config-subif)#interface f0/0.20
R1(config-subif)#encapsulation dot1Q 20
R1(config-subif)#ip address 192.168.20.1 255.255.255.0
R1(config-subif)#interface f0/0.30
R1(config-subif)#encapsulation dot1Q 30
R1(config-subif)#ip address 192.168.30.1 255.255.255.0
R1(config-subif)#exit
- Cấu hình DHCP Pool cho VLANs.
R1(config)#ip dhcp pool VLAN10
R1(dhcp-config)#network 192.168.10.0 255.255.255.0
R1(dhcp-config)#default-router 192.168.10.1
R1(dhcp-config)#dns-server 8.8.8.8
R1(dhcp-config)#exit

R1(config)#ip dhcp pool VLAN20
R1(dhcp-config)#network 192.168.20.0 255.255.255.0
R1(dhcp-config)#default-router 192.168.20.1
R1(dhcp-config)#dns-server 8.8.8.8
R1(dhcp-config)#exit

R1(config)#ip dhcp pool VLAN30
R1(dhcp-config)#network 192.168.30.0 255.255.255.0
R1(dhcp-config)#default-router 192.168.30.1
R1(dhcp-config)#dns-server 8.8.8.8
R1(dhcp-config)#exit
- Cấu hình OSPF cho R1
R1(config)#router ospf 1
R1(config-router)#network 192.168.12.0 0.0.0.3 area 0
R1(config-router)#network 192.168.10.0 0.0.0.255 area 0
R1(config-router)#network 192.168.20.0 0.0.0.255 area 0
R1(config-router)#network 192.168.30.0 0.0.0.255 area 0
- Đến bước này là đã cấu hình xong R1, có thể dùng một VPCs để kiểm tra DHCP đã hoạt động hay chưa.
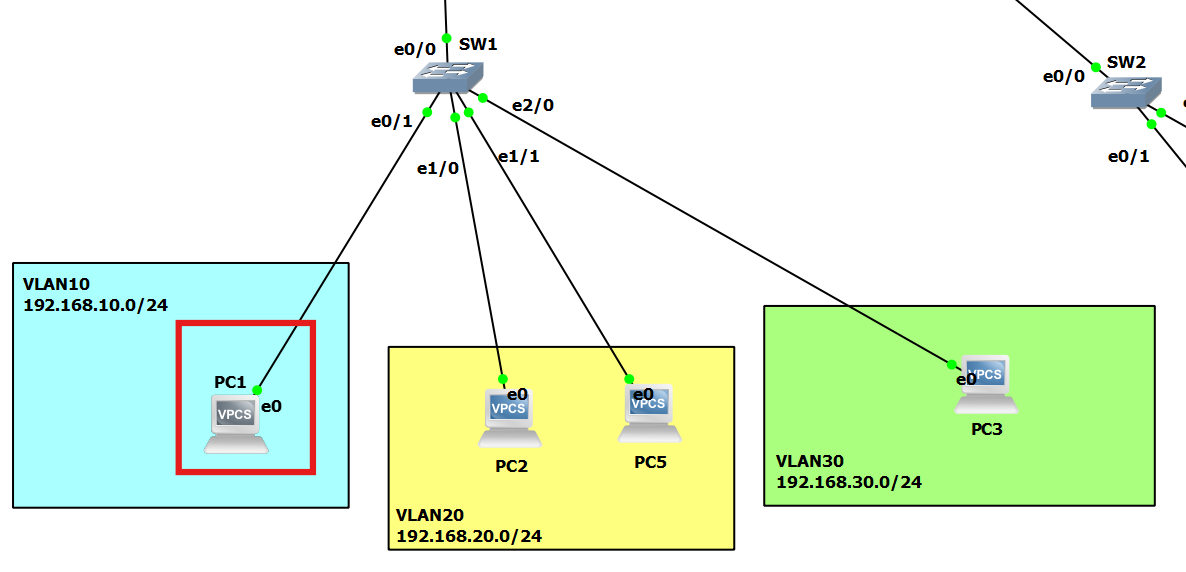
PC1> ip dhcp
DDORA IP 192.168.10.2/24 GW 192.168.10.1

PC1> show ip

NAME        : PC1[1]
IP/MASK     : 192.168.10.2/24
GATEWAY     : 192.168.10.1
DNS         : 8.8.8.8
DHCP SERVER : 192.168.10.1
DHCP LEASE  : 86349, 86400/43200/75600
MAC         : 00:50:79:66:68:03
LPORT       : 20042
RHOST:PORT  : 127.0.0.1:20043
MTU         : 1500
- Máy đã nhận được IP từ DHCP Pool cho VLAN10.
Switch SW2
- Switch 2 cũng sẽ cấu hình tương tự với Switch 1.
SW2#configure terminal
SW2(config)#vlan 40
SW2(config-vlan)#name VLAN40
SW2(config)#interface range e0/1-3, e1/0-3, e2/0-3, e3/0-3
SW2(config-if-range)#switchport mode access
SW2(config-if-range)#switchport access vlan 40
SW2(config-if)#exit
SW2(config)#interface e0/0
SW2(config-if)#switchport mode trunk
SW2(config-if)#switchport trunk allowed vlan 40
SW2(config-if)#exit
SW2(config)#spanning-tree portfast default
Router R2
Router 2 cũng sẽ cấu hình tương tự Router 1.
Cấu hình IP cho cổng s3/0 nối với R1.
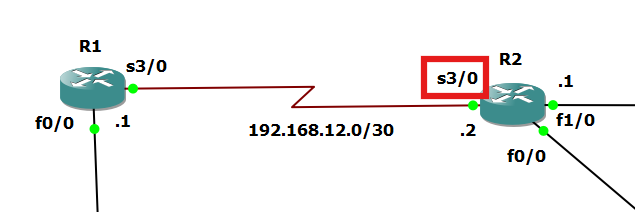
R2#configure terminal
R2(config)#interface s3/0
R2(config-if)#ip address 192.168.12.2 255.255.255.252
R2(config-if)#no shutdown
R2(config-if)#exit
- Cấu hình IP cho cổng f1/0 nối với R3.

R2(config)#interface f1/0
R2(config-if)#ip address 192.168.23.1 255.255.255.0
R2(config-if)#no shutdown
R2(config-if)#exit
- Cấu hình IP và đặt VLAN cho Sub-Interface.
R2(config)#int f0/0.40
R2(config-subif)#encapsulation dot1Q 40
R2(config-subif)#ip address 192.168.40.1 255.255.255.0
R2(config-subif)#exit
R2(config)#interface f0/0
R2(config-if)#no shutdown
R2(config-if)#exit
- DHCP Pool cho VLAN40.
R2(config)#ip dhcp pool VLAN40
R2(dhcp-config)#network 192.168.40.0 255.255.255.0
R2(dhcp-config)#default-router 192.168.40.1
R2(dhcp-config)#dns-server 8.8.8.8
R2(config-if)#exit
- Cấu hình OSPF.
R2(config)#router ospf 2
R2(config-router)#network 192.168.12.0 0.0.0.3 area 0
R2(config-router)#network 192.168.23.0 0.0.0.255 area 0
R2(config-router)#network 192.168.40.0 0.0.0.255 area 0
Router R3
- Cấu hình cho Interface f0/0 nối với R2.

R3#configure terminal
R3(config)#interface f0/0
R3(config-if)#ip address 192.168.23.2 255.255.255.0
R3(config-if)#no shutdown
R3(config-if)#exit
- Interface f0/1 nối với Internet sẽ xin IP từ DHCP.
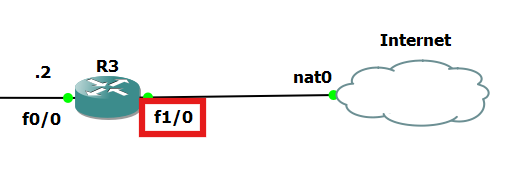
R3(config)#interface f1/0
R3(config-if)#ip address dhcp
R3(config-if)#no shutdown
R3(config-if)#exit
- Cấu hình OSPF. Đặt
R3là default gateway cho OSPF 3.
R3(config)#router ospf 3
R3(config-router)#network 192.168.23.0 0.0.0.255 area 0
R3(config-router)#default-information originate
R3(config-router)#exit
- Cấu hình NAT cho R3.
R3(config)#access-list 1 permit any
R3(config)#ip nat inside source list 1 interface f1/0 overload
R3(config)#interface f1/0
R3(config-if)#ip nat outside
R3(config)#interface f0/0
R3(config-if)#ip nat inside
Mô hình vậy là cơ bản đã xong, các PC trong VLAN đã có thể ra Internet
IP xin được của máy ảo Windows 10.

- Máy Windows 10 có thể truy cập Internet.

📝 Cấu hình một số ACL cơ bản
Cấm VLAN20 kết nối với VLAN10.
- DENY các gói tin có địa chỉ source thuộc lớp mạng
192.168.20.0/24theo chiều ra củaInterface f0/0.10.
R1#conf terminal
R1(config)#ip access-list standard VLAN20
R1(config-std-nacl)#deny 192.168.20.0 0.0.0.255
R1(config-std-nacl)#permit any
R1(config-std-nacl)#exit
R1(config)#interface f0/0.10
R1(config-subif)#ip access-group VLAN20 out
- PC2 thuộc VLAN20 không thể ping tới được các PC thuộc VLAN10. Nhưng vẫn có thể ping tới VLAN30.
PC2> ping 192.168.10.2

*192.168.20.1 icmp_seq=1 ttl=255 time=3.834 ms (ICMP type:3, code:13, Communication administratively prohibited)
*192.168.20.1 icmp_seq=2 ttl=255 time=2.853 ms (ICMP type:3, code:13, Communication administratively prohibited)
*192.168.20.1 icmp_seq=3 ttl=255 time=11.212 ms (ICMP type:3, code:13, Communication administratively prohibited)
*192.168.20.1 icmp_seq=4 ttl=255 time=1.965 ms (ICMP type:3, code:13, Communication administratively prohibited)
*192.168.20.1 icmp_seq=5 ttl=255 time=2.764 ms (ICMP type:3, code:13, Communication administratively prohibited)

PC2> ping 192.168.30.2

84 bytes from 192.168.30.2 icmp_seq=1 ttl=63 time=30.261 ms
84 bytes from 192.168.30.2 icmp_seq=2 ttl=63 time=12.080 ms
84 bytes from 192.168.30.2 icmp_seq=3 ttl=63 time=16.718 ms
84 bytes from 192.168.30.2 icmp_seq=4 ttl=63 time=14.476 ms
84 bytes from 192.168.30.2 icmp_seq=5 ttl=63 time=15.992 ms
Cấm nửa IP đầu của VLAN20 ping đến VLAN40.
- Cấm khoảng IP từ
192.168.20.1 —> 192.168.20.127ping đến VLAN40.
R2(config)#ip access-list extended VLAN40
R2(config-ext-nacl)#deny icmp 192.168.20.0 0.0.0.127 192.168.40.0 0.0.0.255
R2(config-ext-nacl)#permit ip any any
R2(config-ext-nacl)#ex
R2(config)#interface f0/0.40
R2(config-subif)#ip access-group VLAN40 out
Các PC có IP thuộc khoảng
192.168.20.1 —> 192.168.20.127sẽ không thể ping tới VLAN40.PC có IP
192.168.20.2. Không thể ping tới VLAN40.
PC2> show ip

NAME        : PC2[1]
IP/MASK     : 192.168.20.2/24
GATEWAY     : 192.168.20.1
DNS         : 8.8.8.8
DHCP SERVER : 192.168.20.1
DHCP LEASE  : 84996, 86400/43200/75600
MAC         : 00:50:79:66:68:00
LPORT       : 20036
RHOST:PORT  : 127.0.0.1:20037
MTU         : 1500
--------------------------------------------------------------------------------------------------------------------
PC2> ping 192.168.40.4

*192.168.12.2 icmp_seq=1 ttl=254 time=18.647 ms (ICMP type:3, code:13, Communication administratively prohibited)
*192.168.12.2 icmp_seq=2 ttl=254 time=14.823 ms (ICMP type:3, code:13, Communication administratively prohibited)
*192.168.12.2 icmp_seq=3 ttl=254 time=18.710 ms (ICMP type:3, code:13, Communication administratively prohibited)
*192.168.12.2 icmp_seq=4 ttl=254 time=20.678 ms (ICMP type:3, code:13, Communication administratively prohibited)
*192.168.12.2 icmp_seq=5 ttl=254 time=13.579 ms (ICMP type:3, code:13, Communication administratively prohibited)
- PC5 có IP
192.168.20.130. Vẫn có thể ping tới VLAN40 bình thường.
PC5> ip 192.168.20.130 255.255.255.0 192.168.20.1
Checking for duplicate address...
PC5 : 192.168.20.130 255.255.255.0 gateway 192.168.20.1
--------------------------------------------------------------------------------------------------------------------
PC5> ping 192.168.40.4

84 bytes from 192.168.40.4 icmp_seq=1 ttl=62 time=51.643 ms
84 bytes from 192.168.40.4 icmp_seq=2 ttl=62 time=25.726 ms
84 bytes from 192.168.40.4 icmp_seq=3 ttl=62 time=27.759 ms
84 bytes from 192.168.40.4 icmp_seq=4 ttl=62 time=36.449 ms
84 bytes from 192.168.40.4 icmp_seq=5 ttl=62 time=25.847 ms
Cấm PC thuộc VLAN40 telnet tới R1
- Trước khi thực hiện kiểm tra lệnh cấm, telnet thử từ 1 PC trong VLAN40 tới R1.
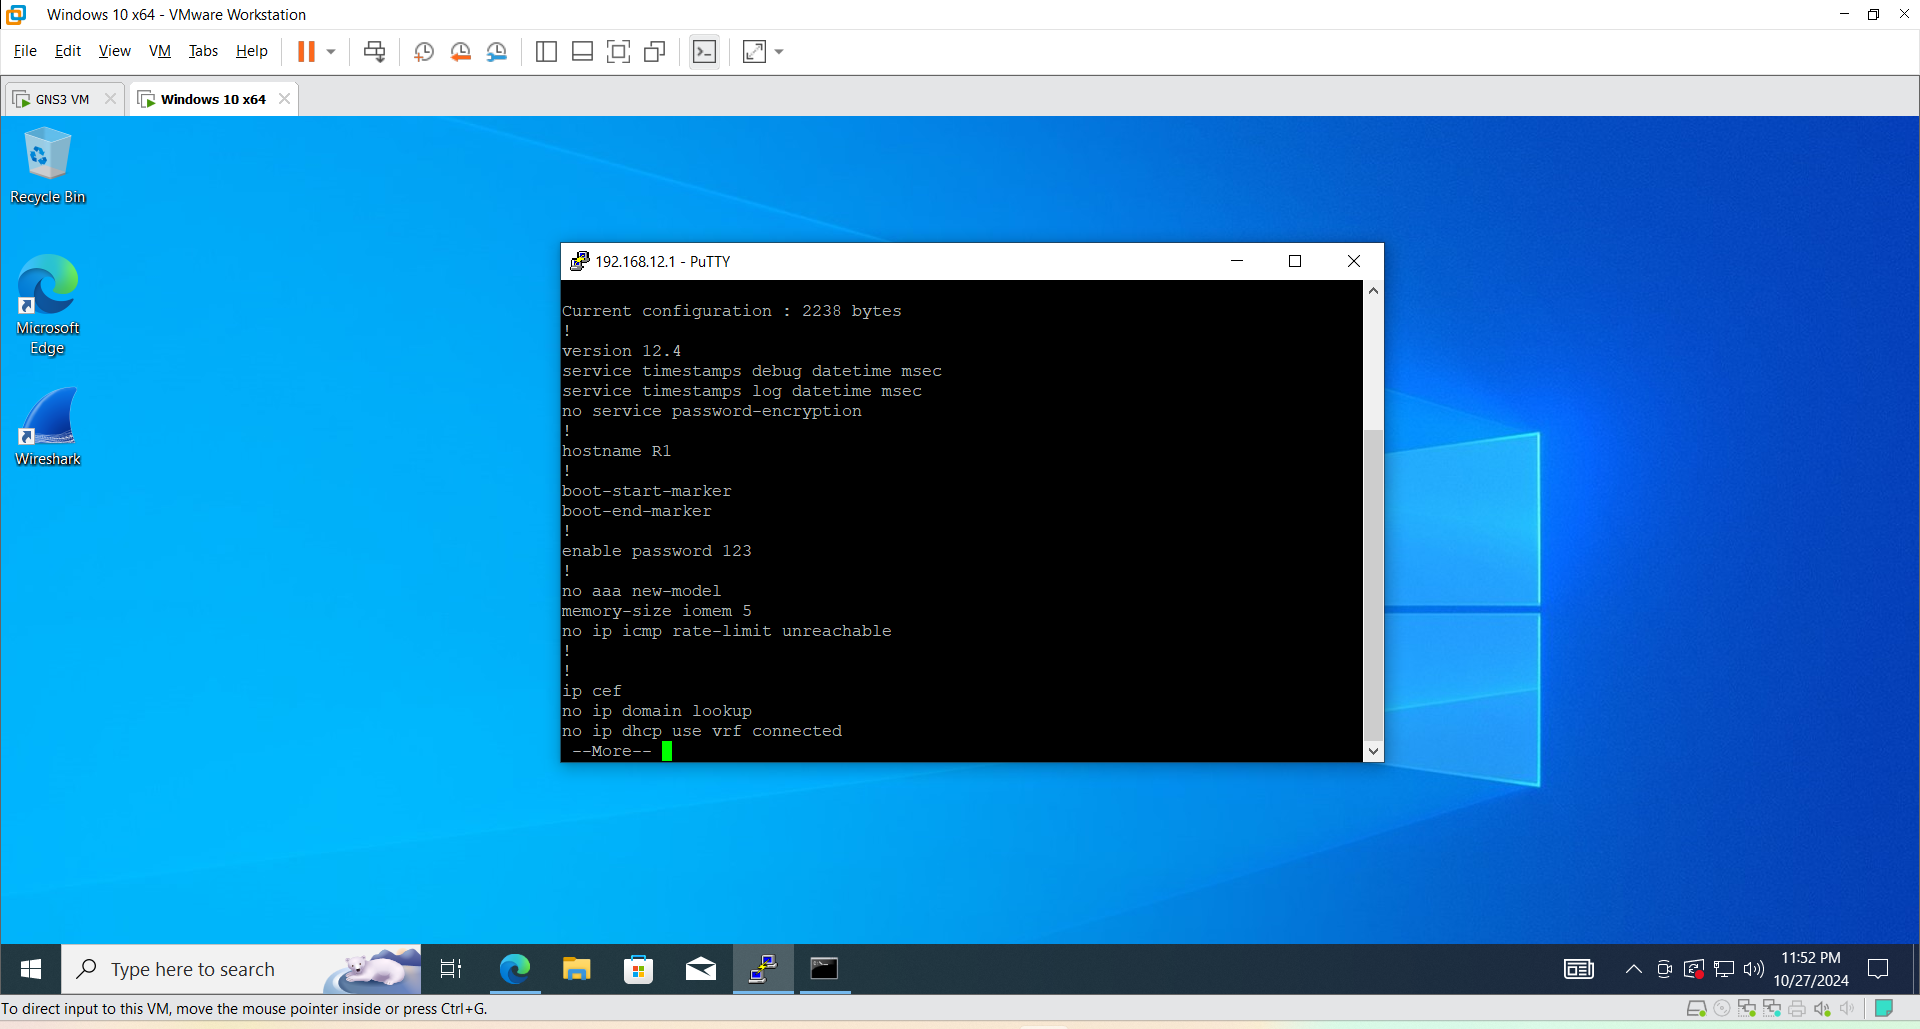
Dùng Putty telnet tới R1.
DENY telnet tới R1.
R1(config)#ip access-list standard TELNET_DENY
R1(config-std-nacl)#deny 192.168.40.0 0.0.0.255
R1(config-std-nacl)#permit any
R1(config-std-nacl)#ex
R1(config)#line vty 0 4
R1(config-line)#access-class TELNET_DENY in
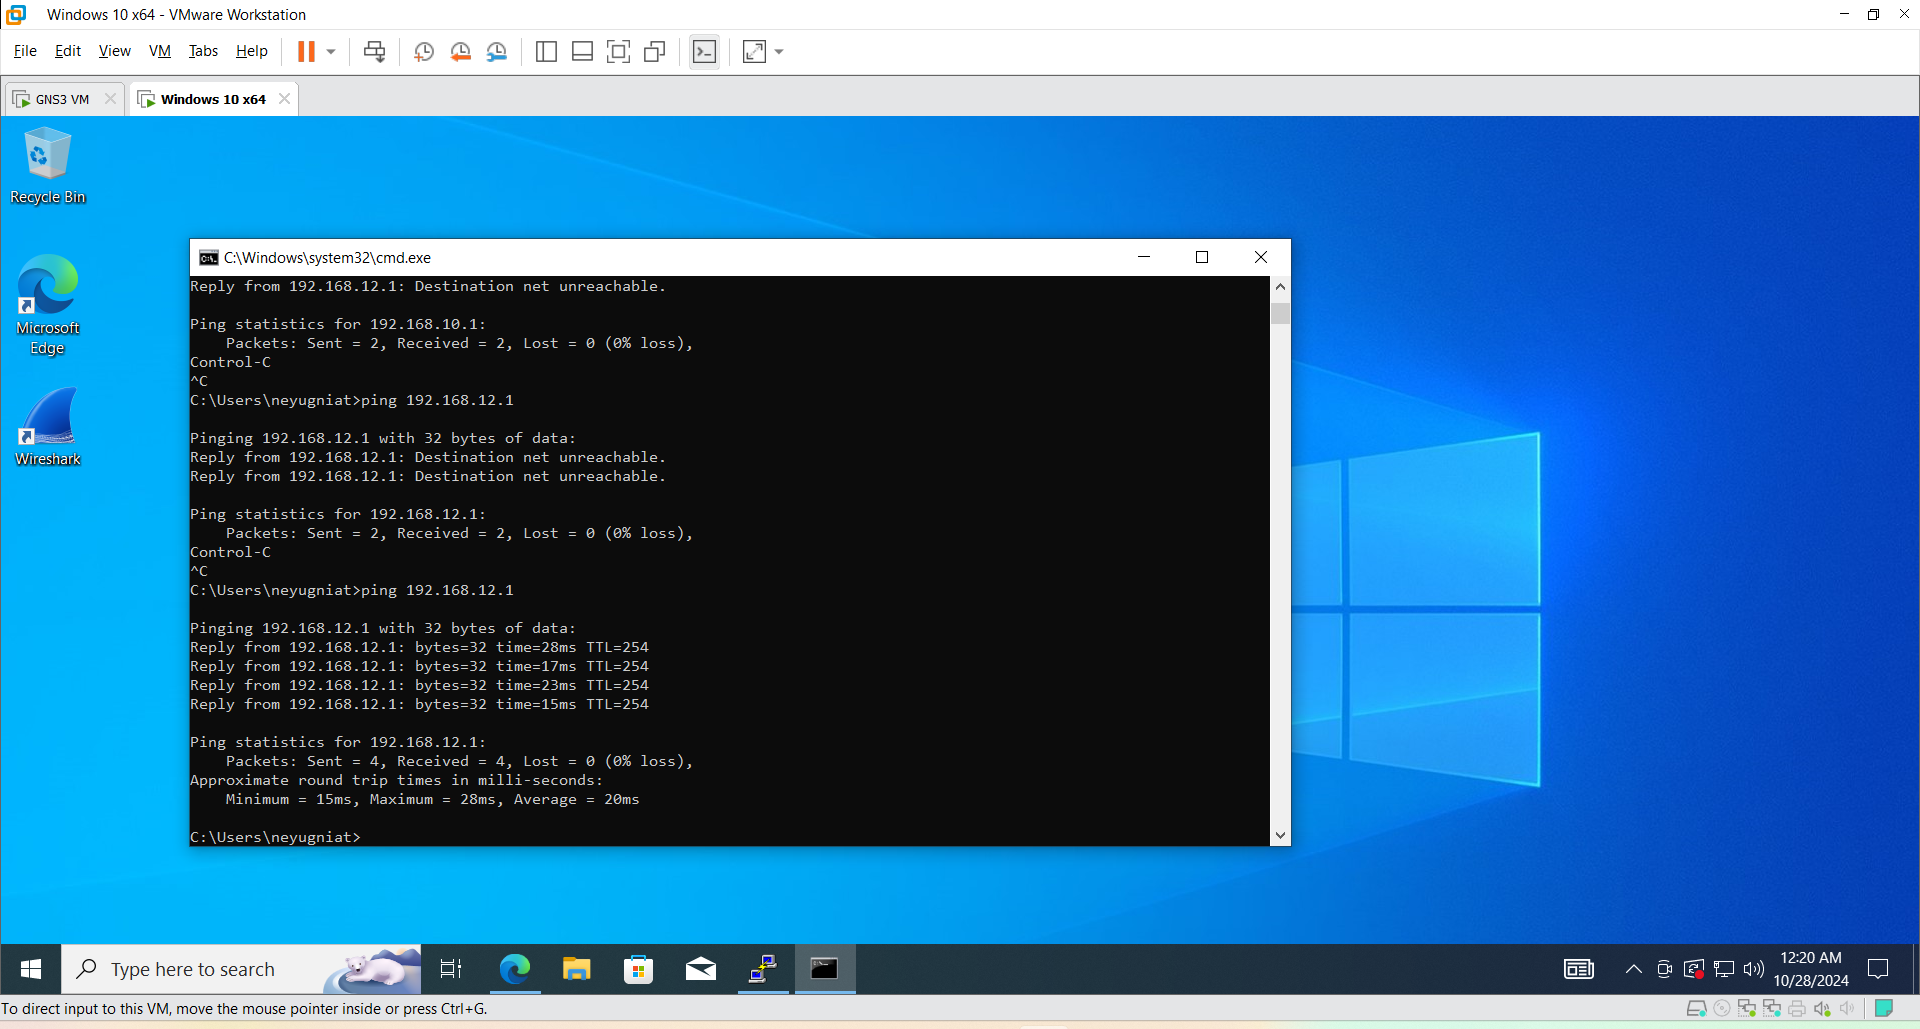
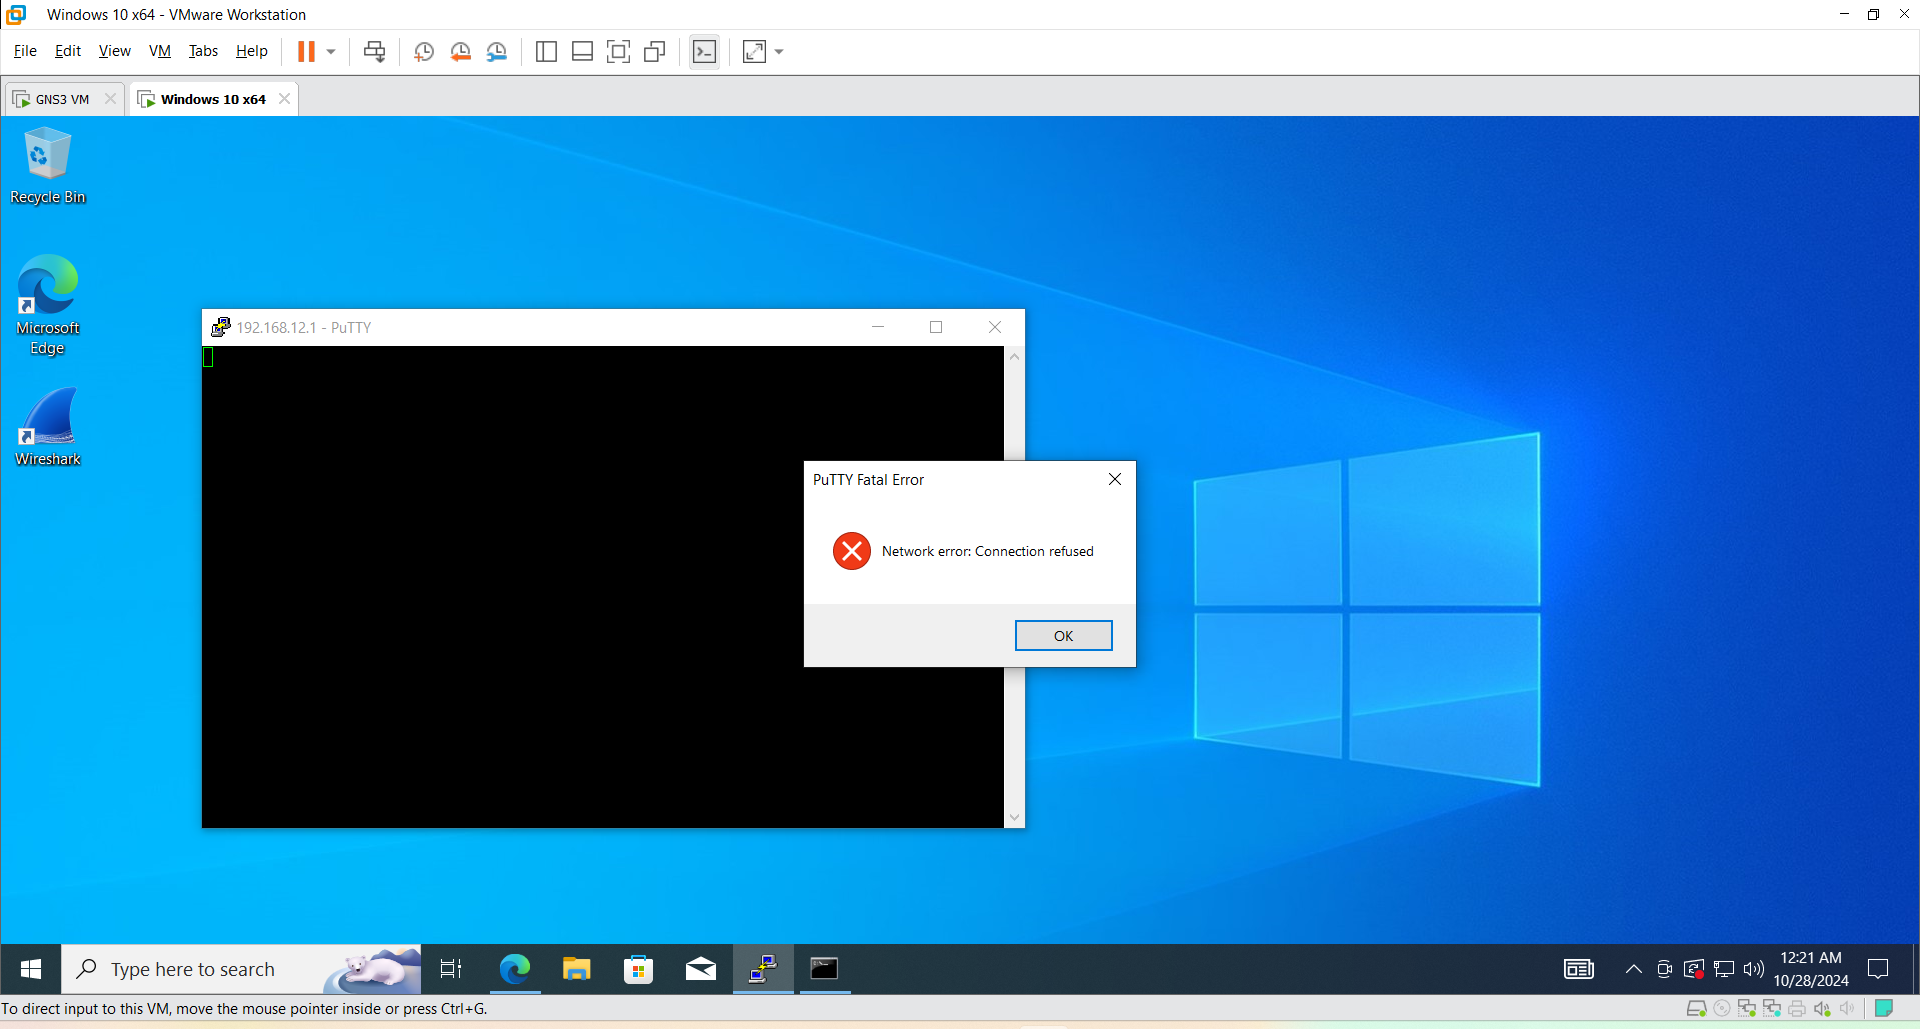
- Máy Windows 10 vẫn có thể ping tới R1, nhưng không thể telnet được nữa.
Cấm VLAN10, 20, 30 không được đi Internet, VLAN40 đi được Internet.
- Cấu hình cho các máy thuộc VLAN10, 20, 30 không thể đi được Internet.
R3(config)#ip access-list extended internet
R3(config-ext-nacl)#deny ip 192.168.10.0 0.0.0.255 any
R3(config-ext-nacl)#deny ip 192.168.20.0 0.0.0.255 any
R3(config-ext-nacl)#deny ip 192.168.30.0 0.0.0.255 any
R3(config-ext-nacl)#permit ip any any
R3(config-ext-nacl)#ex
R3(config)#int f0/0
R3(config-if)#ip access-group internet in
- Các PC thuộc các VLAN 10, 20, 30 đã không thể ra được internet.
PC1> ping 8.8.8.8

*192.168.23.2 icmp_seq=1 ttl=253 time=31.193 ms (ICMP type:3, code:13, Communication administratively prohibited)
*192.168.23.2 icmp_seq=2 ttl=253 time=43.918 ms (ICMP type:3, code:13, Communication administratively prohibited)
*192.168.23.2 icmp_seq=3 ttl=253 time=48.914 ms (ICMP type:3, code:13, Communication administratively prohibited)
*192.168.23.2 icmp_seq=4 ttl=253 time=34.579 ms (ICMP type:3, code:13, Communication administratively prohibited)
*192.168.23.2 icmp_seq=5 ttl=253 time=34.119 ms (ICMP type:3, code:13, Communication administratively prohibited)
PC2> ping google.com
google.com resolved to 64.233.170.102

84 bytes from 64.233.170.102 icmp_seq=1 ttl=51 time=71.259 ms
84 bytes from 64.233.170.102 icmp_seq=2 ttl=51 time=69.987 ms
84 bytes from 64.233.170.102 icmp_seq=3 ttl=51 time=92.759 ms
84 bytes from 64.233.170.102 icmp_seq=4 ttl=51 time=72.200 ms
84 bytes from 64.233.170.102 icmp_seq=5 ttl=51 time=65.471 ms
^C

//Sau khi bat ACL
PC2> ping google.com
Cannot resolve google.com
- PC thuộc VLAN40 vẫn có thể ra Internet bình thường.

- Trên đây là cấu hình ACL cơ bản, với các rules cơ bản như cấm ping từ VLAN này đến VLAN kia, cấm telnet từ VLAN tới Router hay cho phép khoảng IP nào được ping tới khoảng IP nào của VLAN. Dựa vào các cấu hình cơ bản này ta hoàn toàn có thể xây dựng một hệ thống phức tạp hơn, với nhiều thiết bị, giao thức, chi tiết hơn.
Subscribe to my newsletter
Read articles from Nguyễn Tài Nguyên directly inside your inbox. Subscribe to the newsletter, and don't miss out.
Written by

Nguyễn Tài Nguyên
Nguyễn Tài Nguyên
In search of the Great Manifesto