Simple Steps to Launch a Website with Apache2 on AWS EC2
 Olaoluwa Afolami
Are you looking to host your first website and want to learn how to do it on AWS? You’re in the right place! In this guide, I’ll show you how to create an Amazon Web Services (AWS) EC2 instance, install an Apache2 web server, and host your website on it—all with simple, step-by-step instructions. Let’s dive right in!
What is AWS EC2?
AWS EC2 (Elastic Compute Cloud) is a cloud-based virtual server that allows you to run applications or host websites. You don’t need to worry about hardware, and you only pay for the resources you use. Perfect for hosting your website!
Prerequisites
Before we begin, you’ll need:
An AWS account (sign up at aws.amazon.com).
A basic understanding of how to use a terminal (for running commands).
Step 1: Launch an AWS EC2 Instance
First, we need to launch our virtual server, known as an EC2 instance.
Log into AWS:
Head to the AWS Management Console.
Search for EC2 and click on it to go to the EC2 dashboard.
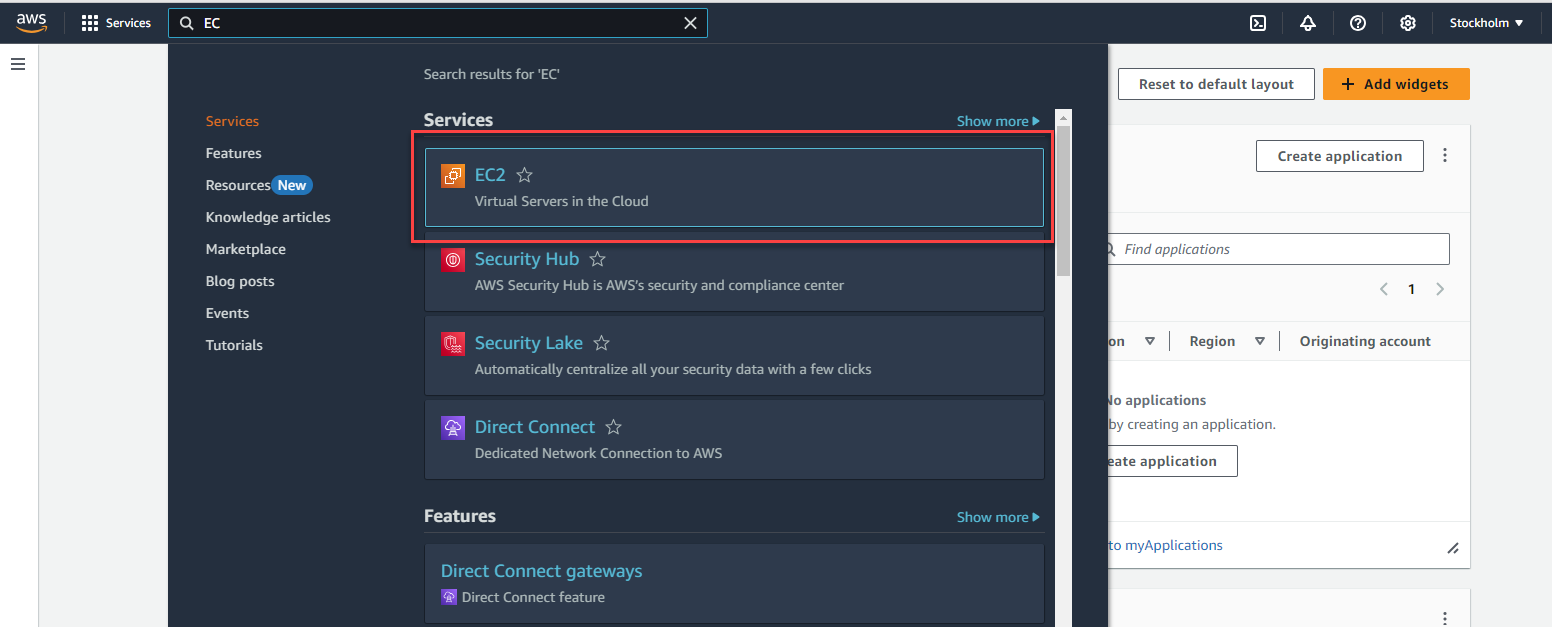
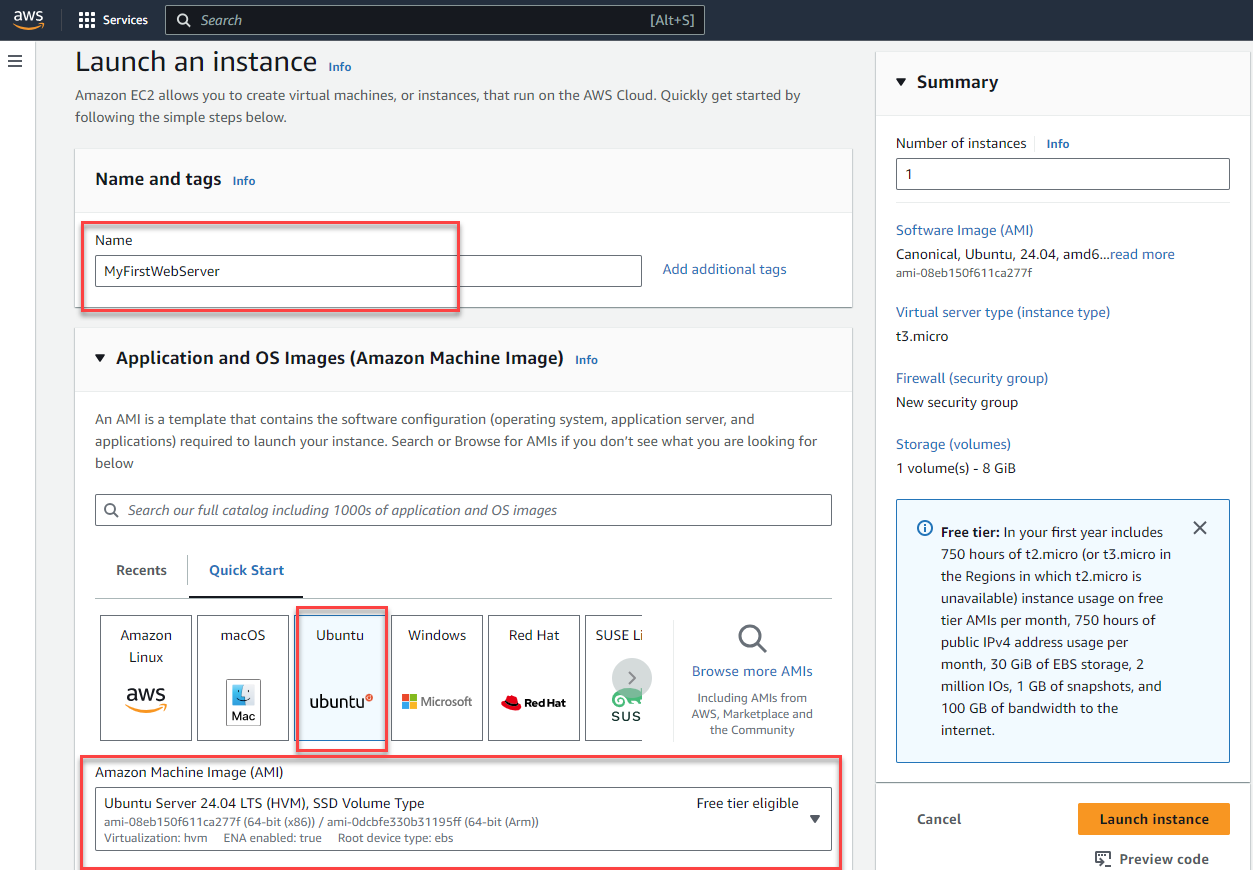
Launch a New EC2 Instance:
- Click Launch Instances.

- Give your instance a name, such as "MyFirstWebServer".
Choose an Amazon Machine Image (AMI):
Select Ububtu AMI (this is free-tier eligible and perfect for beginners).
Click Select.
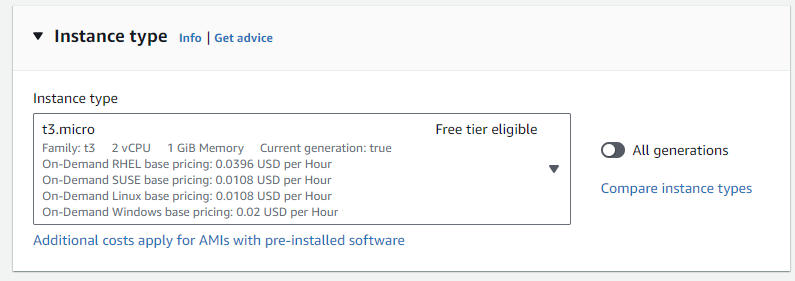
Choose an Instance Type:
The default t3.micro is sufficient for basic web hosting, and it’s free-tier eligible.
Scroll Down: Configure Instance Details.
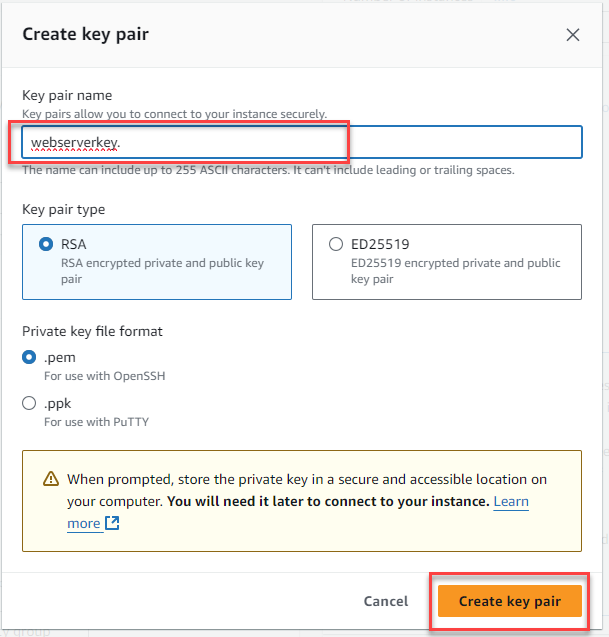
Select Create a New Key Pair, give it a name, and download the
.pemfile (this will allow you to SSH into your instance). Keep it safe!
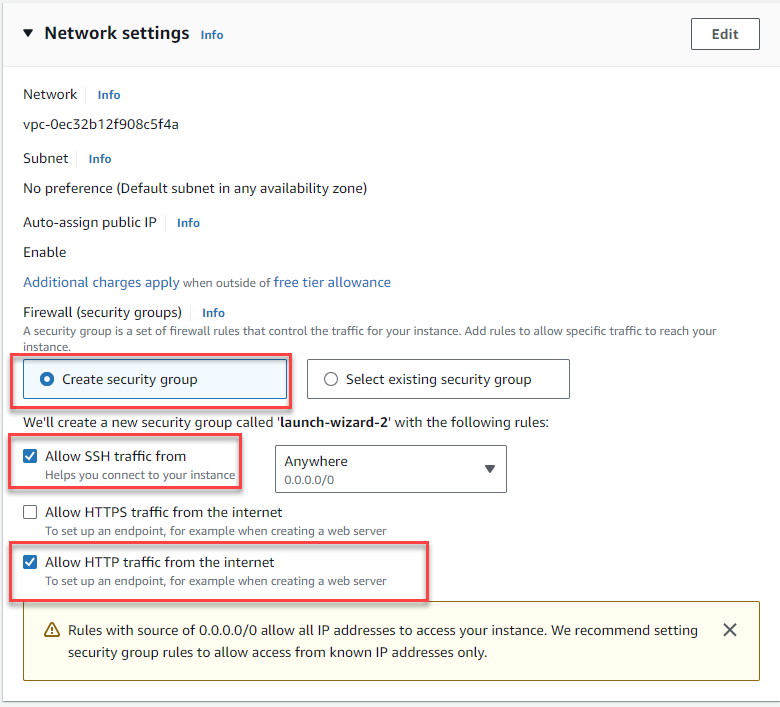
Set Up a Security Group:
A security group acts as a virtual firewall for your instance.
Create a new security group with the following rules:
SSH (Port 22) to connect to your server.
HTTP (Port 80) to serve your website.
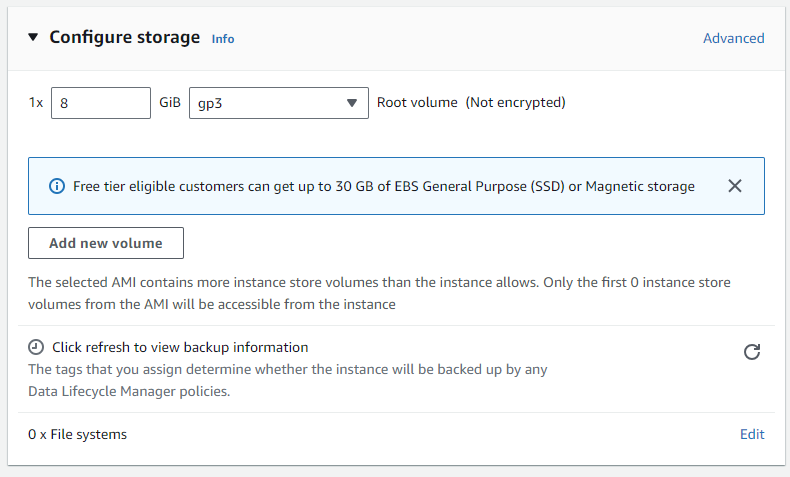
Add Storage:
- The default 8GB of storage is more than enough for a small website. Click Next: Add Tags.
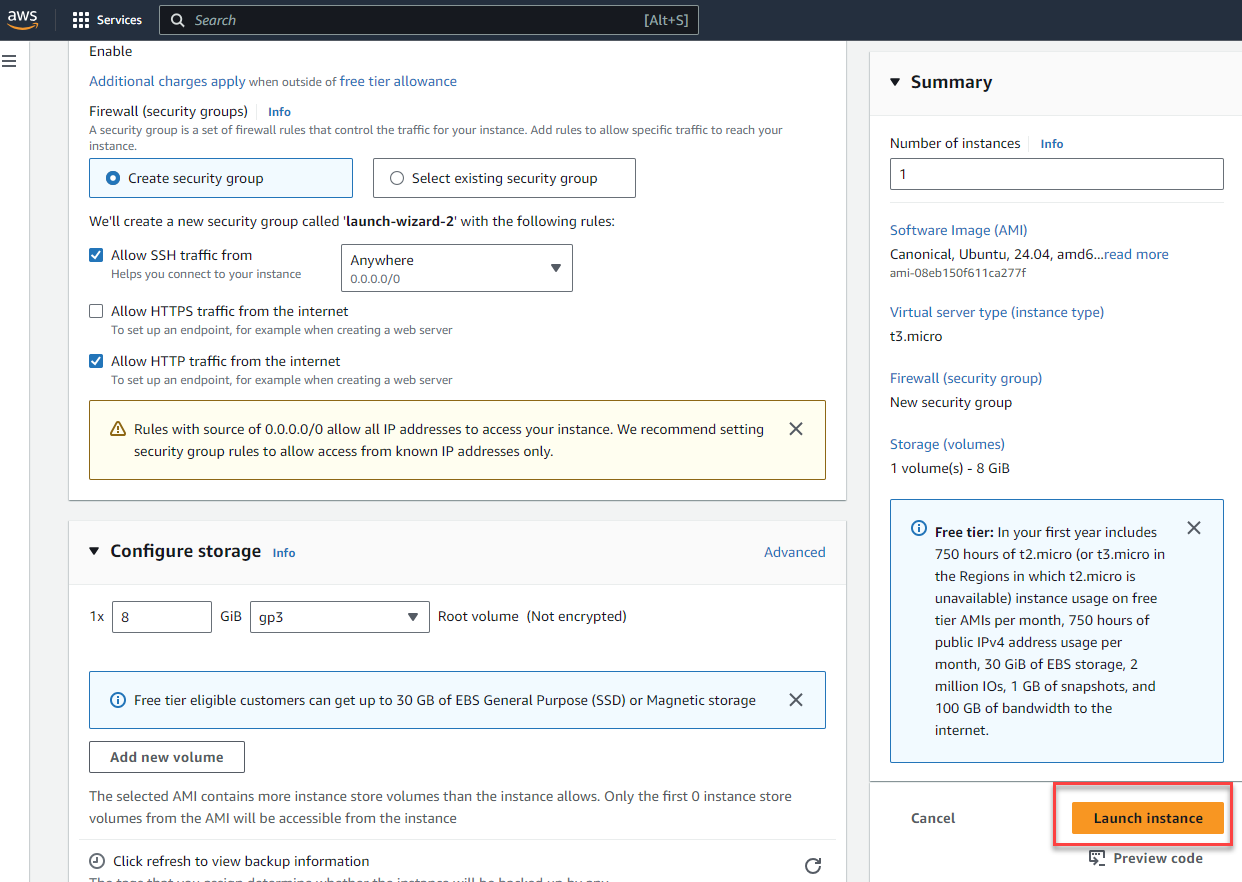
Click Launch instance.
View Your Instance:

- Copy the Public IPv4 address—this is your website’s public address for now.

Step 2: Connect to Your EC2 Instance
Now that your instance is up and running, let’s connect to it and set up the web server.
Open a Terminal (or PowerShell on Windows):
- Navigate to the folder where your
.pemkey file is stored.
- Navigate to the folder where your
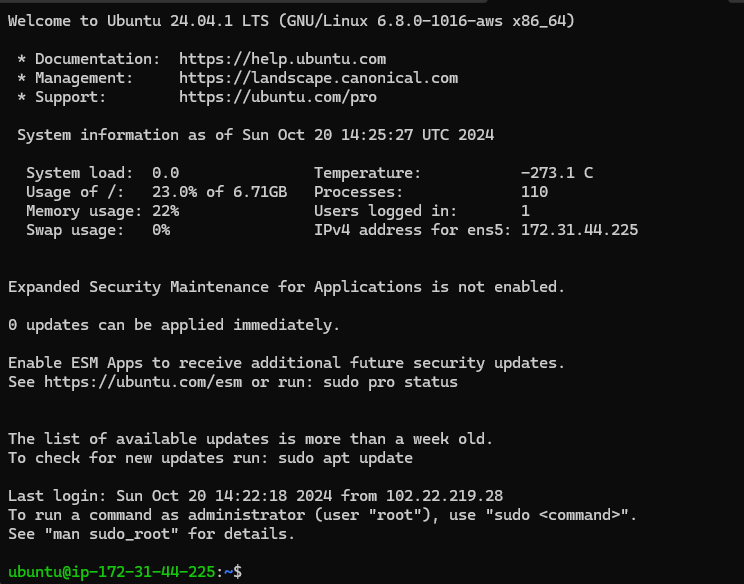
Connect via SSH:
Run this command (replace
<your-key-file>with your.pemfile name and<ec2-public-ip>with the EC2 instance public IP address):chmod 400 <your-key-file>.pem ssh -i "<your-key-file>.pem" ubuntu@<ec2-public-ip>

If prompted, type yes to connect.
Step 3: Install Apache2 Web Server
Now, let's set up the Apache2 web server that will host your website.
Update Your Package Manager:
- After connecting to your EC2 instance, run this command to ensure your system is up to date:
sudo apt update
Install Apache2:
sudo apt install apache2 -yStart Apache2 server
sudo systemctl start apache2Enable Apache2 to Start on Boot:
This ensures Apache starts automatically if your instance reboots
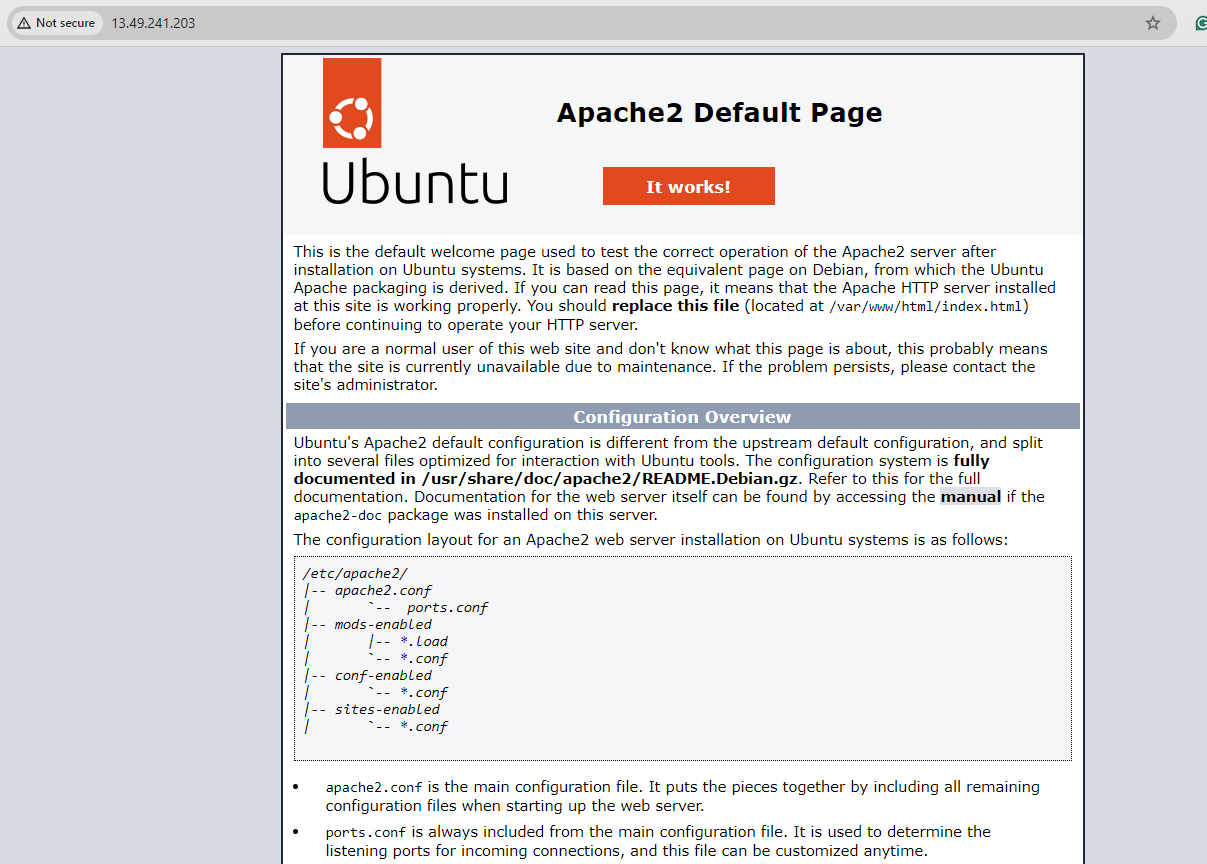
sudo systemctl enable apache2Verify Apache2 is Running:
Open your browser and visit:
http://<ec2-public-ip>
Step 4: Host Your Website on Apache2
My website files are stored in my Github repository (https://github.com/laoluafolami/kids). You can clone this site or simply use your own source files.
Now that Apache is running, let’s replace the default page with your website.
Navigate to the Web Root Directory:
- Run this command to go to the folder where your website files will be stored:
cd /var/www/html
Clone the website files from my repository:
sudo git clone https://github.com/laoluafolami/kids.git

Navigate to the folder where you have your cloned repository.
cd kids

Move the files in your cloned repository to the default Apache2 web root folder (/var/www/html).
sudo mv * /var/www/html
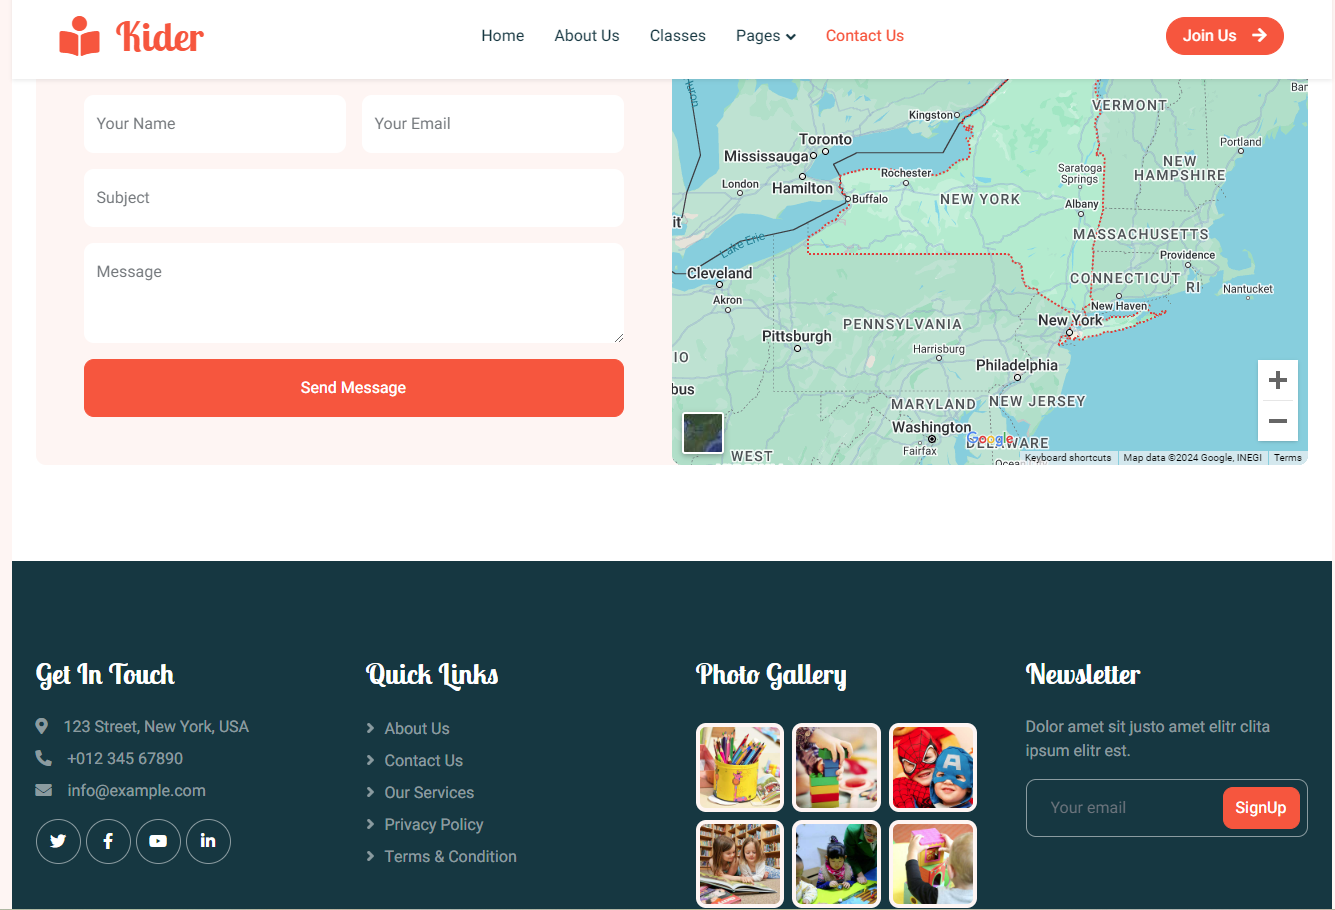
Test Your Website:
Go to your browser and visit:
http://<ec2-public-ip>
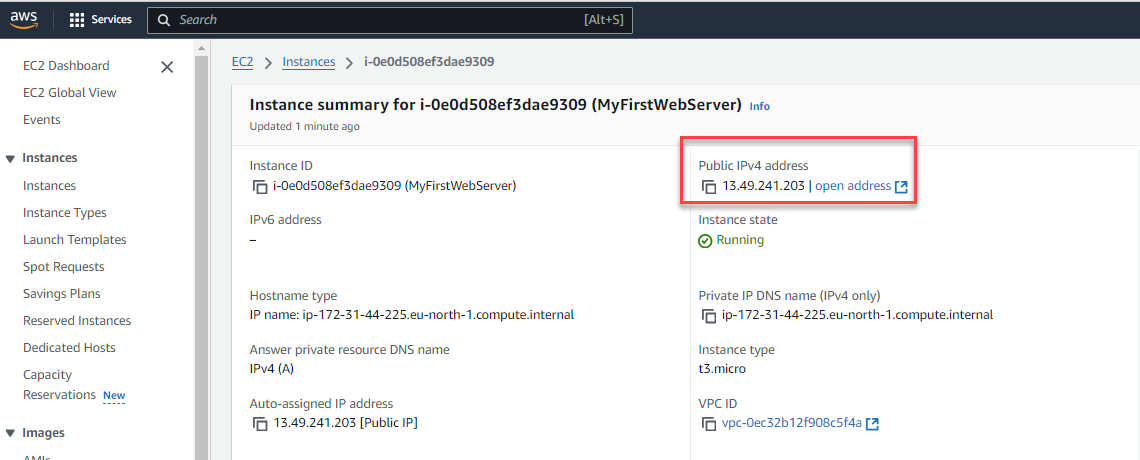
http://13.49.241.203


Conclusion
Congratulations! You’ve successfully set up an EC2 instance, installed Apache2, and hosted your first website. This is a great first step into the world of cloud computing and web hosting
Subscribe to my newsletter
Read articles from Olaoluwa Afolami directly inside your inbox. Subscribe to the newsletter, and don't miss out.
Written by

Olaoluwa Afolami
Olaoluwa Afolami
Detail-oriented and dedicated Cloud/DevOps Engineer with experience in designing, deploying, and managing cloud infrastructure across Azure, AWS and GCP environments. Strong expertise in cybersecurity, system administration, and incident management. Proven history of success in IT support roles, with proficiency in Linux and Windows server administration, virtualisation, identity management, and Active Directory. Committed to enhancing security, optimising system performance, and ensuring the reliability of IT infrastructure.