Day 5 : Advanced Linux Shell Scripting for DevOps Engineers with User Management
 Saad Asif Mujawar
Task 1 : Create Directories Using Shell Script :
- Write a bash script createDirectories.sh that, when executed with three arguments (directory name, start number of directories, and end number of directories), creates a specified number of directories with a dynamic directory name.
- Example 1: When executed as ./createDirectories.sh day 1 90, it creates 90 directories as day1 day2 day3 ... day90.
- Example 2: When executed as ./createDirectories.sh Movie 20 50, it creates 31 directories as Movie20 Movie21 Movie22 ... Movie50.
Solution :
We will create a createdirectories.sh file using vim and write a script that accepts 3 values from the user:
$1: Directory_name$2: Starting no.$3: End no.
We will use a for loop to create directories as specified by the user.
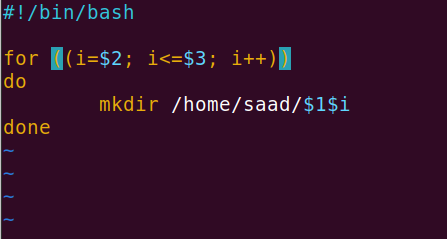
After this, we will save the file by pressing Esc and typing :wq.
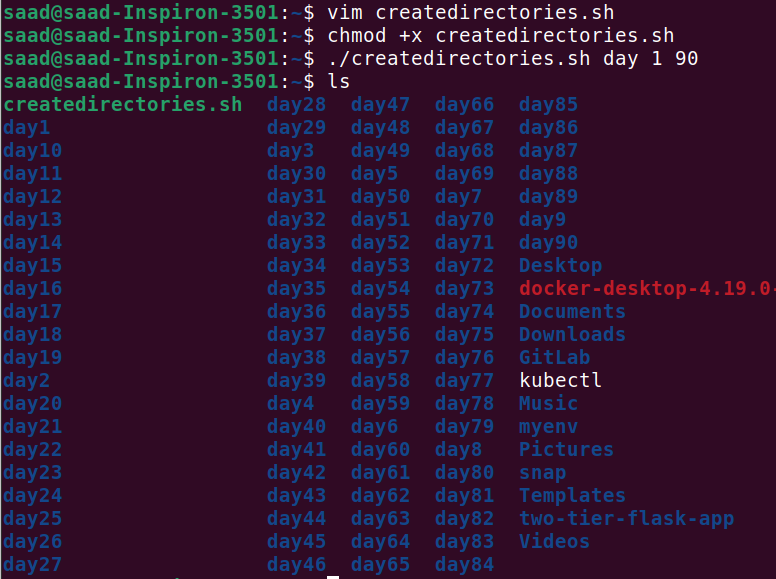
We will give it execute permission using chmod +x createdirectories. Finally, we will run the script with ./createdirectories day 1 90. This will create 90 directories day1, day2, …..day90.

Task 2 : Create a Script to Backup All Your Work :
Solution :
Our files are stored in the data folder. We will take a backup of the files from the data folder to the backup_folder. First, we will create the backup_folder using mkdir and then write a script to take the backup.
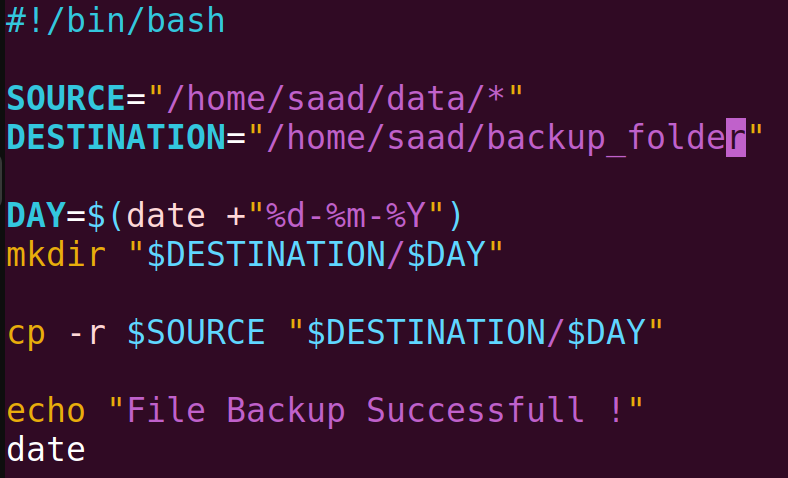
After that, we will give execution permission to the file using chmod +x backup.sh Then, we will execute it with ./backup.sh
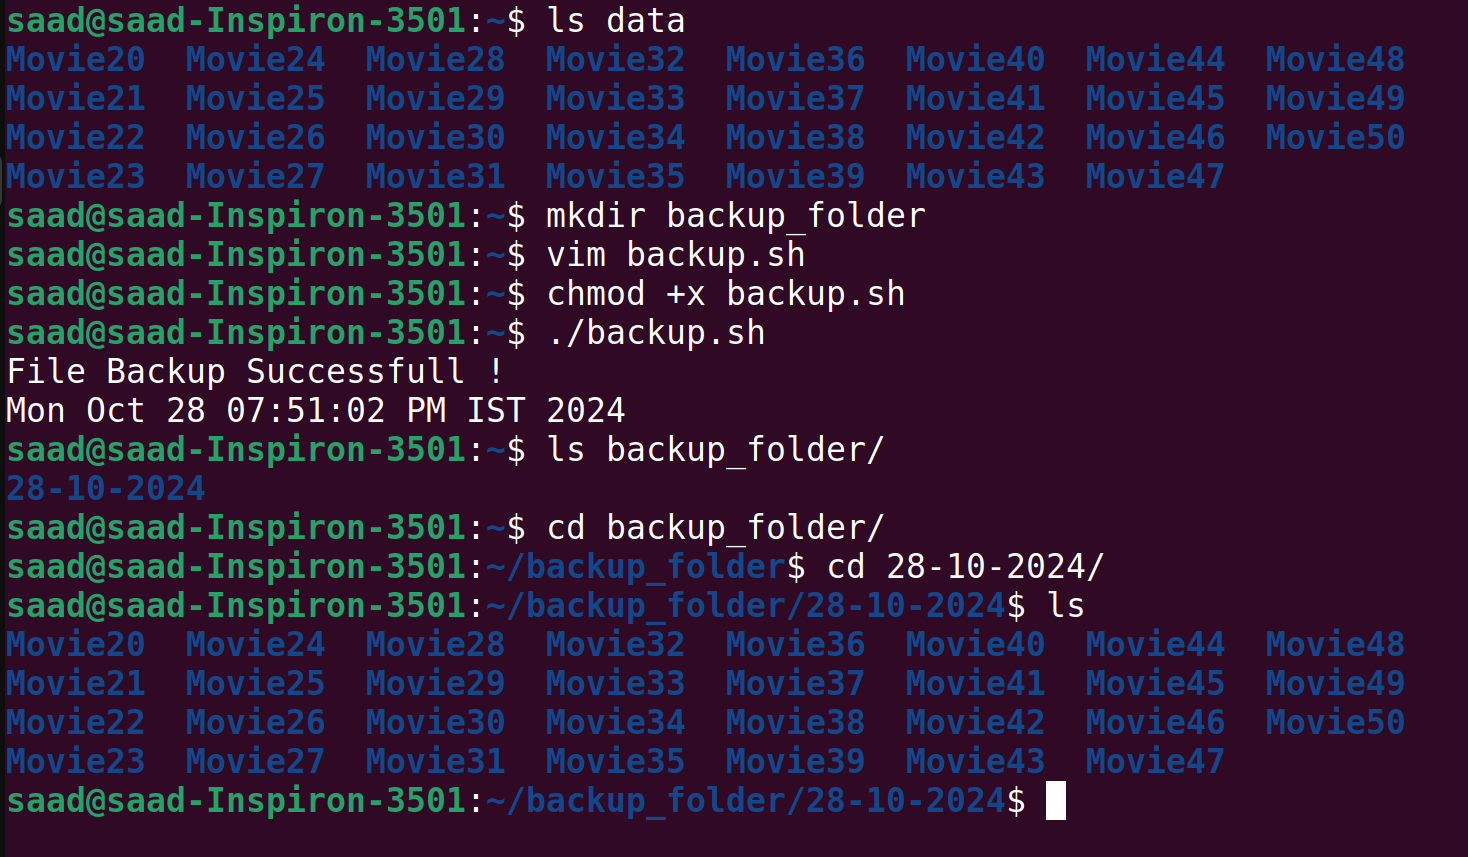
Now we can see that our backup is complete, and all the files are stored in the backup_folder.
Task 3 : Read About Cron and Crontab to Automate the Backup Script :
Solution :
What is Cron ? Cron is a tool that helps you schedule tasks to run automatically at specific times. It runs in the background to take care of these tasks for you.
What is Crontab ? Crontab is a file where you write down the tasks you want to schedule and when you want them to run. It’s like a planner for your automated jobs.
Crontab Syntax Overview :
[Minute] [Hour] [DayOfMonth] [Month] [DayOfWeek] [Command]
Examples :
If we want the task done every minute then we write
* * * * * [command]
If we want the task done every day at 4am (4)
0 4 * * * [command]
If we want the task done every sunday at 4pm (16)
0 16 * * 0 [command]
Lets make a demo crontab which will print every minute “Hello !” in text file
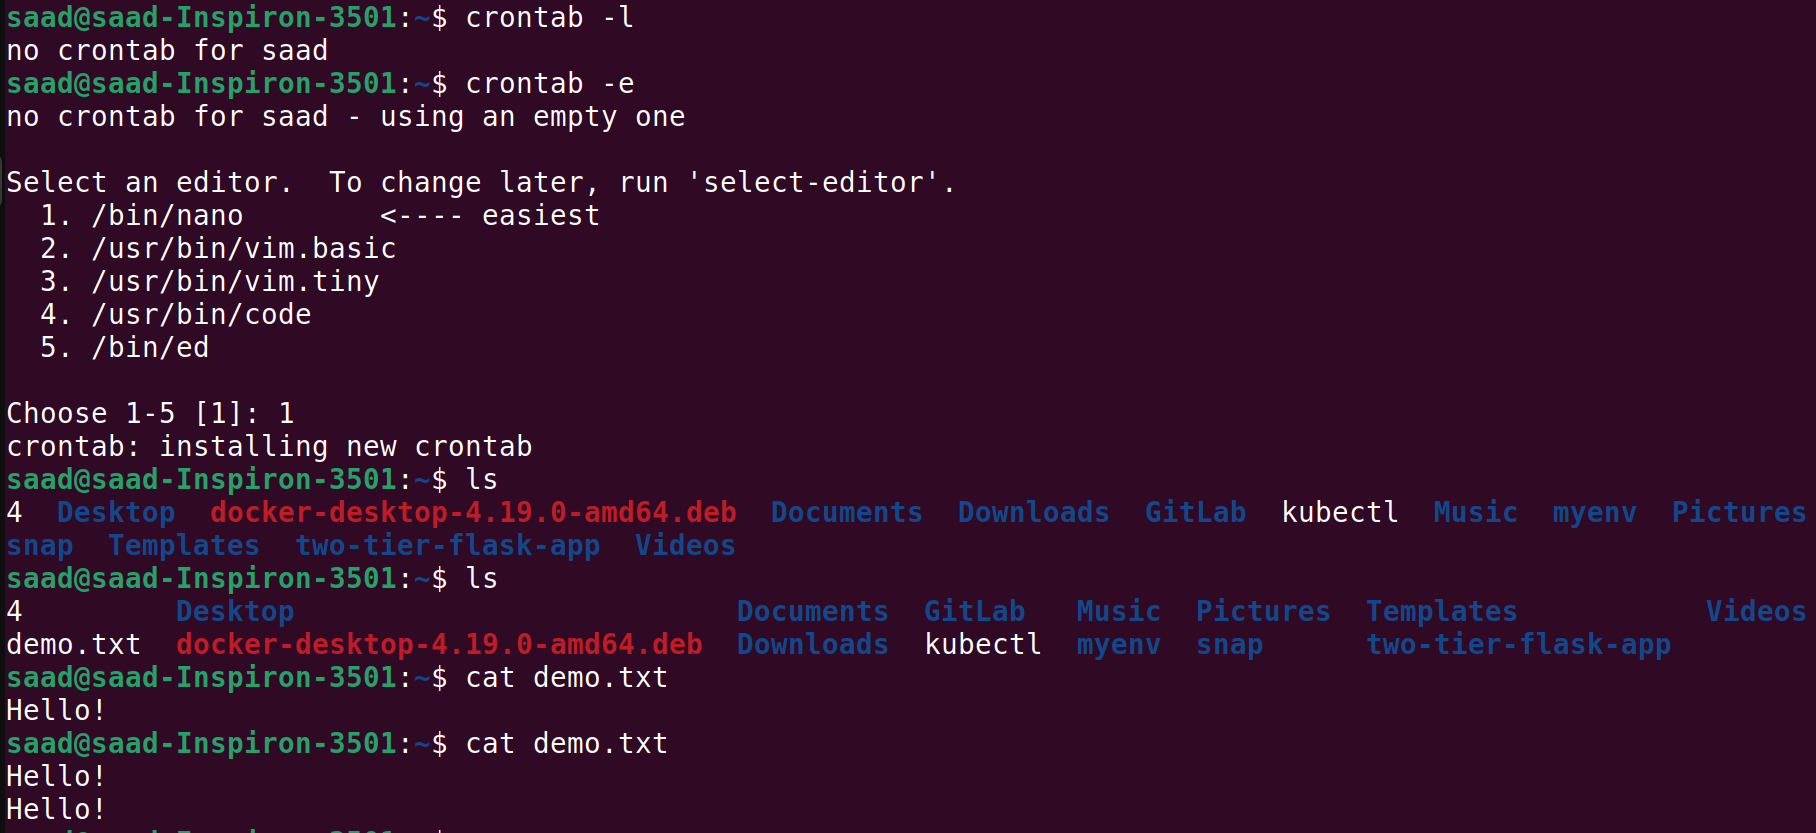
This is the interface you will see in crontab -e
To print every minute , we use * * * * * echo “Hello !” » [destination]
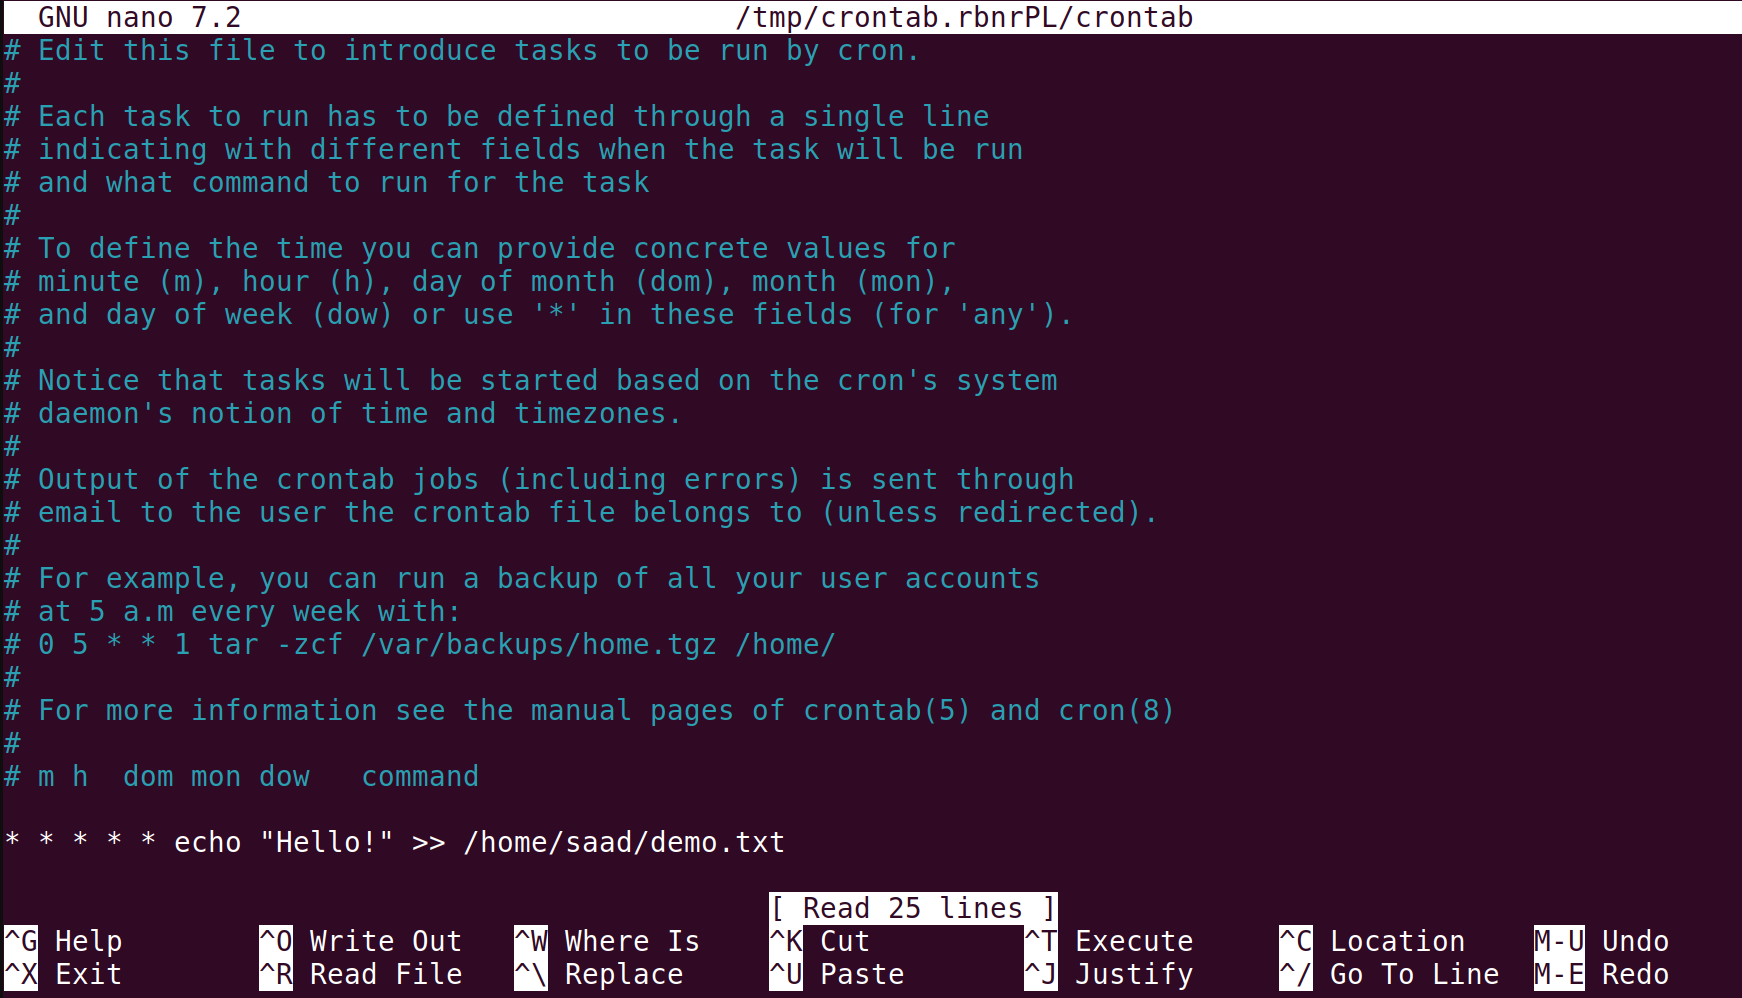
Explaination :
crontab -l: This command shows the list of current crontab entries.crontab -e: This command is used to create or edit a crontab file.After executing this command, it will ask you to choose which editor you want to work with (e.g., nano, vim, etc.).
Checking the Output:
After setting up a cron job, you can check the output by using
lsto see if the file is created.If the job is scheduled to run every minute, the file may not be displayed immediately due to the timing of the next execution.
After a minute, you can check again, and you should see the
demo.txtfile, which will contain "Hello!" printed every minute.
Task 4 : Read About User Management :
A user is an entity in a Linux operating system that can manipulate files and perform several other operations. Each user is assigned an ID that is unique within the system. IDs 0 to 999 are assigned to system users, and local user IDs start from 1000 onwards.
Create 2 users and display their usernames :
Solution :
To create user we write command sudo useradd user_name . I created 2 users
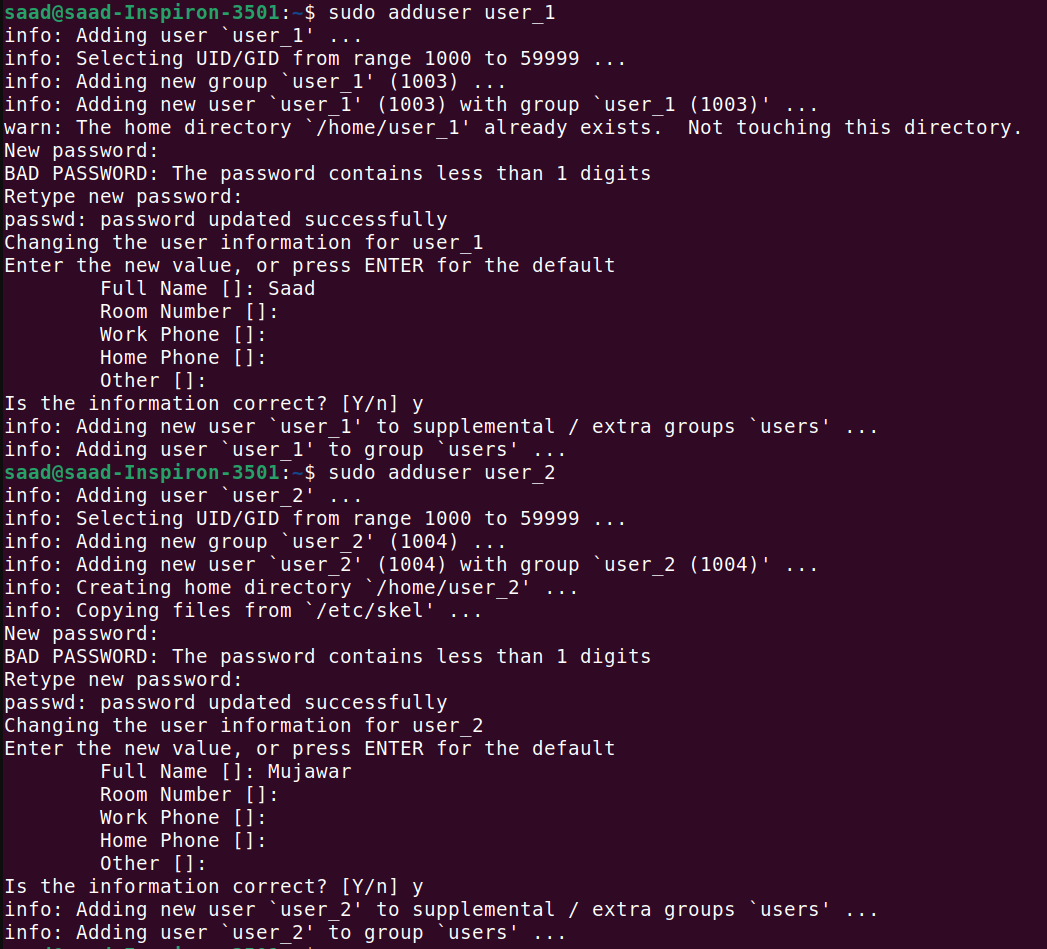
You can display the usernames of the created users by checking the /etc/passwd file or using the getent command:

Here we completed our todays task !
Follow and keep learning !
Subscribe to my newsletter
Read articles from Saad Asif Mujawar directly inside your inbox. Subscribe to the newsletter, and don't miss out.
Written by
Saad Asif Mujawar
Saad Asif Mujawar
Hi, I am Saad, an aspiring DevOps Engineer. My specialization and career interest lie in DevOps and Cloud Computing. I have a deep interest in automating post-development processes with innovative tools and methodologies. I'm always eager to explore and adopt new technologies in DevOps that can help streamline workflows and optimize performance.