User Registration with OTP verification
 Abishek Reddy
In this article we’ll learn how to perform user registration with OTP verification. This is a beginner level article but you need to have basic knowledge about django and django rest framework.
If you’re not aware those, you can refer following tutorials.
https://youtu.be/hw3Cttc9qZQ?si=OJJpu_kI48fLlwLG (django basics)
https://youtu.be/s7aINQPGNDM?si=zil3GG8Ve_-FZ8zs (django rest framework)
this article contains only backend part.
Let’s dive into the process.
There are 3 steps to follow.
Generate app password with your gmail account and store it in settings
create user app and user model.
create user serializers and end points for registration and verification of otp
Step 1:
If you have hostinger or aws account, you can skip this the 1st part of the step and simple add it’s credentials in settings file
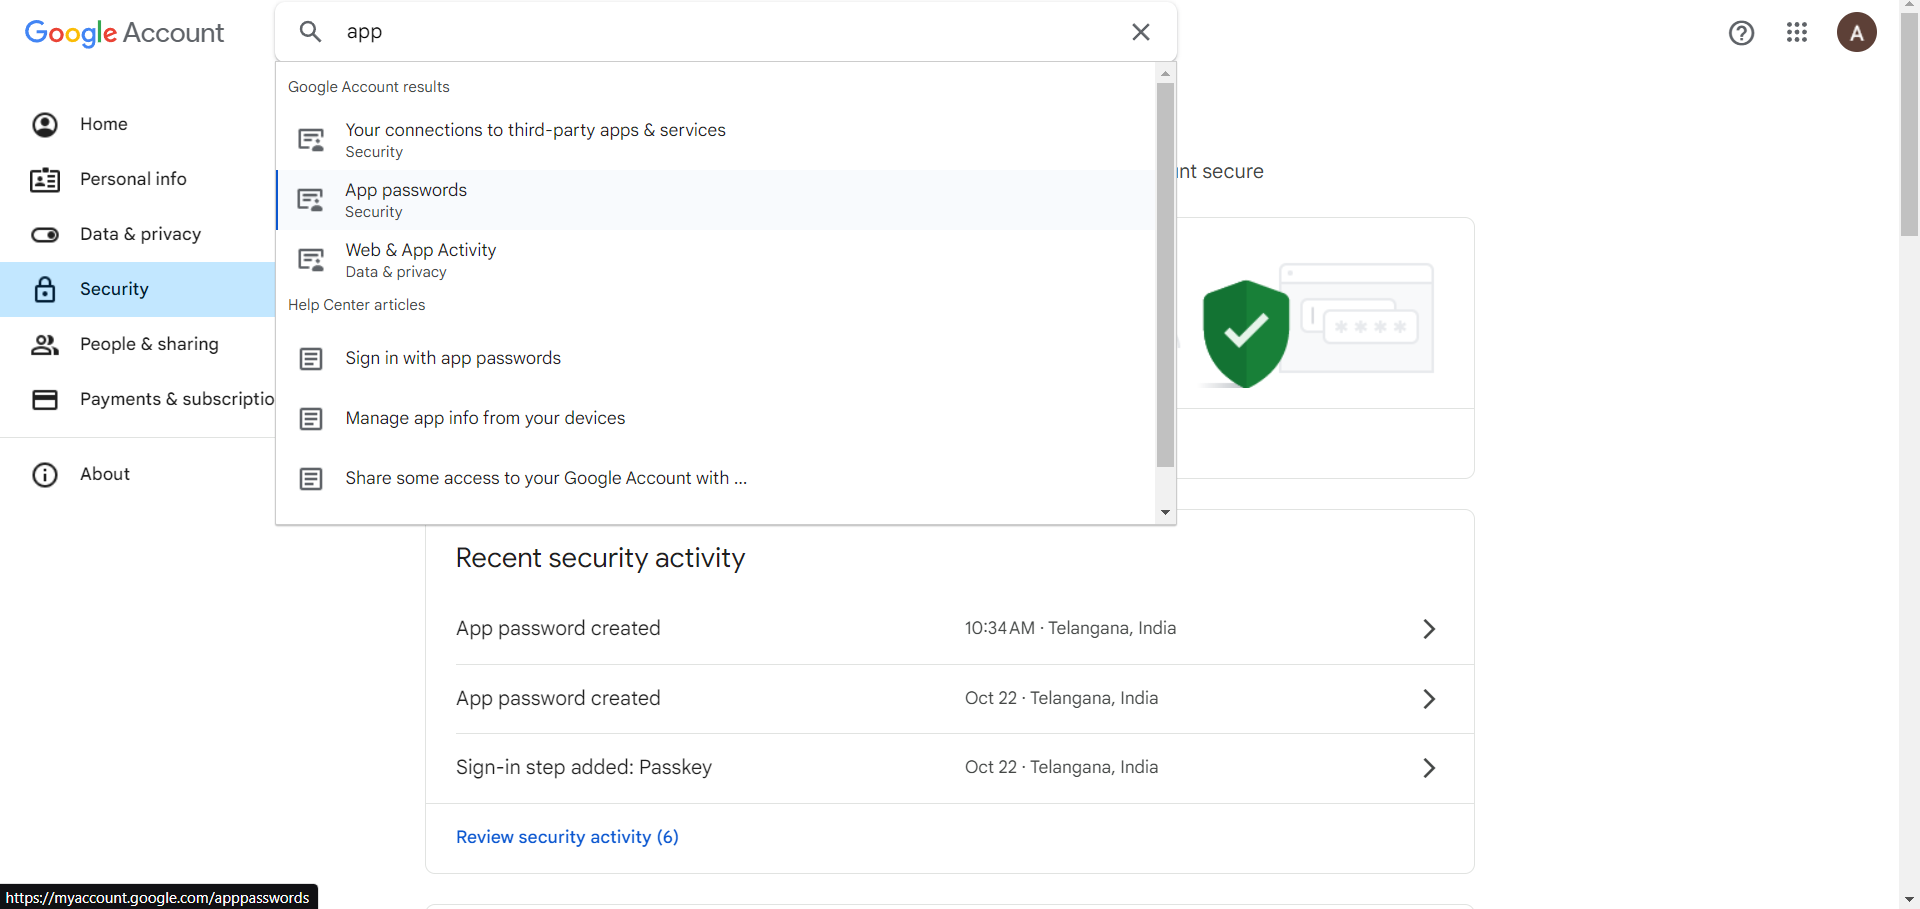
Visit google accounts and search for app passwords
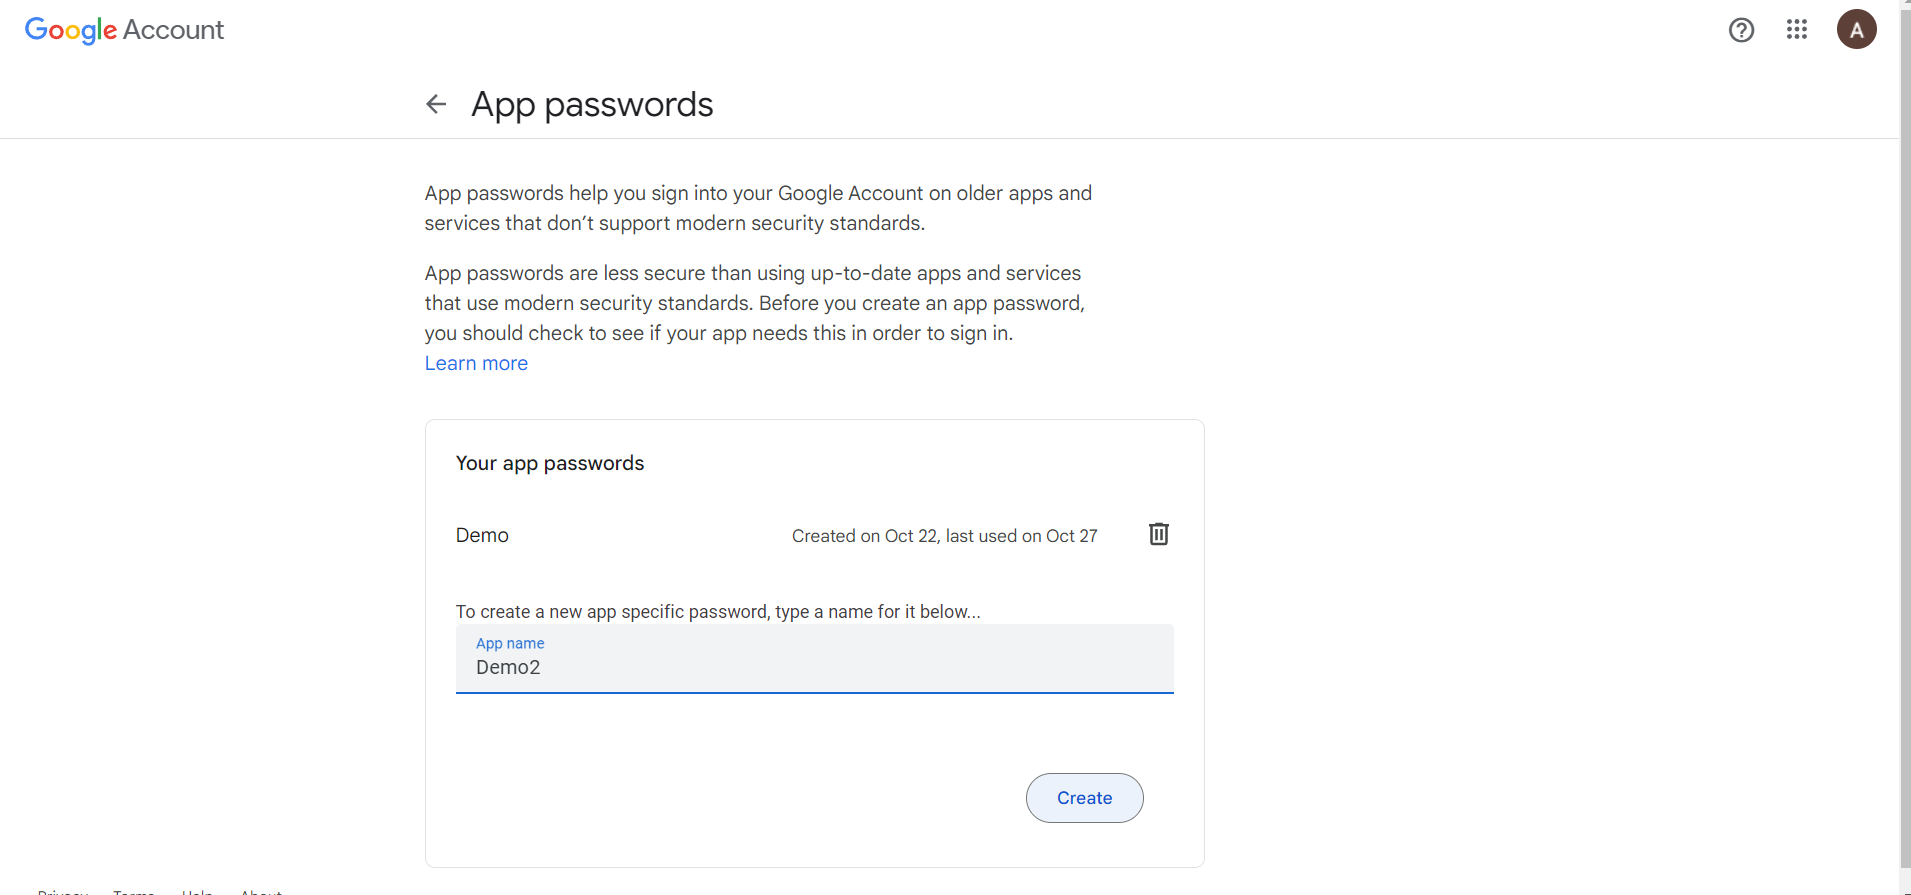
create a demo app
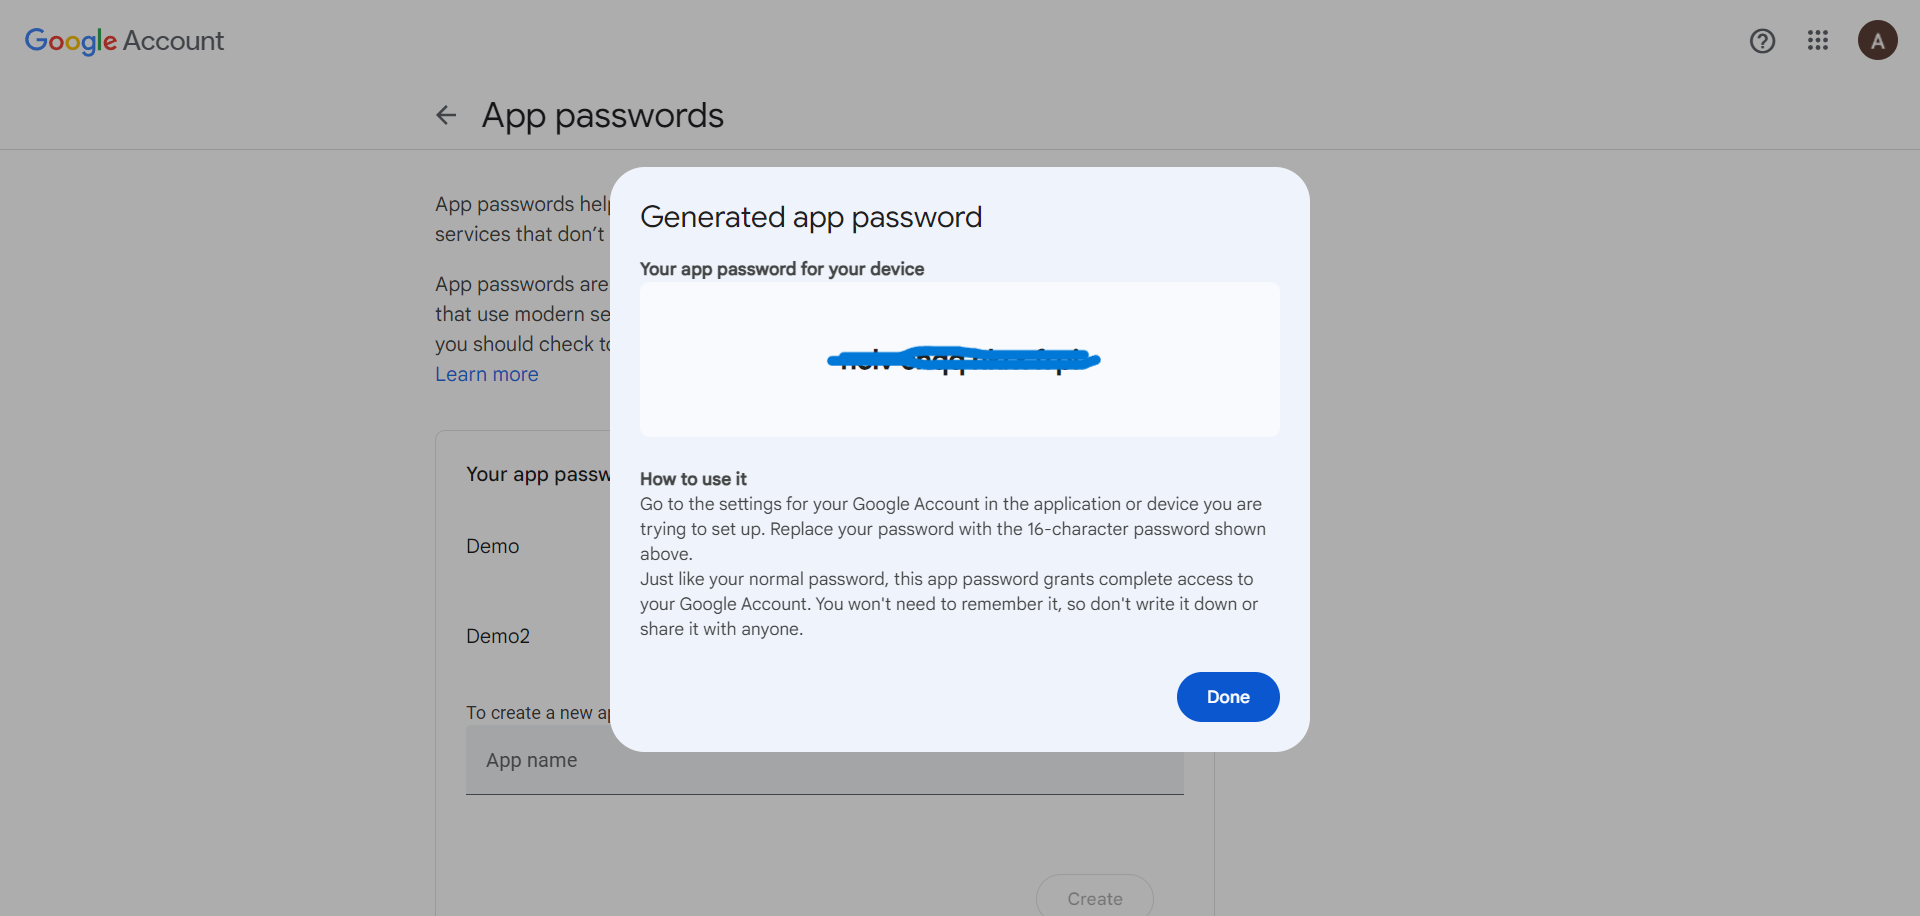
A password is generated
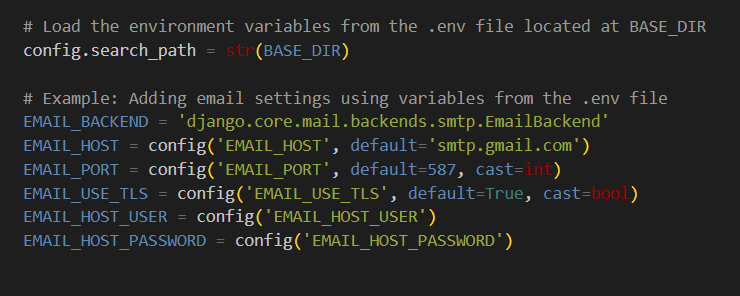
Add these credentials in settings.py
.env file

settings.py
Step 2:
Create User app, user model
create app using “python manage.py startapp users”. include the app in included apps in settings.py.
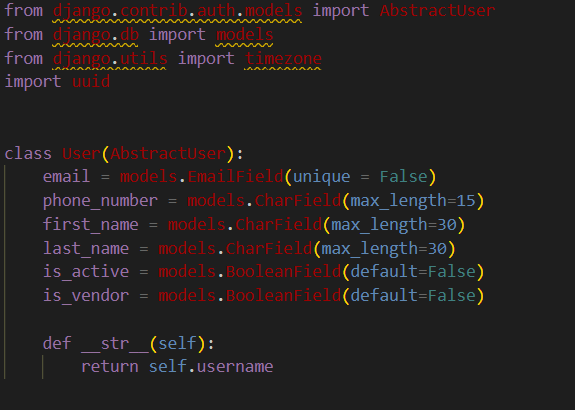
create user model by inheriting AbstractUser
create userprofile with user as onetoone field and otp as one of the field
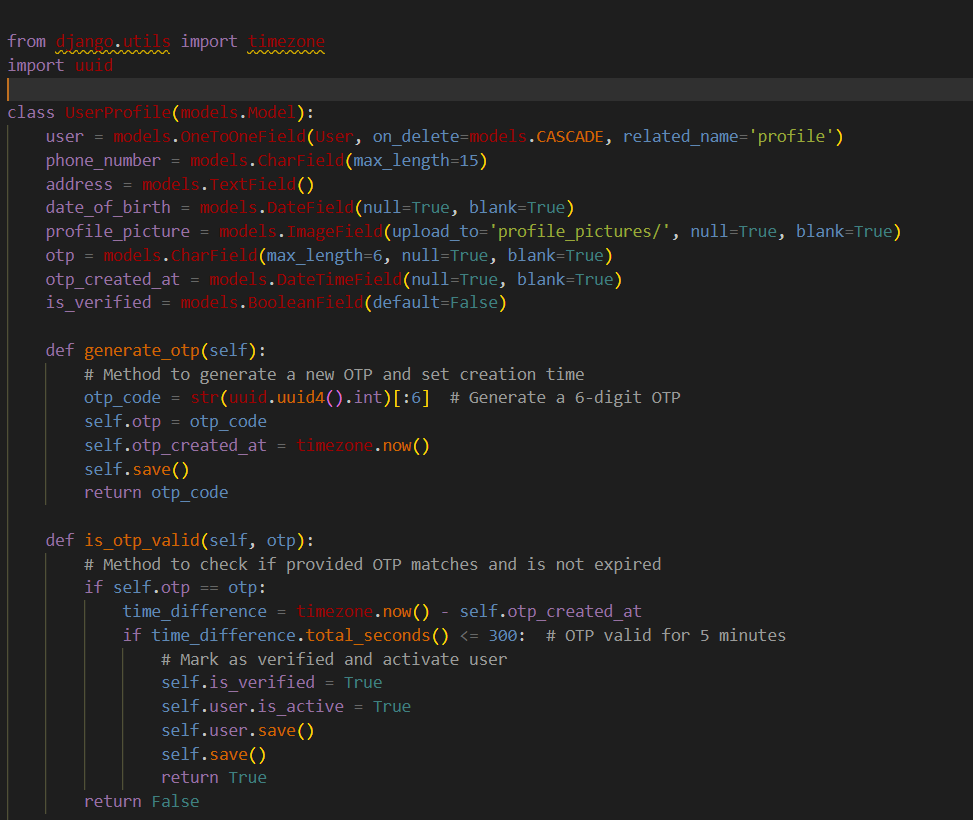
generate_otp function is to generate otp for user and is_otp_valid function is to verify the otp
Step 3: create serializers and end points
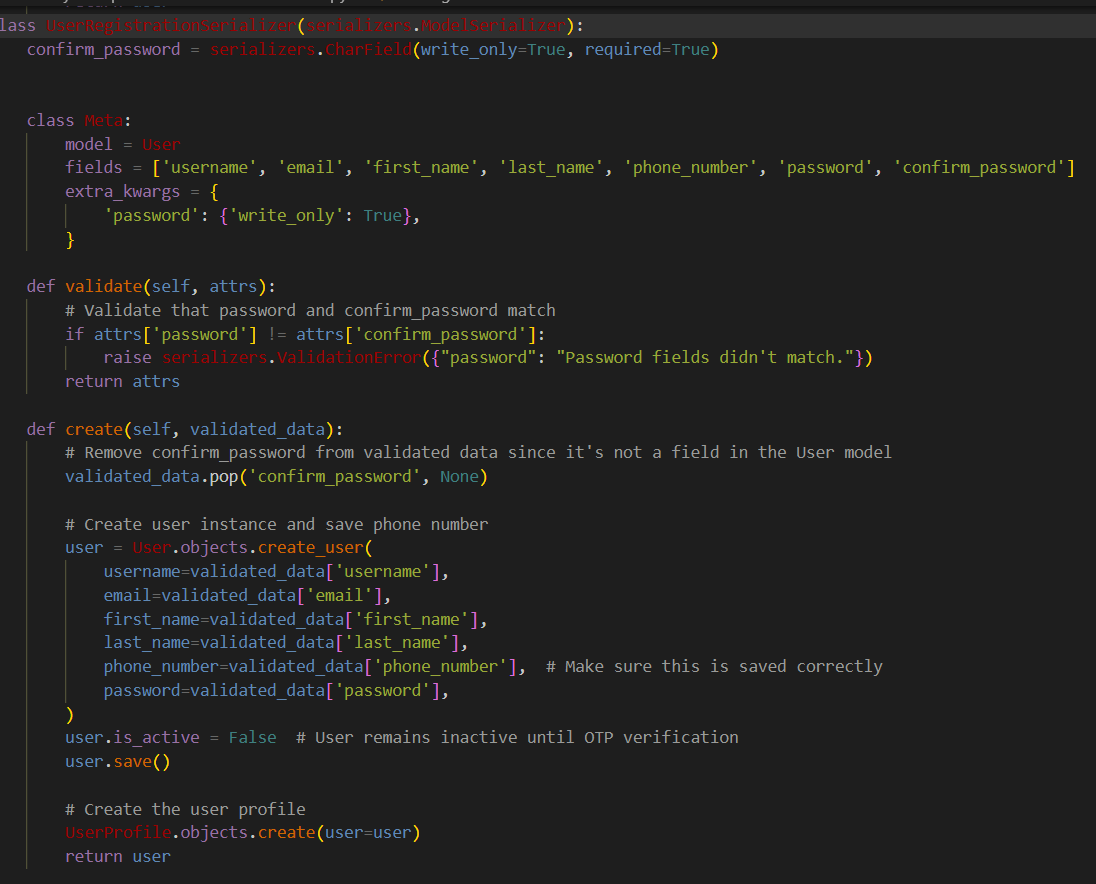
Confirm Password Validation: The serializer checks if
passwordandconfirm_passwordmatch. If not, it raises an error to ensure users provide consistent password inputs.User Creation:
When a new user is registered, this serializer creates a user instance.
The
phone_numberis also saved, ensuring that it's a part of the user data.The user's status is set to inactive initially to ensure OTP verification before activation.
User Profile Creation: After the user is created, a linked
UserProfileis also created to store additional user details.
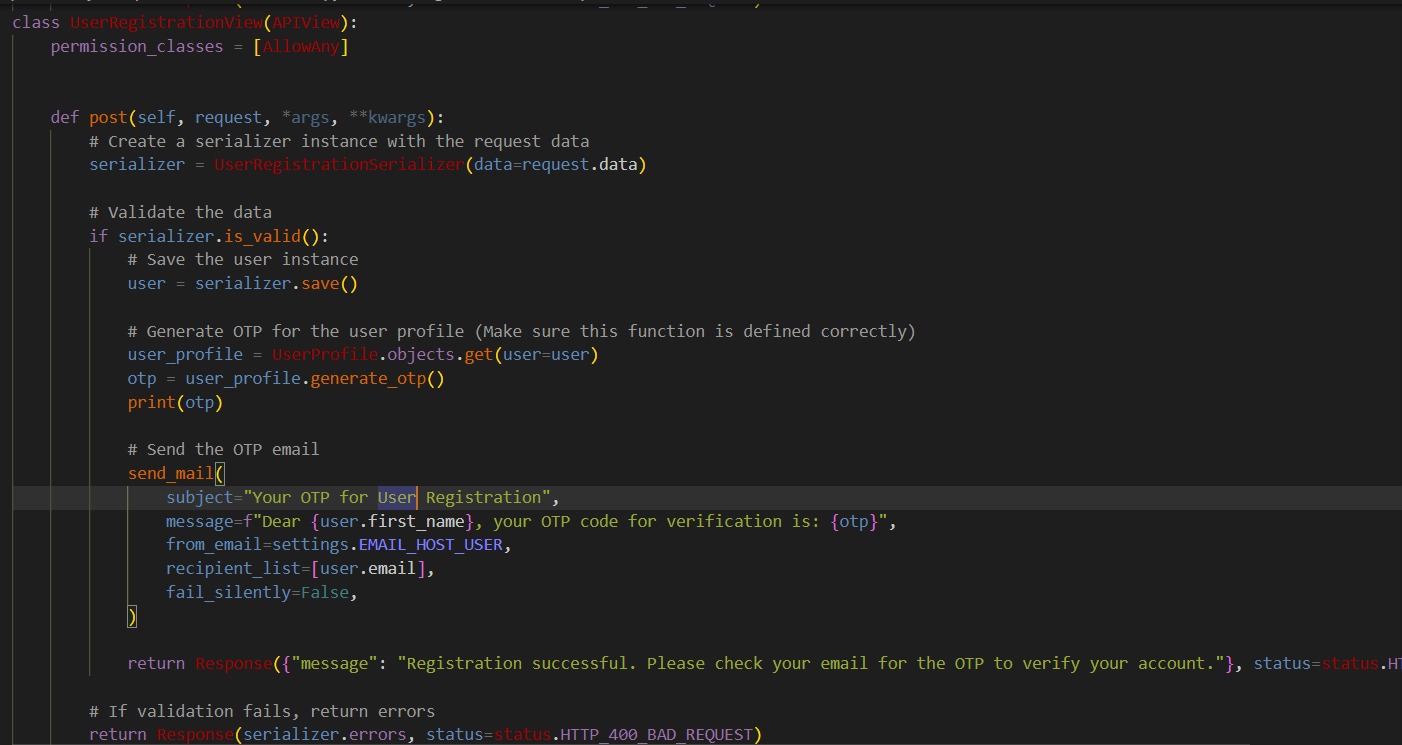
UserRegistrationView
Serializer Integration:
The view creates an instance of the
UserRegistrationSerializerand passes the request data for validation.If valid, the serializer saves the user and sets them as inactive until the OTP is verified.
OTP Generation:
- After the user is saved, the code retrieves the user's profile and generates an OTP using a custom method,
generate_otp().
- After the user is saved, the code retrieves the user's profile and generates an OTP using a custom method,
Email OTP Sending:
The OTP is sent via email using Django’s
send_mail()function, ensuring that the user receives it to verify their account.The email contains a simple message with the OTP, prompting the user to complete their verification.
Response Handling:
If the registration is successful, a confirmation message is returned, instructing the user to verify their account using the OTP.
In case of validation errors, the response returns the specific errors, ensuring transparency.
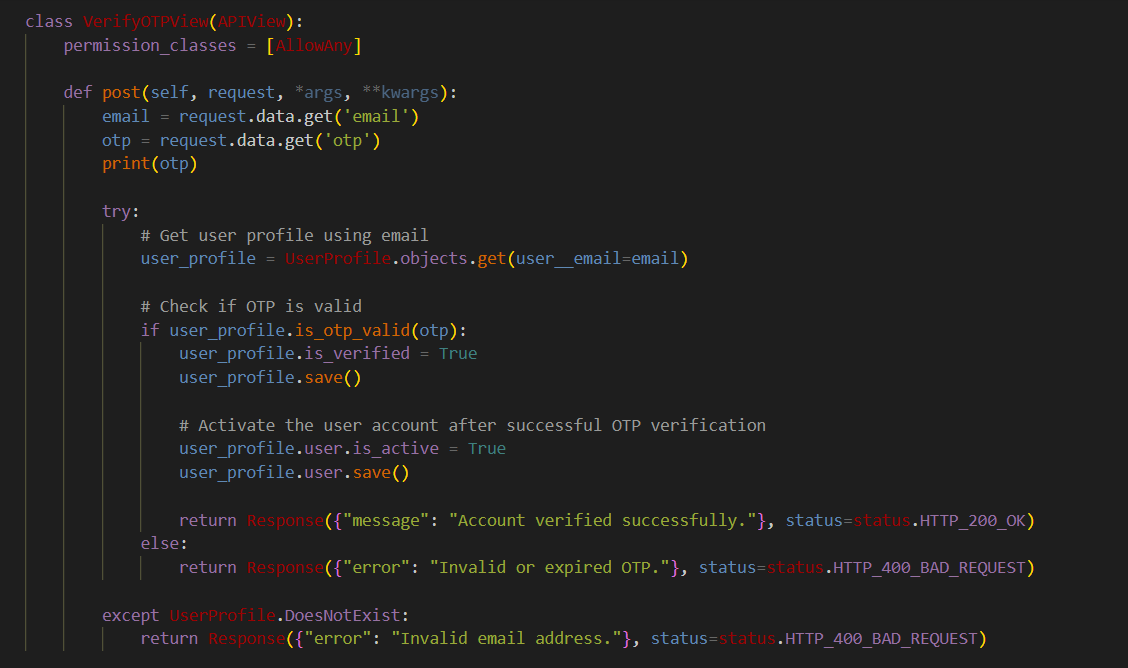
Extracting Data:
- It extracts the
emailandotpfrom the request data to verify the user.
- It extracts the
Finding User Profile:
- The code retrieves the user's profile based on the email provided.
OTP Validation:
It checks if the provided OTP matches the stored OTP using a method,
is_otp_valid(otp).If the OTP is valid, the user's profile is marked as verified, and the user account is activated by setting
is_activetoTrue.
Handling Responses:
If verification is successful, it returns a success message.
If the OTP is invalid or expired, it returns an error response.
If the email is not found, it also returns an error indicating that the email is invalid.
Add these paths in url.py in user App. and don’t forget include user.urls in main project’s urls file.

Now the process runs smoothly as followed,
run the server and send a post request to http://127.0.0.1:8000/api/users/register/ with necessary details of a user
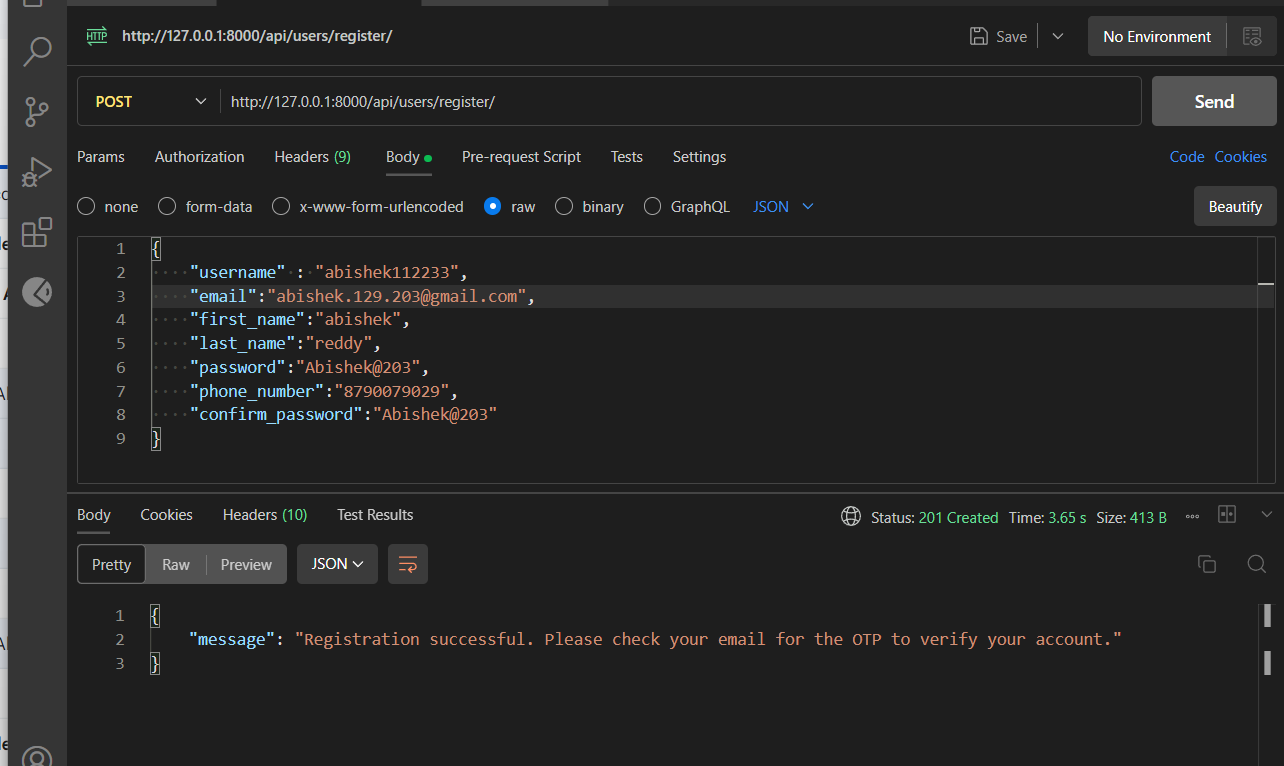
OTP will be sent to the email mentioned in post request.

Send a post request with your mail id and otp to http://127.0.0.1:8000/api/users/verify-otp/
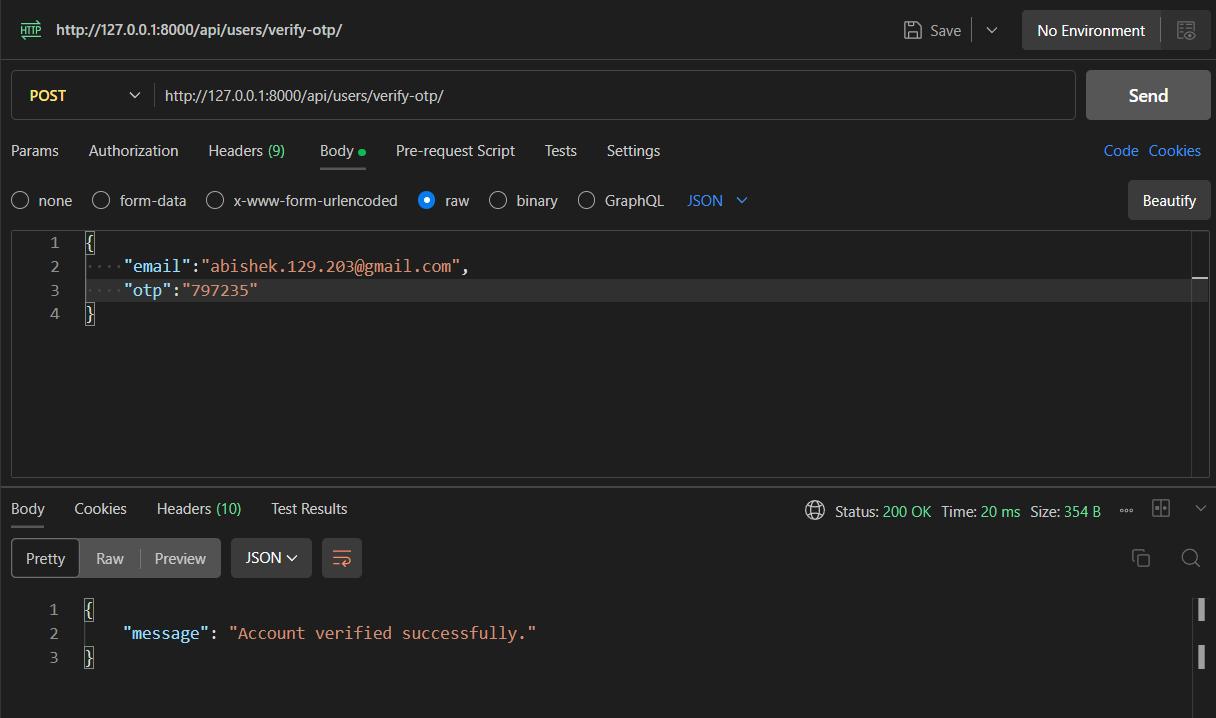
Now the account is registered and verified successfully.
In the next blog, we’ll learn how to implement user logins with simple jwt.
Subscribe to my newsletter
Read articles from Abishek Reddy directly inside your inbox. Subscribe to the newsletter, and don't miss out.
Written by
