Install and run Laravel application on a remote server (Part C)
 JIMOH Mofoluwasho Kolawole
This is the final part of our three-part tutorial on installing your Laravel application on a remote server. In Part A, we covered setting up a Linux server using a DigitalOcean droplet (you can also use an AWS EC2 instance for this). Part B focused on installing PHP, Nginx and Composer. Now, in this concluding section, we'll wrap up the tutorial series.
In this final part, I'll guide you through setting up your database and configuring your Nginx server, among other things, to get your application running. To complete the installation, follow these steps:
1. Install MySQL Most applications these days persist data. Yours will probably not be an exception. You will need to store, modify and retrieve data in your application. For this, you need a database. I will be using MySQL for this tutorial. Mysql is a powerful and popular database used in various applications. To install this database, run the commands below.
sudo apt update
sudo apt install mysql-server

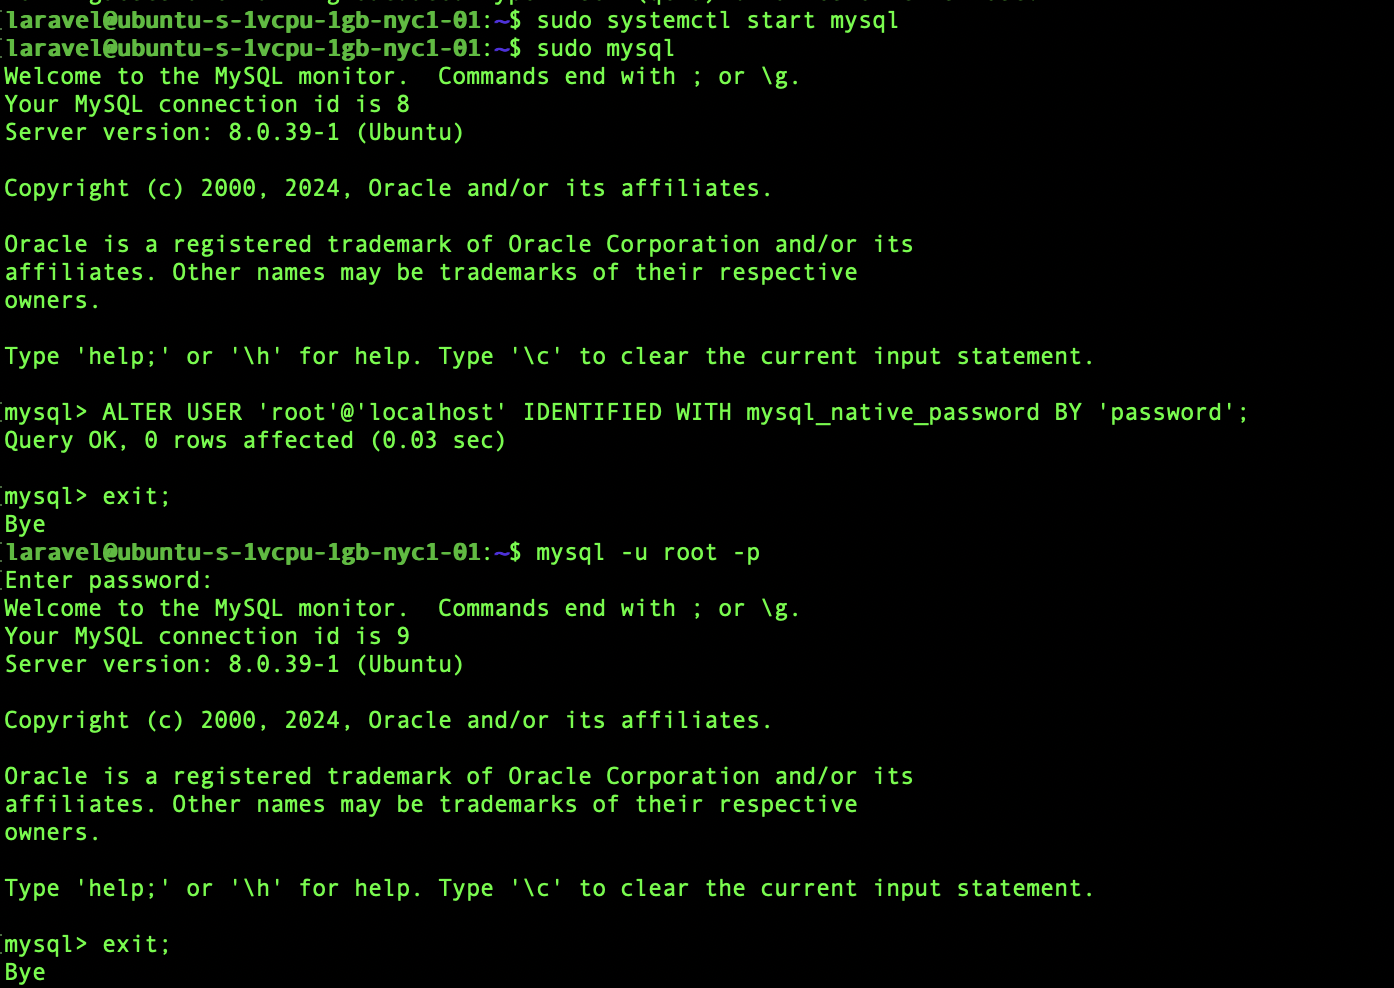
To start the MySQL server, run:
sudo systemctl start mysql
sudo mysql
This command will open the MySQL client (interactive shell) with administrative (root) privileges.
ALTER USER 'root'@'localhost' IDENTIFIED WITH mysql_native_password BY 'password';
The command above changes the authentication method for the root user to mysql_native_password and sets the password to “password”. Ensure to make use of a more secure password when setting up your MySQL user.
exit
mysql -u root -p
You can use this command to access the MySQL server. The -u flag shows you want to log in as the root user, while the -p flag shows that you want to login using your password (which you setup above) . If the login is successful, you will then be taken to the MySQL prompt where you can execute queries.
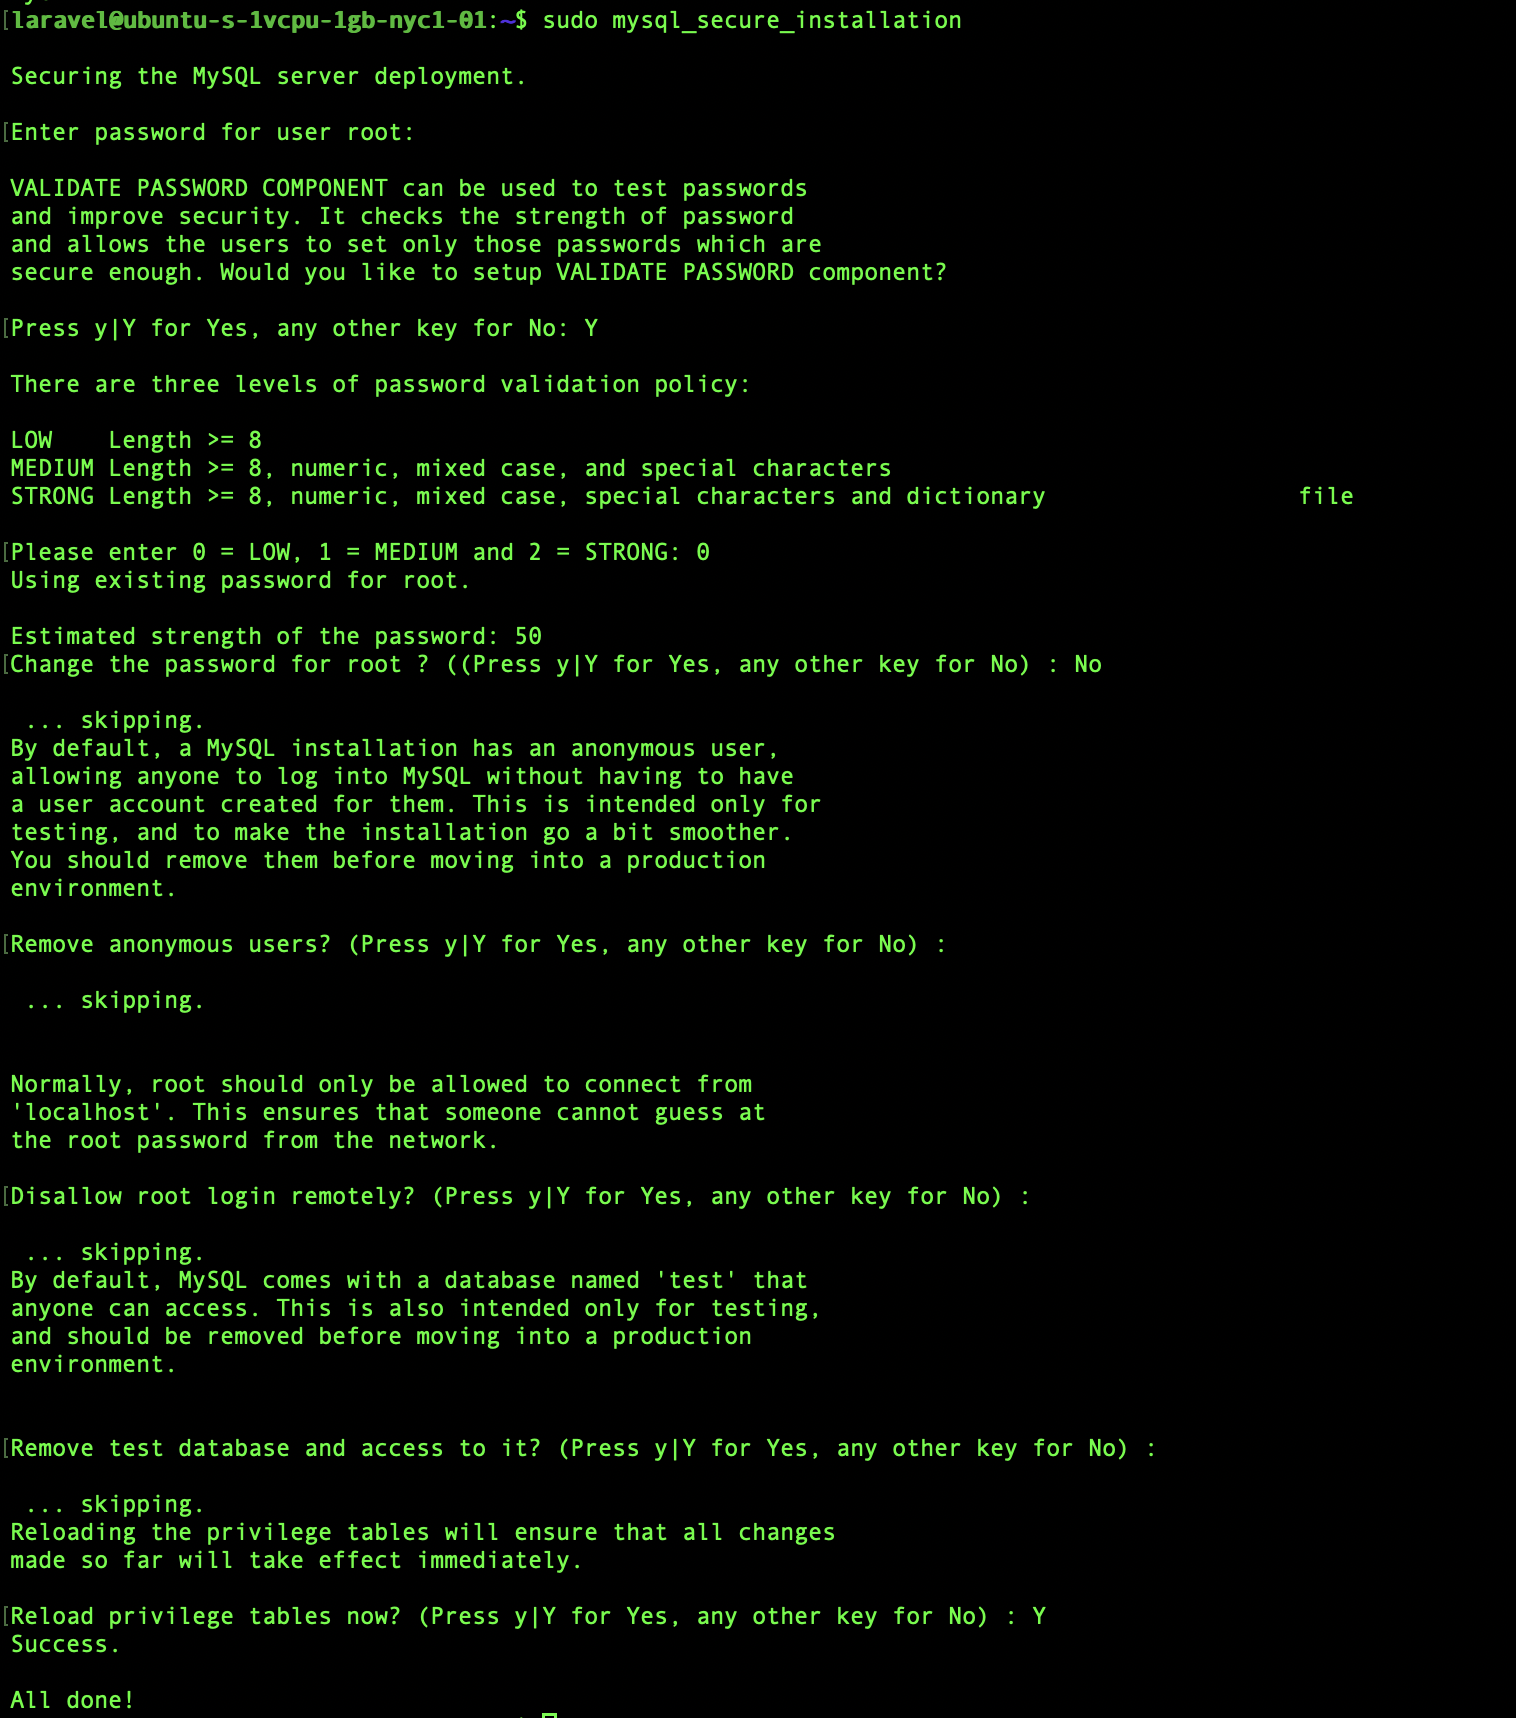
sudo mysql_secure_installation
This command is used to improve the security of a MySQL installation.
2. Configure MySQL
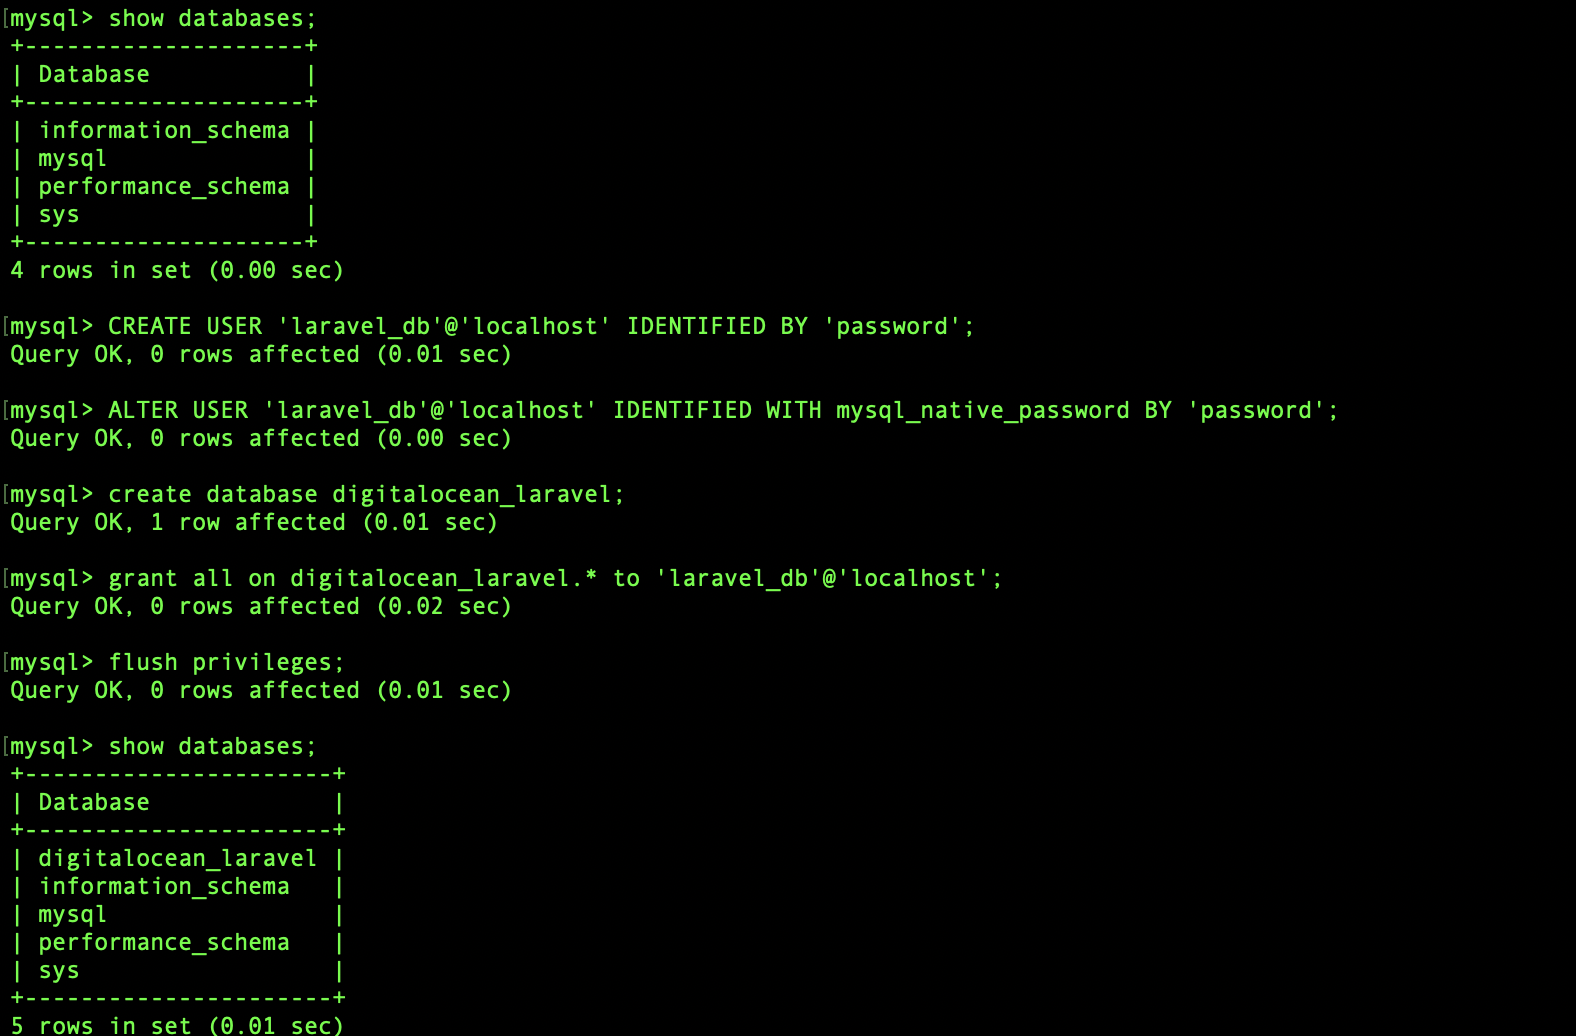
After installing your MySQL database, You need to set it up. To set it up, run the following commands:
sudo mysql -u root -p
CREATE USER 'laravel_db'@'localhost' IDENTIFIED BY 'password';
Create a ‘laravel_db’ user who will authenticate with the password ‘password’
ALTER USER 'laravel_db'@'localhost' IDENTIFIED WITH mysql_native_password BY 'password';
Update the ‘laravel_db’ user’s authentication method to mysql_native_password. This will allow the MySQL server to authenticate properly with your Laravel application
CREATE DATABASE digitalocean_laravel;
This will help create a new database called “digitalocean_laravel”
GRANT ALL ON digitalocean_laravel.* to 'laravel_db'@'localhost';
This command will give the “laravel_db” user full access to all tables within the “digitalocean_laravel” database
FLUSH PRIVILEGES;
This ensures all changes are recognised by the MySQL server without restarting. This is a good practice
3. Clone repository / Create Laravel application
If you type the IP address of the droplet (server) on your browser and press enter, you will be served with the page below:
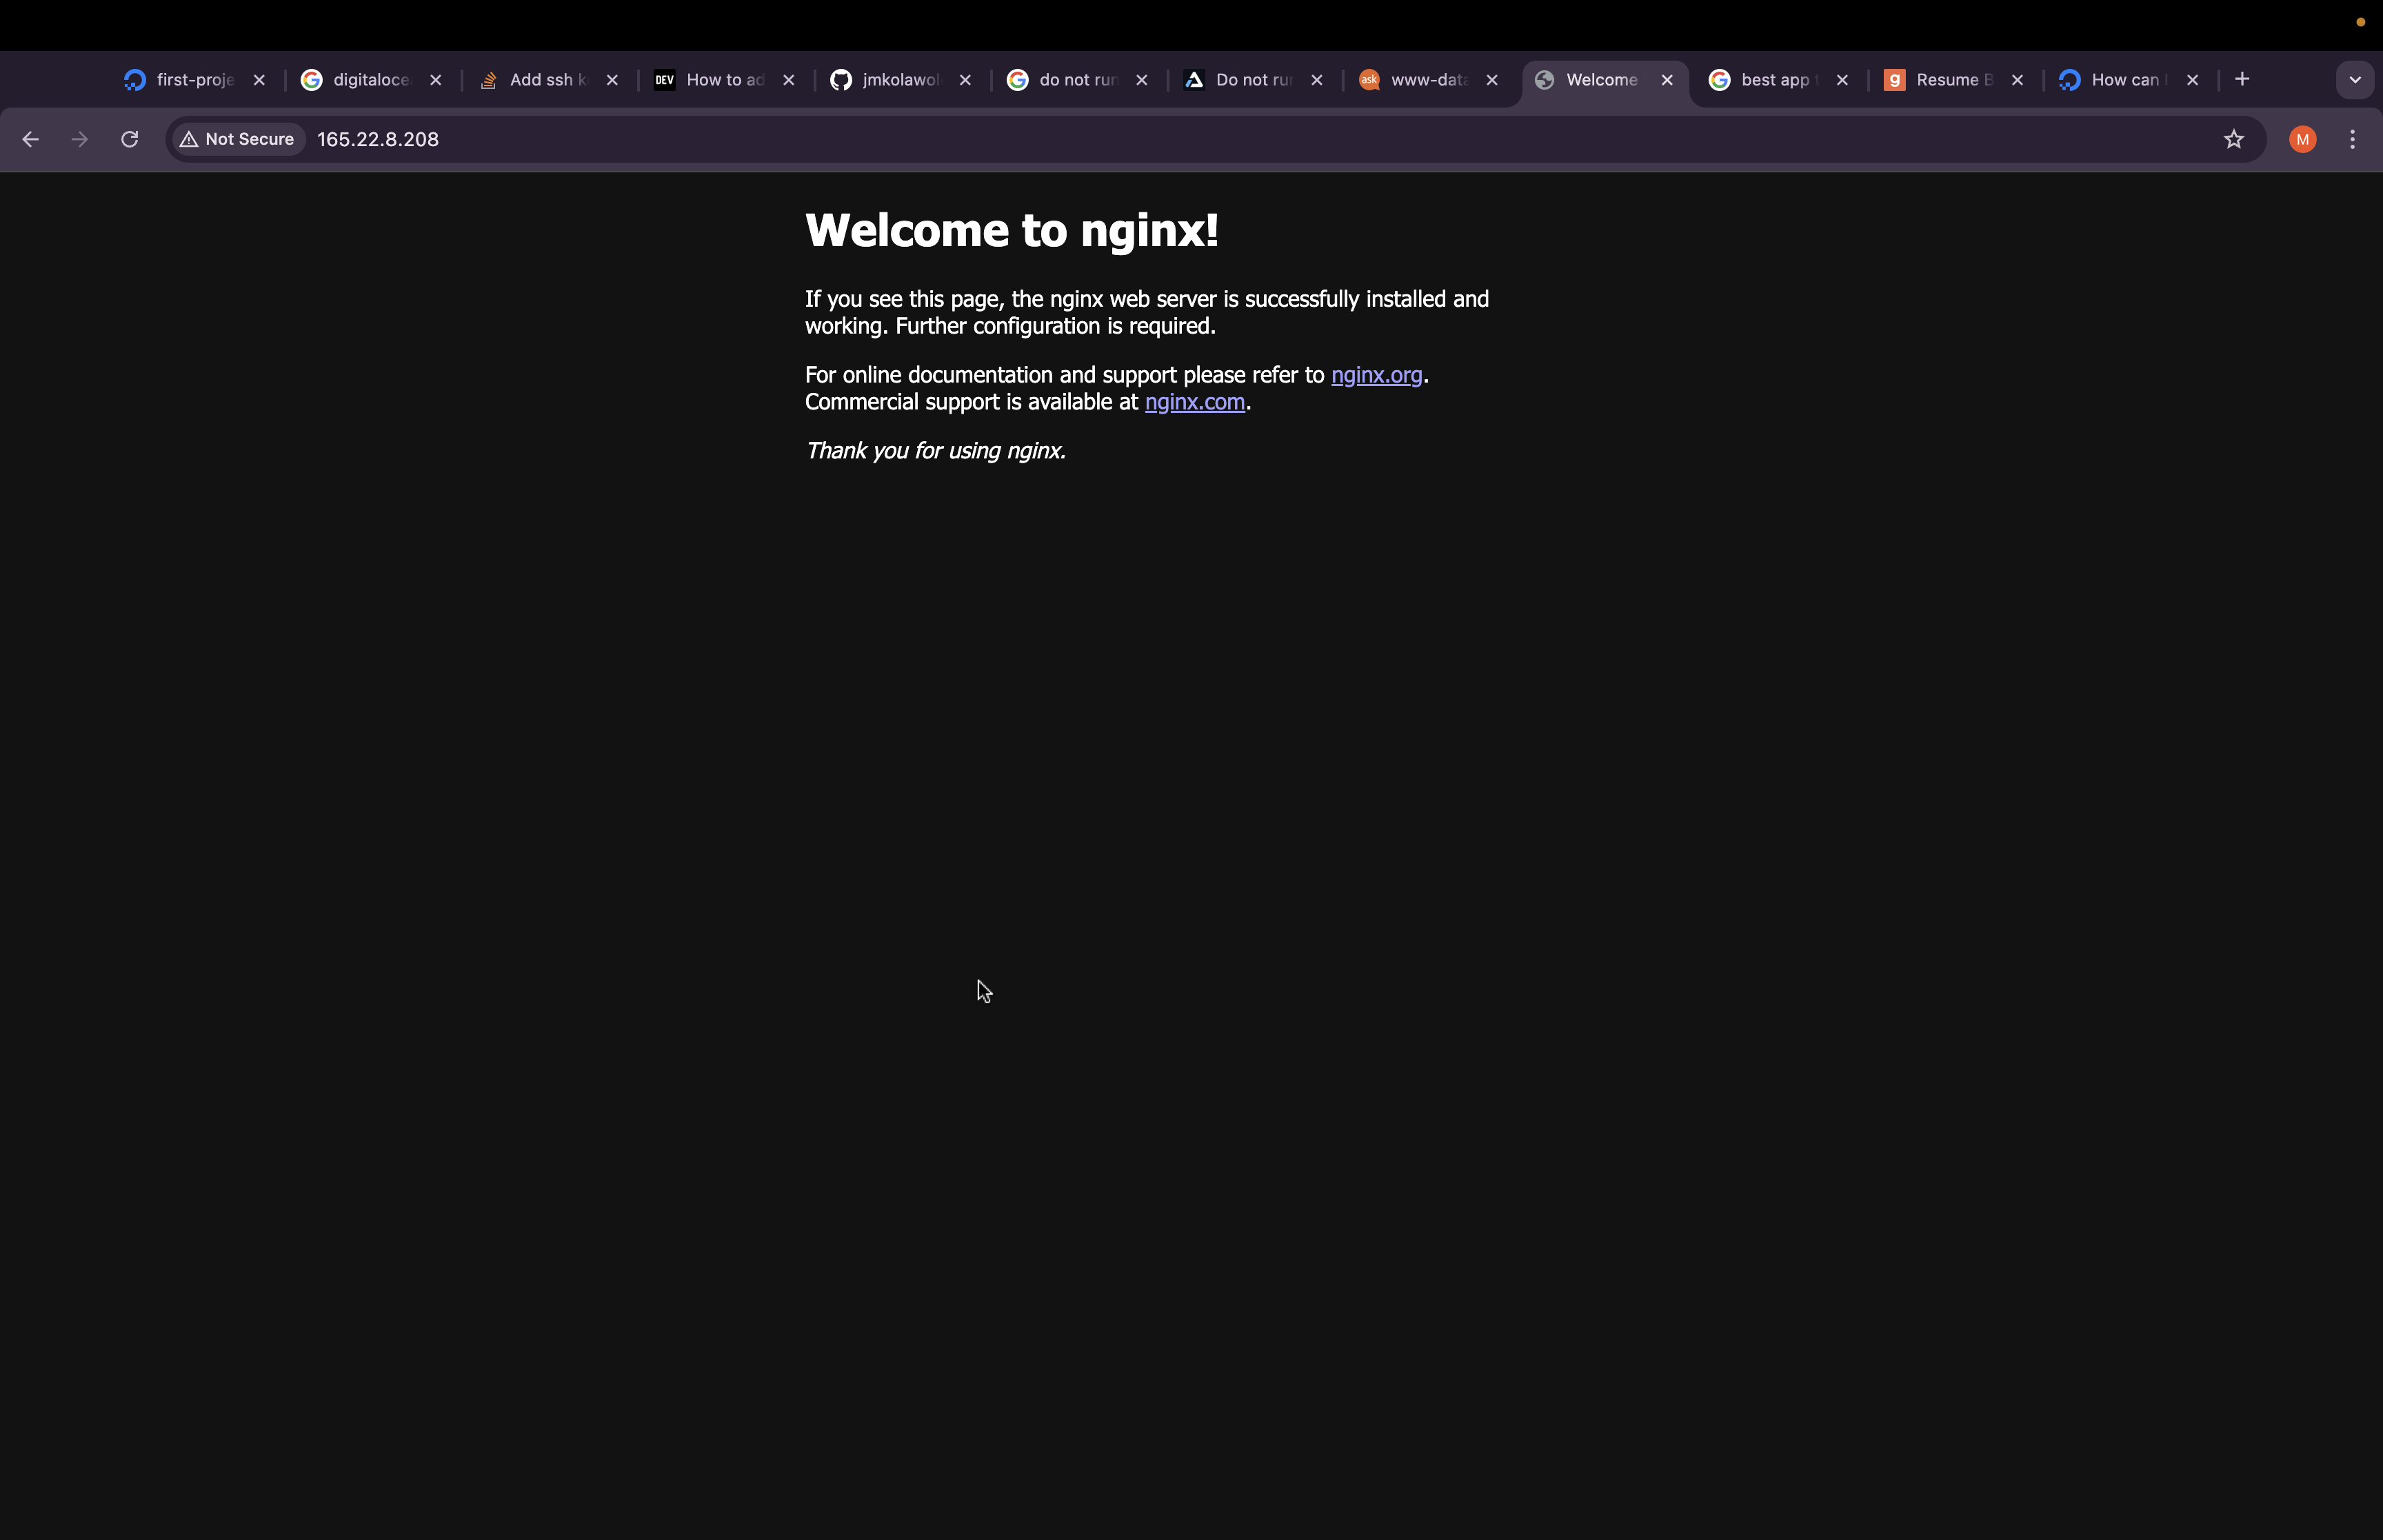
This confirms that your Nginx server has been successfully installed and is running. However, the goal of this tutorial is to help you install and run your Laravel application on the server, not to see the default "Welcome to Nginx" page. Now, it's time to place your actual Laravel application on the server. You can either clone an existing application from a repository from a version control platform such as GitHub or Bitbucket, or create a new Laravel project from scratch. For this tutorial, I’ll use an existing application hosted on GitHub.
Note: Make sure the Github repository is a public one. (At a more advanced or professional level, I will advice you to make your repository private. For private repositories, you can still clone the projects, but you have to authenticate with ssh etc, which is beyond the scope of this tutorial).
In linux based systems, the /var/www directory is usually used to store web application files. To clone the Laravel application, cd (change directory) to that folder with the command:cd /var/www. Once in that directory, write the command:git clone https://github.com/jmkolawole/digitalocean-laravel.git

4. Give user permission to the current directory
After cloning the project, cd into the project directory using the command:cd {project_directory} which is cd digitalocean-laravel in our own case.
When in the directory, run the command:
sudo chown laravel ./
The ownership of the current directory and all its content will be changed to user “laravel” (which we created earlier).
This is crucial because it allows us to run Composer commands within this directory without using root privileges, which helps avoid potential security risks.
5. Install Composer Packages
To install composer packages, cd into the project directory and run the command below:
composer install --ignore-platform-reqs
6. Modify php.ini file.
Open the file and enable the pdo_mysql extension if it isn’t enabled by default.
sudo nano /etc/php/8.3/fpm/php.ini
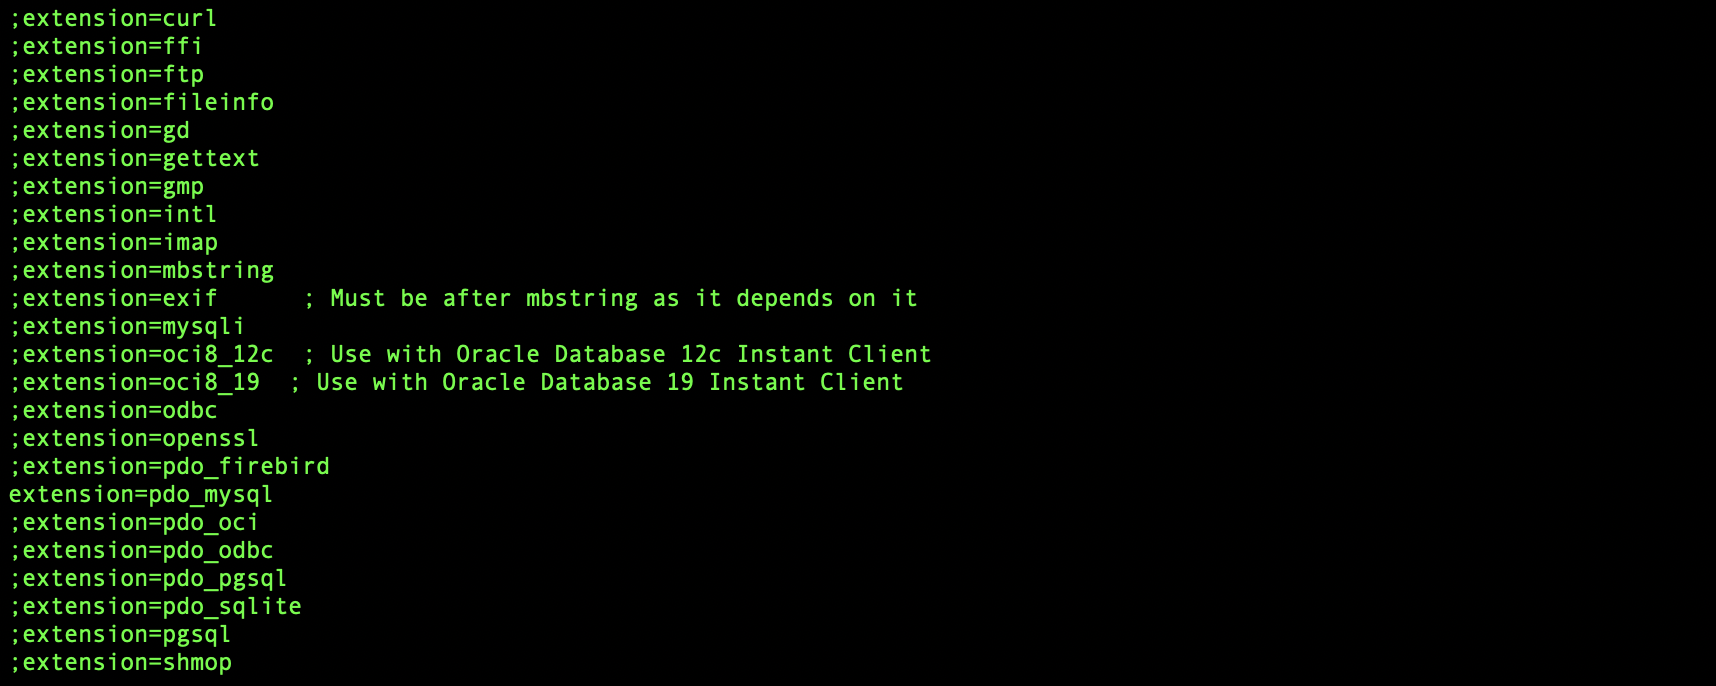
Restart fpm.sudo systemctl restart php8.3-fpm.service
7. Configure Nginx
Next, you need to create a configuration file for your application in Nginx. This will determine how Nginx will serve your Laravel application.
To do this, run the command below:
Create configuration filesudo nano /etc/nginx/sites-available/laravelApp
Update the file with the code below:server {
listen 80;
server_name server_domain_or_IP;
root /var/www/travellist/public;
add_header X-Frame-Options "SAMEORIGIN";
add_header X-XSS-Protection "1; mode=block";
add_header X-Content-Type-Options "nosniff";
index index.html index.htm index.php;
charset utf-8;
location / {
try_files $uri $uri/ /index.php?$query_string;
}
location = /favicon.ico { access_log off; log_not_found off; }
location = /robots.txt { access_log off; log_not_found off; }
error_page 404 /index.php;
location ~ \.php$ {
fastcgi_pass unix:/var/run/php/php7.4-fpm.sock;
fastcgi_index index.php;
fastcgi_param SCRIPT_FILENAME $realpath_root$fastcgi_script_name;
include fastcgi_params;
}
location ~ /\.(?!well-known).* {
deny all;
}
}
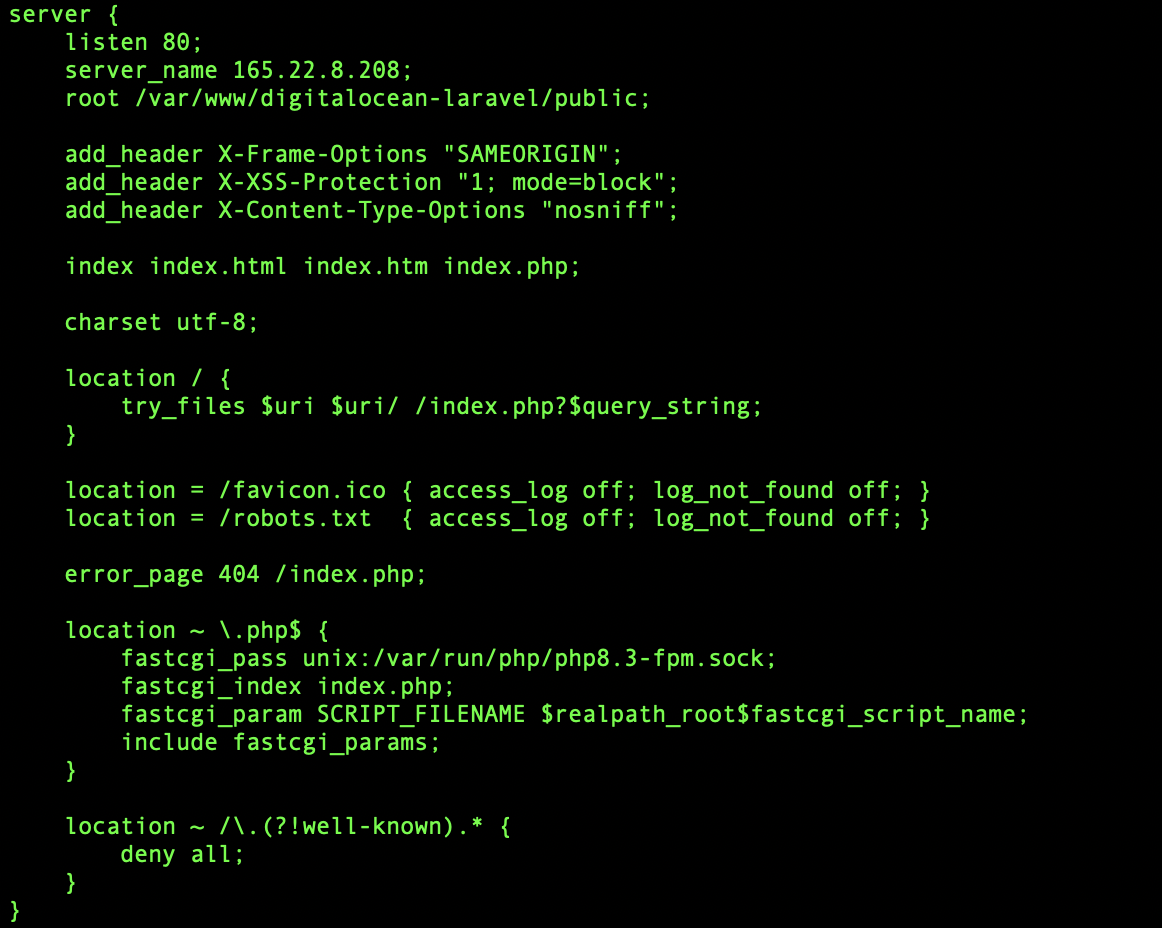
After editing, press CTRL O, Enter and CTRL X to exit the nano editor.
Create symbolic linksudo ln -s /etc/nginx/sites-available/laravelApp /etc/nginx/sites-enabled/laravelApp
The command above creates a symbolic link (shortcut) from the sites-available directory to the sites-enabled directory for the Nginx configuration of your Laravel application.
Test connection
sudo nginx -t
The command will test the Nginx configuration for syntax errors.

Restart nginxsudo service nginx restart
8. Add your user in the www-data group
Note: this action require you to logout and login again using exit and then su -laravel. (Remember, laravel is the name of the user)
sudo usermod -a -G www-data `whoami`
Give the right permissions to /var/www using the commands:
sudo chown root:root /var/www
and
sudo chmod 755 /var/www/
Give these permissions to your project using the commands:
sudo chown -R www-data:www-data /var/www/<project>
sudo chmod -R 774 /var/www/<project>
In our case:
sudo chown -R www-data:www-data /var/www/digitalocean-laravel
sudo chmod -R 774 /var/www/digitalocean-laravel

9. Change ownership
sudo chown -R www-data:www-data storage
This ensures that the web server has the necessary permissions to read and write to the storage directory. This allows the application to function well when handling files.
sudo chown -R www-data:www-data bootstrap/cache
Gives permission to the “bootstrap/cache” directory. This ensures that the application is able to cache data without having permission issues
10. Copy env file and generate key
To do this, run the commands below.
cp .env.example .env
This will create a .env file based on the example file (.env.example) given by Laravel by default.
php artisan key:generate
This will generate a key for the application
11. Edit .env file and migrate
You need to update the .env file that with the database credentials we created in step 2 above.
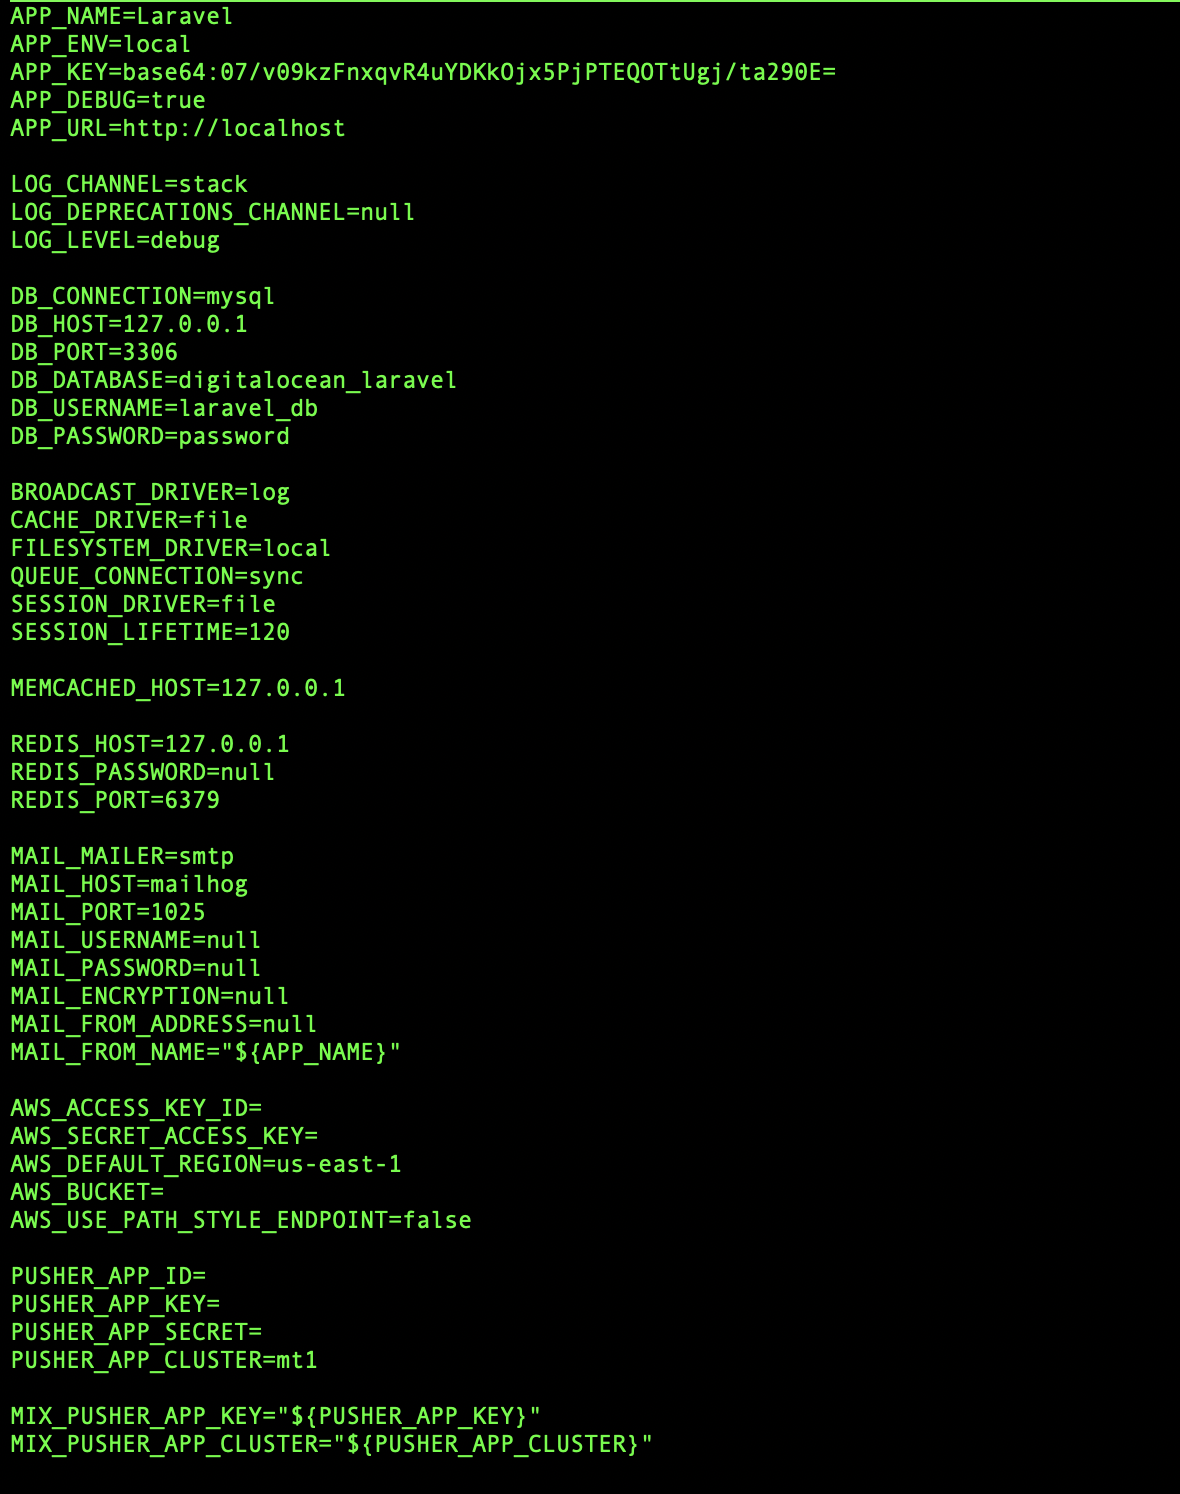
After editing, run php artisan config:cache to clear the application cache.
Then run php artisan migrate to create the tables.
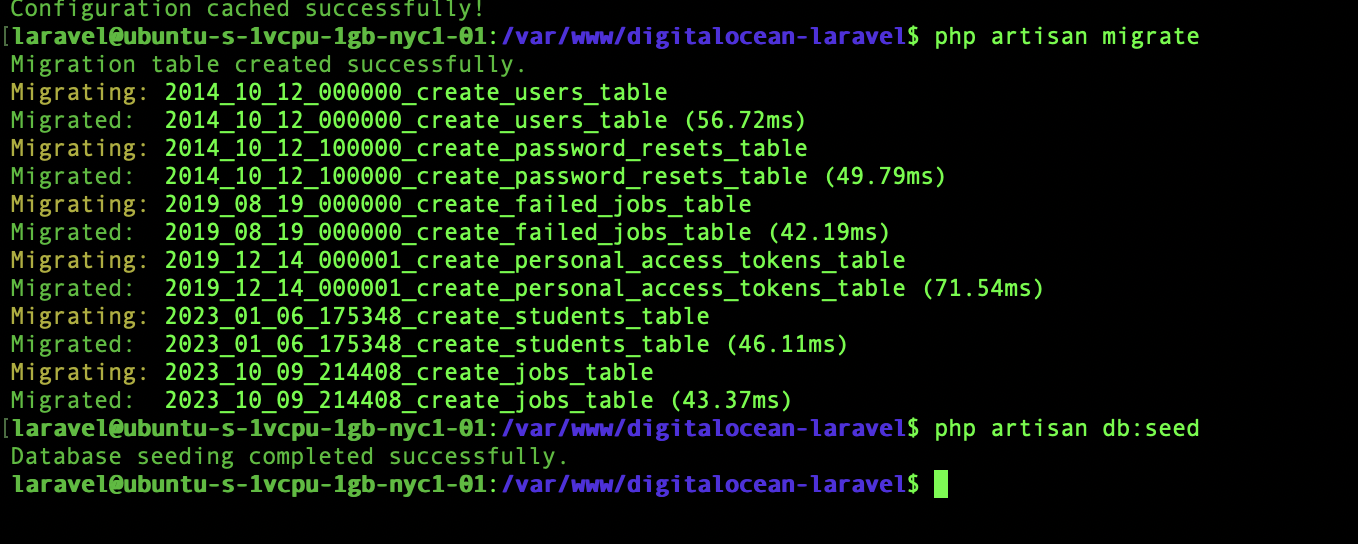
12. Site is ready
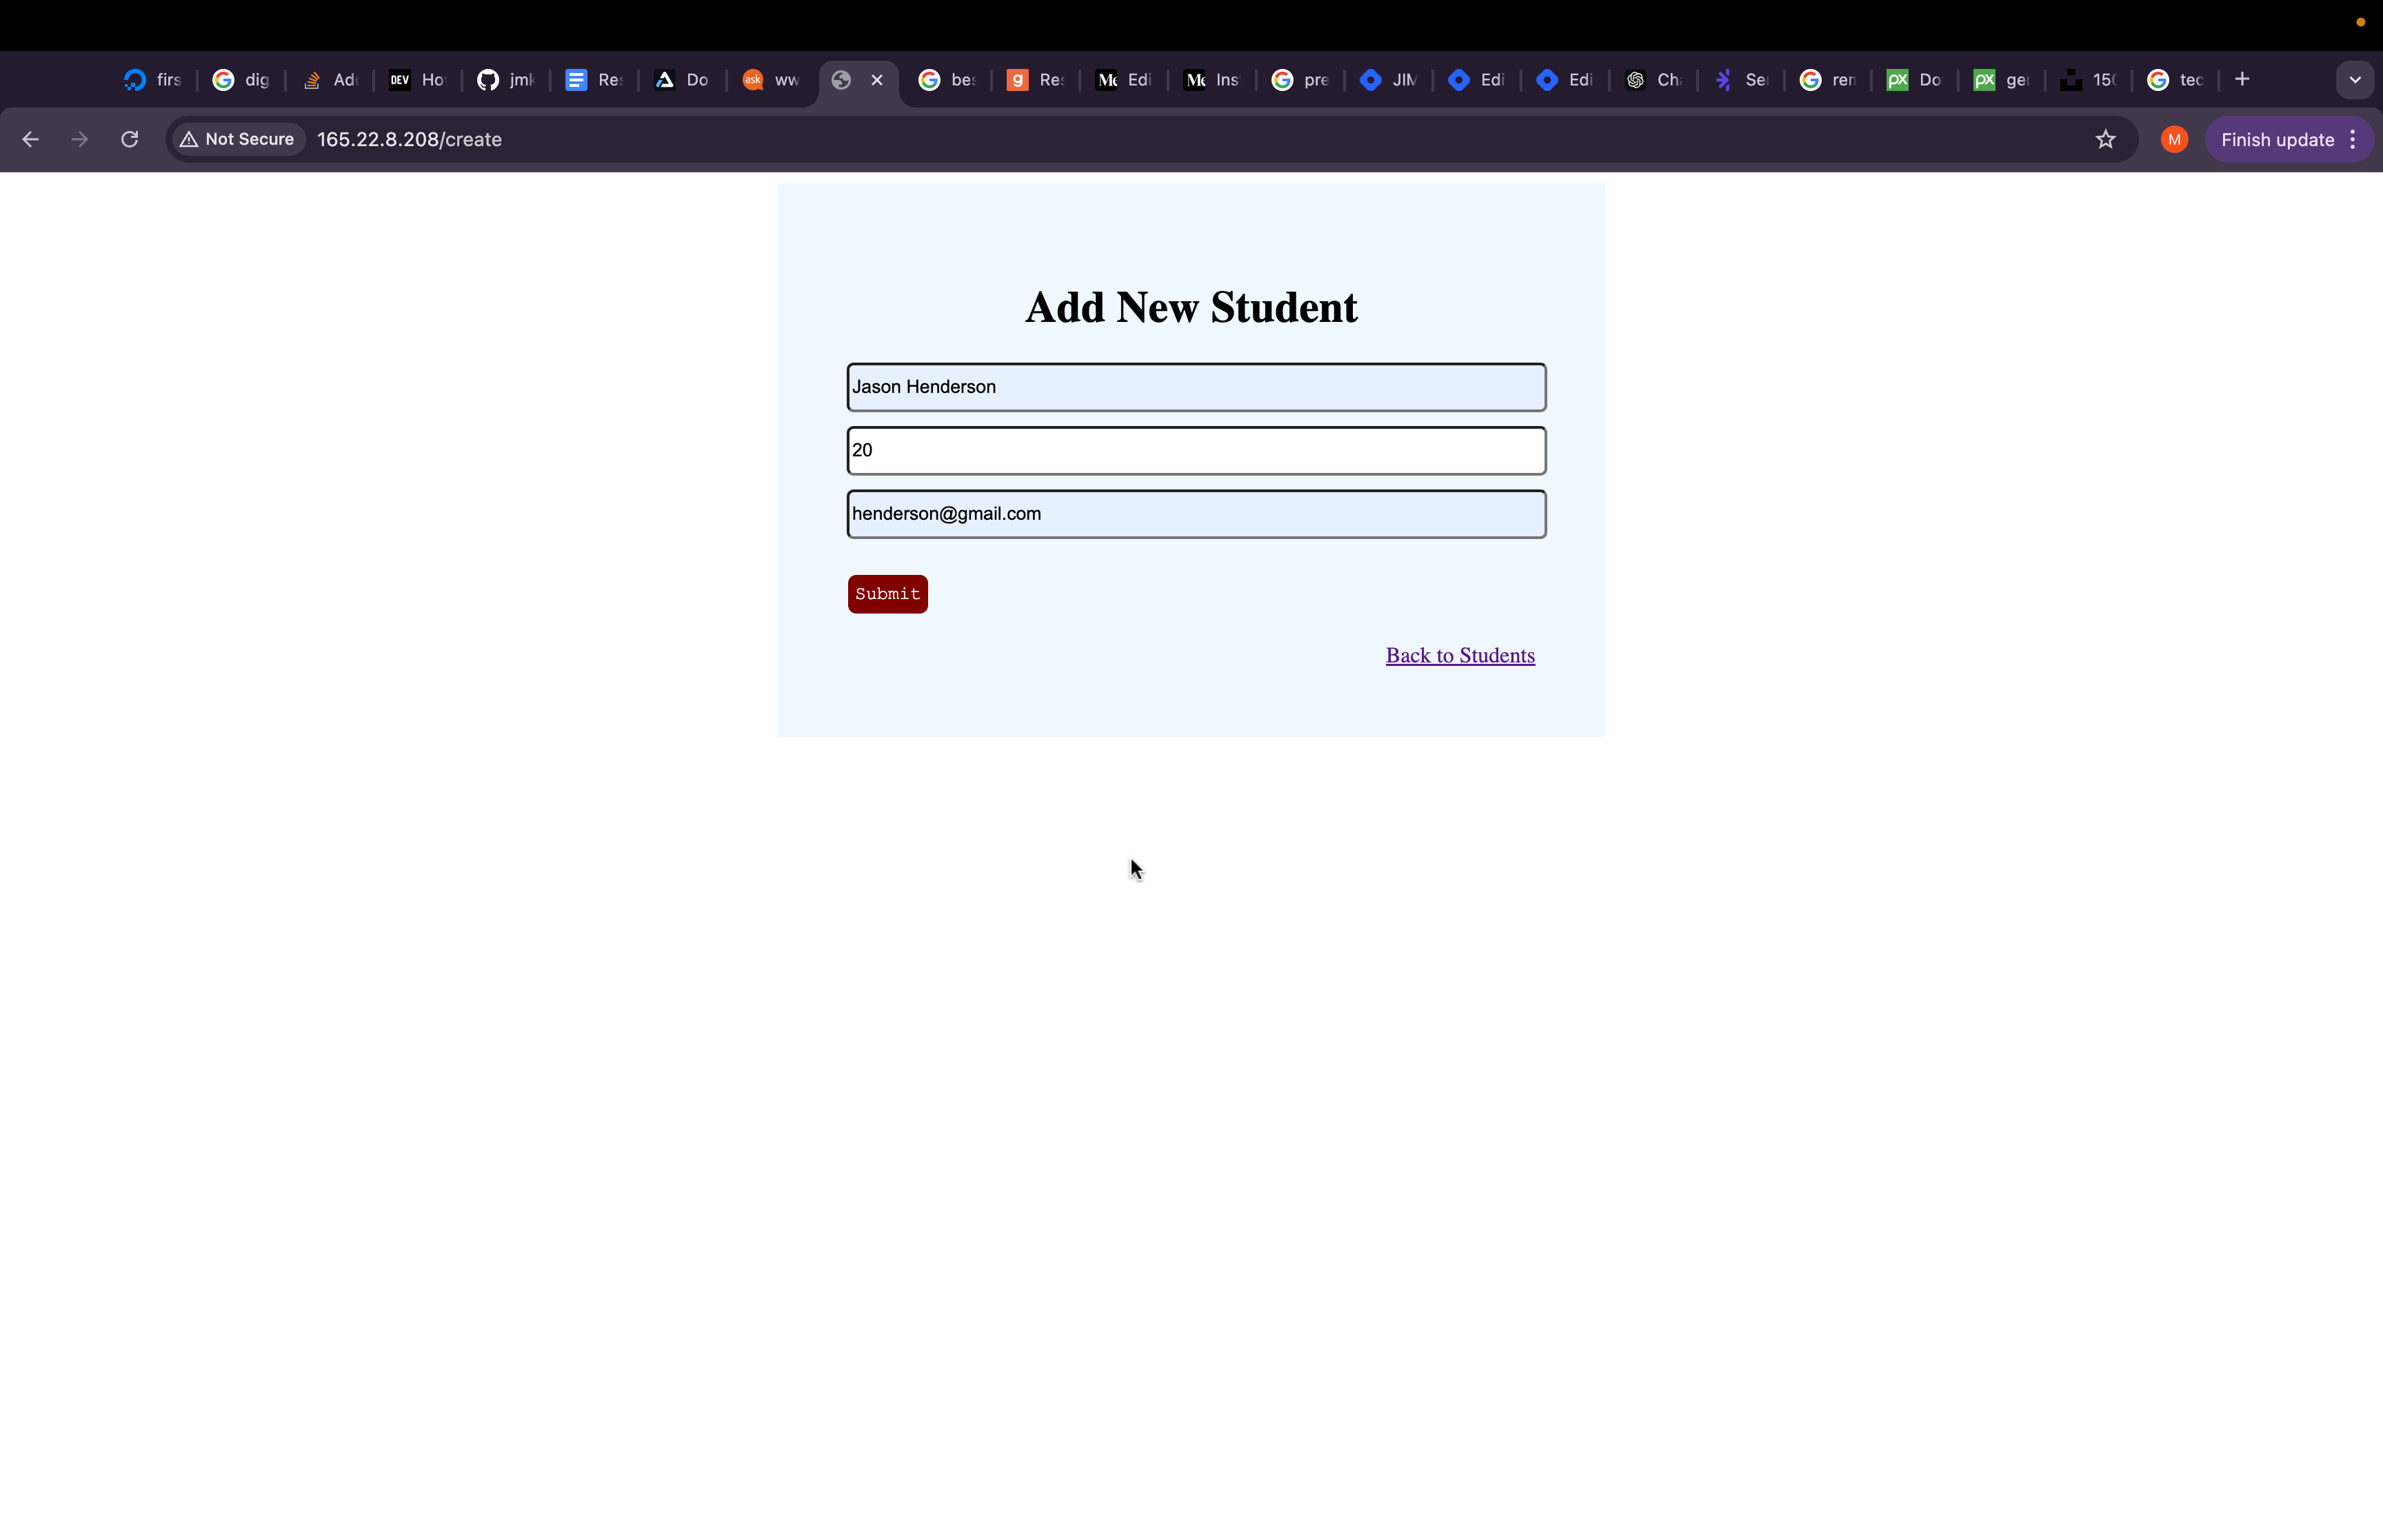
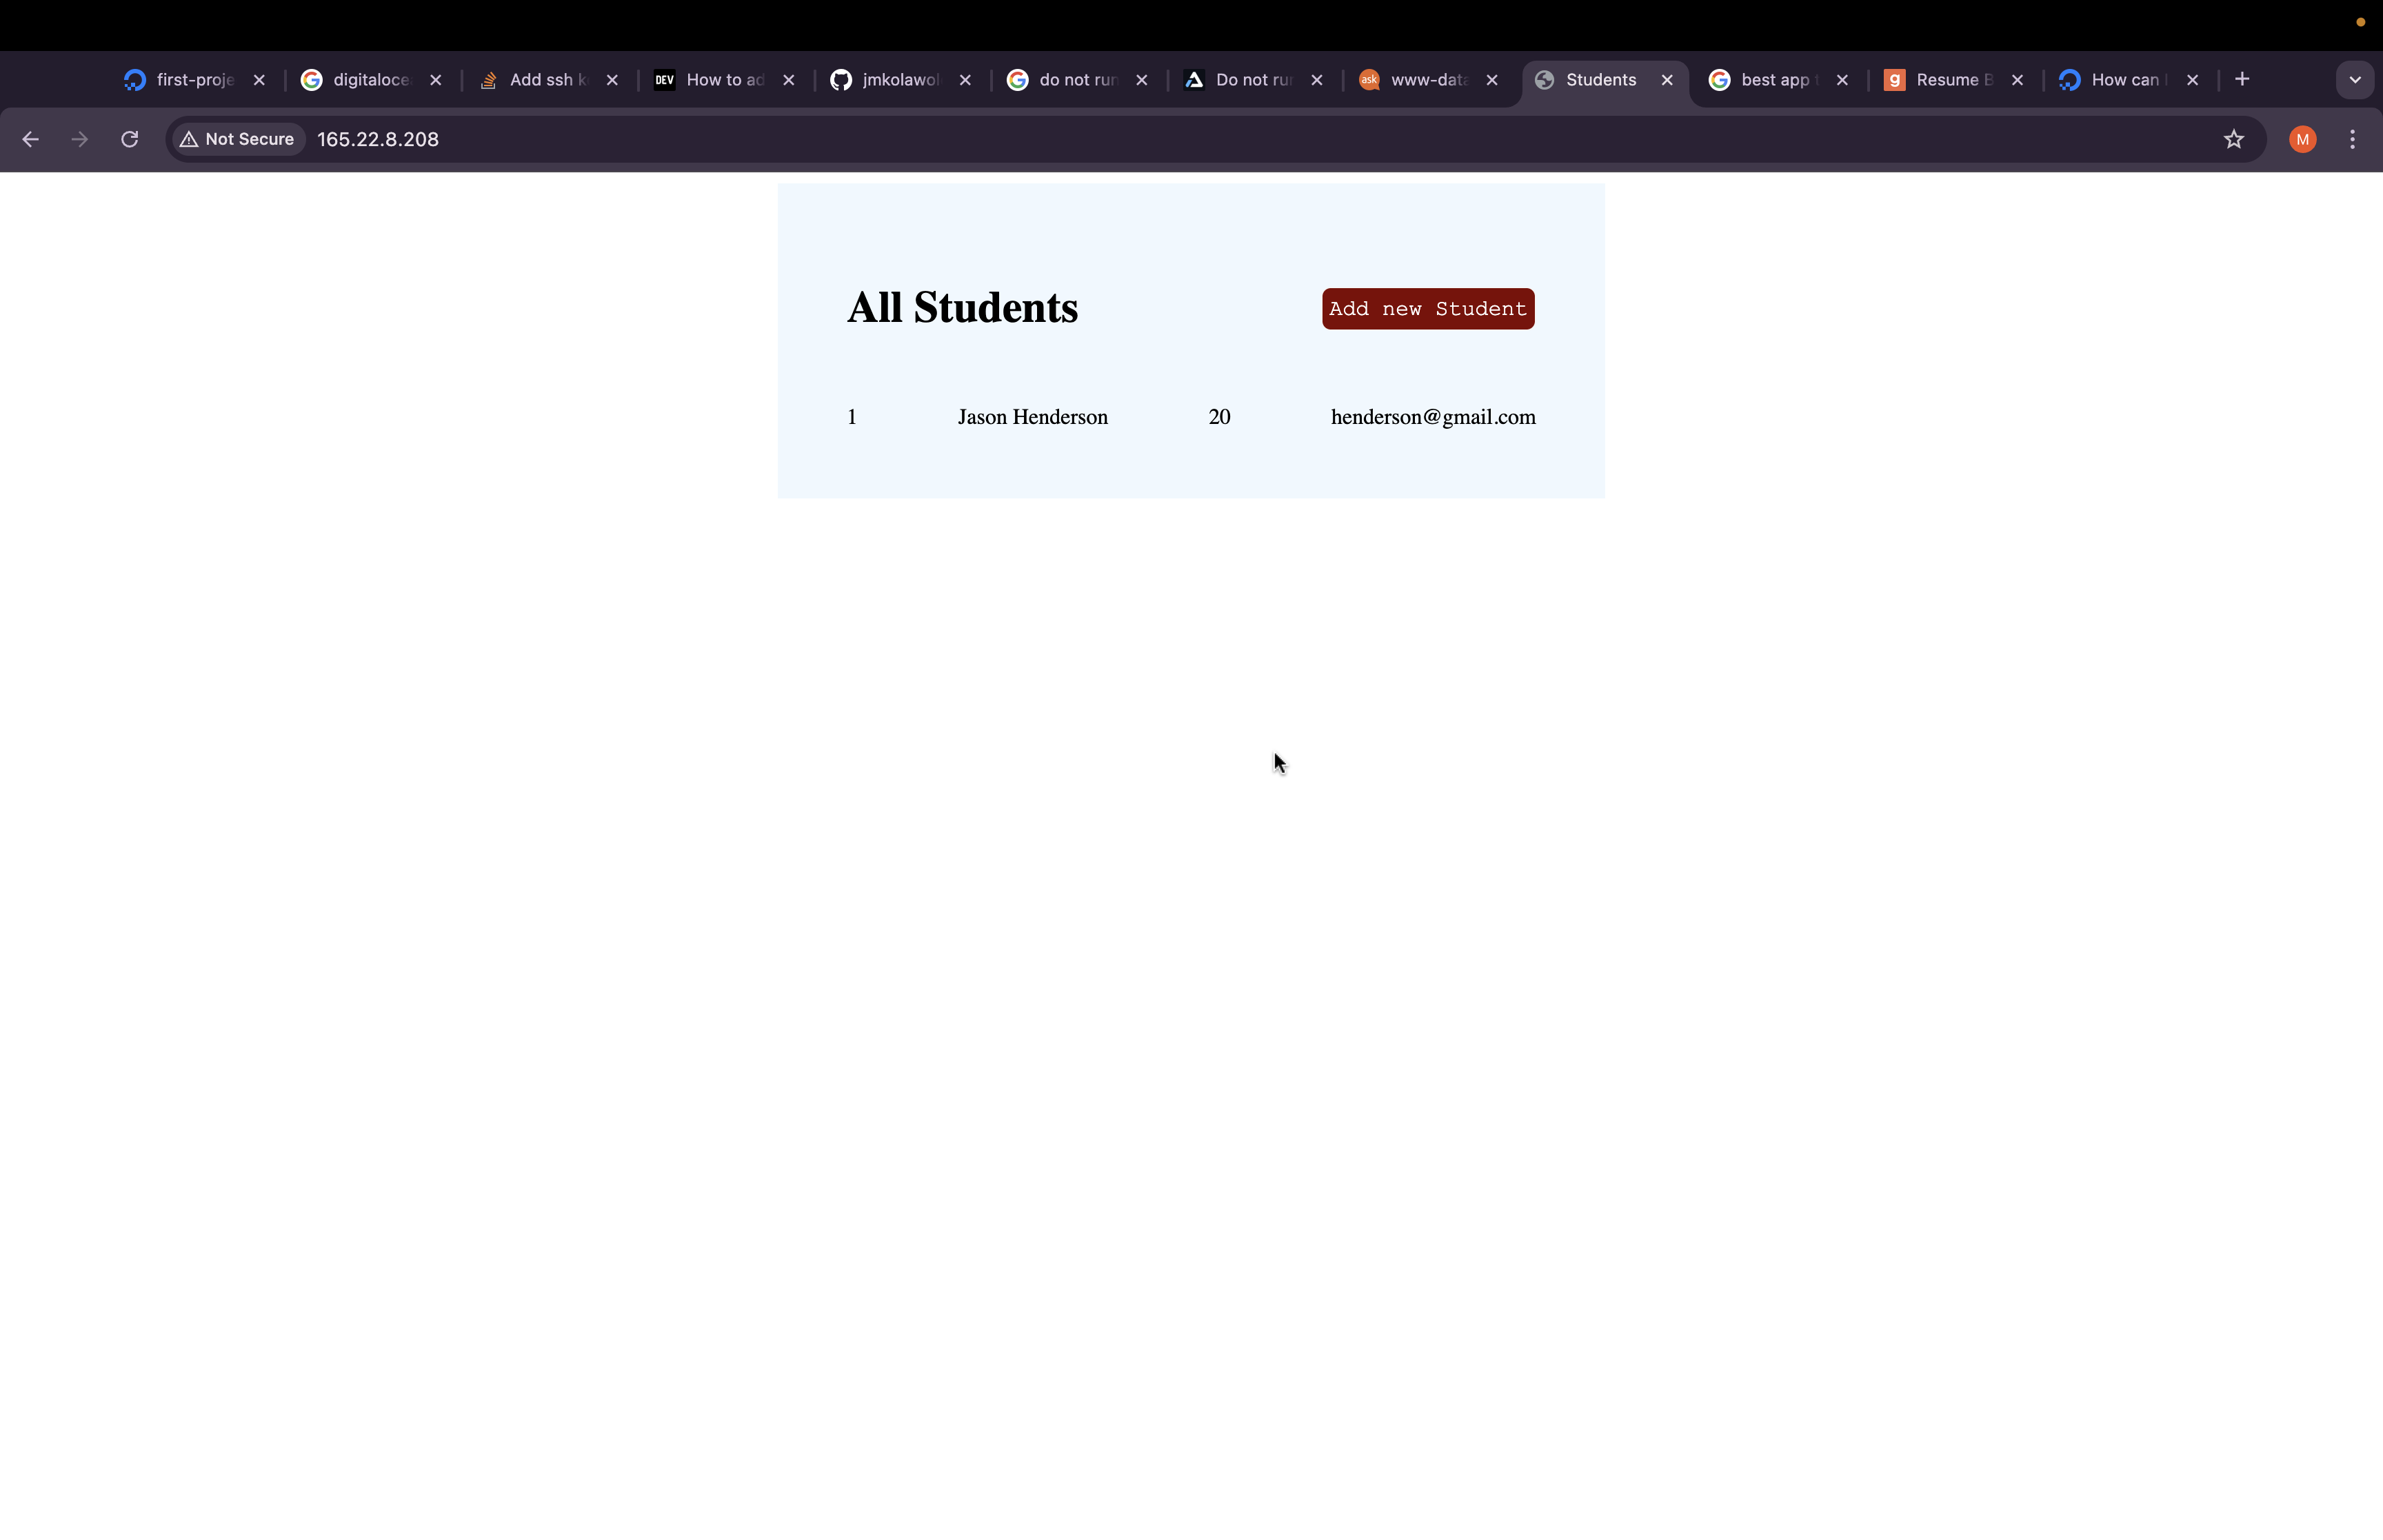
Now, visit the IP address on a browser. You will see the images below.
Congratulations. You have successfully installed and ran your Laravel application on a remote server.
THE END.
Subscribe to my newsletter
Read articles from JIMOH Mofoluwasho Kolawole directly inside your inbox. Subscribe to the newsletter, and don't miss out.
Written by

JIMOH Mofoluwasho Kolawole
JIMOH Mofoluwasho Kolawole
I am a Full Stack developer from Nigeria with over 4 years of experience in web development. I have proficient knowledge and experience with PHP (Laravel). I also work with the MERN stack.