How to Install HashiCorp Vault on Ubuntu: A Comprehensive Guide for Beginners
 Tanvir Sayyad
In today's digital era, data security is not merely a priority—it's an absolute necessity. Many organization have the challenge of keeping sensitive information such as credentials, API keys, encryption keys and configuration data safe. HashiCorp Vault provides a strong solution to all these problems. In this article, I will explain how to install it in an Ubuntu based system (direct commands) and securing your organization secrets with Hashicorp Vault.
Introduction to HashiCorp Vault
HashiCorp Vault is an open-source tool for securely accessing secrets. Secrets include passwords, API keys, and certificates that grant access to systems, services, and data. HashiCorp Vault's purpose is to ensure these secrets are securely stored and accessed, without falling into the wrong hands.
Key Features and Benefits of HashiCorp Vault
Centralized Secret Management: HashiCorp Vault is a central entity for the storage and managing all kinds of secrets in a place that you can access securely and scalably.
Dynamic Secrets Generation: It produces dynamic secrets with a short life, removing the reliance on long-lived, static credentials.
Encryption as a Service: HashiCorp Vault provides encryption at rest and in transit.
Fine-Grained Access Control: Specify policies regarding who is able to access which secrets, providing greater security.
Audit Logging: HashiCorp Vault records all access attempts which creates a fine-grained audit trail for compliance and security audits.
Setting Up HashiCorp Vault on Ubuntu
In this detailed section, we will go through installing and configuring HashiCorp Vault on an Ubuntu server.
Step 1: Prepare Your Ubuntu Environment
For this installation, we will be using an Ubuntu virtual machine. Specifically, we will install HashiCorp Vault on an AWS EC2 instance of type t2.micro, which has the following configuration:
vCPU: 1 core
RAM: 1 GB
HDD: 8 GB (Elastic Block Store)
Network Interface: Capable of accessing the internet
Once we have set up virtual machine, it is crucial to install the latest software patches to ensure security and stability.
sudo apt-get update && sudo apt-get upgrade -y
sudo apt install net-tools
sudo apt install gpg
Step 2: Install HashiCorp Vault
To install HashiCorp Vault, add the HashiCorp official repository and use apt to install the package.
wget -O- https://apt.releases.hashicorp.com/gpg | sudo gpg --dearmor -o /usr/share/keyrings/hashicorp-archive-keyring.gpg
echo "deb [signed-by=/usr/share/keyrings/hashicorp-archive-keyring.gpg] https://apt.releases.hashicorp.com $(lsb_release -cs) main" | sudo tee /etc/apt/sources.list.d/hashicorp.list
sudo apt update && sudo apt install vault
Step 3: Enable and Start Vault Services
Enable and start the HashiCorp Vault services to ensure it runs as a systemd service.
sudo systemctl daemon-reload
sudo systemctl enable vault
sudo systemctl start vault
sudo systemctl status vault

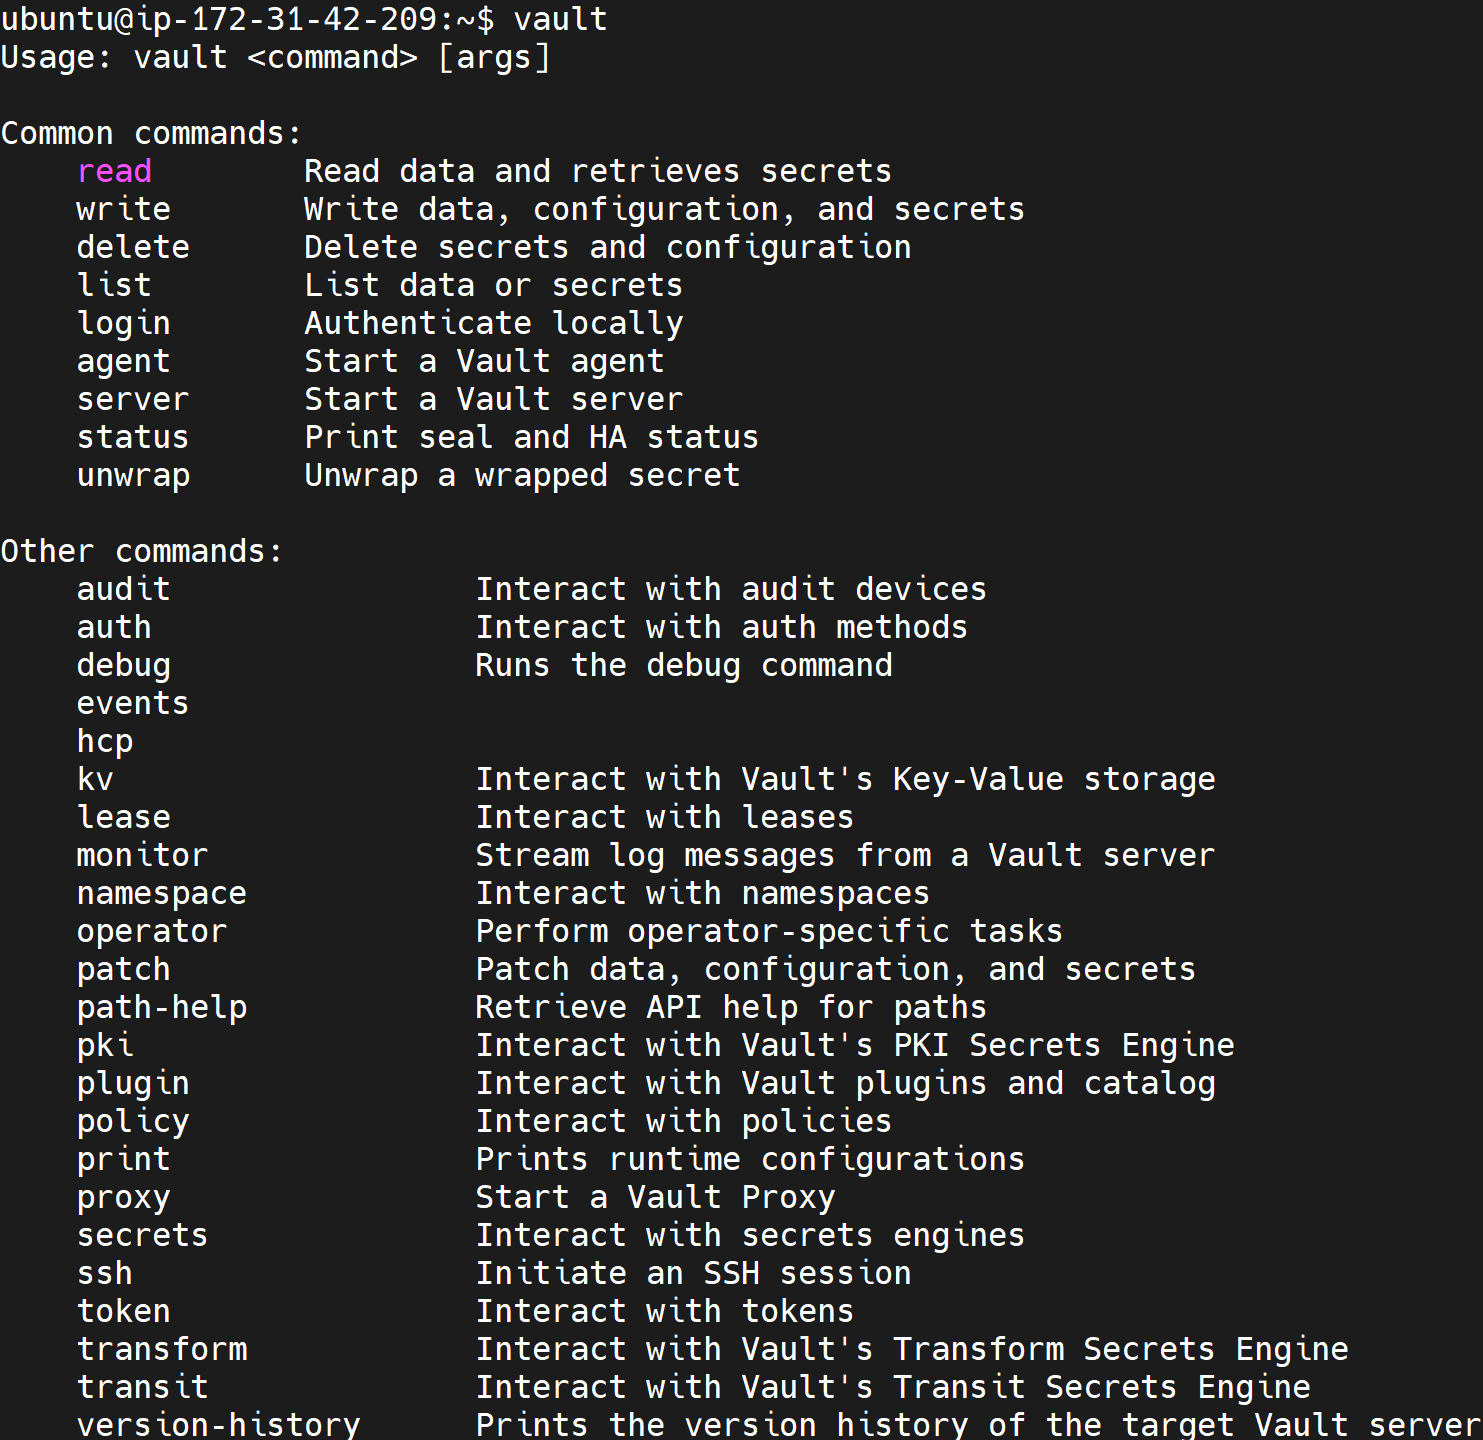
Verify if Vault was installed successfully by checking the version:
vault --version

Or verify if Vault was installed successfully by running command:
vault
Step 4: Configure HashiCorp Vault for HTTP Access
Understanding the Issue: The TLS Certificate Error in HashiCorp Vault
After a successful installation of HashiCorp Vault on an Ubuntu instance, a quick verification command such as vault --version often returns the HashiCorp Vault version without issue, confirming the installation is correct.
However, upon executing the vault status command, the following error might appear:
WARNING! VAULT_ADDR and -address unset. Defaulting to https://127.0.0.1:8200.
Error checking seal status: Get "https://127.0.0.1:8200/v1/sys/seal-status": tls: failed to verify certificate: x509: cannot validate certificate for 127.0.0.1 because it doesn't contain any IP SANs

This issue arises because HashiCorp Vault defaults to HTTPS and attempts to verify SSL/TLS certificates. The root of the problem lies in HashiCorp Vault’s self-generated certificate, which lacks an IP Subject Alternative Name (SAN) for 127.0.0.1. As a result, the Vault client cannot validate the connection to the HashiCorp Vault server over HTTPS.
To ensure a smooth experience, we’ll first address the solution of setting the VAULT_ADDR environment variable to use HTTP and then delve into further configurations if required.
Step-by-Step Solution: Setting the VAULT_ADDR Environment Variable to HTTP
One straightforward approach to resolving this error is to set the VAULT_ADDR environment variable to use HTTP rather than HTTPS, which bypasses the certificate verification requirement. Here are the steps:
1️⃣ Set the VAULT_ADDR Environment Variable to HTTP
To set HashiCorp Vault to use HTTP, run the following command:
export VAULT_ADDR='http://<public_ip_of_the_instance>:8200'
For Example:
export VAULT_ADDR='http://54.208.229.229:8200'
This command instructs Vault to connect over HTTP, thus avoiding the need for certificate verification. By default, Vault tries to use HTTPS, but setting the VAULT_ADDR variable tells it to connect using HTTP instead.
2️⃣ Restart Vault
If Vault is already running, a restart is often necessary to ensure the configuration changes take effect. You can restart Vault as follows:
sudo systemctl restart vault
If Vault is not managed as a service, simply stop and start it manually using the command you used for the initial start.
3️⃣ Verify the Solution
After setting VAULT_ADDR, try running the vault status command again:
vault status
If successful, Vault’s status should display without any certificate-related errors. However, if a different error appears, such as the one below, additional configuration changes will be necessary:

Addressing the “Client Sent an HTTP Request to an HTTPS Server” Error
Error checking seal status: Error making API request.

URL: GET http://127.0.0.1:8200/v1/sys/seal-status
Code: 400. Raw Message:

Client sent an HTTP request to an HTTPS server.
The above error indicates that Vault is configured to only accept HTTPS requests, yet we are now trying to connect over HTTP. To resolve this, we need to modify Vault’s configuration to accept HTTP connections.
For a lab environment, we will disable HTTPS and use HTTP for simplicity. Modify the Vault configuration file (vault.hcl) to enable HTTP. Before proceeding, always take a backup of the configuration file.
sudo cp -p /etc/vault.d/vault.hcl /etc/vault.d/vault.hcl.backup
1️⃣ Modify the Vault Configuration File
Locate the Vault configuration file, typically located at
/etc/vault.d/vault.hcl.Open the file in a text editor:
sudo vi /etc/vault.d/vault.hclWhen you open the
vault.hclfile you need to find thelistenerstanza now, update thevault.hclfile to comment out the HTTPS listener and add the following HTTP listener: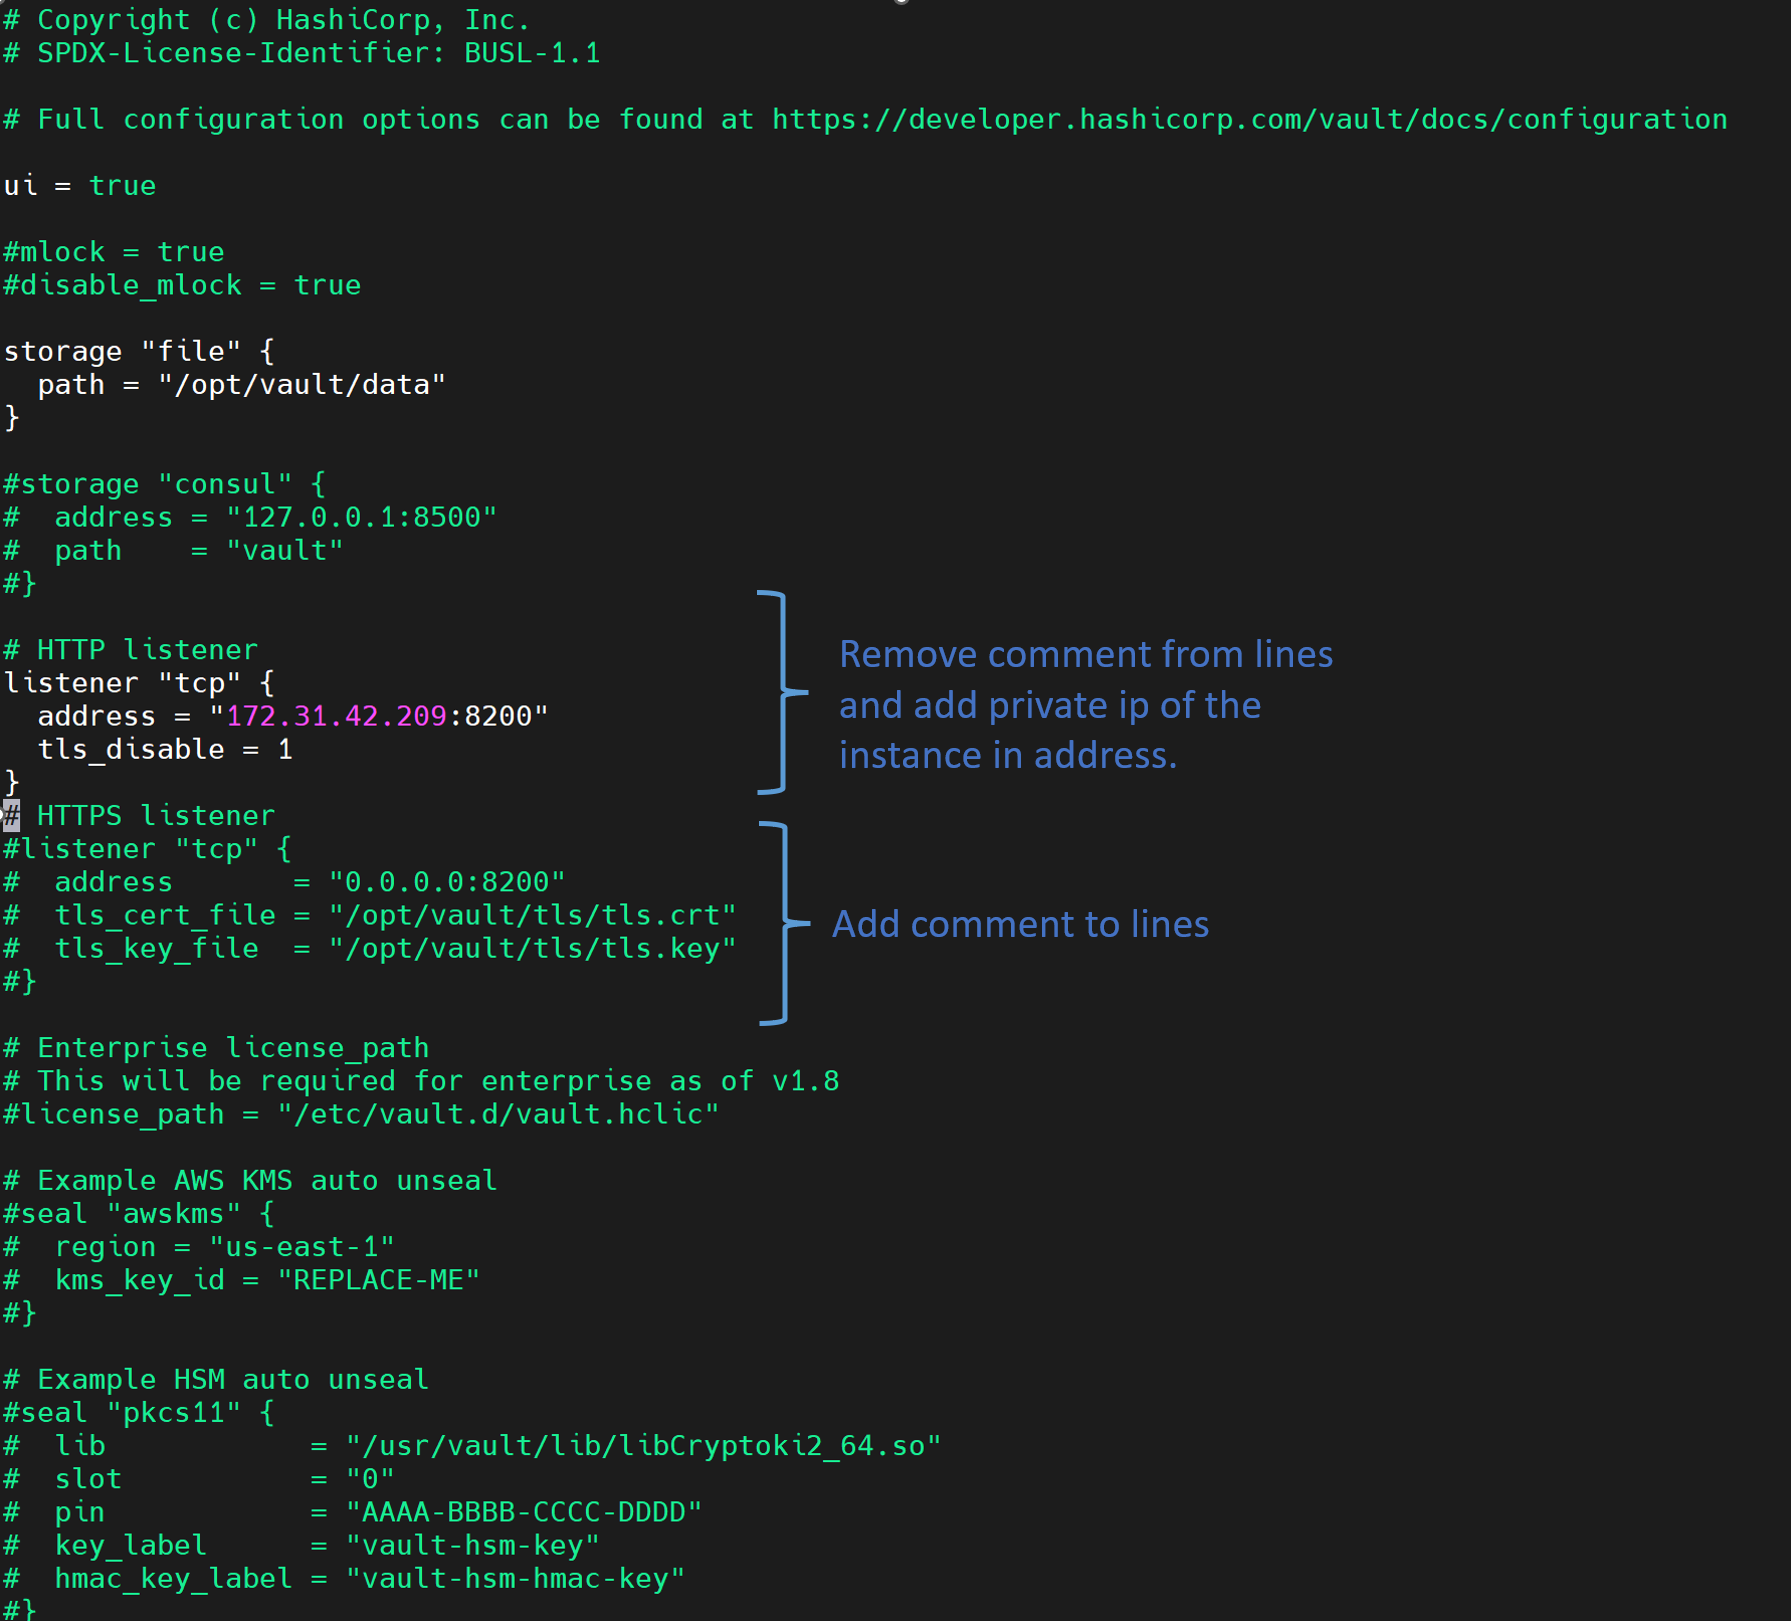
 # Copyright (c) HashiCorp, Inc.
 # SPDX-License-Identifier: BUSL-1.1

 # Full configuration options can be found at https://developer.hashicorp.com/vault/docs/configuration

 ui = true

 #mlock = true
 #disable_mlock = true

 storage "file" {
   path = "/opt/vault/data"
 }

 #storage "consul" {
 #  address = "127.0.0.1:8500"
 #  path    = "vault"
 #}

 # HTTP listener
 listener "tcp" {
   address = "172.31.42.209:8200"
   tls_disable = 1
 }

 # HTTPS listener
 #listener "tcp" {
 #  address       = "0.0.0.0:8200"
 #  tls_cert_file = "/opt/vault/tls/tls.crt"
 #  tls_key_file  = "/opt/vault/tls/tls.key"
 #}

 # Enterprise license_path
 # This will be required for enterprise as of v1.8
 #license_path = "/etc/vault.d/vault.hclic"

 # Example AWS KMS auto unseal
 #seal "awskms" {
 #  region = "us-east-1"
 #  kms_key_id = "REPLACE-ME"
 #}

 # Example HSM auto unseal
 #seal "pkcs11" {
 #  lib            = "/usr/vault/lib/libCryptoki2_64.so"
 #  slot           = "0"
 #  pin            = "AAAA-BBBB-CCCC-DDDD"
 #  key_label      = "vault-hsm-key"
 #  hmac_key_label = "vault-hsm-hmac-key"
 #}
The
tls_disable = 1setting disables TLS, allowing Vault to communicate over HTTP instead of HTTPS.Note: This setting is suitable for development environments. For production, enabling HTTPS with a valid certificate is recommended.
2️⃣ Save and Restart Vault
Save the configuration file and exit the editor (:wq). To apply the changes, restart Vault using the following command:
sudo systemctl restart vault
If Vault is not running as a service, restart it manually.
3️⃣ Check Vault Status Again
After restarting, re-run the vault status command:
vault status
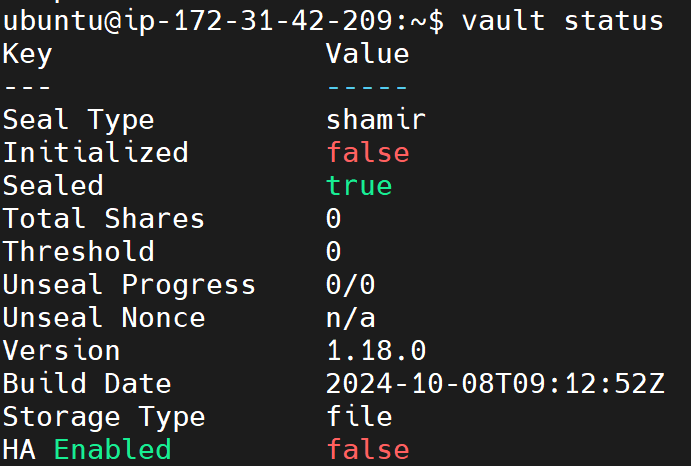
The command should now execute successfully, displaying Vault’s current status without HTTPS-related errors.
Why the “tls_disable” Solution Works?
Setting tls_disable = 1 in Vault’s configuration removes the need for TLS on the Vault server’s listener. TLS is a security measure for encrypting communications, but in certain cases, such as local development or testing environments, HTTP connections may be a more practical choice to simplify setup and testing. For any production instance, it is critical to maintain TLS for secure data transmission.
Step 5: Access Vault from a Browser
You can now access HashiCorp Vault's UI from your browser using the server IP and port:
http://<public_ip_of_instance>:8200
For Example:
http://54.208.229.229:8200
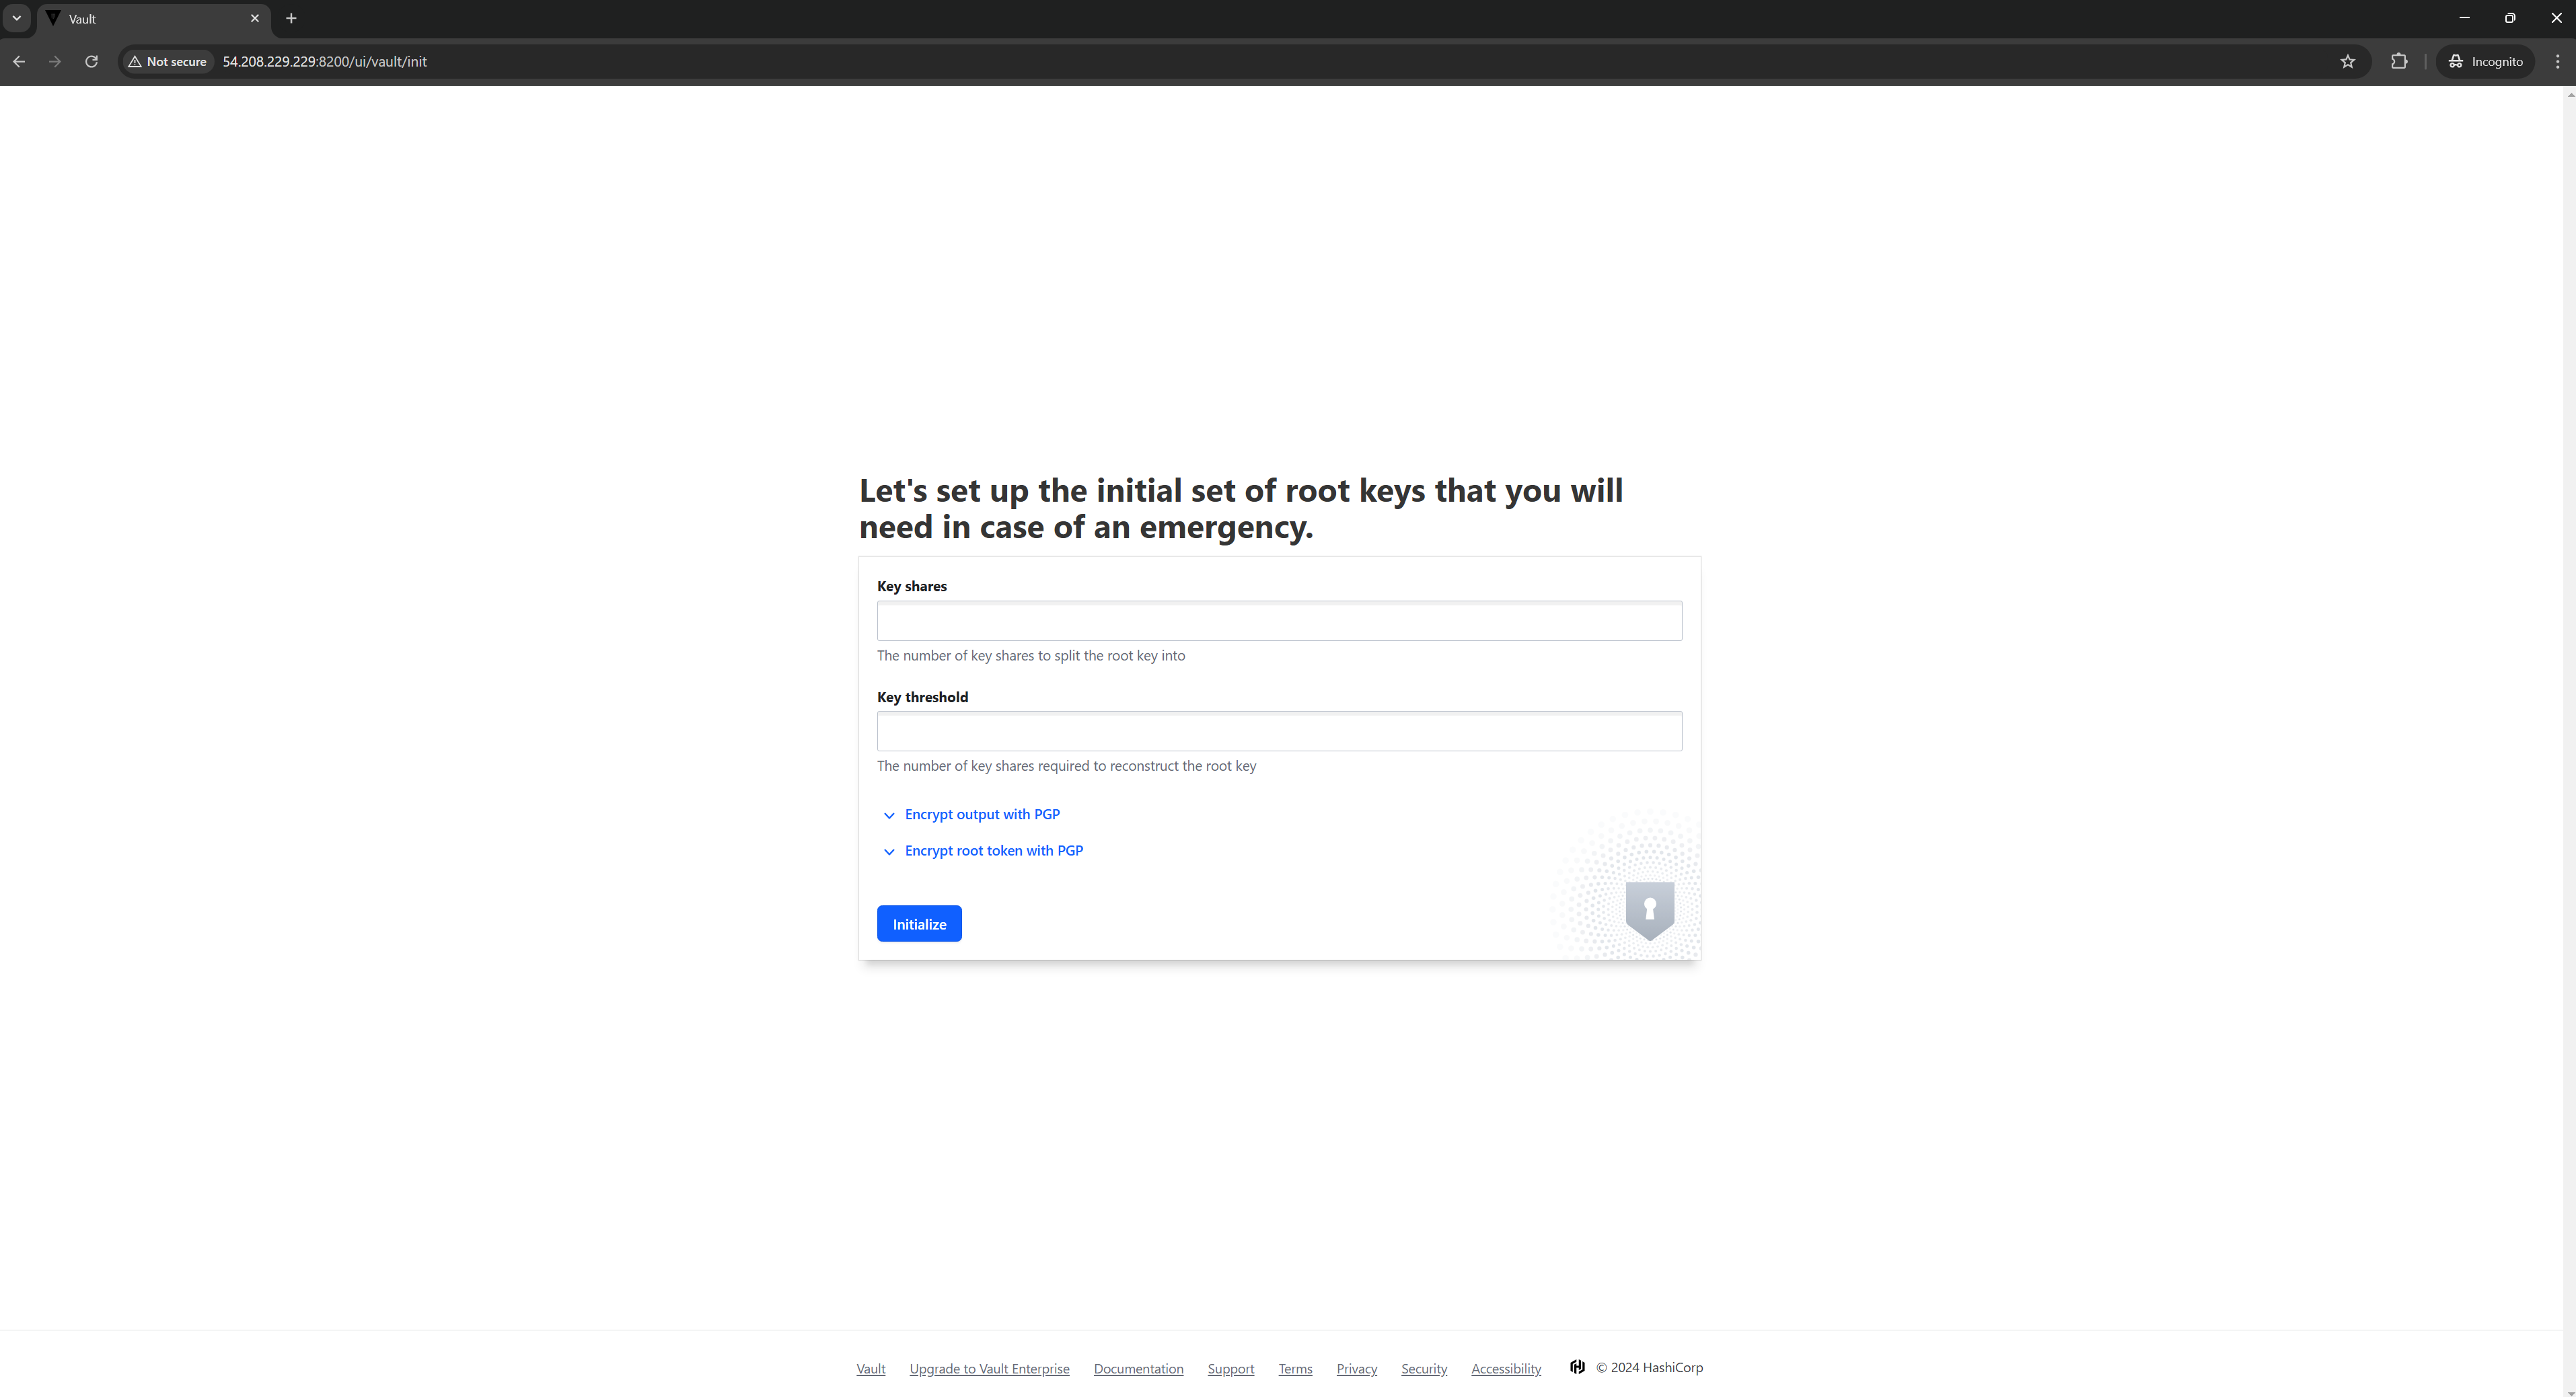
If it is not working in your case try exporting VAULT_ADDR with public ip. As shown below:
export VAULT_ADDR="http://<public_ip_of_instance>:8200"
For Example:
export VAULT_ADDR="http://54.208.229.229:8200"
Make sure that the ui must set to true also, add api_addr with the public_ip of the instance in vault.hcl file. Example given below:
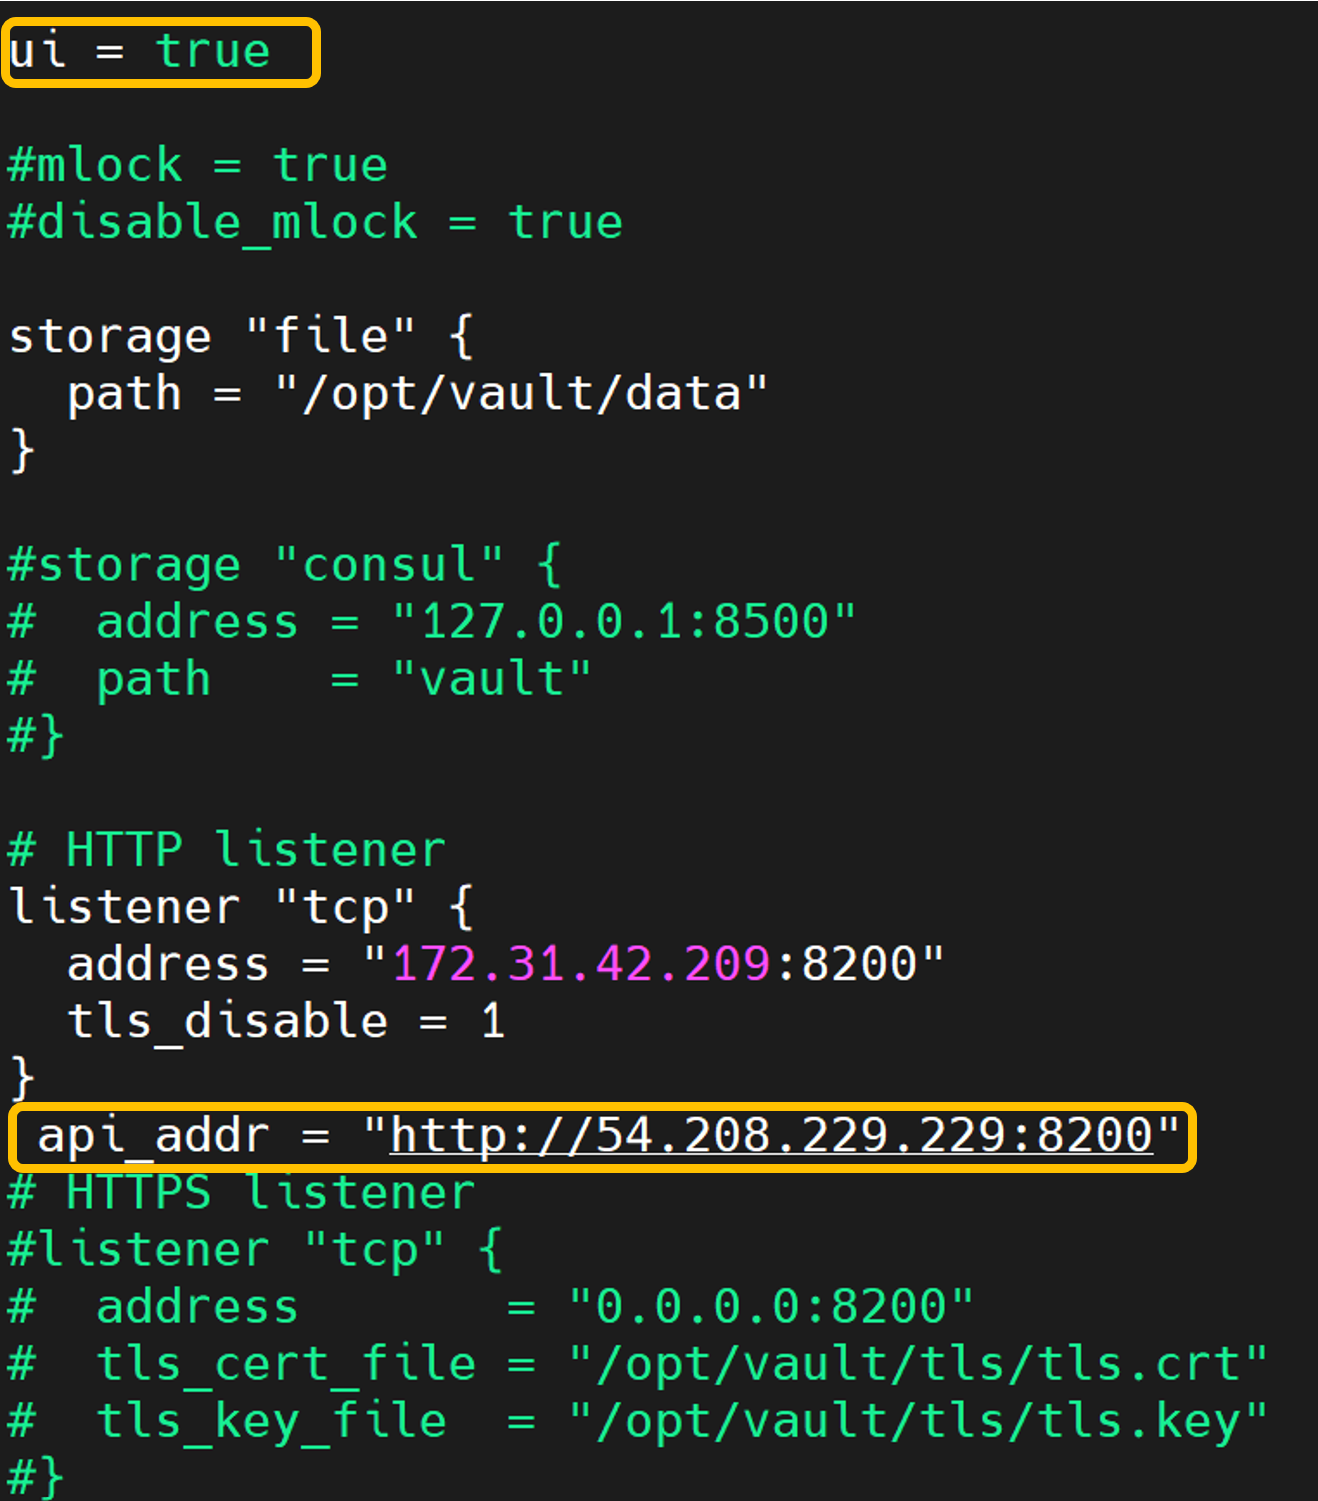
api_addr = "http://<public_ip>:8200"
Final Words
Well, that's it for today! I hope you enjoyed this guide on installing HashiCorp Vault on Ubuntu. If you have any questions or run into issues during the installation, feel free to comment below, and I'll do my best to help you out.
References
Subscribe to my newsletter
Read articles from Tanvir Sayyad directly inside your inbox. Subscribe to the newsletter, and don't miss out.
Written by

Tanvir Sayyad
Tanvir Sayyad
Hi there! I am a competent DevOps Engineer with 2 years of experience in the IT domain with tools and technologies diversity. My professional background encompasses Jenkins, Ansible, HashiCorp Vault, Bitbucket, GitHub, Nexus, Maven, Ant, and Docker. Some of the technologies that I'm familiar with are Terraform, Kubernetes, and GitLab CI/CD. My thirst for learning is never quenched, and in turn, I share my views on it through my blog. Let's connect and learn DevOps together! Feel free to reach out if you’re interested in collaboration or discussions about DevOps innovations at tanvir.sayyad1011@gmail.com.!