I self hosted a VPN on AWS, should you?
 Aditya Raj
Setting up a personal VPN provides a reliable method for securing internet connections, protecting privacy, and maintaining control over sensitive data. This guide explains the process of deploying a self-hosted VPN on AWS, utilizing the OpenVPN Access Server. The solution offers a straightforward and dependable way to establish secure connections for individual use.
Setting up your own VPN sounds cool (and it is), but honestly, I wouldn't recommend it unless you really know what you're doing. If you mess up the setup, you could end up making things less secure. But if you're serious about handling your own privacy and ready to manage it properly, stick around.
Prerequisites
AWS Free Tier account (optional but beneficial for beginners)
Basic familiarity with SSH and EC2 instances
Step 1: Launch an EC2 Instance with OpenVPN
Launch a new instance and search for the OpenVPN Access Server AMI in the AWS Marketplace.
Select an instance type:
t2.micro: Free under the AWS Free Tier, suitable for running OpenVPN Access Server.
t2.nano: An economical choice if not using the Free Tier, costing around $0.006 per hour, capable of supporting OpenVPN’s needs for up to two devices.
Configure network settings to allow essential traffic only. Open port 1194 (UDP) for the VPN connection and port 943 for the admin interface.
Launch the instance with an SSH key pair for secure access.
VPN Location Matters: The location of your VPN server is based on the AWS region where the EC2 instance is hosted. For example, if your instance is in us-east-1 (North Virginia), your internet traffic will appear to originate from the United States. Similarly, hosting in ap-south-1 (Mumbai) routes traffic through the Indian internet. Choose a region based on the geographic benefits or restrictions you prefer.
Step 2: SSH into the Instance and Set Up the Admin User
Once your instance is running, SSH into it by the SSH code provided by the AWS.
Accept the licenses and agreements & keep the default settings.
You’ll be prompted again to login but as
openvpnas.Configure the admin password for the OpenVPN Access Server by running:
sudo passwd openvpnEnter a strong password for logging into the OpenVPN admin portal. The same credentials can be used to access the user portal.
Step 3: Access the OpenVPN Admin Portal
Open a browser and navigate to the admin portal at:
https://your-ec2-instance-public-ip:943/adminLog in with the credentials you set in the previous step.
Configure your VPN settings as needed. This includes adding users, enabling multi-factor authentication (Optional).
Make sure both the options in the routing section are marked
YES: Configuration/VPN Settings. Save the settings and update the running server.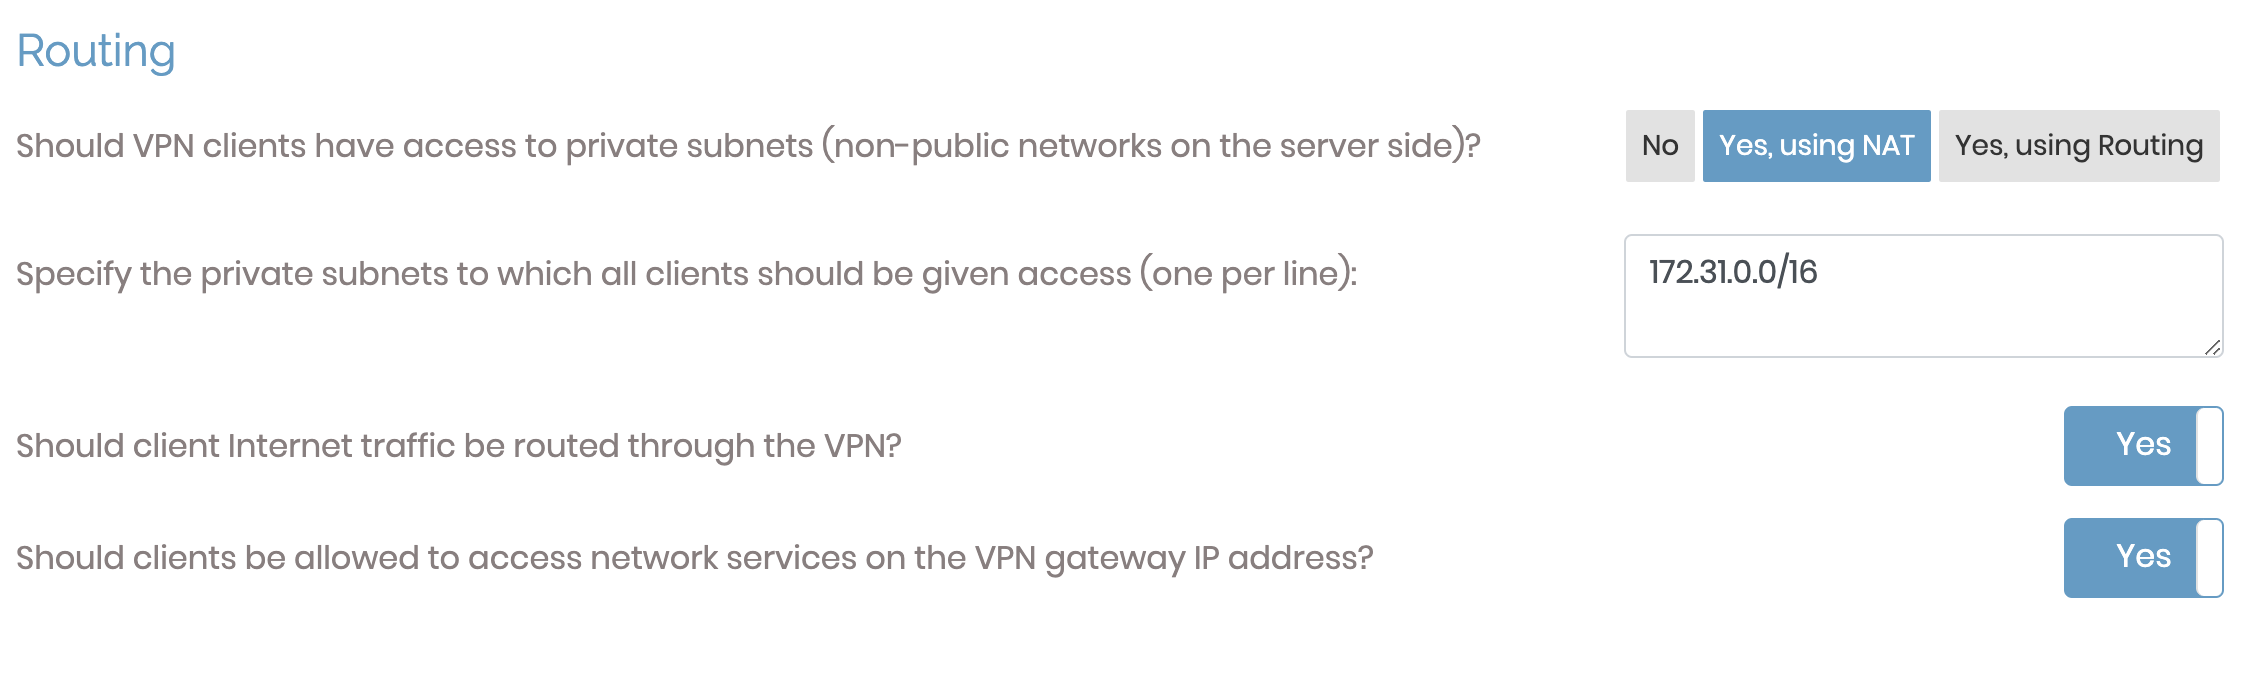
Note: OpenVPN Access Server's free license allows up to 2 simultaneous connections, suitable for personal use across two devices.
Step 4: Download and Install the OpenVPN Client
Now that your OpenVPN server is set up, open this URL:
https://your-ec2-instance-public-ip:943This page provides a download link for the OpenVPN client, pre-configured to connect to your server.
Download and install the client on your device, then enter your VPN credentials when prompted. You’ll now be securely connected to your OpenVPN server on AWS!
Conclusion
In just a few steps, it’s possible to set up a fully working, self-hosted VPN on AWS that keeps internet connections secure and private from anywhere. This setup is a good enough option for anyone who wants more control over their online security without paying for a huge monthly subscription. Even though it’s self-hosted, the VPN runs fast (actually fast) and reliably thanks to AWS’s strong infrastructure, making it perfect for streaming and browsing.
However, I do not recommend setting this up unless you exactly know what you're doing. Self-hosting a VPN means you are responsible for securing the server, managing the EC2, handling firewall rules, and monitoring for potential vulnerabilities. A badly configured VPN can actually expose you to more risks than using a trusted paid service.
Benefits (only if managed well) according to me:
Privacy and Control: Since the VPN is self-hosted, all data stays private without being handled by any third party services.
Geographic Flexibility (not as flexible as traditional VPNs): AWS lets users pick server locations from different regions, like
us-east-1for the U.S. orap-south-1for India, offering more choices based on where the connection needs to be routed.Cost Efficiency: Using AWS’s Free Tier and affordable instances like
t2.nanohelps keep costs low while still getting good performance.
After using this setup for a long time now, it has been extremely reliable on both laptop and mobile. The VPN connection feels smooth, even when streaming 4K videos, with almost no noticeable difference compared to a regular connection. CPU usage on the EC2 instance usually stays under 10%, except during heavier activities like video calls, or being active on Discord (I haven’t tested it for gaming).
Subscribe to my newsletter
Read articles from Aditya Raj directly inside your inbox. Subscribe to the newsletter, and don't miss out.
Written by
Aditya Raj
Aditya Raj
Passionate Software Engineer with a love for learning new technologies and building solutions. Always open to collaboration and growth.