Beginner’s Guide: Connecting Your Local Git to GitHub
 Pulkit Yadav
Introduction
In the world of DevOps, keeping track of changes in your code is essential for smooth collaboration and efficient workflows. That’s where Git comes in. Git is a tool that helps teams manage their code and work together effectively. GitHub is a platform where you can store your Git repositories online, making it easier to share your projects with your team.
In this article, we’ll show you how to connect your local Git repository to a remote one on GitHub. We’ll also cover important commands like git pull and git push which enable collaborative work by allowing you to fetch updates and share your changes with your team. Whether you’re new to DevOps or just need a quick refresher, this guide will help you link your code to GitHub, enabling better teamwork and organization. Let’s get started!
What Does It Mean to Connect Your Local Repository to GitHub?
Connecting your local repository to GitHub is essential for DevOps. It means linking the code you’re developing in your environment to a project on GitHub. This connection allows you to easily share your work with your team, collaborate effectively, and ensure that you have a secure backup online.
Why Is It Important?
As a DevOps engineer, connecting your local code to GitHub is important for several reasons:
Teamwork: When your code is on GitHub, everyone on your team can see and work on it. This makes it easier to collaborate and share ideas, just like working on a team project together.
Backup: Storing your code on GitHub acts like a safety net. If your server fails or you lose your files, you can easily recover everything from GitHub.
Automation: Connecting to GitHub helps set up automated processes like testing and deployment. This means that whenever you push new code, it can automatically get tested and deployed, speeding up your workflow.
Tracking Changes: GitHub keeps track of all the changes made to your code. This helps you see who changed what and when. If there’s a problem, you can quickly find and fix it by going back to an earlier version.
How to Connect Git to a Remote GitHub Repository
Connecting Git to a remote GitHub repository is a crucial step in managing your code effectively. This process allows you to push your changes, collaborate with others, and maintain backups of your projects in the cloud.
There are two common methods to connect your local Git repository to GitHub:
HTTPS: This method uses a URL that starts with https://. It is straightforward to set up but may require you to enter your GitHub username and password every time you push changes, unless you use a credential manager.
SSH: This method uses a secure shell connection, typically starting with git@github.com. SSH is preferred for many developers because it provides a secure, password-less way to authenticate with GitHub. Once you set up your SSH key, you won’t need to enter your credentials each time you push or pull changes.
SSH is the most commonly used method in DevOps and by developers for connecting to GitHub. It streamlines the workflow and enhances security, making collaboration easier and more efficient.
How to Connect to GitHub via SSH
Generate a New SSH Key:
Create a new SSH key on your local machine. This key will be used to establish a secure connection between your computer and GitHub.Add the SSH Key to the SSH Agent:
Start the SSH agent and add your new SSH key to it. This step ensures your key is used for authentication.
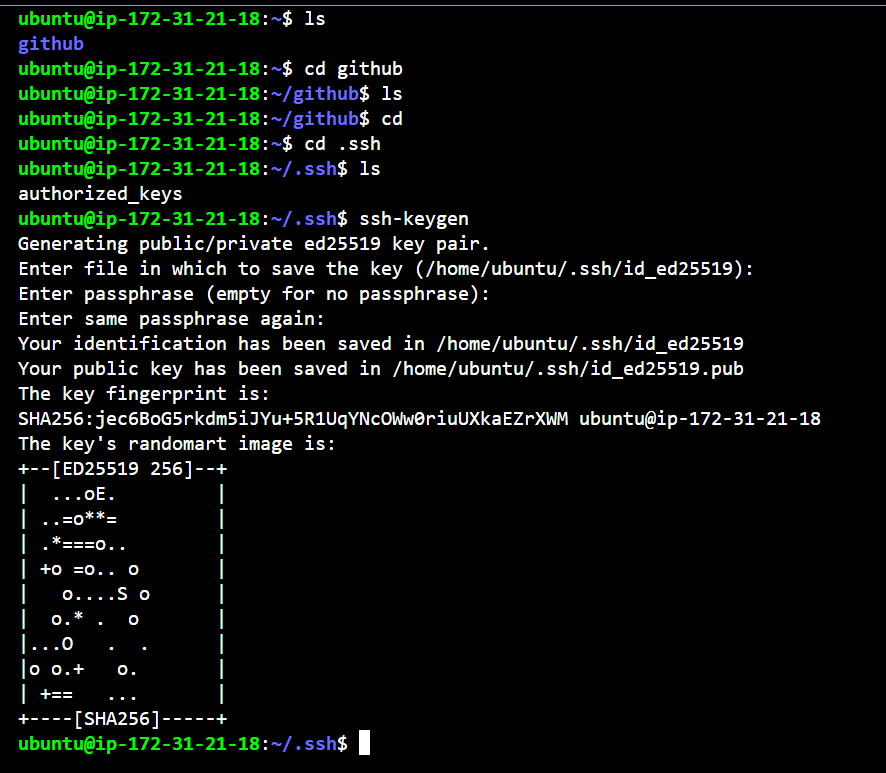
- Copy Your SSH Public Key:
Copy the content of your newly created SSH public key to your clipboard. This key will allow GitHub to recognize your machine.

- Add SSH Key to GitHub:
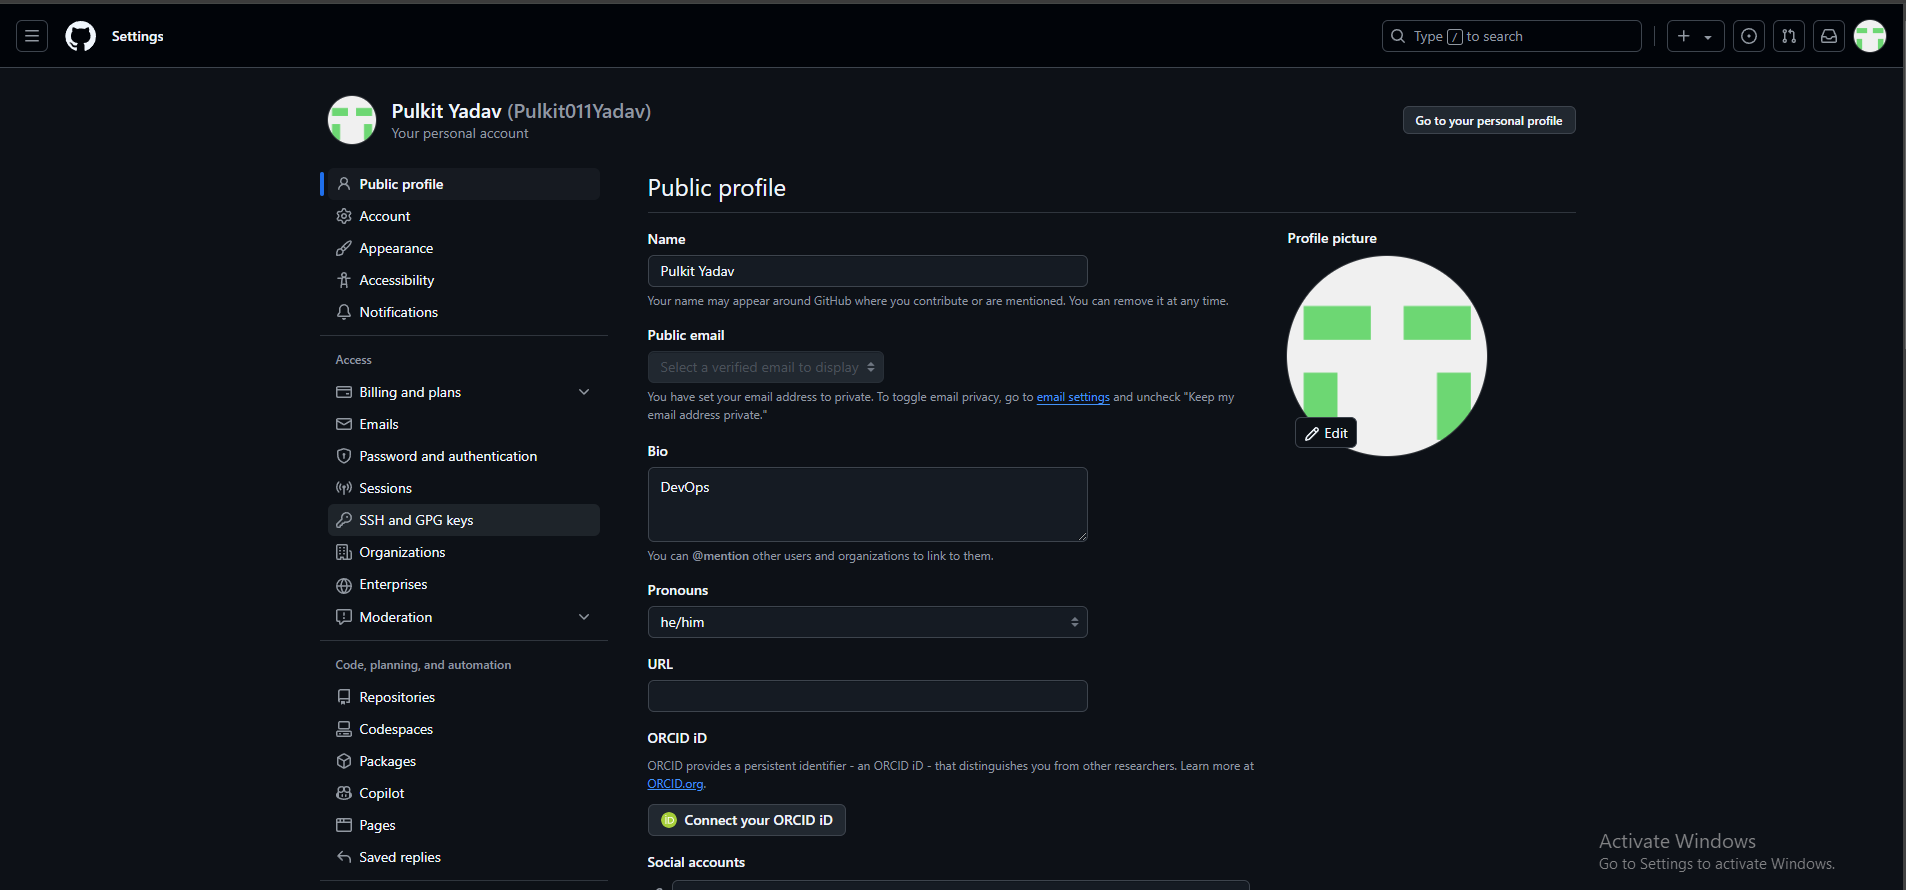
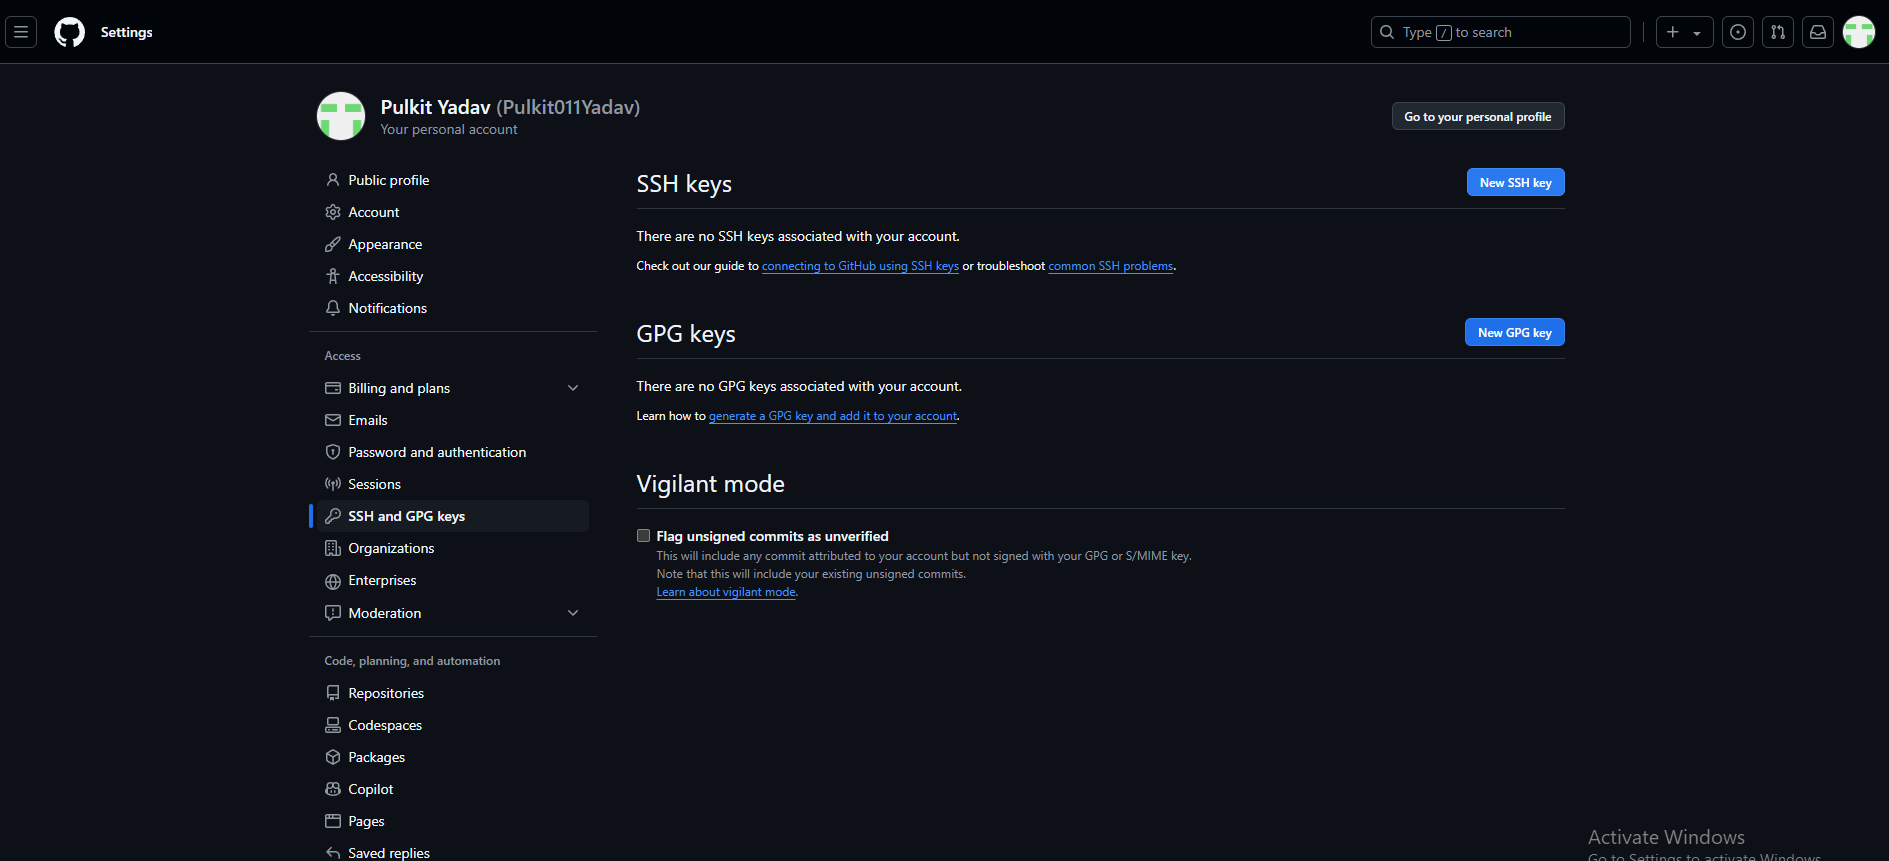
Log in to your GitHub account, navigate to the settings, and add your SSH key under the SSH and GPG keys section. This step links your local machine with your GitHub account.
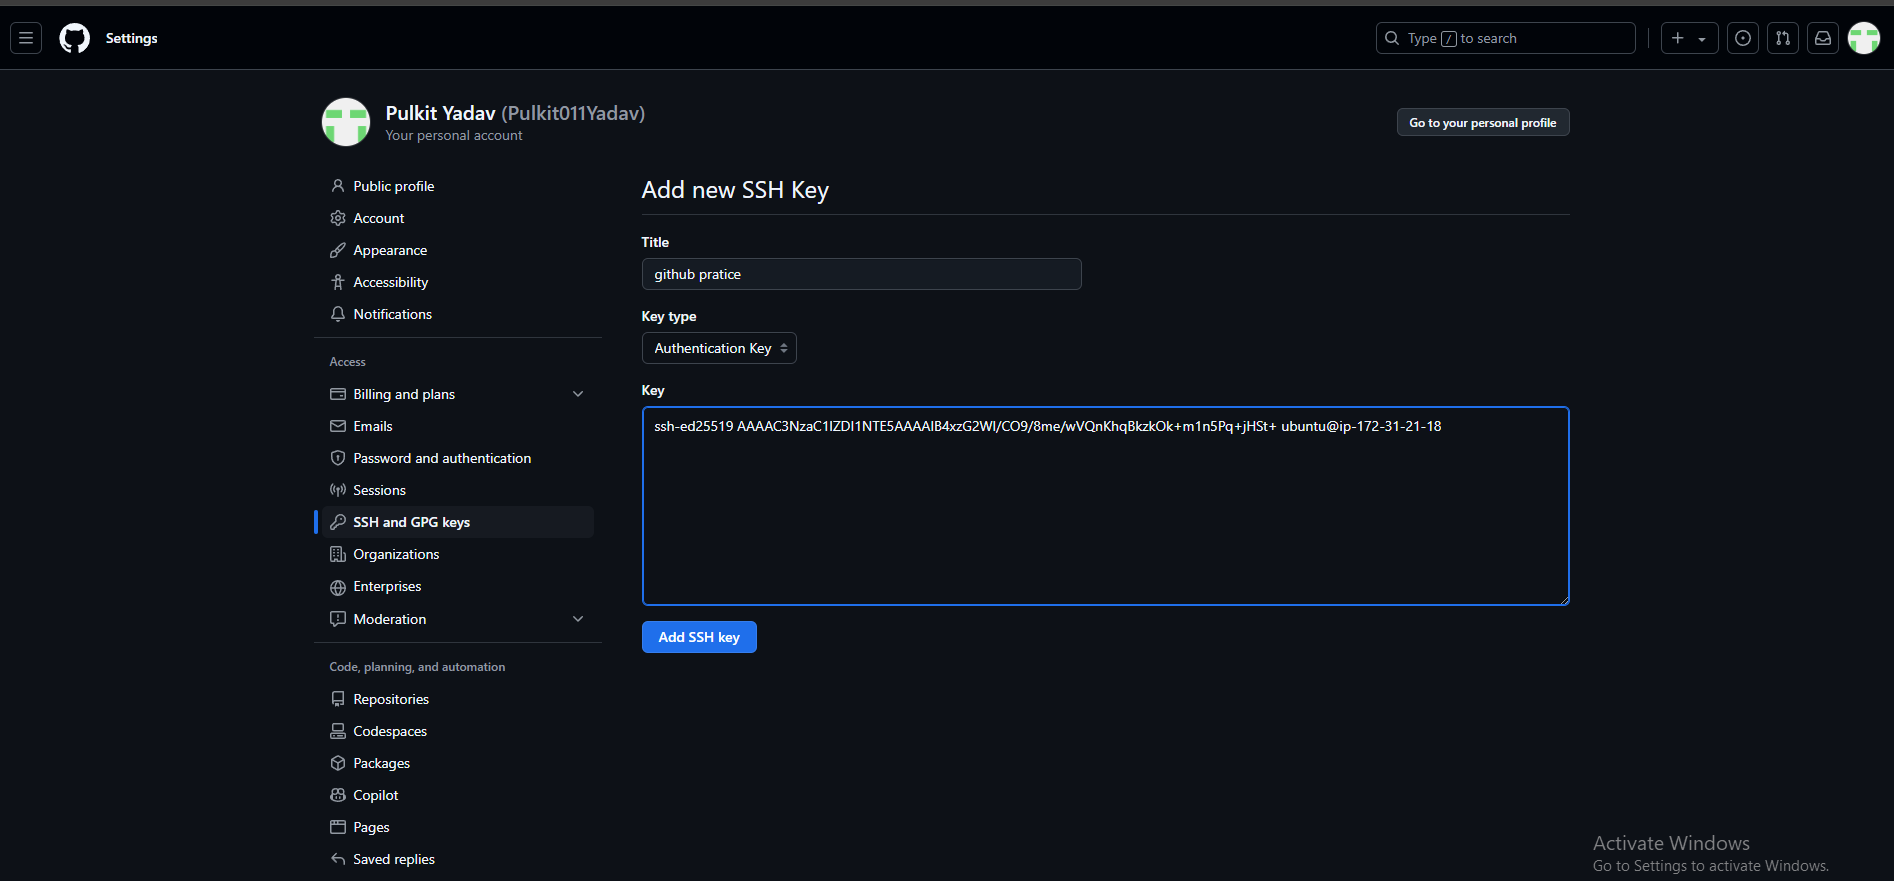
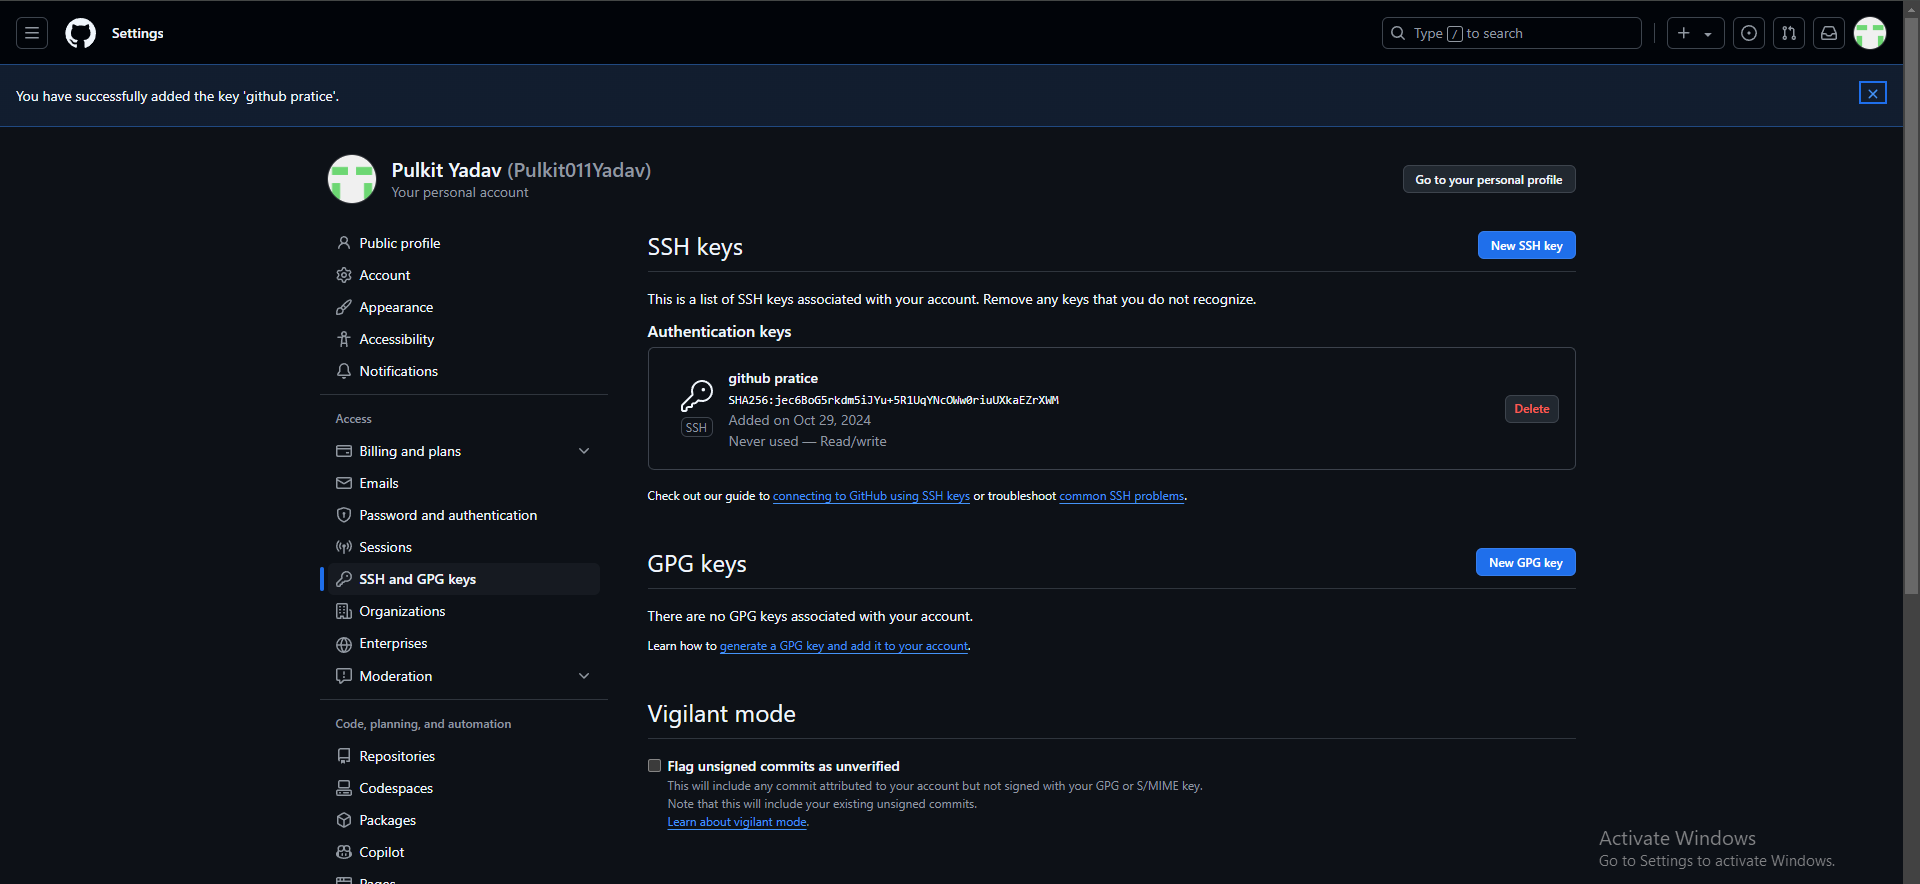
Clone the Repository:
Go to the repository you want to work with and clone it using the SSH URL. This step ensures that you have a local copy of the repository on your machine.Establish the SSH Connection:
With the SSH key added to GitHub and the repository cloned to your local machine, you have now established a secure SSH connection. You can easily push and pull changes without needing to enter your credentials each time.
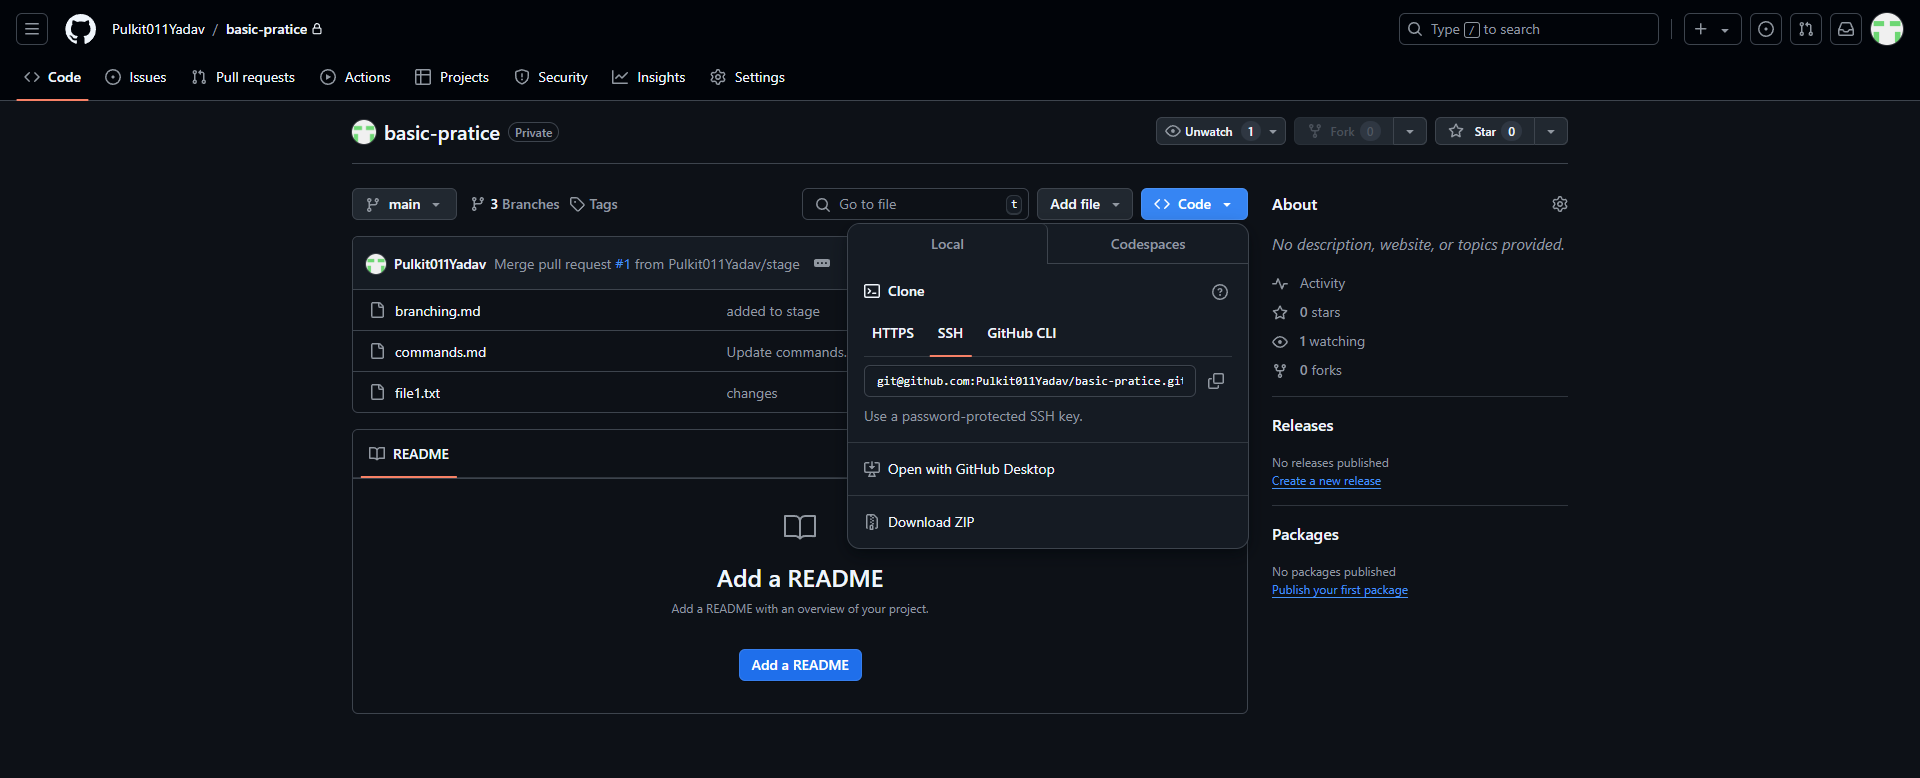
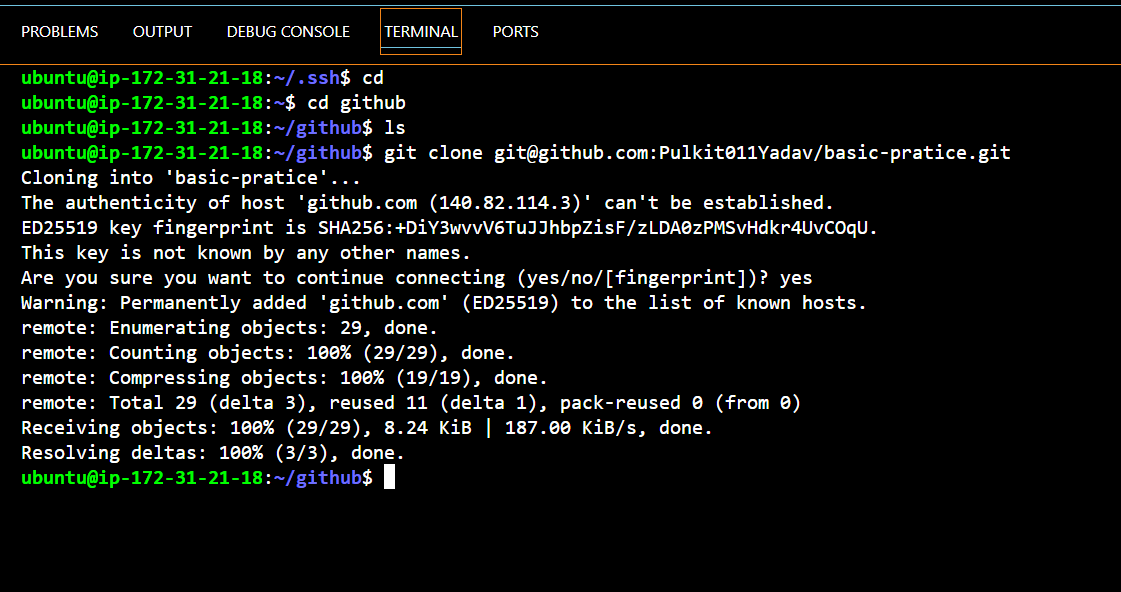
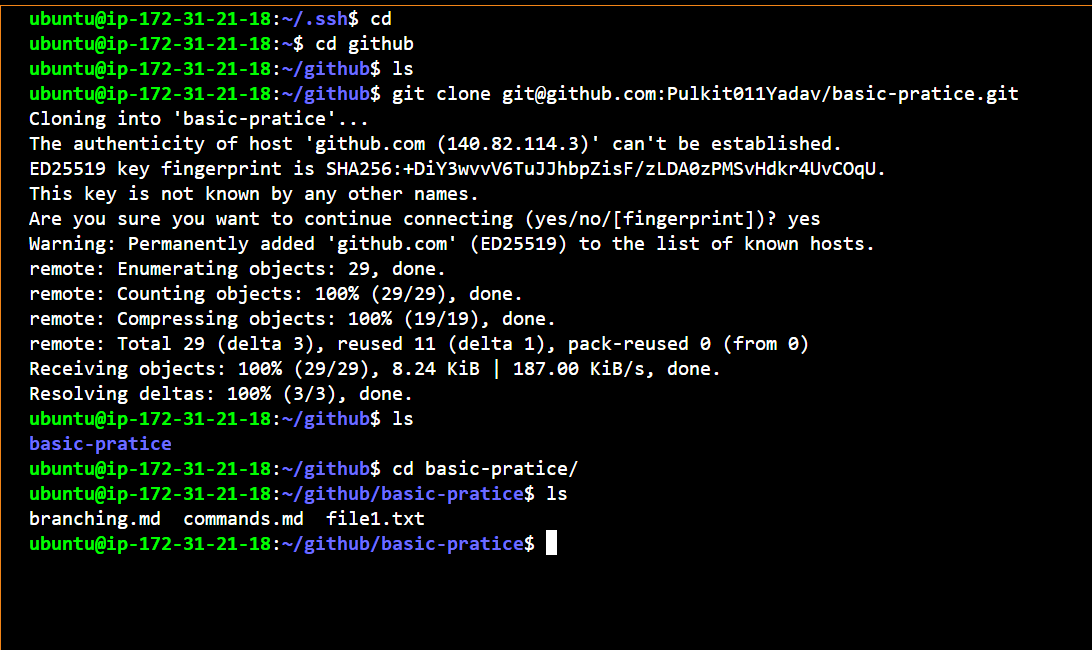
Congratulations! You’ve successfully connected to GitHub using SSH. Now you can collaborate effectively with your team and manage your projects securely.
What is git remote
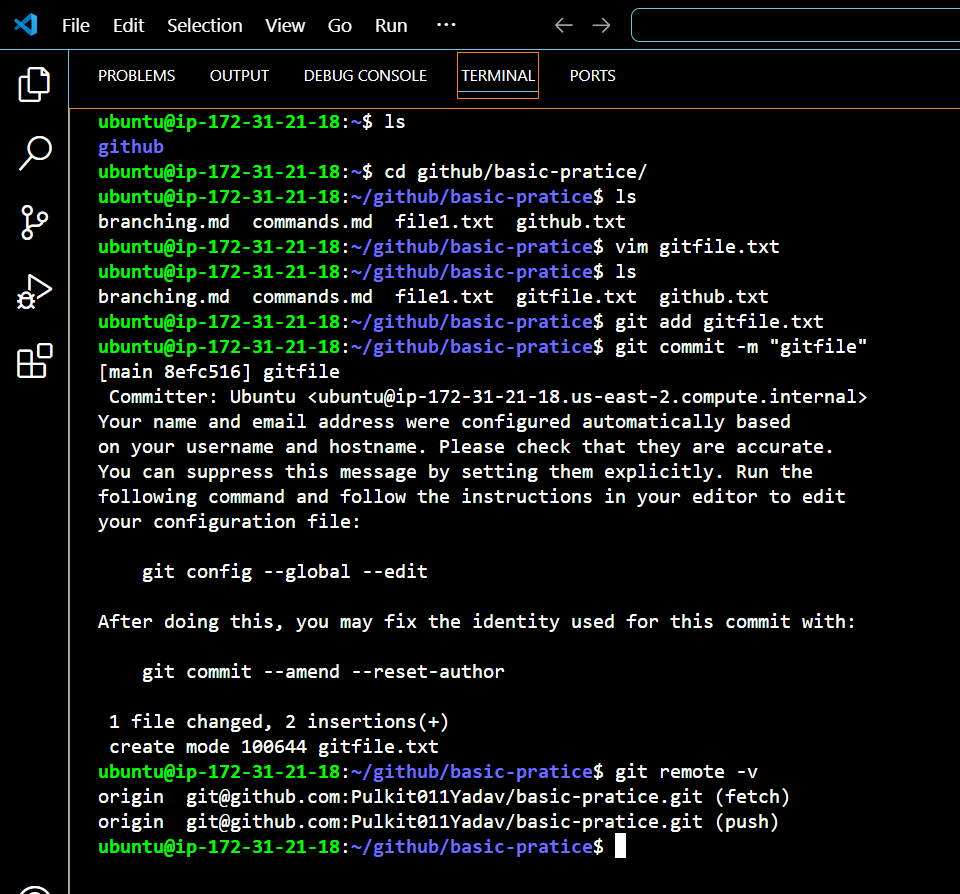
git remote is a command used in Git to manage connections to remote repositories, which are versions of your project hosted on servers like GitHub. This command allows you to add, remove, or view these connections. After connecting via SSH, it’s important to check if the connection is working before pushing your changes. You can do this by running the command git remote -v, which will show any remote repositories linked to your project, including the origin. If no remotes are displayed, you’ll need to add one to establish the connection.

Command use:- git remote add origin SSHURL
How to Push Changes to a Remote Repository
Once you’ve made changes to your local project and confirmed that your remote repository is connected, you’re ready to push your changes to GitHub.
Stage Your Changes: First, you need to stage the gitfile.txt file. You can do this with the command git add gitfile.txt, which stages that specific file.
Commit Your Changes: Next, commit your changes with a message that describes what you’ve done. Use the command git commit -m "Updated gitfile.txt".
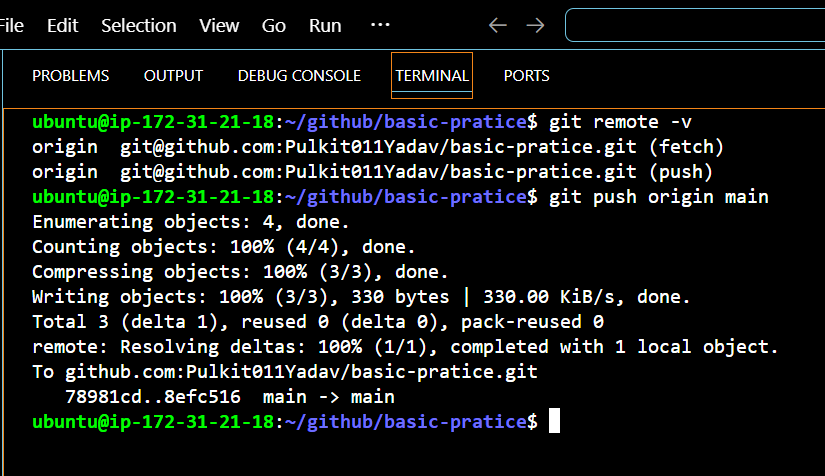
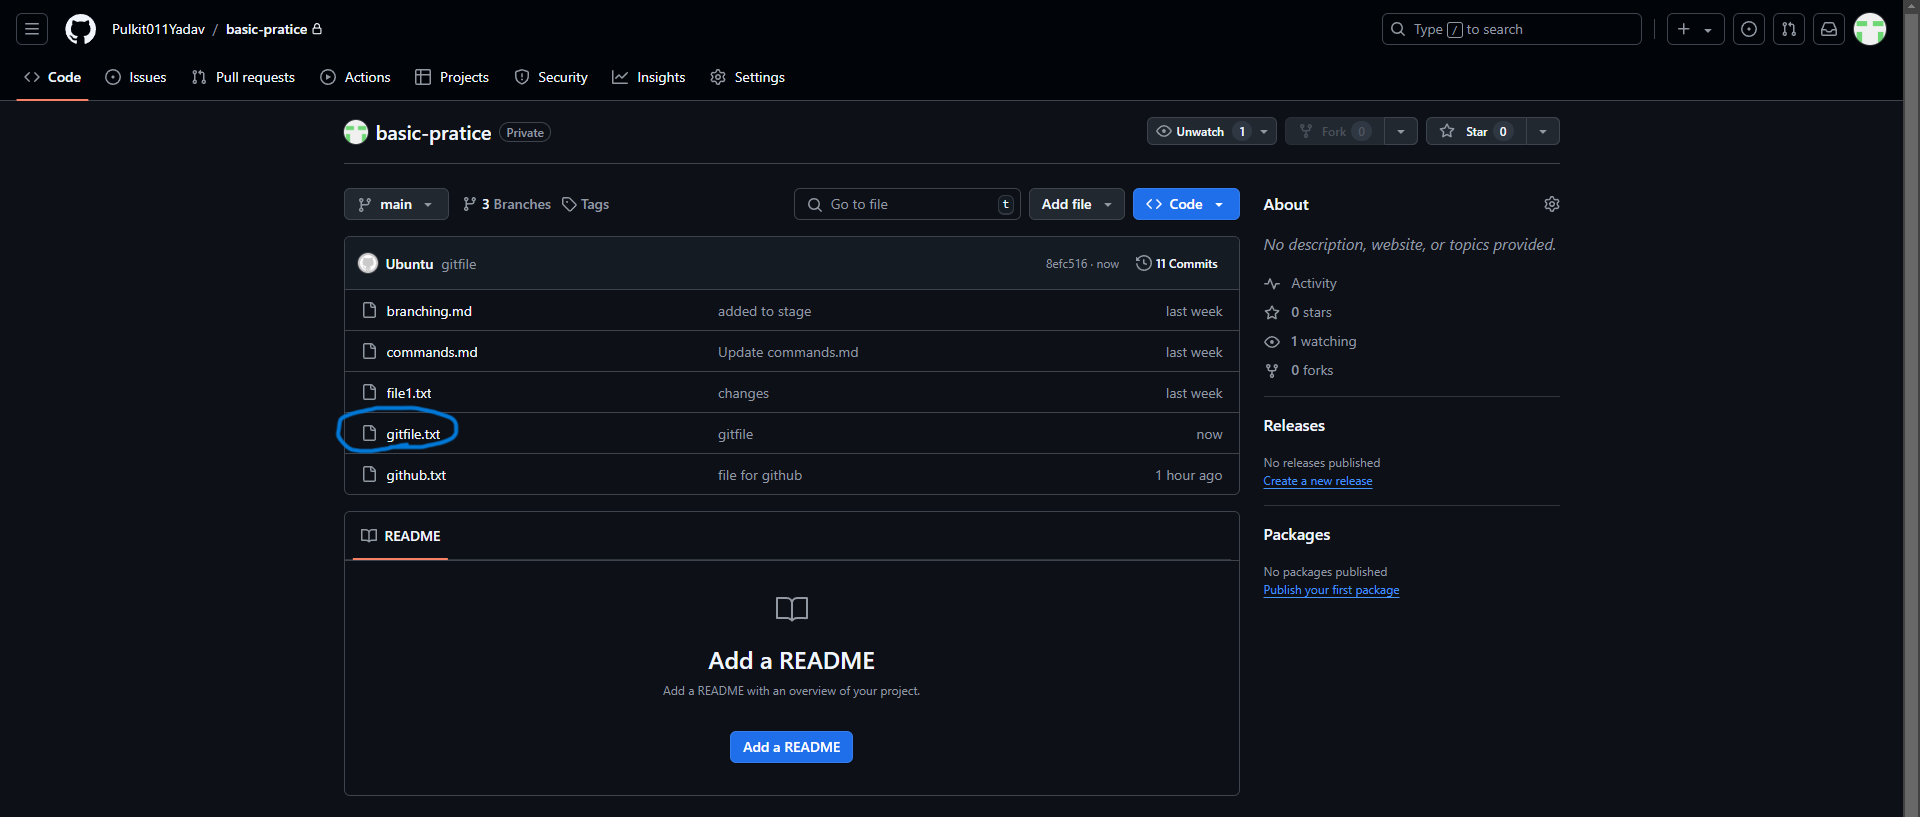
- Push to Remote: Now you can push your changes to the remote repository. Use the command git push origin main (or replace "main" with your branch name if you’re working on a different one). This command sends your committed changes to the remote repository.
After running these commands, your changes in gitfile.txt will be uploaded to GitHub, making them available to others.
How to Pull Changes from a Remote Repository
Pulling changes allows you to update your local repository with the latest changes from the remote repository, ensuring that you're working with the most recent code.
Check Your Branch: Before pulling, make sure you're on the correct branch. You can check your current branch with the command git branch. Switch to the "main" branch if needed using git checkout main.
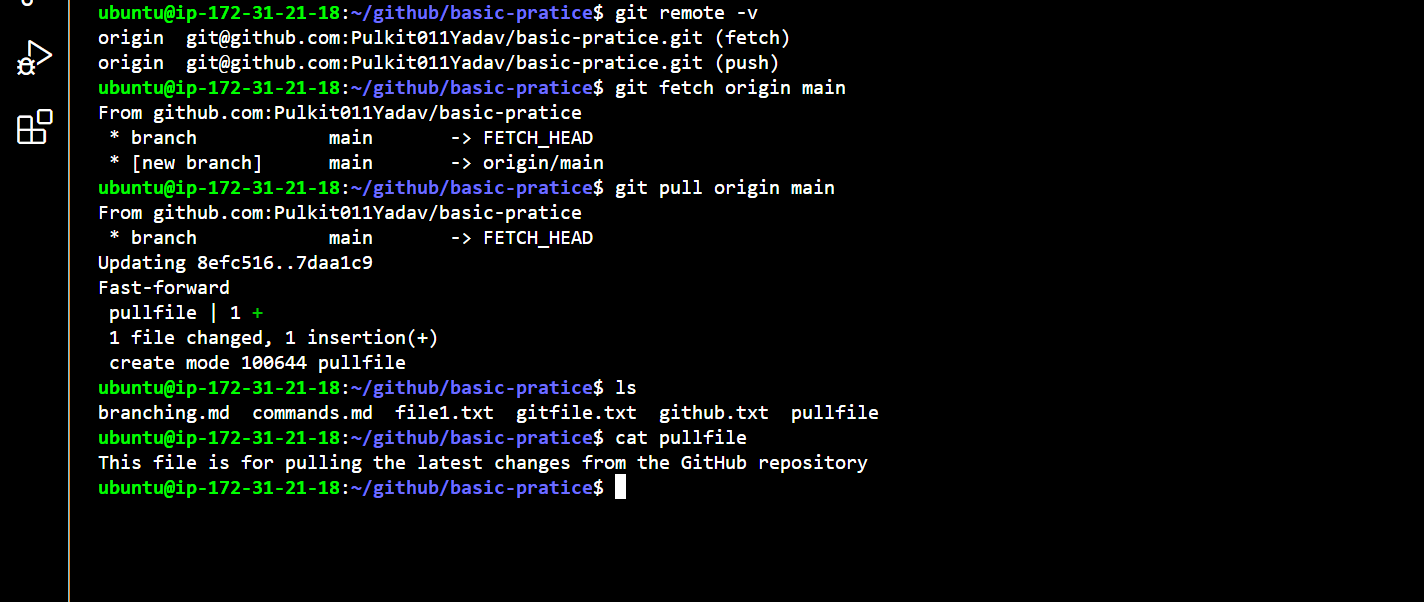
Pull Changes: To pull the latest changes from the remote repository, use the command git pull origin main. This command fetches the changes from the remote and merges them into your local "main" branch.
Resolve Conflicts: If there are any conflicts between your local changes and the remote changes, Git will notify you. You’ll need to resolve these conflicts manually by editing the affected files, staging the resolved files, and committing the changes.
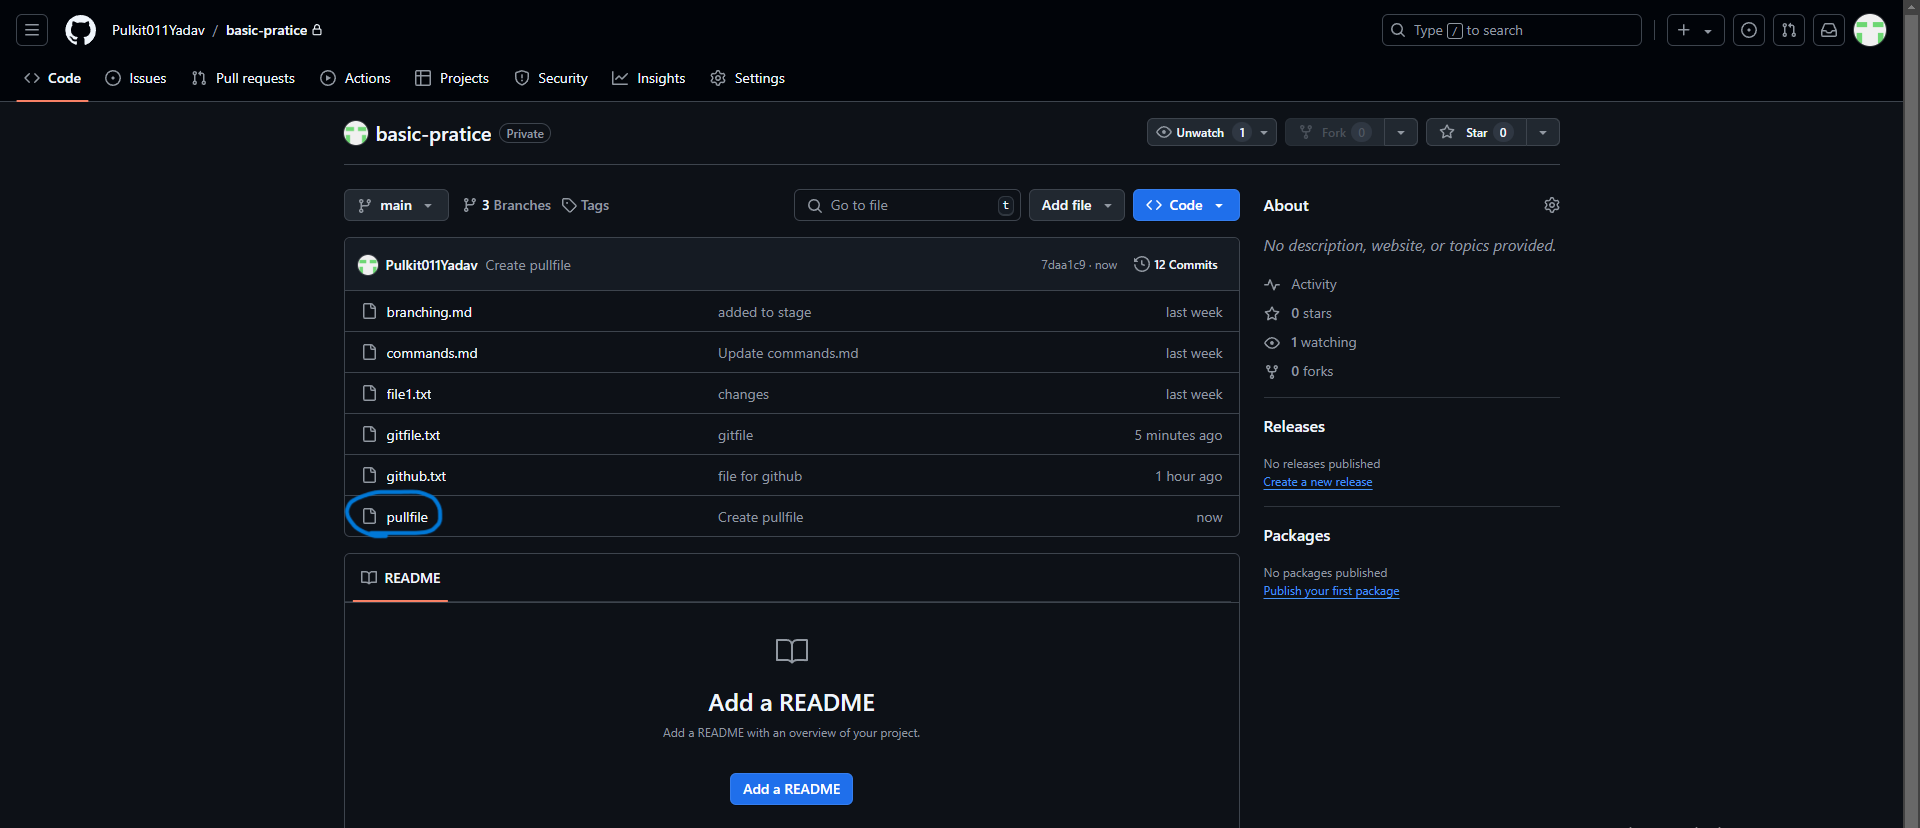
After you pull, your local repository will be updated with the latest changes from the remote, including any updates to pullfile.
How to Push Changes to pullfile After Pulling
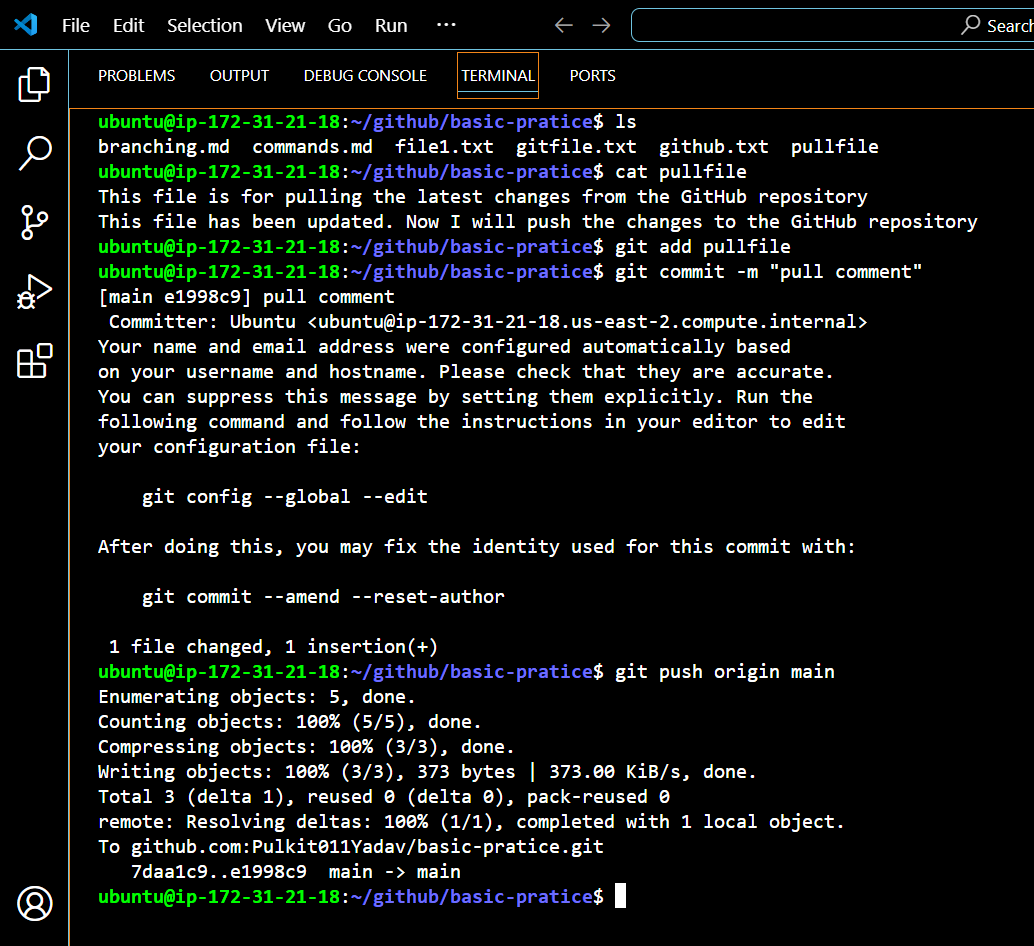
After pulling the latest changes from the remote repository and making updates to pullfile, you’re ready to push your changes back to the remote.
Stage Your Changes: First, stage the modified pullfile using the command git add pullfile. This prepares it to be included in your next commit.
Commit Your Changes: Next, commit your changes with a descriptive message. Use the command git commit -m "Updated pullfile with recent changes".
Push to Remote: Now you can push your changes to the remote repository. Use the command git push origin main. This sends your committed changes in pullfile to the remote repository on the "main" branch.
After running these commands, your changes in pullfile will be uploaded to GitHub, making them available for others to see and use.

What is Fetching?
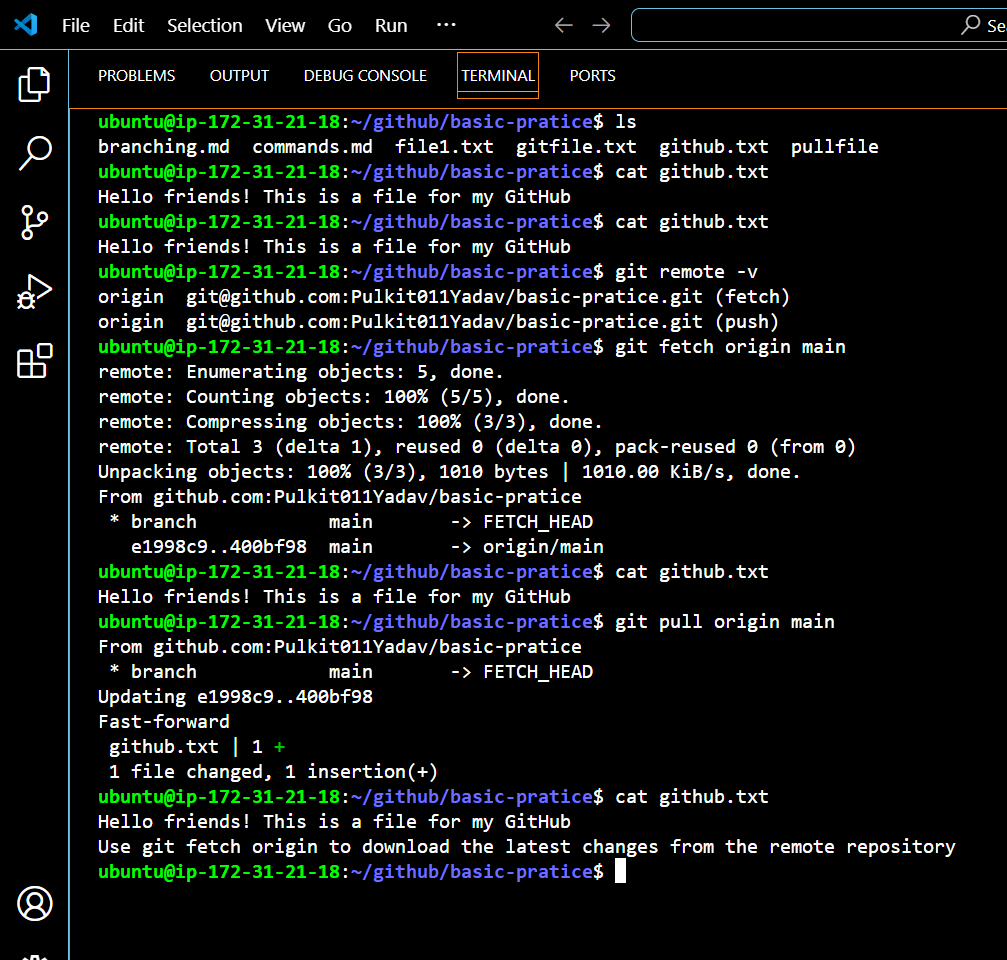
Fetching in Git is the process of downloading updates from a remote repository without merging them into your local branch. It allows you to see what changes are available on the remote server, such as new commits or branches, without altering your current working files. This way, you can review the changes and decide when or if you want to incorporate them into your local repository.
Why Use Fetch?
Stay Informed: Fetching keeps you updated on the latest changes made by others in the remote repository, helping you stay informed about project progress.
No Disruption: Since fetching doesn’t merge changes automatically, it allows you to review updates without disrupting your current work.
Prepare for Integration: After fetching, you can decide which updates to pull into your local branch, ensuring you only incorporate relevant changes.
To fetch updates, use the command git fetch origin, which will download the latest information from the remote repository, including any changes made to githubfile.
Overview
In this guide, we covered the essential steps to connect your local repository to a remote repository on GitHub. By using SSH, you can securely link your code to a project hosted online. Here’s a recap of the key processes:
Connecting to a Remote Repository: We started by linking your local repository to a remote one using SSH, which provides a secure connection for your work.
Pushing Changes: After making updates to your local files, we discussed how to stage git add, commit git commit, and push git push origin main your changes to the remote repository. This ensures your work is shared with your team and backed up online.
Pulling Changes: We explored how to fetch the latest updates from the remote repository using git fetc
hand then merge those changes into your local branch with git pull origin main. This keeps your local code synchronized with the most recent updates from your collaborators.Fetching Changes: Finally, we talked about the importance of fetching, which allows you to download updates without merging them immediately, giving you the opportunity to review changes first.
By mastering these commands and processes, you can collaborate effectively, keep your code organized, and ensure your projects are up to date.
Thank you for joining me! Let’s keep learning together, and I look forward to seeing you in the next blog!
Subscribe to my newsletter
Read articles from Pulkit Yadav directly inside your inbox. Subscribe to the newsletter, and don't miss out.
Written by

Pulkit Yadav
Pulkit Yadav
DevOps Enthusiast | Exploring Cloud & Automation I’m an aspiring DevOps professional passionate about cloud computing, automation, and CI/CD pipelines. I’m currently gaining hands-on experience with tools like AWS, Docker, Kubernetes, Jenkins and GitLab CI/CD, Terraform, Ansible, and more. My focus is on improving development and deployment processes through continuous learning and practical application. Alongside my learning journey, I share my insights and experiences through blogs to help others who are exploring the same path. I believe in learning together and growing by sharing knowledge, and I’m excited to connect with like-minded individuals in the field. Let’s collaborate, share ideas, and grow together!