How to take AWS RDS Database Snapshots
 George Palangattil
Overview
Amazon RDS creates a storage volume snapshot of your DB instance, backing up the entire instance rather than individual databases. When creating this DB snapshot on a Single-AZ DB instance, there is a brief I/O suspension that can last from a few seconds to a few minutes, depending on the size and class of your DB instance. The time required to create a snapshot varies with the size of your databases. Since the snapshot includes the entire storage volume, the size of files, such as temporary files, also affects the duration of the snapshot creation process.
Snapshots of Amazon RDS volumes are incremental, even though database snapshots function operationally as full backups. There are two types of Amazon RDS snapshots: automated and manual. Automated backups occur daily during the preferred backup window, whereas a manual snapshot can be triggered at any time it is needed. Unlike automated backups, manual snapshots are not subject to the backup retention period and do not expire
Step 1 - Select the database
Sign in to the Amazon RDS Console
Go to the AWS Management Console and log in with your credentials. Then In the console, locate and select RDS from the list of services. In the upper-right corner of the RDS console, select the AWS Region where DB instance located.

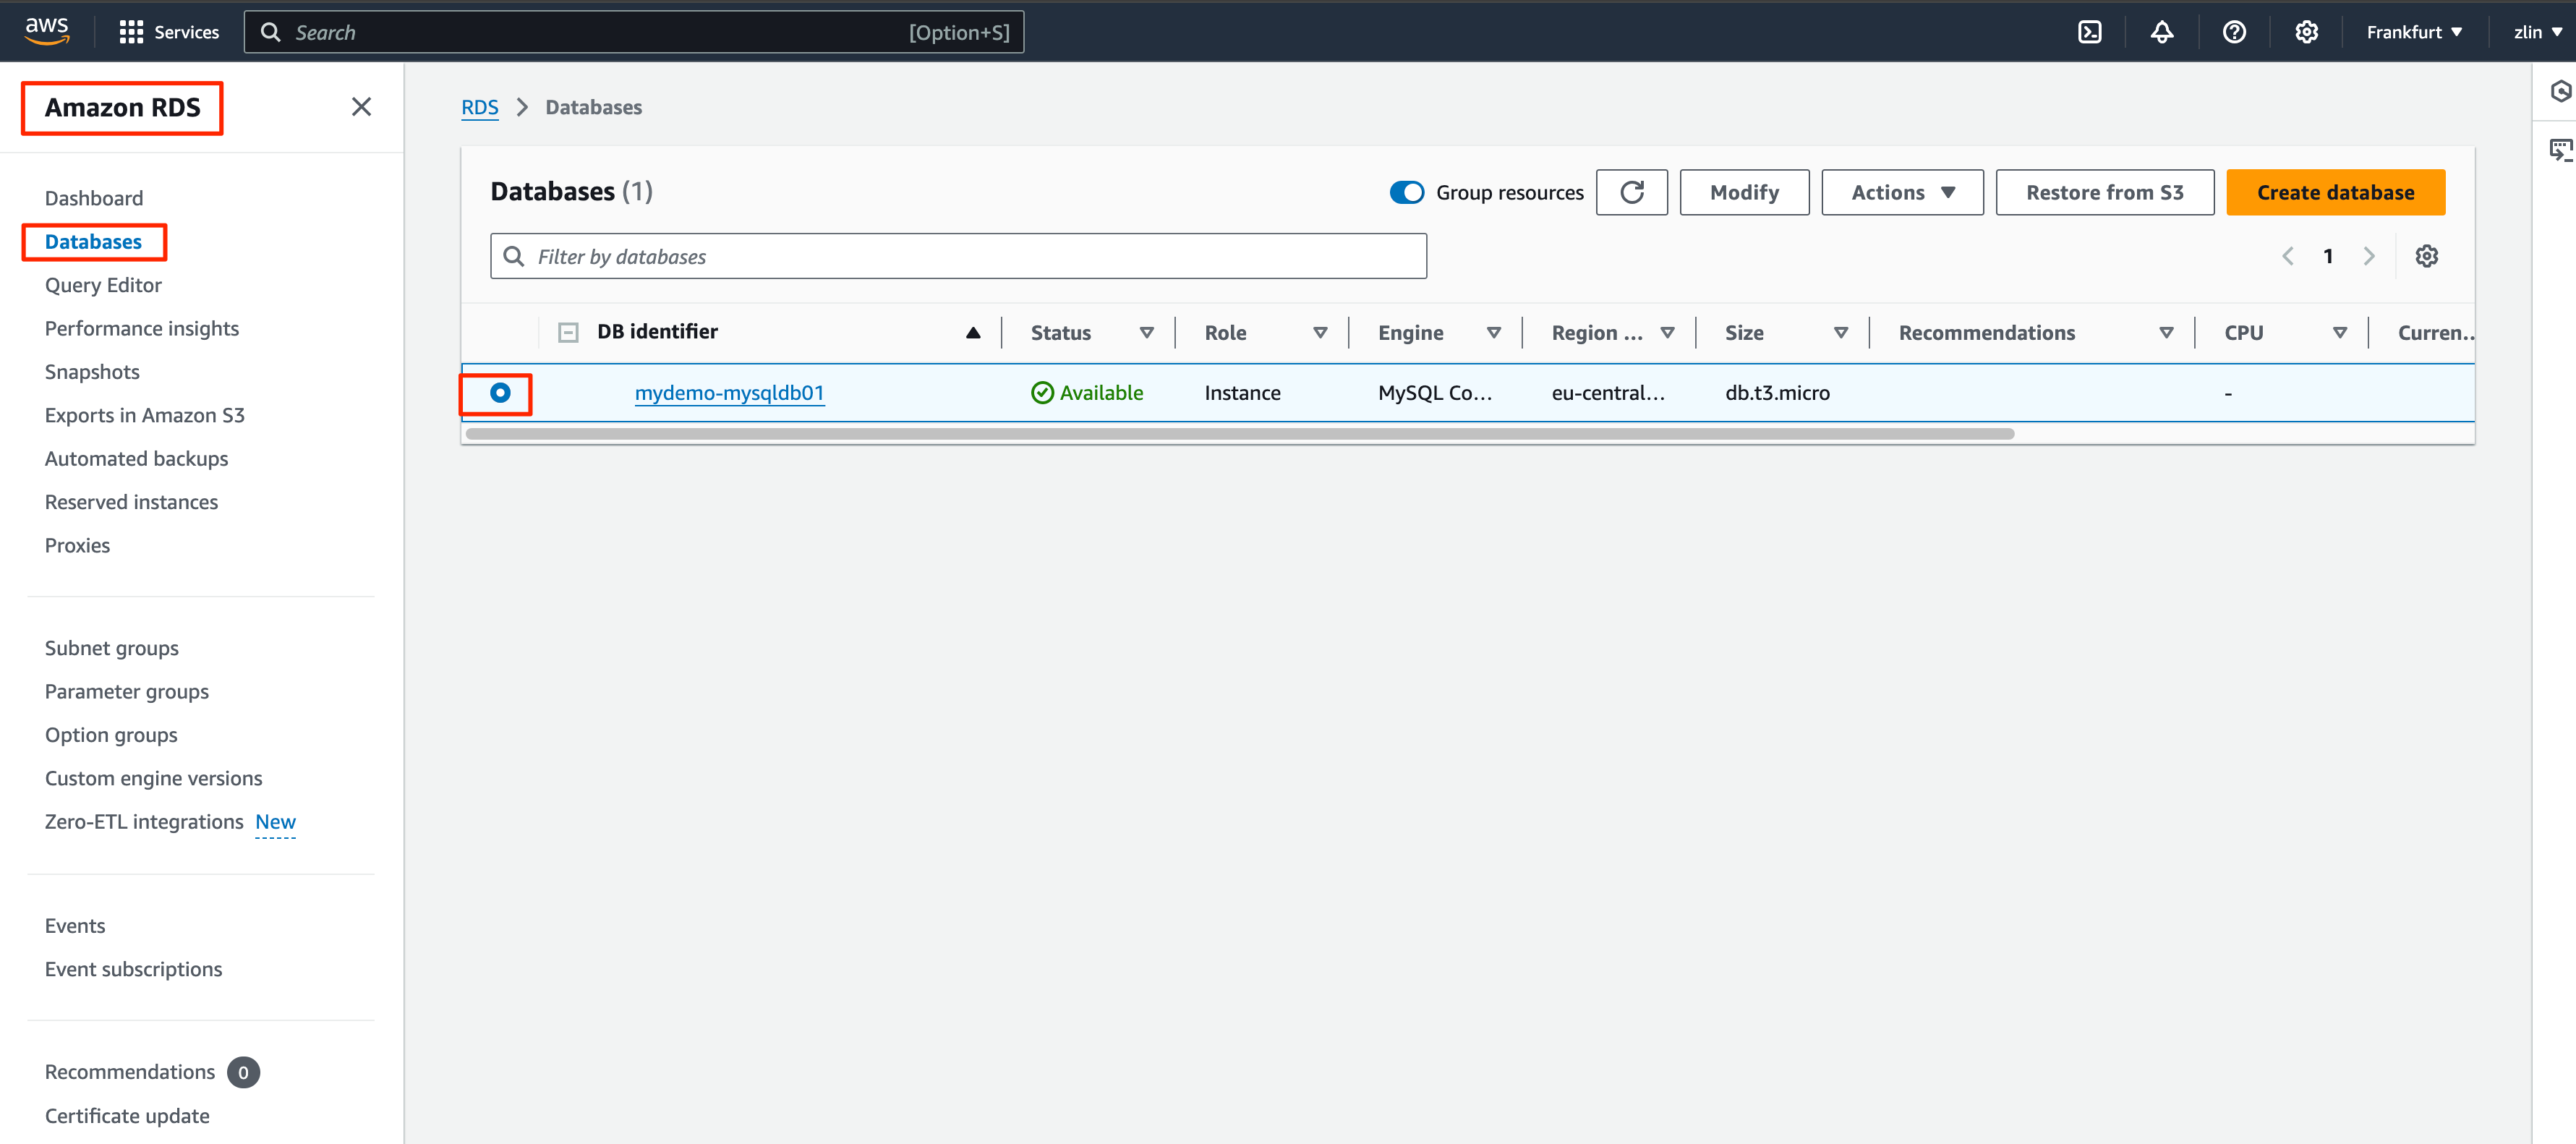
Select the database
In the left navigation pane of the RDS dashboard, click on Databases. This will display a list of all your RDS instances. Locate and select the database instance from the list.
Prepare Snapshot
Manual Snapshot
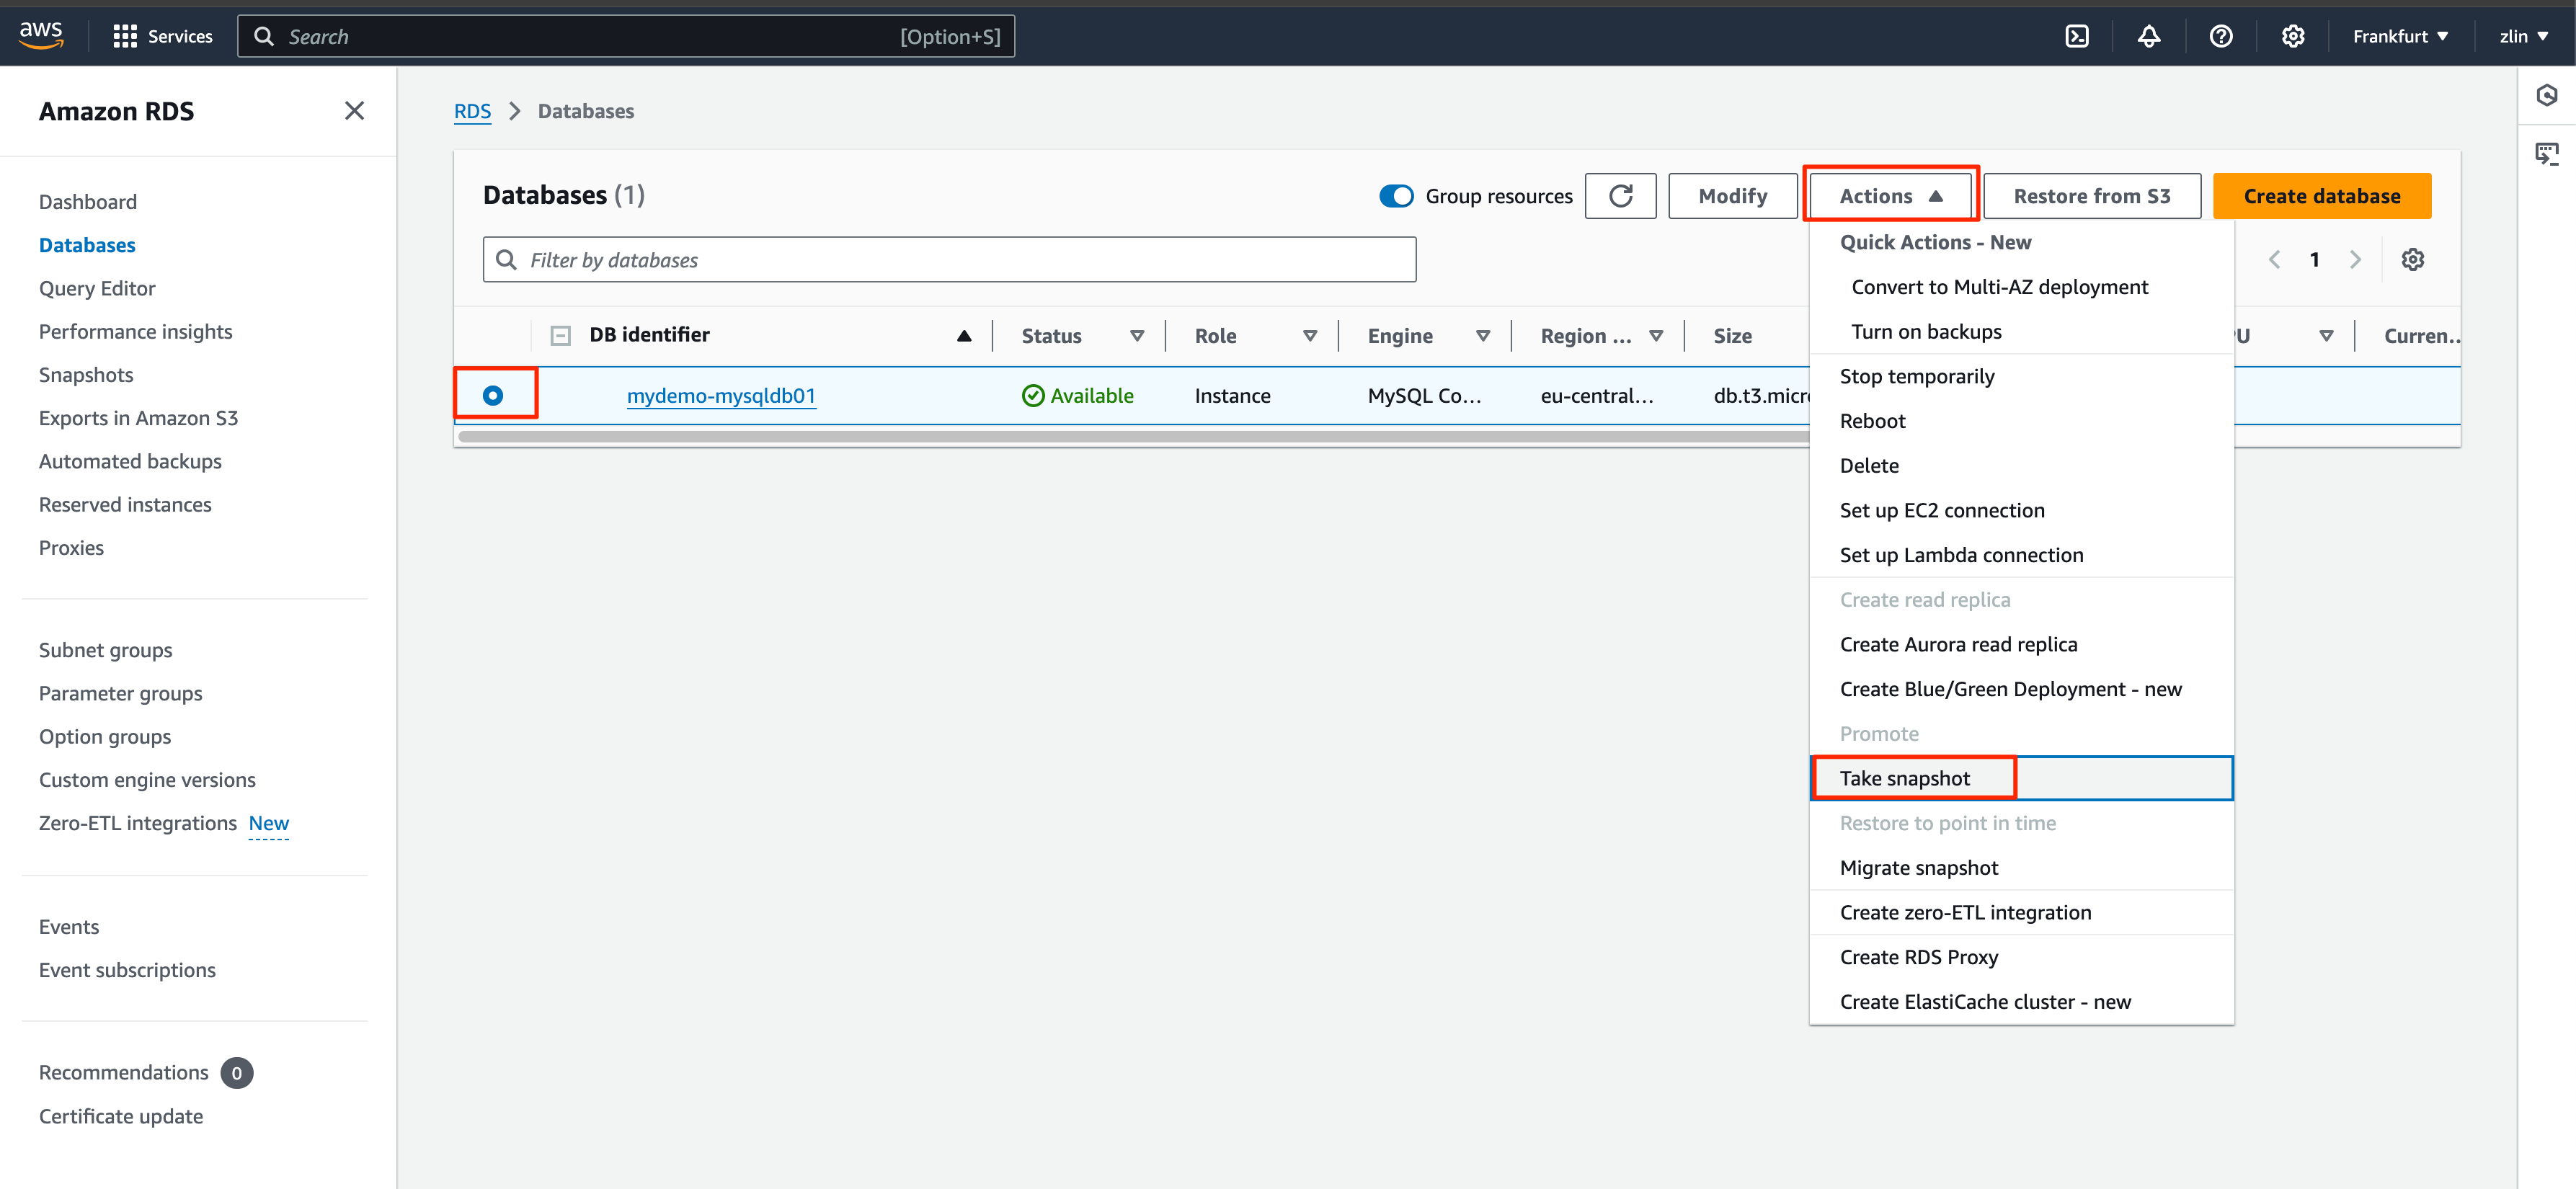
Take Snapshot
Select Database then go to actions and click Take Snapshot option
If it is taking the first snapshot, it may take a couple of minutes depending on the size of the database.
Name it and initiate the snapshot
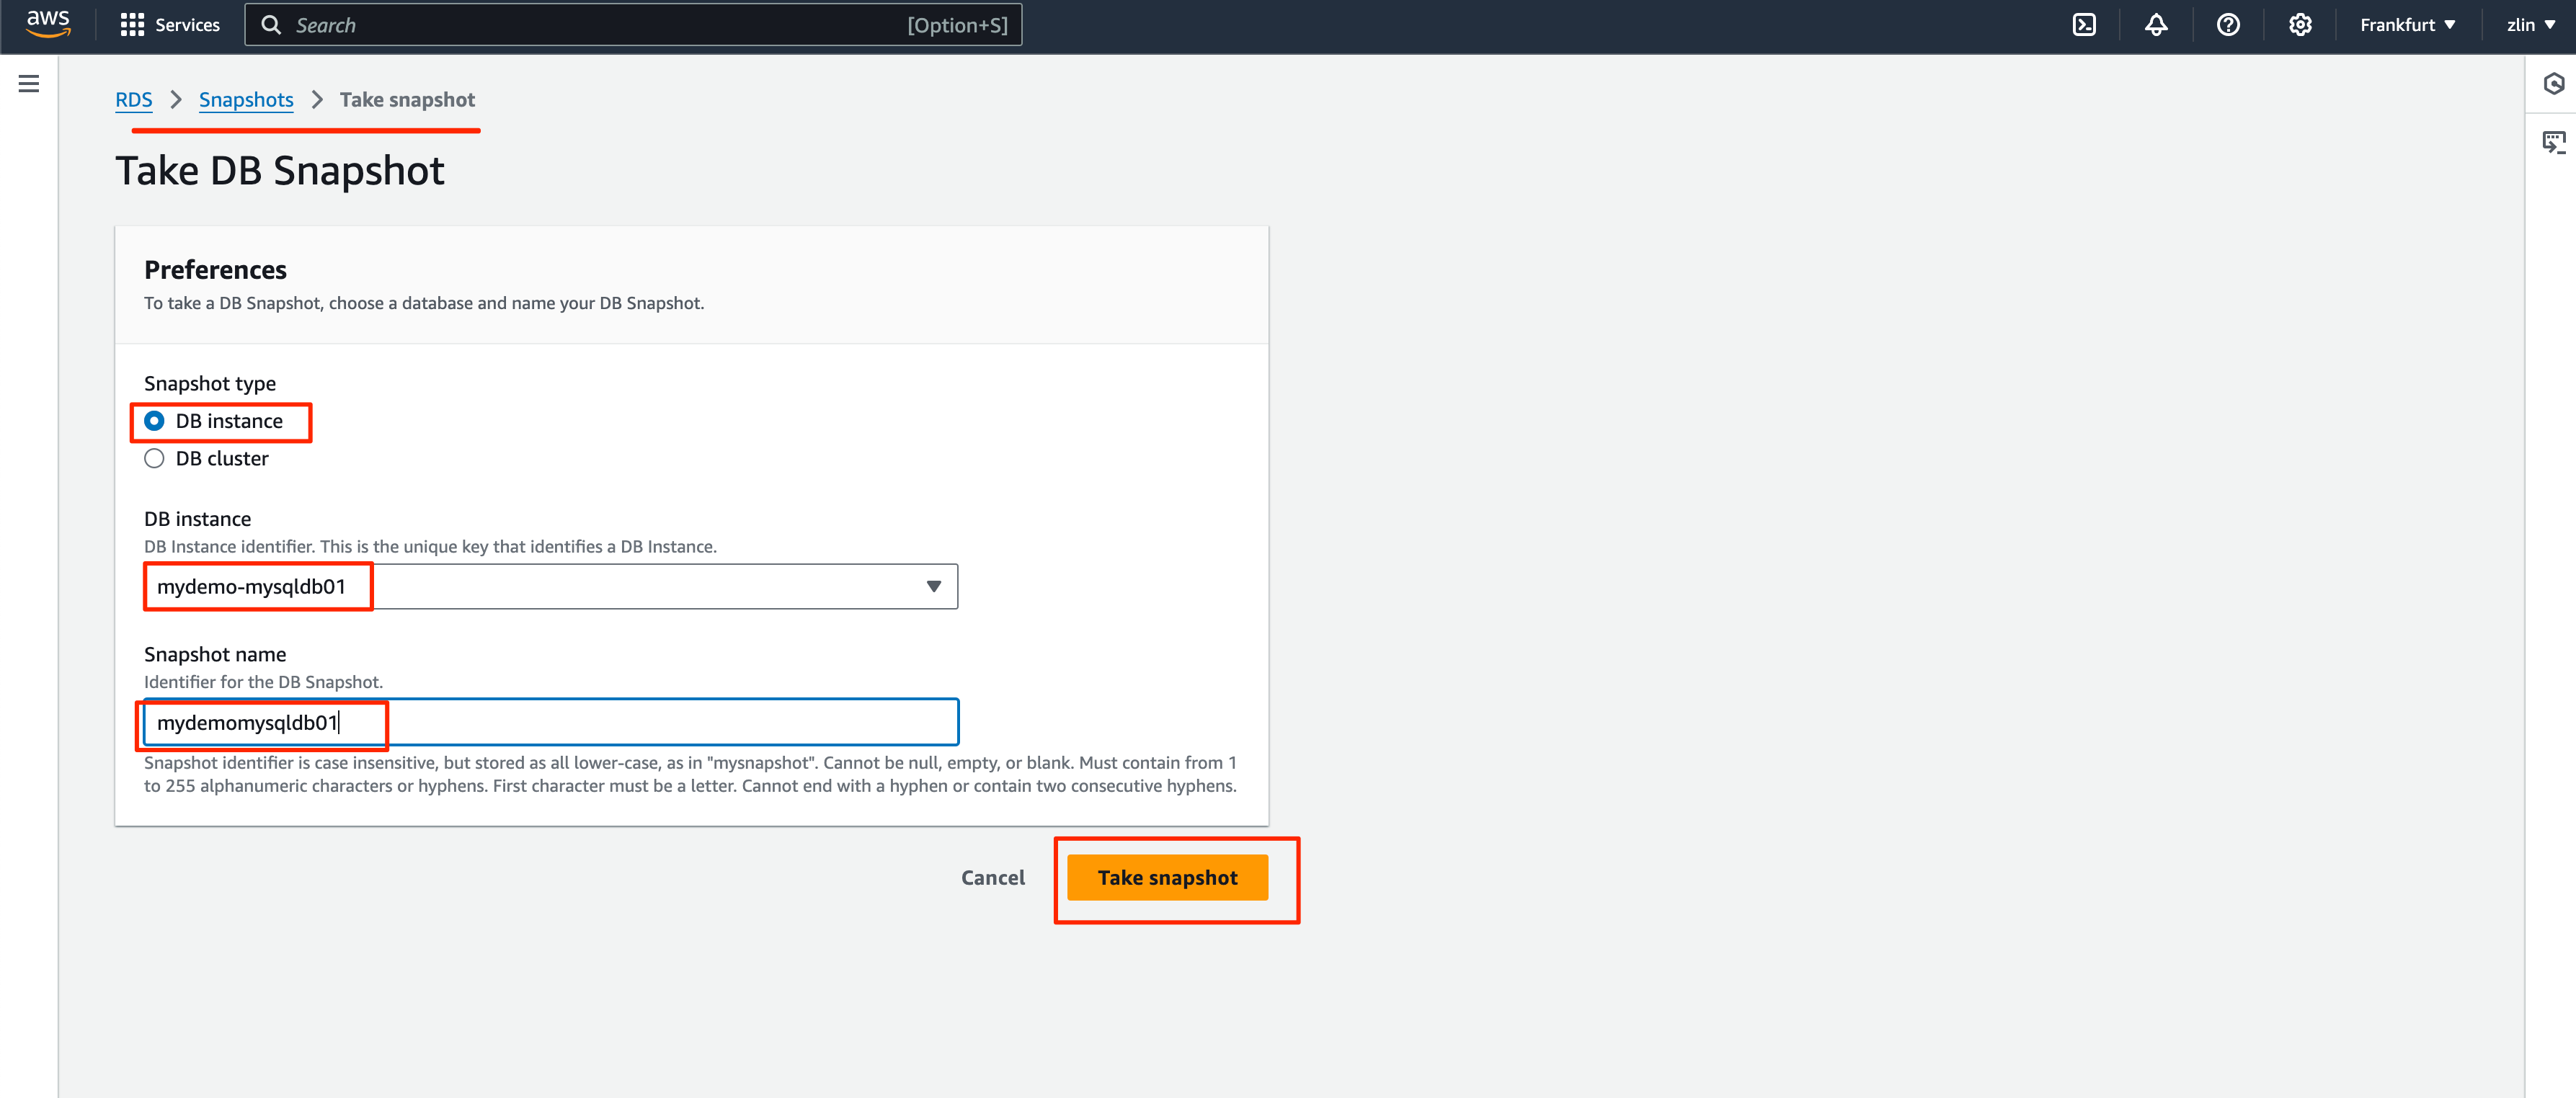
For the snapshot name, use the meaning full and easy to recognise the purpose of each snapshot.
Provide the snapshot name and click on Take Snapshot
Validate the snapshot
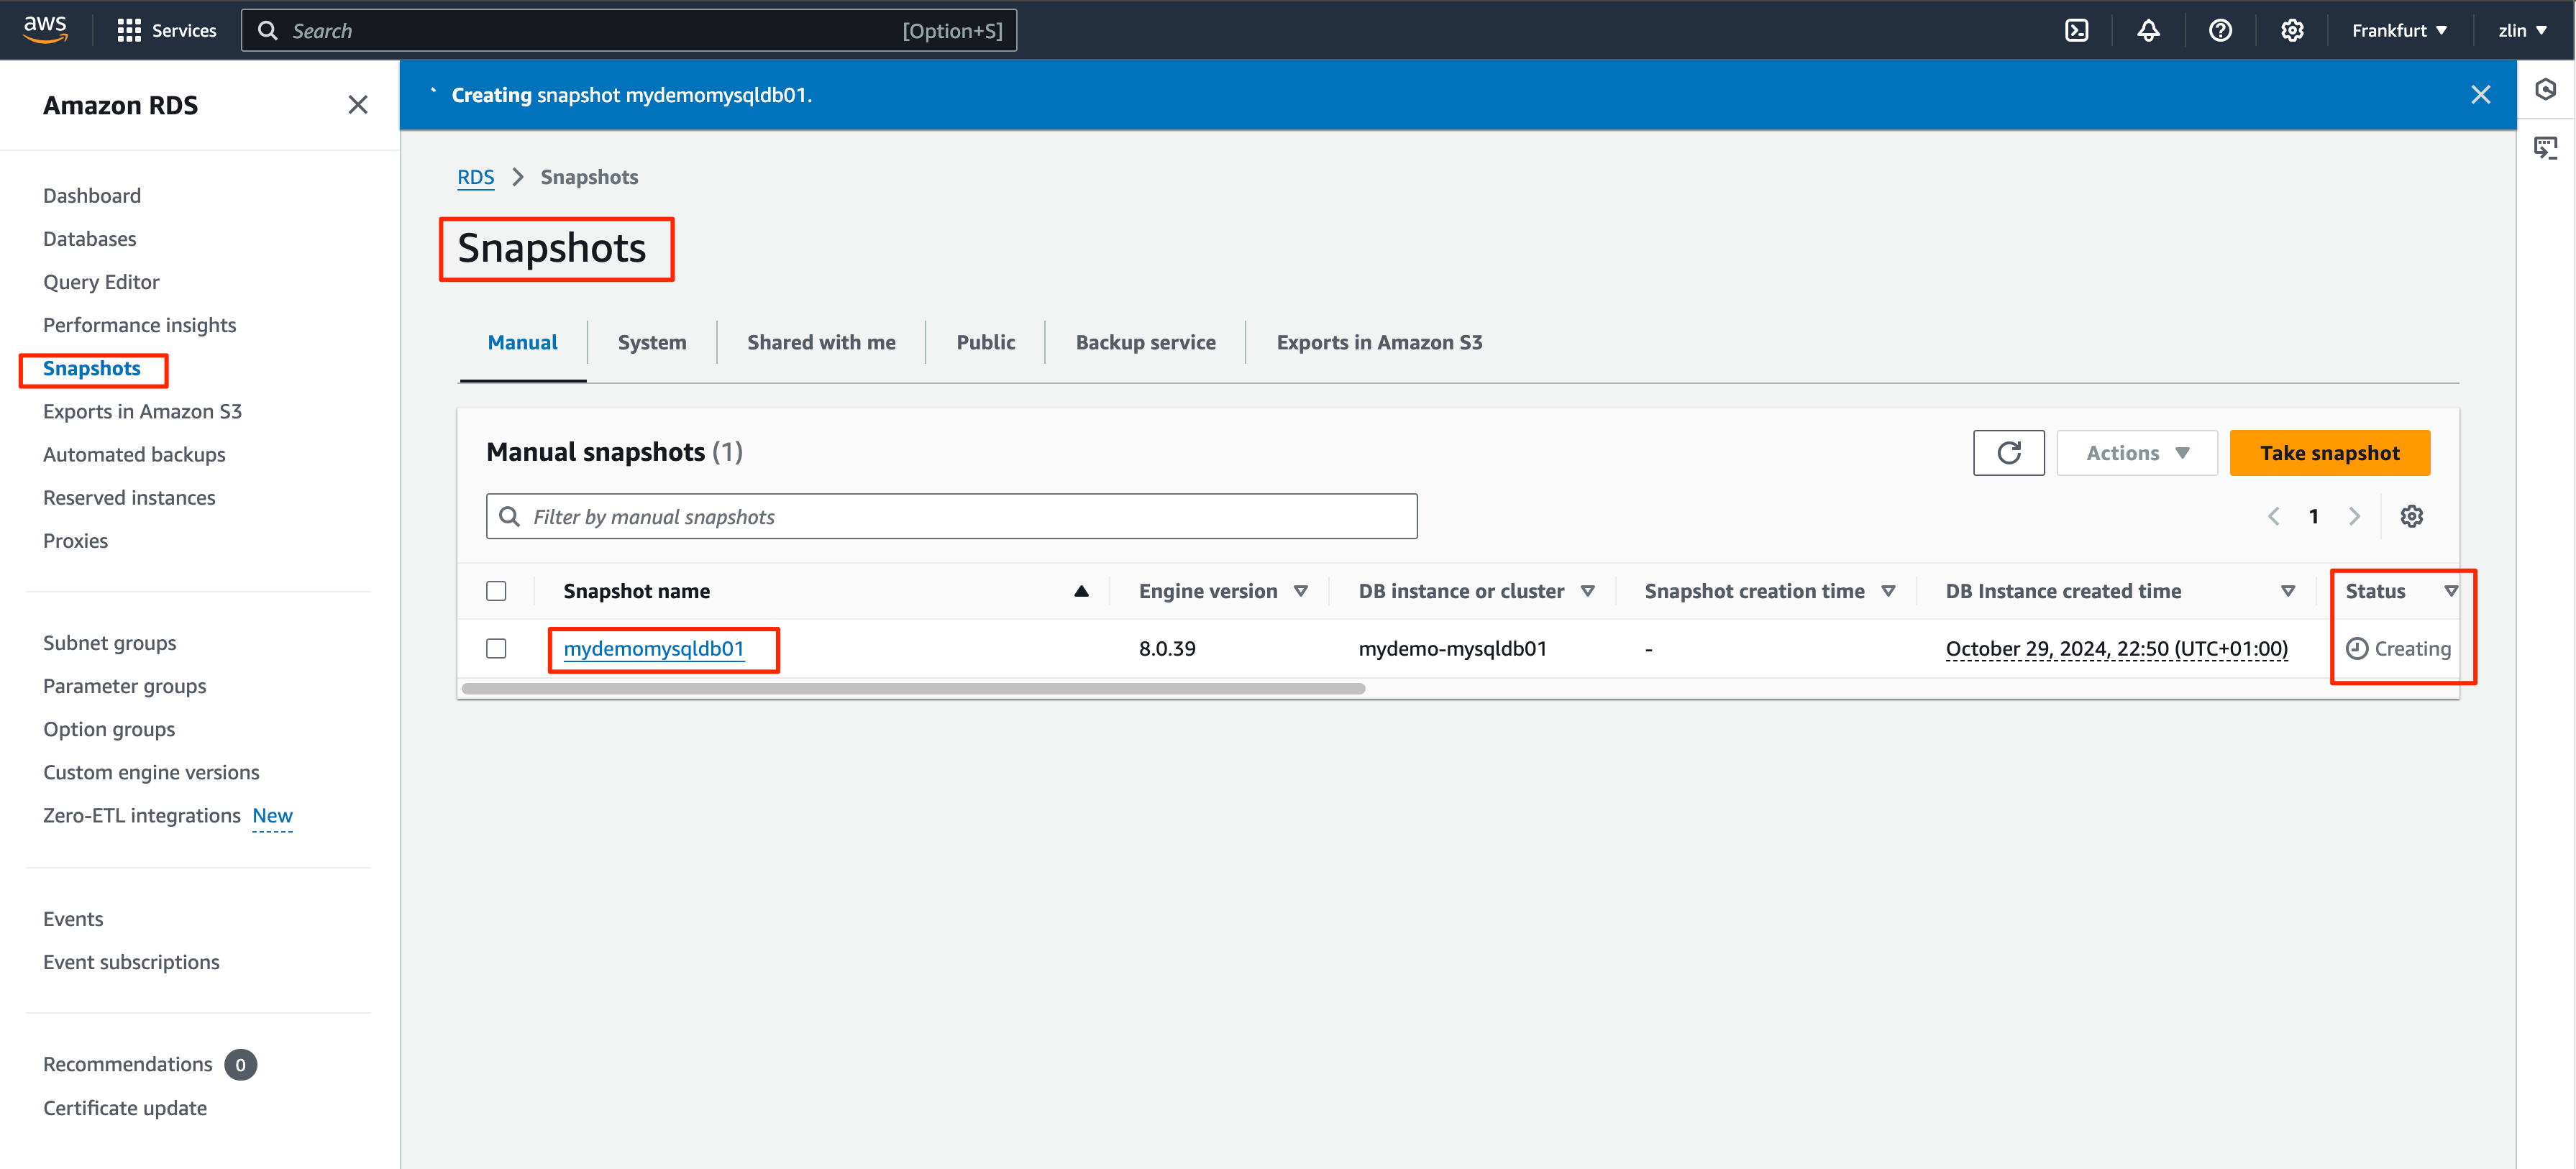
Console automatically move to the RDS Snapshots console. Watch on the snapshot name and the status to see the completion
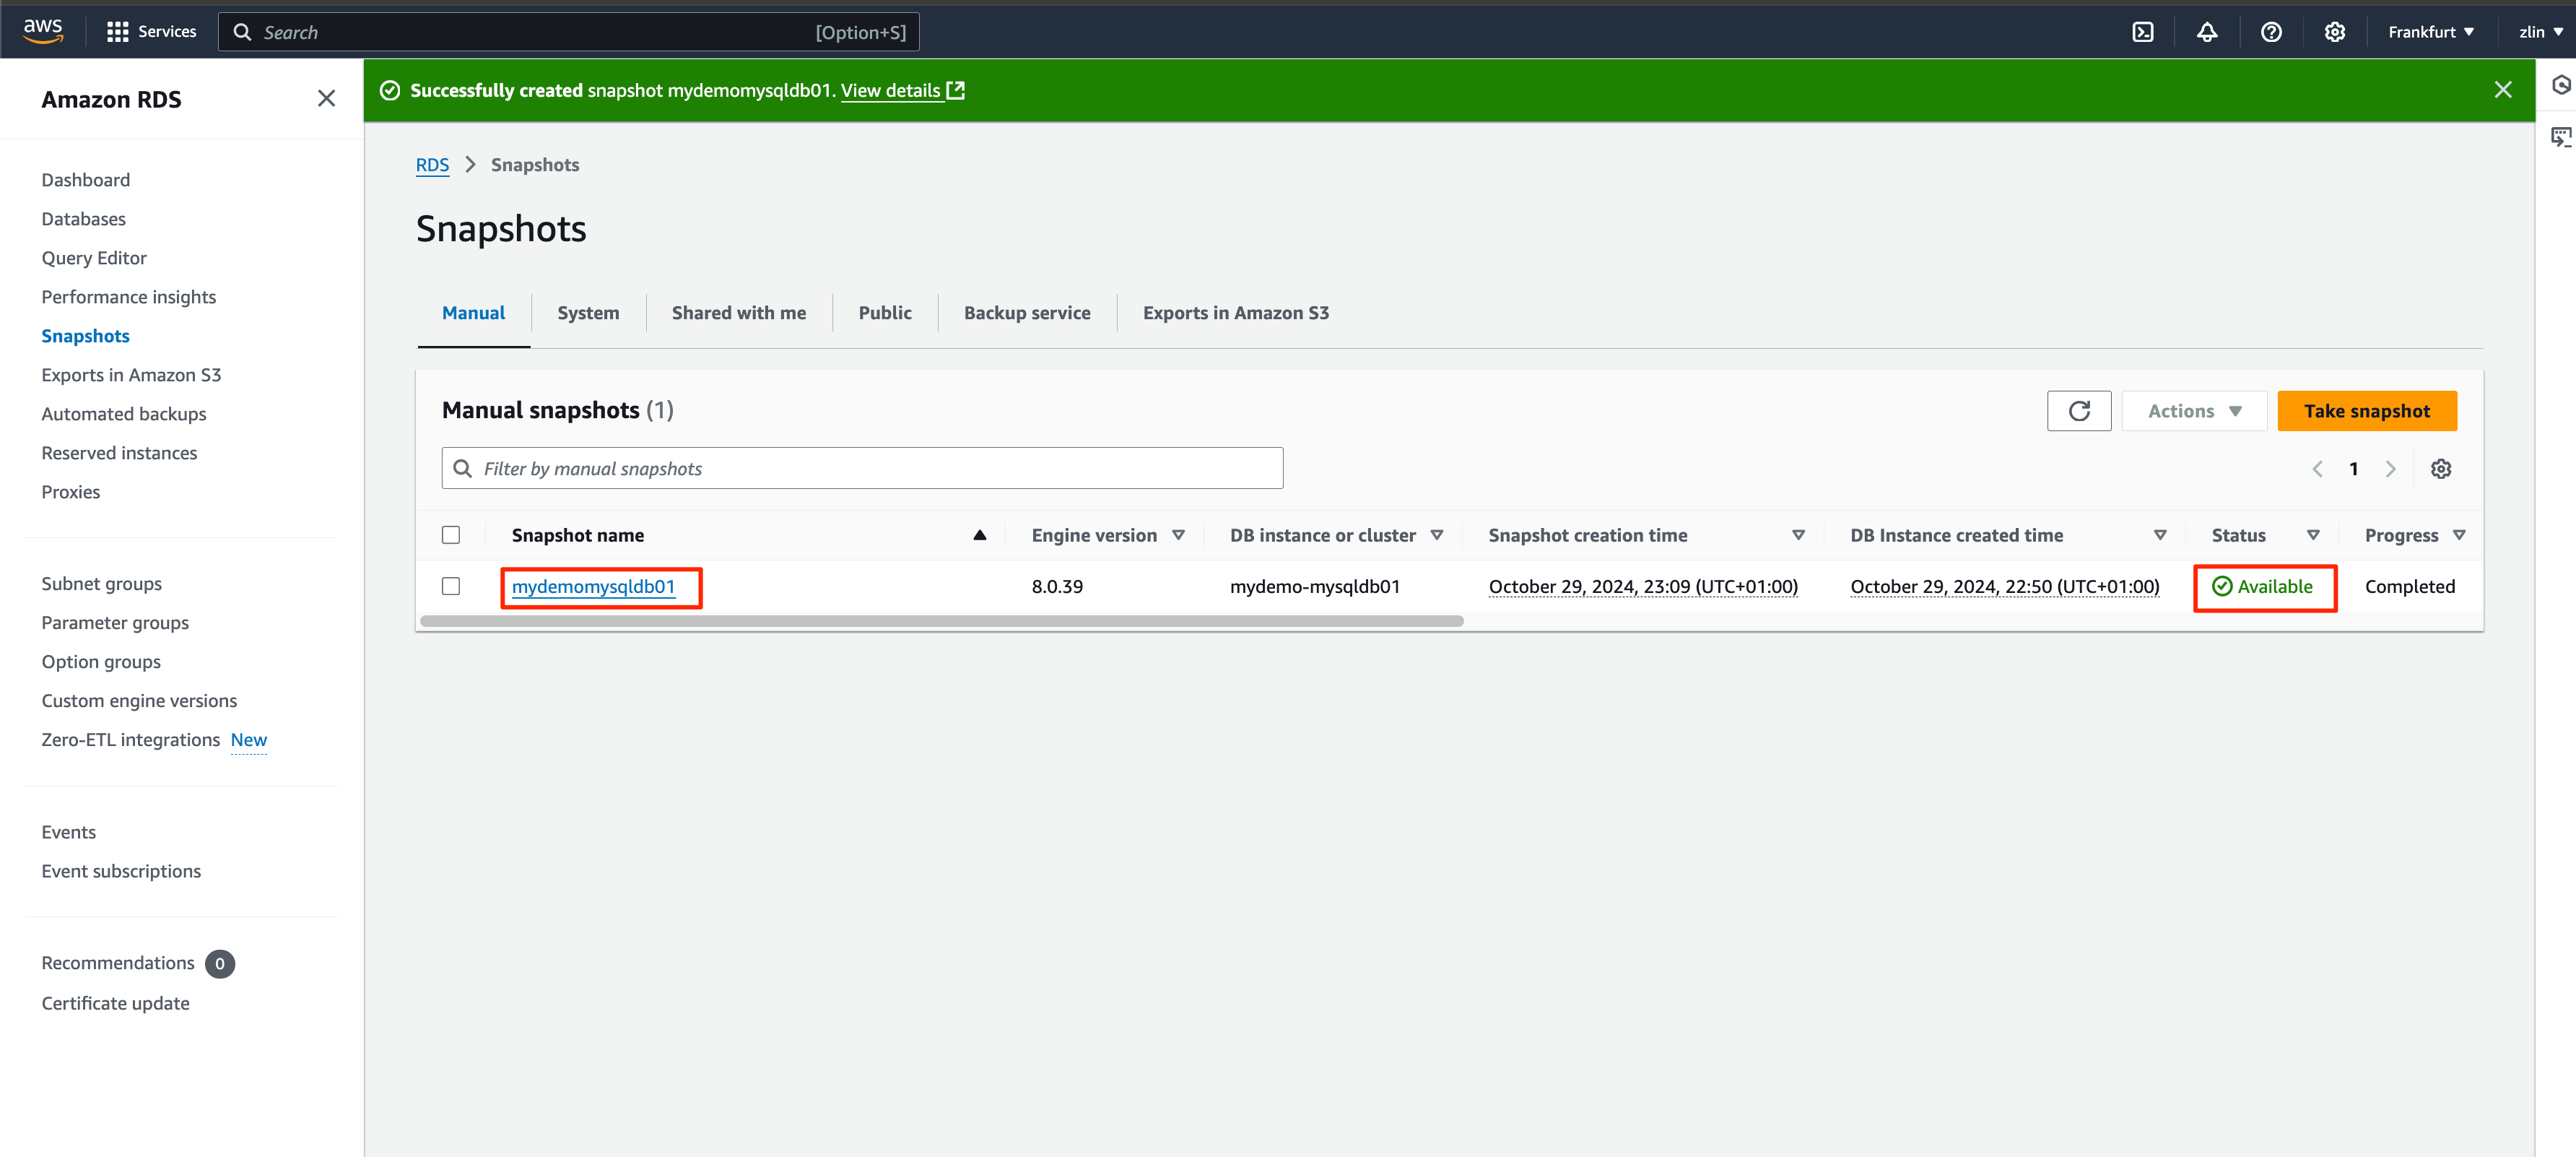
Snapshot is ready, when the status change to Available.
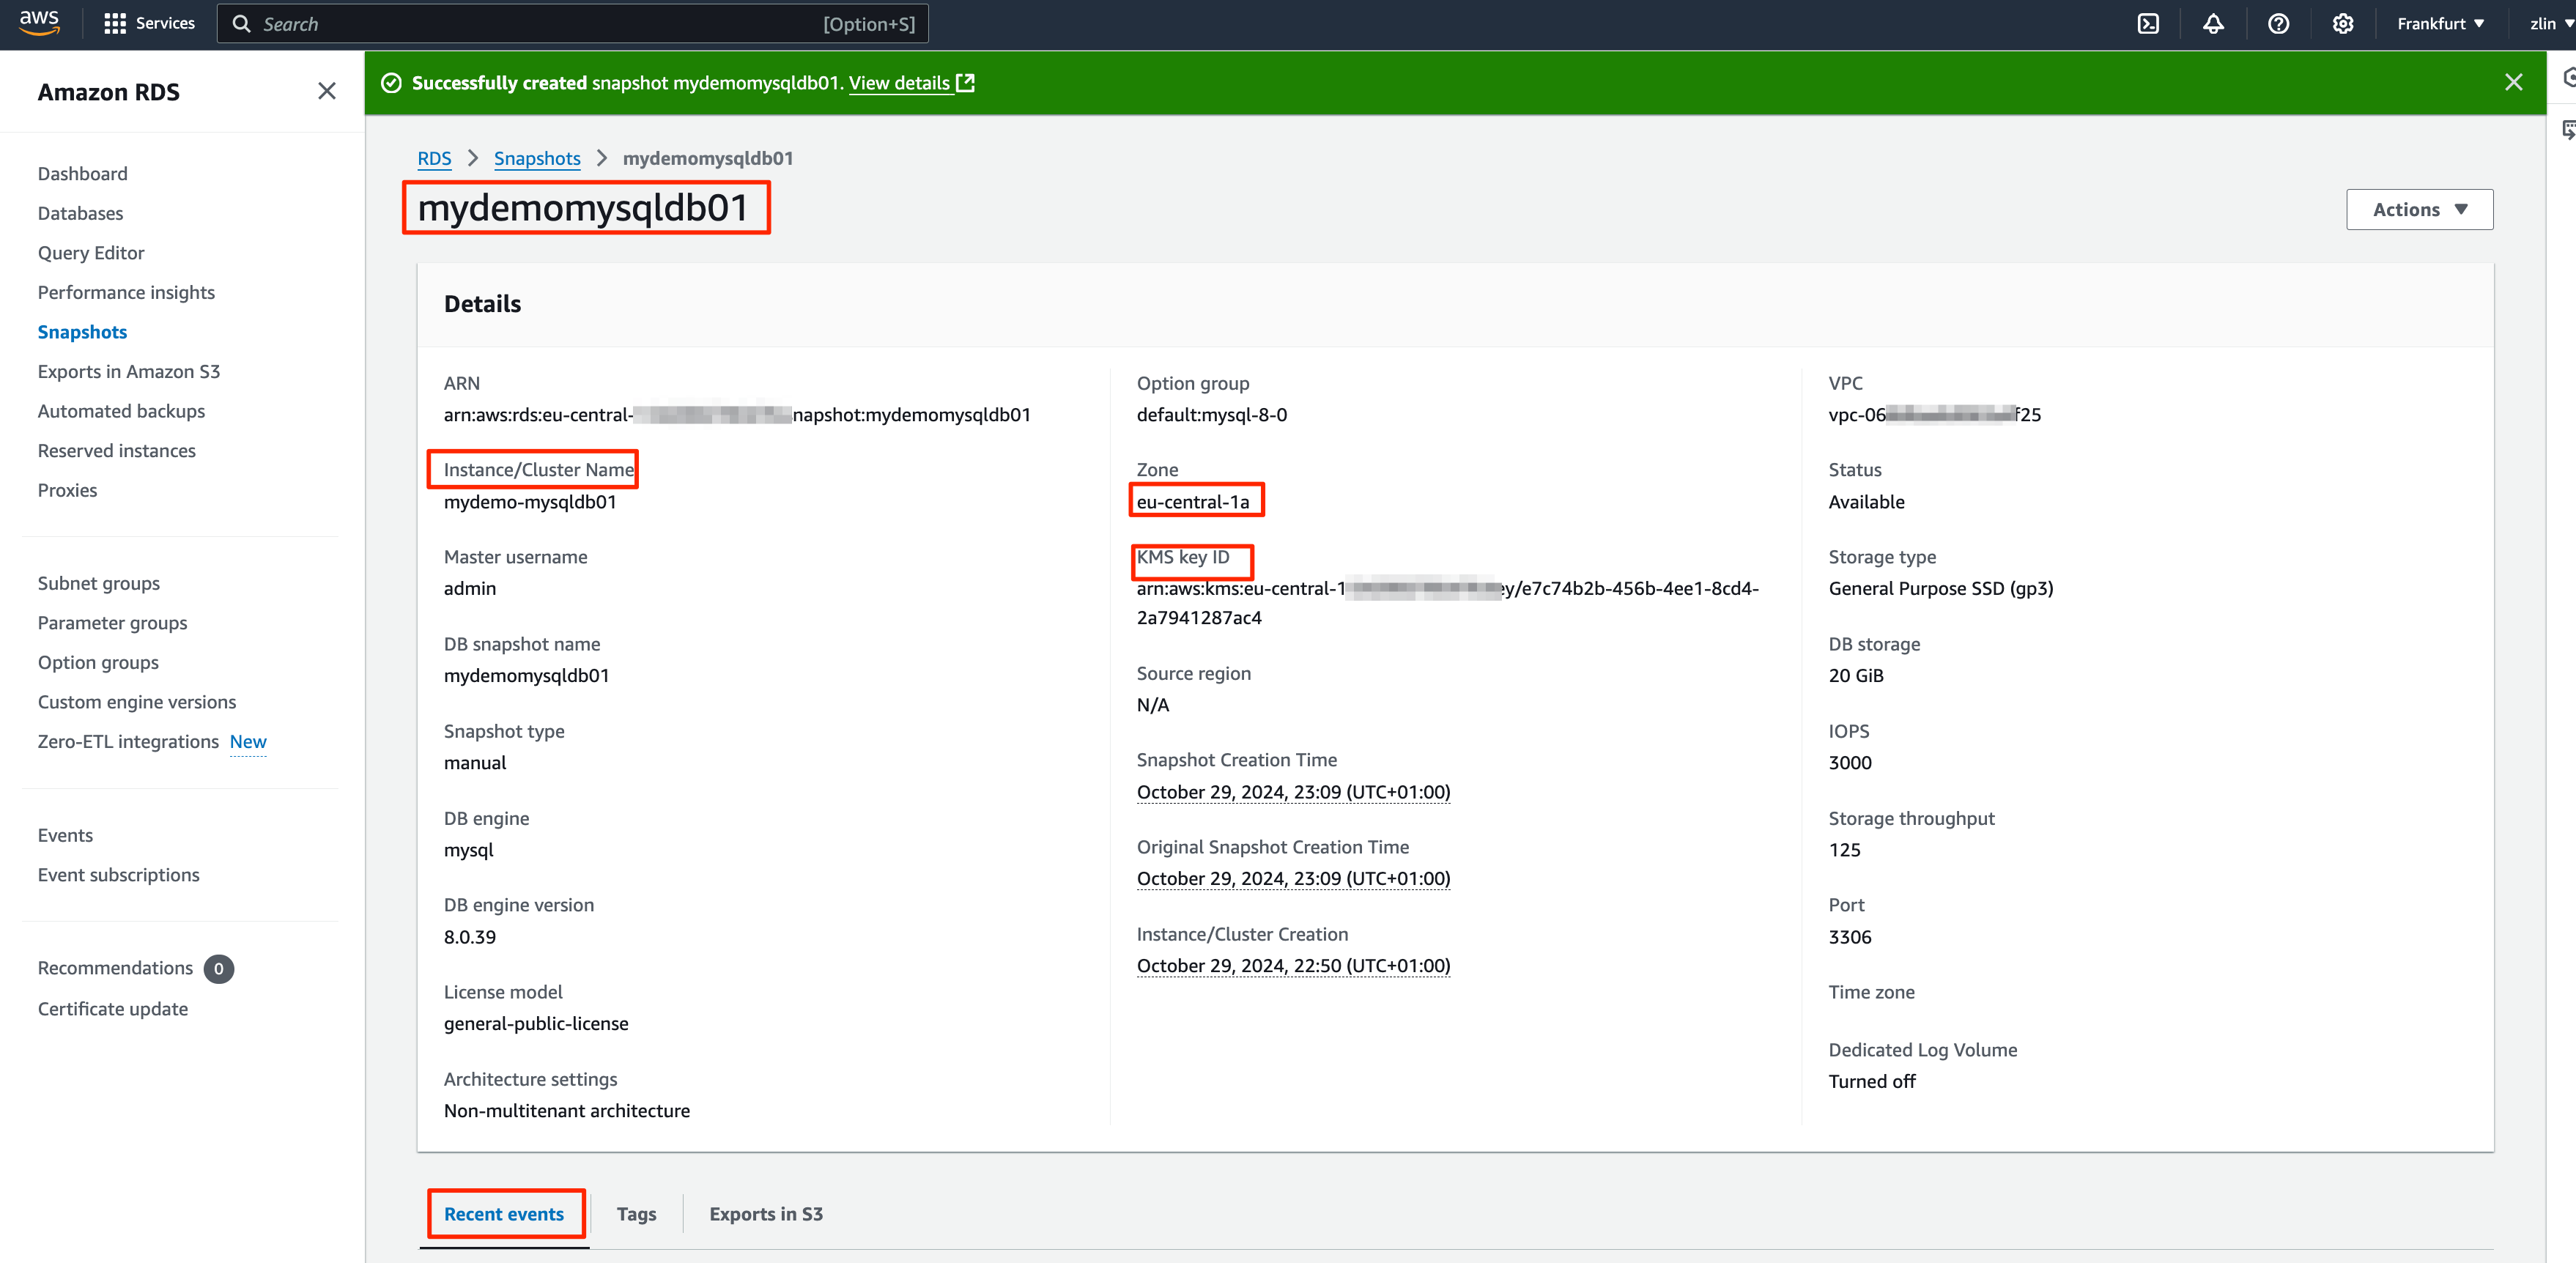
click on the snapshot and validate the details
You successfully created a RDS manual snapshot.
Automated Snapshot
Modify the database configuration
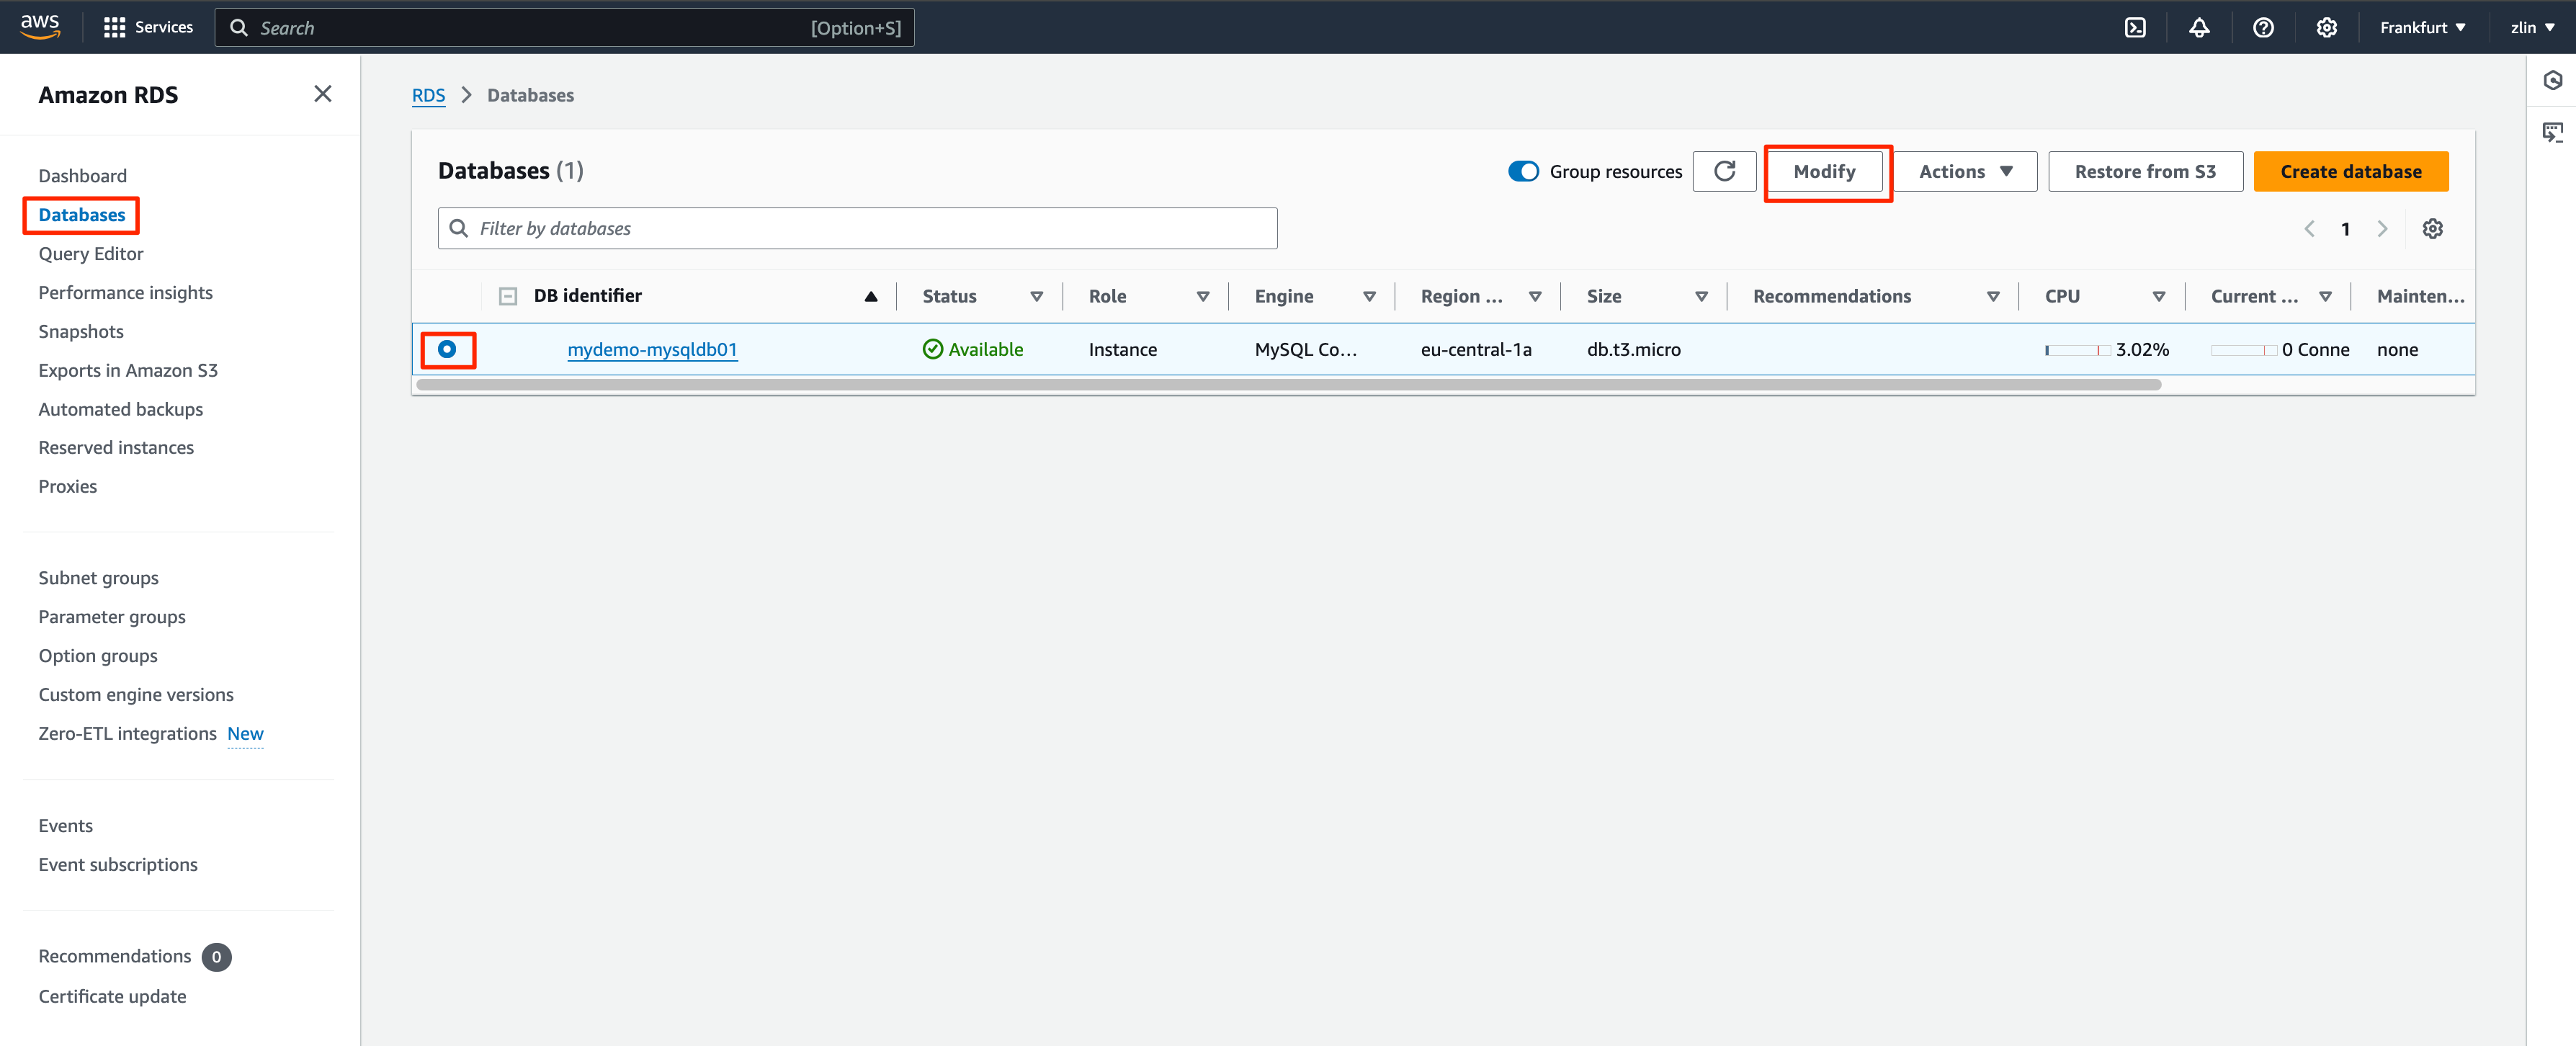
Select the Database and click Modify
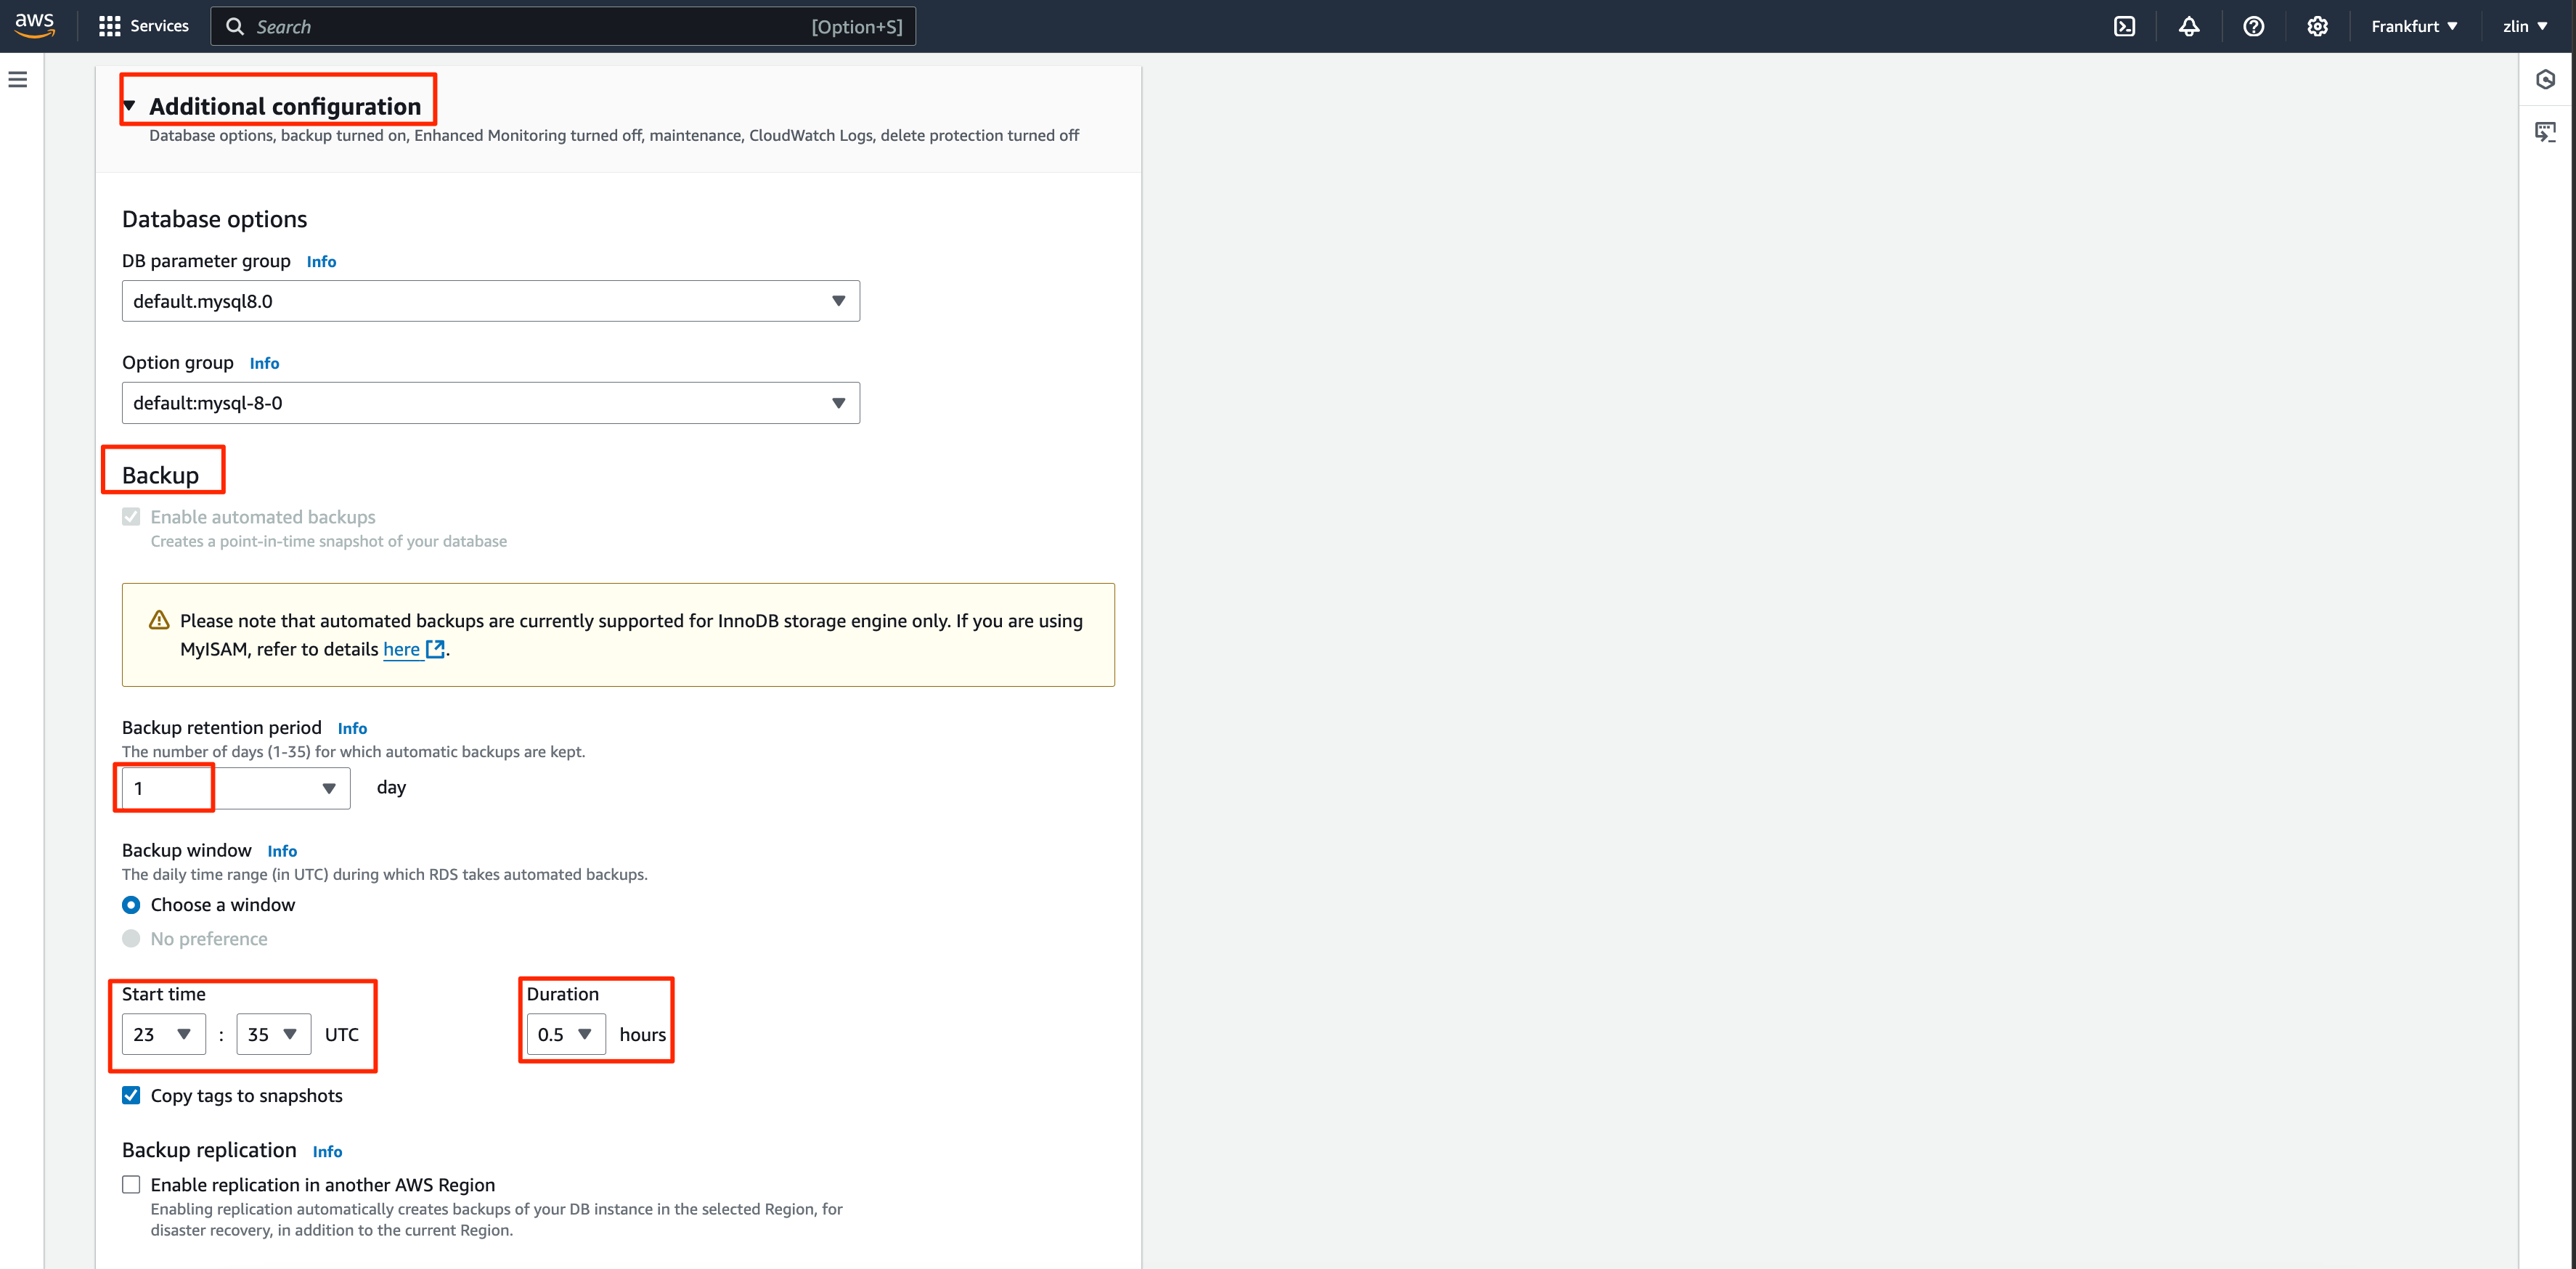
Configure the preferred backup window
Scroll down up to the Additional Configuration and set the time under the Backup section
In the next window, select the option when to apply then click on Modify DB instance
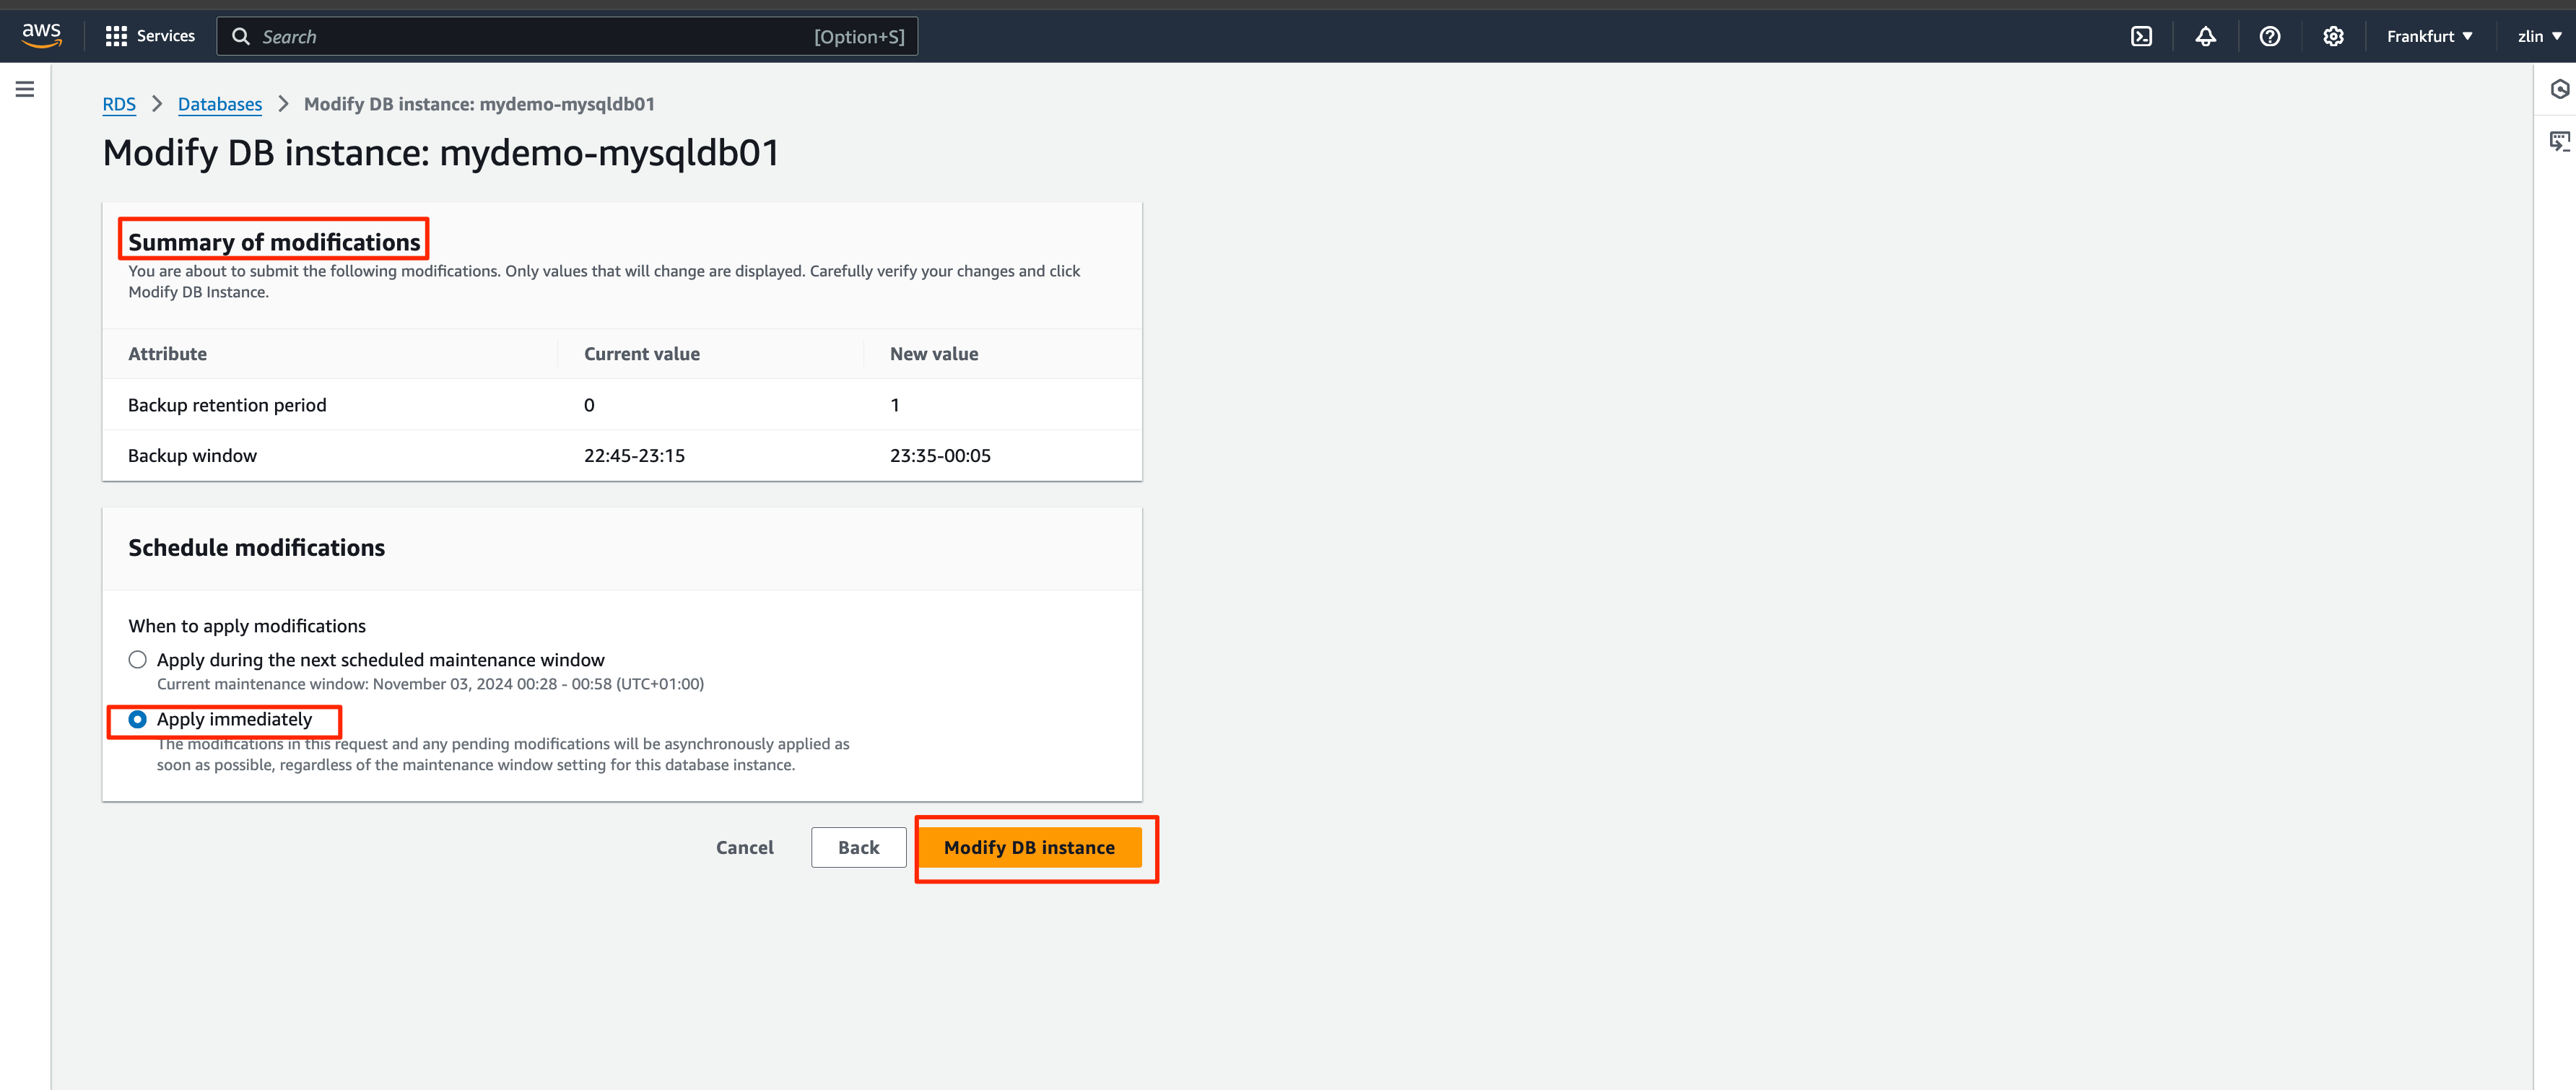
You successfully set the automated snapshot(Backup) window
Validate the Automated Snapshot settings
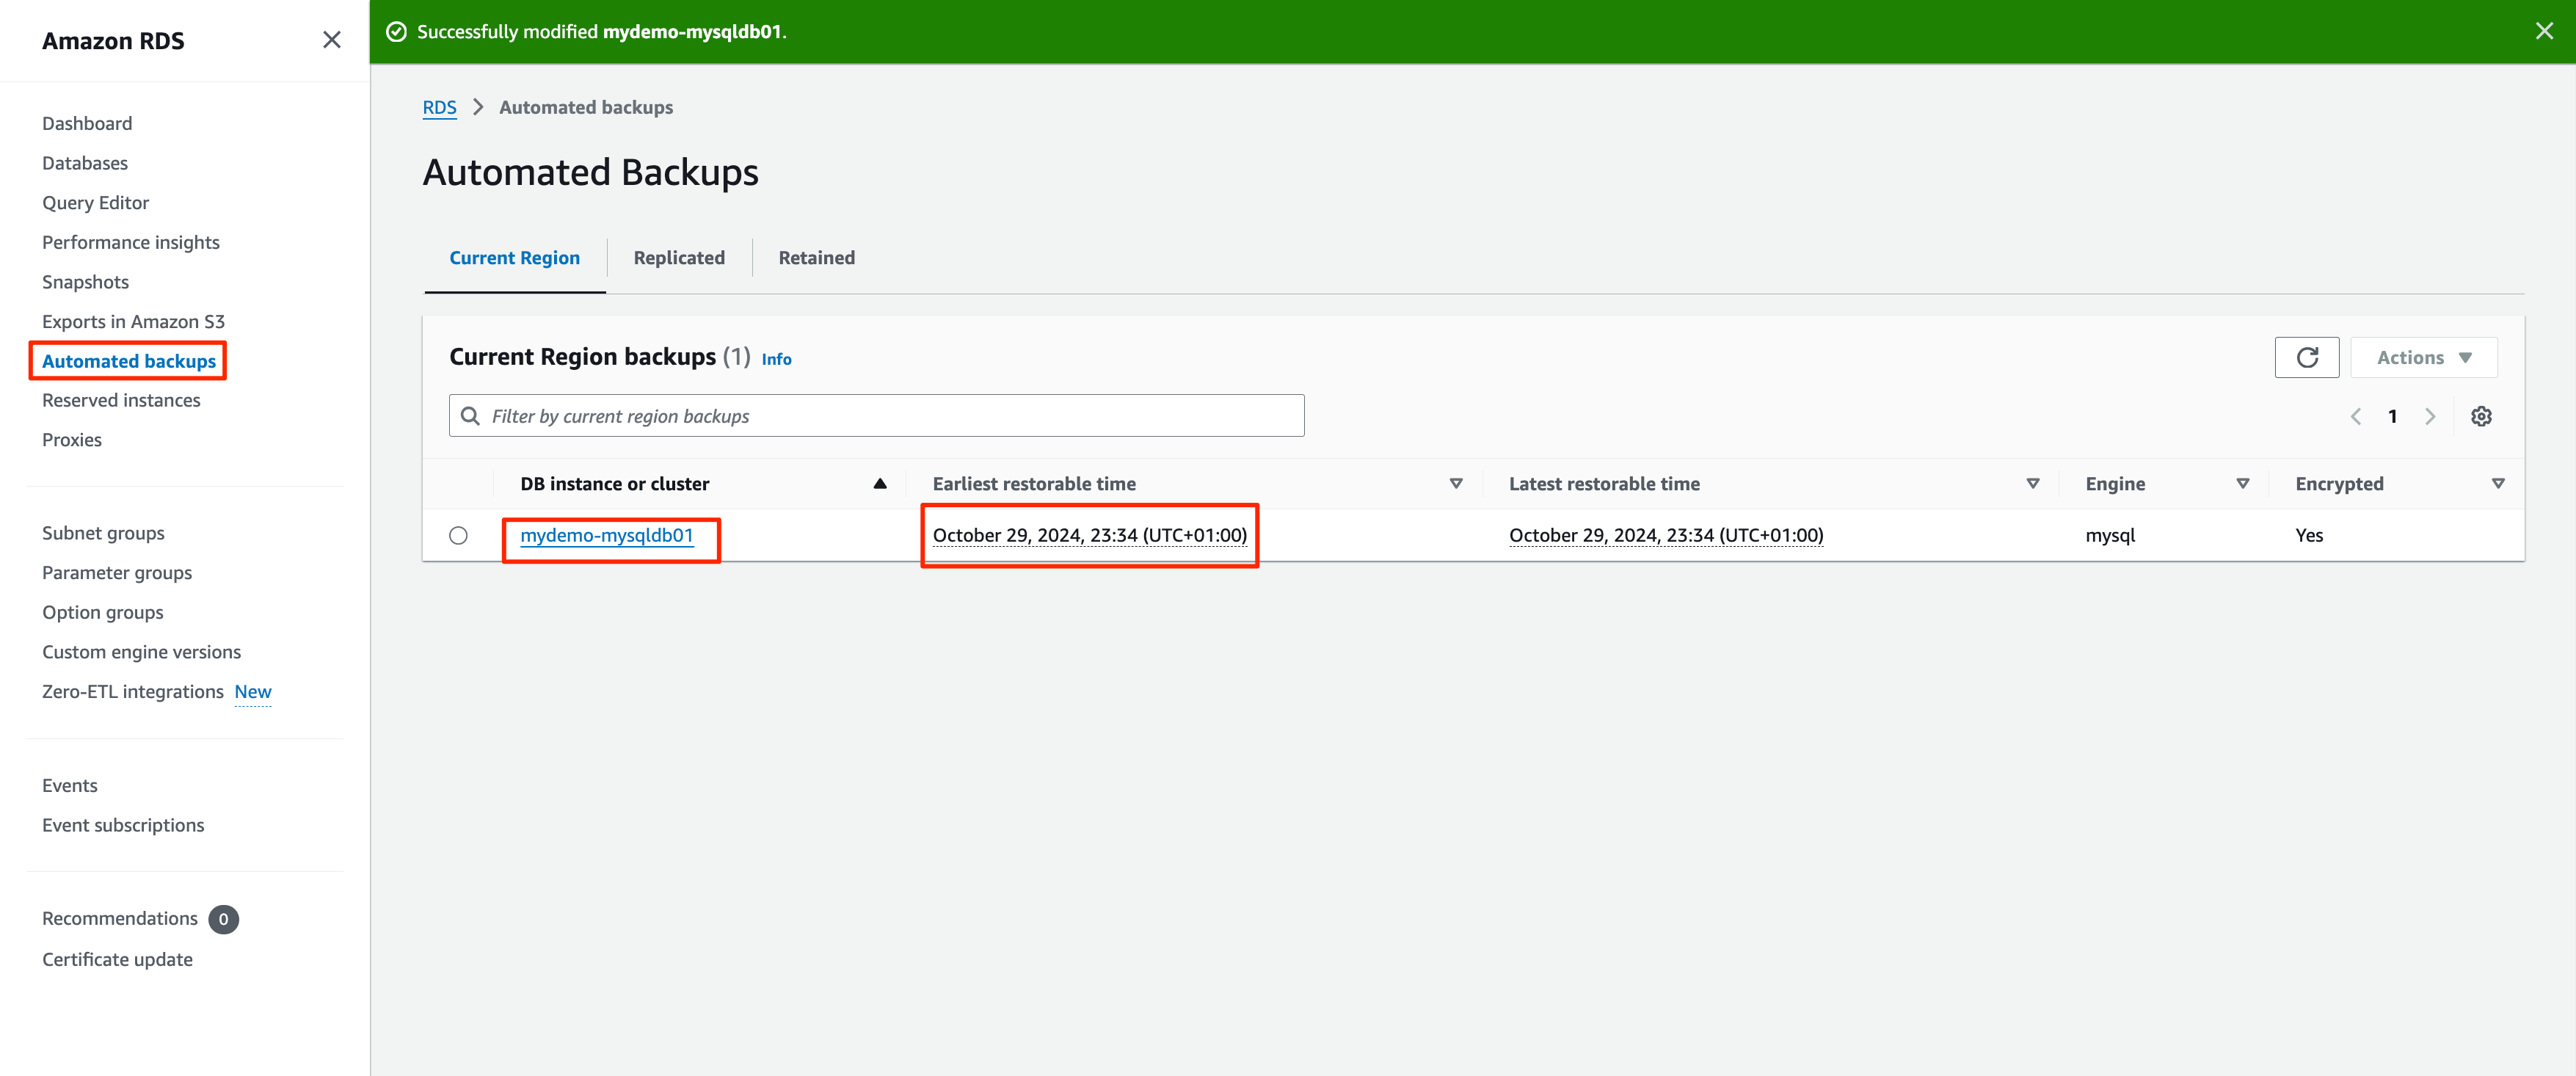
Select the Automated backups section in the left panel (After the scheduled time which set earlier) and find the snapshot form the list.
click on the snapshot and cross check the summary
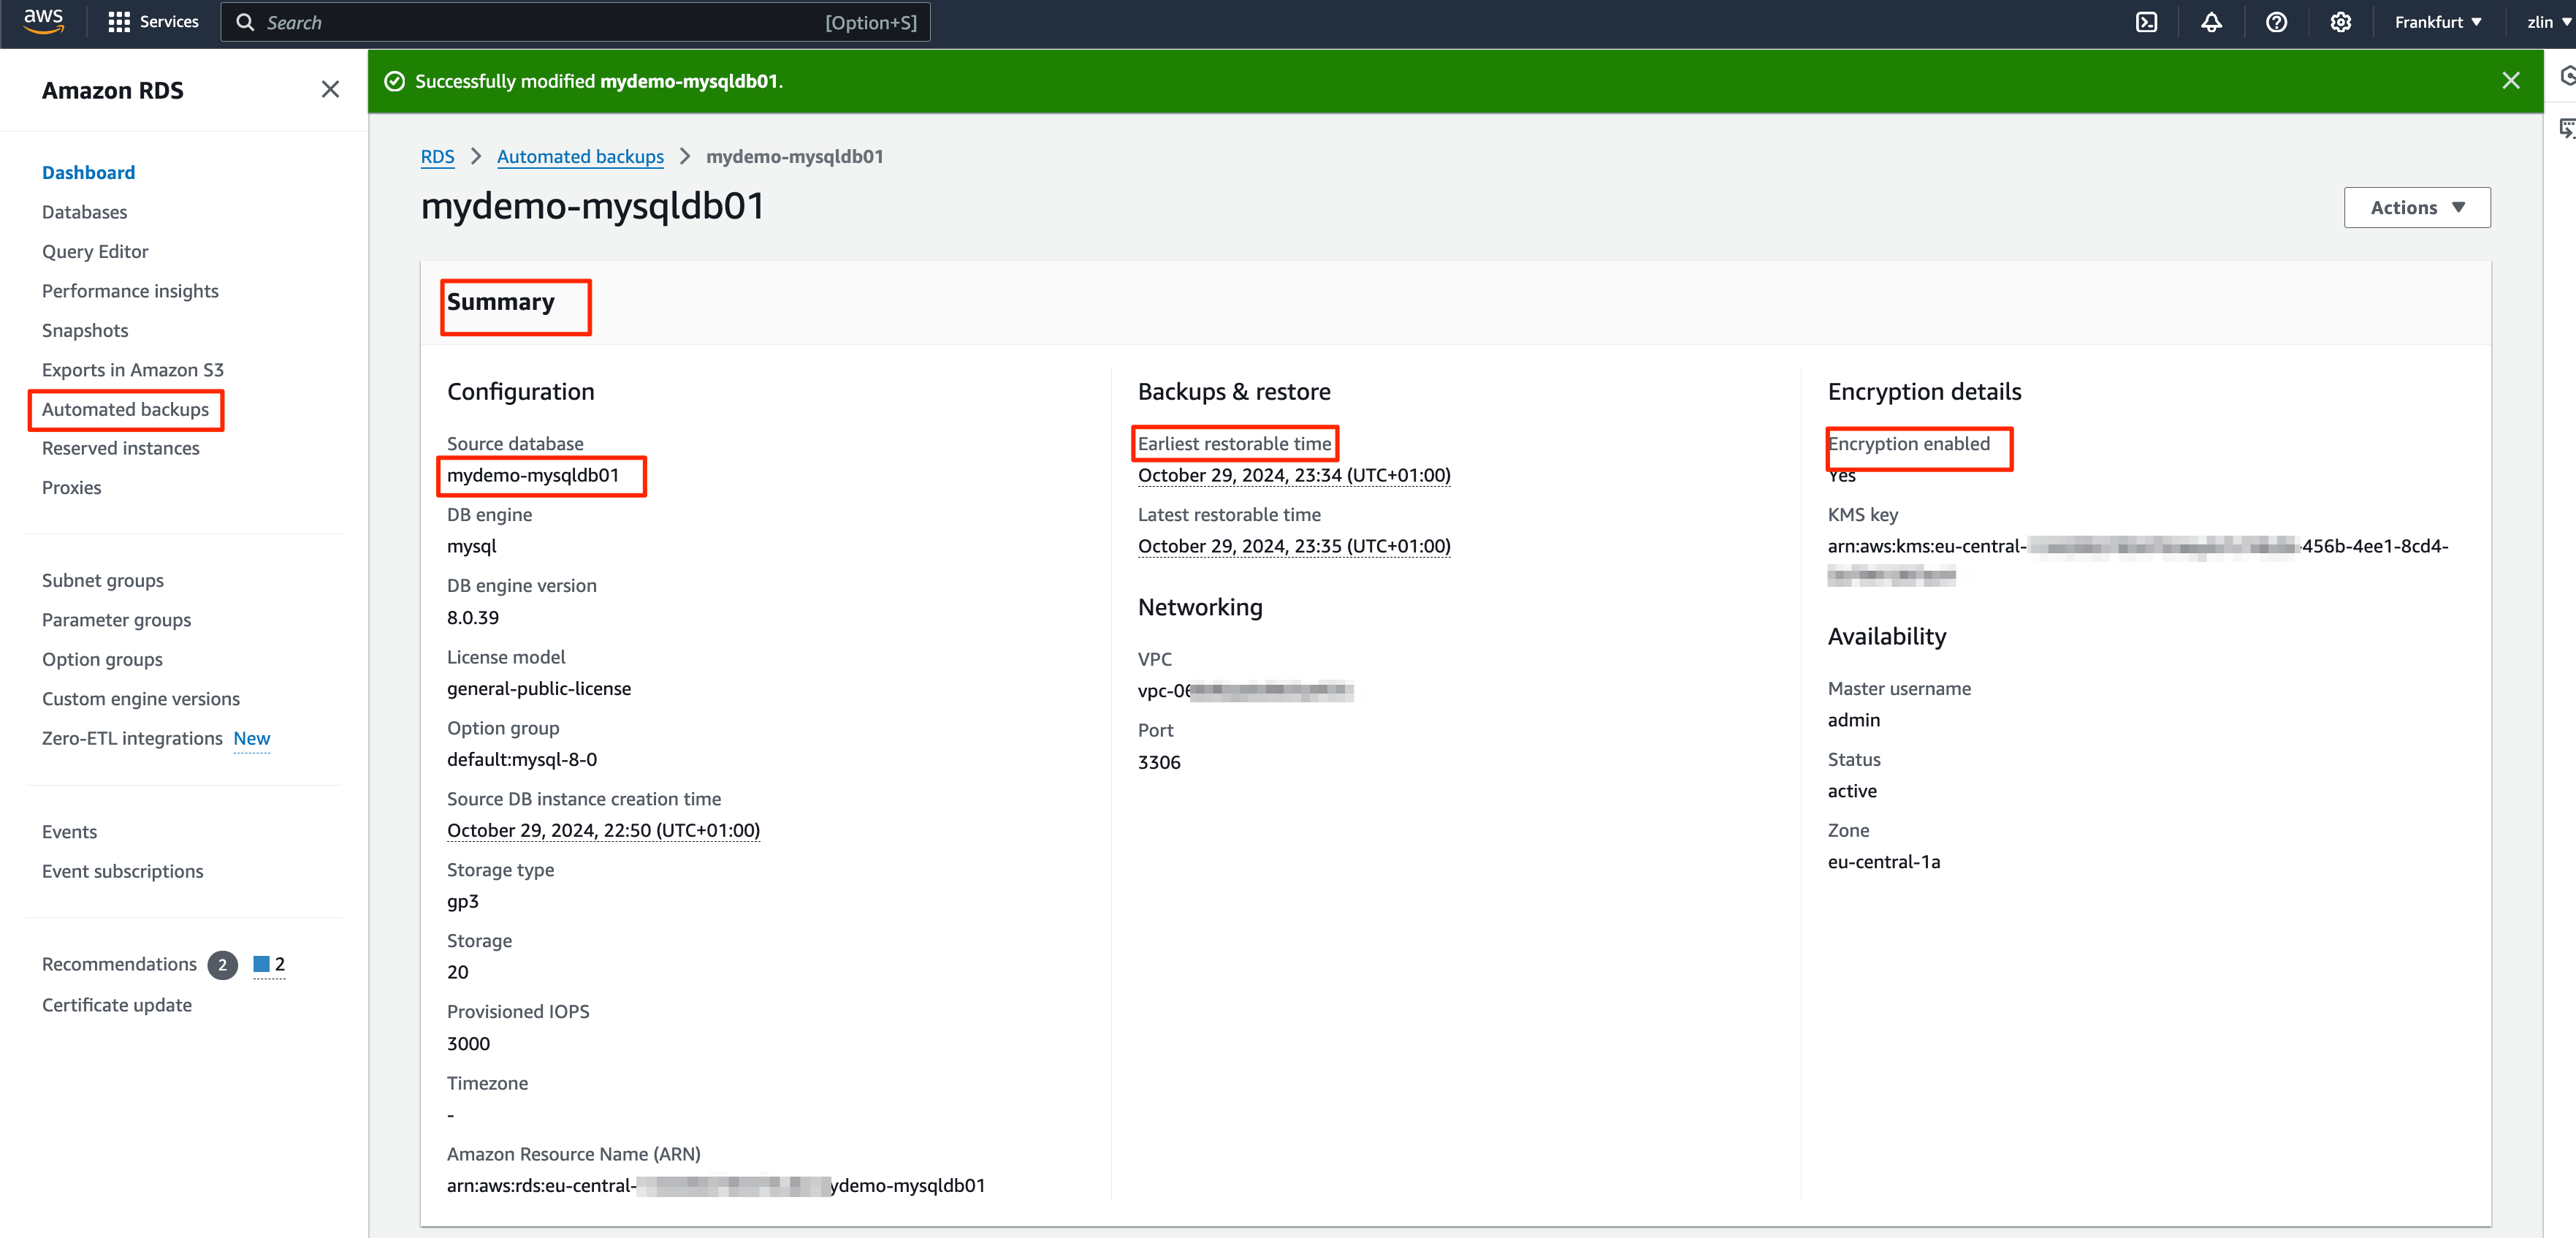
We have successfully configured and created RDS automated and manual snapshots and validated.
Please remember to delete the resources you created if you did it for learning purposes to avoid unnecessary costs on your account.
Subscribe to my newsletter
Read articles from George Palangattil directly inside your inbox. Subscribe to the newsletter, and don't miss out.
Written by
