Mastering Ethernaut Level 0: Hello Ethernaut
 Favour Ajaye
Table of contents
- Ethernaut Level 0
- Instruction 1: Set up MetaMask
- Instruction 2: Open the browser’s console
- Instruction 3: Use the console helpers
- Instruction 4: The ethernaut contract
- Instruction 5: Interact with the ABI
- Instruction 6: Get test ether
- Instruction 7: Getting a level instance
- Instruction 8: Inspecting the contract
- Instruction 9: Interact with the contract to complete the level
- Reference
Ethernaut Level 0
Ethernaut is a game that challenges you to hack smart contracts in the Ethereum Virtual Machine. Level 0 serves as an introduction to help players understand how to interact with the game using the browser’s console and Web3.js.
Here is what it looks like when you enter the ethernaut challenge.
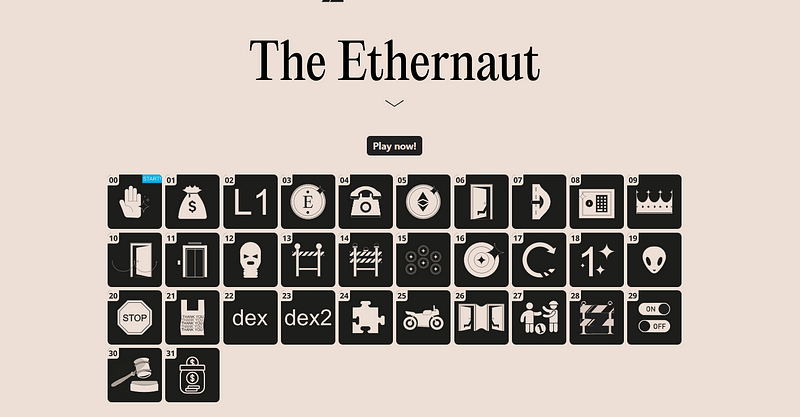
You have to follow the instructions to start.
Instruction 1: Set up MetaMask
Metamask is a software-based crypto wallet available as a browser extension and mobile app. It allows users to store cryptocurrencies and tokens and interact with dApps. There are other wallets available you can also use.
Instruction 2: Open the browser’s console
Initial Setup
The first challenge you see is the Hello Ethernaut Challenge — level 0. You start by setting up your metamask, then you open your browser’s console. For this, challenge, I will be using this address: 0xFED9f22Dcfc036035Ece63E6CEdBCb5C1344Da37 This address represents my address for the Ethereum wallet.
Instruction 3: Use the console helpers
When you start the level, several objects are automatically injected into your browser’s console:
Player : This is the first command we will enter in our console. When we enter this command, it will show the current address that is playing. i.e. the account in the metamask you connected. In my case, the address above. You can see it in the picture below:

getBalance(player)This is used to get the balance of the player. Entering the command yields a Javascript promise as shown below.

You can click on the dropdown to see the value of the Javascript promise which is the balance of the player.

To make it shorter, you can use the await getBalance(player) to get the value immediately.

The above images show I have 10 Eth (test Eth)in my balance.
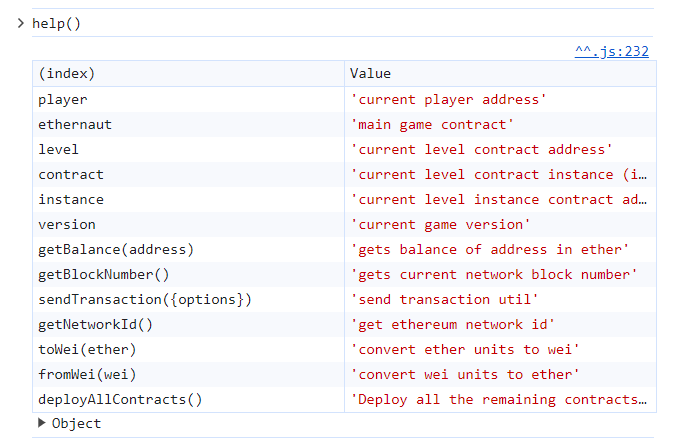
There is also a help() function which gives us a very useful table shown below:
Instruction 4: The ethernaut contract
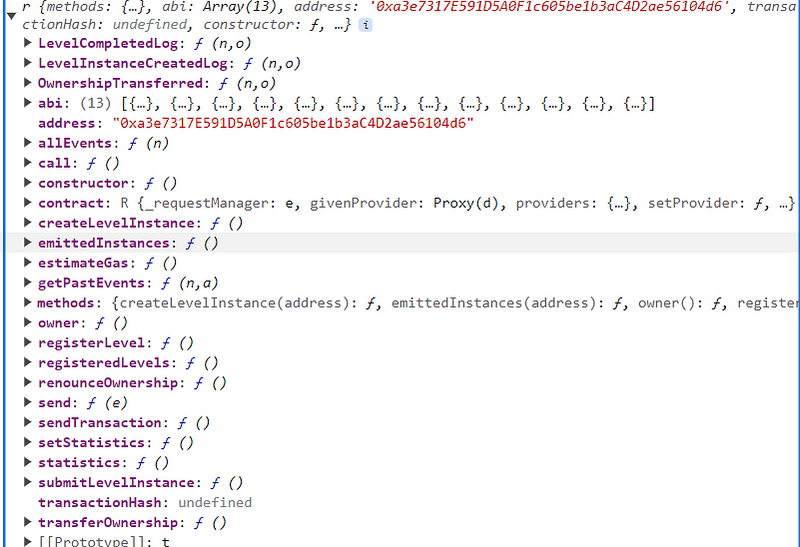
If you enter ethernaut , it shows the game's main contract address.
Instruction 5: Interact with the ABI
Note: We will not be interacting with ethernaut directly. We will be interacting with an instance of the Ethernaut contract. The instance will be deployed to the blockchain after you pay the gas fee. We are going to be interacting with the instance we created.
If we check the image above, we will see the abi as part of the things in the ethernaut command. Let’s open the ABI and see what we have there.

What is an abi?
An ABI (Application Binary Interface) in smart contracts serves as an interface between high-level programming languages (like Solidity) and the low-level bytecode executed by the Ethereum Virtual Machine (EVM).
They allow developers to interact with smart contracts from outside the blockchain. They contain information about function signatures, parameter types, and return types. ABIs are typically represented in JSON format.
Another command we get is the ethernaut.owner() or the await ethernaut.owner() . Looking at the ABI, number 2, we can see the function called owner . Let’s take a look at what is in the function from the ABI.
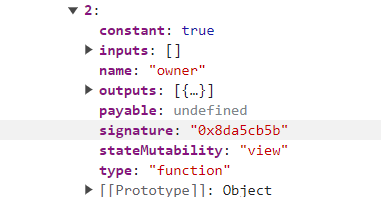
What can we get from this?
constant: true - This indicates it's a view/read-only function that doesn't modify the blockchain state.inputs: Array(0) - The function takes no input parameters.outputs: Array(1) - It returns a single output. The output is of type address with internalType: 'address' .stateMutability: "view" - Confirms this is a view function that only reads data.type: "function" - Indicates this is a contract function.signature: "0x8da5cb5b" - This is the function's 4-byte signature/selector.
Based on these characteristics, this is almost certainly the standard owner function that returns the address of the contract owner.
Now, let’s enter the command and see who the owner of the contract is.

The address in the image is the owner of the contract. Notice that the owner of the smart contract is not our address.
Instruction 6: Get test ether
First, we need to know what testnet is. A testnet is a separate blockchain network that mimics the behaviour of the main network but operates in a controlled environment. They are replicas of the main blockchain with the same technology, software, and functionalities. Transactions on testnets are simulated (“fake”), and the native coins have no real value outside the testnet environment.
Testnet ethers refer to the cryptocurrency tokens used on Ethereum testnets. They are simulated versions of Ether (ETH), the native currency of the Ethereum blockchain. They are simulated versions of Ether (ETH), the native currency of the Ethereum blockchain. They can be obtained through faucets or other methods provided by testnet environments. Currently, the game supports only these networks: SEPOLIA, OPTIMISM_SEPOLIA, ARBITRUM_SEPOLIA, HOLESKY, and AMOY.
Now, make sure your wallet is funded with some test ETH. You can get the test ETH from various platforms, like Alchemy faucets, and the Holesky faucet.
Instruction 7: Getting a level instance
Now, let’s play the game. Click on the Get new instance button to get a new instance. I will assume you now have some test ether in your wallet. Clicking the button will make the metamask to pop up. Confirm the transaction. This means we are deploying a new instance of the contract, we are changing the state of the blockchain. This also means we’ve paid the gas fee because any time we change the state of the blockchain, we have to pay gas.
Once we confirm the transaction, we will see two buttons like this:

Once we complete the challenge, we will click on submit instance button to submit to the ethernaut to know whether we’ve passed the challenge.
Instruction 8: Inspecting the contract
Let’s see what we have inside the new contract instance by entering the command contract .
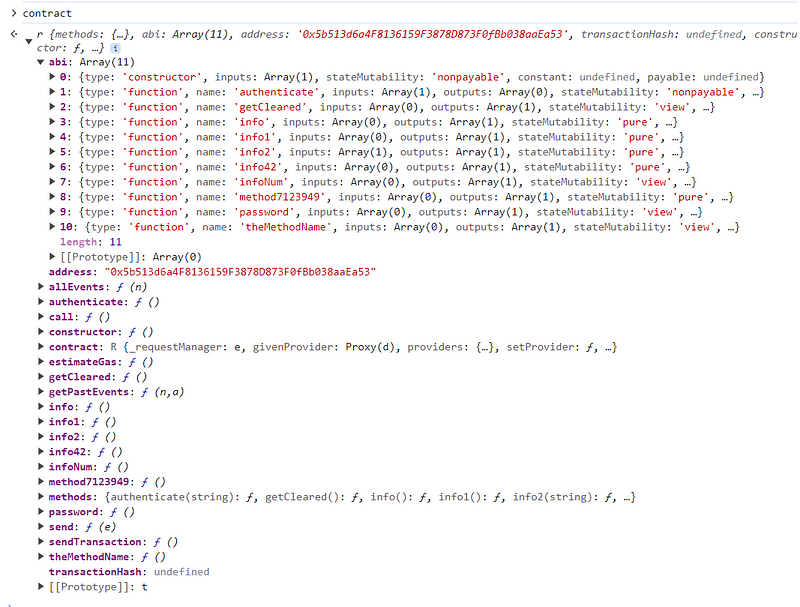
We can see that the contents are quite different from the ethernaut contract, the functions especially.
Starting from the left-hand side of the image, we see that we have a constructor and other functions. Checking the right-hand side of the image (the ending part), we see that some of the functions are non-payable, view, and pure functions.
Non-payable functions are the default function type in Solidity. All functions are non-payable by default unless explicitly declared as payable. They Cannot receive Ether directly and can modify the contract state.
Pure functions are special types of functions that cannot read from or modify contract state, can only use local variables and parameters, must return a value, cannot emit events, and cannot call other functions that are not view or pure.
View functions are similar to pure functions but with one key difference: **Can read from contract state variables.
**In a nutshell:
Non-payable functions are the default and can modify the state
Pure functions perform computations without side effects and cannot access state
View functions can read the state but cannot modify it
Then, we can see the names of the functions; from authenticate down to theMethodName
Instruction 9: Interact with the contract to complete the level
Here, we need to interact with the contract. The instruction says:
Look into the level’s info method
contract.info()orawait contract.info()if you're using Chrome v62.
After entering the await contract.info(), we get the response below:

Command Explanation:
await: Used because contract interactions are asynchronouscontract: References your instance of the levelinfo(): Calls the publicinfofunctionThis returns a promise that resolves to: “You will find what you need in info1().”
Enter the command await contract.info1() . We will get this response:

Command Explanation:
Similar structure to the previous command
Calls the
info1function with no parametersReturns: “Try info2(), but with ‘hello’ as a parameter." This means the next command we will enter is
awaitcontract.info2("hello")
Take note; from the ABI, we will see thatinfo2()function needs an input and the input type is a string.
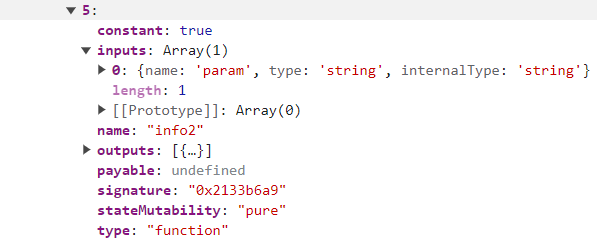
Please note: If we call the function without an input, it will give an error like this:

The call will pass with a new message if we put the correct command.

Command Explanation:
Calls
info2function with a string parameterThe string “hello” is passed as an argument
Returns: “The property infoNum holds the number of the next info method to call.” This means the next command we will be entering is
await contract.infoNum()

Command Explanation:
await contract.infoNum(): Calls the automatically created getter function for the public variable.From the response, the number we are looking for is 42 because the value 42 is returned.
This means we need to enter the command
await contract.info42().

Command Explanation:
Based on the previous step (infoNum = 42)
Calls the function named
info42Returns: “theMethodName is the name of the next method.” Now, we need to enter the command
await contract.theMethodName.

Command Explanation:
await contract.theMethodName(): Calls the getter for the public string variableReturns: “The method name is method7123949.” This shows that the next command we will enter is
await contract.method7123949().

Command Explanation:
Calls the function whose name we discovered
Returns: “If you know the password, submit it to authenticate().” From what it returns, the next command will be
await contract.password().

Command Explanation:
await contract.password(): Calls the getter function for the public password variableThe password is stored in plain text in the contract (not secure!)
Returns the actual password string.
To authenticate, we will call the function authenticate(). Now, if you take a look at the ABI, you will know we have interacted with almost all the functions except one. That one is the authenticate() function. Now, the function takes an input which is a string. That string is going to be our password. Let’s enter the command and see what happens. The command is await contract.authenticate("ethernaut0"). This will open our metamask and we will confirm the transaction and then we see this:

This means our transaction has been confirmed.
When you know you have completed the level, submit the contract using the submit button at the bottom of the page. This sends your instance back to the ethernaut, which will determine if you have completed it.
We will click on the submit button now to see if we have passed this challenge. We will need to confirm the transaction on metamask again. And then, we see this:
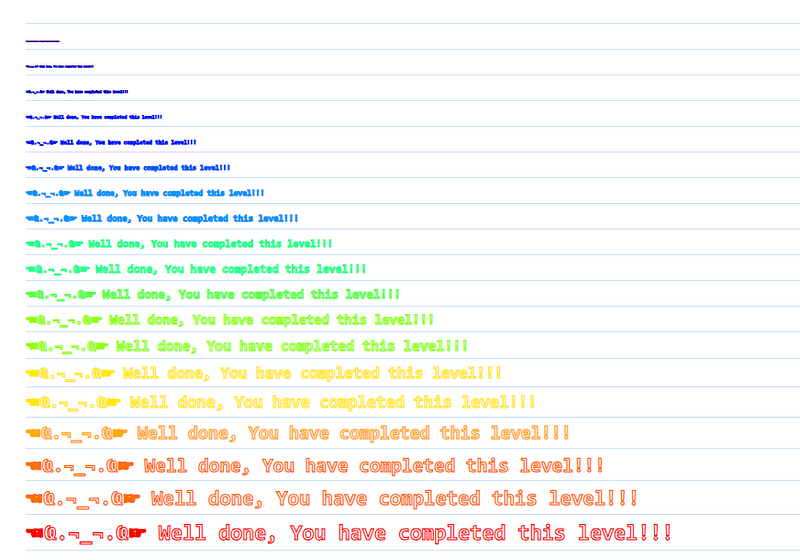
We can now see a message congratulating us.
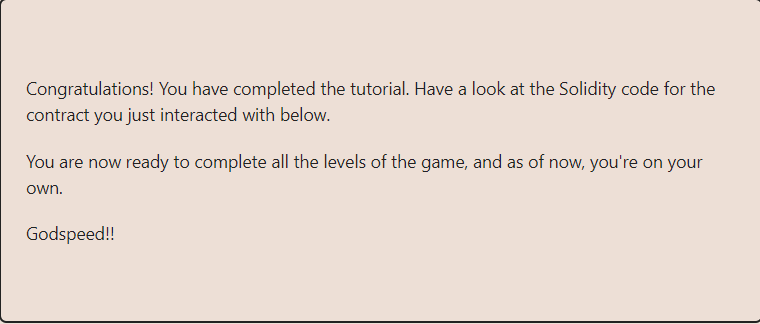
Then, it reveals the source code to us.
// SPDX-License-Identifier: MIT
pragma solidity ^0.8.0;

contract Instance {
    string public password;
    uint8 public infoNum = 42;
    string public theMethodName = "The method name is method7123949.";
    bool private cleared = false;

    // constructor
    constructor(string memory _password) {
        password = _password;
    }

    function info() public pure returns (string memory) {
        return "You will find what you need in info1().";
    }

    function info1() public pure returns (string memory) {
        return 'Try info2(), but with "hello" as a parameter.';
    }

    function info2(string memory param) public pure returns (string memory) {
        if (keccak256(abi.encodePacked(param)) == keccak256(abi.encodePacked("hello"))) {
            return "The property infoNum holds the number of the next info method to call.";
        }
        return "Wrong parameter.";
    }

    function info42() public pure returns (string memory) {
        return "theMethodName is the name of the next method.";
    }

    function method7123949() public pure returns (string memory) {
        return "If you know the password, submit it to authenticate().";
    }

    function authenticate(string memory passkey) public {
        if (keccak256(abi.encodePacked(passkey)) == keccak256(abi.encodePacked(password))) {
            cleared = true;
        }
    }

    function getCleared() public view returns (bool) {
        return cleared;
    }
}
Looking through the contract, we can see all the functions we interacted with.
Checking the info2(), The contract compares the parameter using keccak256 hash.abi.encodePacked() is used internally to pack the strings before hashing.
I hope you’ve been able to pass the challenge like I did. I also hope it wasn’t difficult to find your way around the level 0 challenge. Next time, we will be trying the level 1 challenge and see if we can beat the challenge.
Thank you for taking the time to go through this with me. You can check my other articles to know more about smart contracts, and solidity.
I’m also starting a series on Reentrancy, I hope you join me on that too.
See you next time.
Reference
https://ethernaut.openzeppelin.com/
https://www.quicknode.com/guides/ethereum-development/smart-contracts/what-is-an-abi
https://www.alchemy.com/overviews/what-is-an-abi-of-a-smart-contract-examples-and-usage
https://docs.soliditylang.org/en/latest/abi-spec.html
https://metamask.io/
https://masterthecrypto.com/mainnet-vs-testnet-whats-the-difference/
https://whiteboardcrypto.com/solidity-function-type-view-pure-payable/
https://ethereum.stackexchange.com/questions/59326/what-is-the-difference-between-payable-and-view-in-a-smart-contract-in-solidity
https://medium.com/coinmonks/exploring-the-differences-between-payable-and-non-payable-functions-in-solidity-an-in-depth-d031c6ae577b
Subscribe to my newsletter
Read articles from Favour Ajaye directly inside your inbox. Subscribe to the newsletter, and don't miss out.
Written by

Favour Ajaye
Favour Ajaye
smart contract developer