🚀 My Docker & DevOps Learning Journey Begins! 🚀
 Mohd Salman
Day 9: Diving Deeper into Docker with Volumes & Networks
Welcome back to my Docker journey! Today’s focus is on two powerful concepts: Volumes and Networks in Docker. These tools make data handling, communication, and management in containers smooth and efficient. We’ll look at practical applications of both and see why they’re critical in real-world scenarios. Let’s break it down in simple terms!
🧠 What I Learned Today
- Why Docker for Databases?
- The Problem: Losing Data on Restart
- Solution: Volumes for Persistent Data
- Volumes in depth with practical examples
- Networks in depth (how it works internally)
However, there’s a small challenge with databases in Docker...
The Problem: Losing Data on Restart
When we make changes within a container, including modifying data in a database, everything is stored inside the container. If you reboot your system, Docker doesn’t save these changes by default. This means any data updates you made would disappear once the container restarts. But luckily, Docker has a solution: Volumes.
Solution: Volumes for Persistent Data
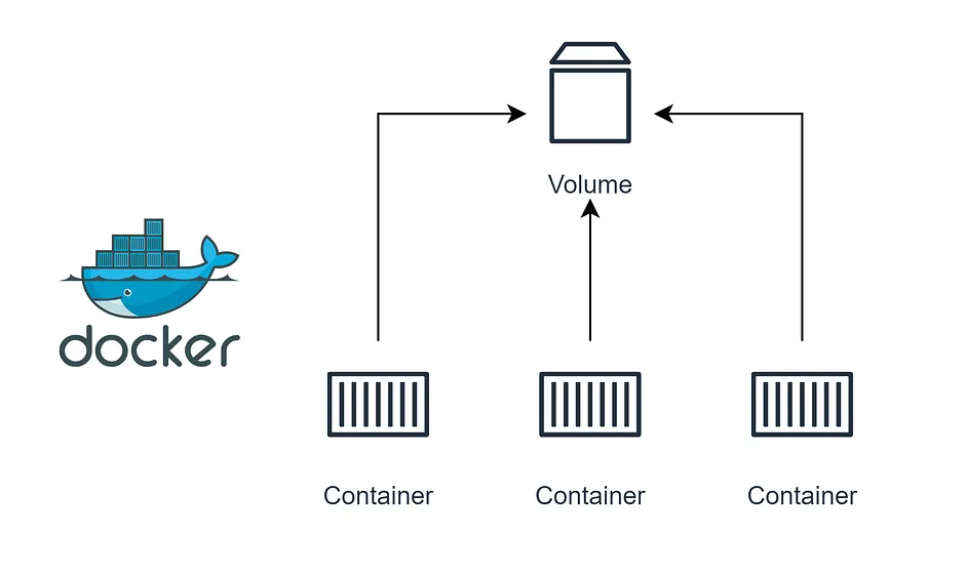
Volumes in Docker help solve this data persistence problem. Think of a Volume as a separate storage area for your container. It’s like a dedicated, durable data box for your Docker container to store information that persists even after the container is closed or restarted.
Benefits of Using Volumes:
Data persists across container restarts: The data in the volume is saved separately, so even if the container stops, the volume retains your data.
Clean separation of data: Keeps your data safe, even if you decide to delete the container.
Creating a Volume
To create a volume, you can run:
docker volume create volume_database
Now, to run a container with this volume:
docker run -v volume_database:/data/db -p 27017:27017 mongo
Here’s a quick breakdown:
-v volume_database:/data/db: Connects the volume to the MongoDB container at/data/db.- Note:
/data/dbis MongoDB’s default location for storing data. For other databases, this path may differ.
- Note:
-p 27017:27017: Maps port 27017 on your system to the MongoDB container’s port 27017, so you can interact with MongoDB on your localhost.
Practical Example with Volumes:
Start the MongoDB container with a volume.
Add or modify data in MongoDB.
Restart Docker.
Data remains intact because it’s stored in
volume_database, not directly within the container.
Networks: Communication Between Containers
In a Dockerized application, you may have multiple services (e.g., a backend and MongoDB). For these services to interact, Docker provides Networks. This allows containers to communicate as if they were on the same local network.
Why Use Networks?
If you need, say, a backend service to access MongoDB, they must be able to “see” each other on the network.
Creating a Docker Network
You can create a network with:
docker network create my_network
Running Containers on a Network
When starting each container, specify the network they’ll be on:
docker run -p 3000:3000 --name backend --network my_network mongo
Breakdown:
--network my_network: Connects the container tomy_network, where it can interact with other containers on the same network.--name backend: Assigns a name to the container (e.g., “backend”), making it easier for other containers on the same network to identify it.
How Network Communication Works
When containers are on the same network, they can communicate by referencing each other’s container name.
Docker will resolve the container name into an IP address, allowing containers to connect directly without needing specific IPs.
To test this, you can use the command:
ping backendThis will show the IP address Docker assigned to “backend,” confirming that the two containers can communicate.
🔥 Takeaway
Volumes help in persisting data, so changes aren’t lost on restart.
Networks enable containers to communicate, simulating a local network environment.
Docker’s volumes and networks simplify managing multi-service applications, allowing us to handle data effectively and create reliable connections between services. By deep-diving into these concepts and making them accessible, I’m building a solid foundation in Docker that will be invaluable in real-world DevOps scenarios!
What’s Next?
In the next few days, I’ll be covering more Docker concepts, including how to manage containers more efficiently. Stay tuned for more updates as I continue on this journey of mastering Docker & DevOps!
🔗 Follow My Docker & DevOps Journey!
I’ll be learning and posting daily updates, sharing challenges, solutions, and practical examples along the way. You can follow my progress using the hashtag: #SalmanDockerDevOpsJourney.
Feel free to connect with me on LinkedIn or follow along with the hashtag!
Stay tuned for more, and don’t forget to follow my journey on Hashnode for in-depth guides!
Subscribe to my newsletter
Read articles from Mohd Salman directly inside your inbox. Subscribe to the newsletter, and don't miss out.
Written by
