Part I: Bare websockets with Elixir Phoenix (wo/ Channels)
 Ryan Marvin
Websockets are great for when you want bidirectional communication between the client and the server over an extended session.
The de facto approach to building websockets with Elixir Phoenix involves using Channels. This pattern is great and it comes with a very well designed protocol and library of clients that make it really easy to get started. But for my use case while building for this customer, I needed a bare websocket since I didn’t have any supported Phoenix Channels client I could use.
This guide will share how I did that and it presumes you have the Phoenix application and server set up already. We will be using an example social media newsfeed backend, which would establish a long-lived connection with a user’s browser and constantly refresh as soon as new posts appear. It is far easier to implement this using Channels but for my demonstration we won’t be doing this.
This is the reference codebase for this article. It contains a pre-generated Phoenix app called my_app.
1. Setup a scaffold for the socket transport
i. We start by creating a custom socket transport by copying the scaffold from the docs here. Its behaviour is to echo back whatever input is sent.
# lib/myapp_web/sockets/newsfeed_socket.ex
defmodule Myapp.NewsfeedSocket do
  @behaviour Phoenix.Socket.Transport
  def child_spec(_opts) do
    # We won't spawn any process, so let's ignore the child spec
    :ignore
  end
  def connect(state) do
    # Callback to retrieve relevant data from the connection.
    # The map contains options, params, transport and endpoint keys.
    {:ok, state}
  end

  def init(state) do
    # Now we are effectively inside the process that maintains the socket.
    {:ok, state}
  end

  # messages sent to us by the client
  def handle_in({text, _opts}, state) do
    {:reply, :ok, {:text, text}, state}
  end

  # messages sent to this connection process by other processes on the server
  def handle_info(_, state) do
    {:ok, state}
  end

  def terminate(_reason, _state) do
    :ok
  end
end
ii. Add the websocket route in endpoint.ex
# lib/myapp_web/endpoint.ex
socket "/feed", Myapp.NewsfeedSocket, websocket: true
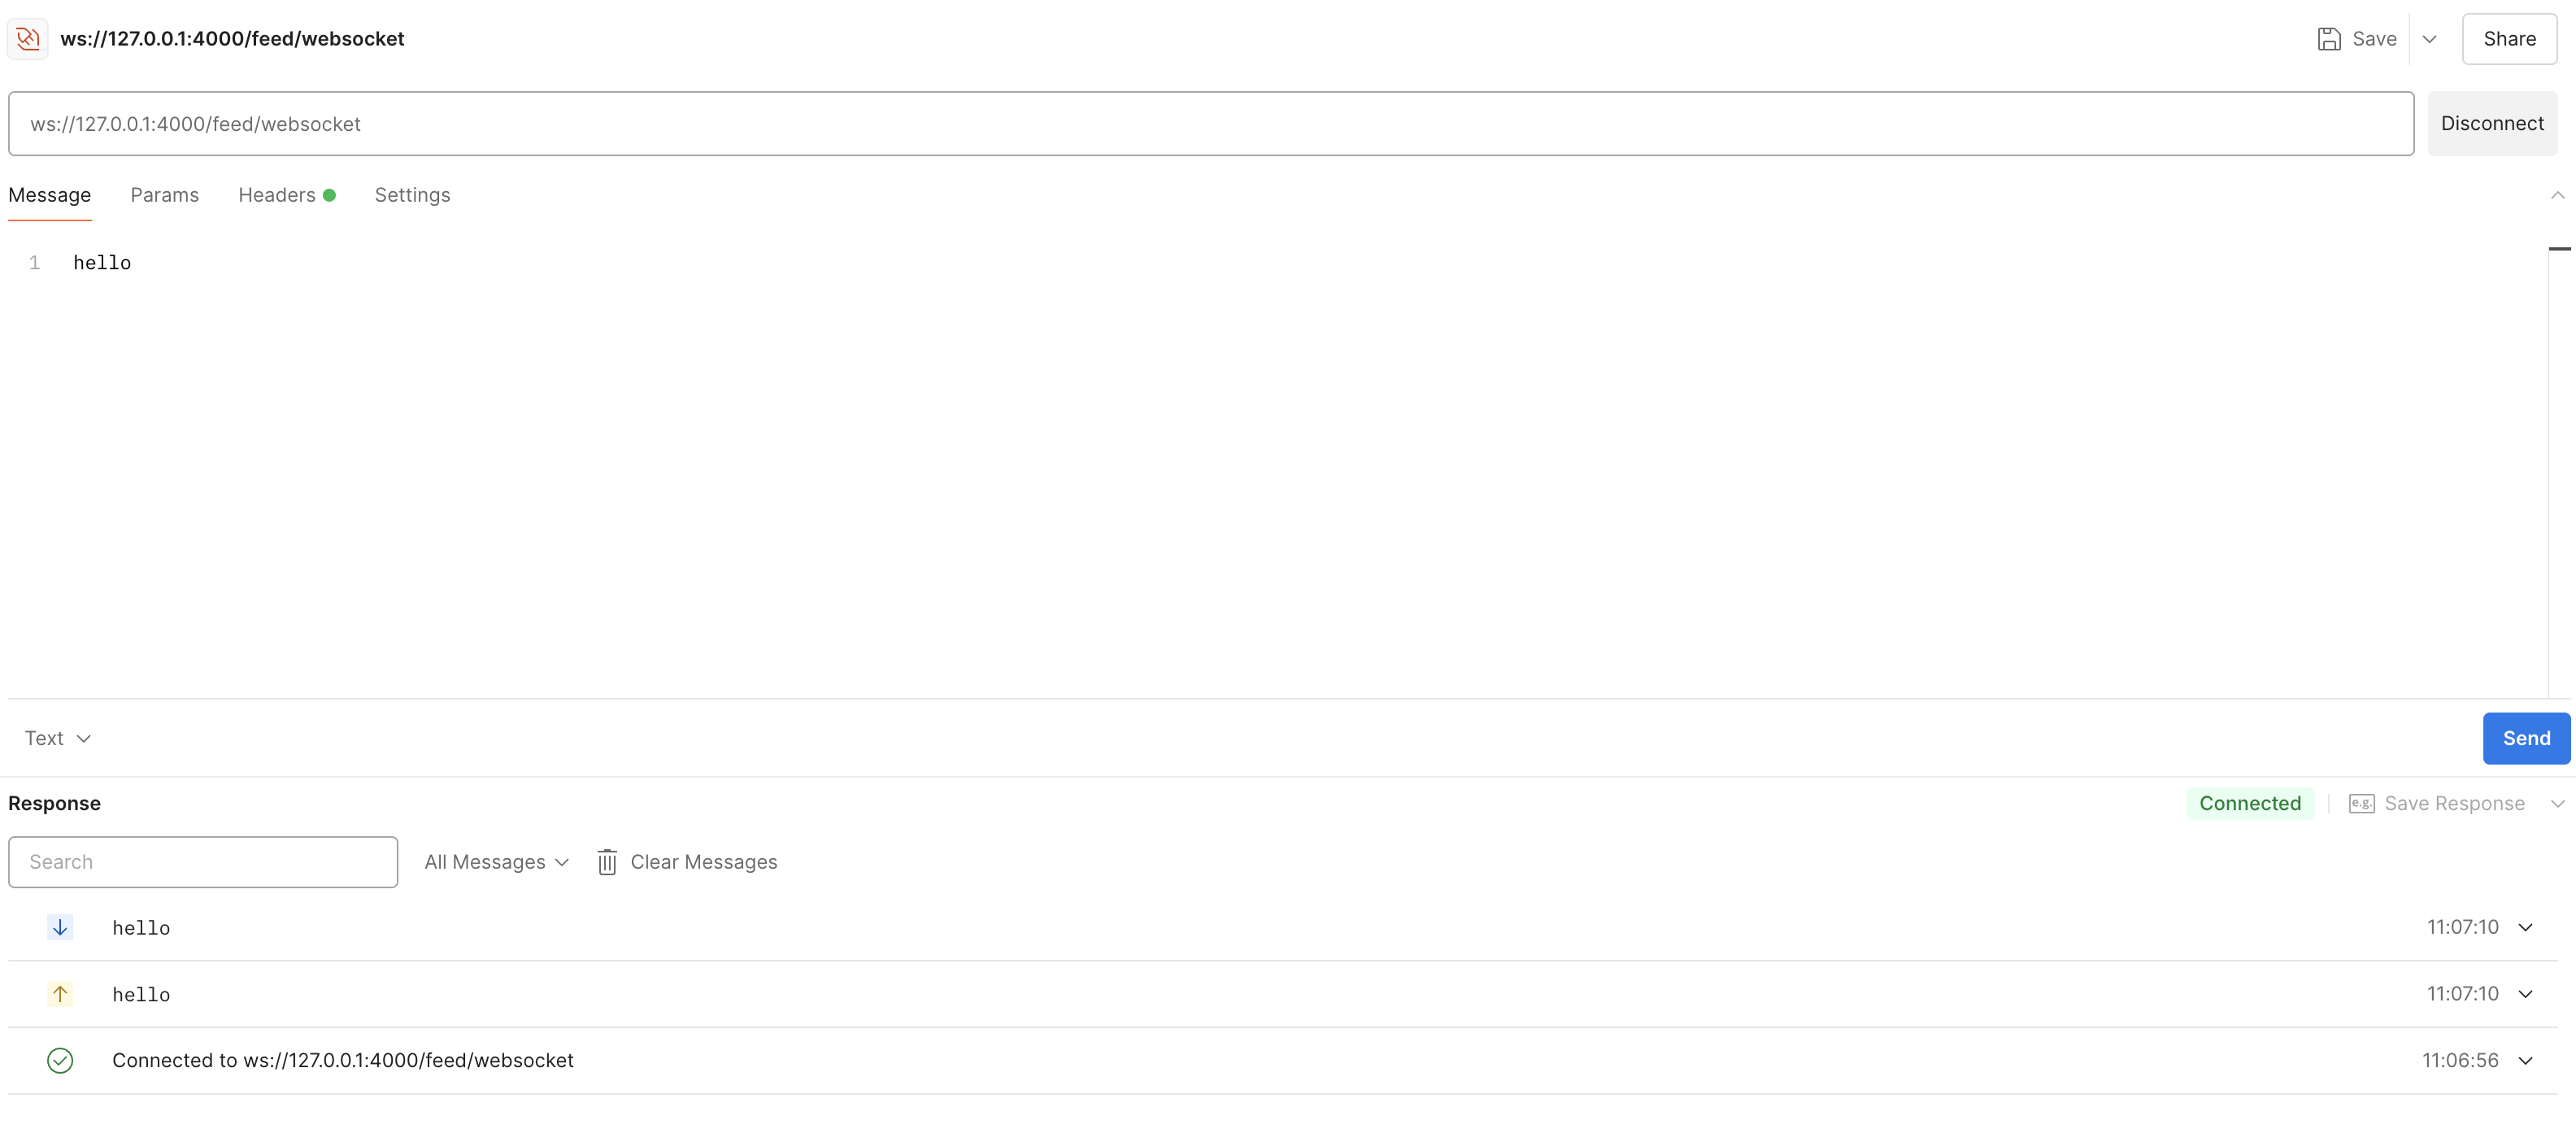
iii. Postman offers a really convenient UI for testing websockets and it’s what we’ll be using in this guide.
Connecting to the route we created via ws://127.0.0.1:4000/feed/websocket and sending some text, we can verify that we have setup the code correctly since it echoes it back:

2. Implement auth validation
Roughly described, the protocol for websockets is:
a. a client initiates the connection by making a HTTP GET request with a specification to upgrade the connection. This corresponds connect/1 in the module above.
b. The server initiates the session by switching to the websocket protocol or declines the HTTP request. This corresponds to init/1.
Our auth validation will have to be implemented in connect/1.
i. First we’ll need to pass the headers onto the state through the route in endpoint.ex. We’ll also add an error handler whose implementation we’ll define later:
# lib/myapp_web/endpoint.ex
socket "/feed", Myapp.NewsfeedSocket,
    websocket: [
      connect_info: [:x_headers],
      error_handler: {Myapp.NewsfeedSocket, :handle_error, []}
    ]
ii. Next we’ll add the validate_auth function and call it in our module:
defmodule Myapp.NewsfeedSocket do
...
  def connect(state) do
    validate_auth(state)
  end
...
  defp validate_auth(state) do
    headers = Enum.into(state[:connect_info][:x_headers] || [], %{})
    auth_token = headers["x-authorization"]
    case auth_token do
      "secret" ->
        {:ok, state}
      _ ->
        {:error, :unauthorized}
    end
  end
...
This simple validate method checks the x-authorization header to confirm the value included matches the secret string we expect, otherwise returning an error.
iii. Last we’ll add the handle_error function. This allows us to set the status code on the HTTP response
defmodule Myapp.NewsfeedSocket do
 import Plug.Conn
...
 def handle_error(conn, error) do
    case error do
      :unauthorized ->
        conn
        |> send_resp(401, "Unauthorized")

      _ ->
        conn
        |> send_resp(500, "Internal Server Error")
    end
  end
...
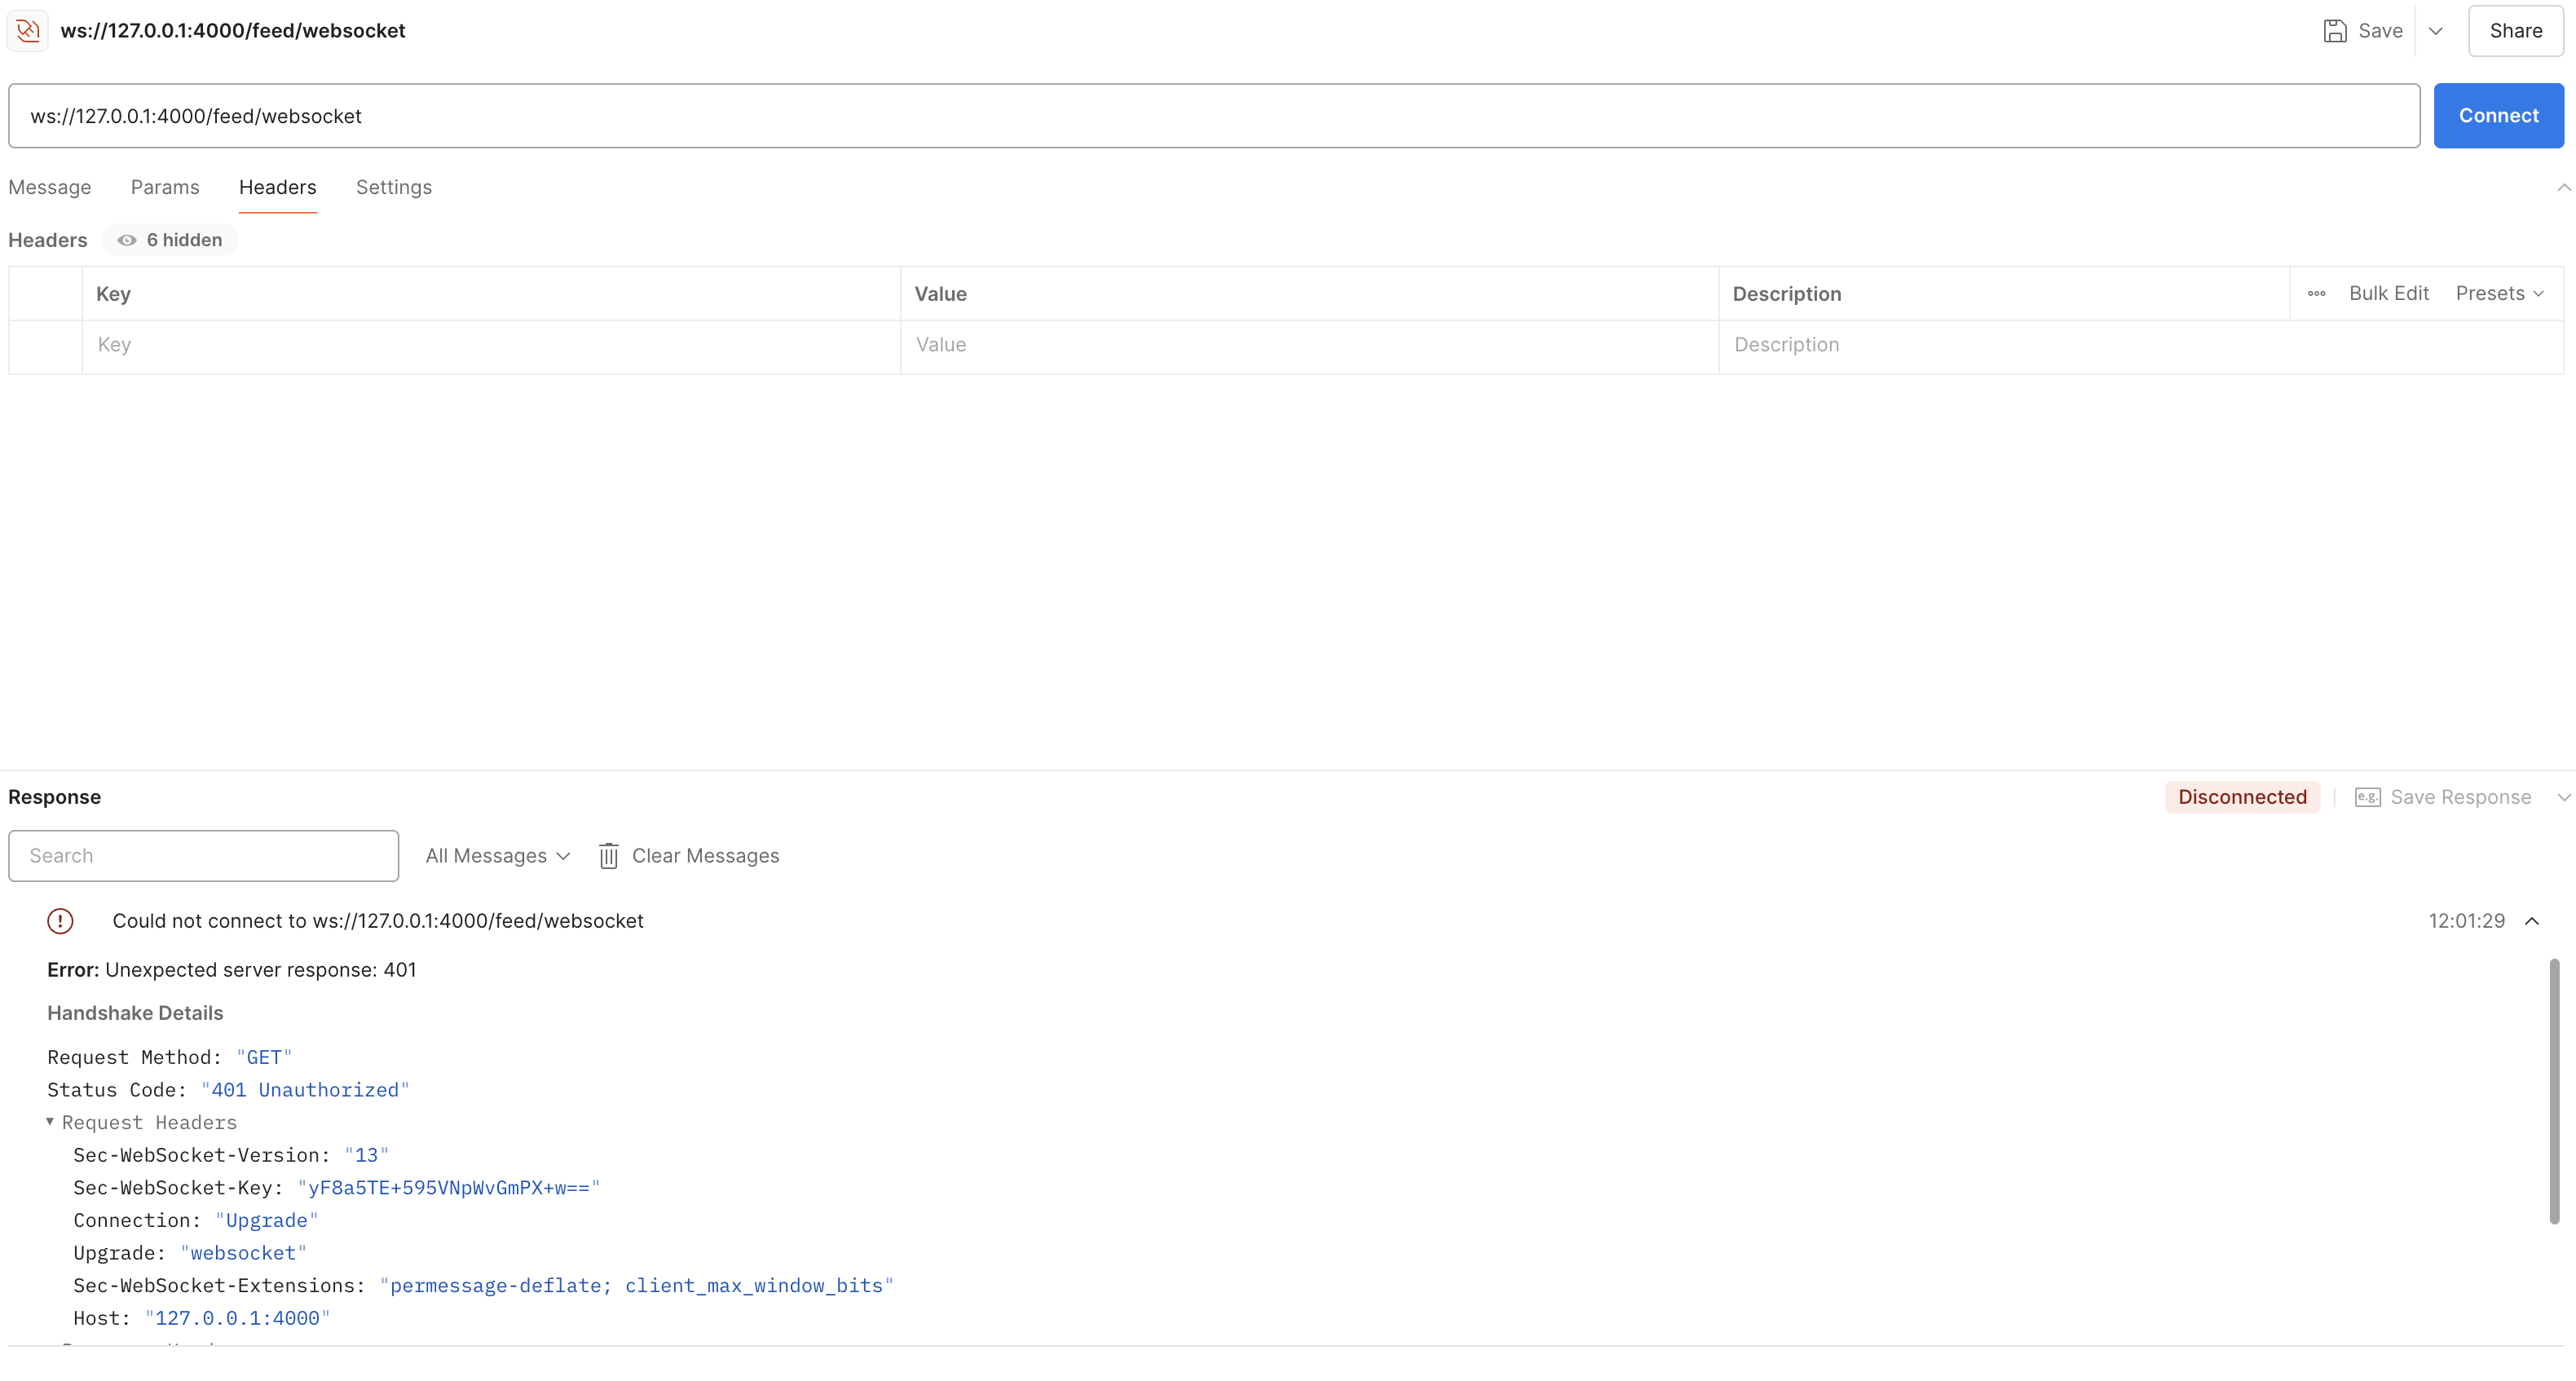
iv. Validating this on Postman we should see an error if we make a request with an invalid or missing auth header

We’ll disable this validation by commenting out so we can build out the rest of our application:
defp validate_auth(state) do
...
    _ ->
       # {:error, :unauthorized}
       {:ok, state}
end
3. Create Newsfeed business logic
We’ll add some simple business logic to return a list of posts which represents our newsfeed.
# lib/myapp/newsfeed.ex
defmodule Myapp.Newsfeed do
  # make struct JSON encodable
  @derive Jason.Encoder
  defstruct author: nil, body: nil, time: nil

  def get_feed(),
    do: [
      %__MODULE__{author: "user1", body: "It do be like that", time: ~U[2025-01-01 12:00:00Z]},
      %__MODULE__{author: "user2", body: "Covfefe again", time: ~U[2025-01-01 12:01:00Z]},
      %__MODULE__{author: "user3", body: "It's giving", time: ~U[2025-01-01 12:02:00Z]}
    ]
end
4. Periodic fetch and refresh of feed
We want to send the posts to the user immediately they connect then refresh this by sending them the latest posts every 10 seconds.
defmodule Myapp.NewsfeedSocket do
 alias Myapp.Newsfeed
 ...
 def init(state) do
    send(self(), :refresh_and_push_feed)
    {:ok, state}
 end

 def handle_info(:refresh_and_push_feed, state) do
    feed = Jason.encode!(Newsfeed.get_feed())
    # schedule the refresh for the next interval
    schedule_feed_refresh()
    {:push, {:text, feed}, state}
  end

 @doc """
  Schedule pushing of newsfeed every 10 seconds
  """
  def schedule_feed_refresh() do
    Process.send_after(self(), :refresh_and_push_feed, 10_000)
  end
...
end
i. handle_info/2 handles messages sent to the process managing the websocket connection. We add a handle_info/2 that will fetch the latest posts and push them to the client
ii. We then trigger its call immediately the websocket is initialized in init/1.
iii. Finally, we implement the scheduled refresh to happen every 10 seconds.
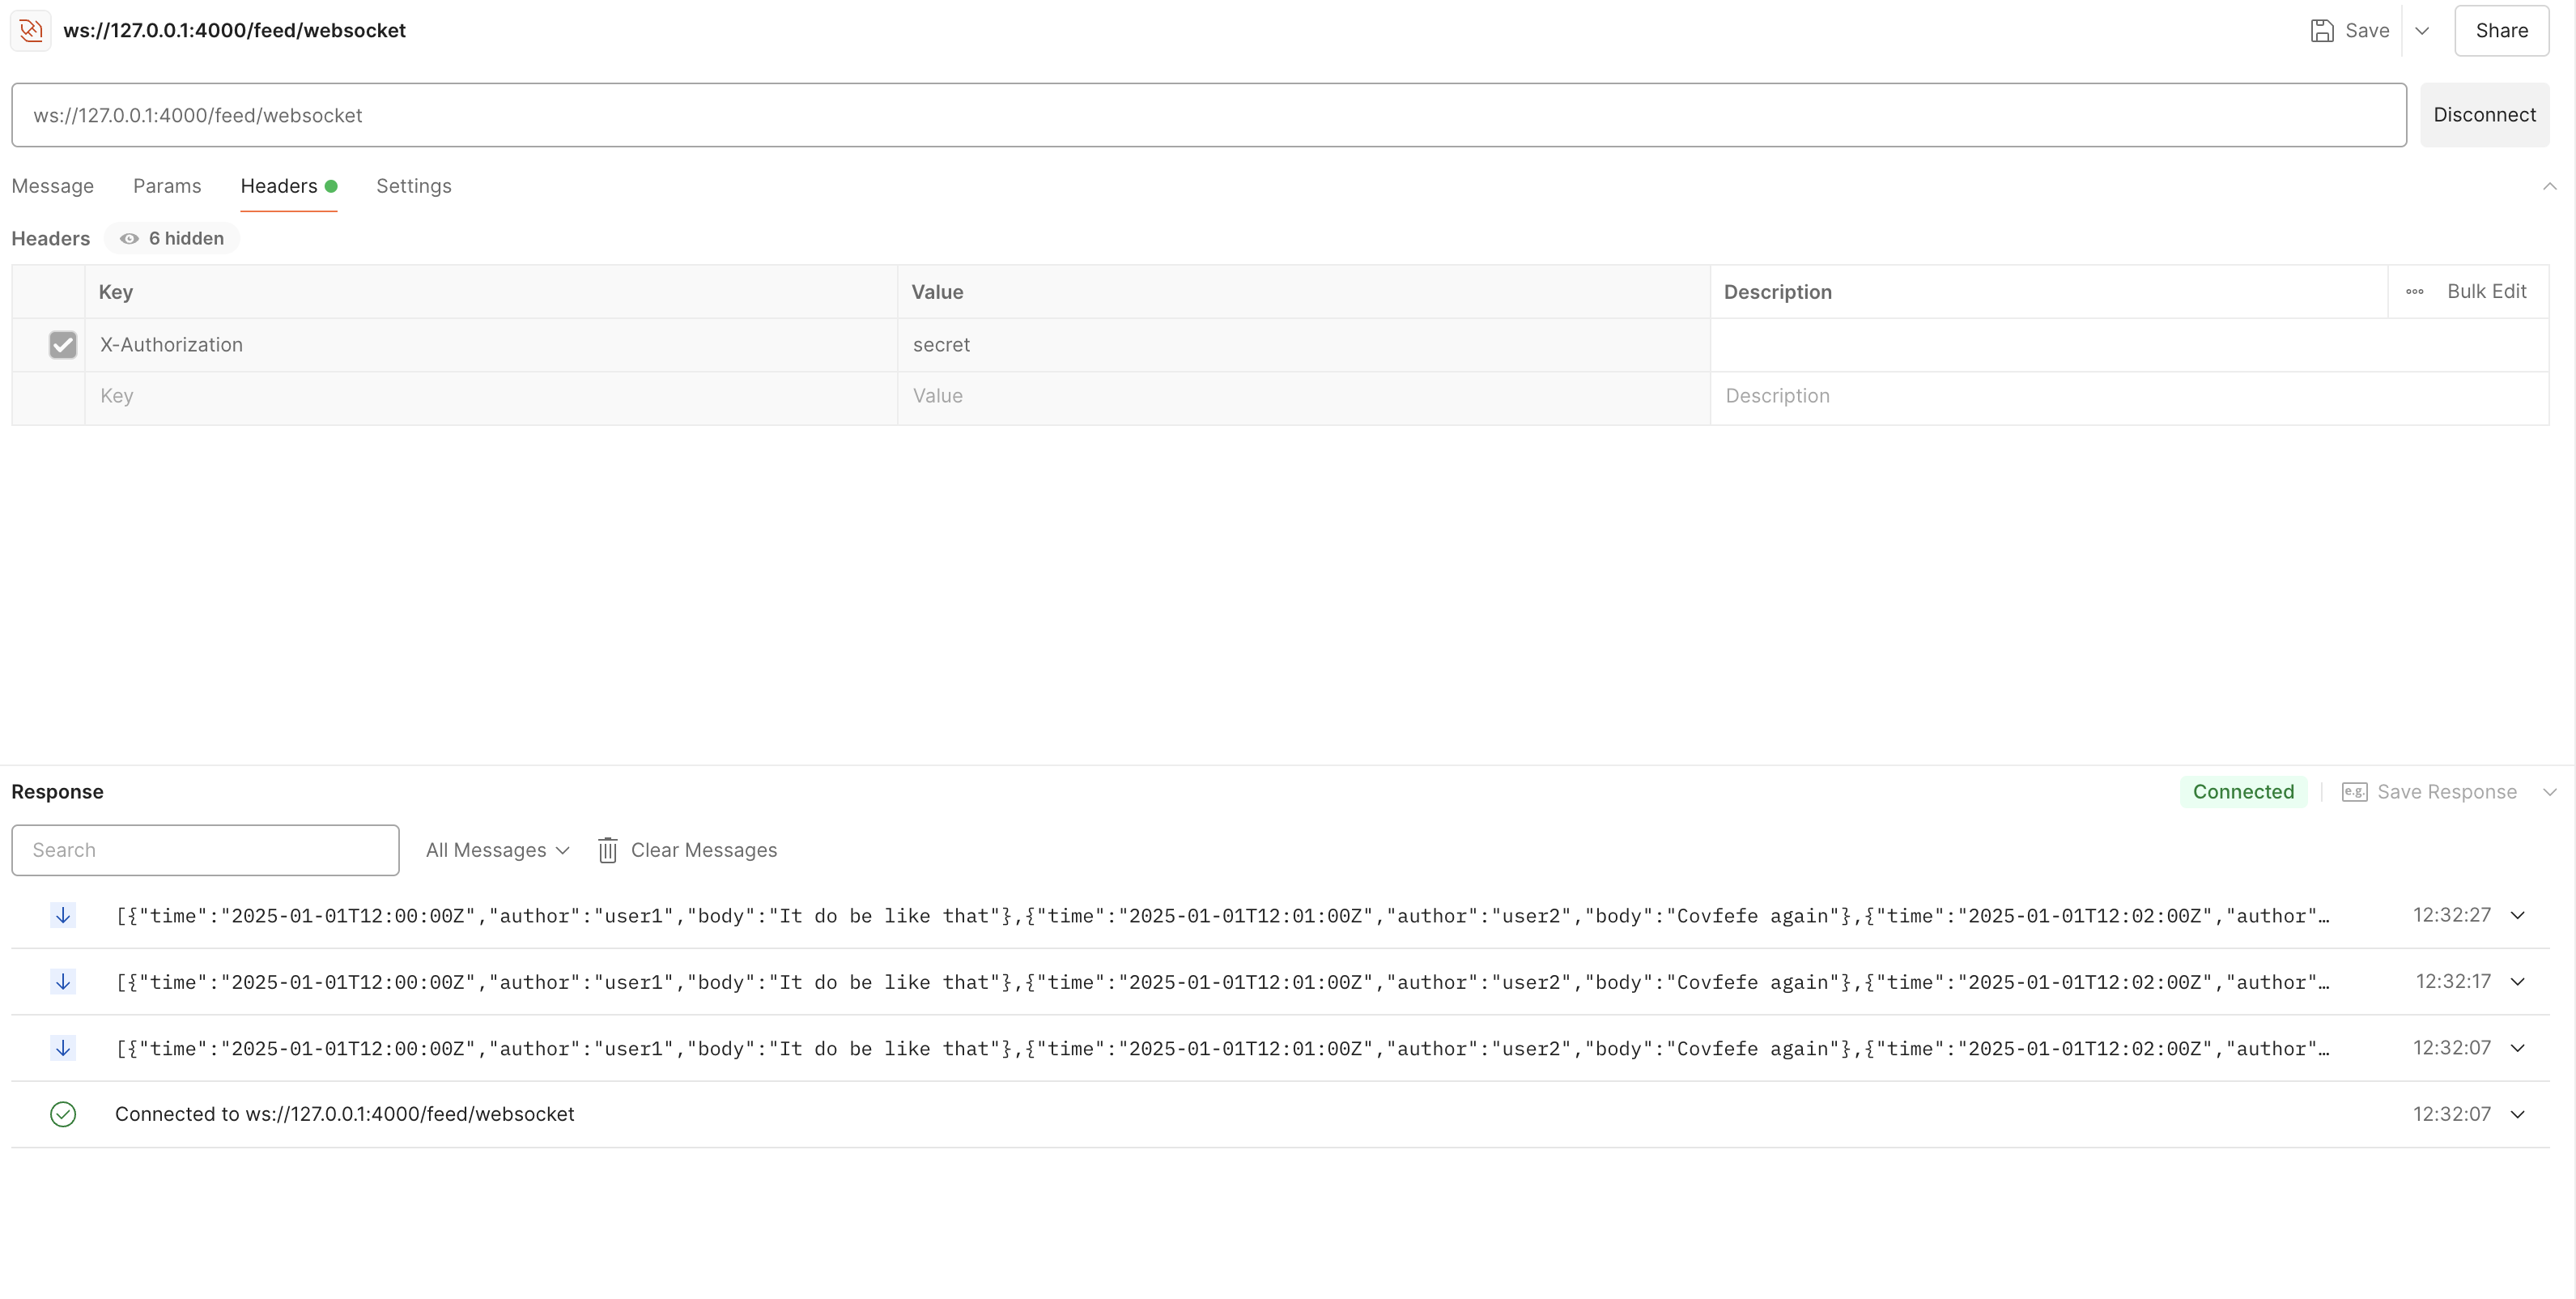
iv. We verify that this works on Postman, by seeing a message come in from our server every 10 seconds

This is part 1 of 3 of this series. In the next articles, I will show you how to implement ping/pong opcodes and how to write tests. Let me know if you have any questions.
Subscribe to my newsletter
Read articles from Ryan Marvin directly inside your inbox. Subscribe to the newsletter, and don't miss out.
Written by
