Deploy two-tier application on Kubernetes
 Nihal Shardul
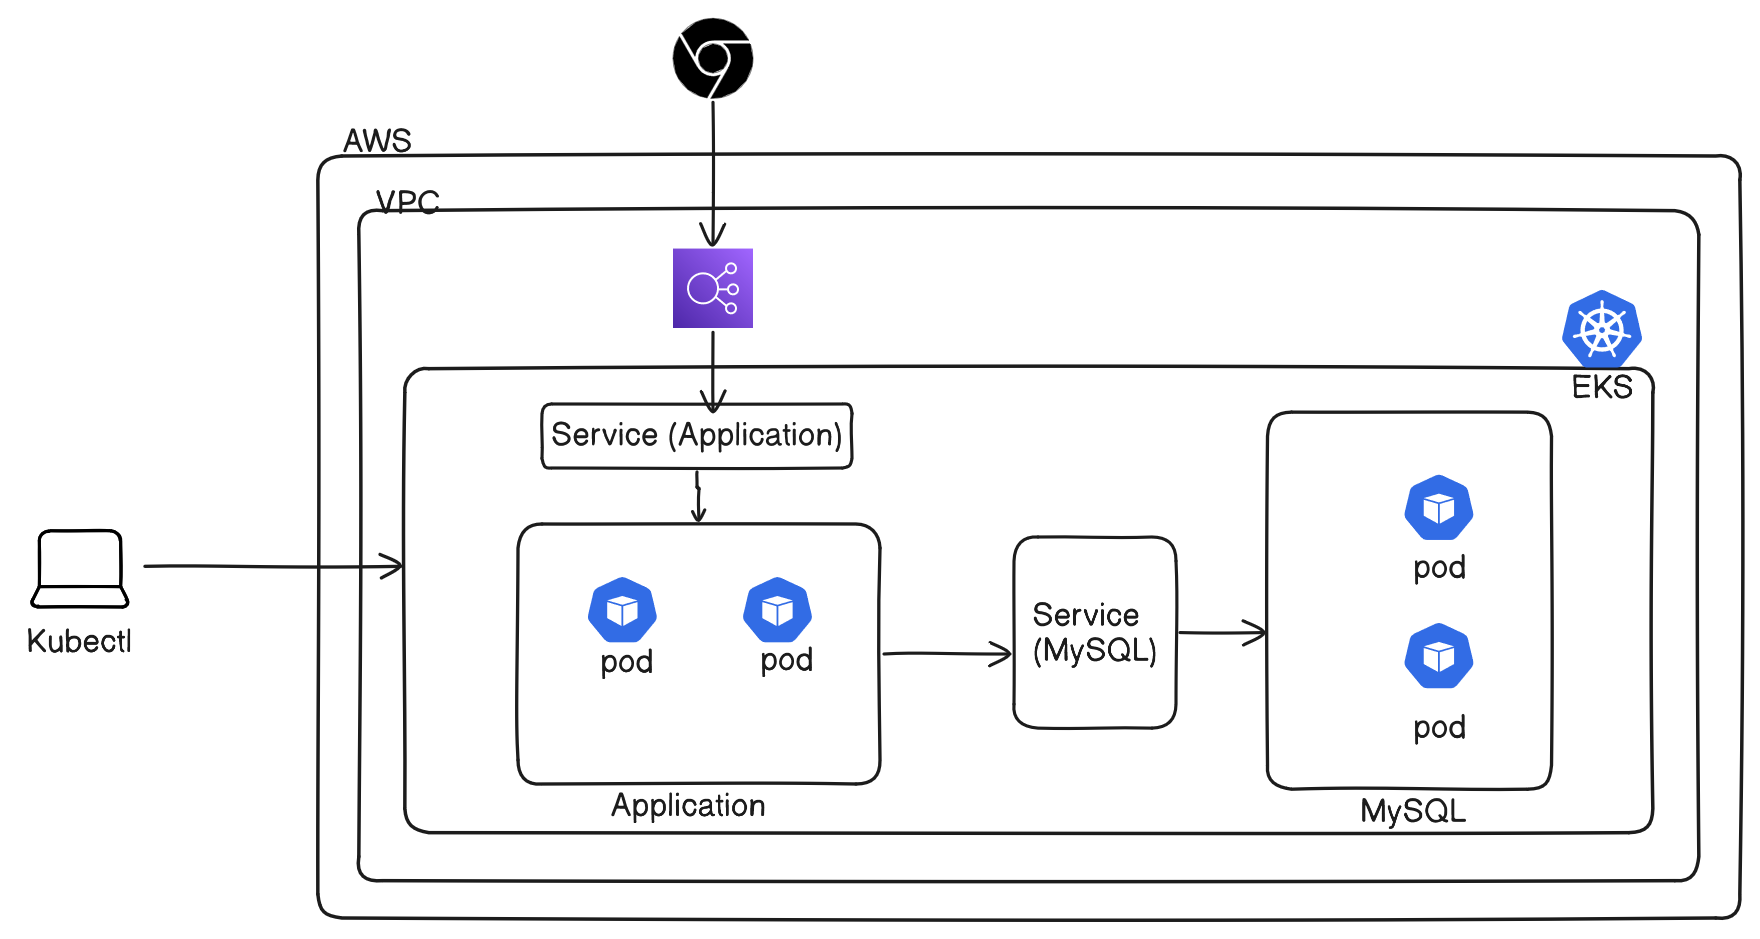
Amazon Elastic Kubernetes Service (EKS) makes it easy to run Kubernetes on AWS without needing to install and operate your own control plane. In this guide, we’ll walk through creating an EKS cluster with a managed node group, allowing you to deploy and manage our applications seamlessly.
This cloud-native web application is built using a mix of technologies. It's designed to be accessible to users via the internet, allowing them to create a task-list for them.
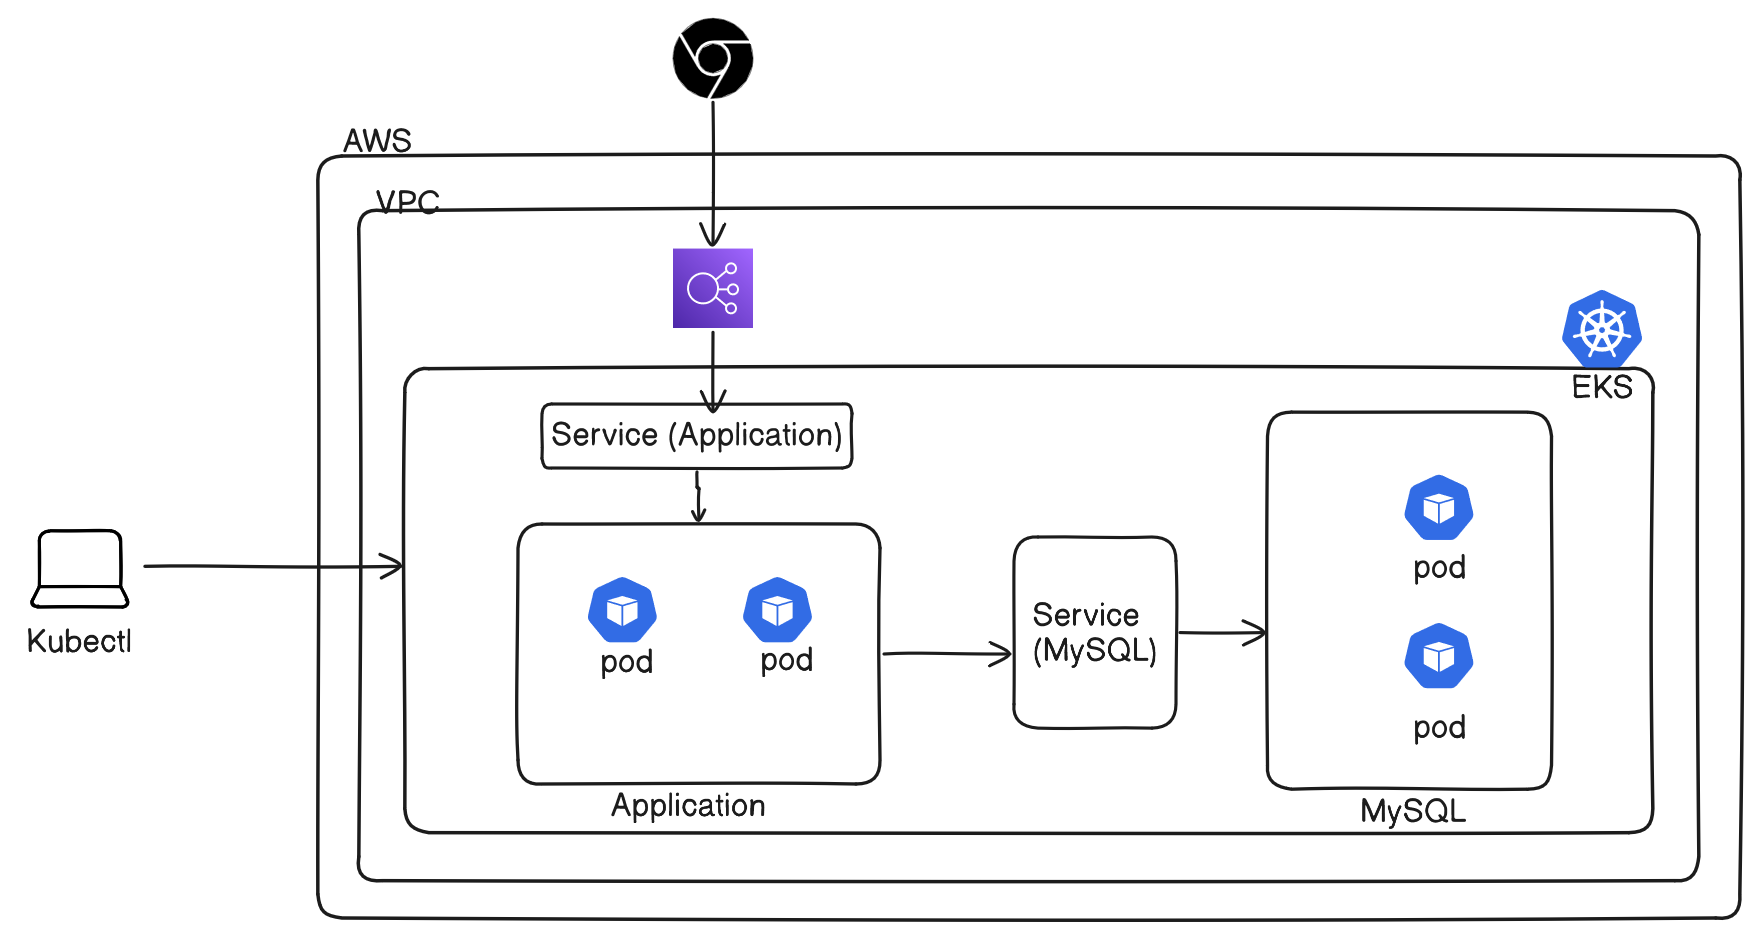
The architecture would look like below,
Prerequisites
Before we begin, ensure you have the following:
AWS Account: Sign up for an AWS account if you don’t already have one.
AWS CLI: Install and configure the AWS Command Line Interface.
kubectl: Install
kubectl, the command-line tool for interacting with your Kubernetes cluster.eksctl: Install
eksctl, the command-line tool for EKS cluster management.
Technical Stack
Application: This application is built using Flask. It provides a responsive and user-friendly interface for task list.
Database: The database of this application is powered by MySQL. The database configured with a replica set for data redundancy and high availability.
Step 1: Create Your EKS Cluster
Create a Amazon EKS cluster using eksctl using this link → https://nshardul.hashnode.dev/create-amazon-eks-cluster-using-eksctl
By following this link, you will create an Kubernetes Cluster of 2 nodes where control plane will be managed by AWS. Make sure Node type set to t2.medium
Step 2: Clone Repository from Github
Clone repository from github using below command.
git clone https://github.com/nihalshardul/two-tier-flask-app.git

Once done, have a look on manifest files.
Step 3: Overview of manifest file
We will be creating namespace named as task-list, in which all the resources will be deployed in this namespace.
Let’s have a manifest file overview:
mysql-secrets.yml → Contains mysql credential required for this project.
mysql-configmap.yml → Contains mysql command, which should be run when initializing pod.
mysql-deployment.yml → Create deployment which handles mysql database for this project.
mysql-svc.yml → Create a service which will forward the request to pods which handles mysql database of this project.
two-tier-app-deployment.yml → Create deployment which will handle flask app request.
two-tier-app-svc.yml → Create a loadbalancer service which will be accessible over the internet and forward the request to pods which handles flask app request for this project.
Step 4: Deploy our application
Let’s deploy our application using below commands,
- Create task-list namespace and verify it.
kubectl create ns task-list #creating namespace
kubectl get ns #verify creation of namespace

- Deploy mysql-secret which contains mysql credentials
kubectl apply -f mysql-secrets.yml
- Deploy mysql-configmap which contains init.db, used for initializing db at start.
kubectl apply -f mysql-configmap.yml
- Deploy mysql-deployment which contains deployment configuration for mysql, mysql-configmap and msql-secrets also configured.
kubectl apply -f mysql-deployment.yml
- Deploy mysql-service which create service which whill be accessible only within cluster.
kubectl apply -f mysql-svc.yml
Once above steps are done, we will check if all resources are in healthy state or not.
Use kubectl get all -n task-list to list all resources in task-list namespace.
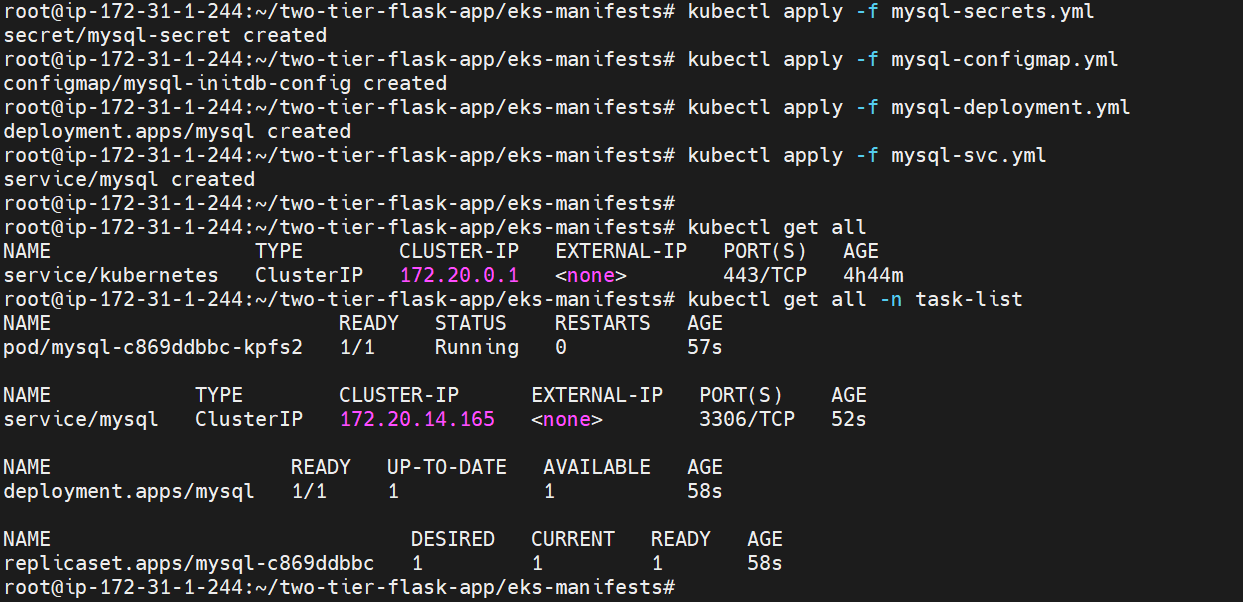
We confirm all resources are healthy, now check if data have been fetched in mysql pod. Type command kubectl describe pod <pod-name> -n task-list
- Deploy Application of this project which is two-tier-app-deployment.yml
kubectl apply -f two-tier-app-deployment.yml
- Create Load-balancer for our application which will be accessible to everyone(over the internet).
kubectl apply -f two-tier-app-svc.yml
Once above things are done. Verify this using kubectl get all -n task-list

You will get all the resources deployed in task-list namespace.
To access the application, copy the external-ip from LoadBalancer service type. And paste it into url.
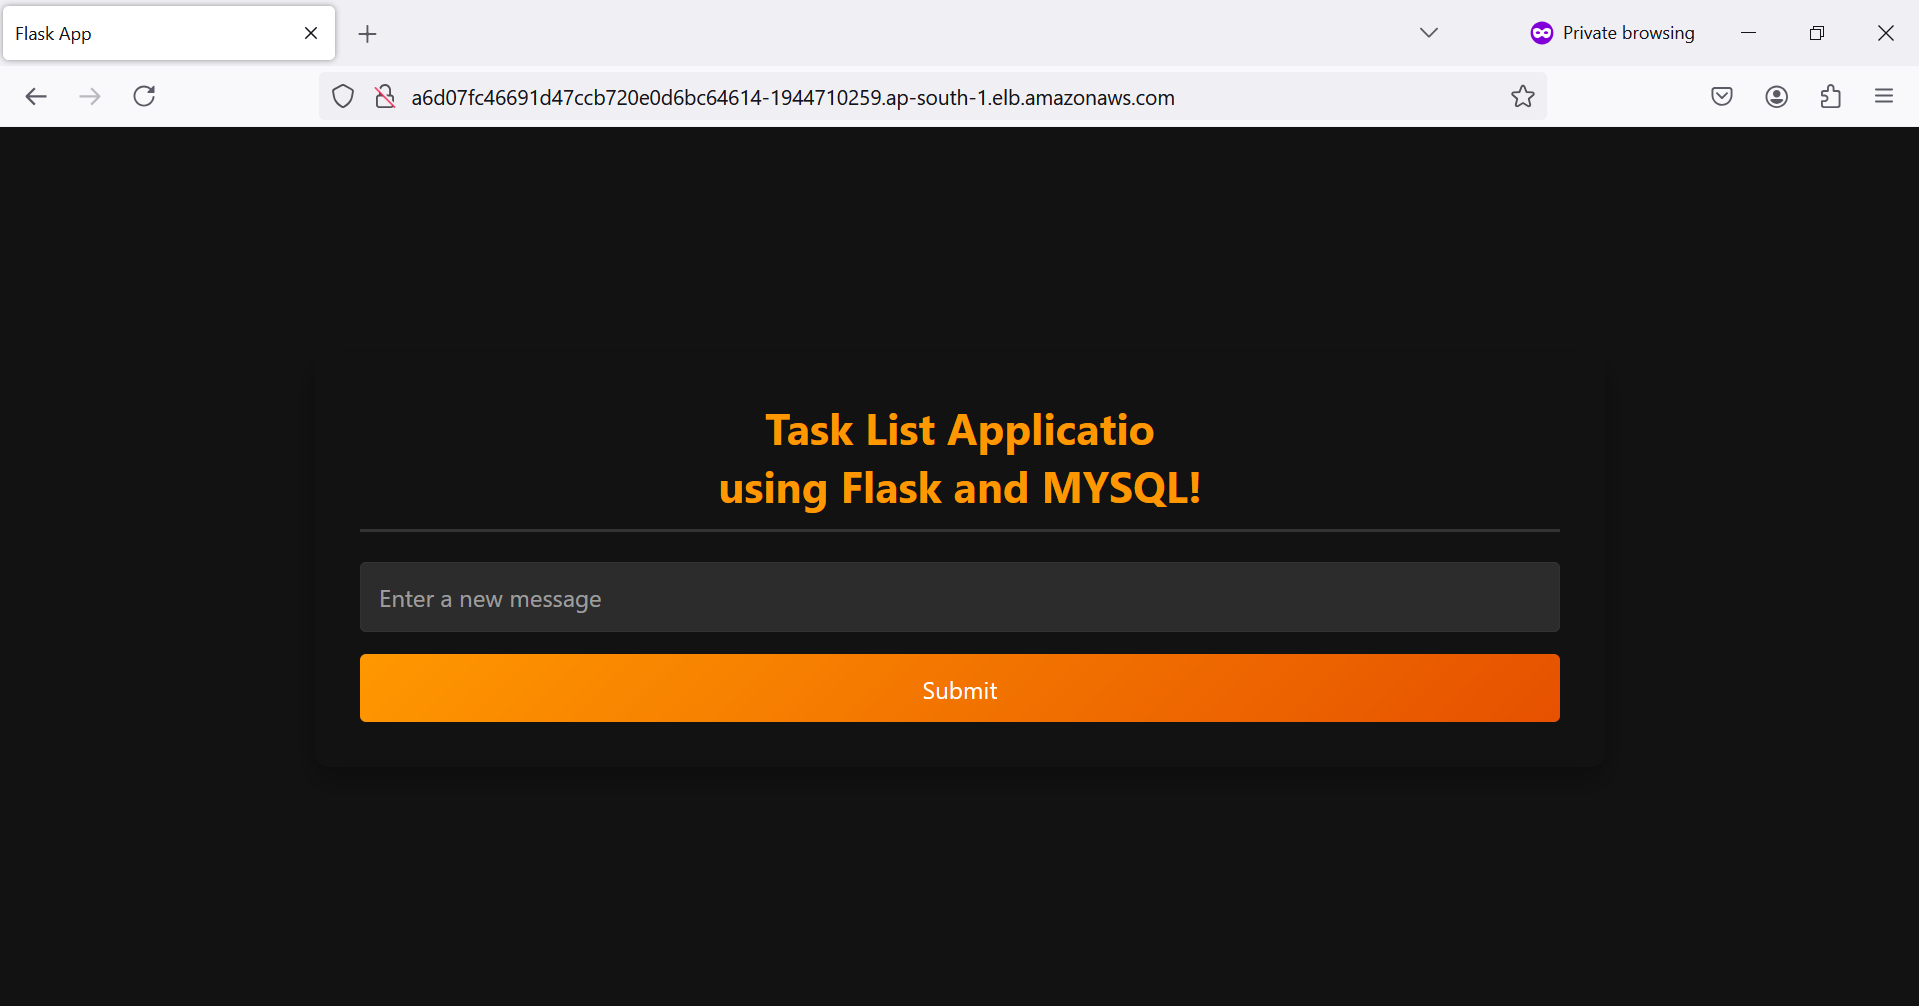
Yeahh !!! We got our application deployed. Let’s try to type something in it. “Document this on Hashnode.”
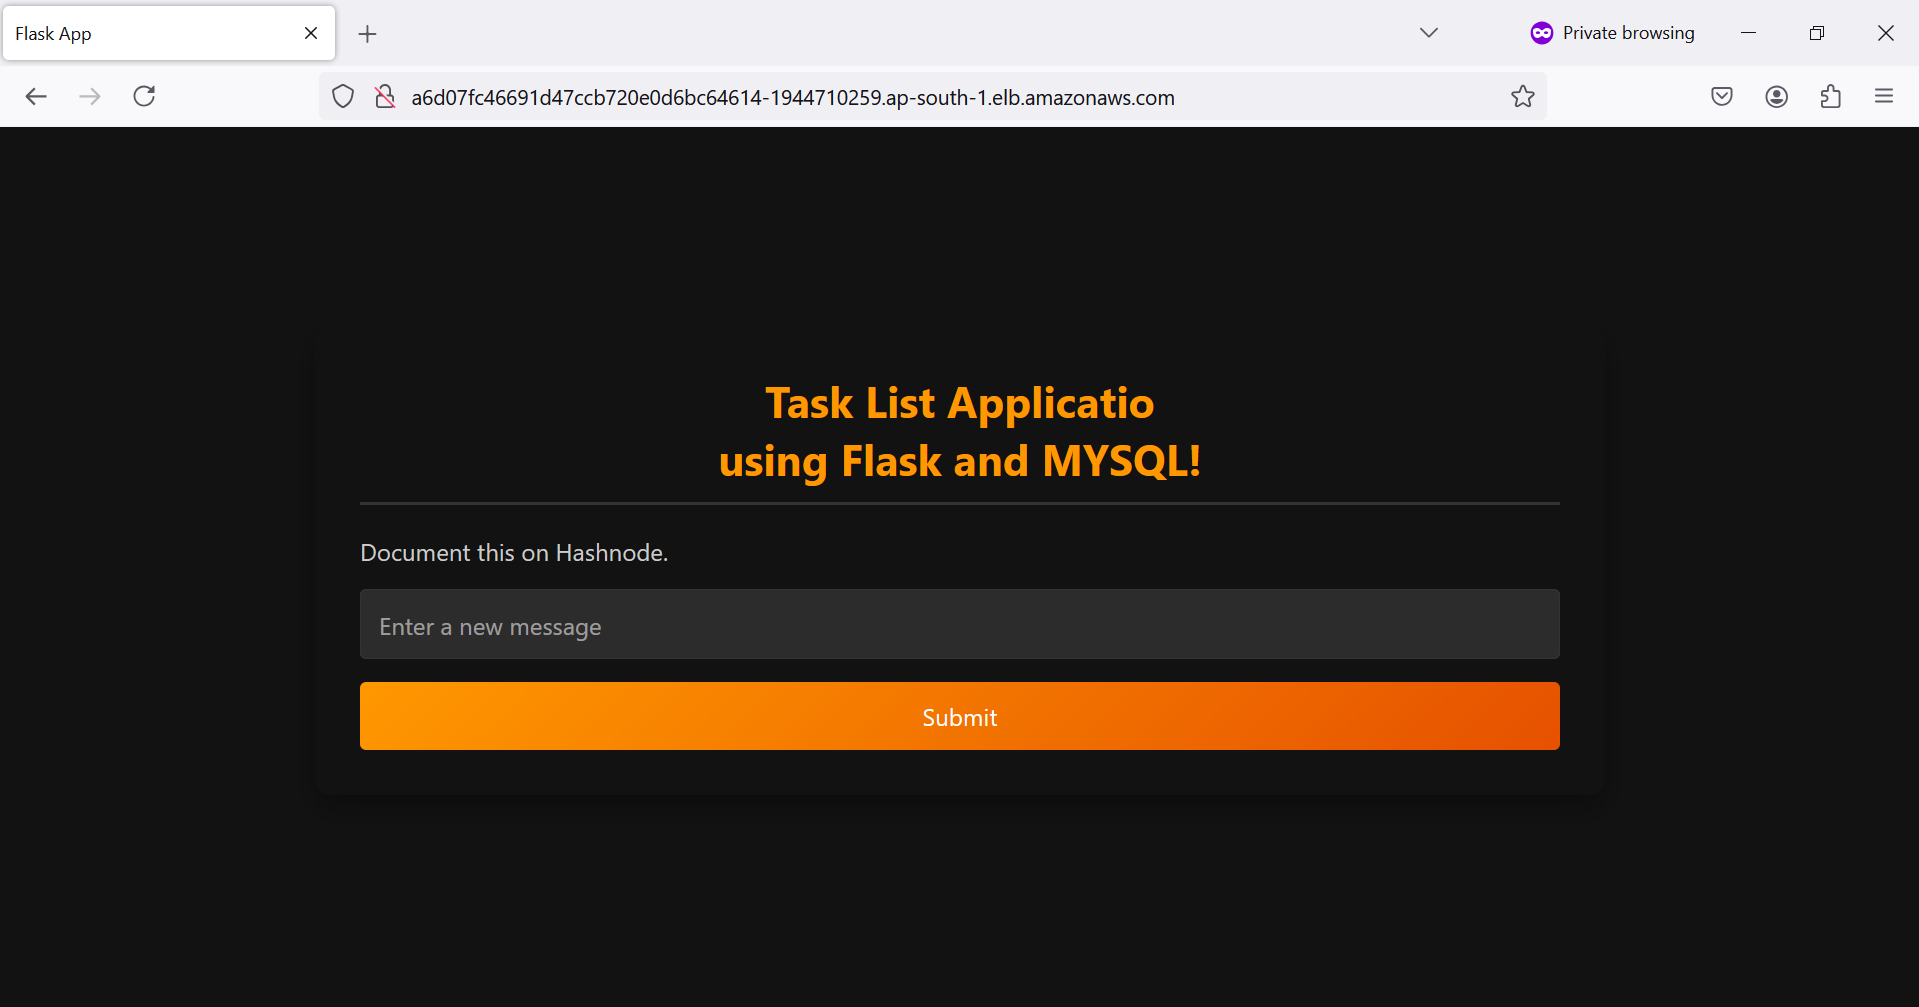
Our application is working as we expected.
Hurray !!! We have successfully deployed our two-tier application on Amazon EKS cluster.
Thanks.
Subscribe to my newsletter
Read articles from Nihal Shardul directly inside your inbox. Subscribe to the newsletter, and don't miss out.
Written by

Nihal Shardul
Nihal Shardul
Enthusiast Cloud and Security with expertise in AWS and DevOps. Proficient in Python, Bash, Git, Jenkins, and container orchestration tools like Docker and Kubernetes, I focus on automation and CI/CD practices. I leverage security tools such as NMAP, Nessus, and Metasploit to identify and mitigate vulnerabilities. Passionate about learning and collaboration, I thrive on enhancing cloud security and efficiency. Always eager to advance my skills, I aim to contribute to the tech community.