Mount Elastic Block Store (EBS) on EC2 Instance
 Celestina Odili
Introduction
Amazon Elastic Block Store (EBS) is a scalable, high-performance block storage service designed to work with Amazon EC2 (Elastic Compute Cloud) instances. It is suitable for a wide range of use cases in data-intensive applications from web apps to enterprise-level storage needs. Here are its main uses:
EBS provides persistent storage for data, applications, and databases on EC2 instances, even after the instances are shut down.
Data Backup and Recovery**:** With snapshots, users can create backups of EBS volumes, storing them in Amazon S3, which helps with disaster recovery and data retention.
It is ideal for databases requiring high I/O operations, like relational databases (MySQL, Oracle, etc.), and NoSQL databases, due to its low-latency performance.
High-performance Workloads: Applications needing rapid read/write operations, like analytics, transactional applications, and big data processing, benefit from EBS's high IOPS (Input/Output Operations Per Second) and throughput.
Scaling and Flexibility: EBS volumes can be resized and moved across availability zones to meet changing demands, making it highly adaptable to workload requirements.
Encryption and Security: Amazon EBS offers data encryption at rest, helping to meet compliance requirements and ensuring secure data handling.
Cost Optimization: EBS provides various volume types (e.g., General Purpose SSD, Provisioned IOPS SSD, Cold HDD) for cost-effective storage tailored to performance needs.
The steps below provide a guide to mounting amazon EBS on EC2 instance
Step 1: Create EC2 Instance
- Sign in to AWS Account
Go to aws.amazon.com and sign in to AWS management console. If you do not have an AWS account yet, click Create an AWS Account to create one.

For a guide on how to create AWS Account, click here
- Launch an EC2 Instance
Search for EC2 on the AWS Management Console search bar and select it.

On the EC2 Dashboard, Click on Launch Instance.

- Provide the EC2 Instance Details
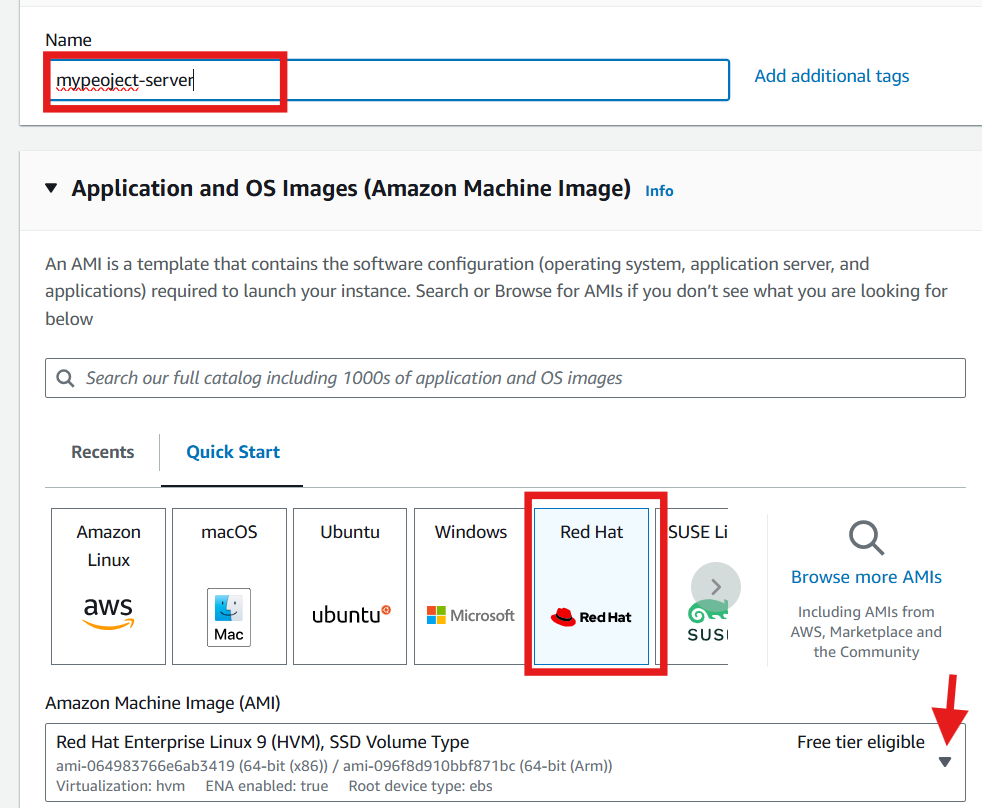
Under name and tags, provide a name for the instance
Under application and OS Images (Amazon Machine Image), select an an image type and Choose a free tier eligible version from Amazon Machine Image (AMI) dropdown.
Here we will use Red Hat
Under description, take note of the username, you will need it for connection. For Red Hat, the username is ec2-user.
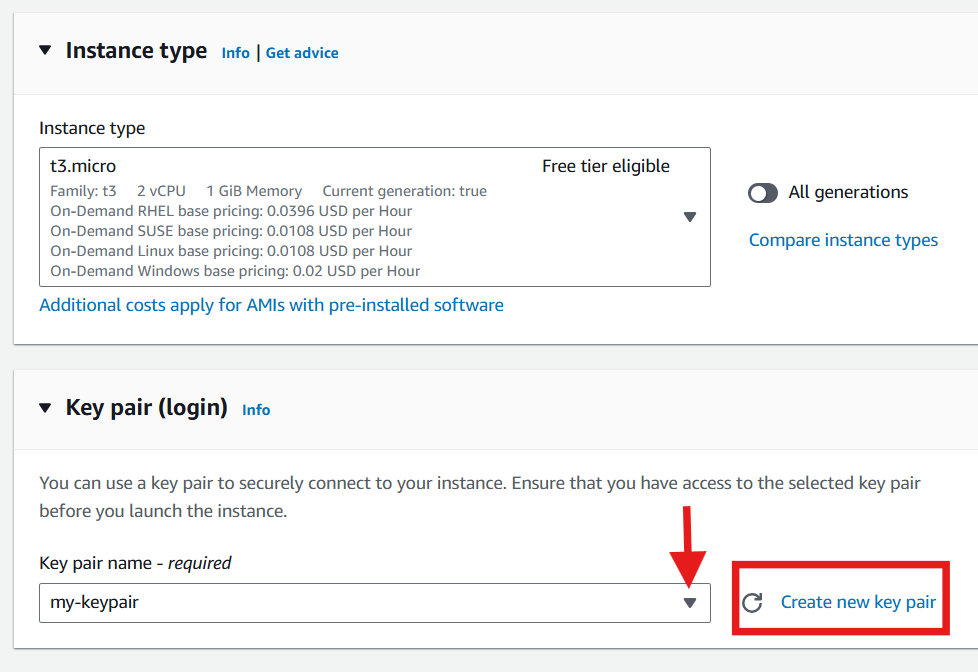
Select an Instance Type: choose any suitable type. Here I am using t3.micro free tier eligible.
Create new key pair or select an existing: To create new one click on create new key pair and provide key pair name and click create key pair, It will be downloaded automatically.
Network setting: Click edit to select a subnet. This is important so you can note the availability zone.
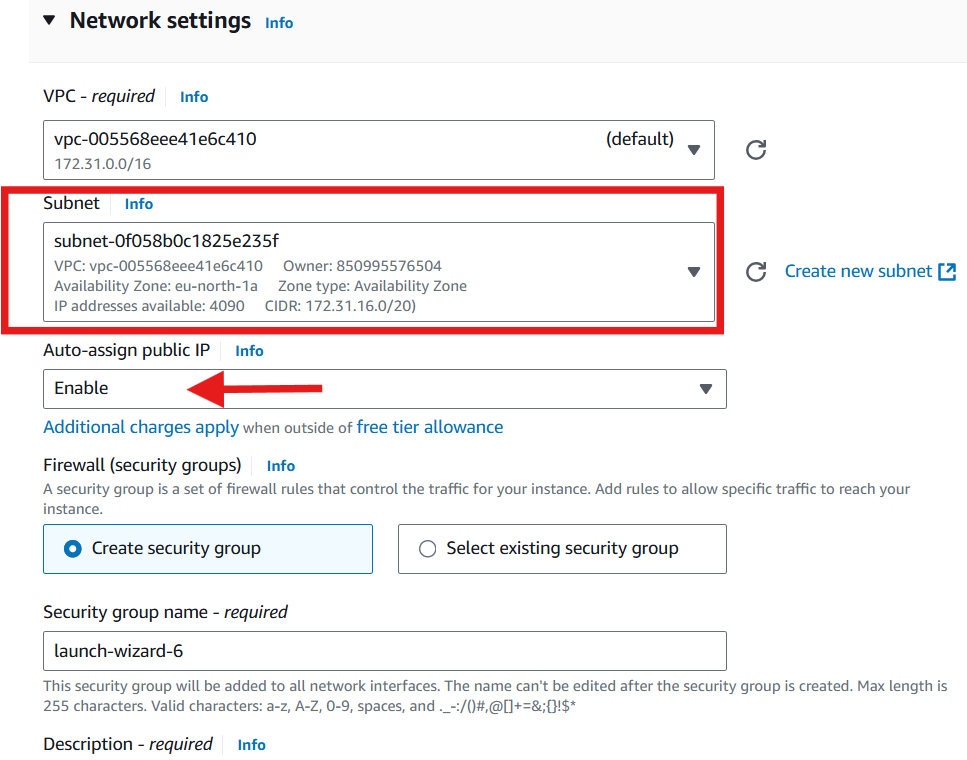
- Leave the rest at default.
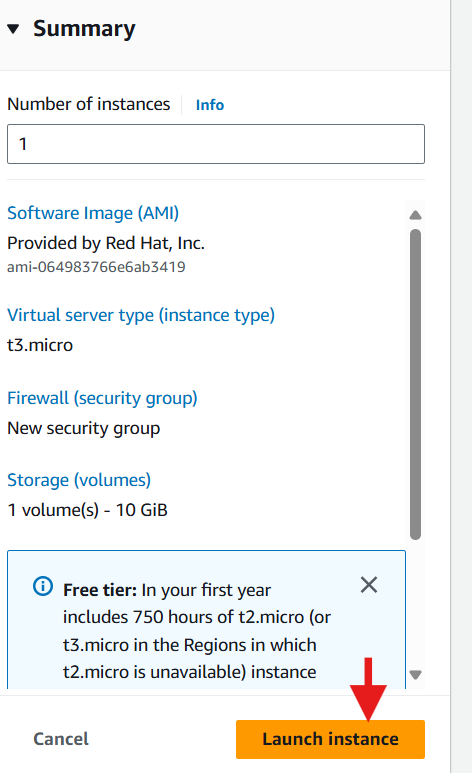
Summary: Review summary and launch the instance to create.
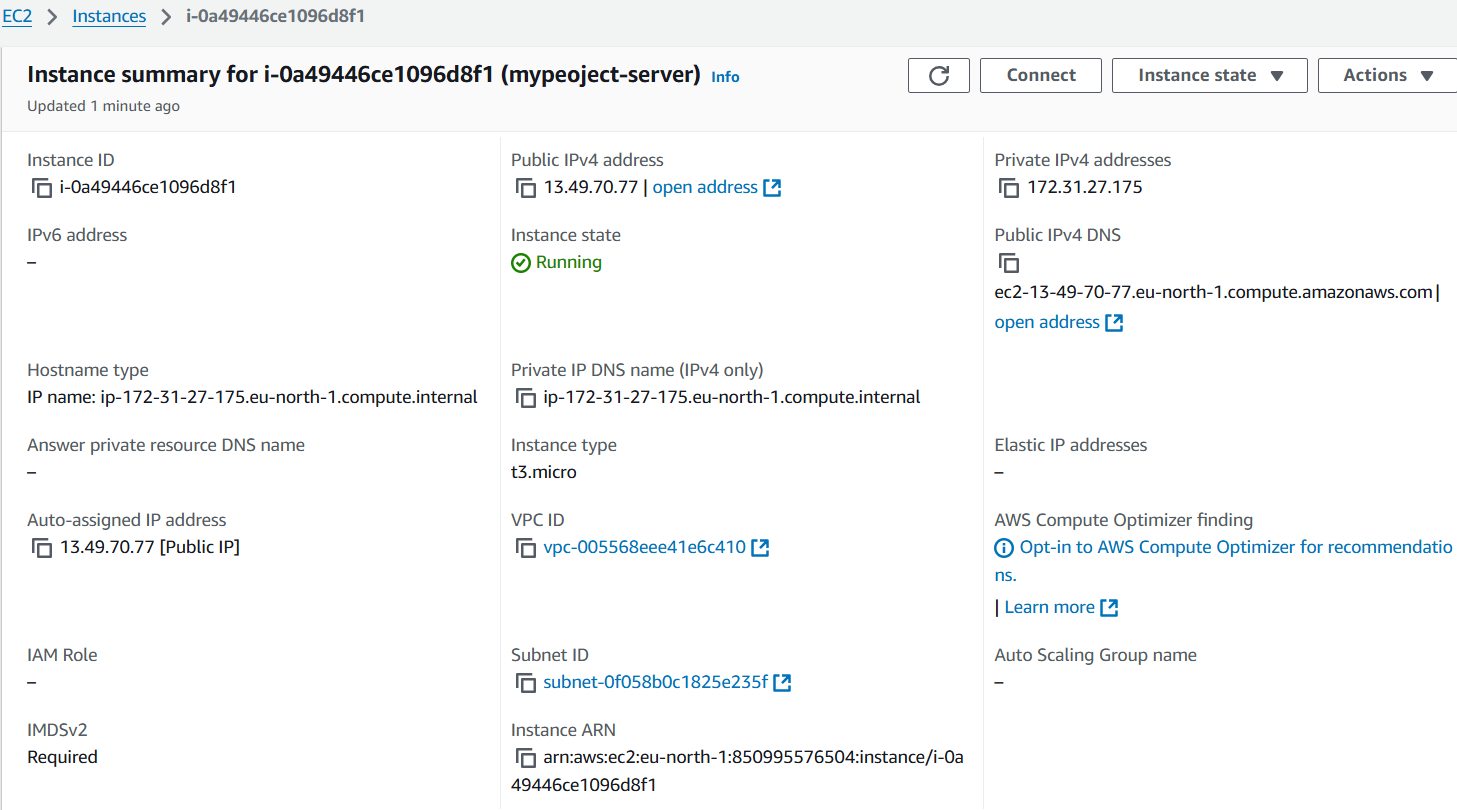
Once the instance is successfully created, you will see a success notification. You can click on the instance ID to open and view the instance summary.

Step 2: Create and Attach the EBS Volume
Navigate to the EC2 Dashboard.
In the left-hand menu, under "Elastic Block Store" click on "Volumes".
Click "Create Volume"

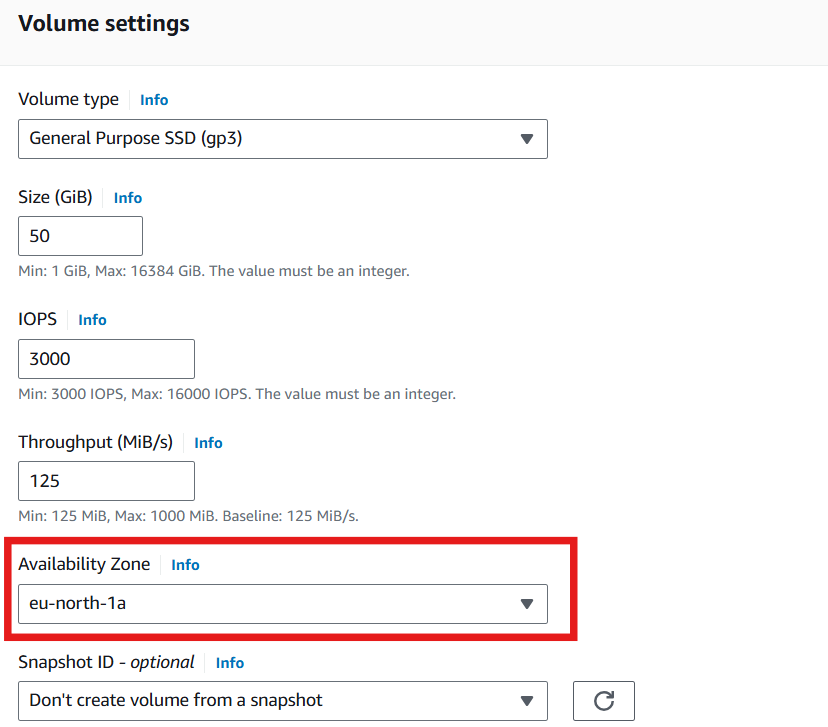
Configure the volume settings (size, type, availability zone). Make sure the availability zone matches that of your EC2 instance. Here I will select
eu-nort 1aand enter 50 for sizeScroll down and click create volume
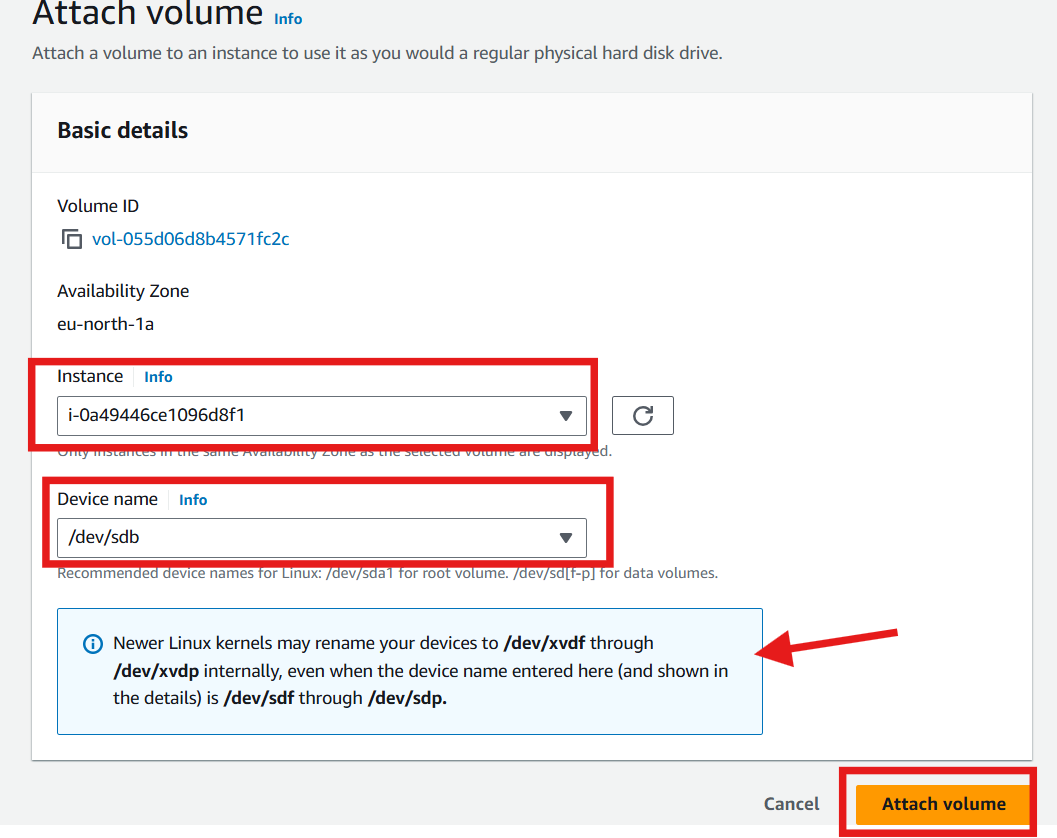
Attach Volume. After creating the volume, select it from the list,
Click on the Volume ID to open it

click "Actions" and select "Attach Volume".

Choose the instance to attach the volume to
Specify the device name (e.g.,
/dev/sdf) and note the explanation regarding device name.Click attach volume
Step 3: Connect to the EC2 Instance
Go to your EC2 instance
Click connect

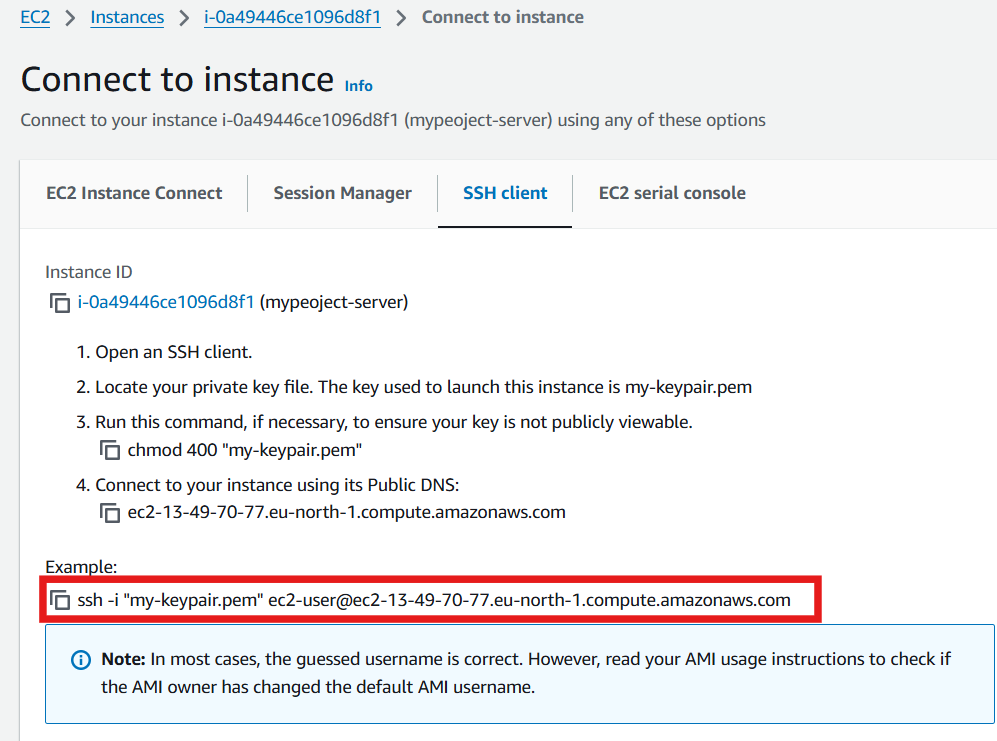
Navigate to SSH client tab. Instructions on how to connect to your EC2 instance is here. The example contains the full path, you can copy it.
Open a terminal or command prompt
Navigate to the private key path. This is the folder where the key is located. Mine is the downloads folder. so, I will change directory to download and paste the copied command.
ssh -i "my-keypair.pem" ec2-user@ec2-13-49-70-77.eu-north-1.compute.amazonaws.com
Step 4: Update and Upgrade the Package (Optional)
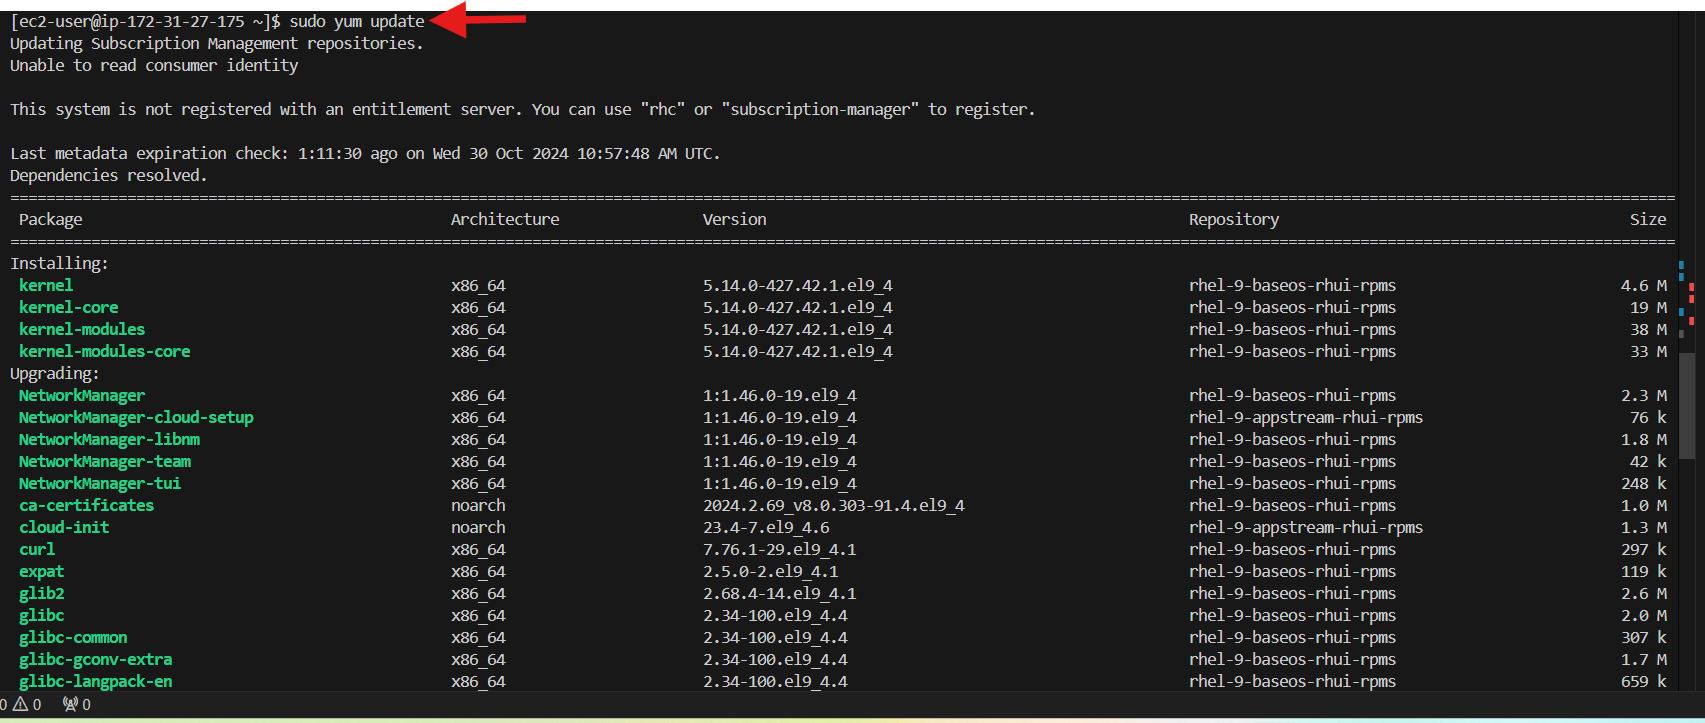
Update the package: Type y for yes when prompted to upgrade the package.
sudo yum update

Step 5: Format the EBS Volume (New Volume)
Skip this step if the volume already has data. Formatting the volume creates a filesystem.
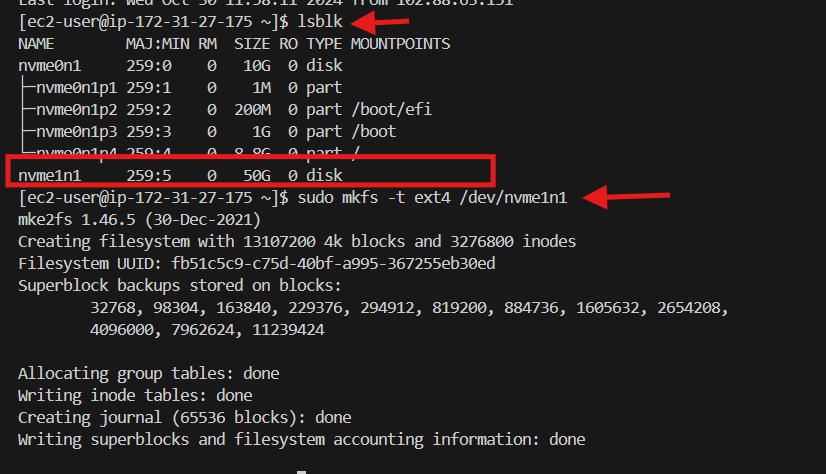
List the block devices to verify the new volume is attached. run the command. take note of the name.
lsblkFormat the volume with following command replacing
nvme1n1with your device namesudo mkfs -t ext4 /dev/nvme1n1
Step 6: Mount the EBS Volume
Step 1: Create a mount point. Create a directory to mount the volume. Replace mydisk with any name and run the command below.
sudo mkdir /mnt/mydiskStep 2: Mount the volume to the created directory:
sudo mount /dev/nvme1n1 /mnt/mydiskStep 3: Verify the volume is mounted:
df -h
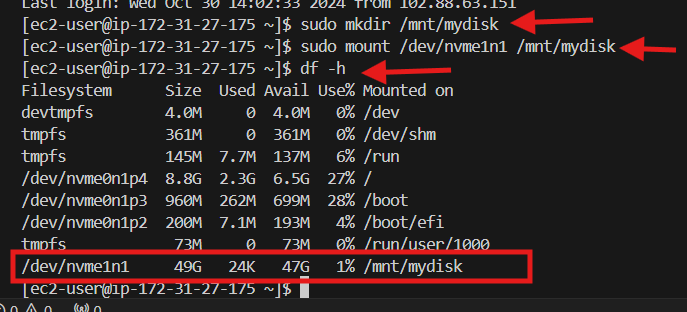
Congratulations!!! your EBS volume has been successfully mounted and ready for use on your EC2 instance.
Subscribe to my newsletter
Read articles from Celestina Odili directly inside your inbox. Subscribe to the newsletter, and don't miss out.
Written by

Celestina Odili
Celestina Odili
Computer Scientist/ Cloud Engineer/DevOps Engineer / Technical writer