Creating Sidebars in WordPress: Block, Post, Plugin, and Full Site Editor
 Matt Watson
Table of contents
- What are WordPress Sidebars?
- 1. Block-Level Sidebar: Toggle Block Visibility
- 2. Using Block Filters: Adding Block Visibility Toggle to All Blocks
- 3. Post-Level Sidebar: Toggle Post Content Visibility
- 4. Custom Plugin Sidebar: Toggle Entire Post Visibility
- 5. Full Site Editor (FSE) Sidebar: Global Settings
- Conclusion

In this guide, we’ll explore sidebars within WordPress, including block sidebar controls (for new and existing blocks), post sidebar controls. We’ll also delve into creating a fully custom plugin sidebar, and for those feeling adventurous, we will wrap up with a Full Site Editor (FSE) sidebar!
Sidebars serve as quick-access control panels within the block editor, perfect for custom settings and content controls.
You’ll see how to set up each one with @wordpress/create-block or in some cases @wordpress/scripts, and we will add unique settings and functionality to each sidebar.
If you are completely new to WordPress development environments and block creation, please read the getting started with WordPress development guide first.
What are WordPress Sidebars?
In the WordPress block editor, sidebars are panels on the right-hand side of the screen that offer quick access to settings and configuration options. These sidebars can be customised to provide controls specific to your content and enhance the editing experience.
There are several types of sidebars you can create:
Block Sidebar (Inspector Controls): Ideal for configuring individual block settings, such as adding specific styling options, or other customisation for specific blocks in a post or page.
Block Filters for All Blocks: By using block filters, you can add controls to all blocks (even core blocks). This allows for consistent settings across different block types without modifying each block individually.
Post Sidebar: Provides options applicable to the entire post, such as a control for post meta.
Custom Plugin Sidebar: Acts as a dedicated settings panel, usually for broader configurations that need to be accessed across different content types or pages.
Full Site Editor (FSE) Sidebar: Ideal for site-wide settings and controls when working within the FSE, allowing global options that apply to all pages and posts.
In this article we will take a look at how to implement each type of sidebar and controls.
1. Block-Level Sidebar: Toggle Block Visibility
Blocks can render pretty much any type of content. When you select a block the block sidebar usually becomes visible. It is here we can add controls so that we can customise our blocks layout, style or behaviour.
To showcase our block sidebar, we’ll create a custom block with a visibility toggle. When disabled, this toggle will prevent the block from rendering on the front end.
1.1: Setting Up the Block Attributes
First, we’ll use @wordpress/create-block to scaffold a new block plugin. Open your terminal and run the following command:
npx @wordpress/create-block block-visibility-toggle
This command will generate all the necessary files for a basic block plugin called block-visibility-toggle.
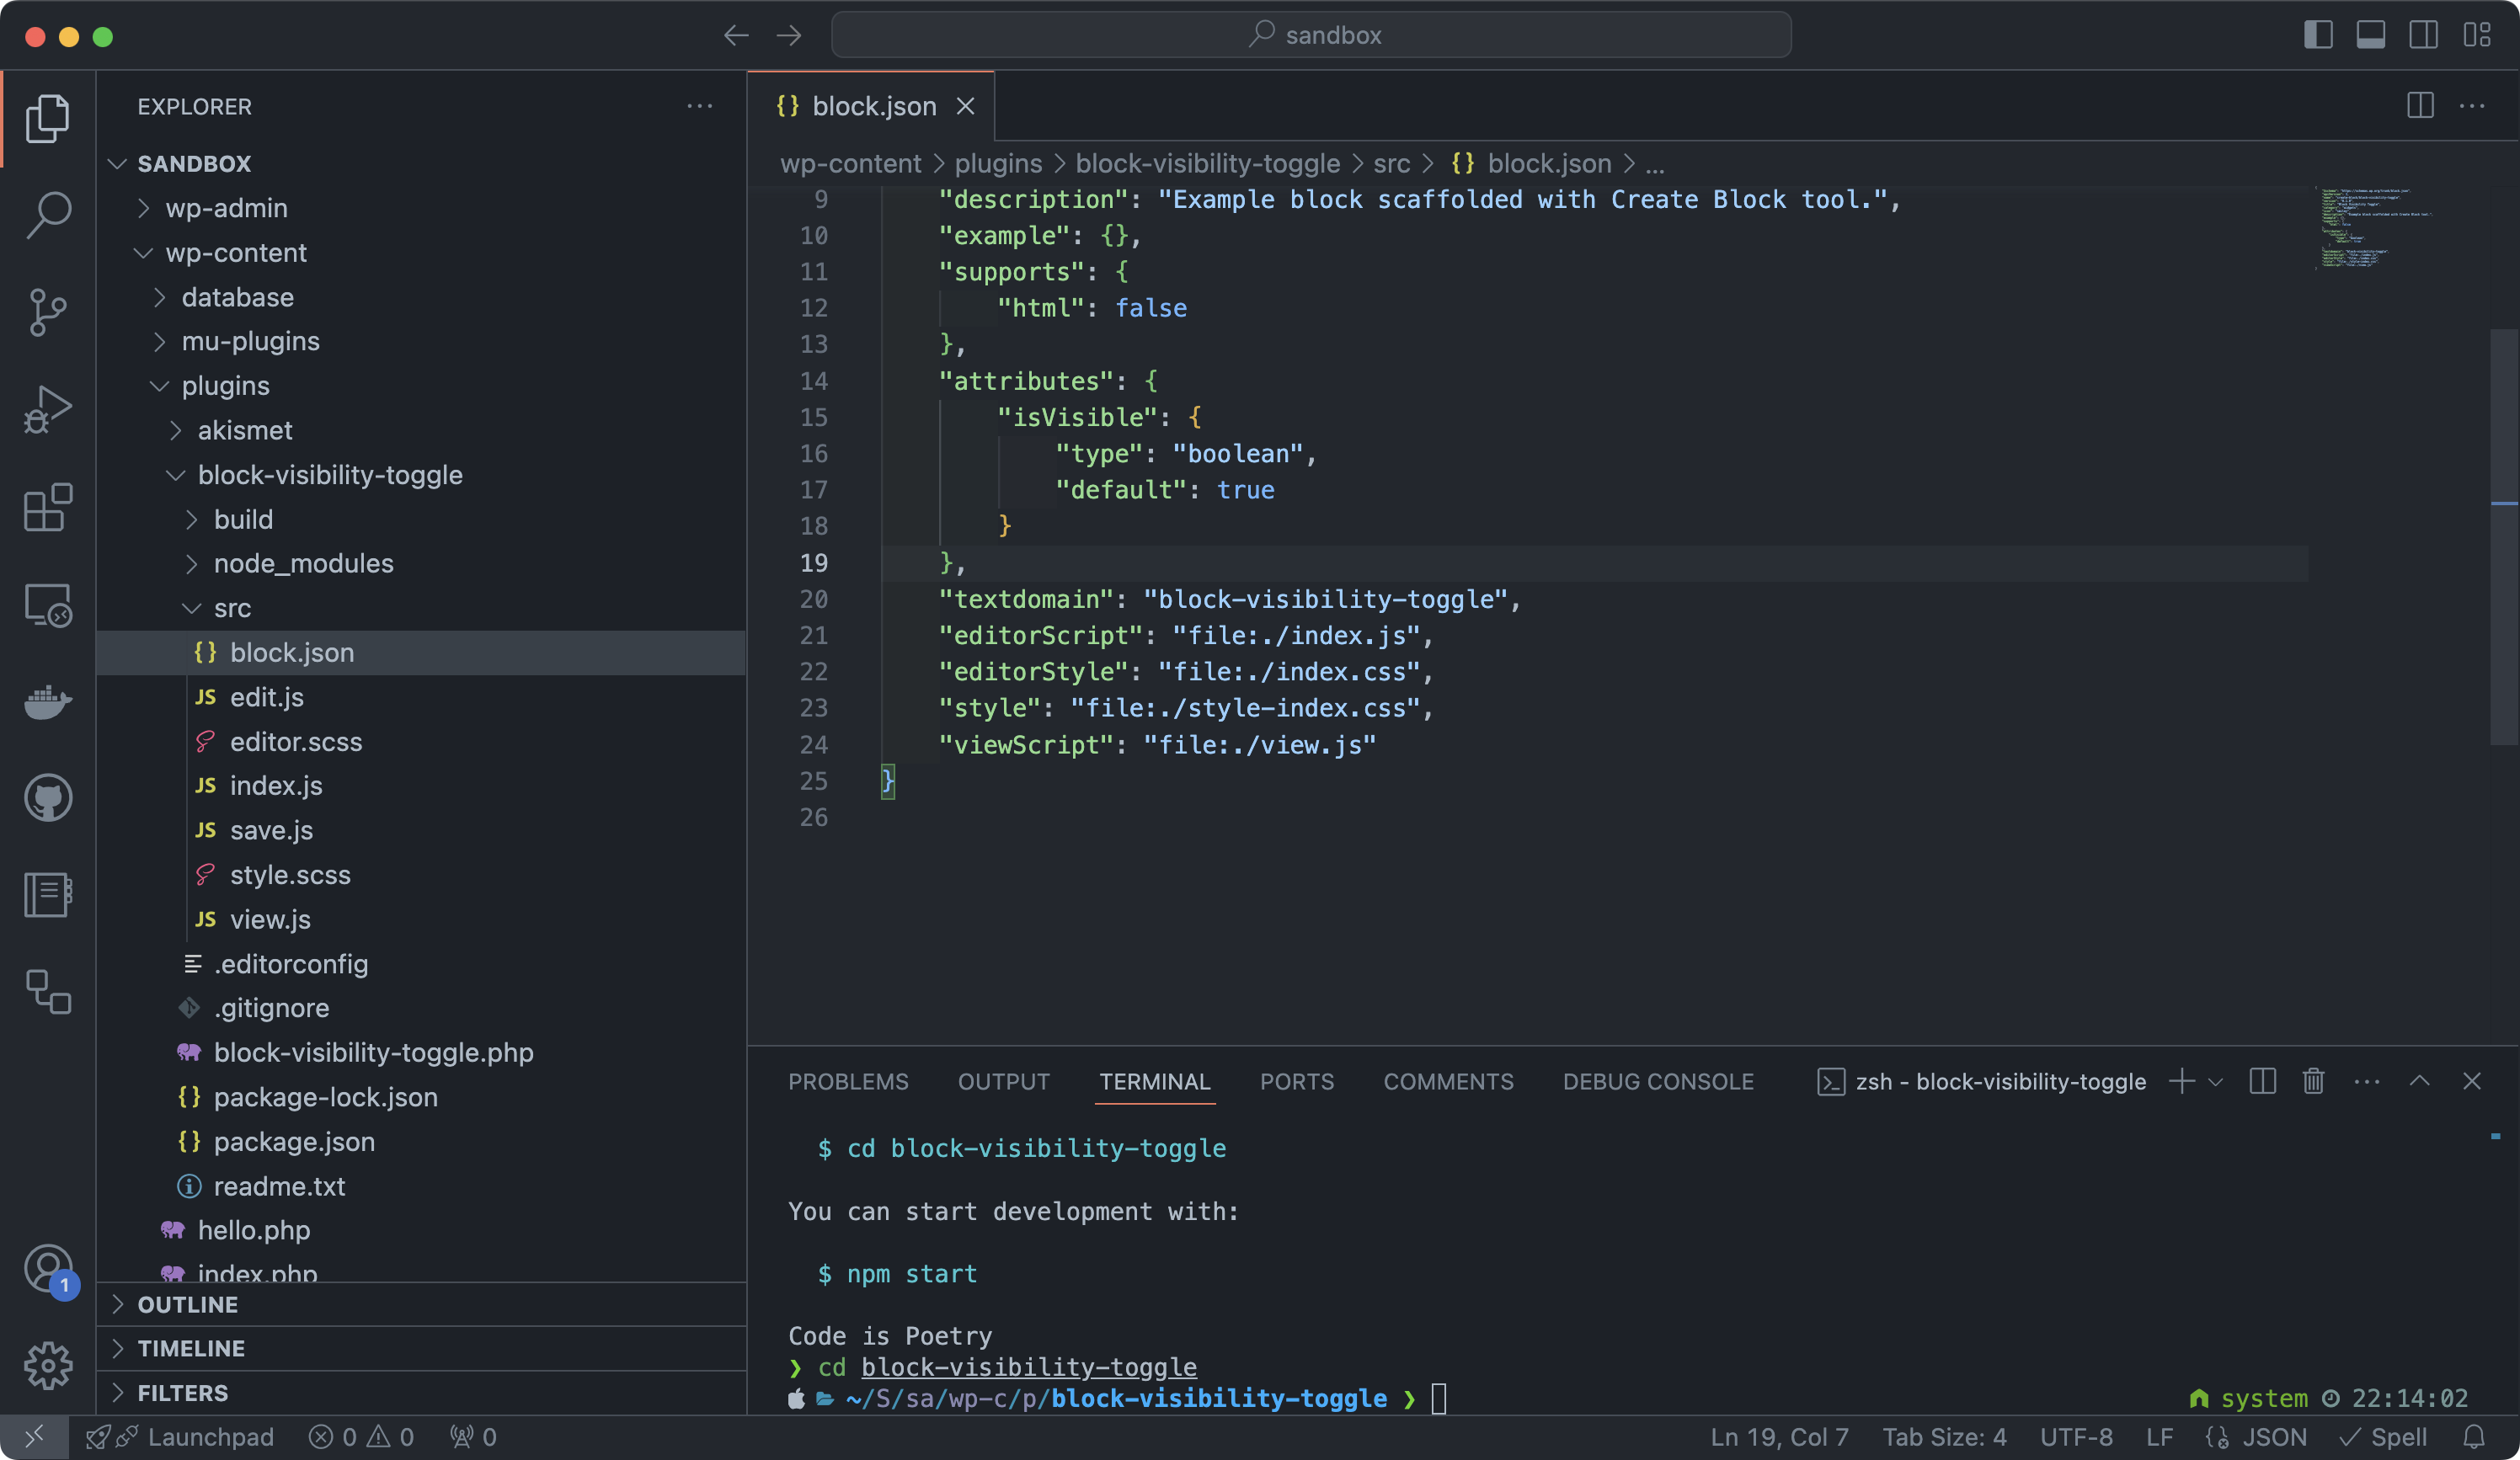
Next, open the generated src/block.json file in your code editor. We’ll need to add an attribute to control the visibility of the block. To do this add the following code inside the generated "attributes" object.
"attributes": {
    "isVisible": {
        "type": "boolean",
        "default": true
    }
}
Your block.json file should now look like the following screenshot.
1.2: Building the Sidebar Toggle
Next, we’ll create a toggle control in the block’s sidebar to allow users to show or hide the block. Open the src/edit.js file and modify it as follows:
import { InspectorControls, useBlockProps } from '@wordpress/block-editor';
import { ToggleControl, PanelBody } from '@wordpress/components';
import { __ } from '@wordpress/i18n';

export default function Edit( { attributes, setAttributes } ) {
    const { isVisible } = attributes;

    return (
        <>
            <InspectorControls>
                <PanelBody title={ __( 'Block Settings', 'block-visibility-toggle' ) }>
                    <ToggleControl
                        label={ __( 'Display Block', 'block-visibility-toggle' ) }
                        checked={ isVisible }
                        onChange={ ( value ) => setAttributes( { isVisible: value } ) }
                    />
                </PanelBody>
            </InspectorControls>
            <div { ...useBlockProps() }>
                { isVisible ?
                    <p>{ __( 'Your content here.', 'block-visibility-toggle' ) }</p>
                :
                    <p>{ __( 'Your block will be hidden.', 'block-visibility-toggle' ) }</p>
                }
            </div>
        </>
    );
}
1.2.1: Display Controls to the Advanced Section
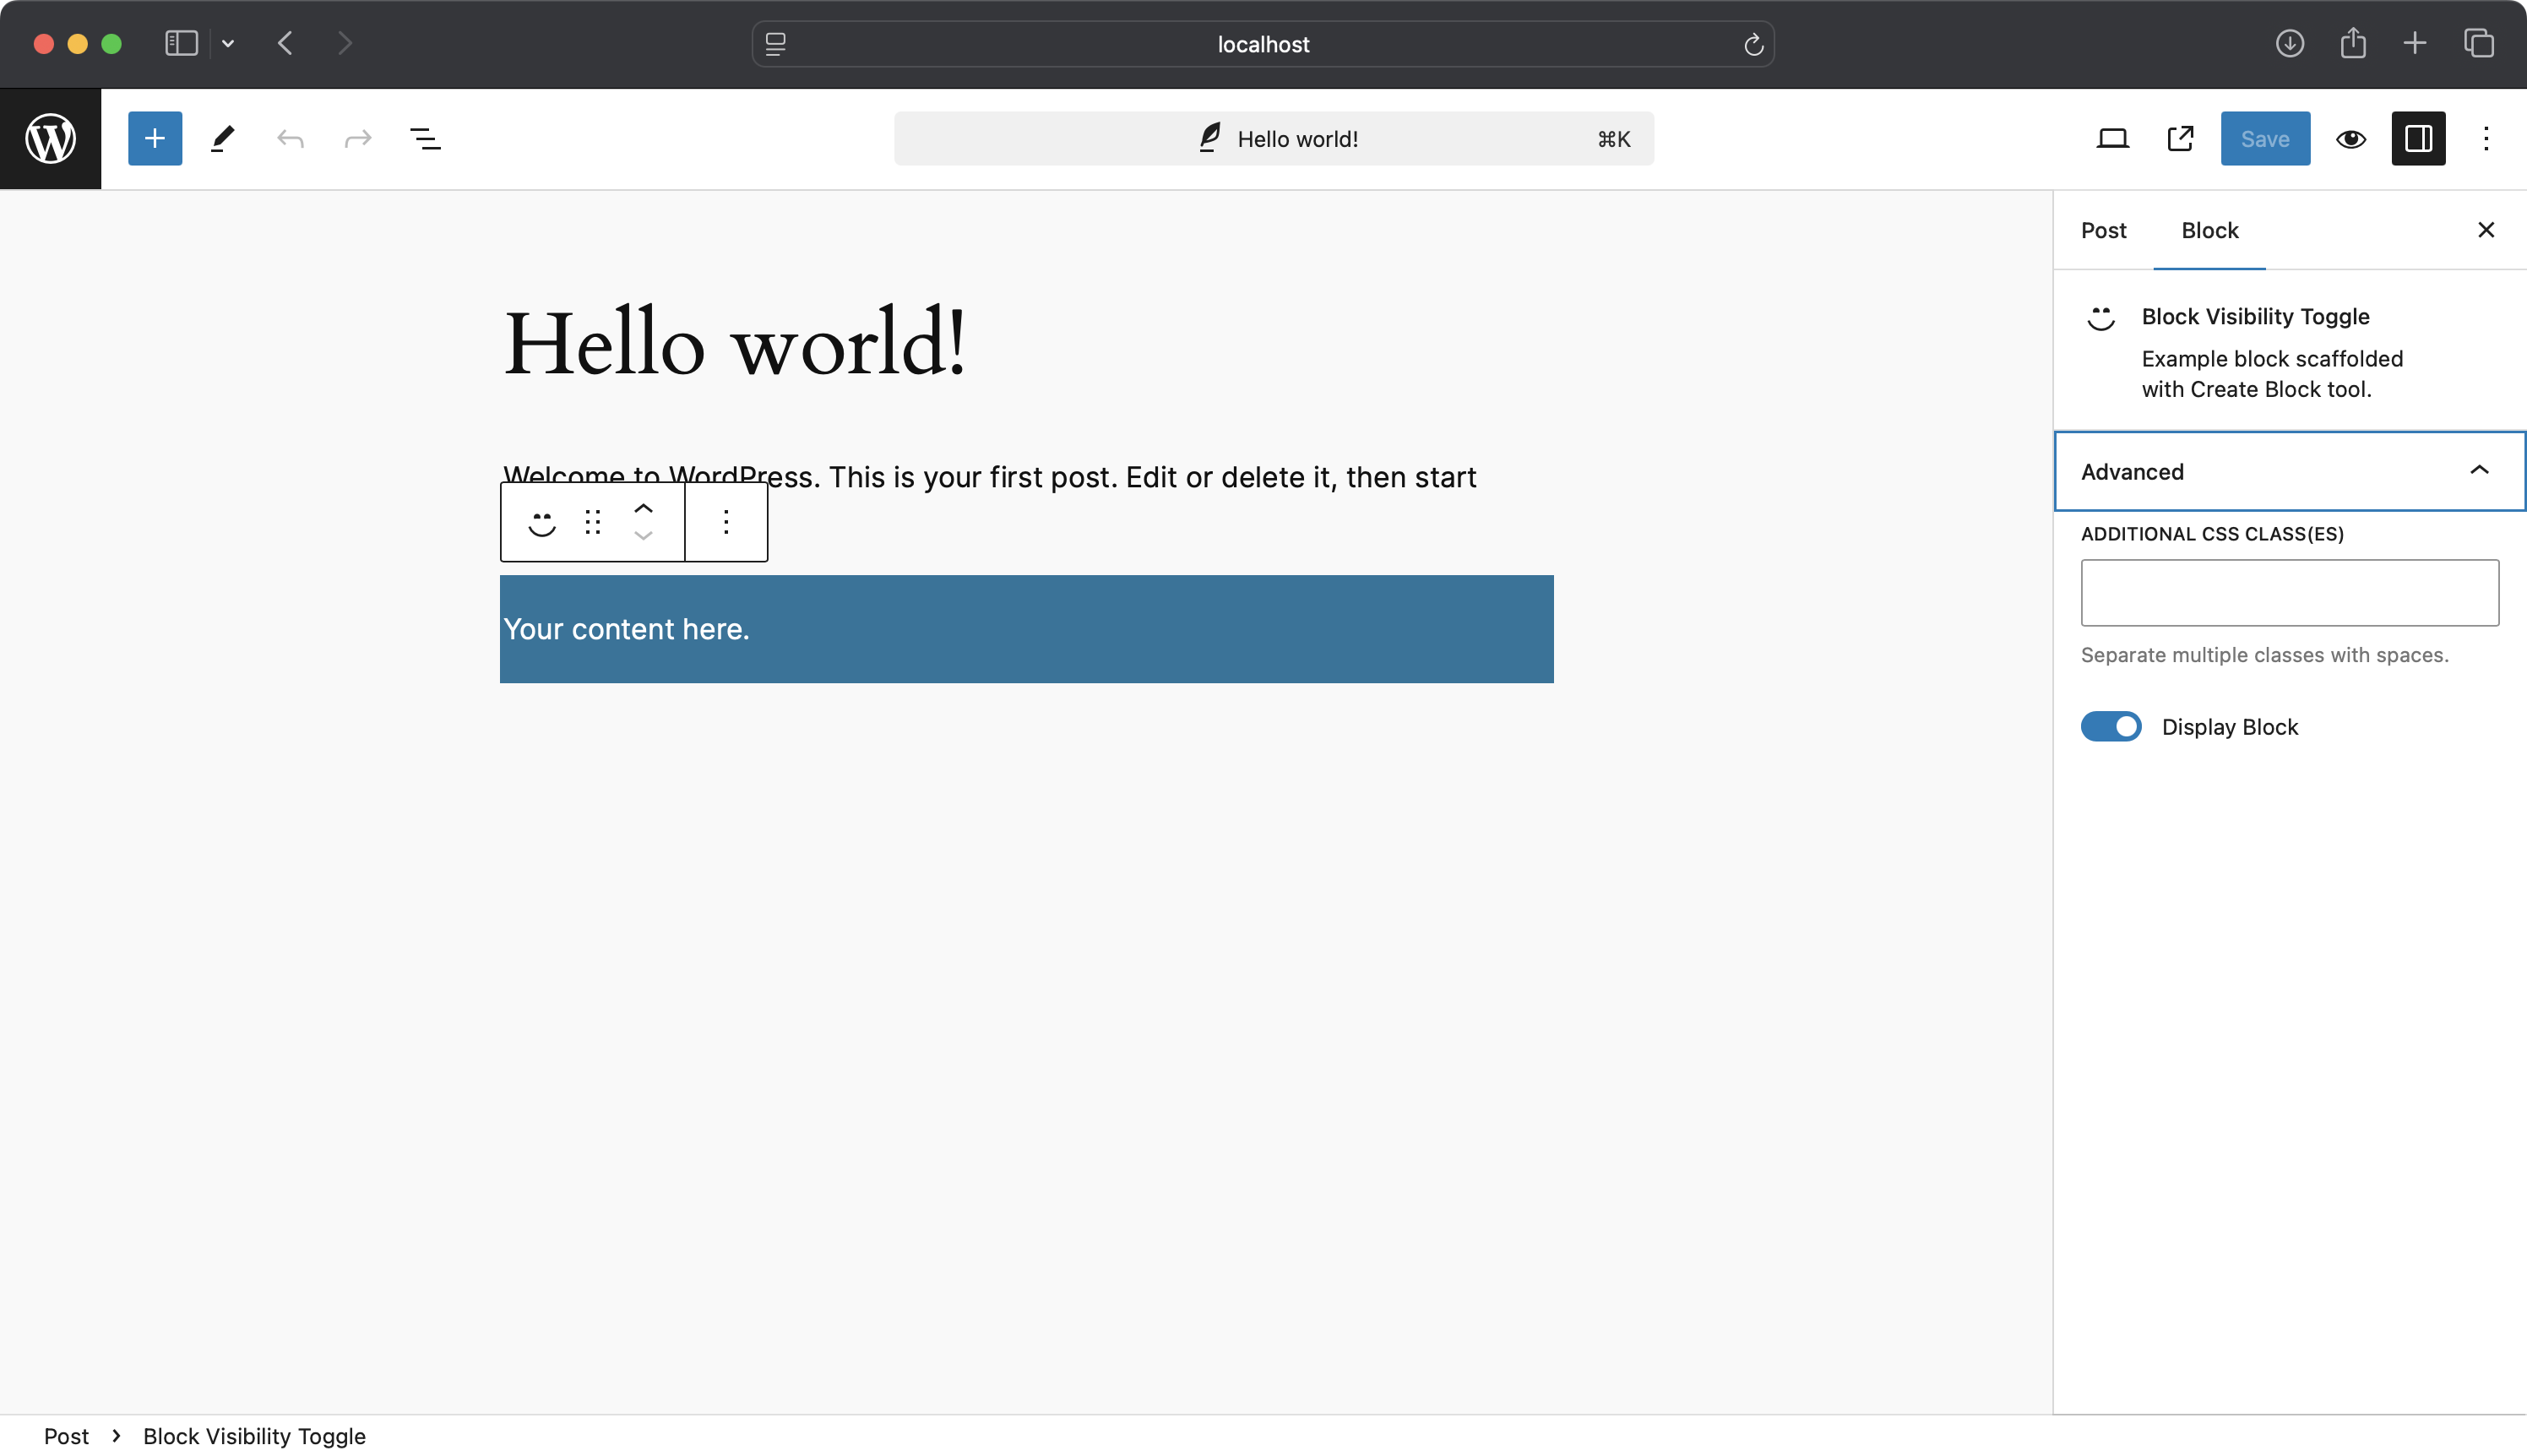
If you prefer, you can place the visibility toggle under the “Advanced” section of the block sidebar.
To do this, replace InspectorControls with InspectorAdvancedControls in your edit.js file. You can also remove the PanelBody too, as the Advanced section acts as its own Panel.
import { InspectorAdvancedControls, useBlockProps } from '@wordpress/block-editor';
import { ToggleControl } from '@wordpress/components';
import { __ } from '@wordpress/i18n';

export default function Edit( { attributes, setAttributes } ) {
    const { isVisible } = attributes;

    return (
        <>
            <InspectorAdvancedControls>
                <ToggleControl
                    label={ __( 'Display Block', 'block-visibility-toggle' ) }
                    checked={ isVisible }
                    onChange={ ( value ) => setAttributes( { isVisible: value } ) }
                />
            </InspectorAdvancedControls>
            <div { ...useBlockProps() }>
                { isVisible ?
                    <p>{ __( 'Your content here.', 'block-visibility-toggle' ) }</p>
                :
                    <p>{ __( 'Your block will be hidden.', 'block-visibility-toggle' ) }</p>
                }
            </div>
        </>
    );
}
1.3: Altering the Save Function to Hide the Block
Modify the save function in src/save.js to check the isVisible attribute. Open src/save.js and update it as follows:
import { useBlockProps } from '@wordpress/block-editor';
import { __ } from '@wordpress/i18n';

export default function save( { attributes } ) {
    const { isVisible } = attributes;

    if ( ! isVisible ) {
        // If the block is set to not visible, return null to render nothing.
        return null;
    }

    return (
        <div { ...useBlockProps.save() }>
            <p>{ __( 'Your content here.', 'block-visibility-toggle' ) }</p>
        </div>
    );
}
By returning null when isVisible is false, the block will not output any HTML on the front end, effectively hiding it.
1.4: Using the Sidebar
Remember to run npm run build in your block directory and to activate the block.
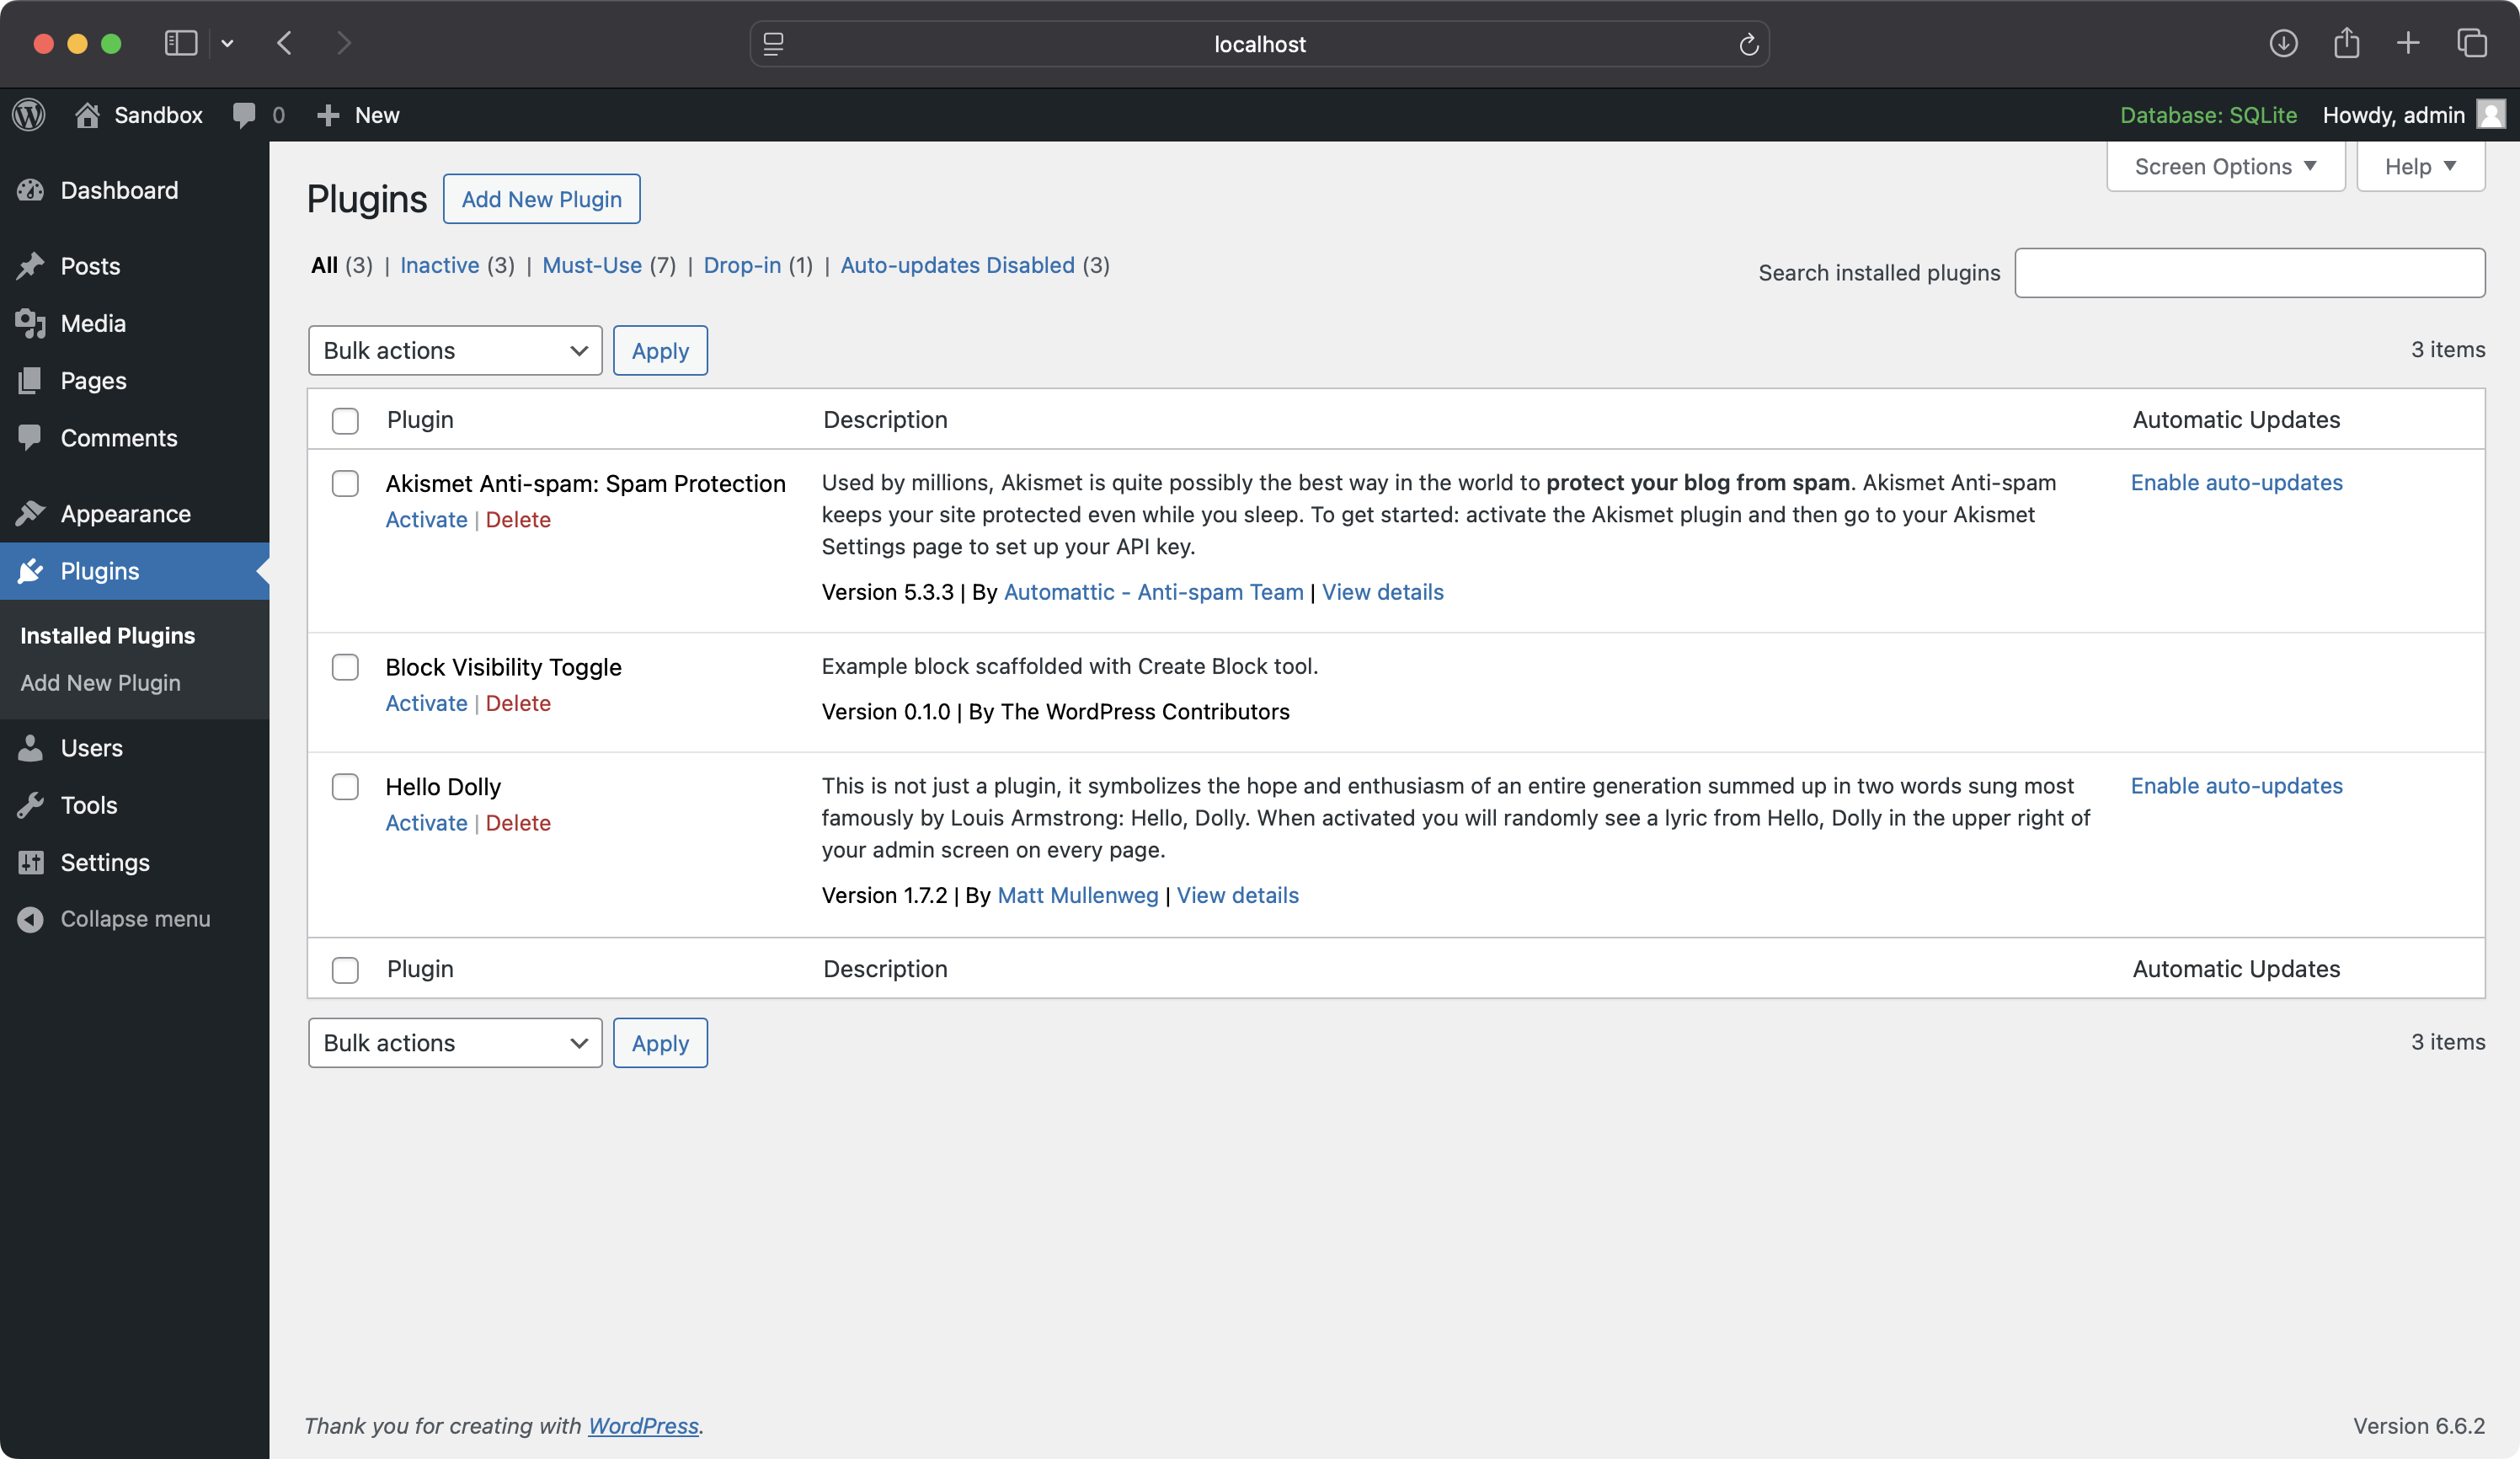
Once you have done this, you can insert the custom block you created by typing / and searching for Block Visibility Toggle.
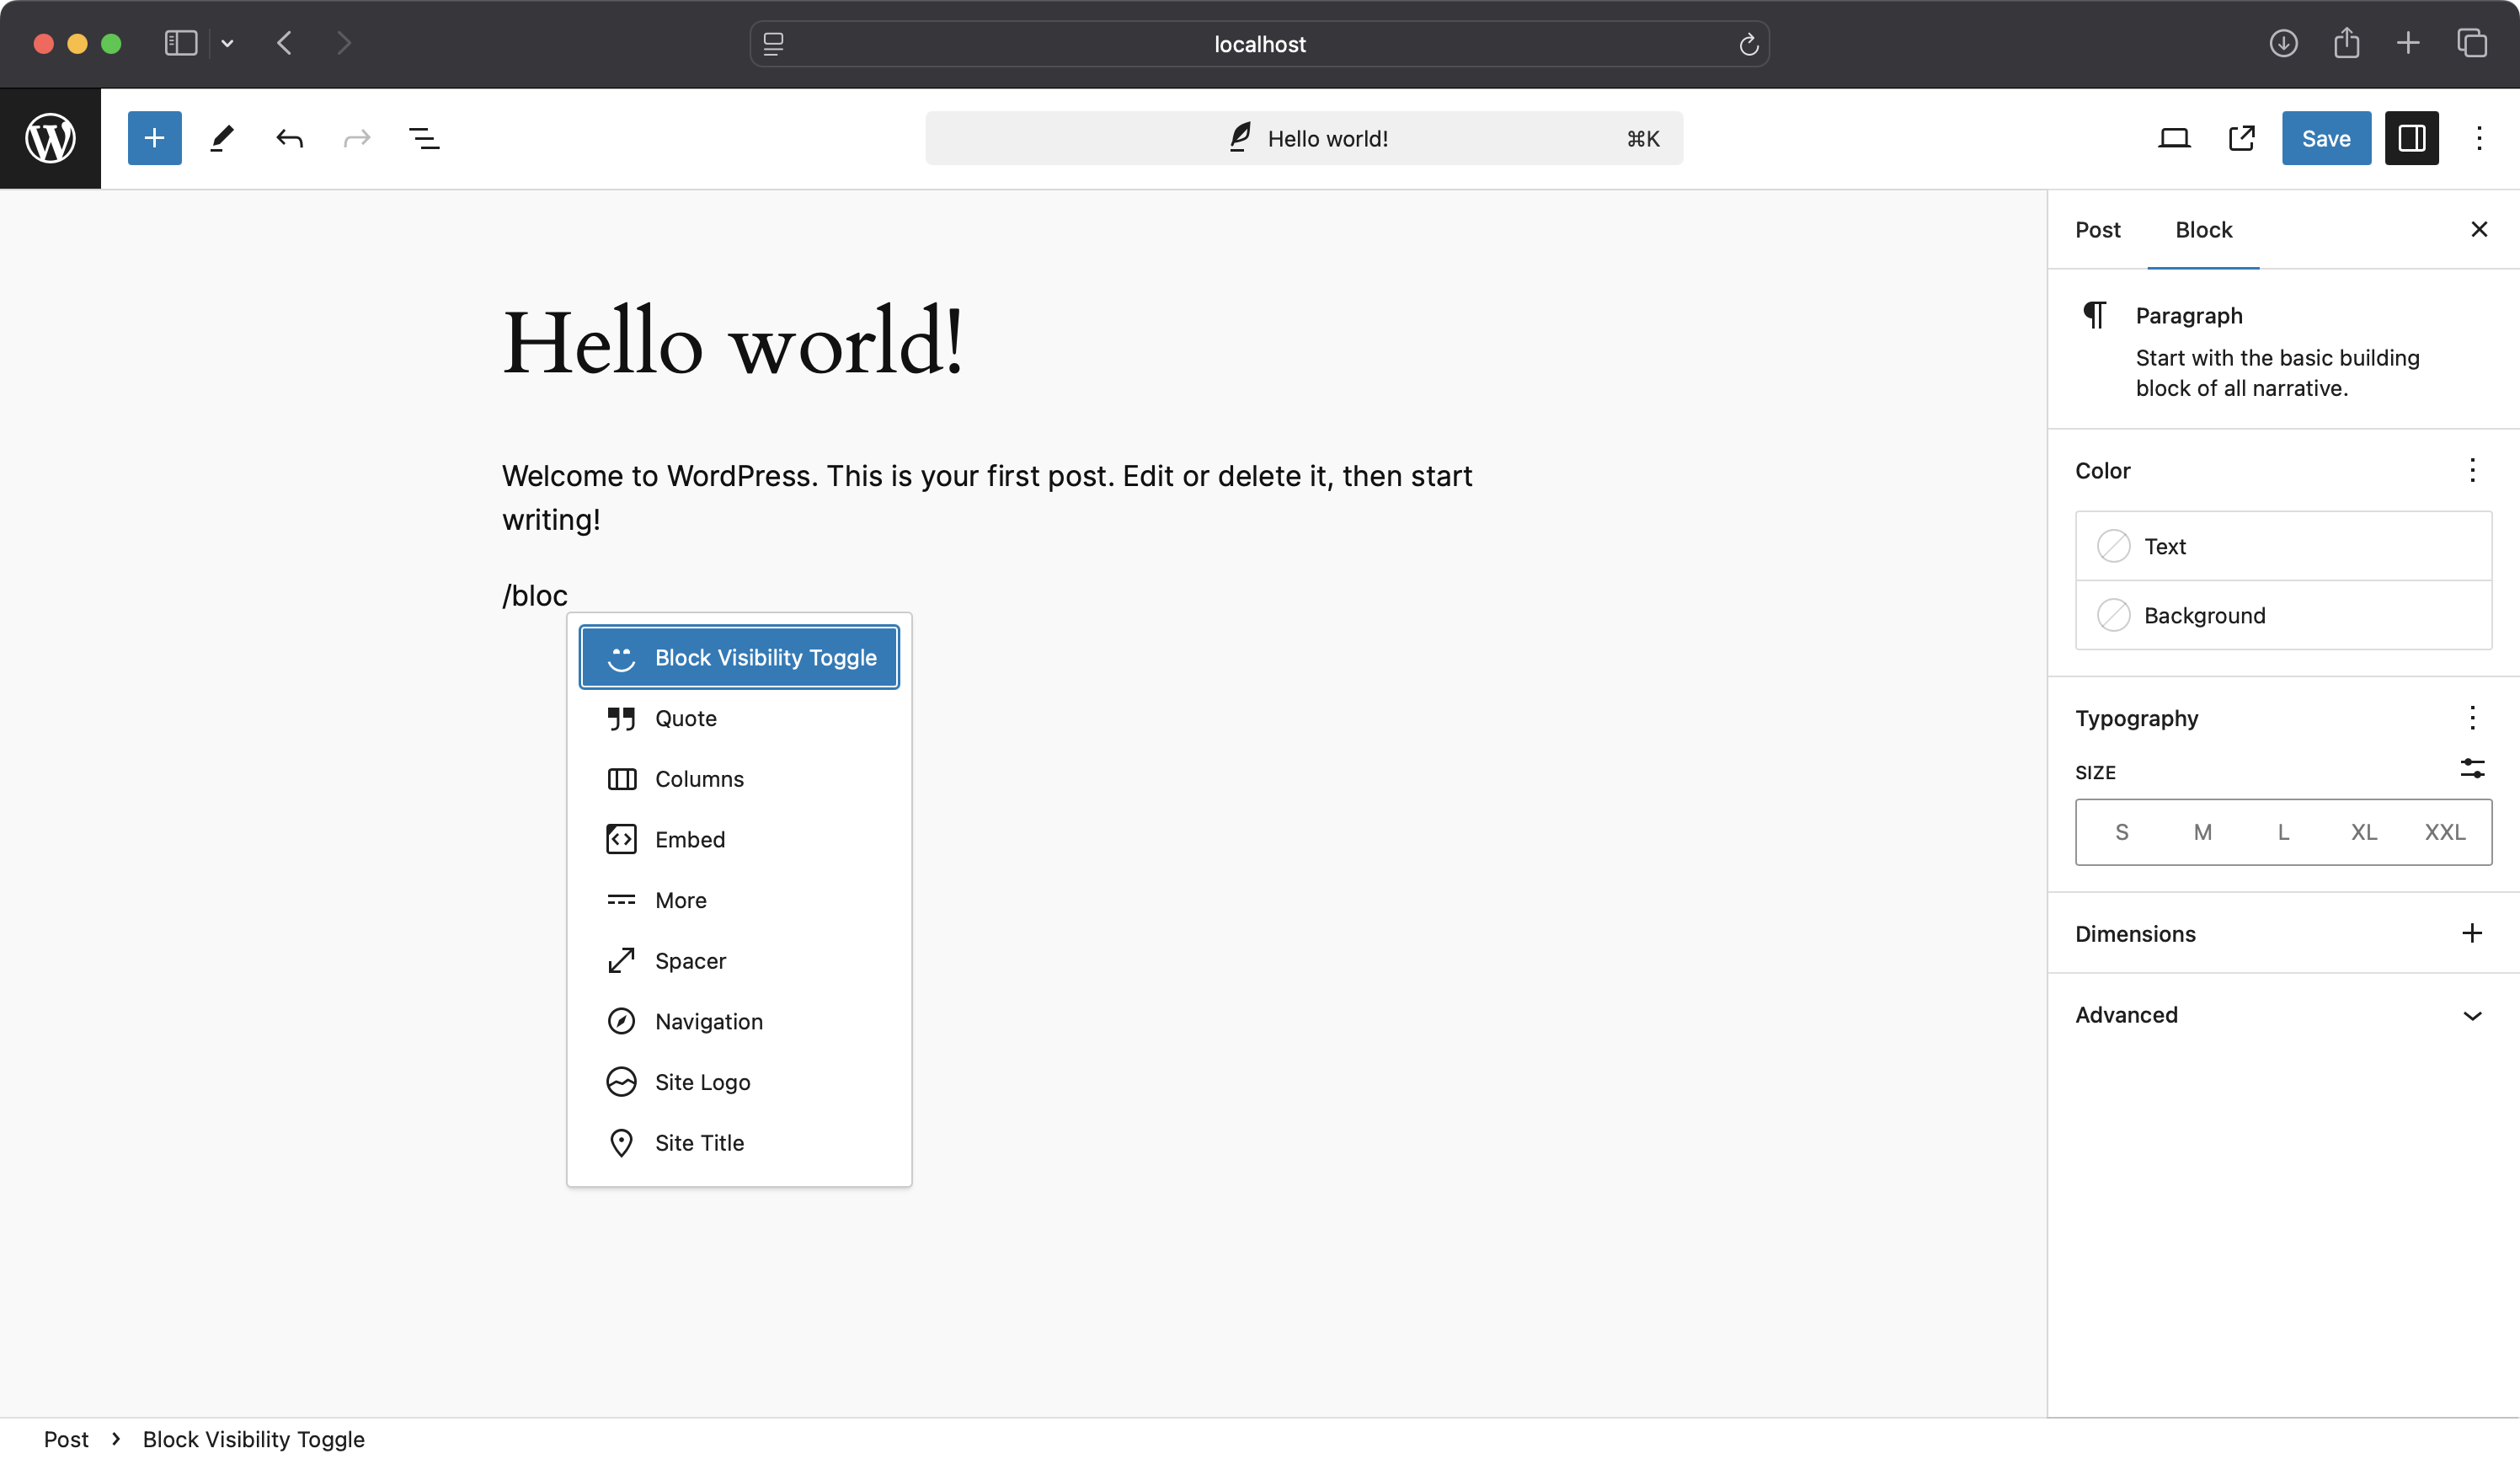
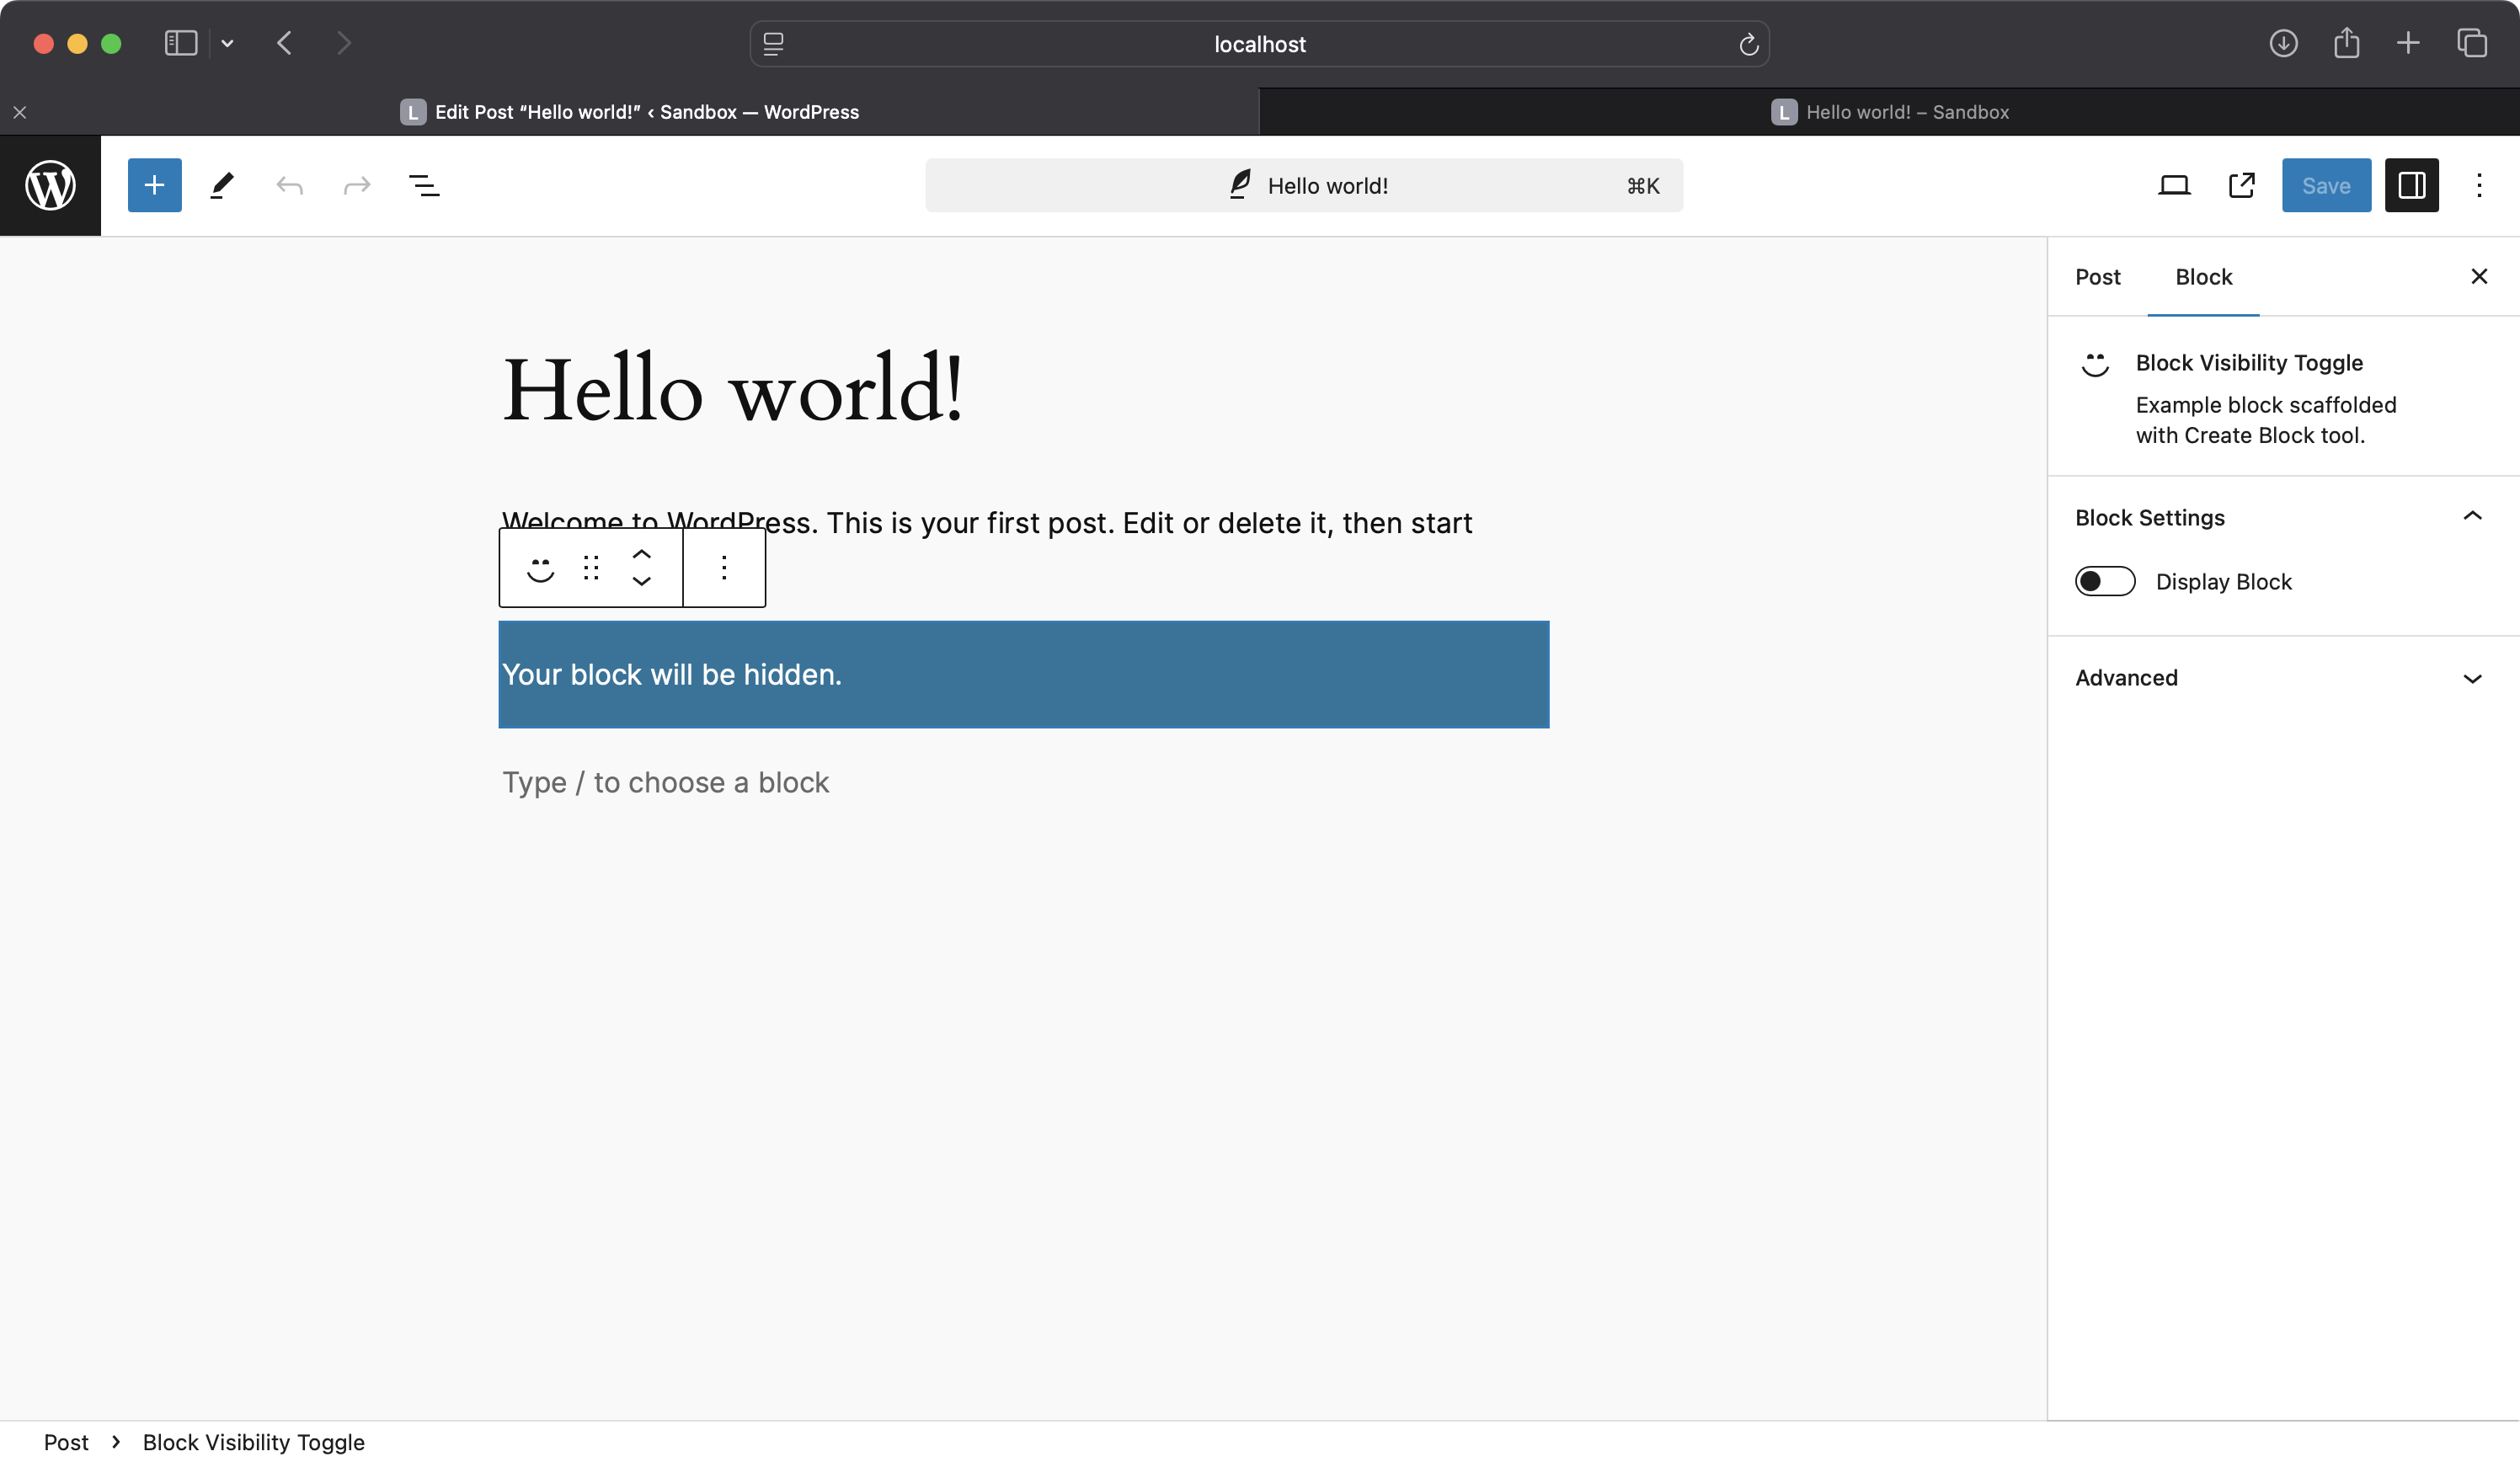
After you have inserted the block, click on it to reveal the “Block” section of the “Post” sidebar. Here you will see the new “Display Block” toggle.
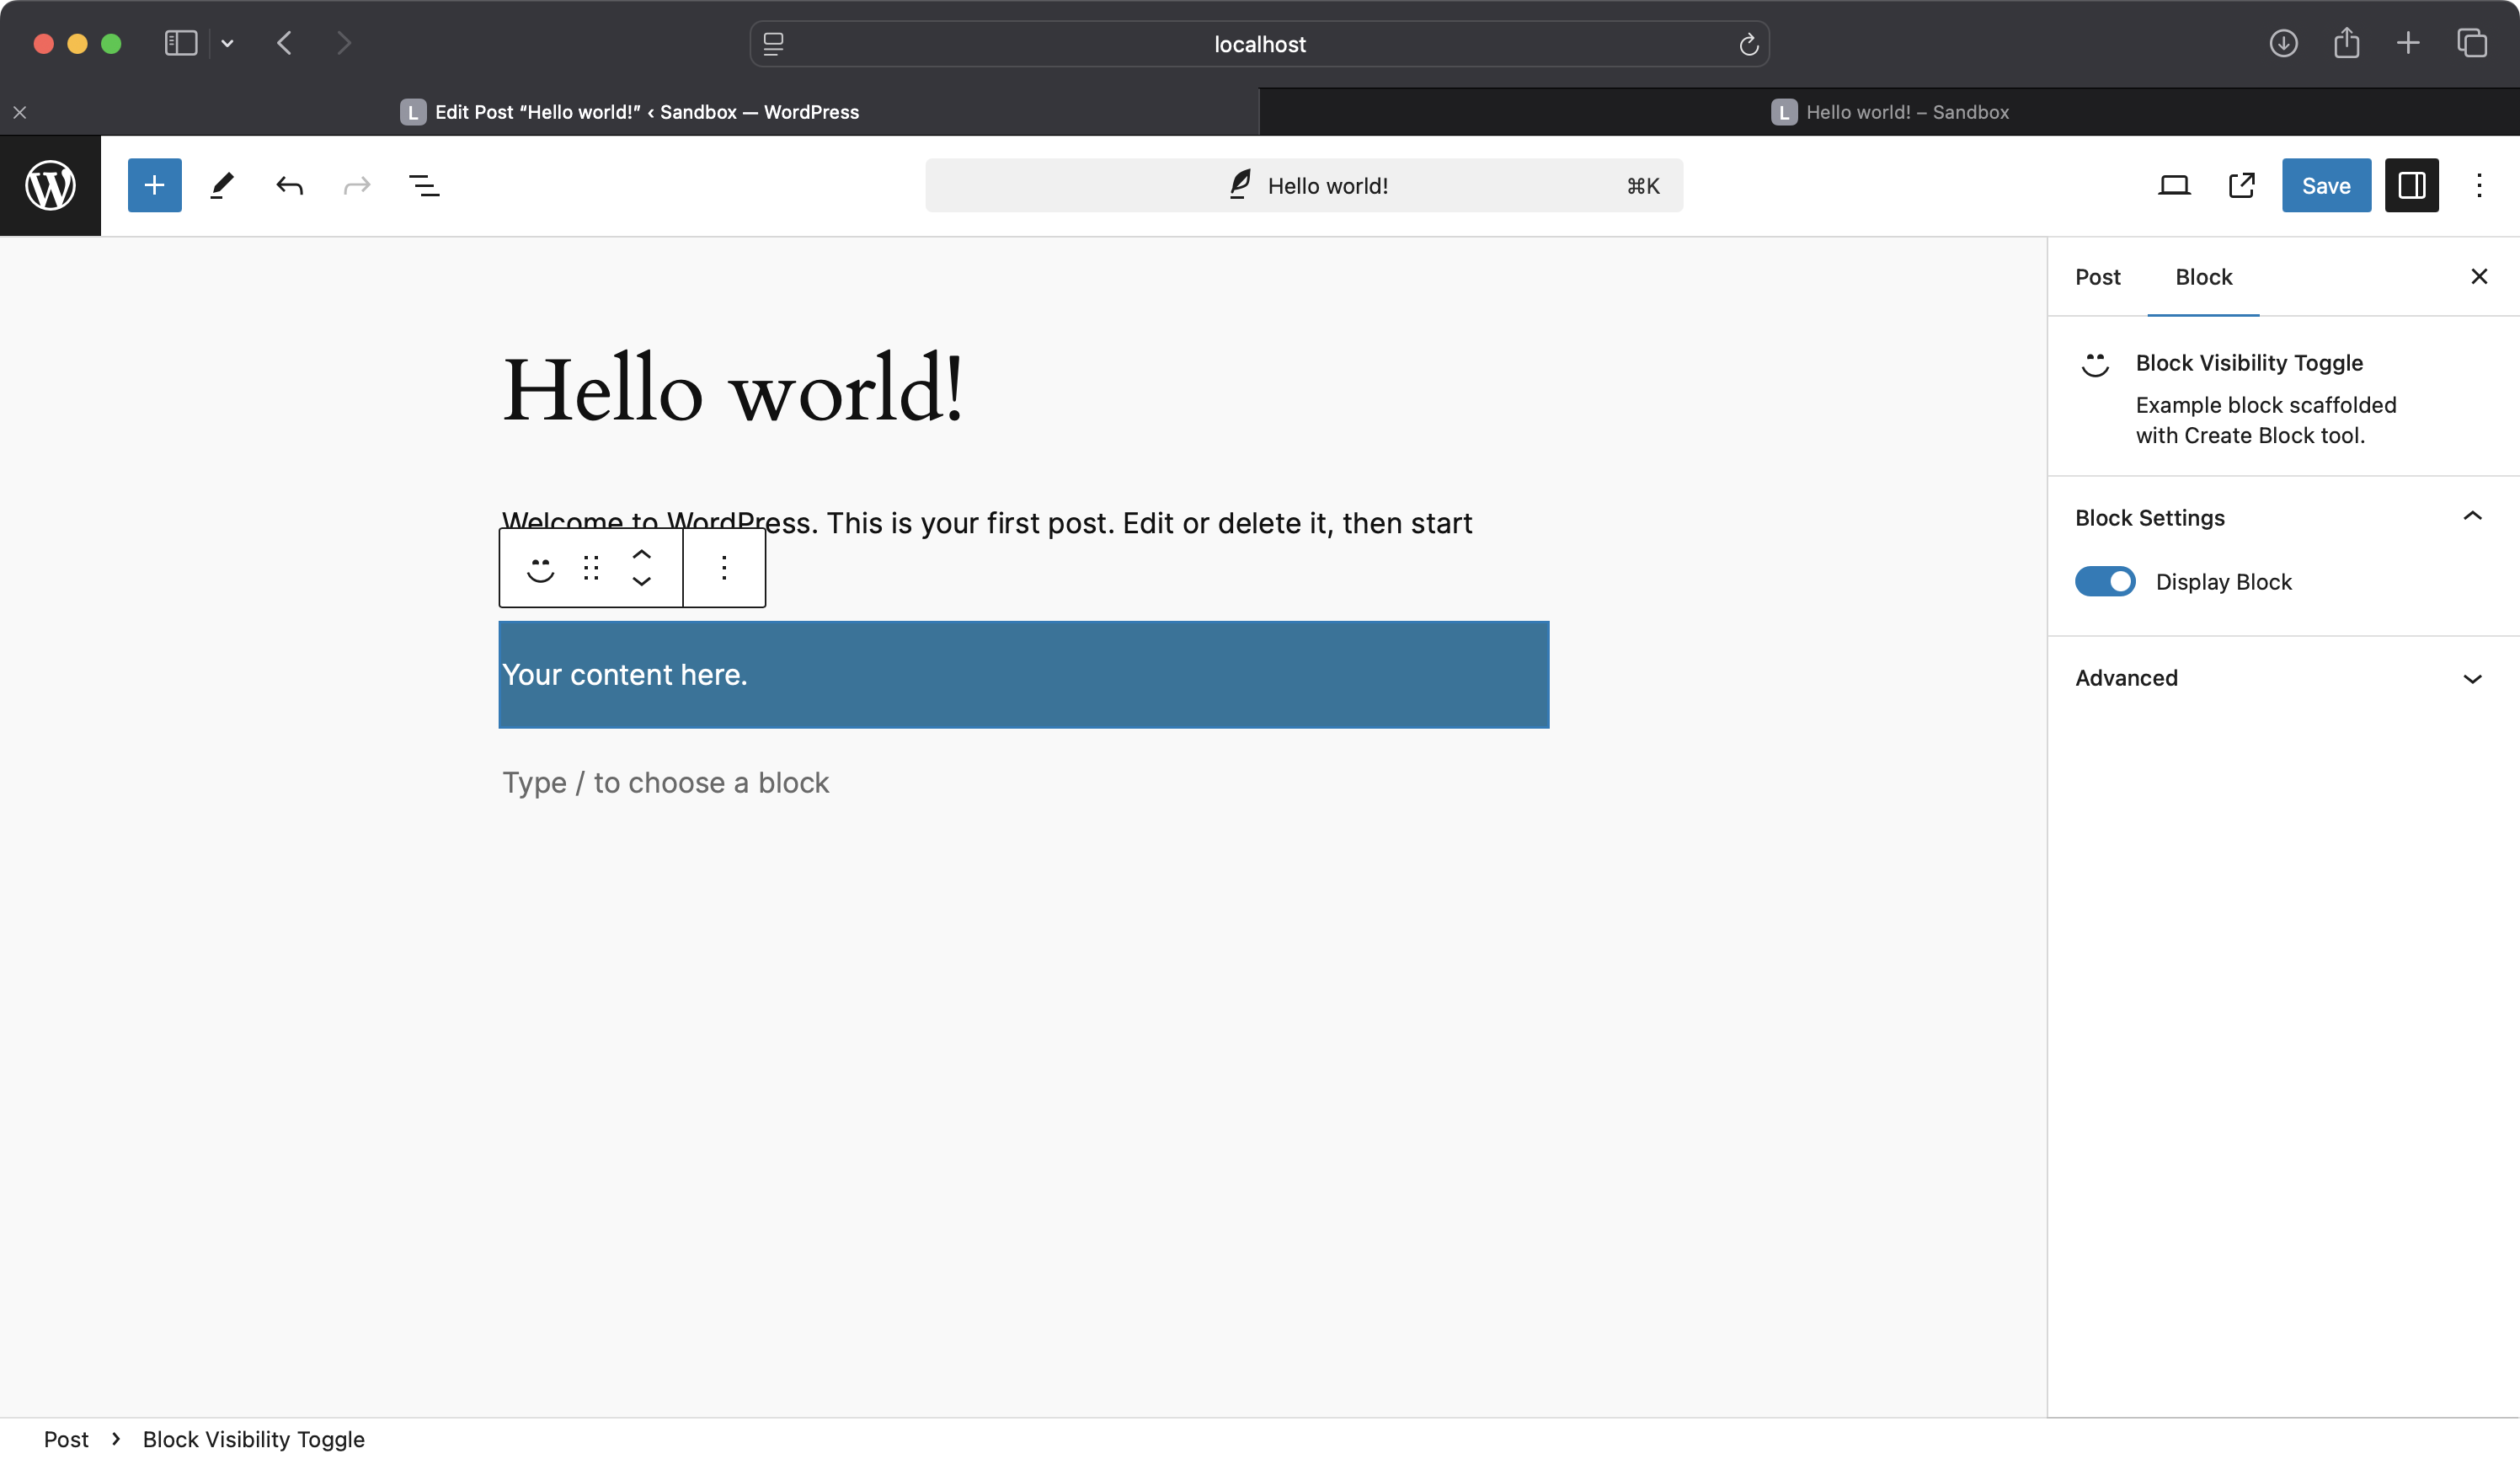
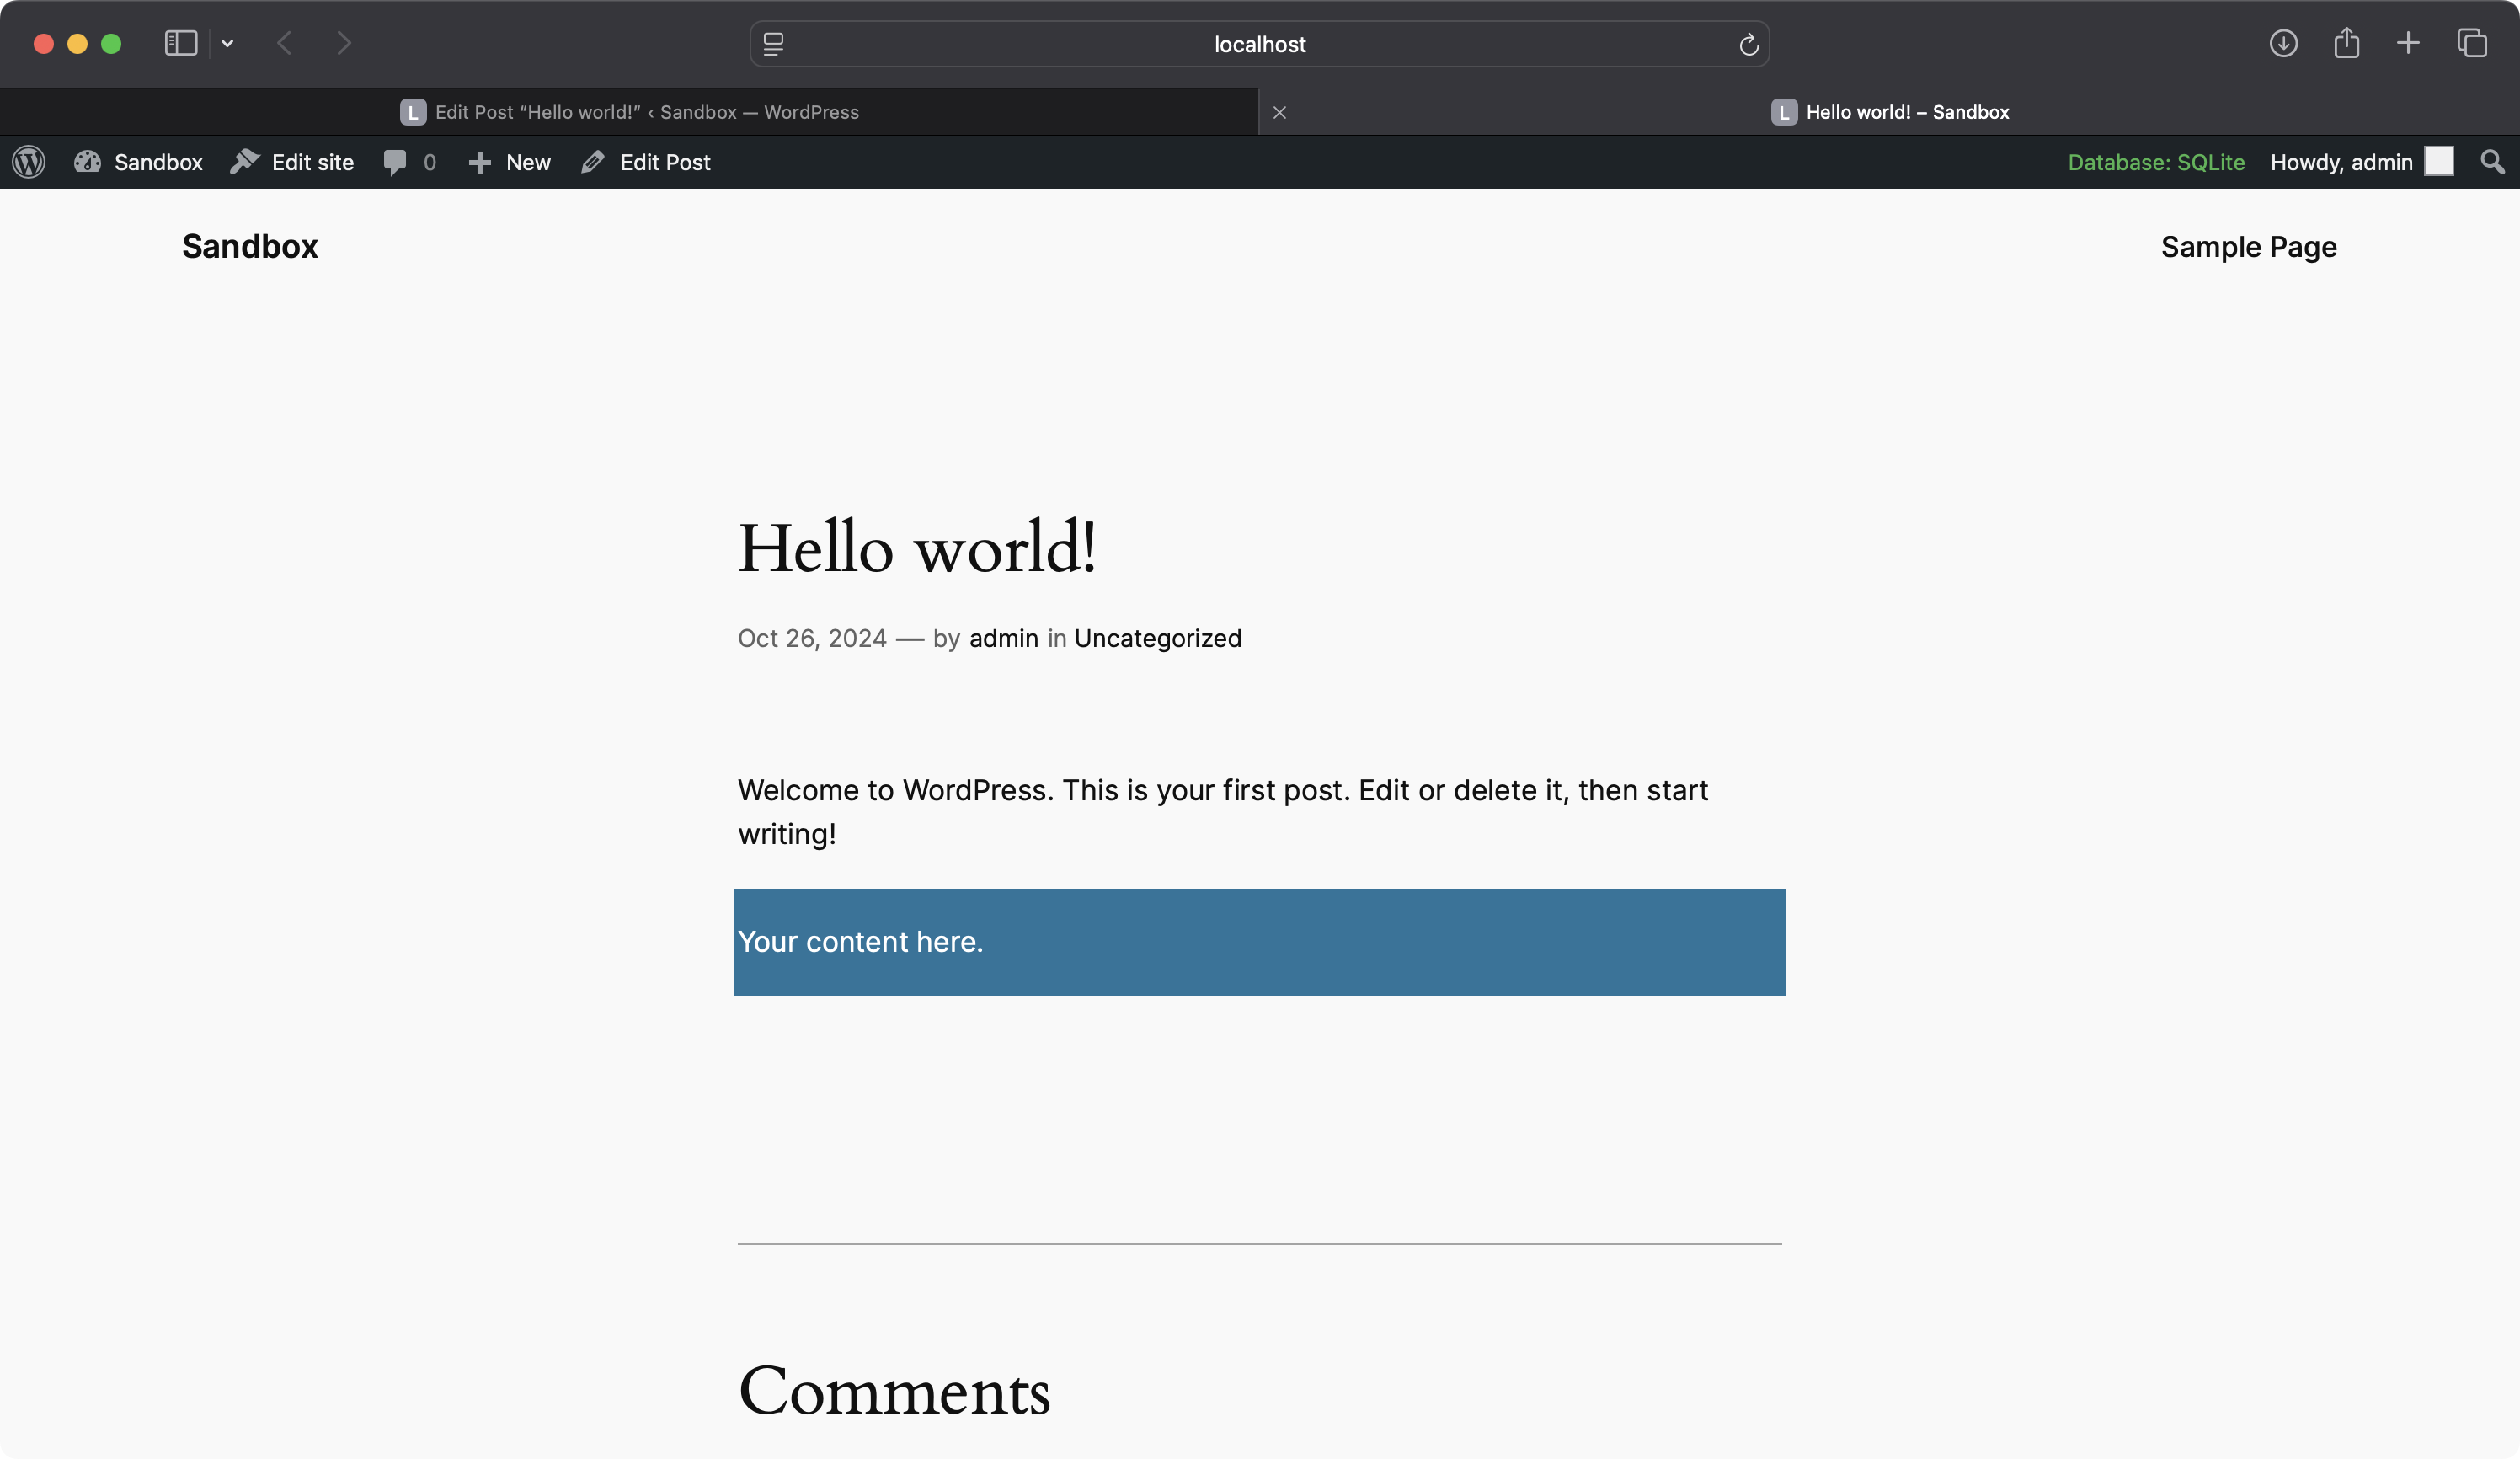
Do not toggle it just yet, first check that the block displays as expected on the front end.
Now toggle the “Display Block” toggle in the backend, and save your post.
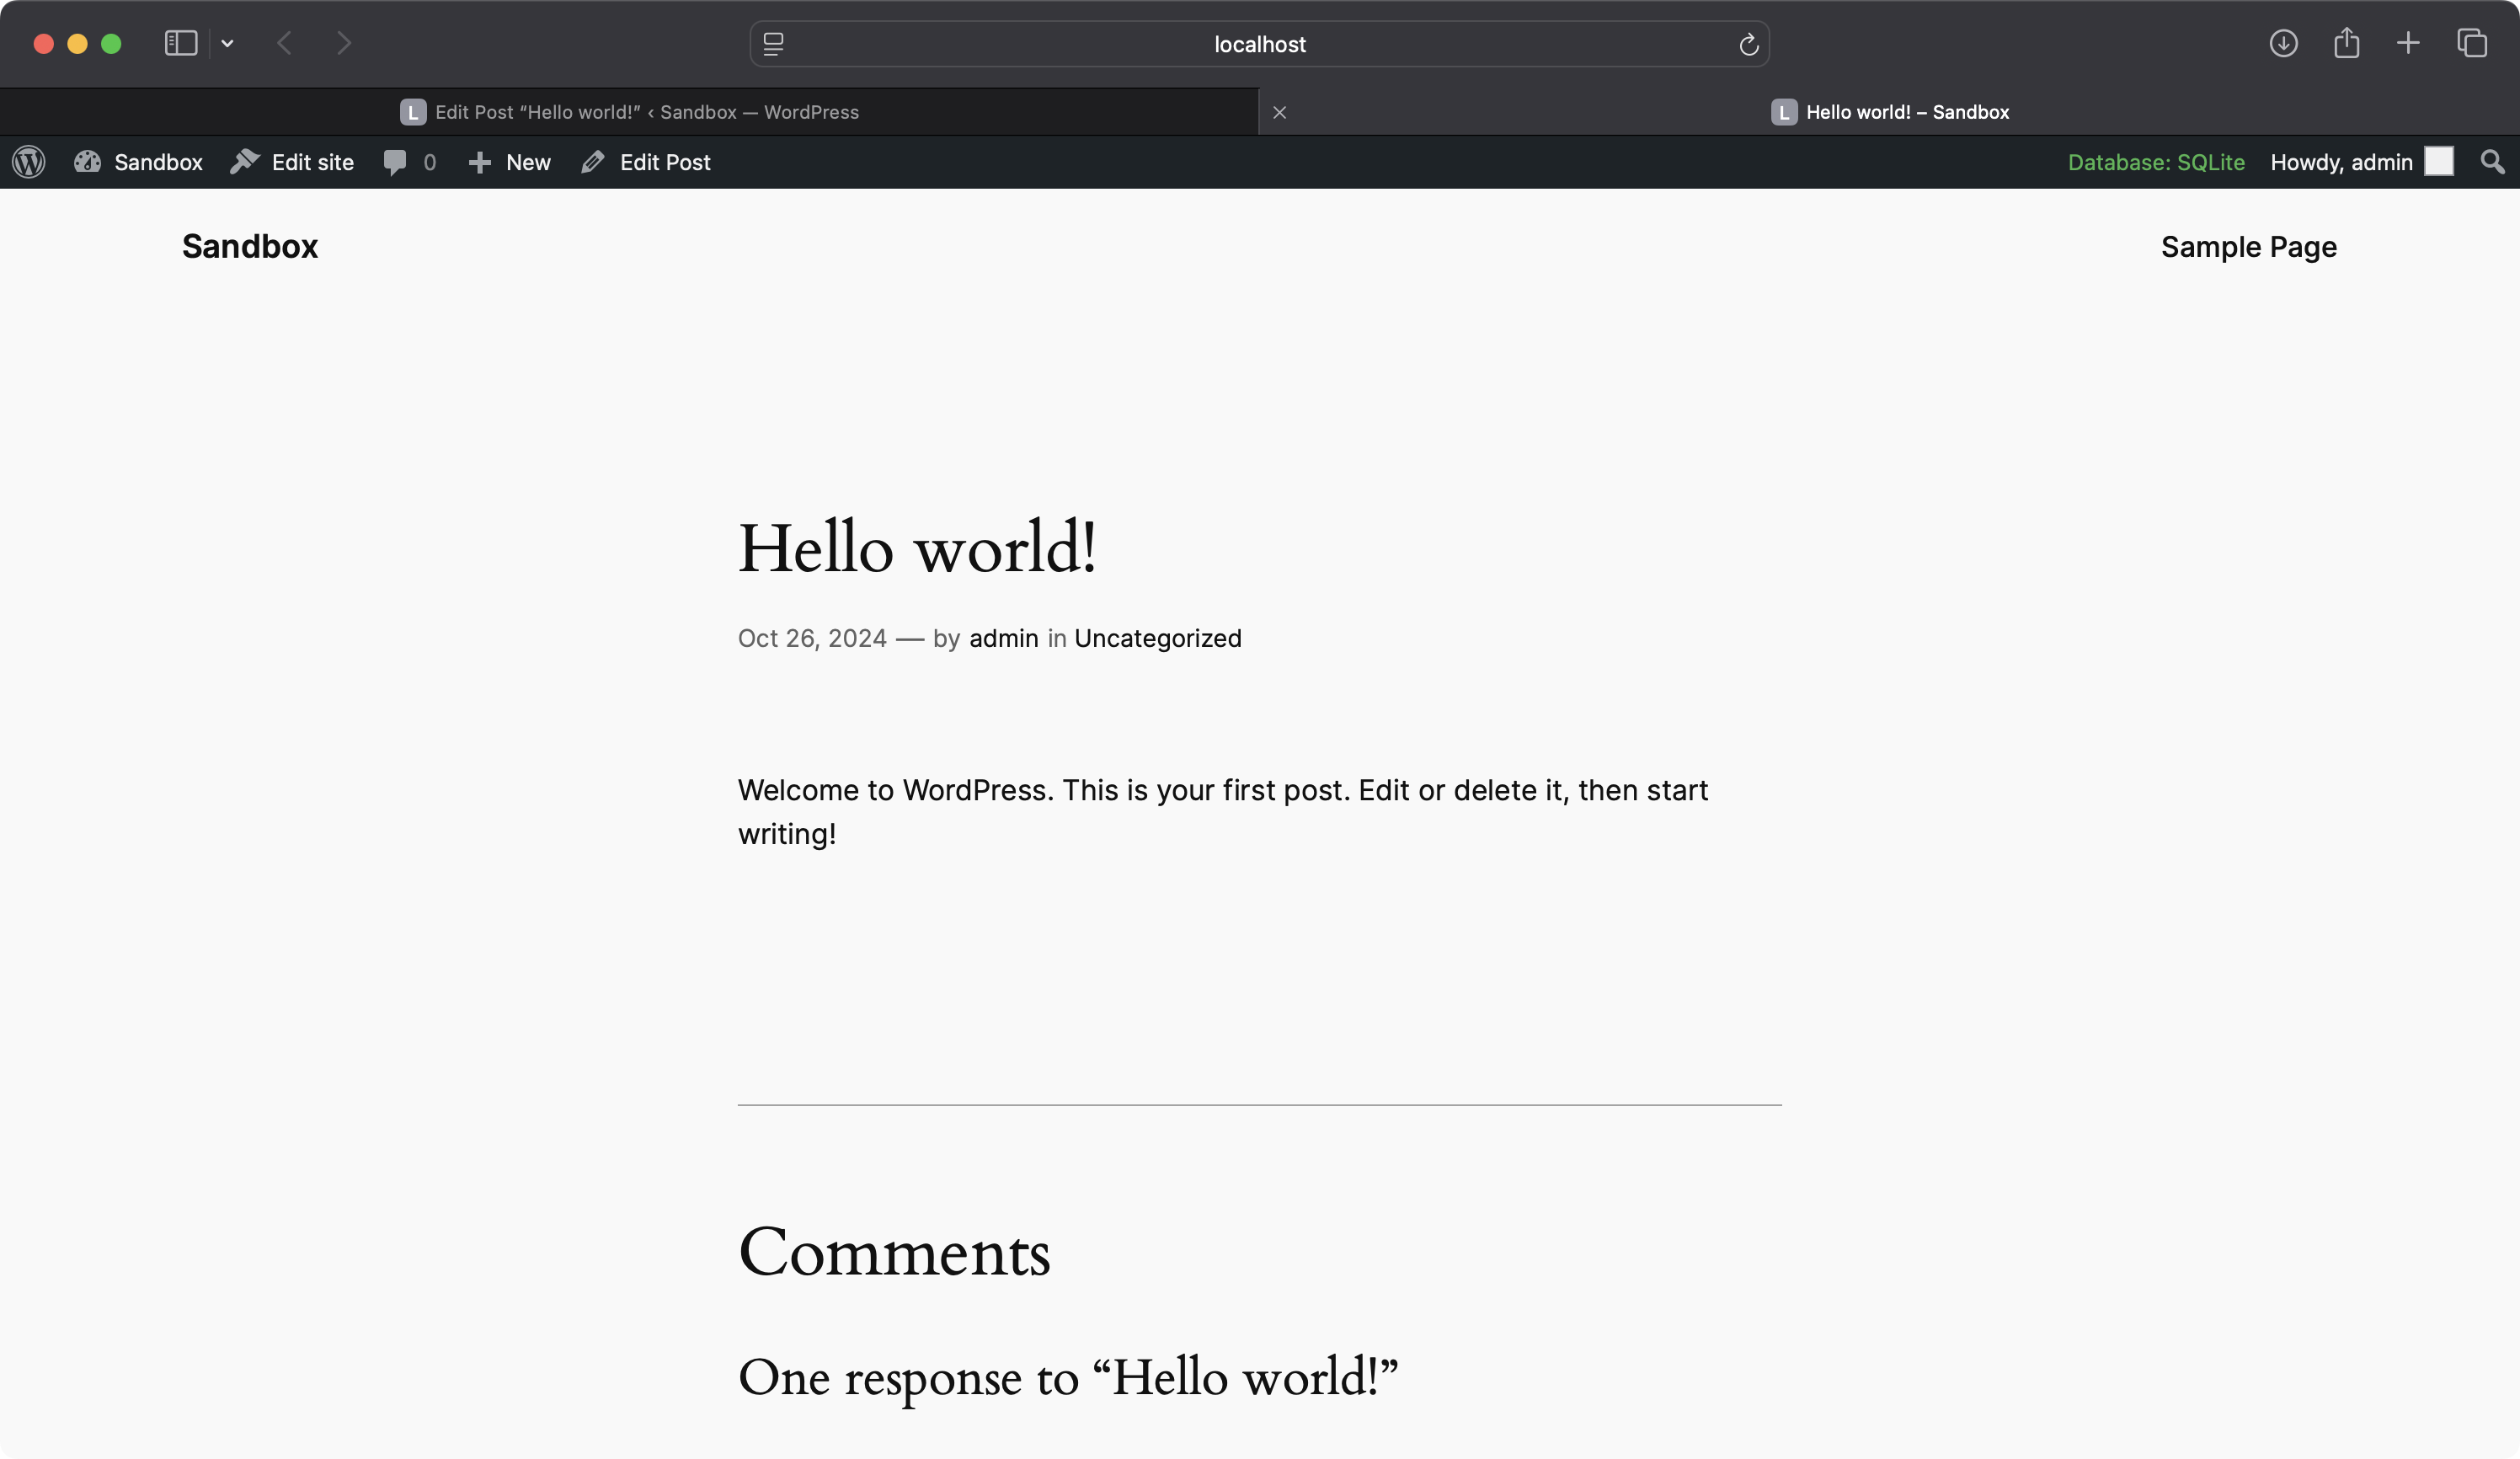
If all worked as expected, you should no longer be able to see the block on the front end of the site.
As mentioned in section 1.2.1 you can display controls in the Advanced section of the sidebar with InspectorAdvancedControls. That should look a little like the following screenshot.
2. Using Block Filters: Adding Block Visibility Toggle to All Blocks
Sometimes you cannot alter the markup of a block. Perhaps it is a WordPress Core block that you wish to add additional controls to, or one provided by a plugin, or perhaps you just want to register one control that can be used on several blocks (gotta keep it DRY).
We will showcase this by using block filters to inject the toggle control into the sidebar of every block (realistically you would probably restrict which blocks use it).
2.1: Setting Up the Plugin
Since we need to create a plugin that modifies existing blocks, @wordpress/create-block might not be the most suitable tool. Instead, we’ll manually create a plugin and use @wordpress/scripts (also known as wp-scripts) to handle the build process.
Create a new folder in your wp-content/plugins directory called global-block-visibility-toggle. Inside this folder, create a PHP file named global-block-visibility-toggle.php and add the following plugin header:
<?php
/**
 * Plugin Name: Global Block Visibility Toggle
 * Description: Adds a visibility toggle to all blocks using a block filter.
 * Version: 1.0.0
 * Author: Your Name
 * Text Domain: global-block-visibility-toggle
 */
2.2: Setting Up the Development Environment with wp-scripts
We’ll use @wordpress/scripts to simplify our build process. This package provides a pre-configured build setup for WordPress development, allowing us to write modern JavaScript without manually configuring tools like webpack and Babel.
wp-scripts gives you a build process very similar to the create-block script. To do this we will need to run a few commands, if you need to re-familiarise yourself with some of the concepts, give the WordPress development guide a read.
2.2.1: Initialise package.json
Make sure you are in the plugins directory. Open your terminal and navigate to the plugin directory:
cd global-block-visibility-toggle
Initialize a new package.json file by running:
npm init -y
This will create a basic package.json file in your plugin directory.
2.2.2: Install @wordpress/scripts
Install @wordpress/scripts as a development dependency:
npm install @wordpress/scripts --save-dev
2.2.3: Update package.json Scripts
In your package.json file, add the following scripts:
"scripts": {
    "build": "wp-scripts build",
    "start": "wp-scripts start",
    "format": "wp-scripts format",
    "lint:css": "wp-scripts lint-style",
    "lint:js": "wp-scripts lint-js",
    "lint:md:docs": "wp-scripts lint-md-docs"
},
To add in the description and to save some time, you can copy the below to your `package.json file.
{
  "name": "global-block-visibility-toggle",
  "version": "1.0.0",
  "description": "Adds a visibility toggle to all blocks using a block filter.",
  "main": "index.js",
  "scripts": {
    "build": "wp-scripts build",
    "start": "wp-scripts start",
    "format": "wp-scripts format",
    "lint:css": "wp-scripts lint-style",
    "lint:js": "wp-scripts lint-js",
    "lint:md:docs": "wp-scripts lint-md-docs"
  },
  "author": "Your Name",
  "license": "GPL-2.0-or-later",
  "devDependencies": {
    "@wordpress/scripts": "^24.0.0"
  }
}
2.2.4: Create the src Directory and index.js File
Create a src directory inside your plugin folder:
mkdir src
Inside the src directory, create a file named index.js. This is where we’ll write our JavaScript code to add the visibility toggle to all blocks.
2.3: Registering the Block Filter
In src/index.js, add the following code:
import { addFilter } from '@wordpress/hooks';
import { InspectorControls } from '@wordpress/block-editor';
import { PanelBody, ToggleControl } from '@wordpress/components';
import { __ } from '@wordpress/i18n';

/**
 * Add the 'isVisible' attribute to save the visibility state.
 *
 * @param {Object} settings Original block settings.
 * @returns {Object} Modified block settings with new attribute.
 */
function addVisibilityAttribute( settings ) {
    settings.attributes = {
        ...settings.attributes,
        isVisible: {
            type: 'boolean',
            default: true,
        },
    };

    return settings;
}

addFilter(
    'blocks.registerBlockType',
    'gbvt/add-visibility-attribute',
    addVisibilityAttribute
);

/**
 * Wraps the block's edit component to include the visibility toggle control in advanced settings.
 *
 * @param {Function} BlockEdit The original block edit component.
 * @returns {Function} Wrapped component with visibility toggle control.
 */
const addVisibilityToggleControl = ( BlockEdit ) => ( props ) => {
    const { attributes, setAttributes } = props;
    const { isVisible } = attributes;

    return (
        <>
            <BlockEdit { ...props } />
            <InspectorControls>
                <PanelBody title={ __( 'Block Settings', 'block-visibility-toggle' ) }>
                    <ToggleControl
                        label={ __( 'Display Block', 'global-block-visibility-toggle' ) }
                        checked={ isVisible }
                        onChange={ ( value ) => setAttributes( { isVisible: value } ) }
                        help={ __( 'Toggle block visibility on the front end.', 'global-block-visibility-toggle' ) }
                    />
                </PanelBody>
            </InspectorControls>
        </>
    );
};

addFilter(
    'editor.BlockEdit',
    'gbvt/add-visibility-toggle-control',
    addVisibilityToggleControl
);
2.4: Applying the Visibility on the Front End
Now, we need to ensure that blocks with isVisible set to false do not render on the front end. We’ll use a PHP filter to modify the rendered content.
In your global-block-visibility-toggle.php file, add the following code:
<?php
/**
 * Plugin Name: Global Block Visibility Toggle
 * Description: Adds a visibility toggle to all blocks using a block filter.
 * Version: 1.0.0
 * Author: Your Name
 * Text Domain: global-block-visibility-toggle
 */

/**
 * Enqueue block editor assets.
 */
function gbvt_enqueue_block_editor_assets() {
    wp_enqueue_script(
        'gbvt-editor-script',
        plugins_url( 'build/index.js', __FILE__ ),
        [ 'wp-blocks', 'wp-dom-ready', 'wp-edit-post', 'wp-hooks' ],
        filemtime( plugin_dir_path( __FILE__ ) . 'build/index.js' )
    );
}
add_action( 'enqueue_block_editor_assets', 'gbvt_enqueue_block_editor_assets' );

/**
 * Filter block content to control visibility on the front end.
 *
 * @param string $block_content The block content.
 * @param array  $block         The block settings.
 * @return string Modified block content.
 */
function gbvt_filter_block_visibility( $block_content, $block ) {
    if ( isset( $block['attrs']['isVisible'] ) && ! $block['attrs']['isVisible'] ) {
        return ''; // Do not render the block
    }
    return $block_content;
}
add_filter( 'render_block', 'gbvt_filter_block_visibility', 10, 2 );
2.5: Building and Activating the Plugin
We need to build our JavaScript code into a build/index.js file that can be enqueued.
With @wordpress/scripts, we can use the following command to build our JavaScript files:
npm run build
This will compile src/index.js and output the result to build/index.js.
Alternatively, if you want to watch for changes and rebuild automatically during development, you can use:
npm run start
This command runs in watch mode, rebuilding the code whenever you save changes.
2.6: Using the Sidebar
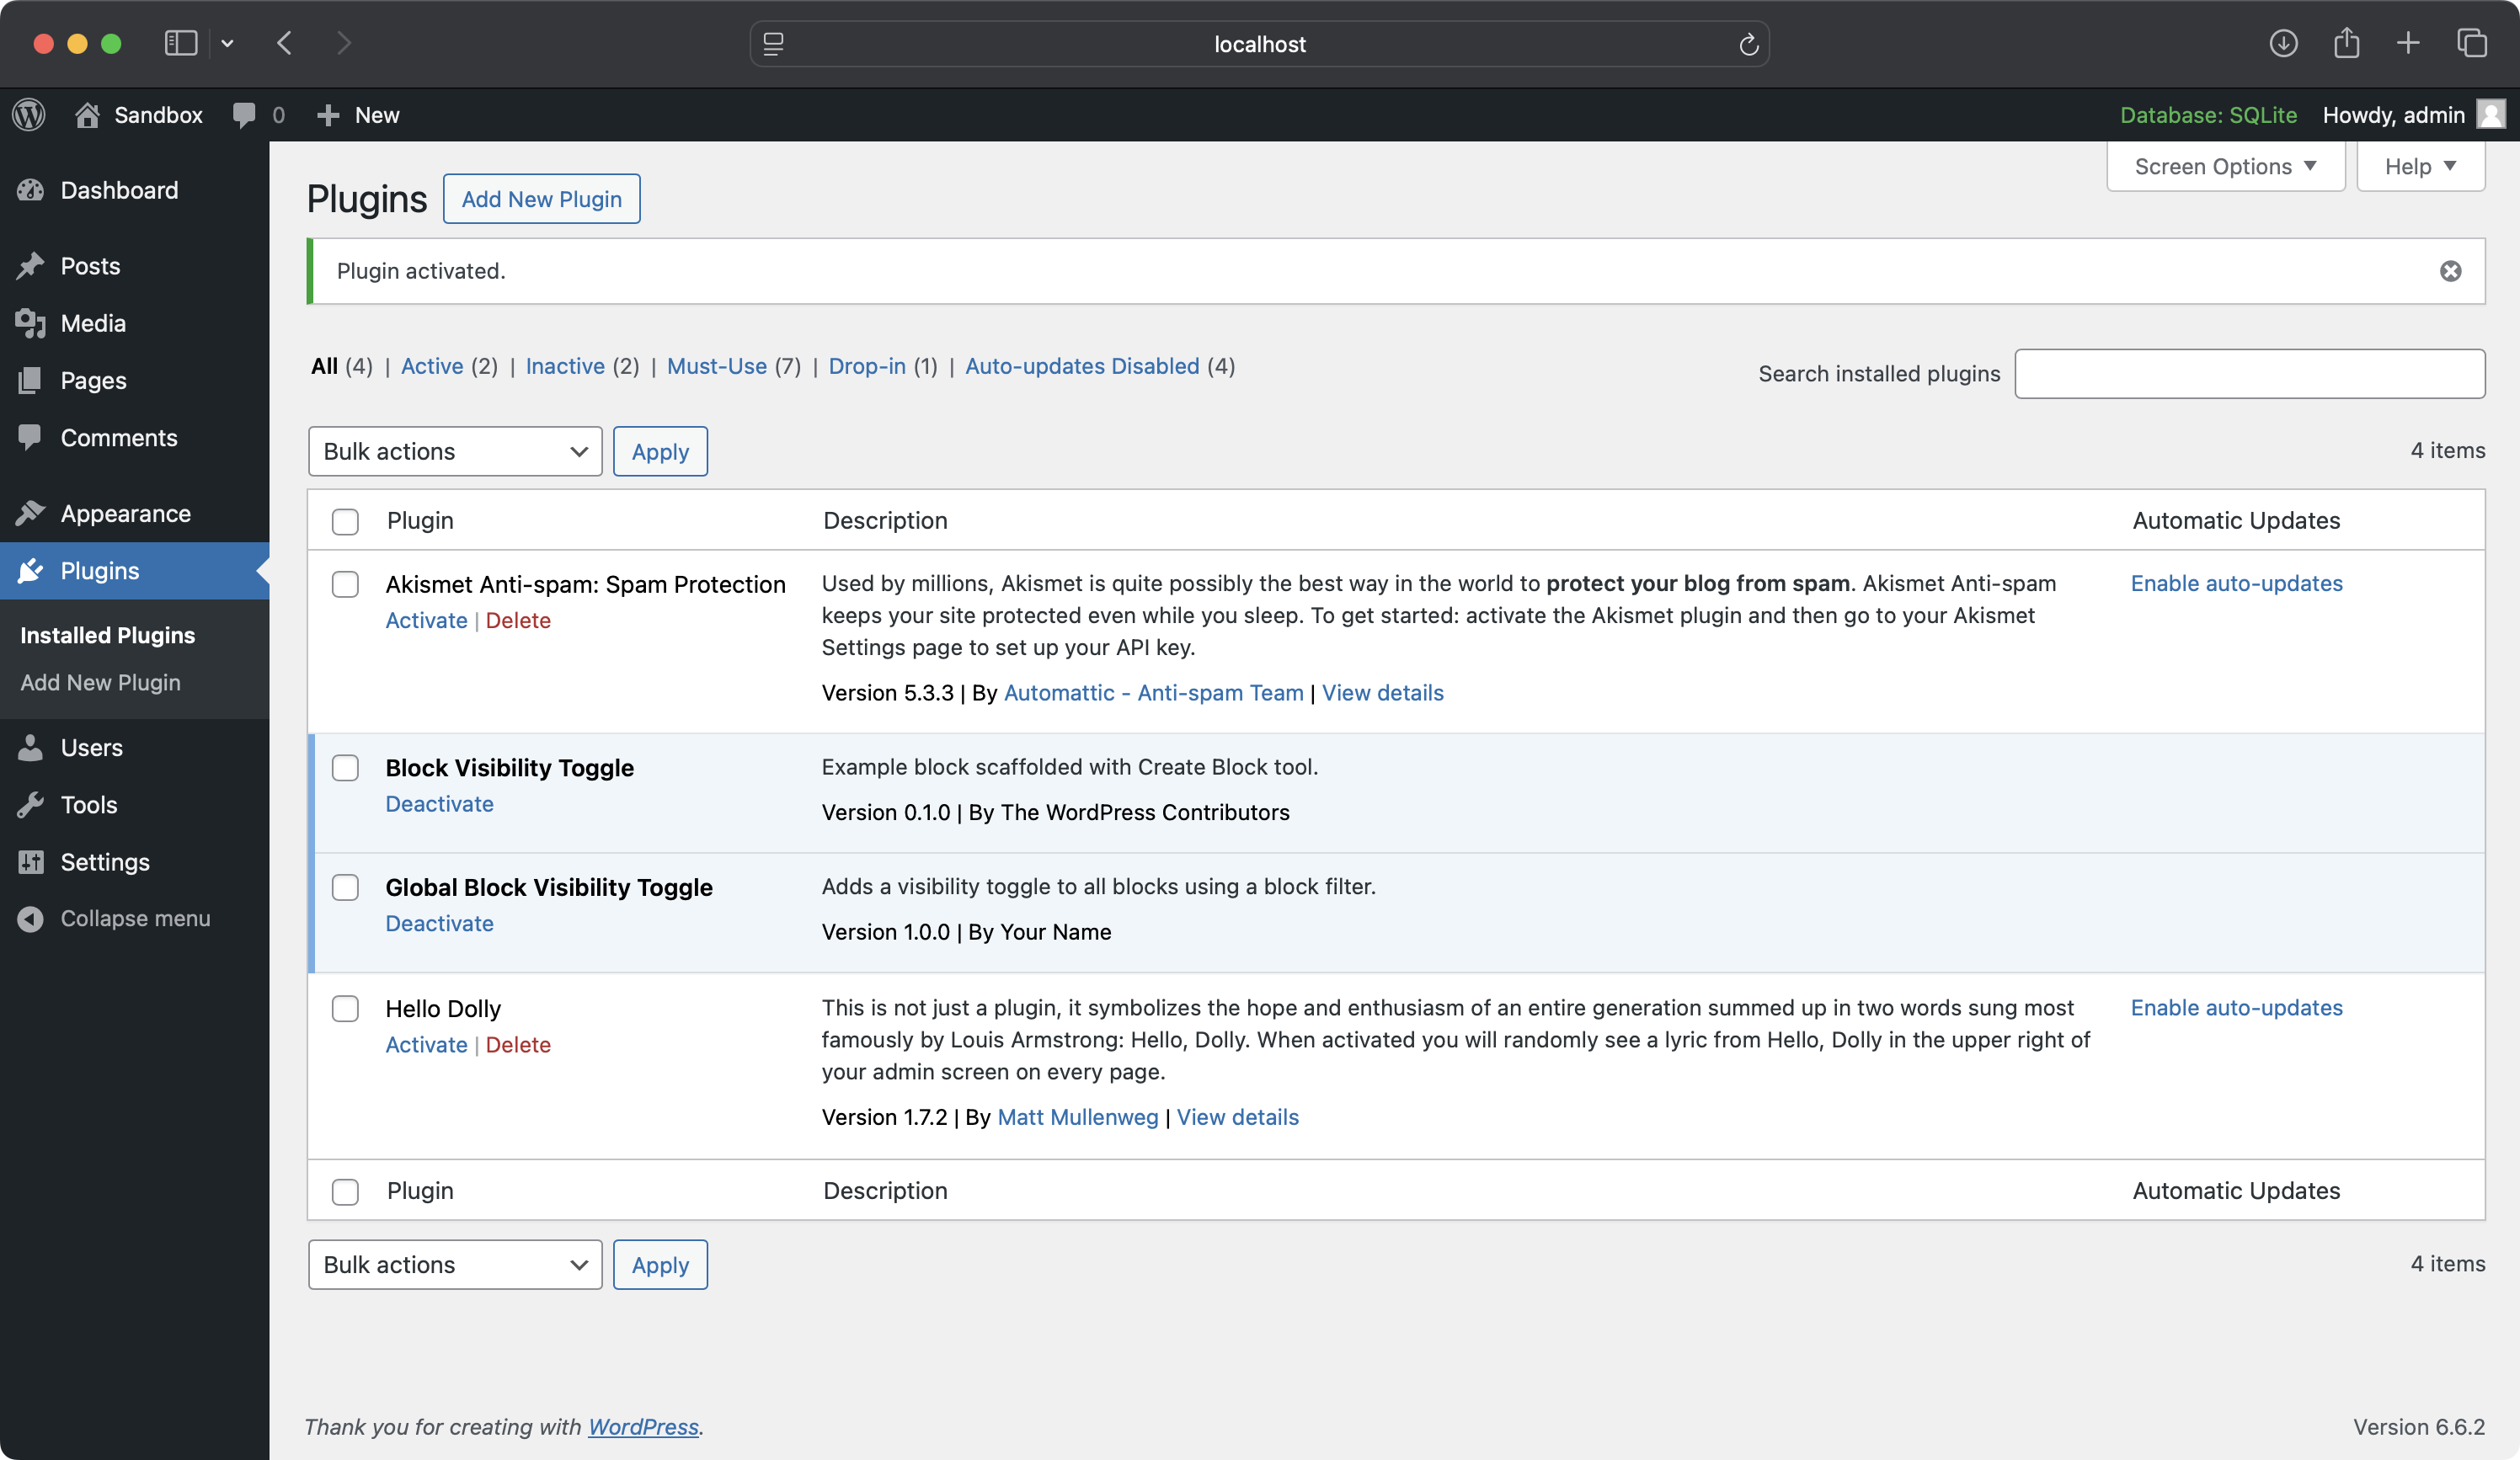
Remember after you have ran npm run build that you need to activate the plugin.
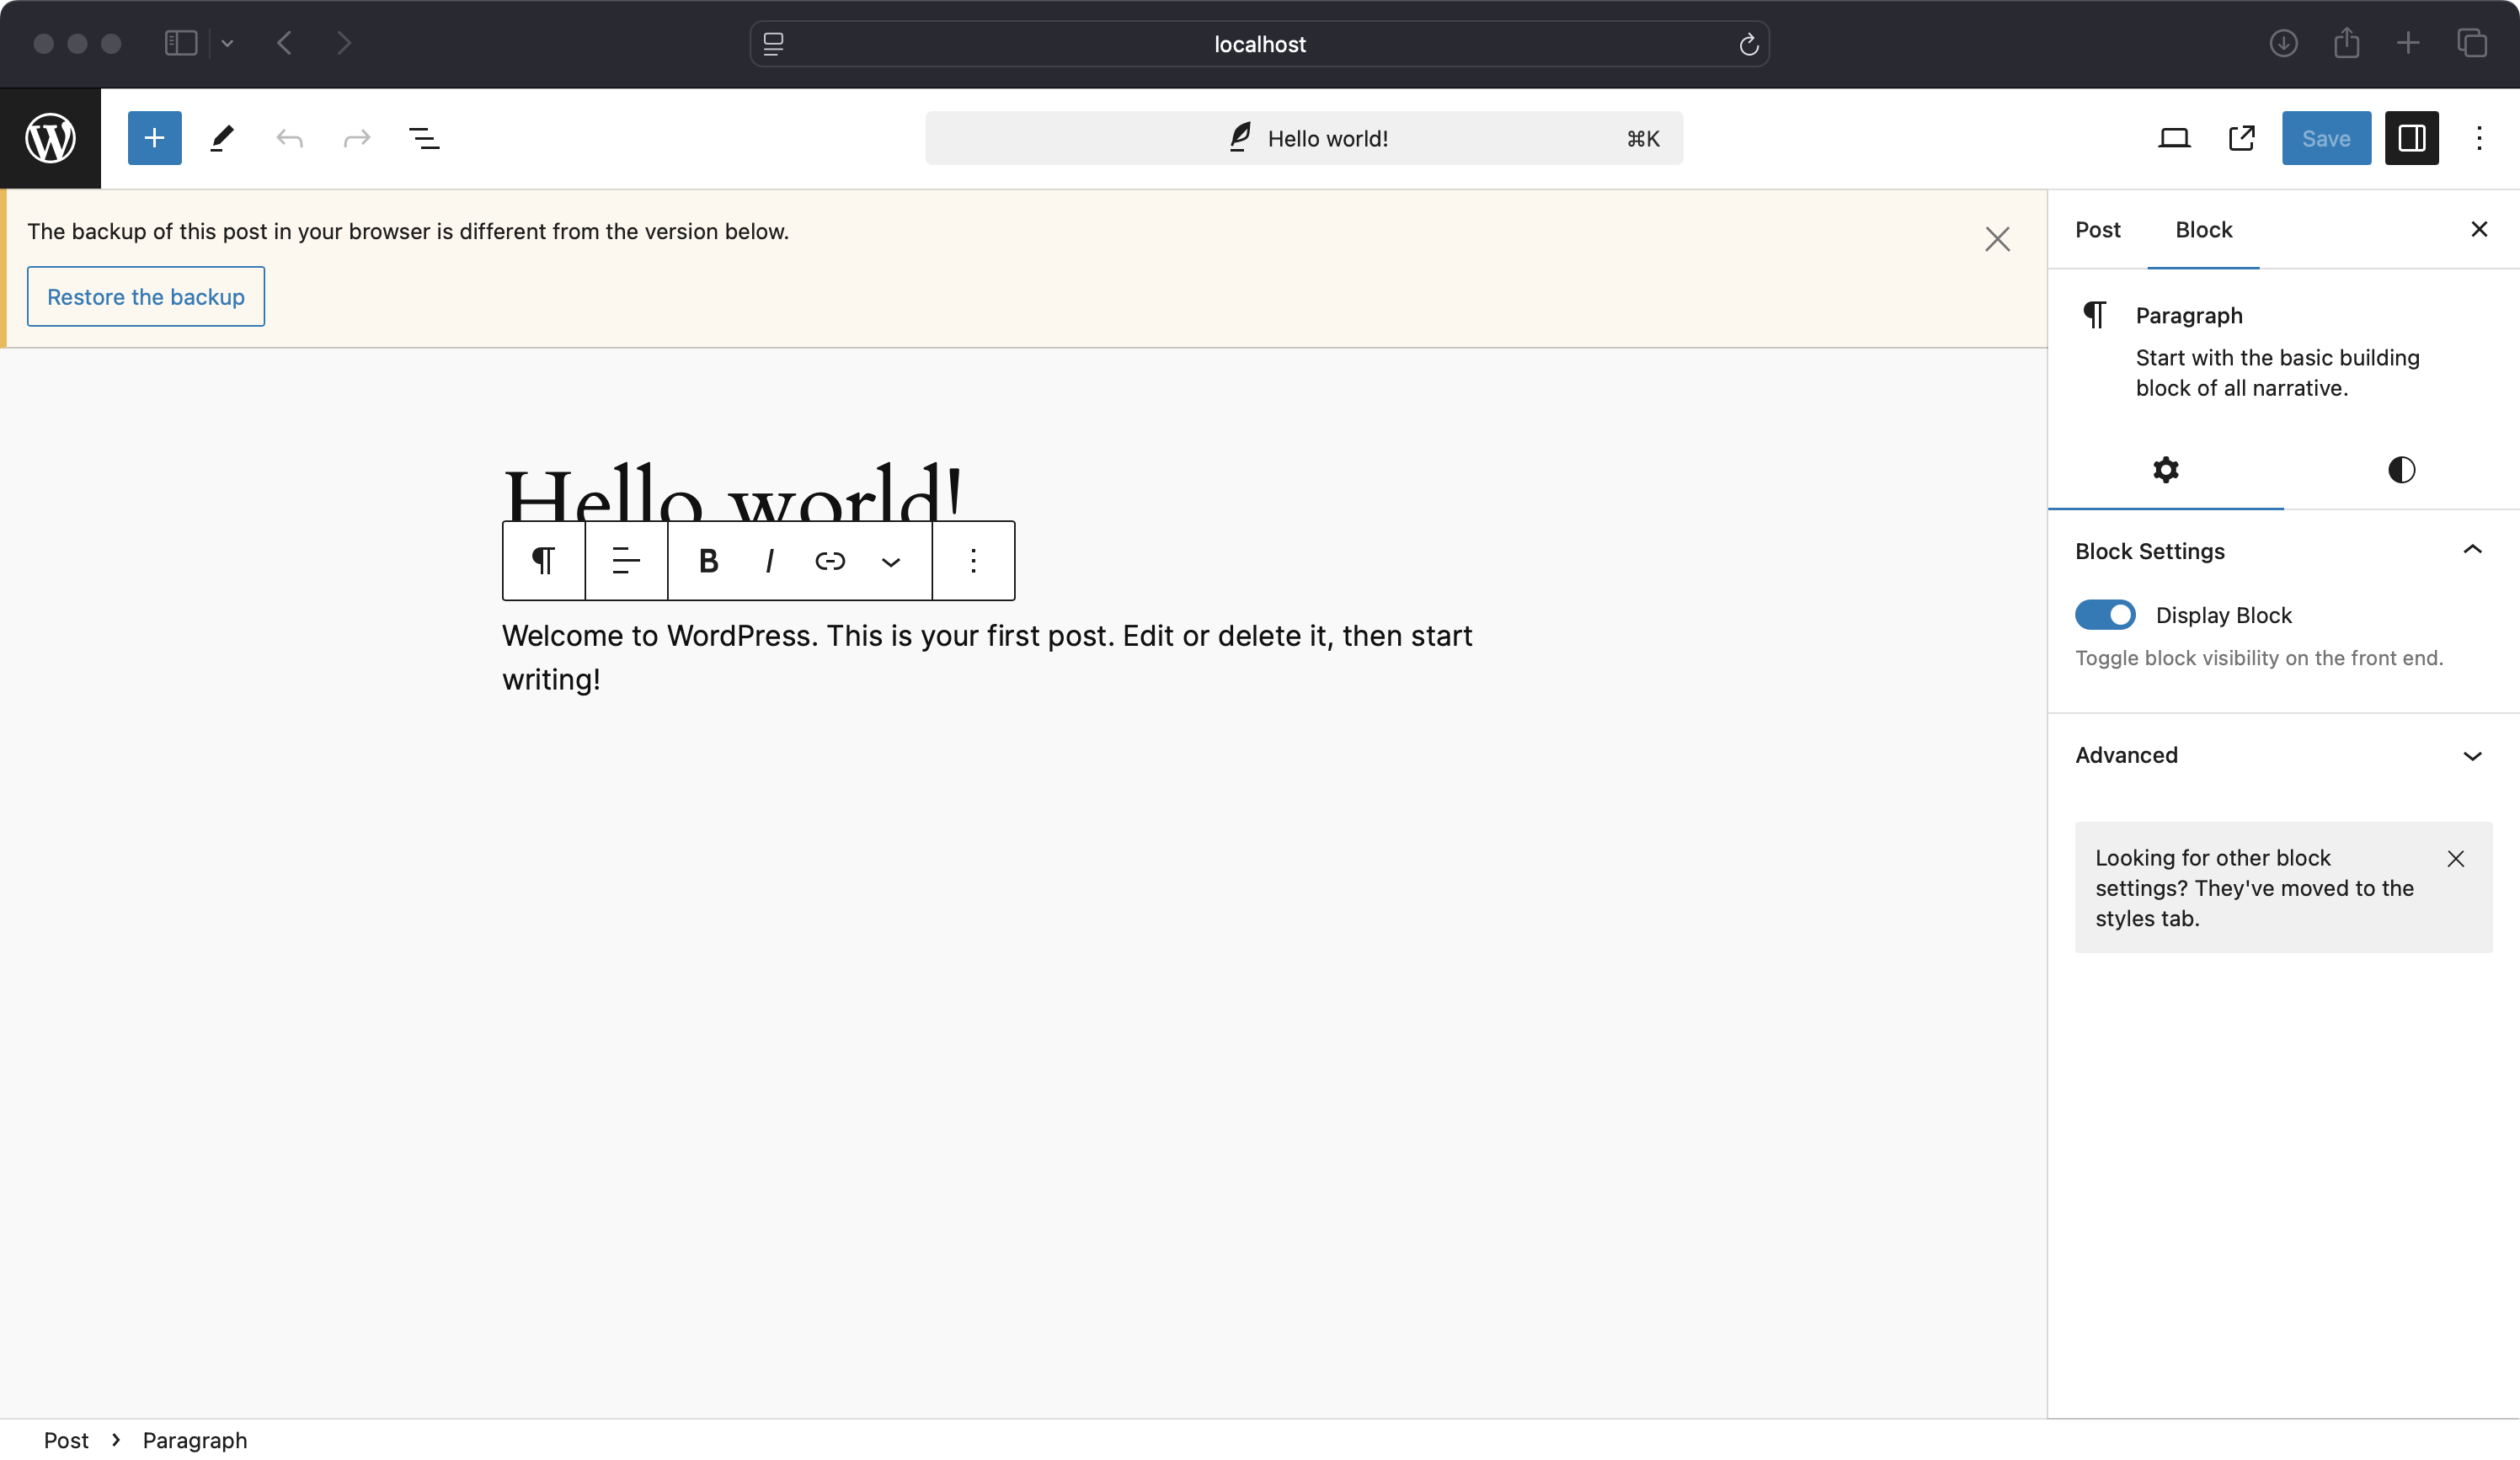
Select any block (in this case I’m selecting the paragraph block) and note that the Display Block toggle is now visible.
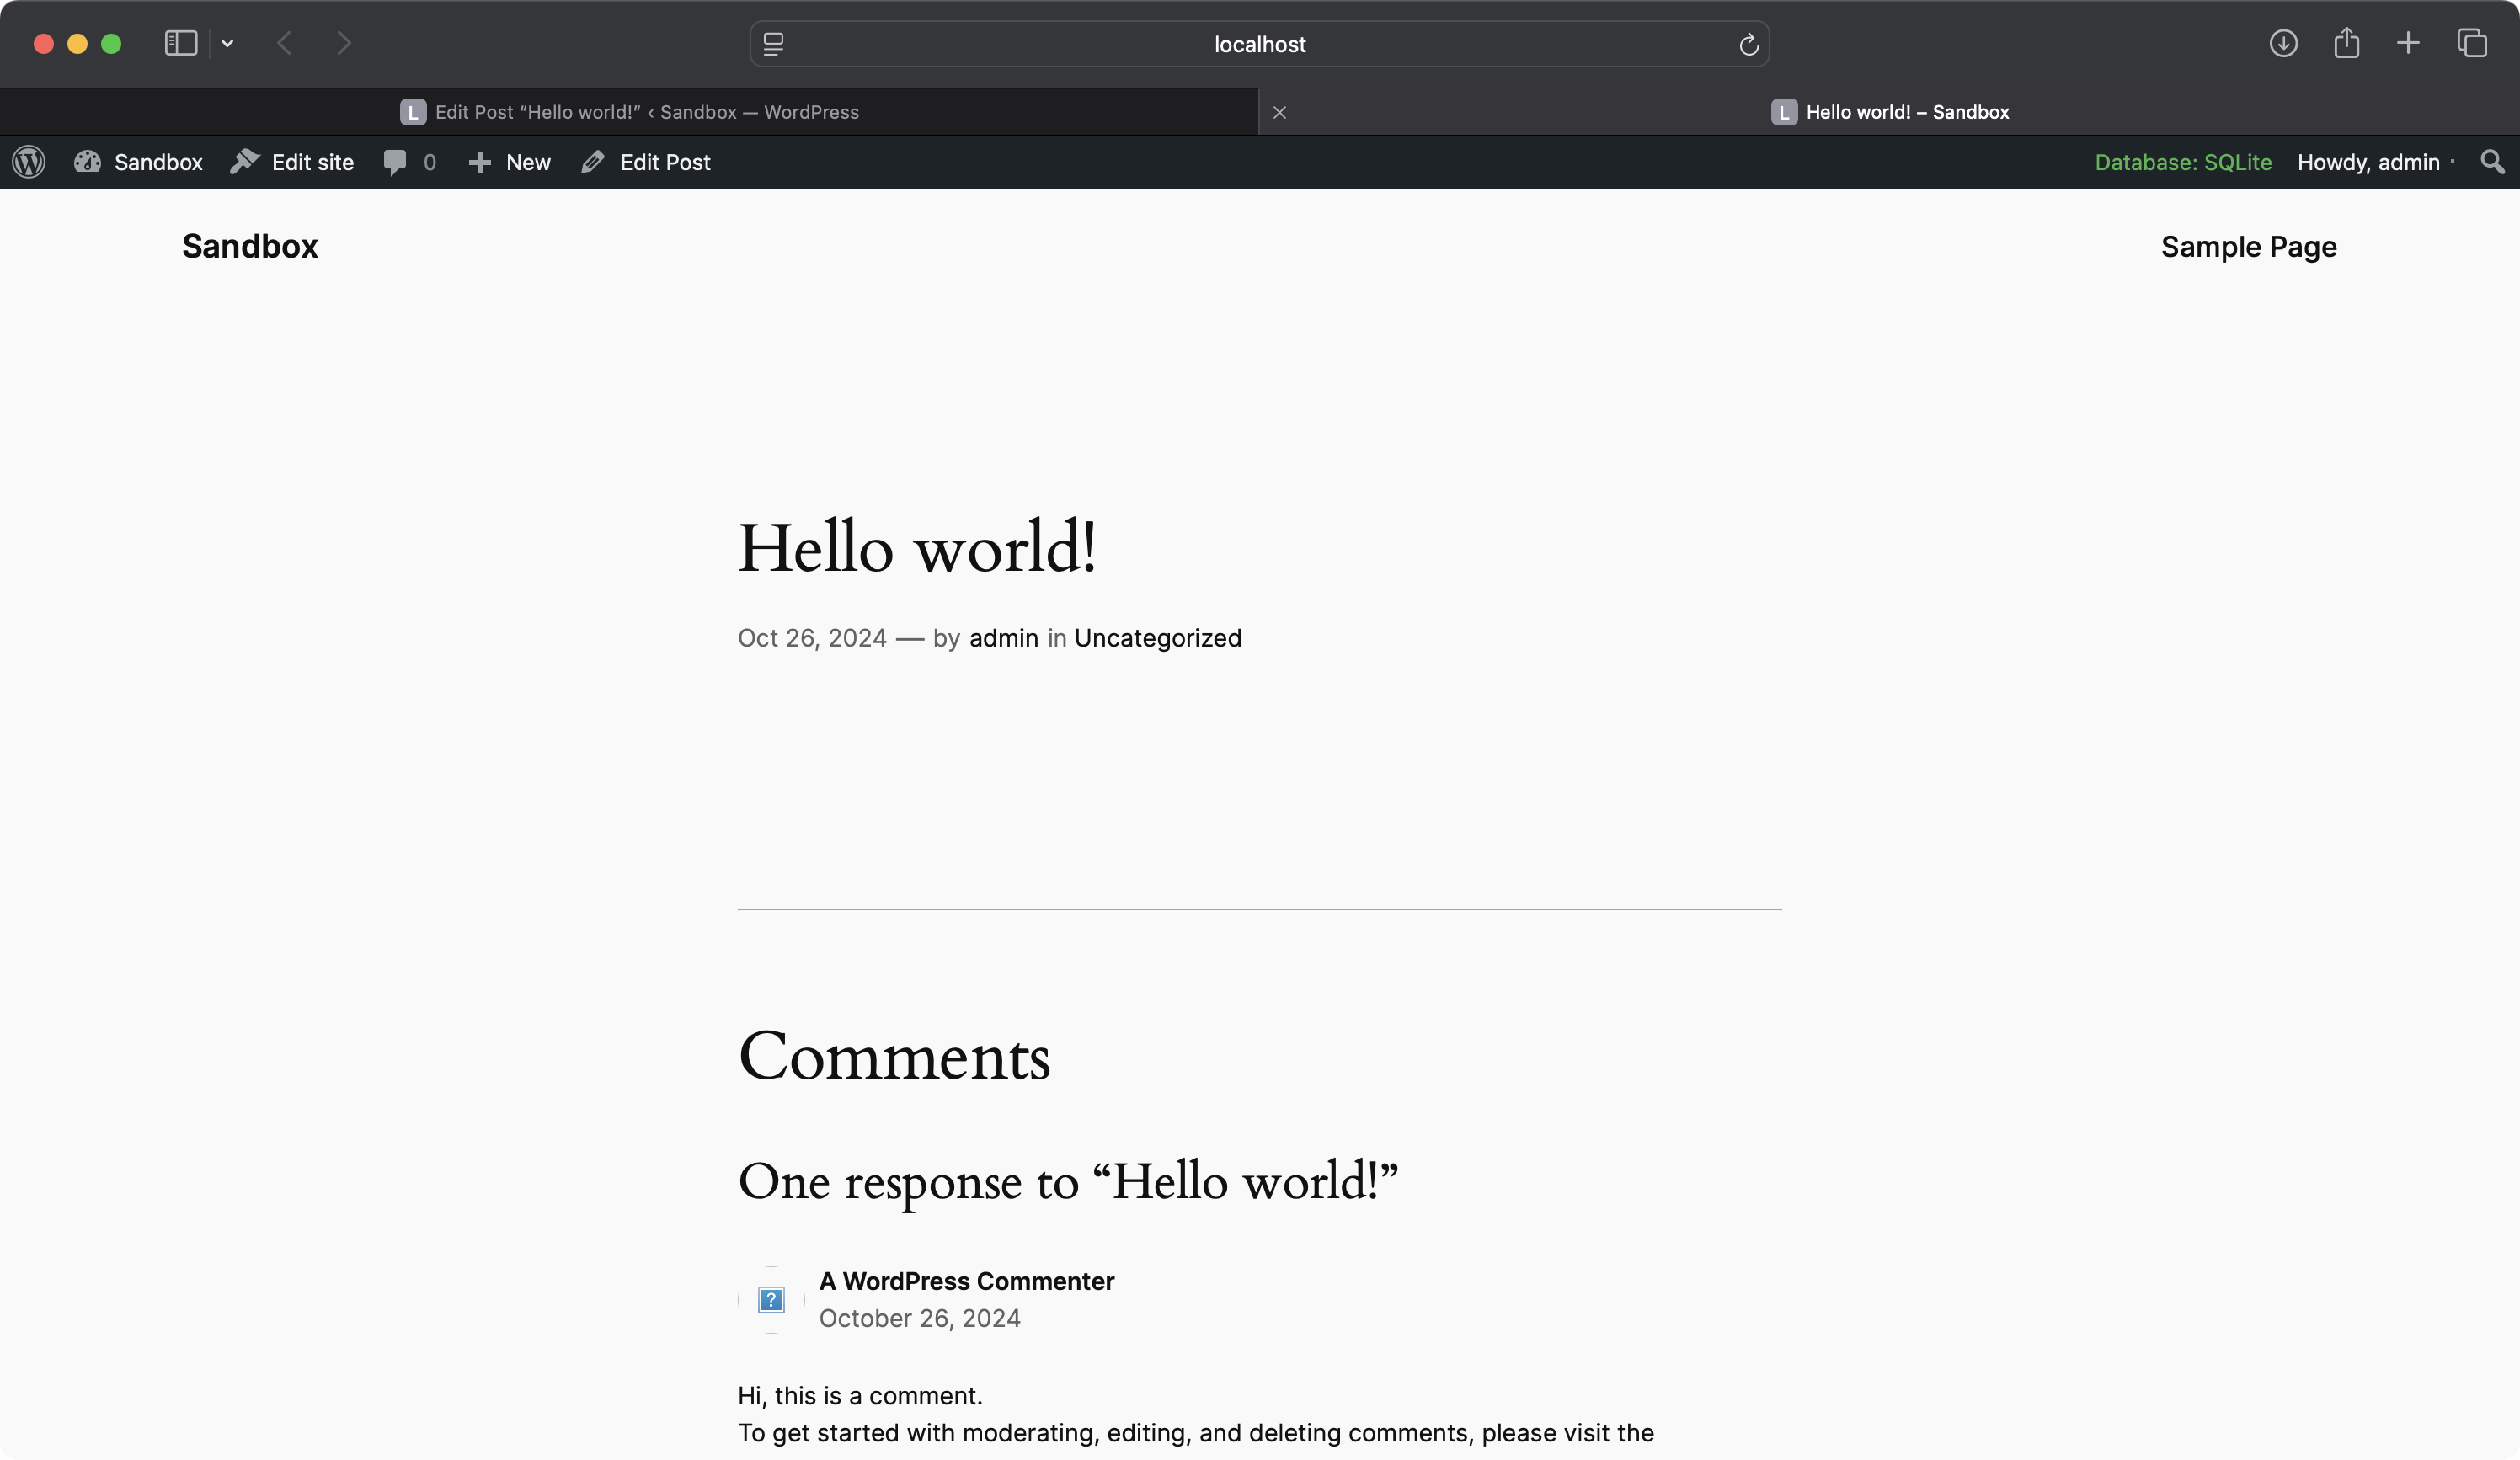
Toggle this so that it no longer displays, and save the post.
When you view the post on the front end, that block (the paragraph block) is no longer visible.
3. Post-Level Sidebar: Toggle Post Content Visibility
If you would like to add a control that impacts the entire post, you can add controls to the post sidebar. In this type of sidebar it might make sense for the controls to alter post meta data.
To showcase a post-level sidebar that allows you to toggle the visibility of the post content. If disabled, the content will not display on the front end, and a custom message will be shown instead.
3.1: Setting Up the Plugin
Create a new plugin folder called post-content-visibility in your WordPress wp-content/plugins directory.
Inside this folder, create a src folder for your JavaScript code and a post-content-visibility.php file for the plugin’s PHP code.
As per the last example we are going to use wp-scripts. We will take a bit of a shortcut this time, by setting up the package.json file and then running our setup command.
In the post-content-visibility folder, initialise your package with wp-scripts creating the following package.json file in the root of the plugin.
{
    "name": "post-content-visibility",
    "version": "1.0.0",
    "description": "Toggle the visibility of post content from the editor sidebar.",
    "main": "index.js",
    "scripts": {
        "build": "wp-scripts build",
        "start": "wp-scripts start"
    },
    "keywords": [],
    "author": "Your Name",
    "license": "ISC",
    "dependencies": {
        "@wordpress/scripts": "^25.0.0"
    }
}
Now run npm install from inside the post-content-visibility folder, and wait for the package to initialise. You can now build and run your JavaScript using npm run build or npm start.
3.2: Registering Post Meta
We need to register a post meta field to store the visibility setting. Open the post-content-visibility.php file in the plugin directory and add the following code:
<?php
/**
 * Plugin Name:       Post Content Visibility
 * Description:       Adds a toggle to control the visibility of post content on the front end.
 * Version:           1.0.0
 * Author:            Your Name
 * Text Domain:       post-content-visibility
 */

function pcv_register_post_meta() {
    register_post_meta( '', 'pcv_display_post_content', [
        'show_in_rest' => true,
        'single'       => true,
        'type'         => 'boolean',
        'default'      => true,
    ] );
}
add_action( 'init', 'pcv_register_post_meta' );
By registering the meta for all post types (denoted by the empty string ''), we can use this setting across different content types.
3.3: Enqueuing the Sidebar Toggle Script
Add the following code to your post-content-visibility.php file to enqueue the sidebar toggle script in the block editor:
function pcv_enqueue_editor_assets() {
    wp_enqueue_script(
        'post-content-visibility',
        plugins_url( 'build/index.js', __FILE__ ),
        array( 'wp-plugins', 'wp-edit-post', 'wp-element', 'wp-components', 'wp-data', 'wp-i18n' ),
        '1.0.0',
        true
    );
}
add_action( 'enqueue_block_editor_assets', 'pcv_enqueue_editor_assets' );
This function ensures that the script is loaded in all editors that support the block editor.
3.4: Building the Toggle in the Post Sidebar
We’ll use the PluginDocumentSettingPanel component to add a custom panel in the post sidebar. Open src/index.js and replace its content with the following code.
import { PluginDocumentSettingPanel } from '@wordpress/editor';
import { ToggleControl } from '@wordpress/components';
import { useSelect, useDispatch } from '@wordpress/data';
import { registerPlugin } from '@wordpress/plugins';
import { __ } from '@wordpress/i18n';

const PostContentVisibility = () => {
    const { editPost } = useDispatch( 'core/editor' );
    const displayContent = useSelect(
        ( select ) => select( 'core/editor' )?.getEditedPostAttribute( 'meta' )?.['pcv_display_post_content'],
        []
    );

    return (
        <PluginDocumentSettingPanel
            name="post-content-visibility"
            title={ __( 'Post Content Visibility', 'post-content-visibility' ) }
            className="post-content-visibility-panel"
        >
            <ToggleControl
                label={ __( 'Display Post Content', 'post-content-visibility' ) }
                checked={ displayContent }
                onChange={ ( value ) => editPost( { meta: { pcv_display_post_content: value } } ) }
                help={ __( 'Toggle the visibility of the post content on the front end.', 'post-content-visibility' ) }
            />
        </PluginDocumentSettingPanel>
    );
};

// Check if we're in the Post Editor before registering the plugin.
if ( window.pagenow !== 'site-editor' ) {
    registerPlugin( 'post-content-visibility', {
        render: PostContentVisibility,
        icon: 'visibility',
    } );
}
This component fetches the pcv_display_post_content meta field and updates it when the toggle is changed.
3.5: Modifying the Front-End Display
We need to check the meta value when rendering the post content and conditionally display it. In post-content-visibility.php, add the following code:
function pcv_filter_the_content( $content ) {
    if ( is_singular() ) {
        $display_content = get_post_meta( get_the_ID(), 'pcv_display_post_content', true );
        if ( ! $display_content ) {
            return '<p>' . __( 'This post is hidden from view.', 'post-content-visibility' ) . '</p>';
        }
    }
    return $content;
}
add_filter( 'the_content', 'pcv_filter_the_content' );
This function checks if the pcv_display_post_content meta is false and replaces the content with a custom message if so.
3.6: Building the Plugin
After updating src/index.js, build your JavaScript file using wp-scripts:
npm run build
This will generate a build/index.js file. Your plugin is now ready to use!
Step 7: Using the Sidebar
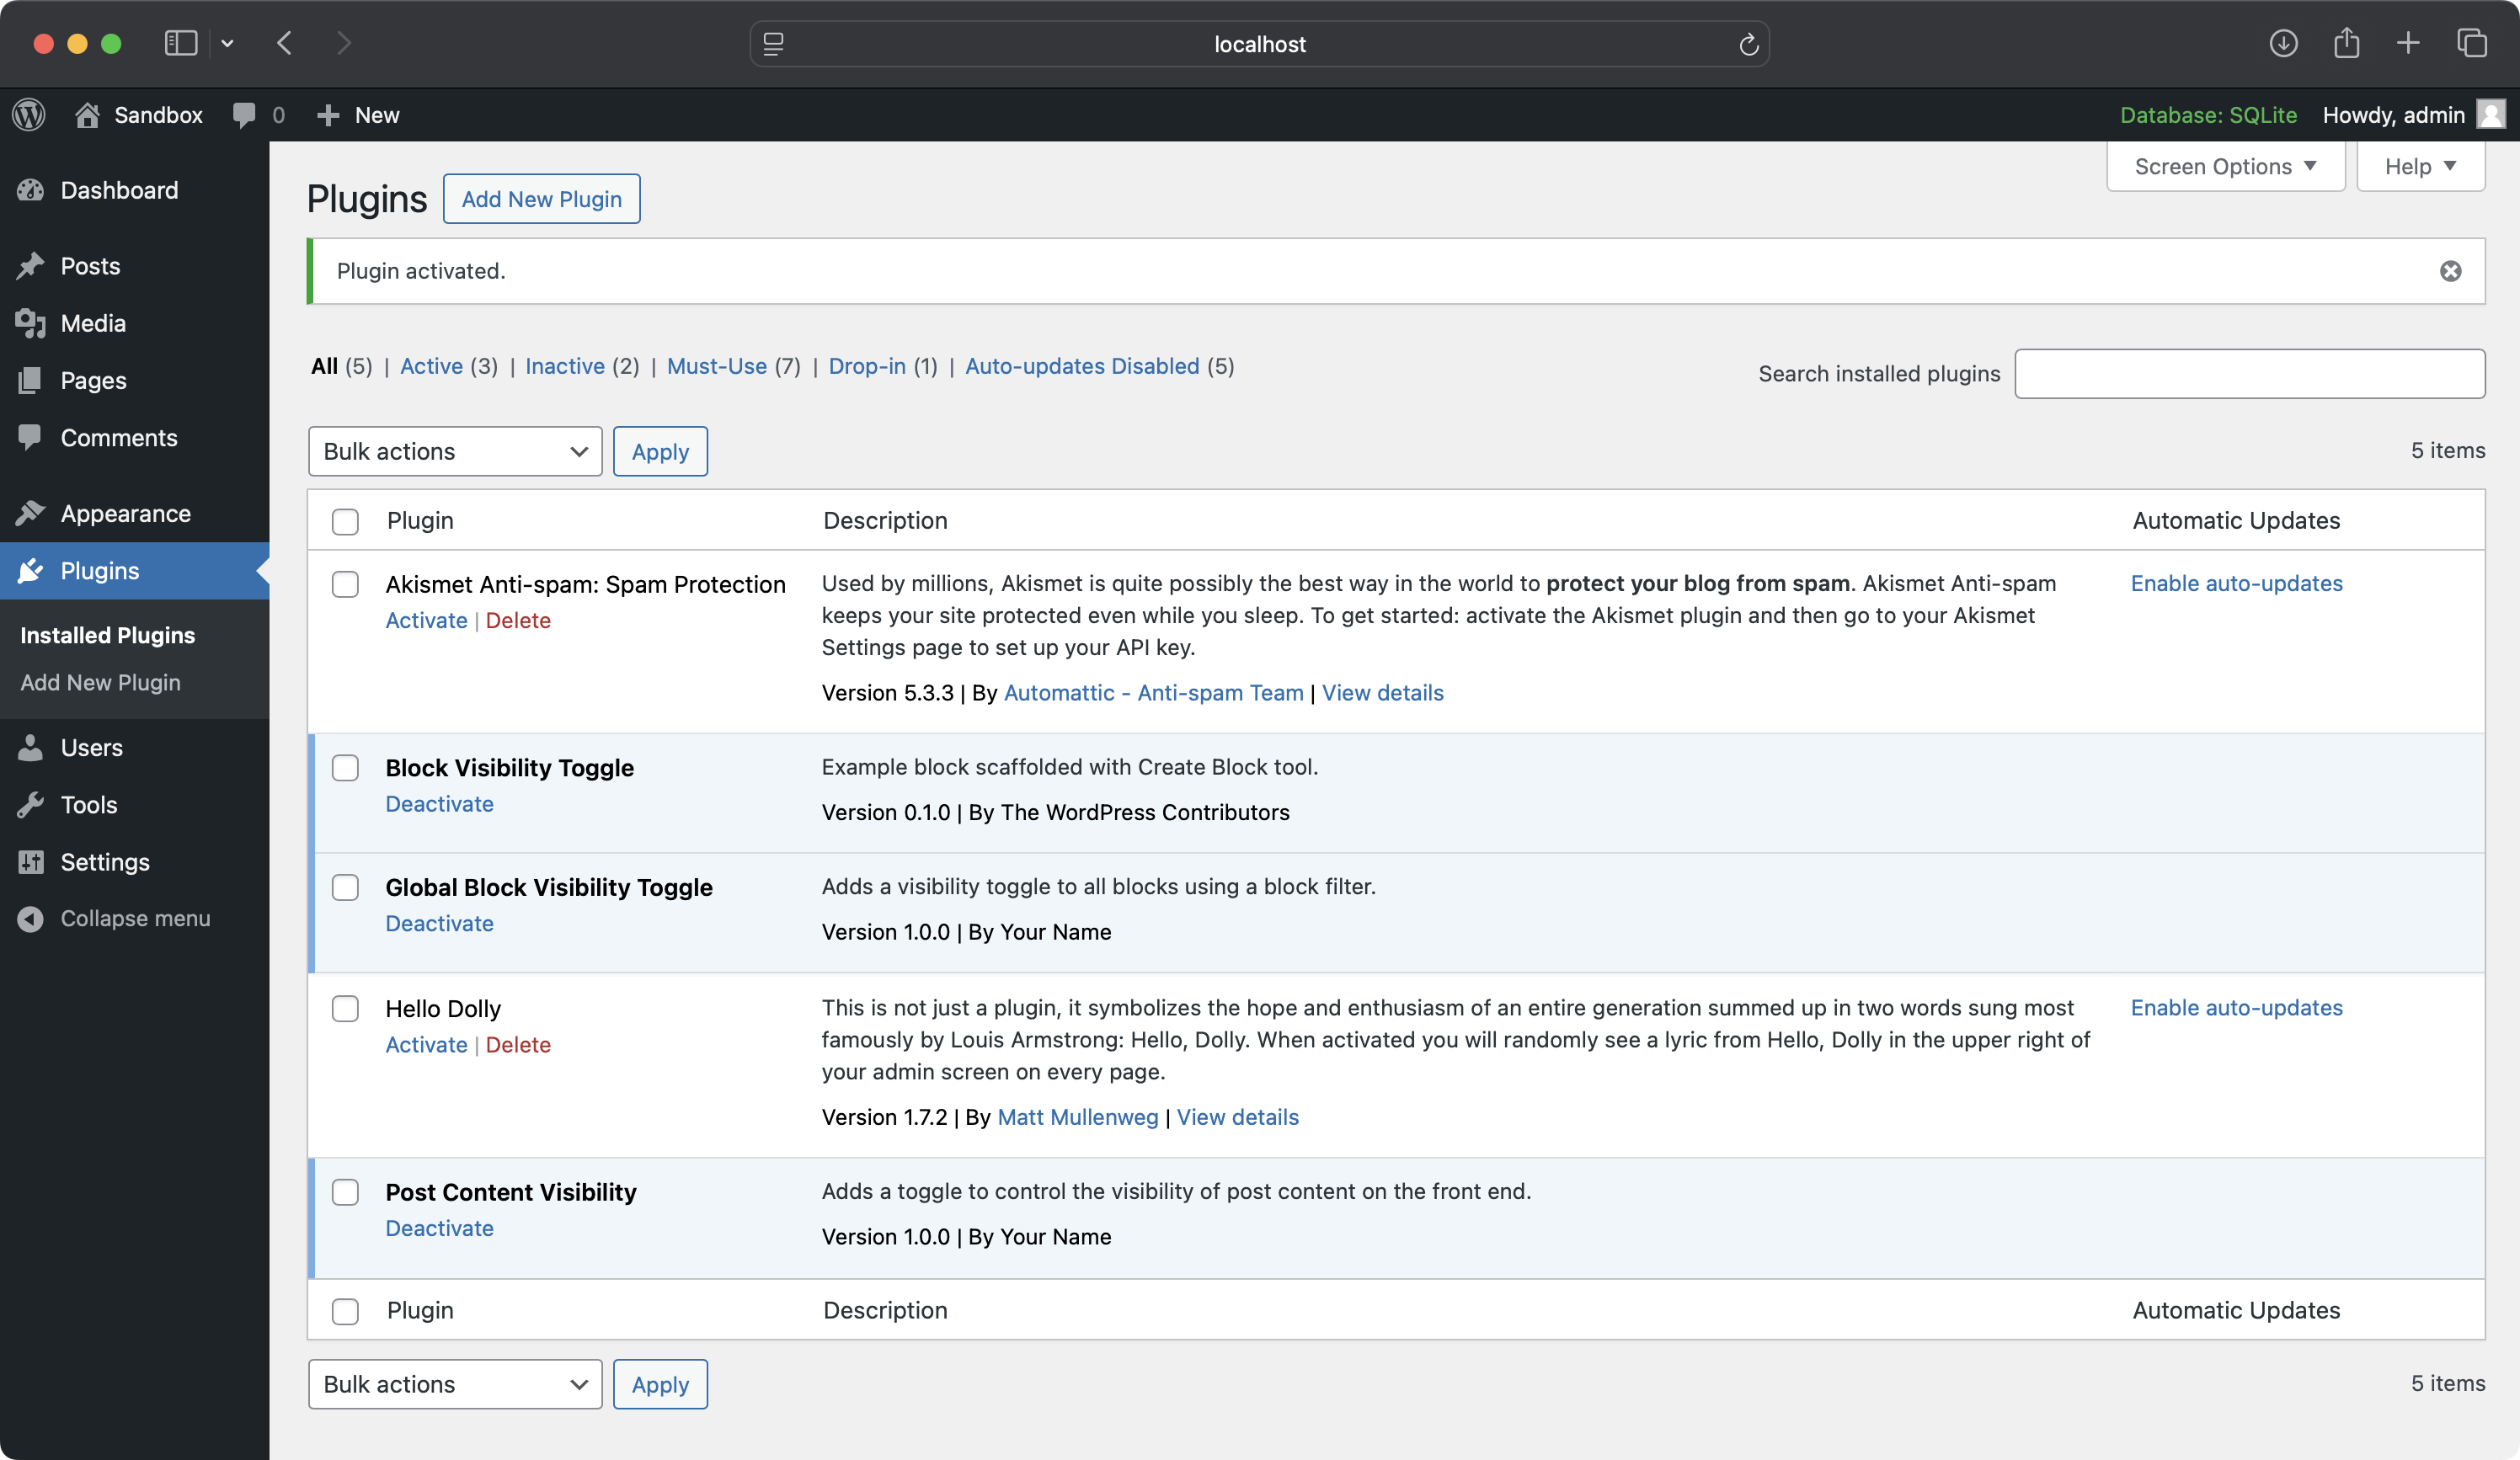
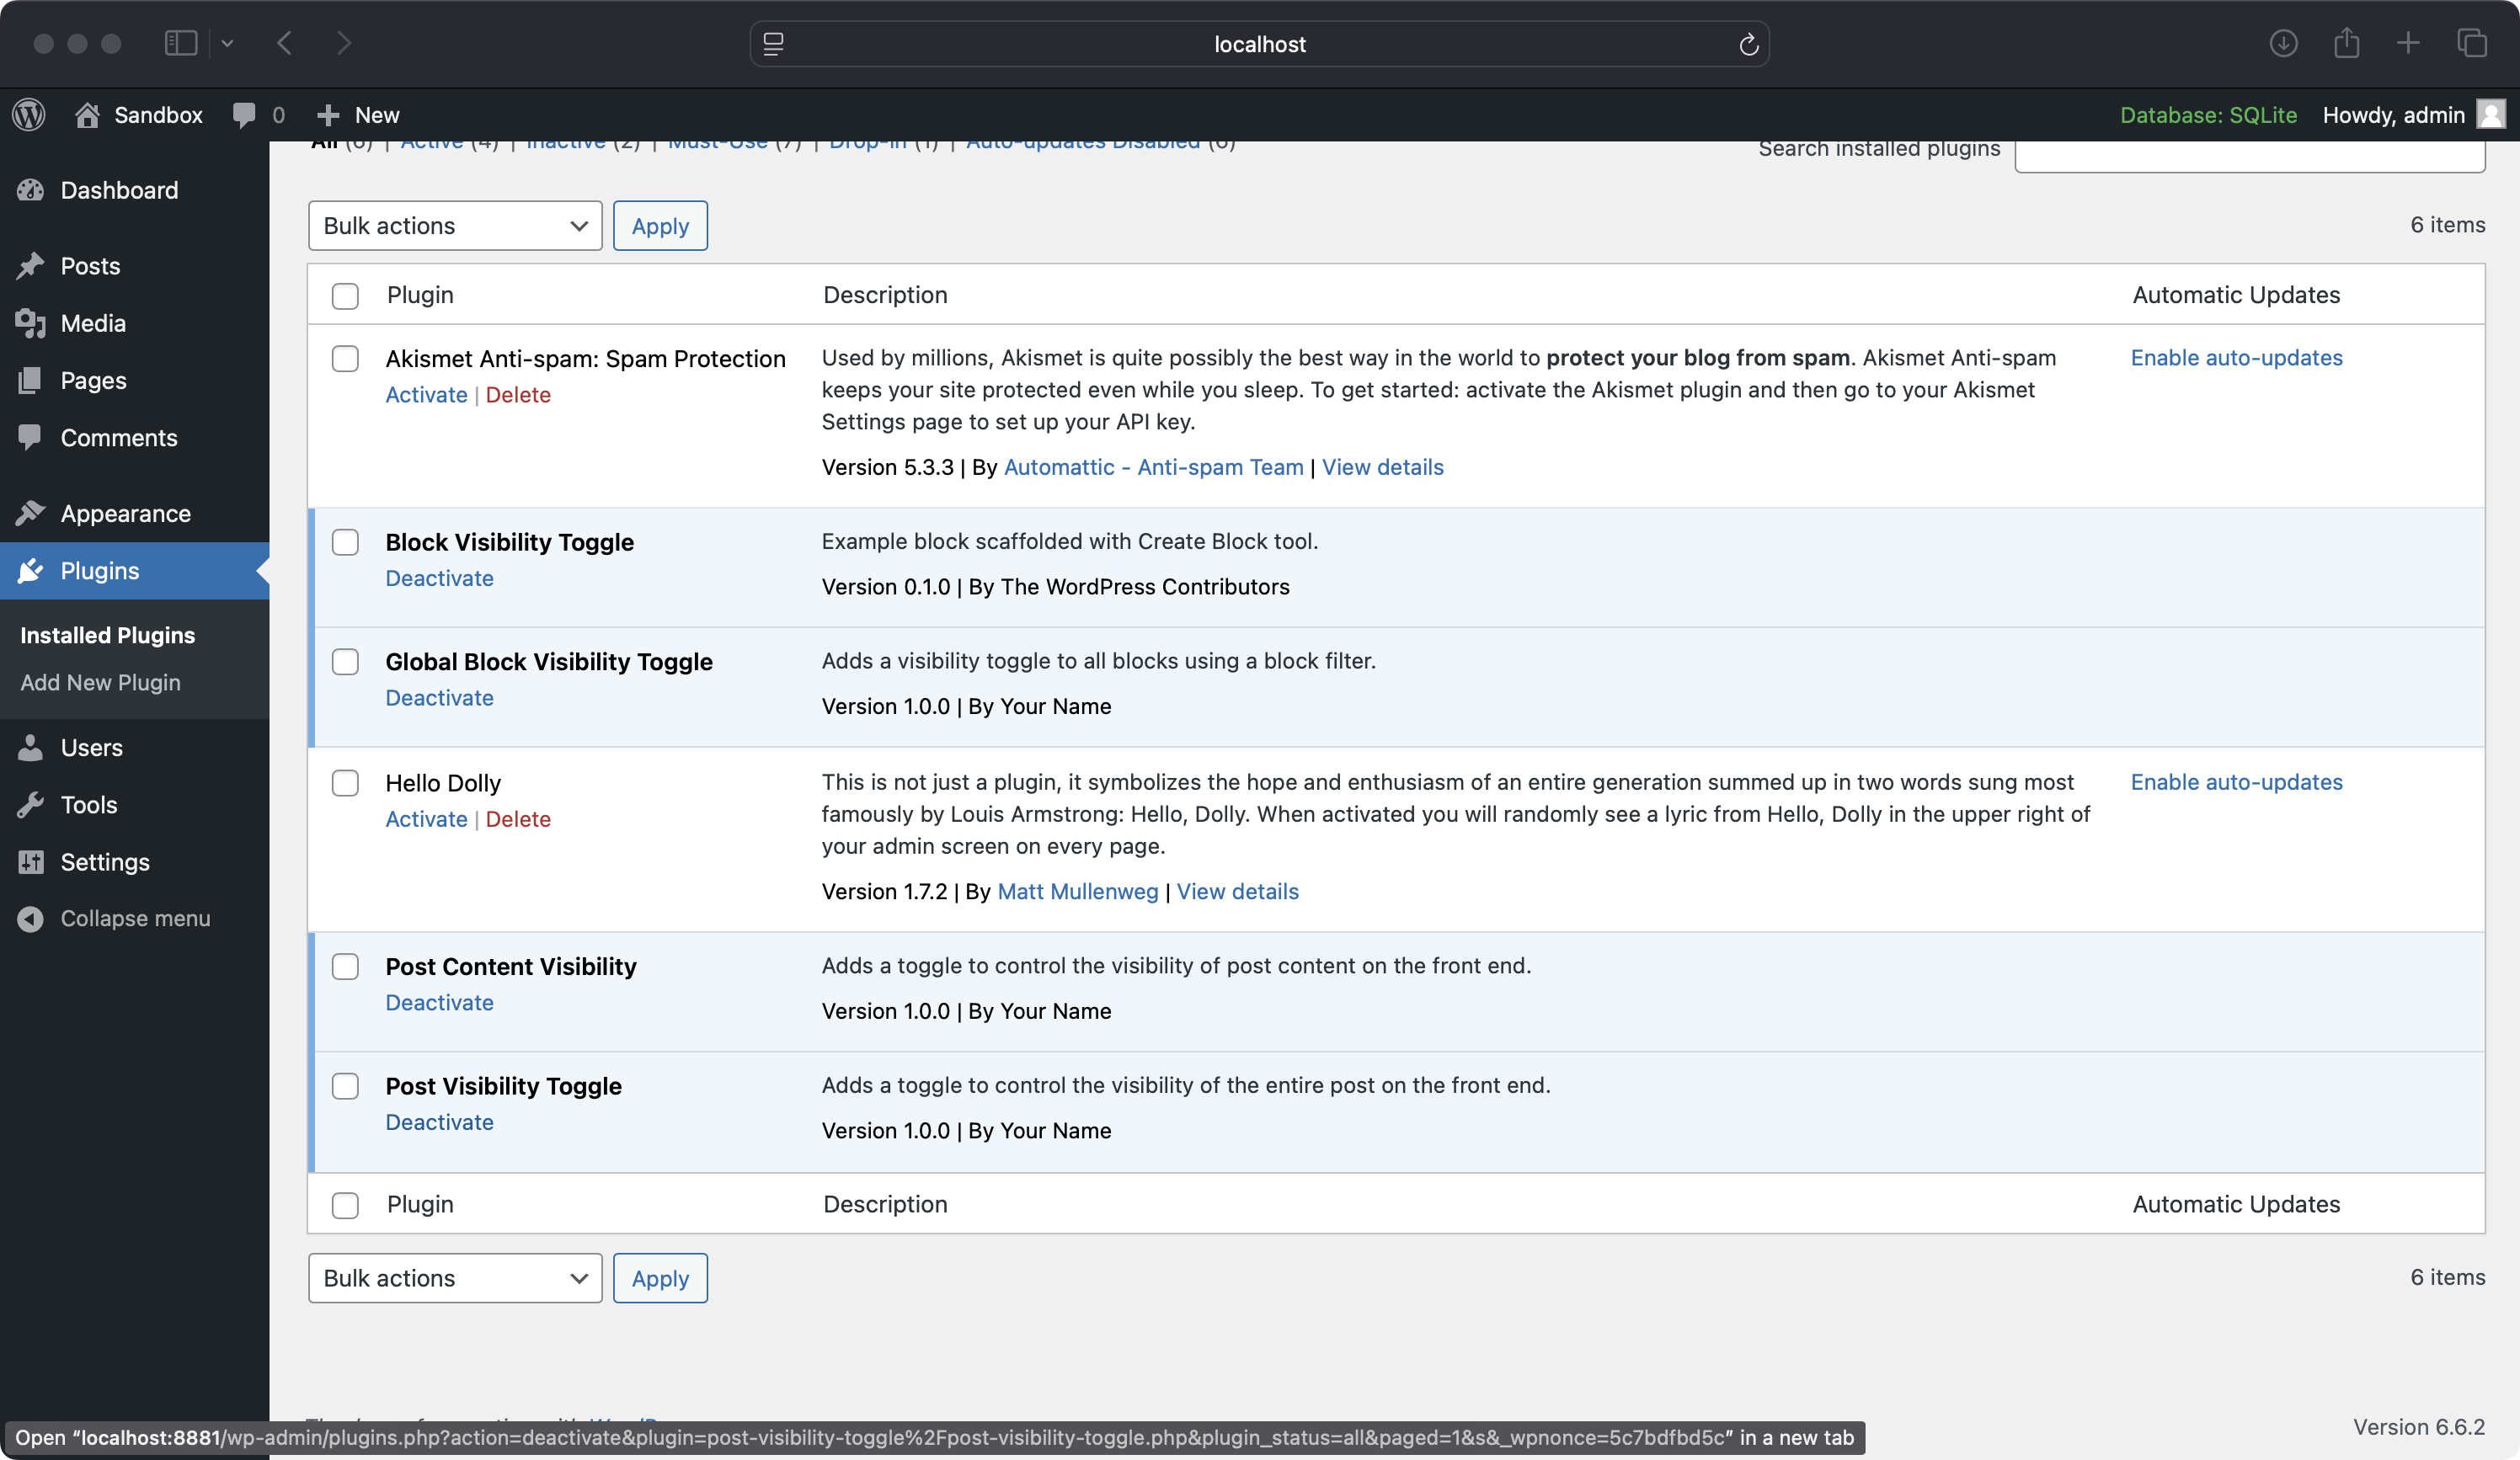
Remember to activate the plugin.
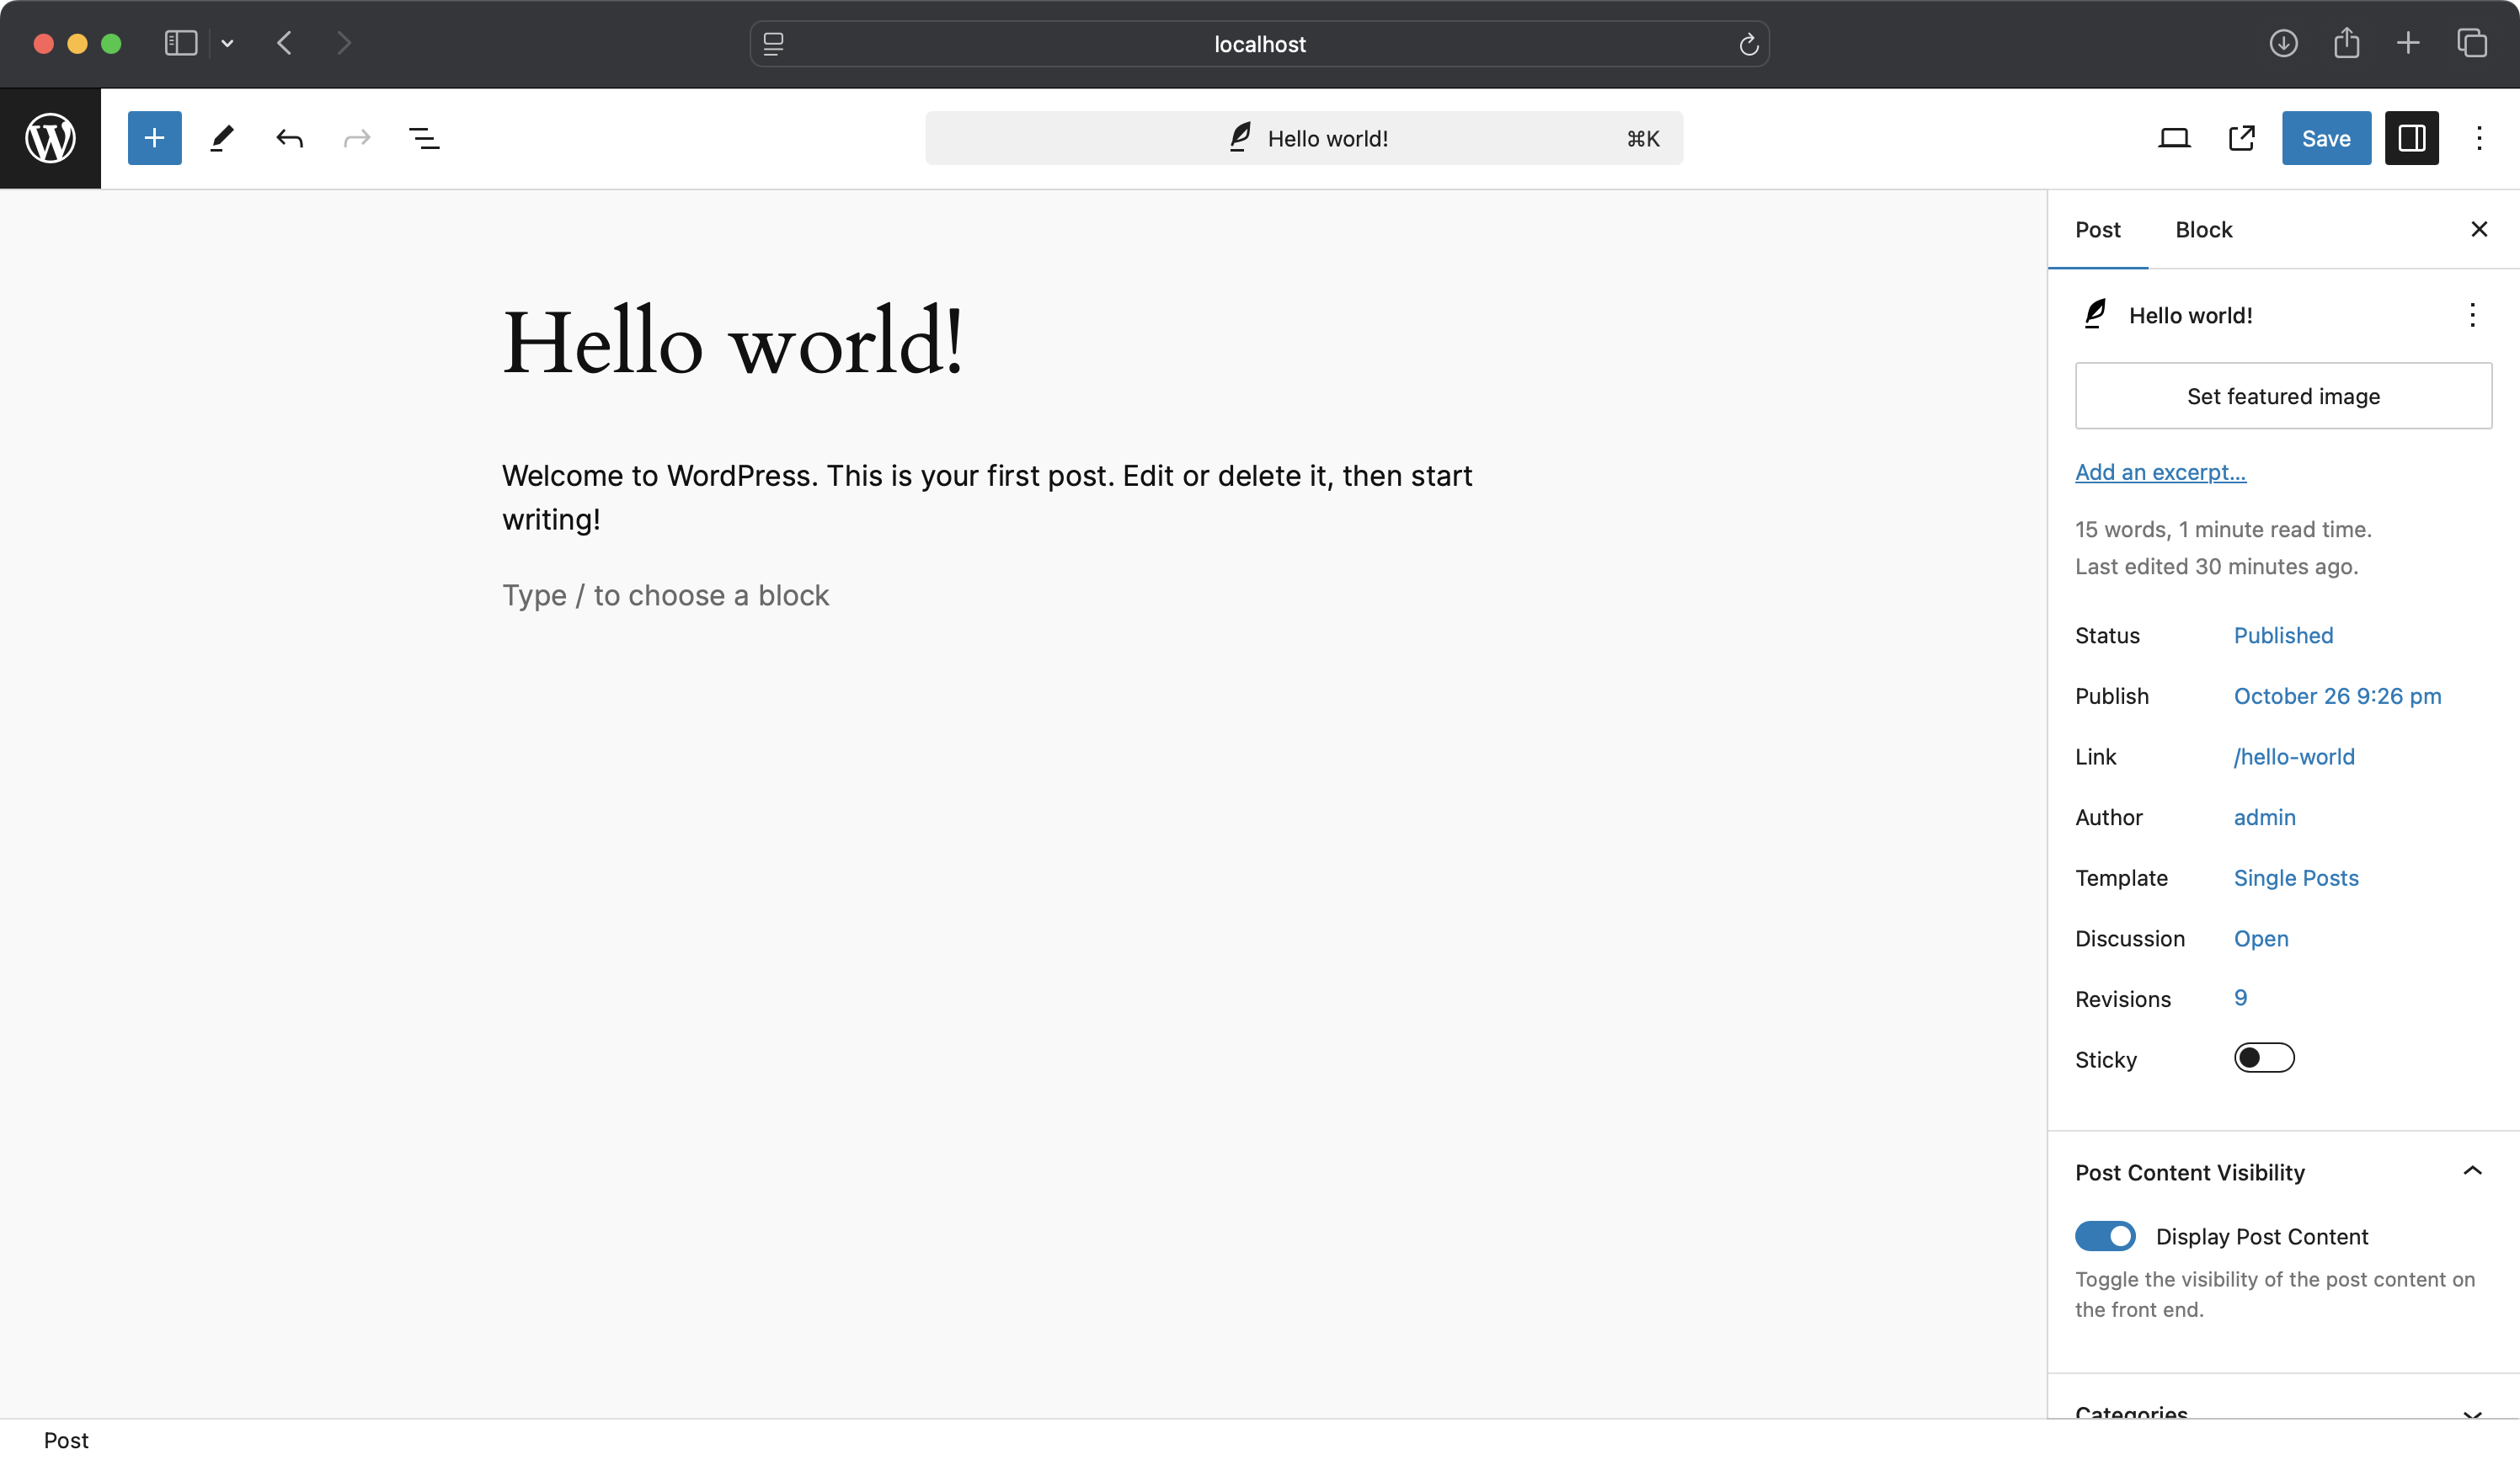
Note that in the post sidebar we now have the Display Post Content toggle.
Switch the toggle and save the post.
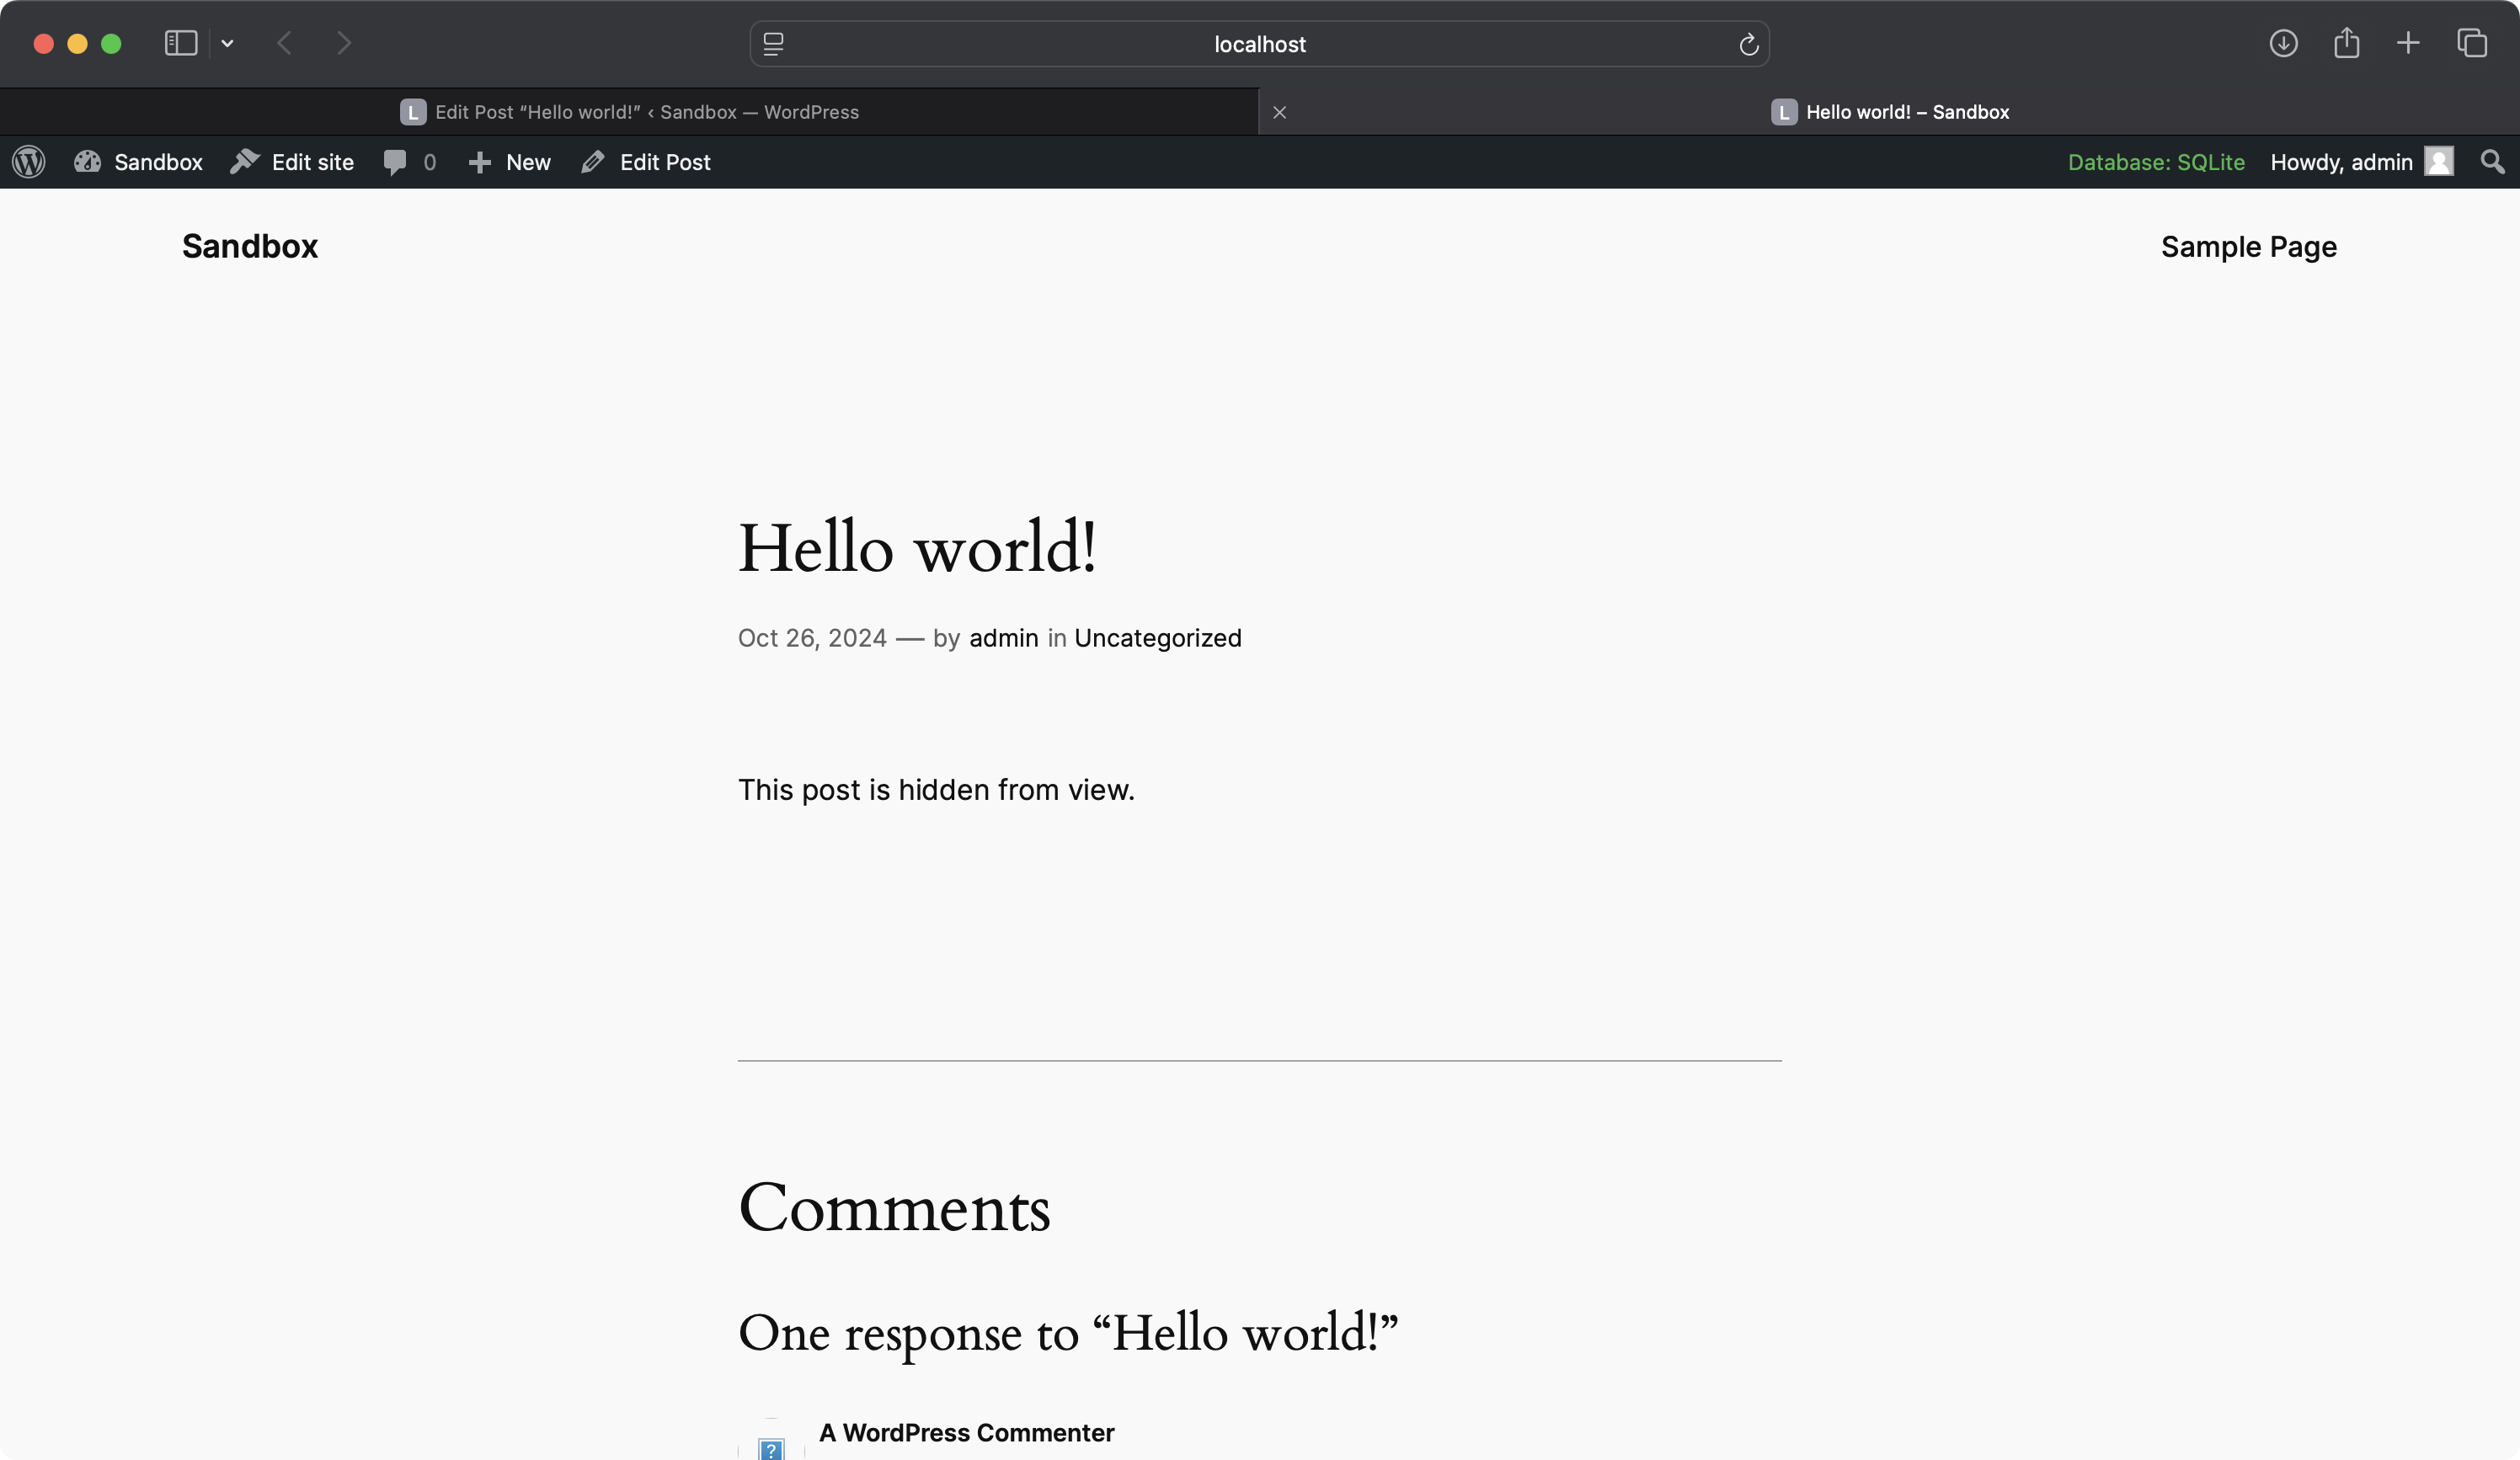
Note that we have now replaced the content of the entire post.
4. Custom Plugin Sidebar: Toggle Entire Post Visibility
Sometimes you might have a plugin that adds many post controls, when this happens it might make sense to put all of these in a custom sidebar so that they are all together, easily identifiable and reduce post sidebar clutter.
In this section, we’ll create a custom plugin sidebar that allows you to toggle the entire post’s visibility. When disabled, the post will not be accessible on the front end, and visitors will see a 404 error.
4.1: Setting Up the Plugin
Create a new plugin folder called post-visibility-toggle in your WordPress wp-content/plugins directory.
Inside this folder, create a src folder for your JavaScript code and a post-visibility-toggle.php file for the plugin’s PHP code.
As per the last couple of examples, we are going to use wp-scripts. In the post-visibility-toggle folder, initialise your package with wp-scripts by creating the following package.json file in the root of the plugin:
{
    "name": "post-visibility-toggle",
    "version": "1.0.0",
    "description": "Toggle the visibility of the entire post from the editor sidebar.",
    "main": "index.js",
    "scripts": {
        "build": "wp-scripts build",
        "start": "wp-scripts start"
    },
    "keywords": [],
    "author": "Your Name",
    "license": "ISC",
    "dependencies": {
        "@wordpress/scripts": "^25.0.0"
    }
}
Now run npm install from inside the post-visibility-toggle folder, and wait for the package to initialise. You can now build and run your JavaScript using npm run build or npm start.
4.2: Registering Post Meta
Open the post-visibility-toggle.php file, make sure the enqueue for the editor and register a post meta field to store the visibility setting:
<?php
/**
 * Plugin Name:       Post Visibility Toggle
 * Description:       Adds a toggle to control the visibility of the entire post on the front end.
 * Version:           1.0.0
 * Author:            Your Name
 * Text Domain:       post-visibility-toggle
 */

function pvt_enqueue_editor_assets() {
    wp_enqueue_script(
        'post-visibility-toggle',
        plugins_url( 'build/index.js', __FILE__ ),
        [ 'wp-plugins', 'wp-edit-post', 'wp-element', 'wp-components', 'wp-data', 'wp-i18n' ],
        '1.0.0',
        true
    );
}
add_action( 'enqueue_block_editor_assets', 'pvt_enqueue_editor_assets' );

function pvt_register_post_meta() {
    register_post_meta( '', 'pvt_display_post', [
        'show_in_rest' => true,
        'single'       => true,
        'type'         => 'boolean',
        'default'      => true,
    ] );
}
add_action( 'init', 'pvt_register_post_meta' );
4.3: Creating the Plugin Sidebar
In src/index.js, create the plugin sidebar with a toggle control:
import { PluginSidebar } from '@wordpress/editor';
import { ToggleControl, PanelBody } from '@wordpress/components';
import { useSelect, useDispatch } from '@wordpress/data';
import { registerPlugin } from '@wordpress/plugins';
import { __ } from '@wordpress/i18n';

const PostVisibilityToggle = () => {
    const { editPost } = useDispatch('core/editor');
    const displayPost = useSelect(
        ( select ) => select( 'core/editor' )?.getEditedPostAttribute( 'meta' )?.['pvt_display_post'],
        []
    );

    return (
        <PluginSidebar
            name="post-visibility-toggle"
            title={ __( 'Post Visibility', 'post-visibility-toggle' ) }
            icon="visibility"
        >
            <PanelBody title={ __('Post Visibility Settings', 'post-visibility-toggle' ) }>
                <ToggleControl
                    label={ __( 'Display Post', 'post-visibility-toggle' ) }
                    checked={ displayPost }
                    onChange={ ( value ) => editPost( { meta: { pvt_display_post: value } } ) }
                    help={ __( 'Toggle the visibility of the entire post on the front end.', 'post-visibility-toggle' ) }
                />
            </PanelBody>
        </PluginSidebar>
    );
};

// Check if we're in the Post Editor before registering the plugin.
if ( window.pagenow !== 'site-editor' ) {
    registerPlugin( 'post-visibility-toggle', {
        render: PostVisibilityToggle,
        icon: 'visibility',
    } );
}
This code creates a sidebar that appears in the editor where you can toggle the entire post’s visibility.
4.4: Redirecting Hidden Posts to 404
In the plugin’s PHP file, we’ll add an action to redirect to a 404 page if the post is hidden:
function pvt_redirect_hidden_posts() {
    if ( is_singular() && !is_admin() ) {
        $display_post = get_post_meta( get_the_ID(), 'pvt_display_post', true );
        if ( ! $display_post ) {
            global $wp_query;
            $wp_query->set_404();
            status_header( 404 );
            nocache_headers();
            include( get_query_template( '404' ) );
            exit;
        }
    }
}
add_action( 'template_redirect', 'pvt_redirect_hidden_posts' );
This function checks if the post should be displayed and, if not, sets a 404 status and loads the 404 template.
4.5: Using the Sidebar
Remember to run npm run build in your block directory and to activate the plugin.
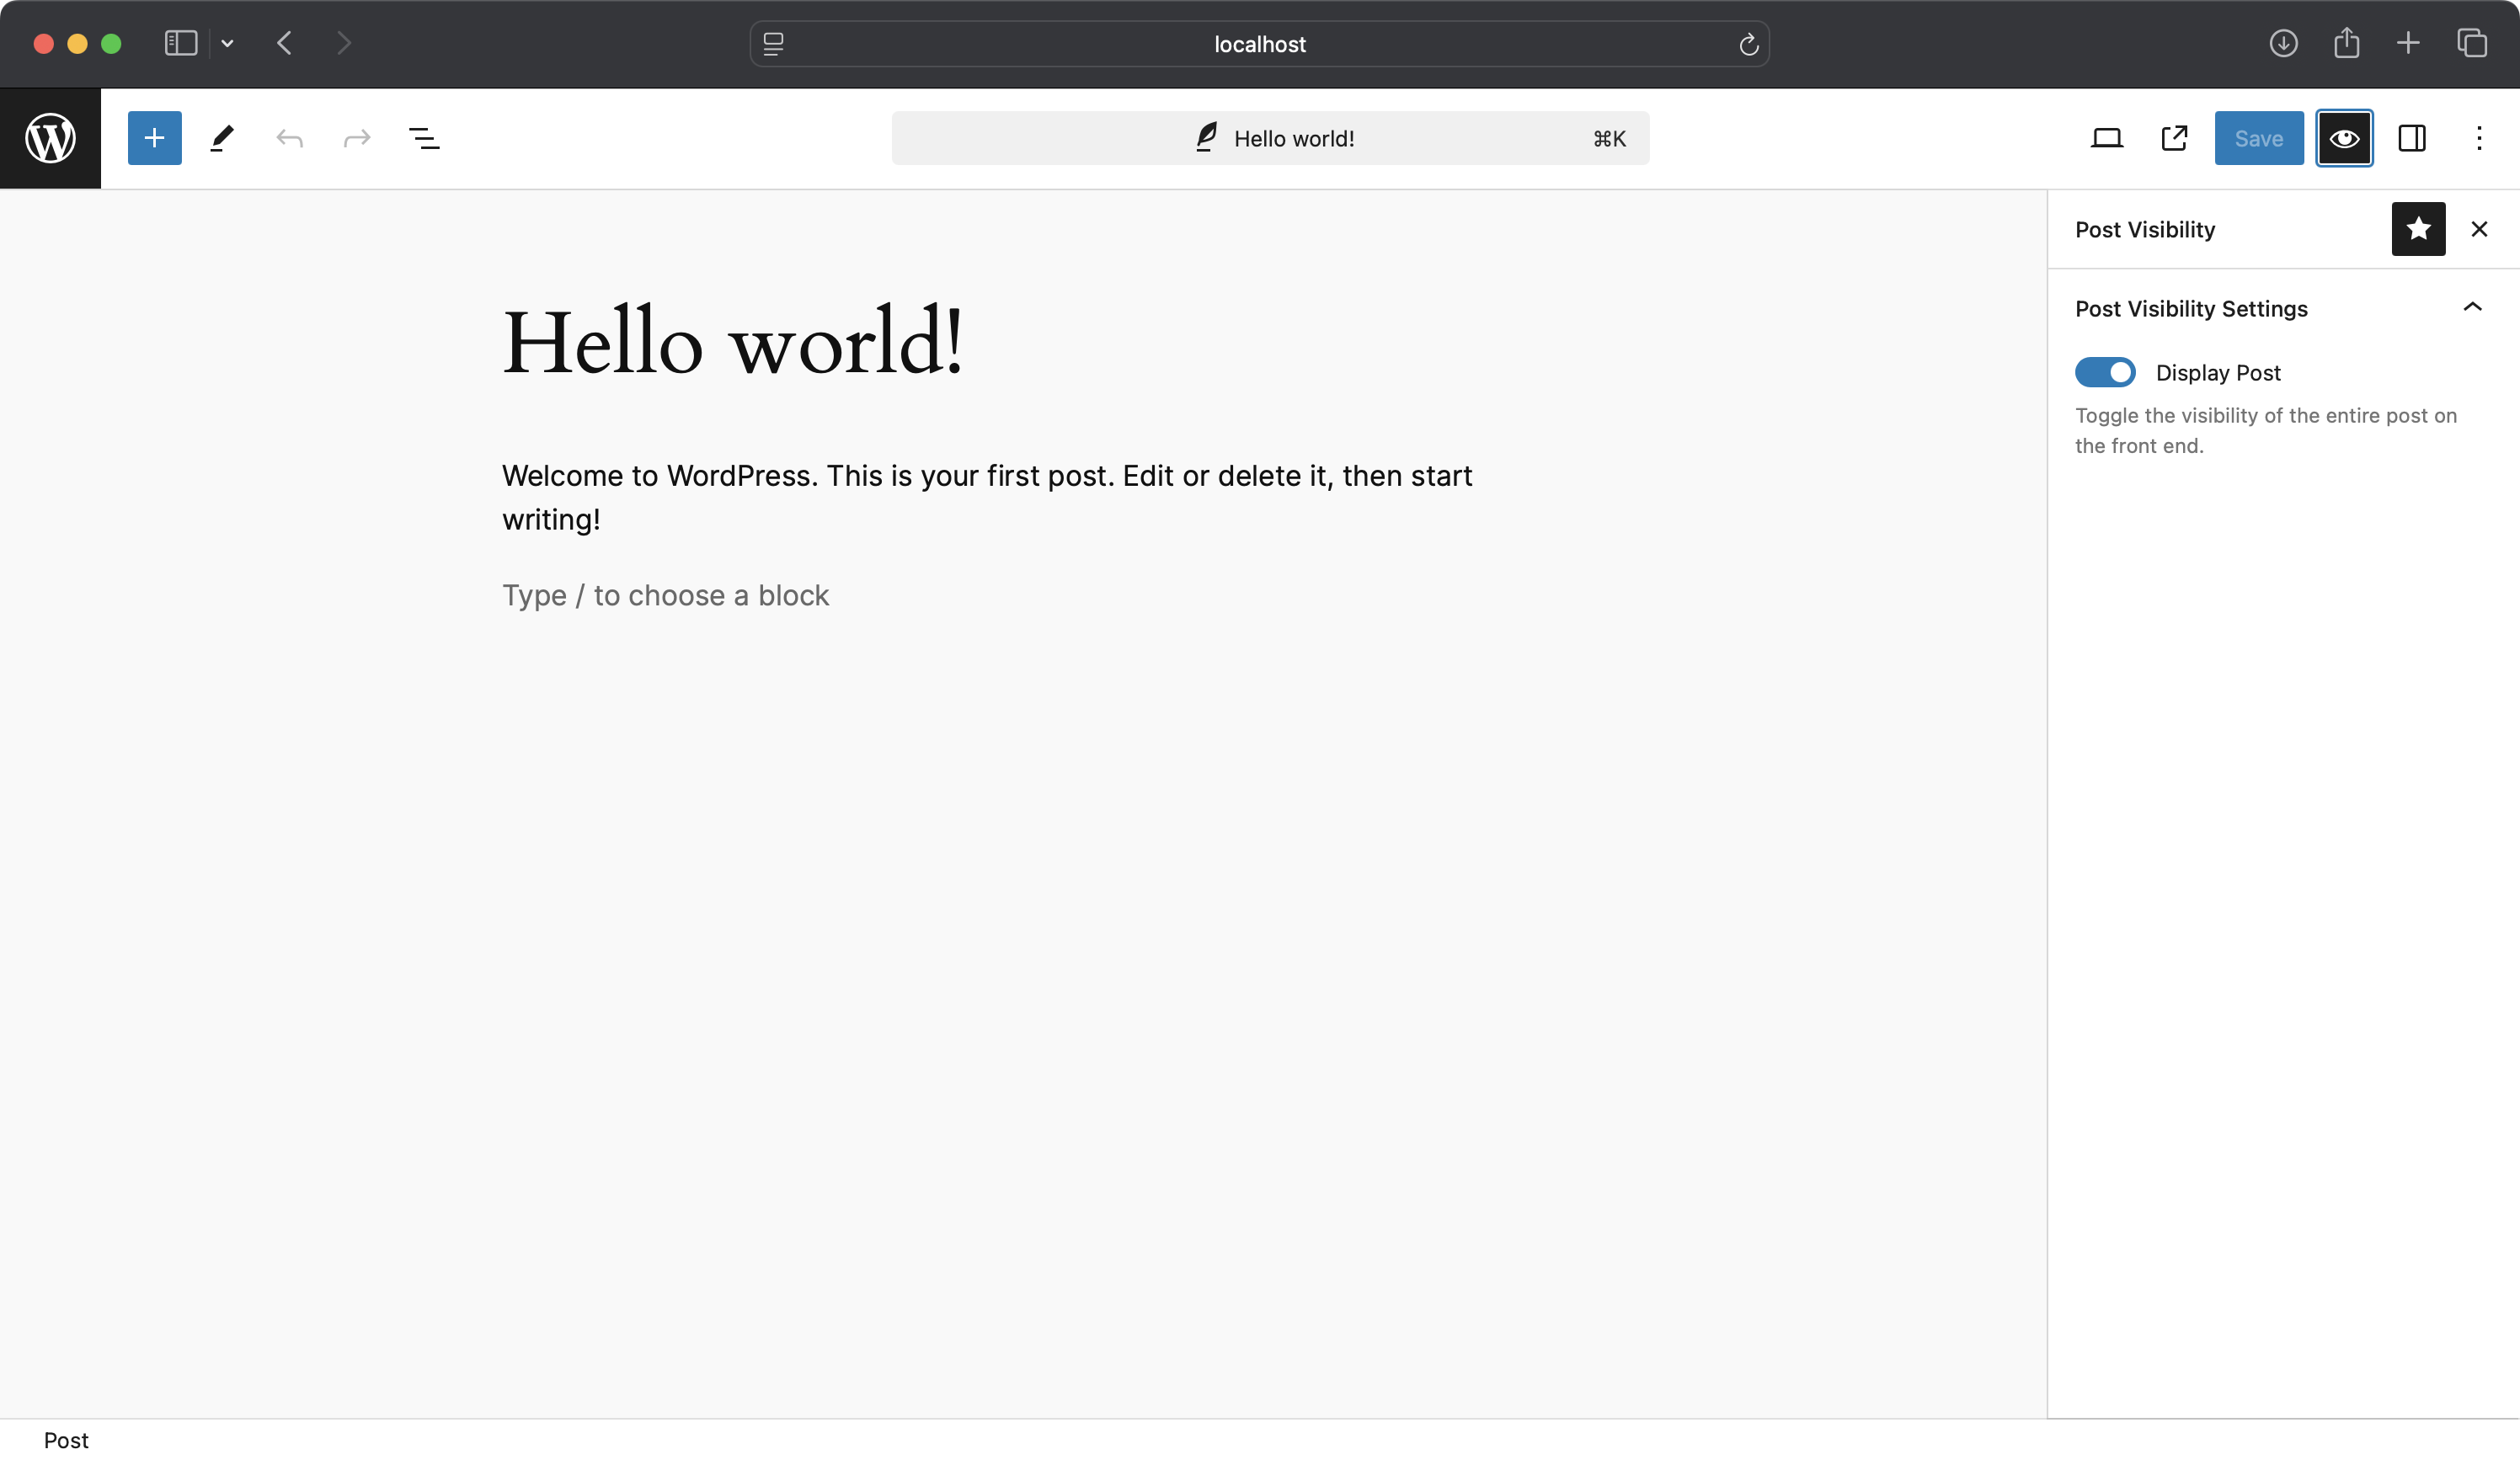
Now you should be able to see your custom Post Visibility sidebar, identified by the “eye” icon. Click the icon and it should open up the sidebar. Once you have done this you should be able to see the controls that you registered for the sidebar.
Be sure to switch the toggle and save the post.
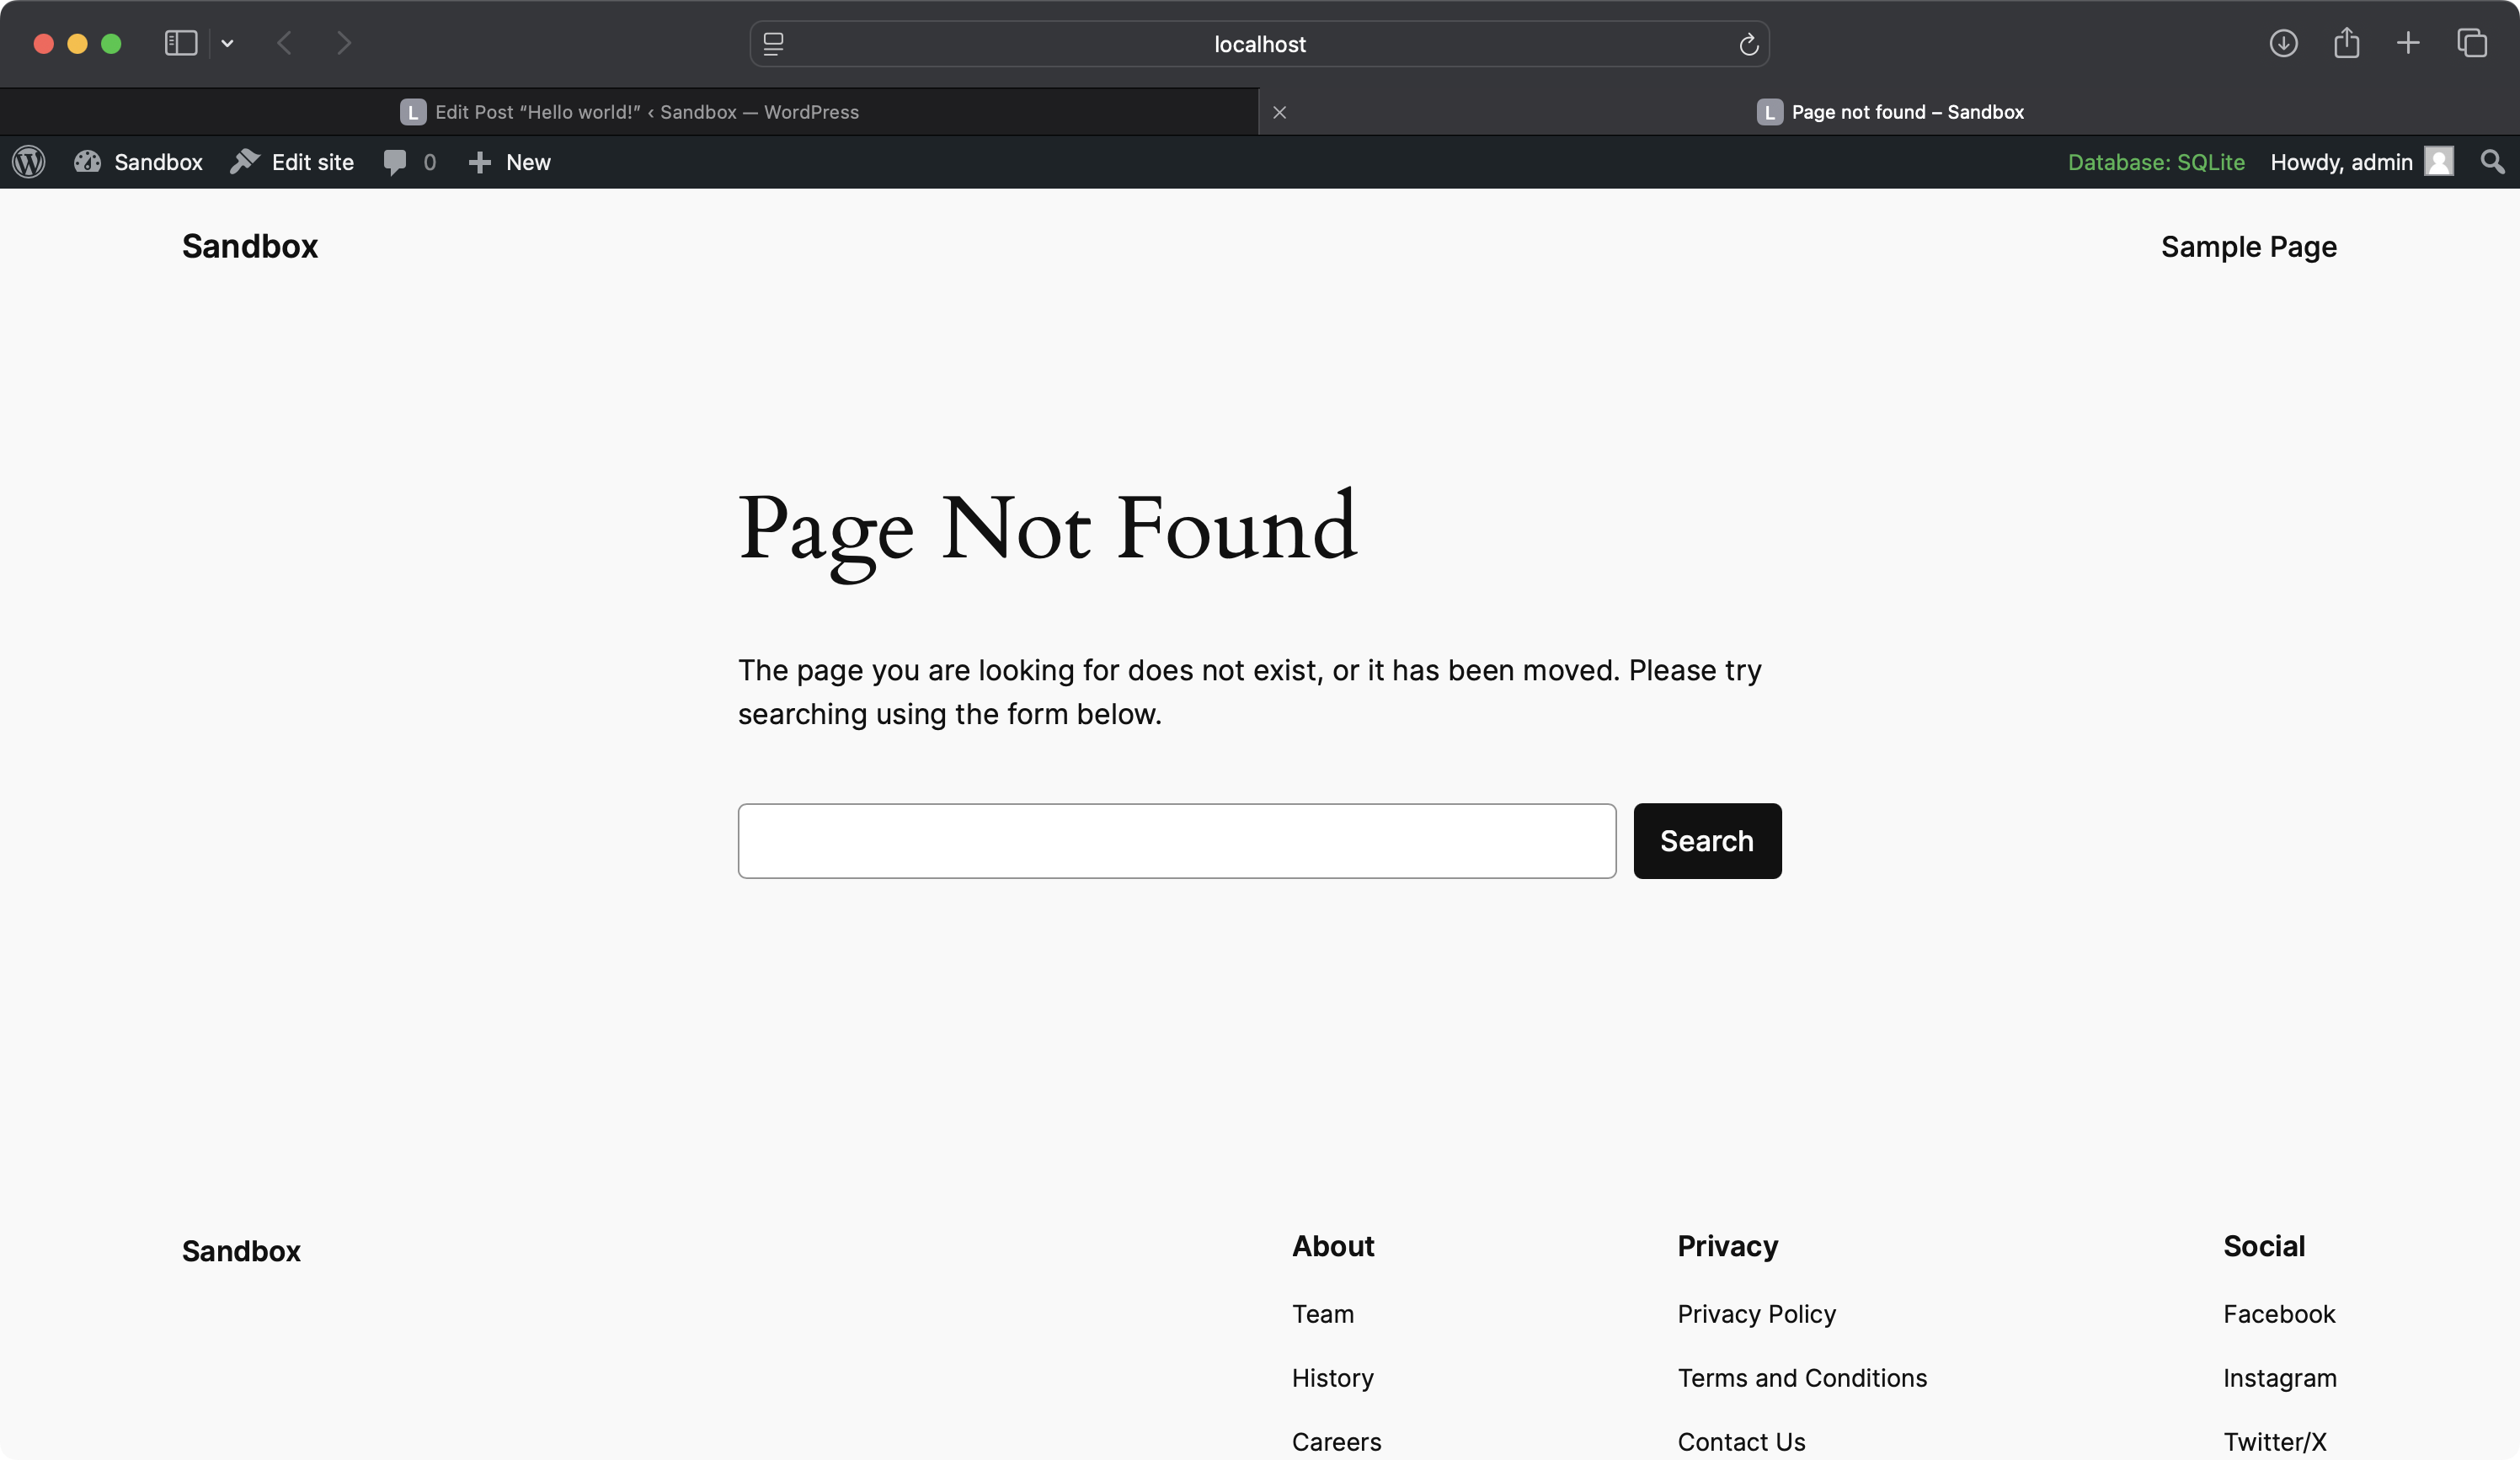
As per the logic we set, this will redirect the post to a 404 page on the front end.
5. Full Site Editor (FSE) Sidebar: Global Settings
We have explored block settings with block sidebars, post settings with post sidebars and custom sidebars. What if we want something that impacts the entire site? Say something that is stored in an option?
To explore this we’ll create a sidebar in the Full Site Editor (FSE) to manage global site-wide settings. This sidebar can control settings that affect the entire website.
In this example, we will prevent the entire site from displaying with a wp_die(). This is absolutely overkill (and you should never do this), but it serves to prove how this kind of sidebar can be used.
5.1: Setting Up the Plugin
Create a new plugin folder called fse-global-settings in your WordPress wp-content/plugins directory.
Inside this folder, create a src folder for your JavaScript code and a fse-global-settings.php file for the plugin’s PHP code.
As per the last few examples, we are going to use wp-scripts. In the fse-global-settings folder, initialise your package with wp-scripts by creating the following package.json file in the root of the plugin:
{
    "name": "fse-global-settings",
    "version": "1.0.0",
    "description": "Adds a custom sidebar to the Full Site Editor for global settings.",
    "main": "index.js",
    "scripts": {
        "build": "wp-scripts build",
        "start": "wp-scripts start"
    },
    "keywords": [],
    "author": "Your Name",
    "license": "ISC",
    "dependencies": {
        "@wordpress/scripts": "^25.0.0"
    }
}
Now run npm install from inside the fse-global-settings folder, and wait for the package to initialise. You can now build and run your JavaScript using npm run build or npm start.
5.2: Enqueueing Scripts and Styles
We need to include our plugin header in the root plugin file.
We’ll also enqueue our JavaScript file that registers the sidebar component. In fse-global-settings.php, add the following code:
<?php
/**
 * Plugin Name: FSE Global Settings
 * Description: Adds a custom sidebar to the Full Site Editor for global settings.
 * Version: 1.0.0
 * Author: Your Name
 * Text Domain: fse-global-settings
 */

function fse_gs_enqueue_assets() {
    wp_enqueue_script(
        'fse-gs-editor-script',
        plugins_url( 'build/index.js', __FILE__ ),
        [ 'wp-edit-site', 'wp-plugins', 'wp-element', 'wp-data', 'wp-components', 'wp-i18n' ],
        filemtime( plugin_dir_path( __FILE__ ) . 'build/index.js' )
    );
}
add_action( 'enqueue_block_editor_assets', 'fse_gs_enqueue_assets' );
5.3: Creating the Sidebar Component
Now, we’ll add the code for the sidebar. In src/index.js, add the following:
import { registerPlugin } from '@wordpress/plugins';
import { PluginSidebar } from '@wordpress/edit-site';
import { PanelBody, ToggleControl } from '@wordpress/components';
import { useSelect, useDispatch } from '@wordpress/data';
import { __ } from '@wordpress/i18n';

const GlobalSettingsSidebar = () => {
    const { editEntityRecord } = useDispatch( 'core' );
    const globalVisibility = useSelect( ( select ) => {
        const settings = select('core').getEntityRecord( 'root', '__experimentalSite' );
        return settings ? settings.global_visibility : true;
    }, []);

    const onChange = (value) => {
        editEntityRecord( 'root', '__experimentalSite', undefined, { global_visibility: value } );
    };

    return (
        <PluginSidebar
            name="fse-global-settings"
            title={ __( 'Global Settings', 'fse-global-settings' ) }
            icon="admin-site"
        >
            <PanelBody title={ __( 'Site-Wide Settings', 'fse-global-settings' ) }>
                <ToggleControl
                    label={ __('Enable Global Content Visibility', 'fse-global-settings' ) }
                    checked={ globalVisibility }
                    onChange={ onChange }
                    help={ __( 'Toggle global visibility settings for the site.', 'fse-global-settings' ) }
                />
            </PanelBody>
        </PluginSidebar>
    );
};

// Check if we're in the Site Editor before registering the plugin.
if ( window.pagenow === 'site-editor' ) {
    registerPlugin( 'fse-global-settings', {
        render: GlobalSettingsSidebar,
    } );
}
5.4: Registering Global Settings
We need to register the global_visibility setting so it can be saved and retrieved. In fse-global-settings.php, add:
function fse_gs_register_settings() {
    register_setting( 'general', 'global_visibility', [
        'type'         => 'boolean',
        'default'      => true,
        'show_in_rest' => true,
    ] );
}
add_action( 'init', 'fse_gs_register_settings' );
5.5: Applying Global Settings on the Front End
Finally, we’ll check the global_visibility setting when rendering the site. In your theme’s functions.php or within the plugin, add:
function fse_gs_check_global_visibility() {
    $global_visibility = get_option( 'global_visibility', true );
    if ( ! $global_visibility ) {
        // Redirect to maintenance page or display a message.
        wp_die( __( 'The site is currently not visible.', 'fse-global-settings' ) );
    }
}
add_action( 'template_redirect', 'fse_gs_check_global_visibility' );
This function checks the global_visibility option and, if set to false, prevents the site from displaying.
5.6: Using the Sidebar
Remember to run npm run build in your block directory and to activate the plugin.
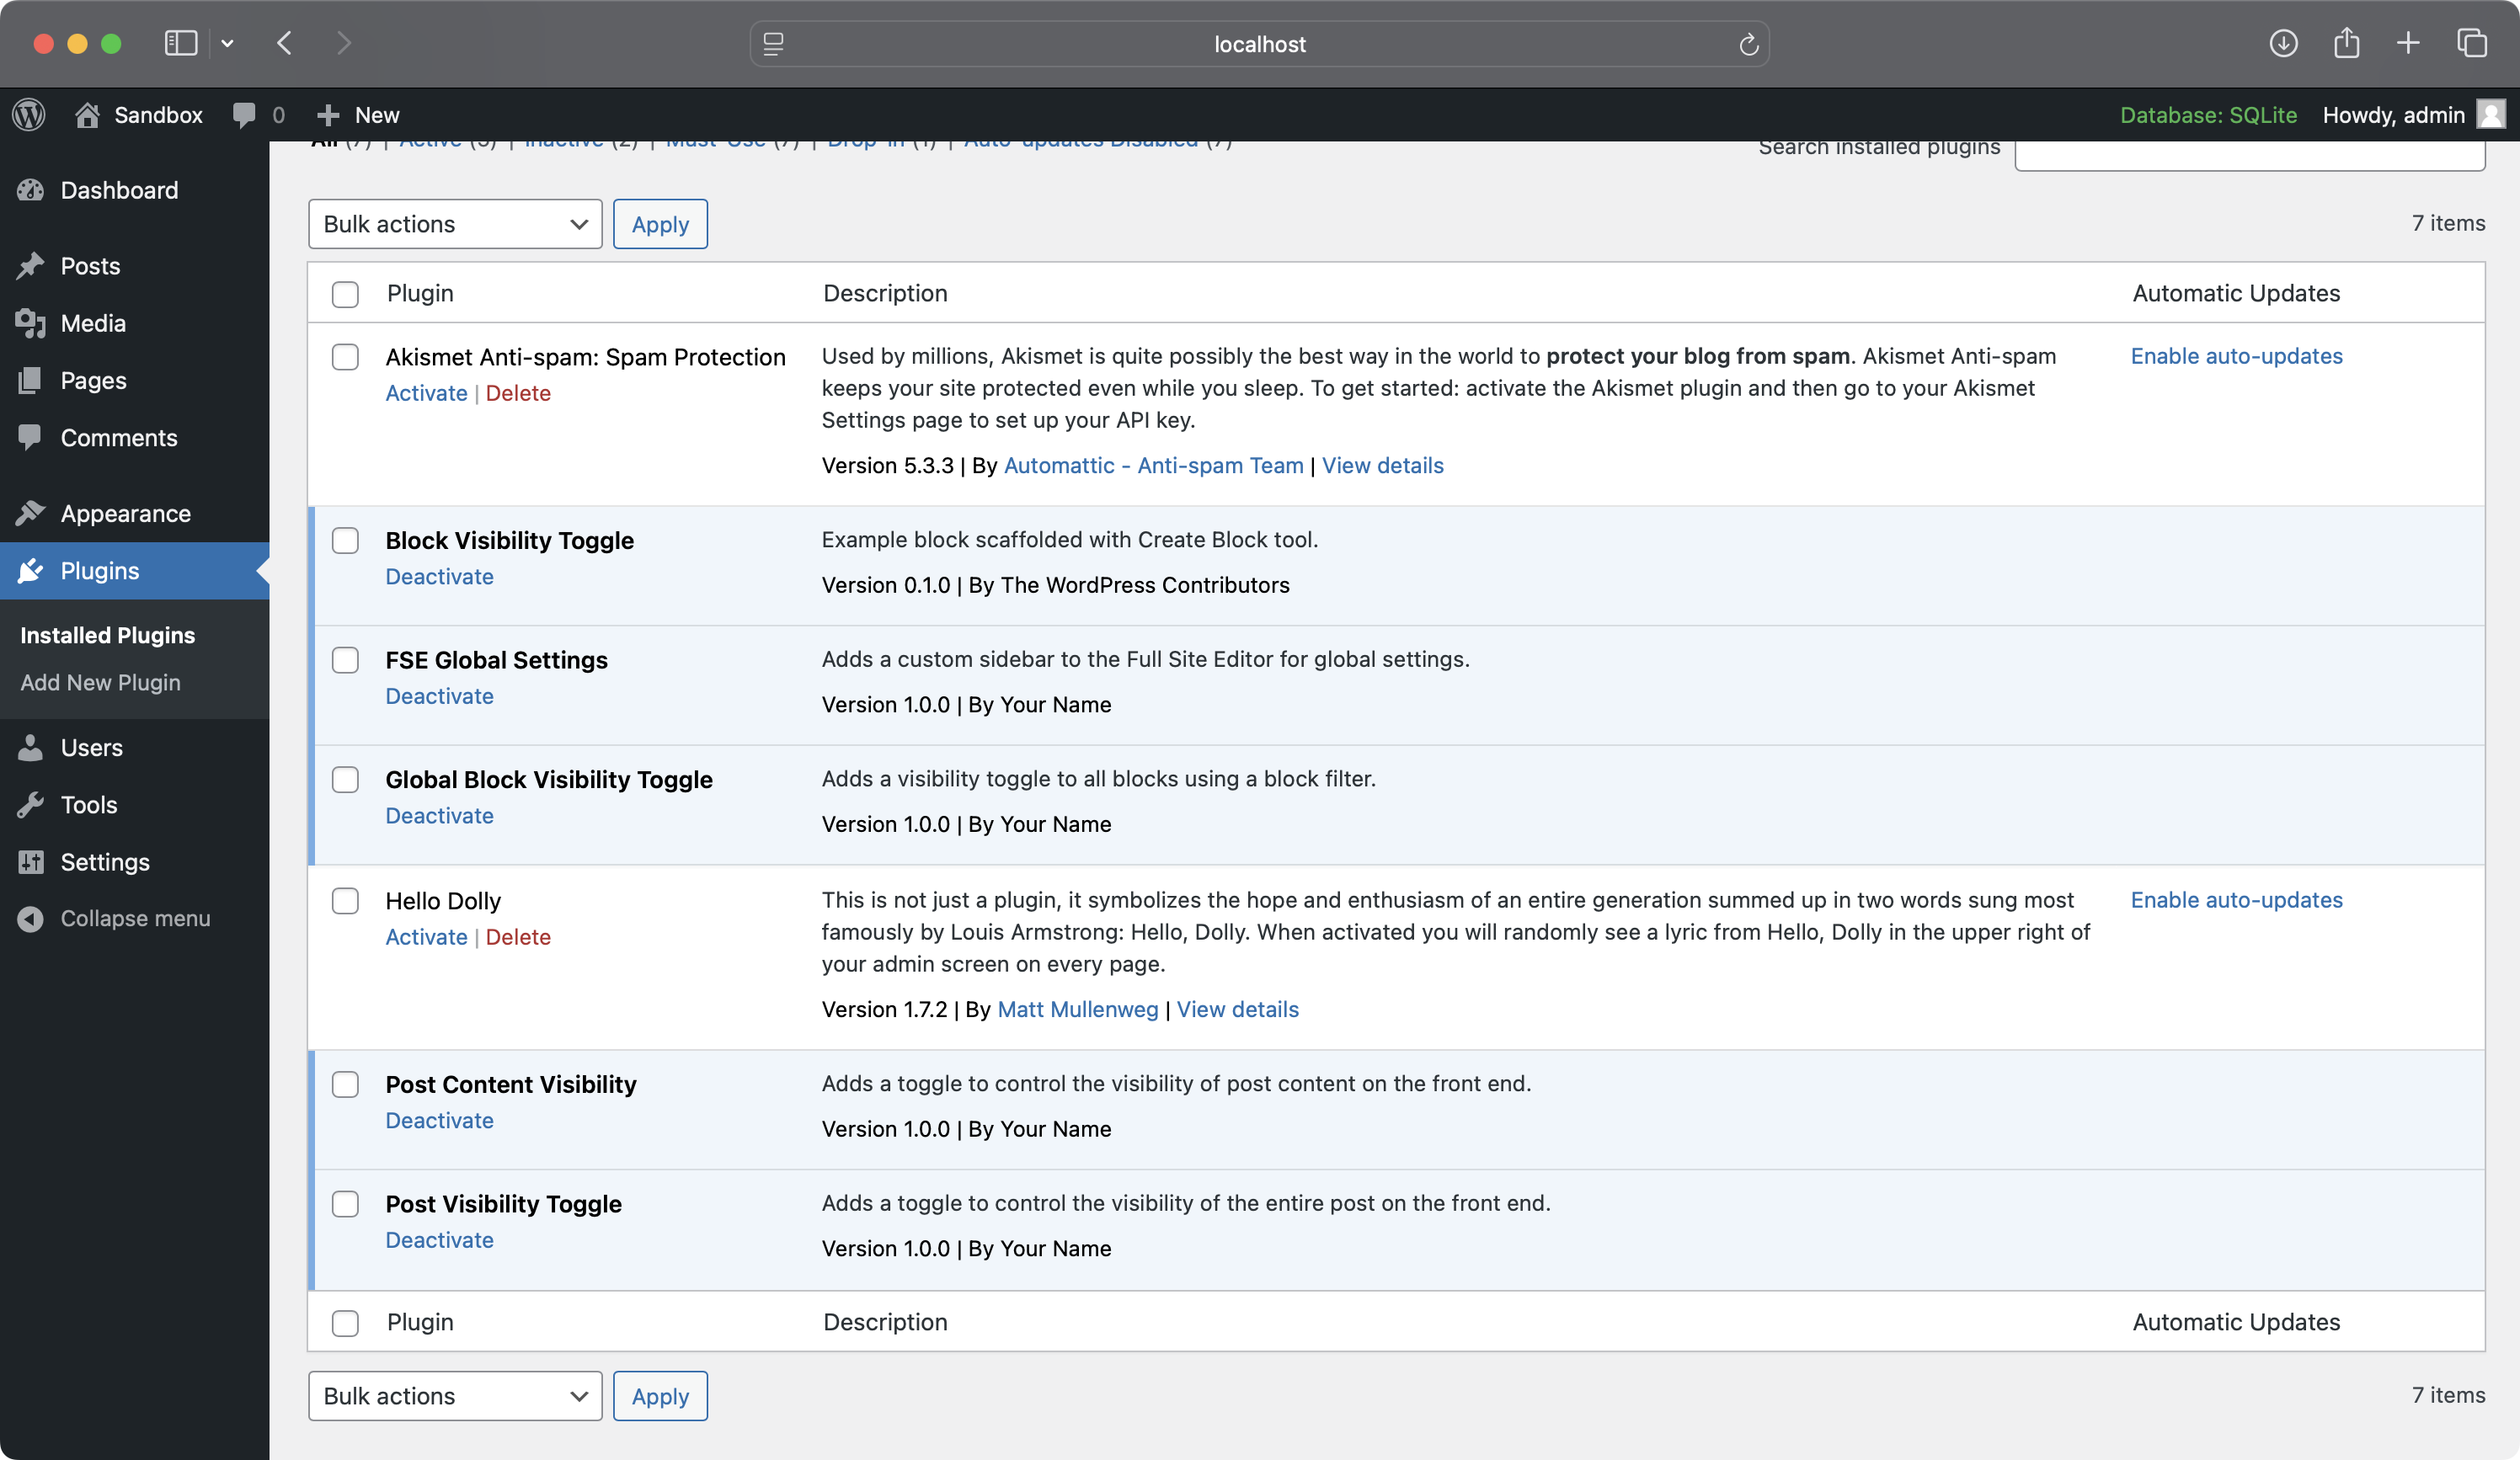
Now, when you edit a template in the Full Site Editor, you will see the “globe” icon. Clicking on this icon will open the sidebar we just created.
Again, the control we added to the sidebar is visible. Toggle this and save the sidebar.
You will likely then be prompted by another confirmation sidebar, save the setting here too.
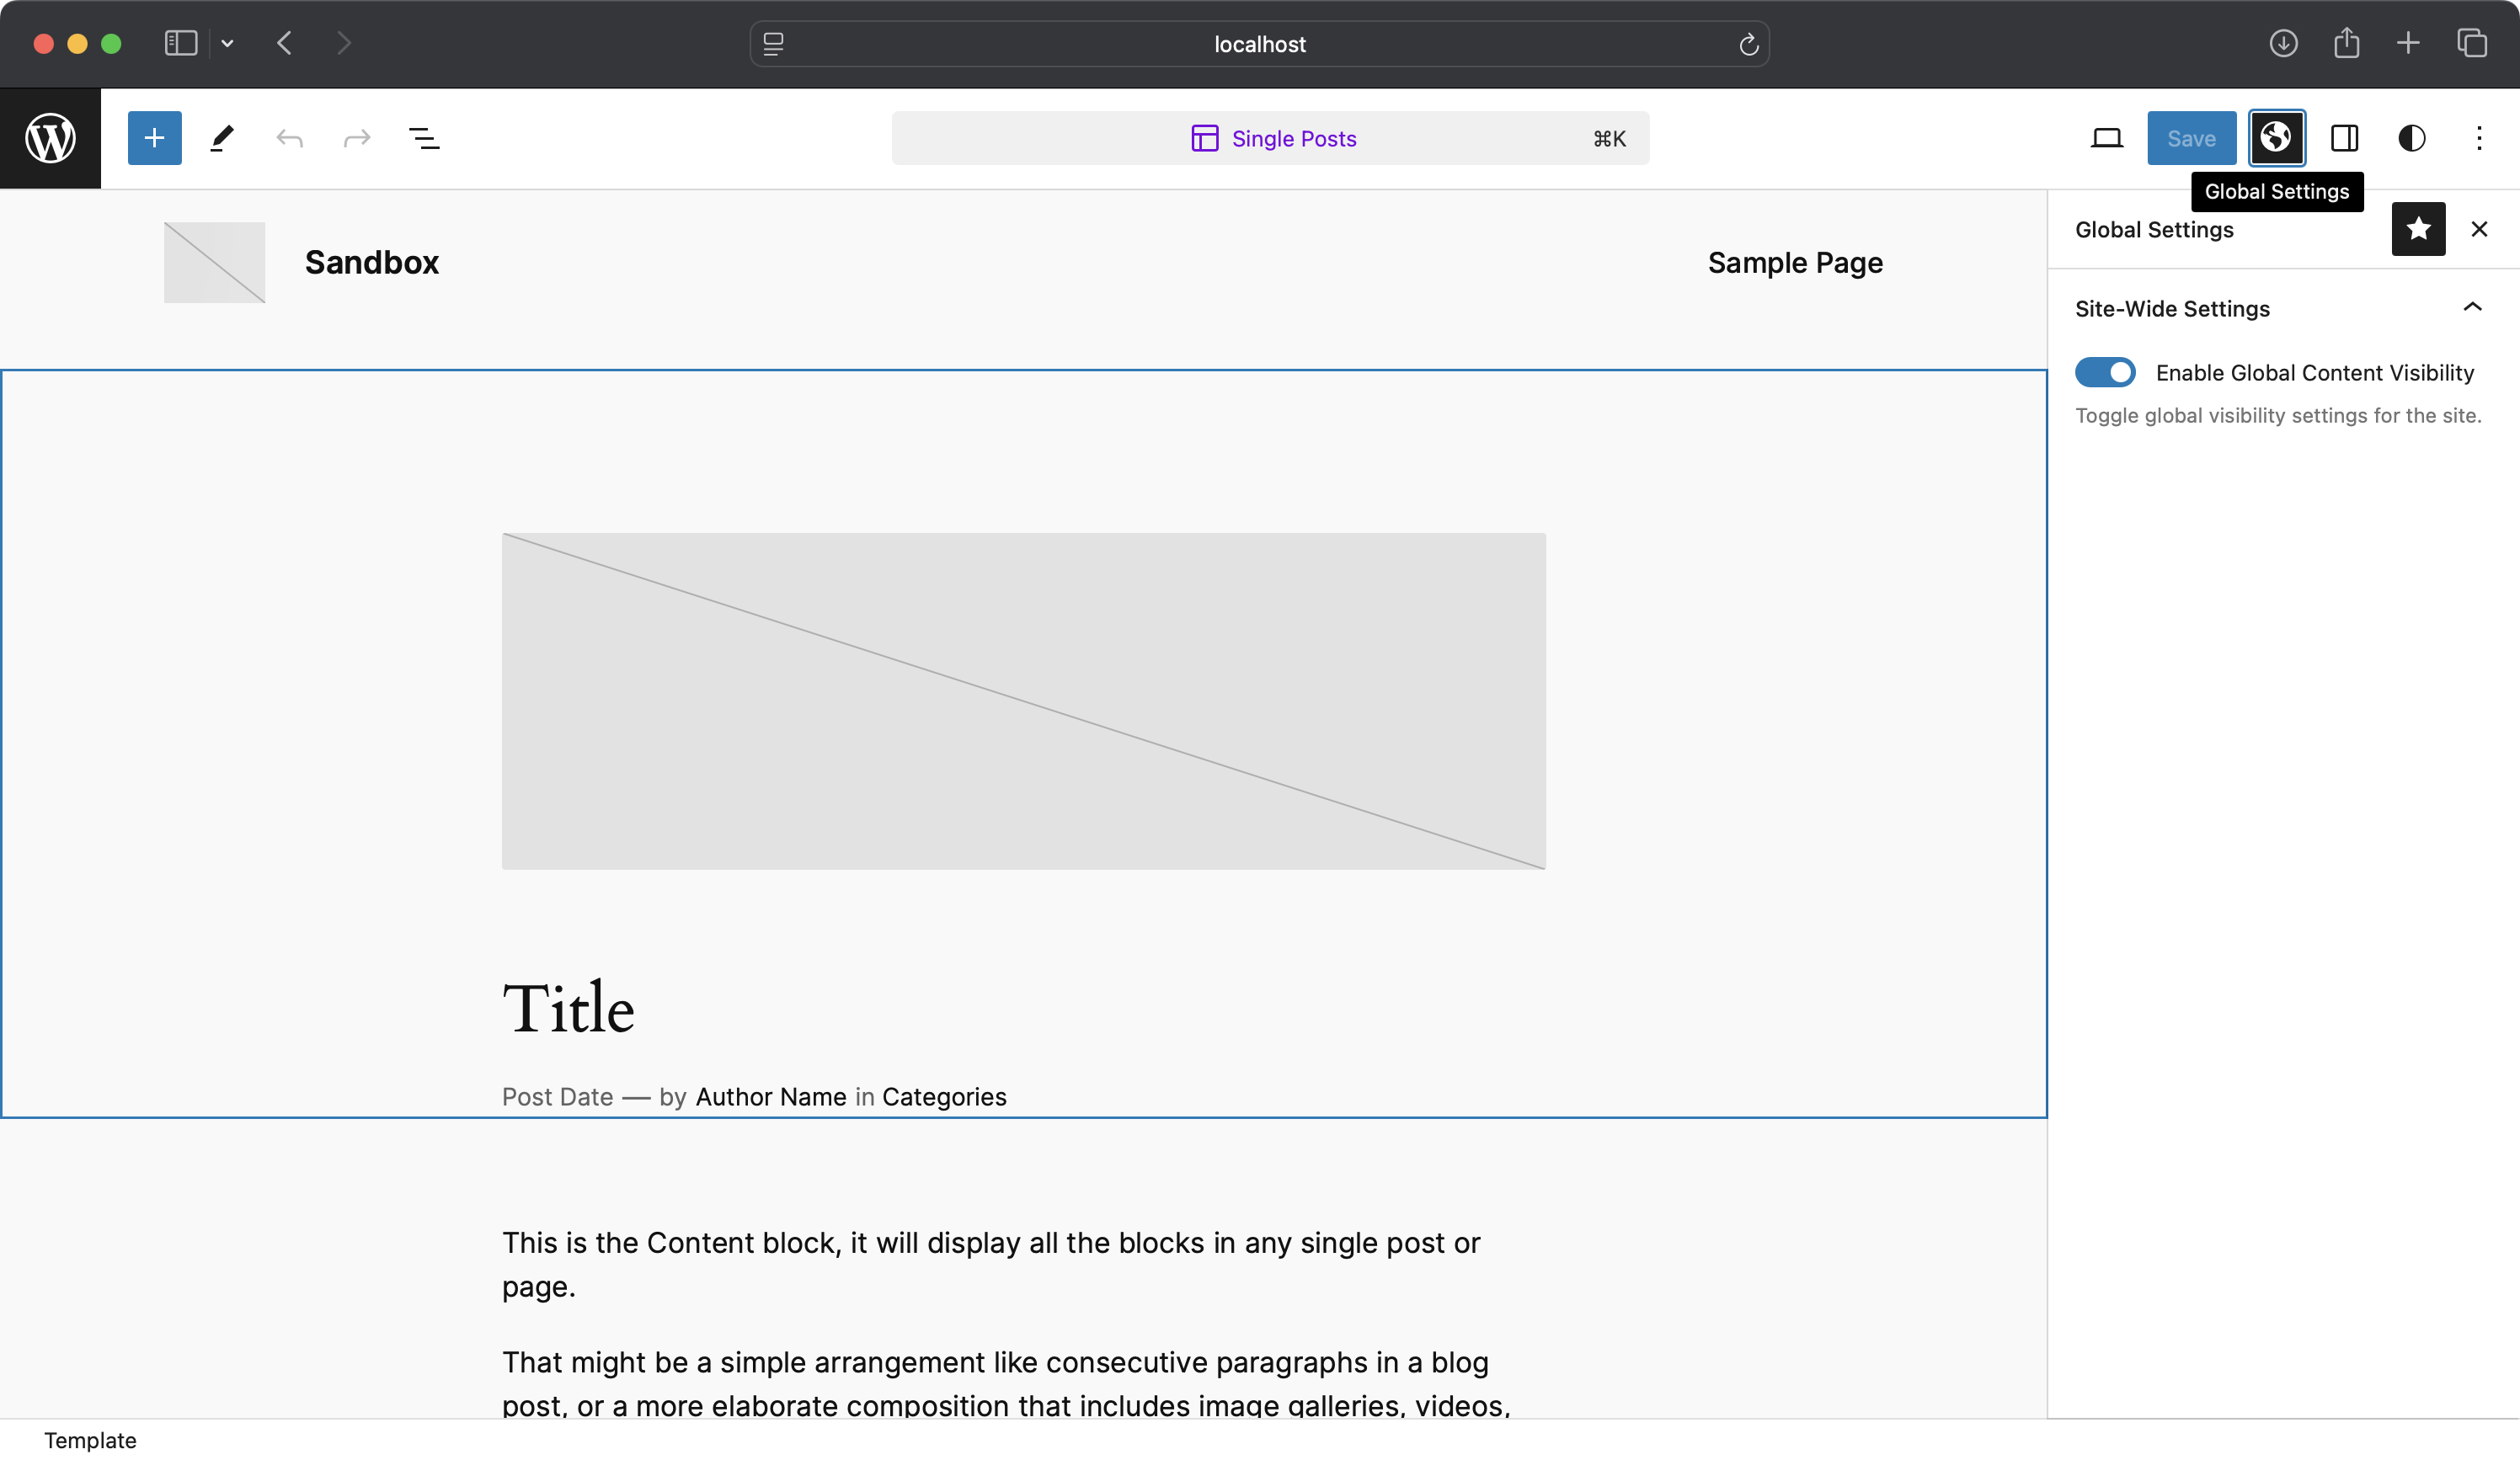
As per our logic, we get a side wide message, preventing us from loading the site.
Conclusion
You’ve learned how to create four distinct types of sidebars in WordPress: block-level controls, post-specific options, a custom plugin sidebar, and a Full Site Editor sidebar. Each of these sidebars provides specialized content control options, enhancing both the editing experience and the front-end behavior of your site.
We also explored how to use block filters to add features to all blocks, and discussed when @wordpress/create-block is suitable for plugin creation and when manual @wordpress/scripts is more appropriate.
If you have any questions, please drop them below in the comments.
Subscribe to my newsletter
Read articles from Matt Watson directly inside your inbox. Subscribe to the newsletter, and don't miss out.
Written by

Matt Watson
Matt Watson
Hello there! I’m Matt Watson — a developer, father, and husband, remotely coding from the charming landscapes of Yorkshire, UK. I’ve been crafting wonderful things with WordPress since 2006 and spinning webs (the good kind) since 1996 — yes, I survived the dial-up era! Solving (and occasionally committing) WordPress-based crimes, I juggle code by day and dad jokes by night. Remote worker since 2014, I’ve mastered the art of debugging in my slippers while keeping the coffee industry in business.