Automating Storage Optimization: Setting Up Amazon S3 with Lifecycle Management for Storage Class Transitions and Auto Deletion
 Celestina Odili
Overview of S3
Amazon Simple Storage Service (Amazon S3) is an object storage service from AWS designed for scalability, data durability and availability, security, and performance. It’s commonly used for storing and retrieving large volumes of data both structured and unstructured.
Amazon S3 is highly versatile, making it suitable for backup storage, application hosting, data lake creation, media distribution, and more. Its flexible features allow organizations to optimize for cost, durability, and data security, making it one of the most popular cloud storage solutions available.
Here is a step-by-step guide to creating an Amazon S3 bucket, uploading files, and setting up lifecycle management to transition objects between storage classes and delete objects after a specified period of time.
Step 1: Create an S3 Bucket
Open the Amazon S3 Console:
Sign in to your AWS Management Console and
Search for and select S3 in the search bar.

Create a New S3 Bucket:
Click Create bucket.

Bucket name: Enter a globally unique name for your bucket.
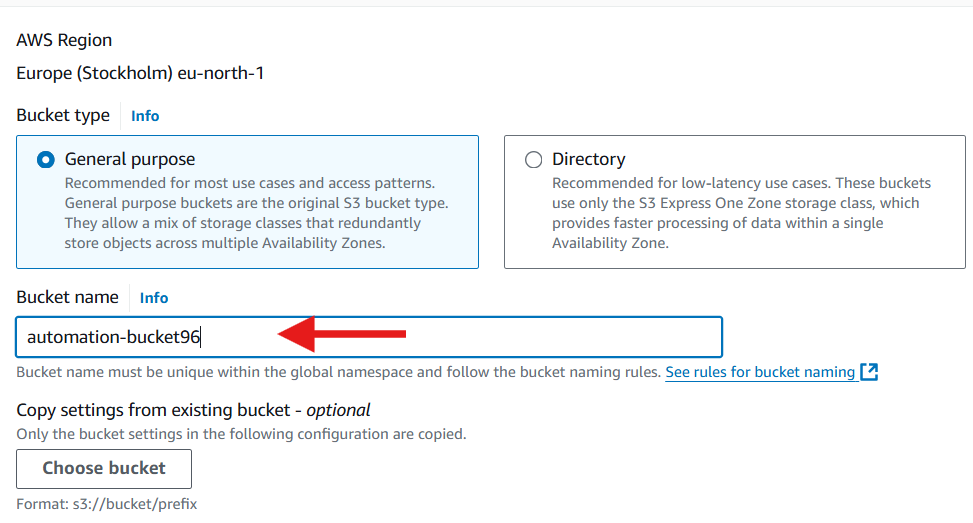
Leave every other option at default
Click Create bucket.

Step 2: Upload Files to the Bucket
Open the bucket you just created by clicking on its name in the bucket session of the S3 console.
Click Upload and Add file(s) or folder to upload to the bucket.
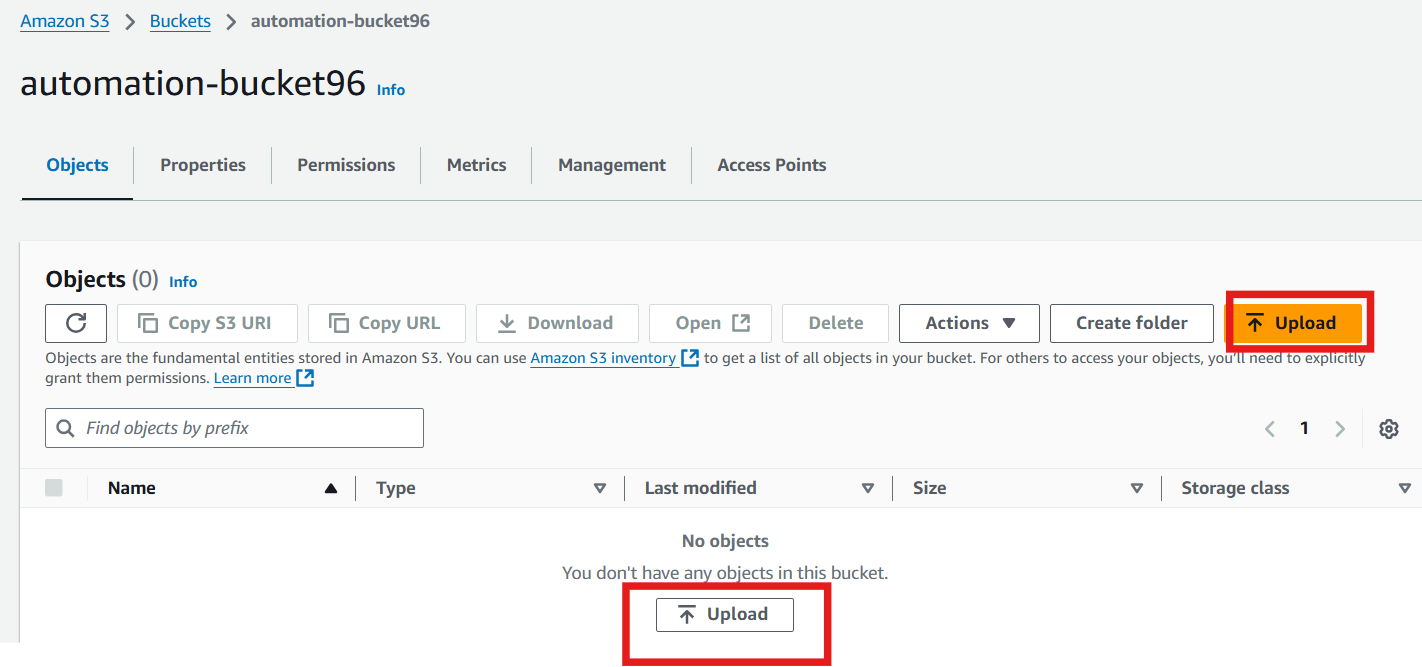
Scroll down
Click Upload.
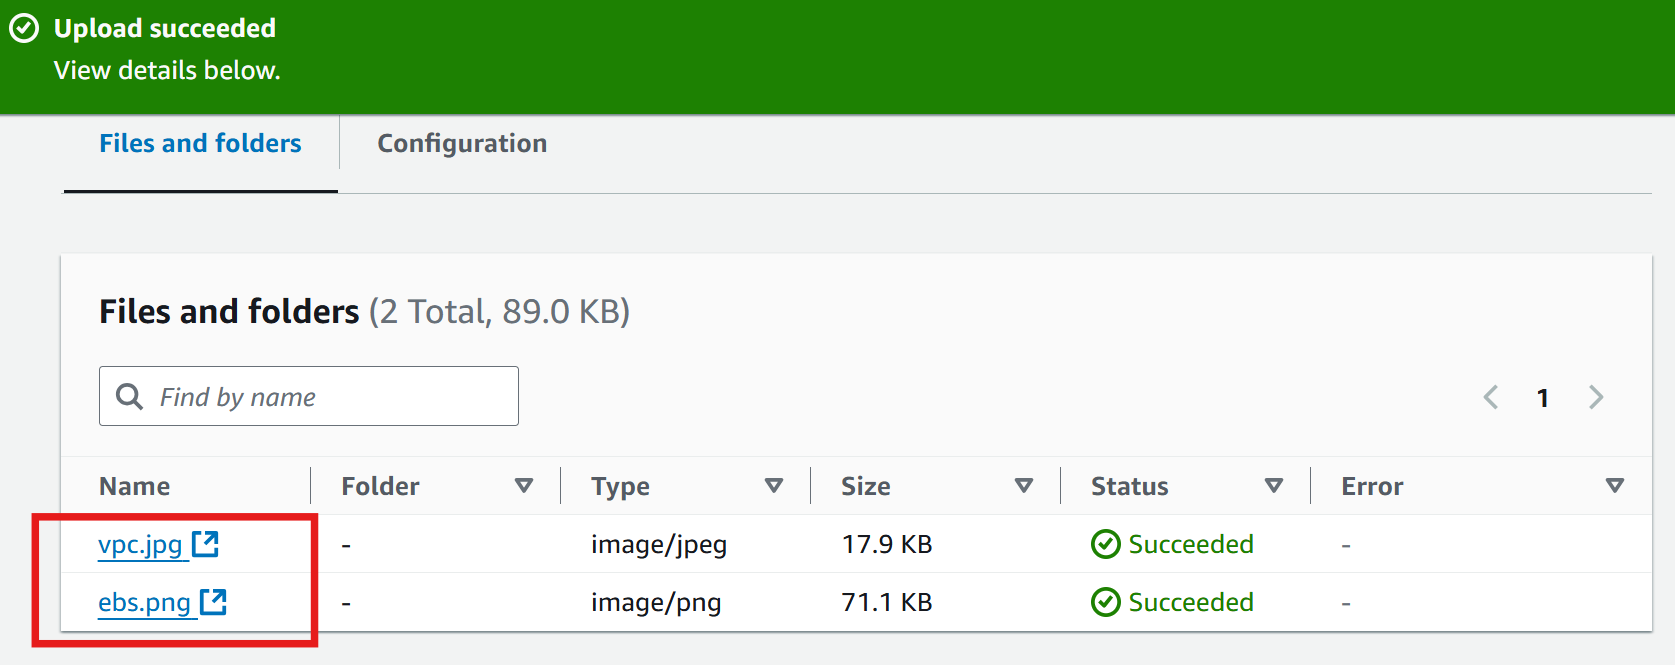
After a successful upload, you should see a page like the one below.
Step 3: Configure Lifecycle Management
Go to Lifecycle Management:
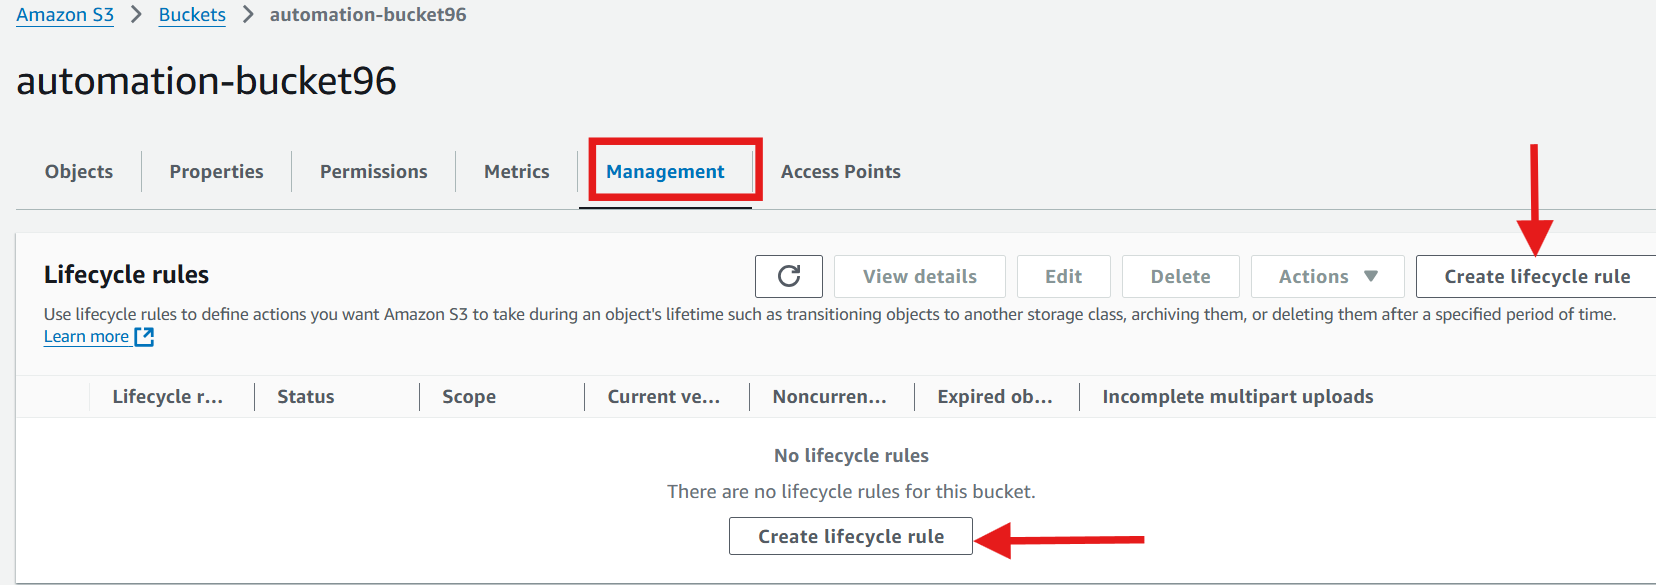
Within the S3 bucket, go to the Management tab.
Click on Create lifecycle rule under Lifecycle rules.
Define the Lifecycle Rule:
Rule Name: Enter a name for the rule
Scope of Rule: Apply to the entire bucket or use filters (such as prefixes or tags) if you want the rule to apply only to specific objects.
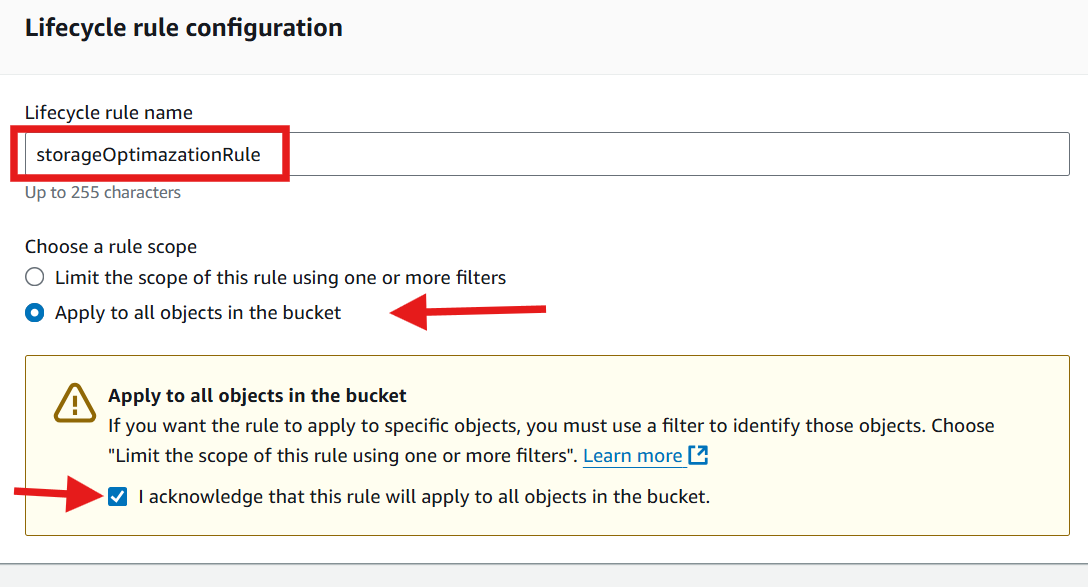
Select Lifecycle rule action(s)
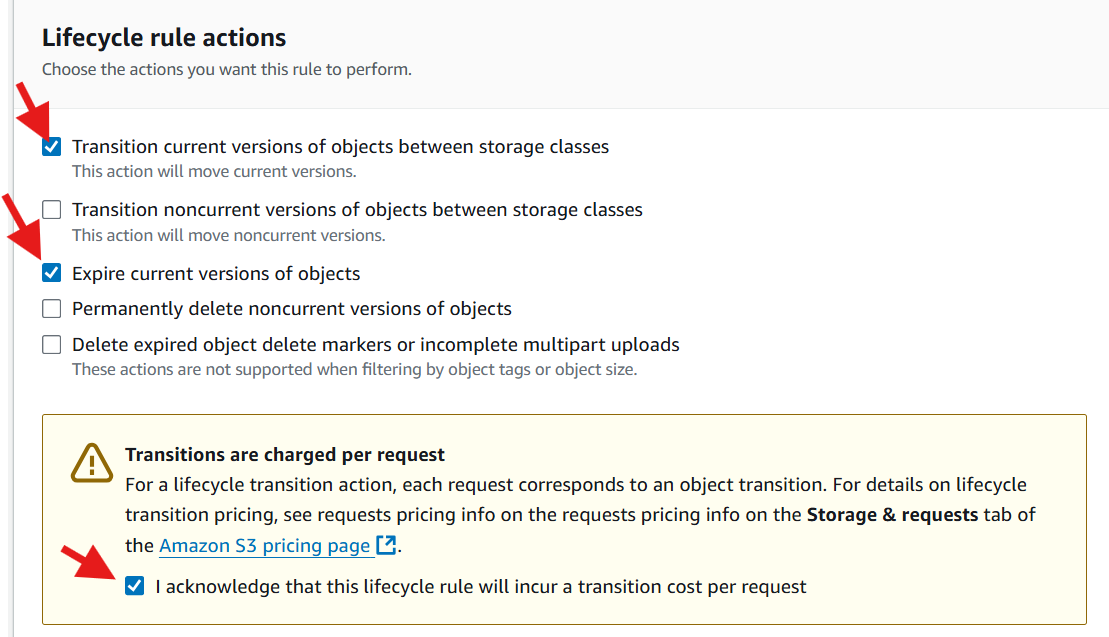
Step 4: Set Transition Actions
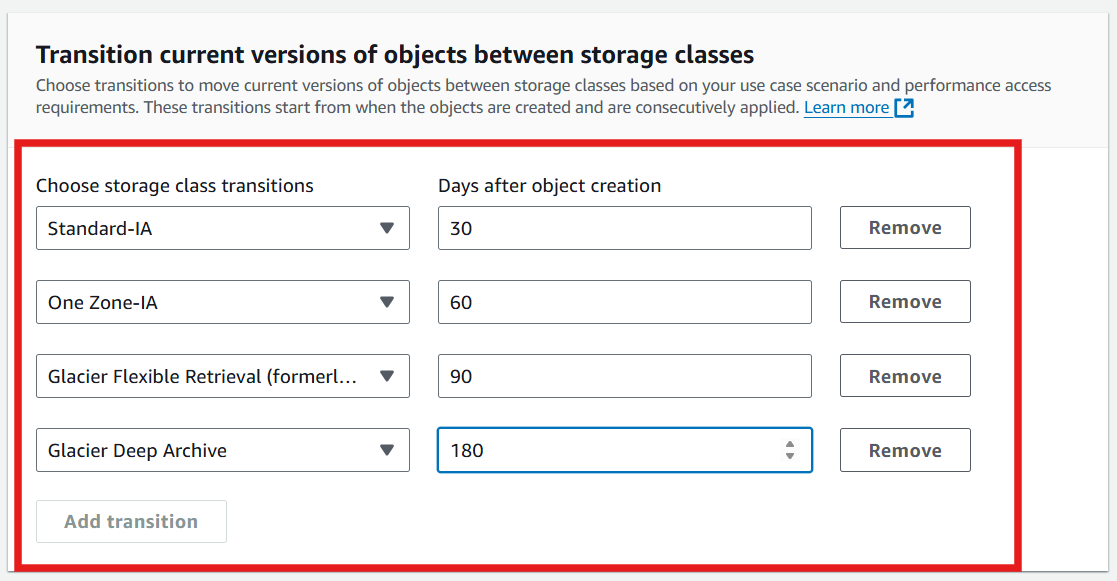
Add Transition Actions for between classes transition:
Under Transition options, click Add transition.

Define when you want objects to transition to different storage classes:
Standard-IA: For example, after 30 days of the object creation date.
Click Add Transition again to add another transition definition.
Adjust these periods as needed for your data retention policy.
Step 5: Set Expiration Action
Set the Expiration Period:
Specify the number of days after the object’s creation when it should be deleted. For example, enter 3650 days if you want objects to be deleted 3650 days (10 years) after they are created.
Step 6: Review and Activate the Lifecycle Policy
Review the Rule:
Check all settings to confirm the transition and expiration rules are set correctly.
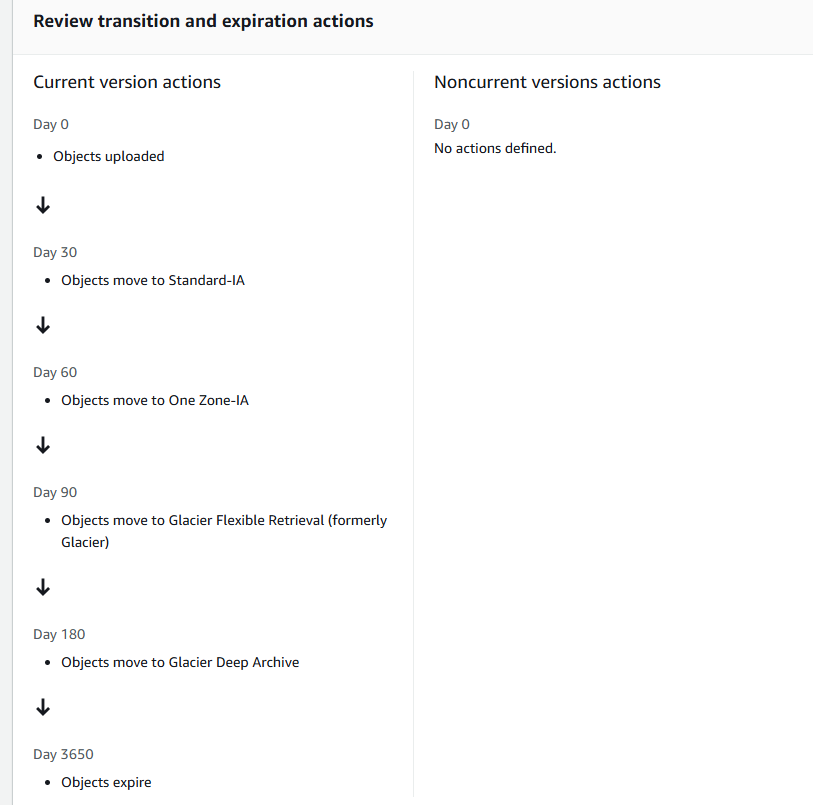
Click Create rule to activate the lifecycle policy.
Step 7: Verify Lifecycle Management
Monitor the Bucket:
Lifecycle policies will automatically apply according to your defined timelines.
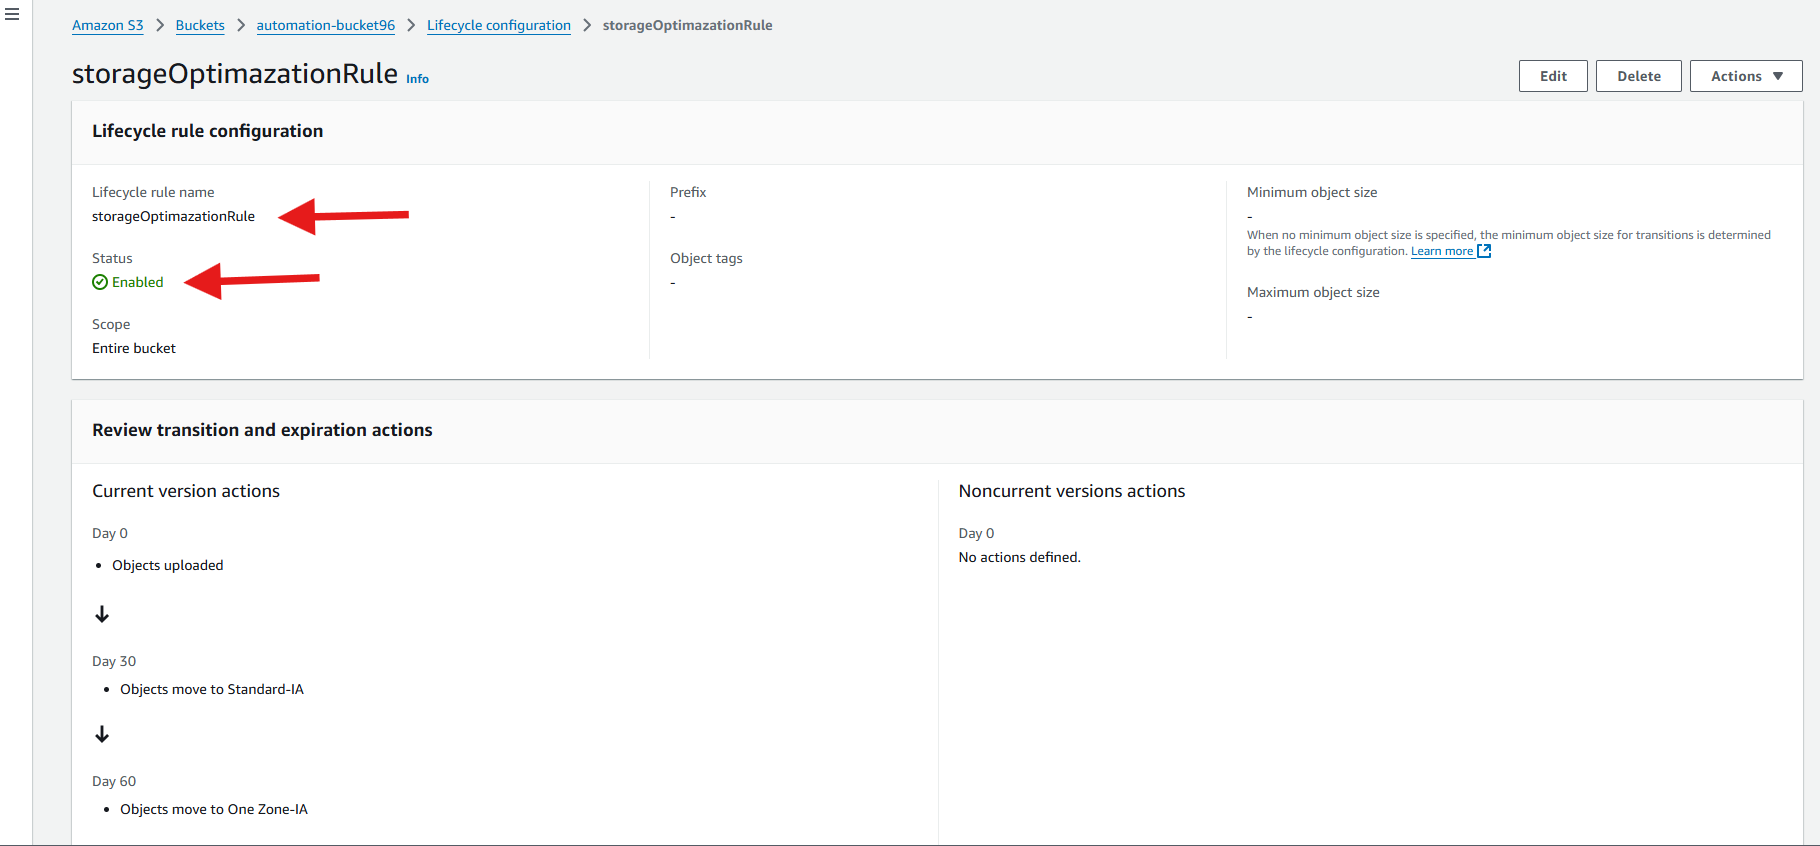
Check back periodically or view object metadata to confirm transitions and expirations.
This configuration will help optimize storage costs by automatically moving objects to lower-cost storage classes and deleting them when no longer needed.
Subscribe to my newsletter
Read articles from Celestina Odili directly inside your inbox. Subscribe to the newsletter, and don't miss out.
Written by

Celestina Odili
Celestina Odili
Computer Scientist/ Cloud Engineer/DevOps Engineer / Technical writer
