A Step-by-Step Guide: Creating a Windows 11 Virtual Machine in Azure Portal
 Uzomah Chiemerie
Want to try out Windows 11 without affecting your computer? A Windows 11 virtual machine acts as a digital sandbox, allowing you to safely explore the latest features. It's a separate, virtual copy of Windows 11 that runs on your existing computer, enabling you to experiment, install new software, or even make mistakes without worrying about harming your main operating system.
Why use a virtual machine?
Safety: Test new software or settings without risking your main system.
Flexibility: Create multiple virtual machines for different purposes.
Convenience: Easily manage and customize your virtual environments.
Ready to get started? Let's create your Windows 11 virtual machine in the Azure cloud. Follow these simple steps...
Signing in to Azure Portal:
Imagine the Azure Portal as the control center for all your cloud resources in Microsoft Azure. To get started, follow these simple steps:
Open your favorite web browser. This could be Chrome, Firefox, Edge, or any other browser you use.
Head to portal.azure.com. This is the website address for the Azure Portal. Enter your login details. This includes your Azure account email address or username, followed by your password. Click "Next" after each entry. Verify your identity (if needed). If you have multi-factor authentication enabled, you might be asked for an extra verification step. This could be a code sent to your phone or email.
Welcome aboard! Once you've entered the correct details and passed any verification steps, you'll land on the Azure Portal dashboard. Here, you can manage all your cloud resources, including creating your Windows 11 virtual machine.
CREATE YOUR VIRTUAL MACHINE:
In the search bar, type "Virtual Machine”.
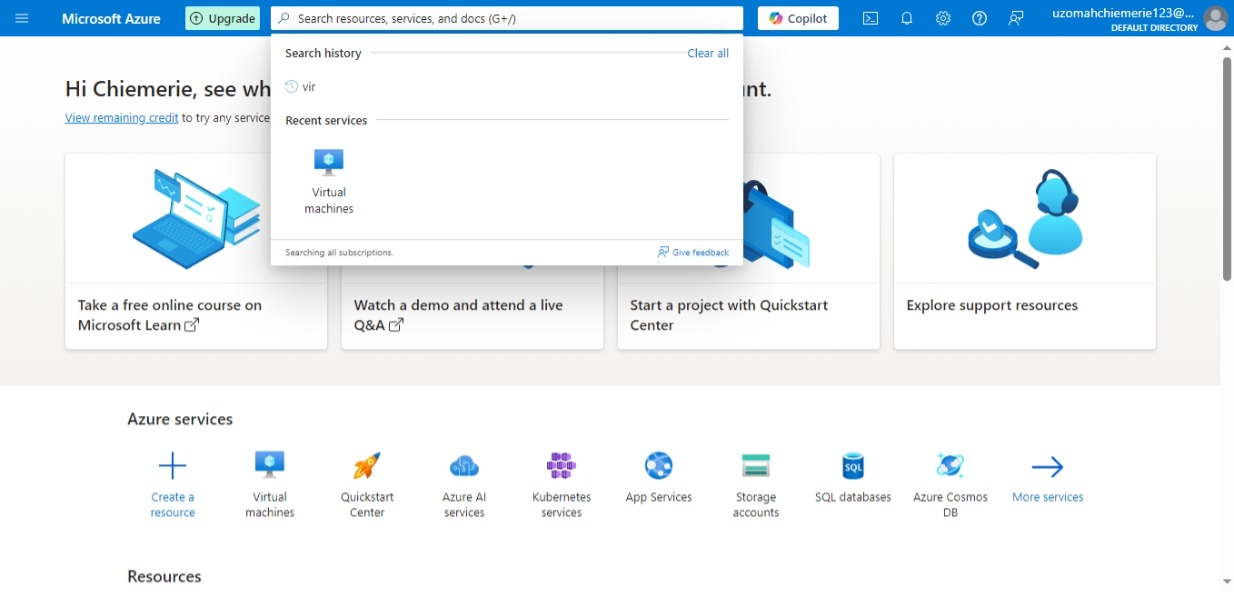
From the search results, select "Virtual Machine" from the list of resources shown.
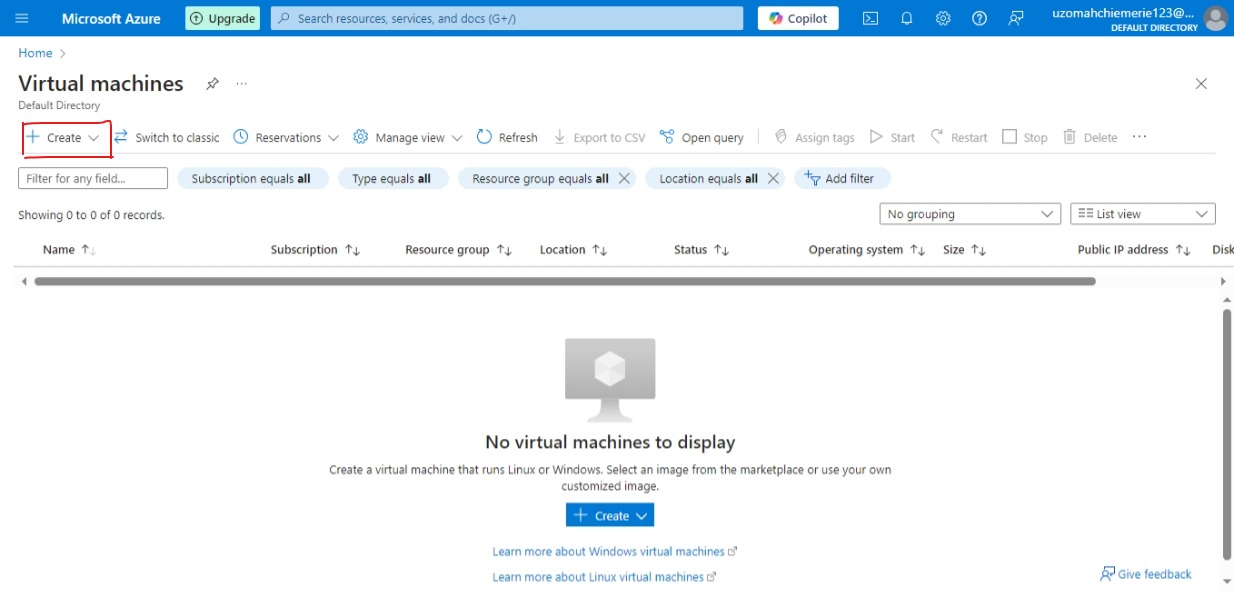
Click on the “Create” button.
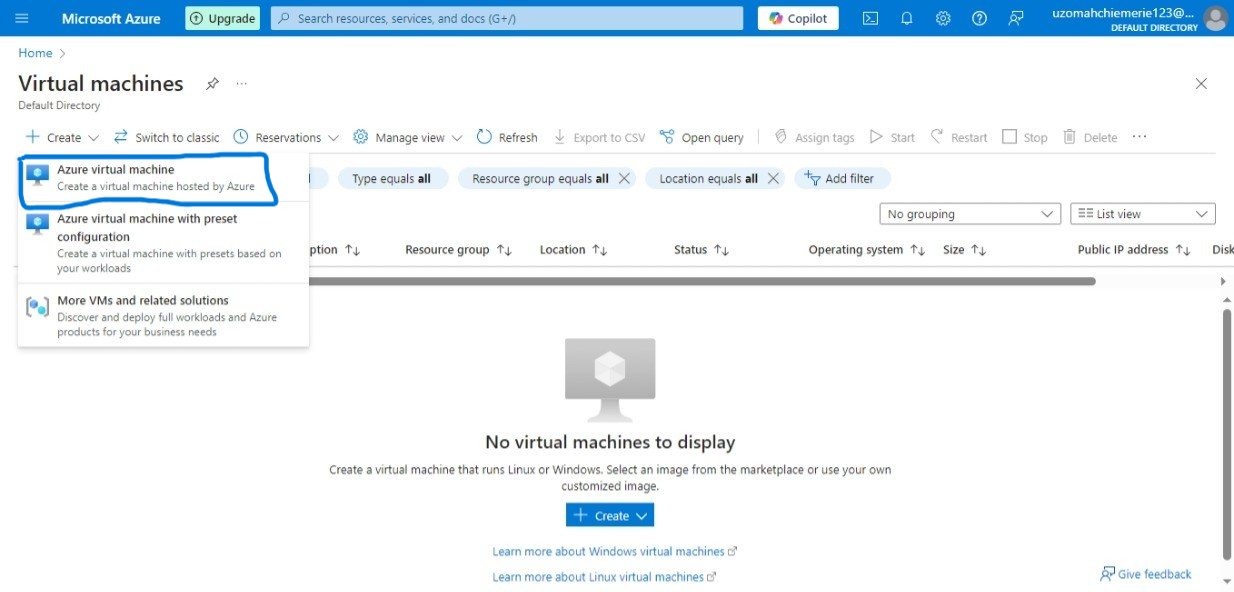
Select the virtual machine highlighted.
You will be directed to the “Basic” page
Configure Basic Settings:
Select the subscription you want to use.
Choose or create a new resource group for your VM.
Enter a name for your virtual machine.
Choose a region where your VM will be deployed.
Select "Windows 11" as the image.
A. Project Details:
In the project details category, we have the subscription and resource group.
(i). Subscription: An Azure subscription is a service provided by Microsoft that allows users to access and utilize Azure Cloud. In a simple term, your ownership of Azure resources is like owning a plot of land.
(ii). Resource group: A container for organizing and managing resources within your subscription, like organizing tools and materials for a construction project in one location.
B. Instance Details:
(i) Enter a name for your virtual machine.
(ii) Choose a region where your VM will be deployed.
A region refers to a specific geographical location with data centers that host infrastructure and services. Each region operates independently and is designed to be self-contained, with its own set of resources and infrastructure. I will be using (Asia Pacific) South India as my region.
(iii) Choose your availability Zone - Click on the drop-down to select your availability option and availability Zone.
(iv) Security Type - Based on preference or specified requirements if being done for an organization.
(v) In the image section, select Windows11 from the drop-down as the image. If not seen click on “see all images”.
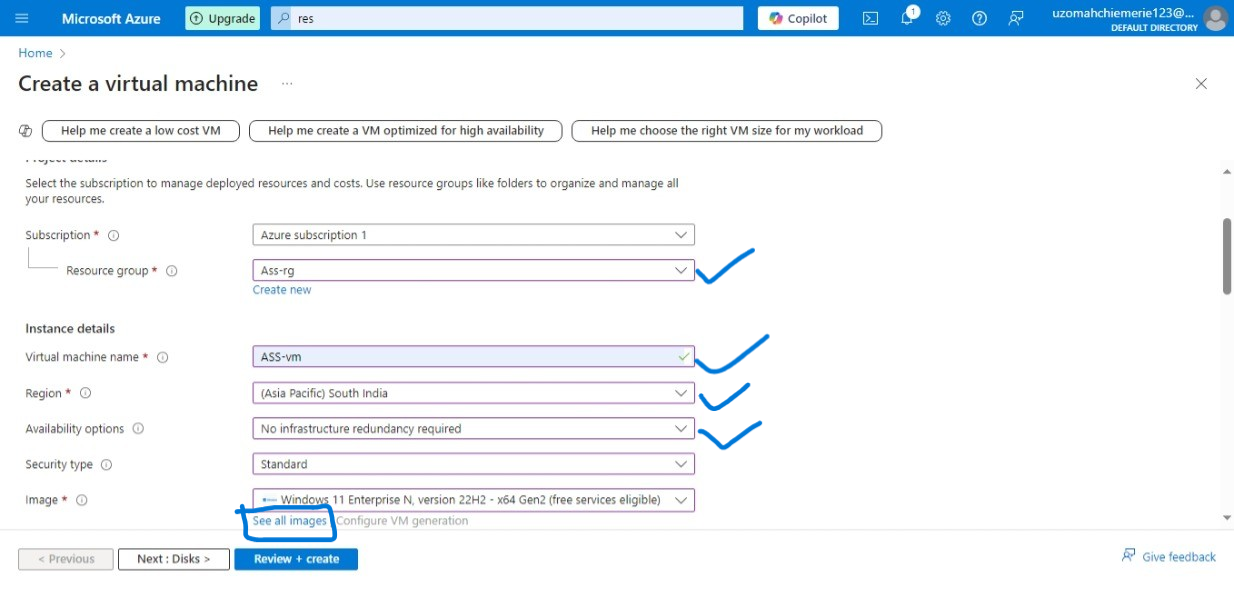
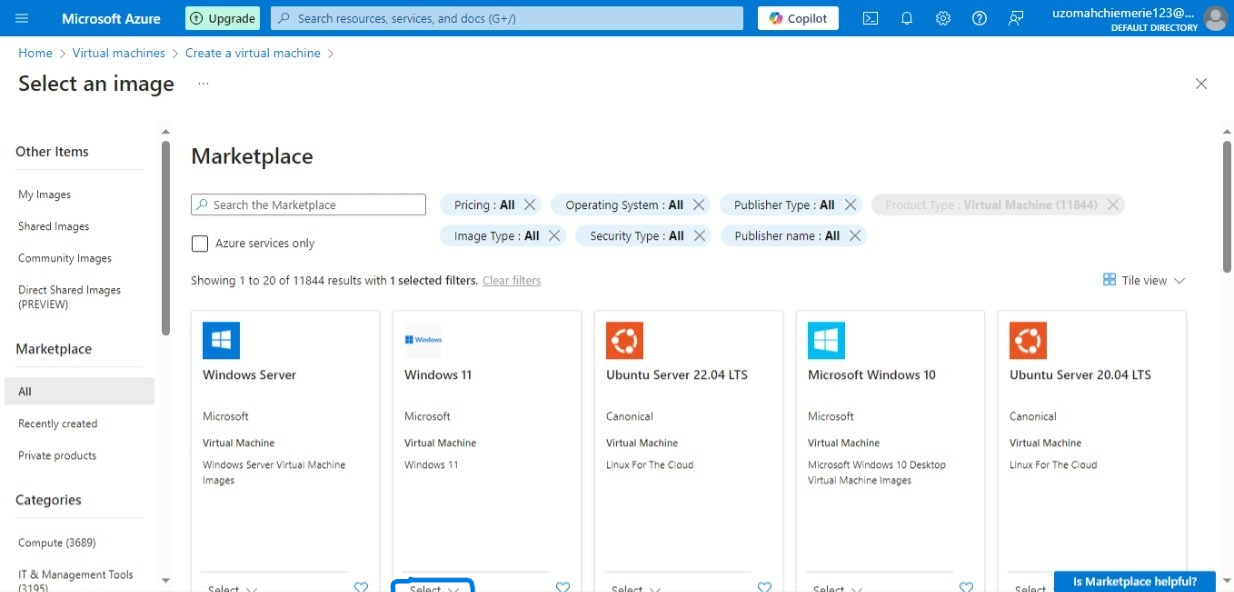
On the Marketplace window, select Windows 11 then choose the version you want. I am going to select Windows 11 Enterprise N, version 22H2 – x64 Gen2 here.
In the context of Azure and virtual machines, an “image” refers to a pre-configured template or snapshot of an operating system (OS) that includes the necessary files, settings, and software installations to deploy a virtual machine (VM) with specific characteristics.
After you select Windows 11 edition, you should specify the Administrator account details. You cannot use Administrator as username, so specify another name for Administrator. Next, enter a complex password twice. If you see a green tick, it means you have entered a correct complex password.
For inbound rules, you can specify the network ports using which you can connect and access the VM from public internet. For testing purpose, I am going to select Allow Selected ports and select inbound ports to RDP (3389).
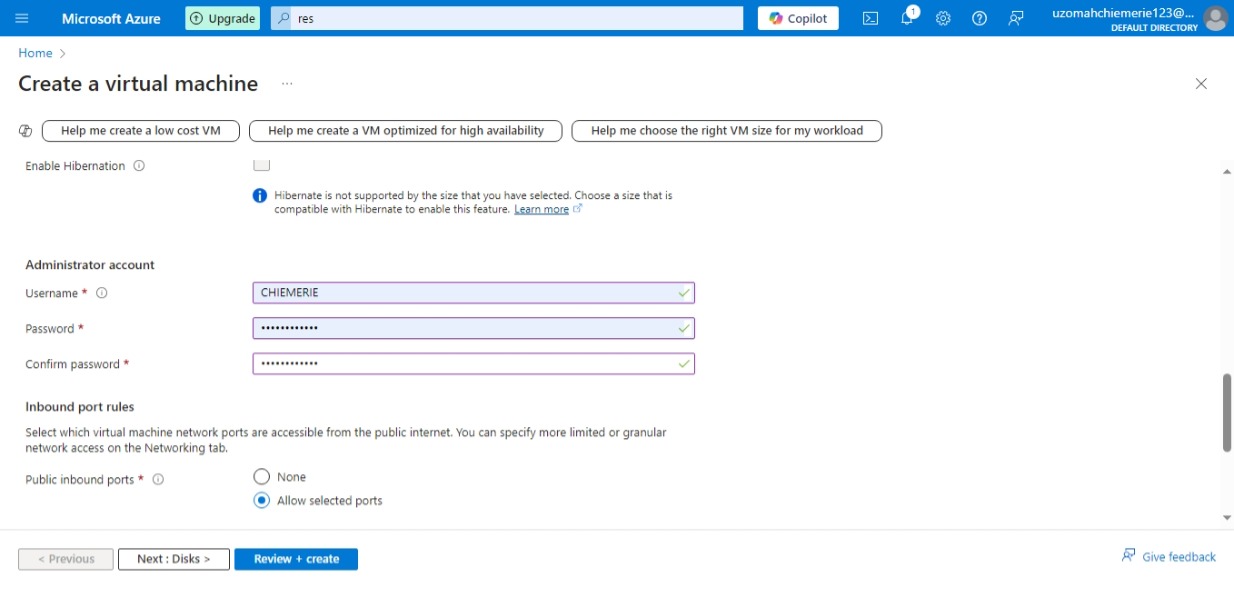
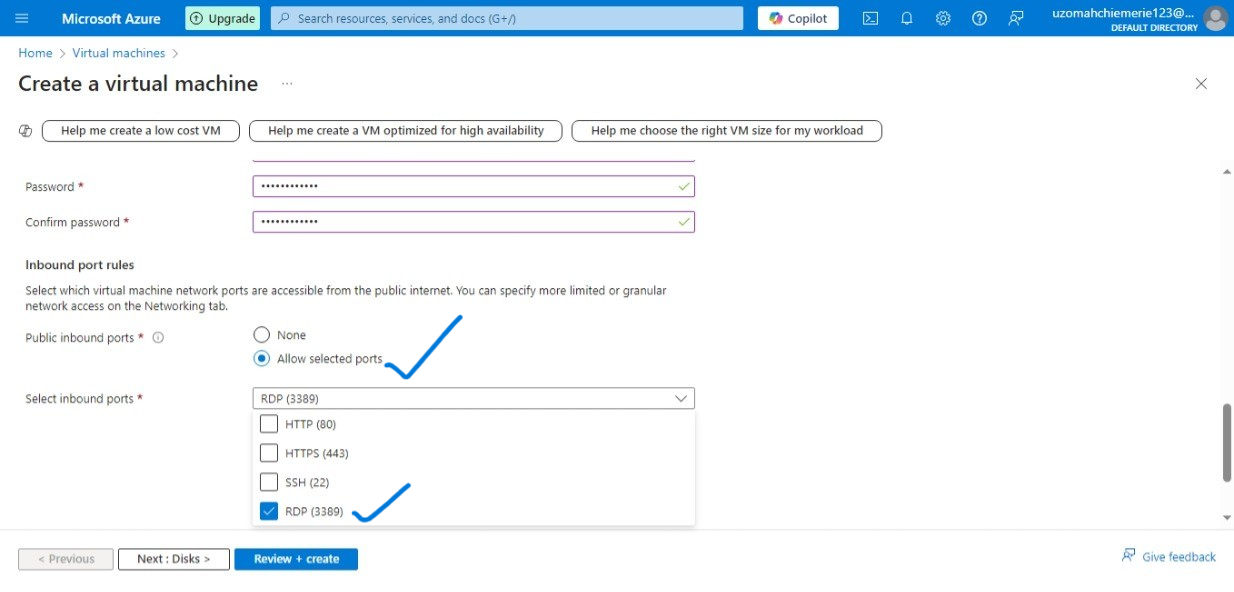
Since you’re going to use this Windows 11 VM for your work, you have to confirm if you have an eligible Windows 11 license with multi-tenant hosting. Check that box to confirm the license and click Review+Create.
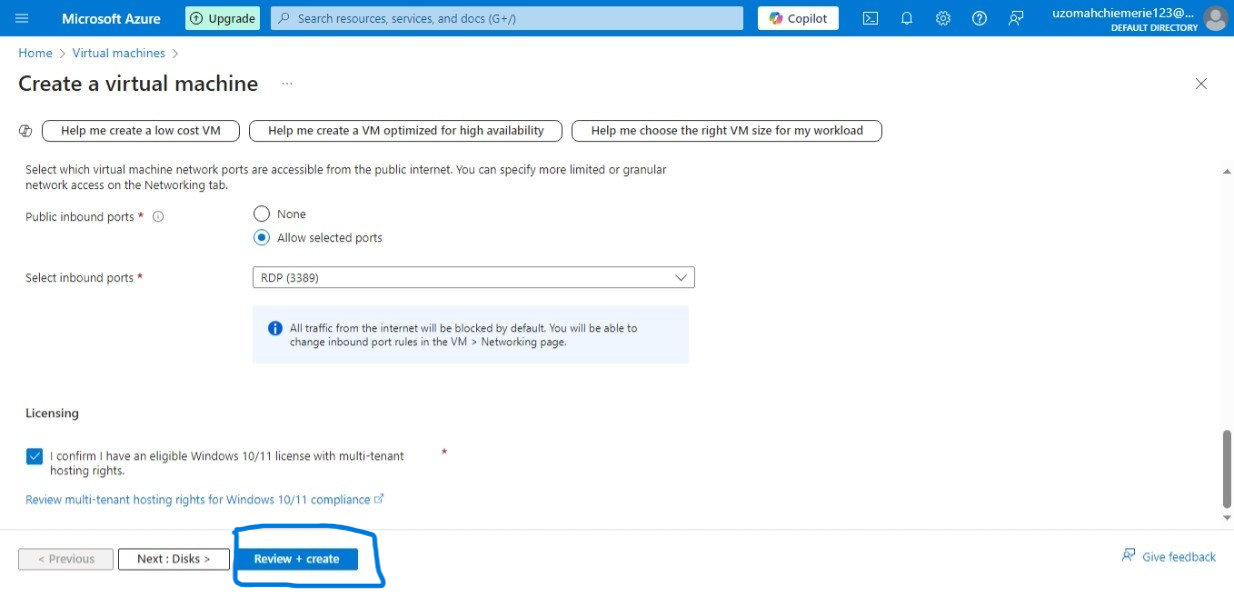
Once you see Validation passed, create the Windows 11 virtual machine by selecting Create.
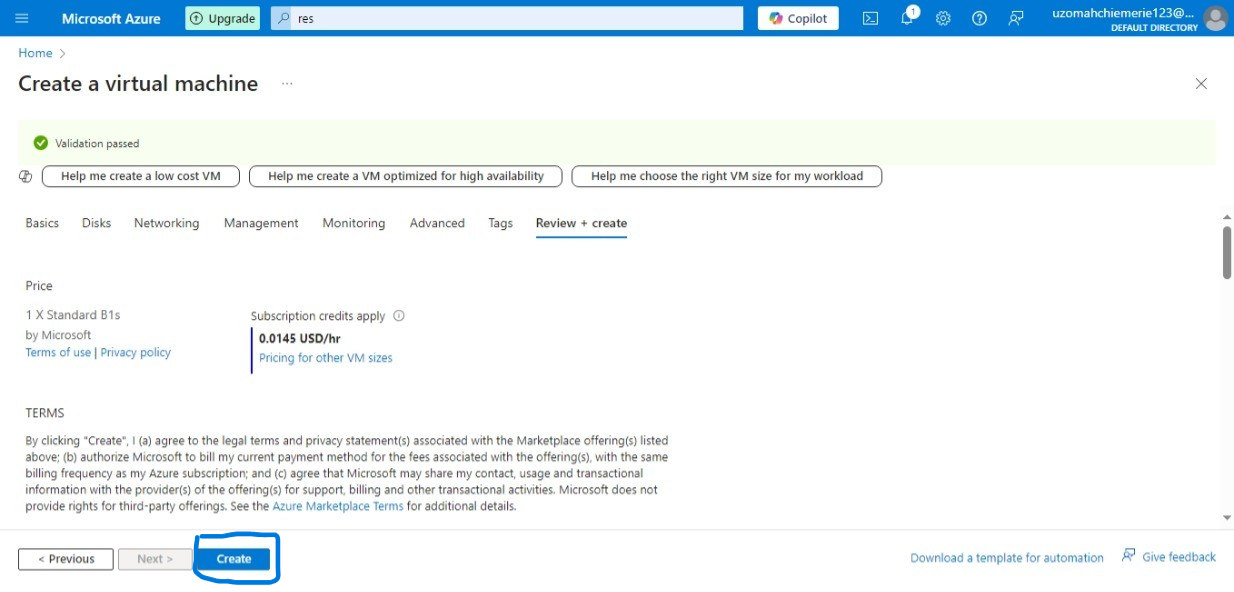
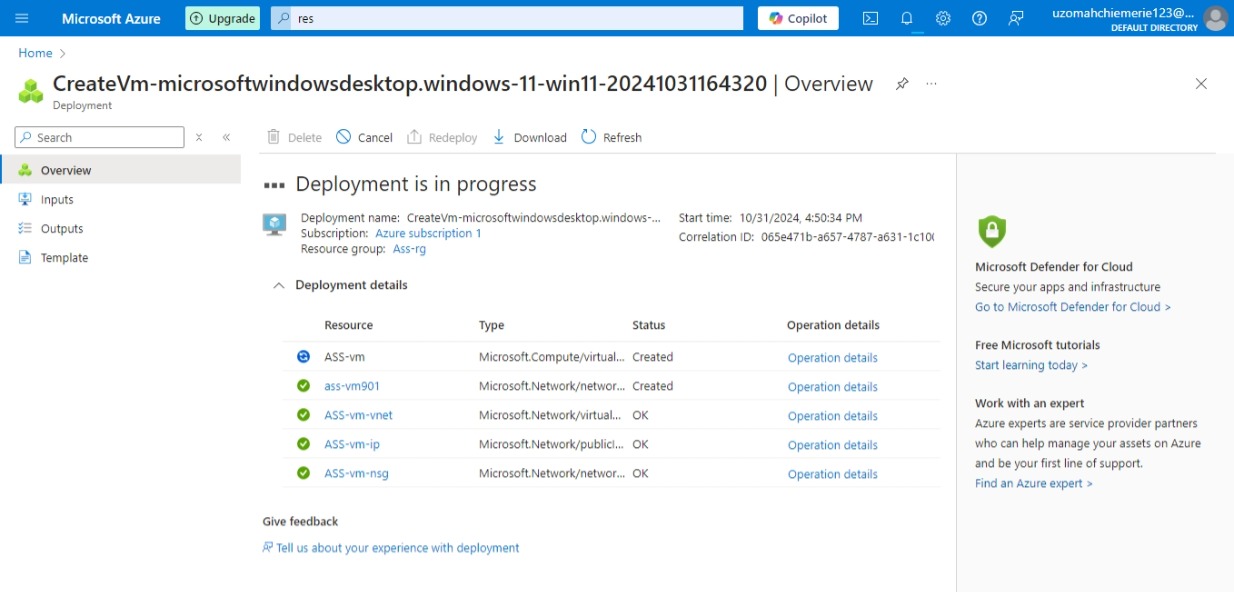
The Windows 11 Virtual Machine is now being created. You see the status as deployment is in progress. Wait for a few minutes while the VM is created.
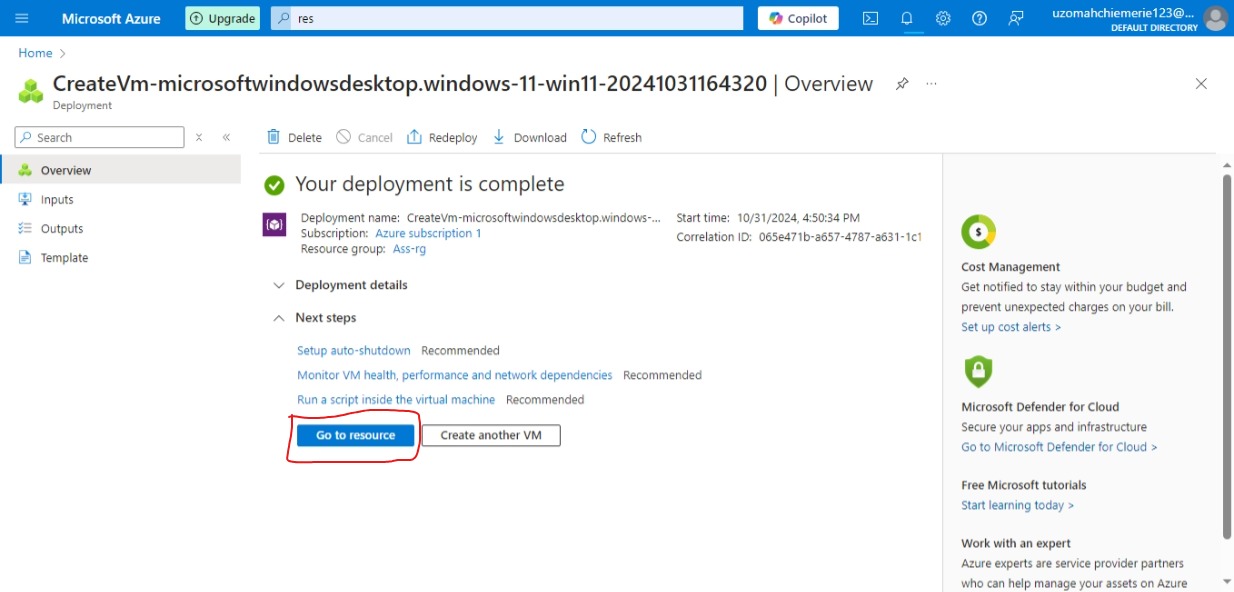
“Your Deployment is complete”- If you see this, congrats on setting up your Windows 11 VM in Azure with ease. Now, from this screen, you can grab deployment details, set auto-shutdown to save credits, run scripts inside the VM, or create another VM. For now, click on “Go to Resource”.
Connect to Windows 11 VM in Azure using RDP
Once you create a Windows 11 VM in Azure, you can connect to the virtual machine and access it via RDP (3389).
On the Windows 11 resource window, select Connect.
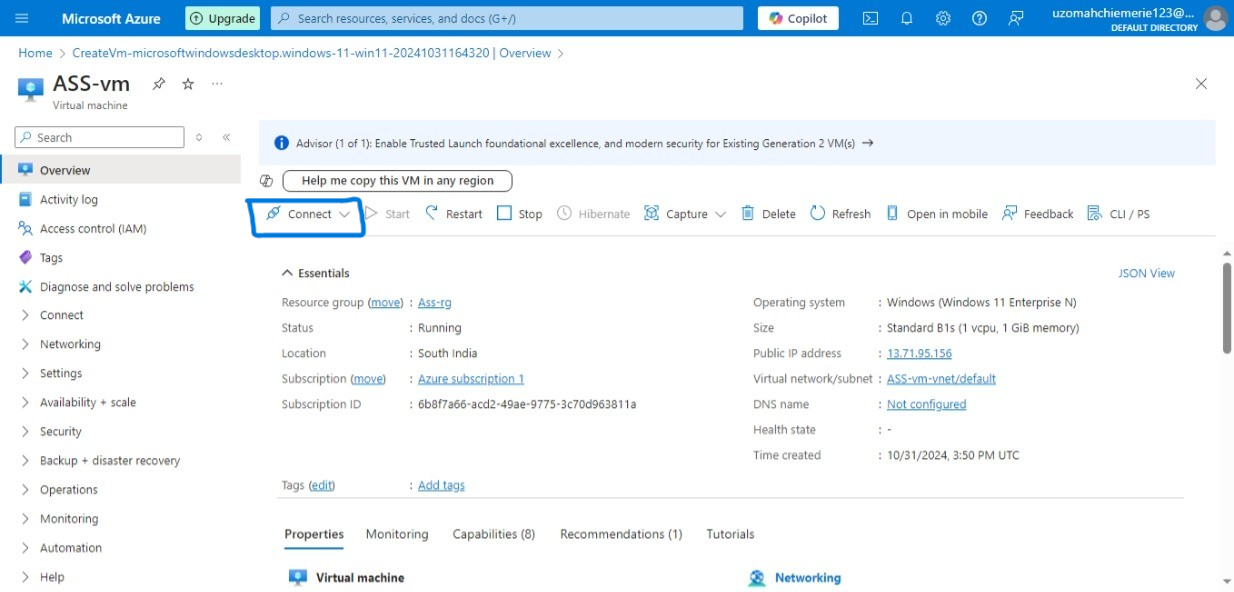
You can connect to these Windows 11 Virtual machine using RDP, SSH and Bastion. While creating the VM, we had enabled port 3389, hence select RDP.
You should now see the public IP address of your Windows 11 VM and port number (by default 3389). To connect to your virtual machine via RDP, select an IP address, optionally change the port number, and select Download RDP File.
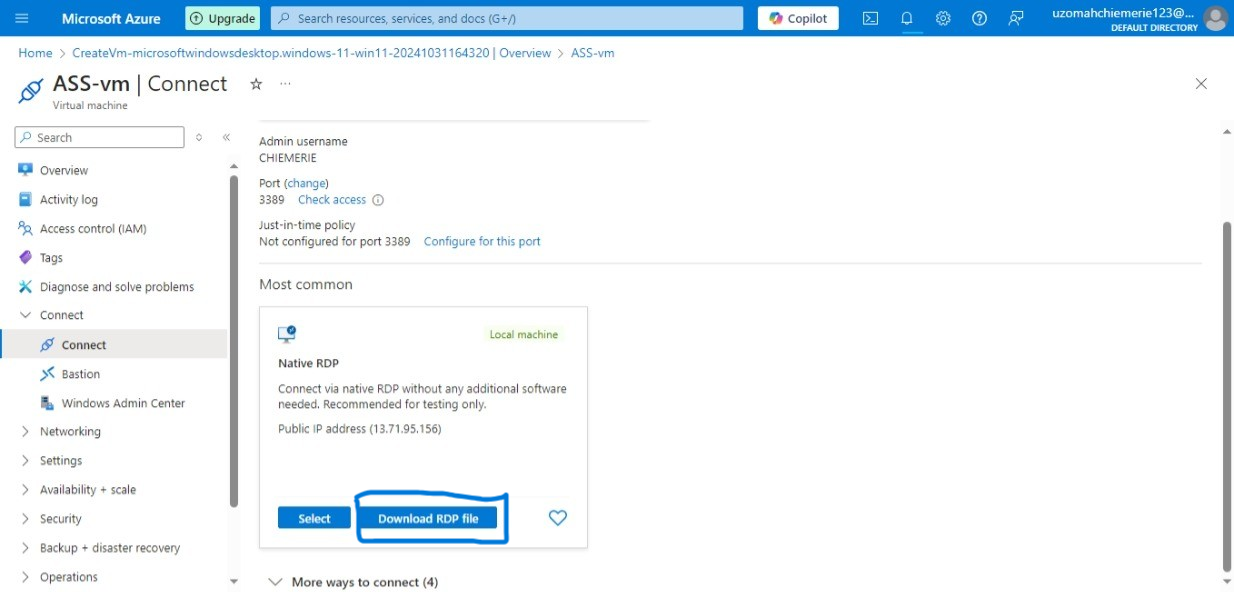
Open the downloaded RDP file and click "connect” then type in your username and password.
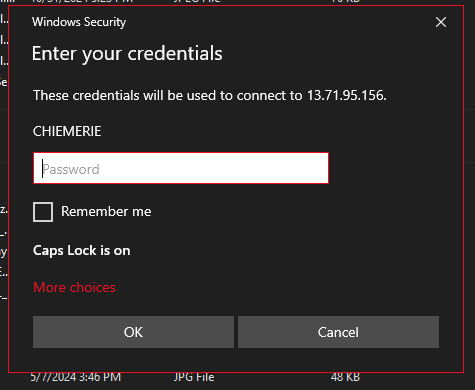
Once the password has been typed, click ok
And there you have it, your very own Windows 11 virtual machine in Azure Portal.

CONCLUSION
Creating a Windows 11 virtual machine in the Azure Portal is a straightforward process that offers a safe and flexible environment to explore the latest features of Windows 11. By following the step-by-step guide, you can easily set up a virtual machine, configure its settings, and connect to it using RDP. This approach allows you to test new software, customize your virtual environment, and manage multiple virtual machines without affecting your main operating system. Whether for personal experimentation or professional use, leveraging Azure's cloud resources provides a convenient and efficient way to experience Windows 11.
Subscribe to my newsletter
Read articles from Uzomah Chiemerie directly inside your inbox. Subscribe to the newsletter, and don't miss out.
Written by
