Hello Ubiquiti EdgeRouter
 Dave Davis
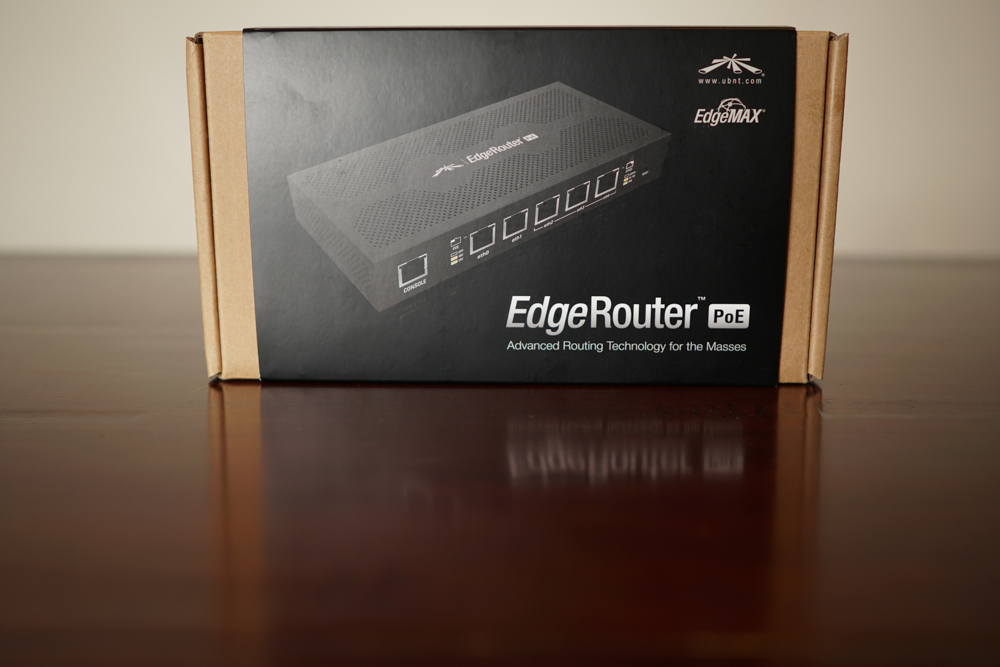
After hearing good things about the Ubiquiti EdgeRouter. I decided to pull the trigger and order the ERPOE-5 to replace my aging pfSense box. The EdgeRouter is feature packed at a reasonable price point and perfect for most homelabbers. For me the routing and POE capabilities was the selling point as I’ve been wanting to play with OSPF and NSX in the homelab for some time now and being able to power security cameras from the router is super convenient. I wanted to have the ability to mount this in my rack so I also splurged on a mount from ebay.
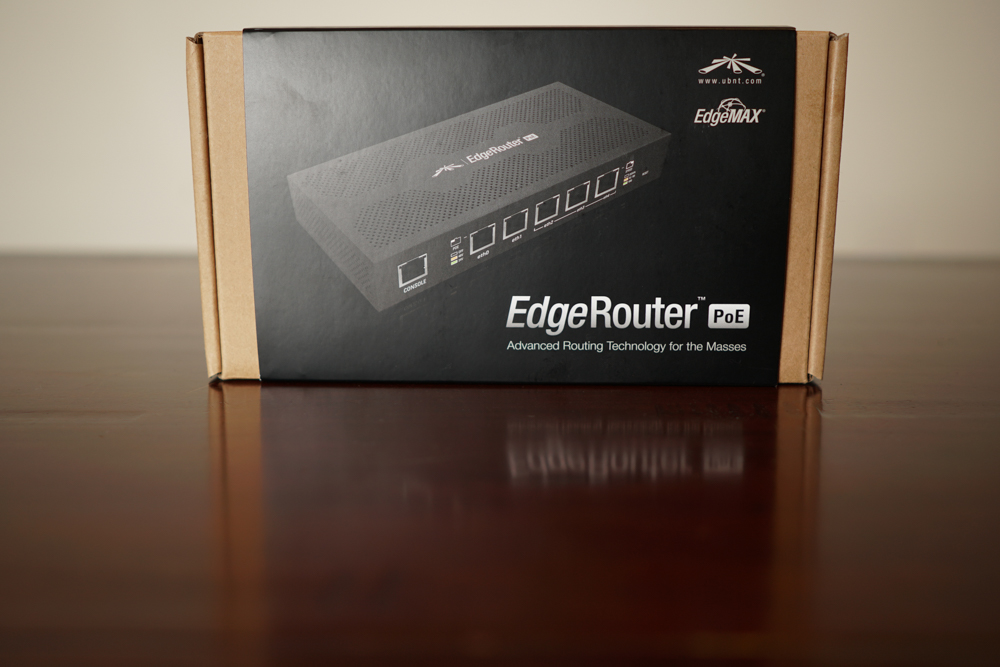
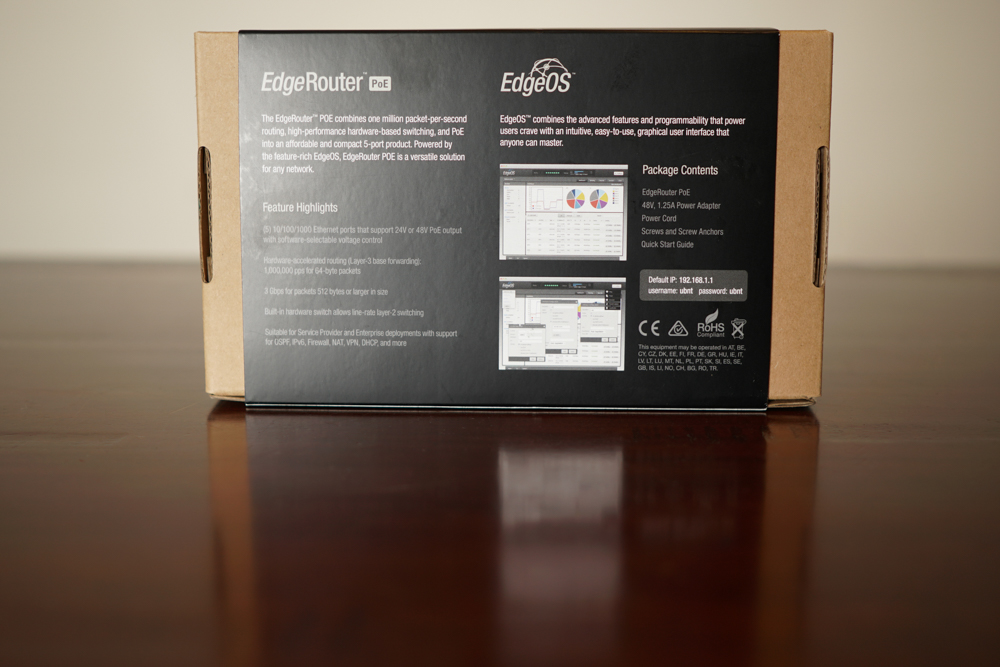
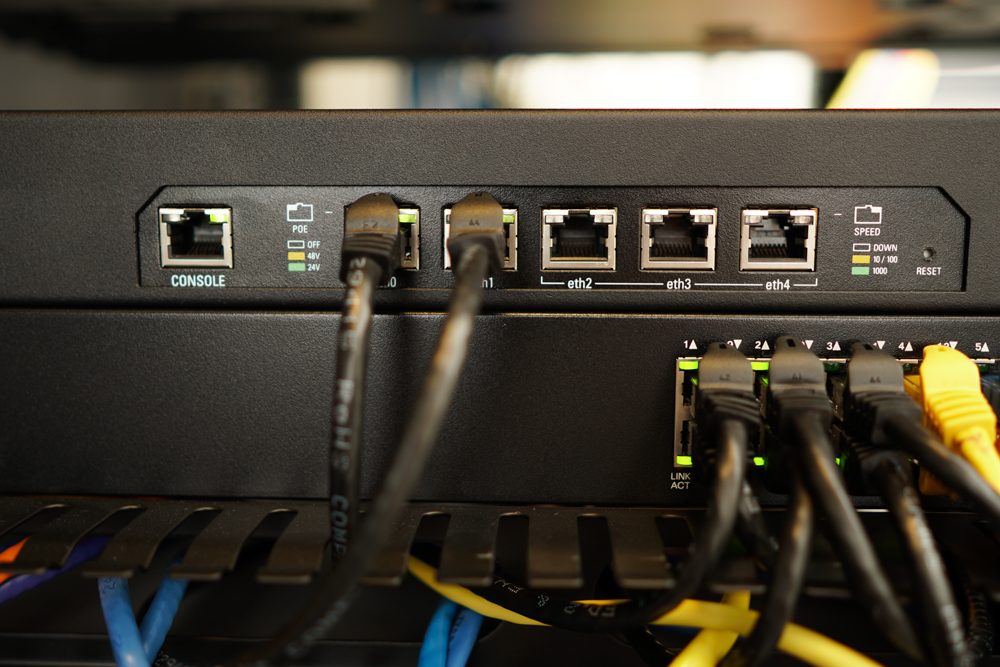
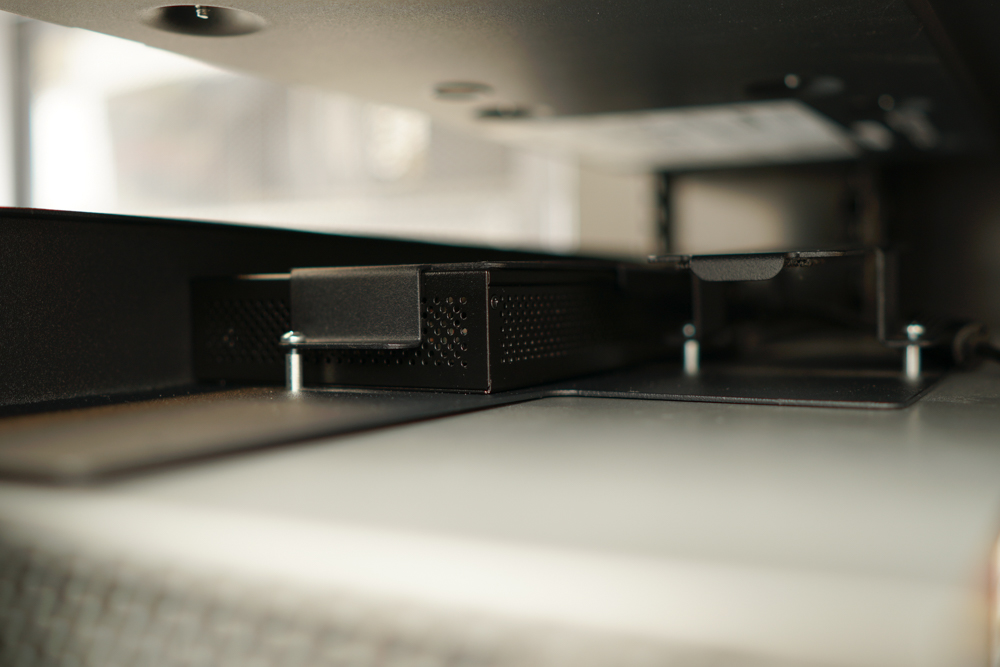
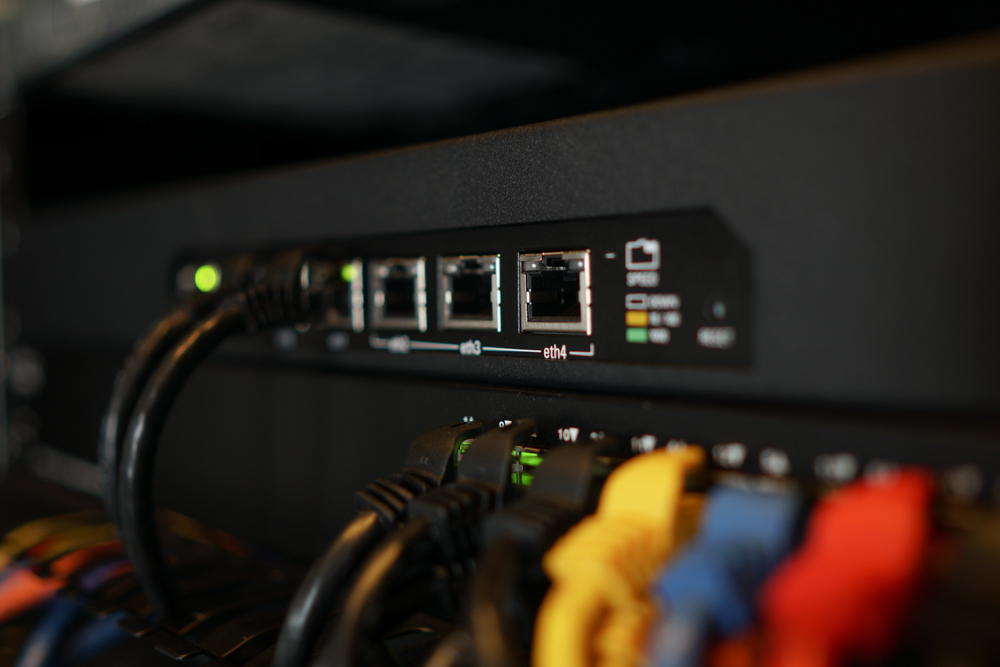
I decided to make some design changes with regards to the networking but before discussing those I need to first update the firmware.
Updating Firmware on EdgeRouter
Upon receiving the device I noticed the firmware version was v1.2.0, Figure-1. Luckily Ubiquiti makes upgrading the firmware a breeze by providing the download link to the firmware from within the user interface, Figure-2.

Figure-1

Figure-2
From the download page, select the correct device as seen in Figure-3:
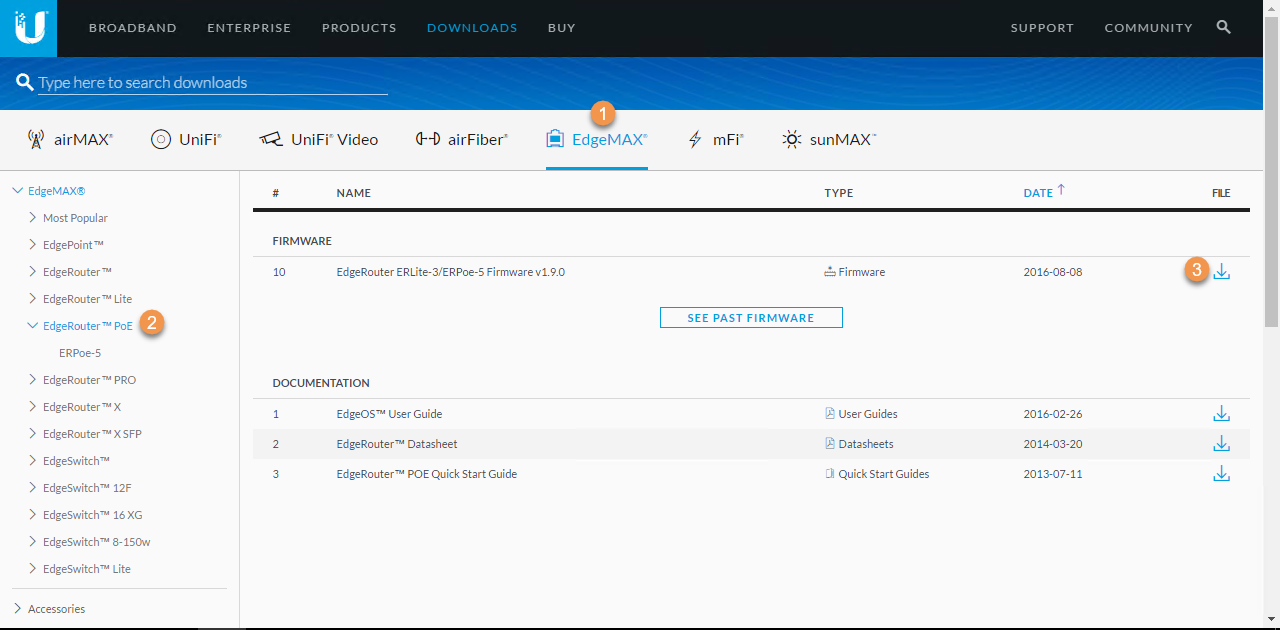
Figure-3
Click EdgeMAX
Select EdgeRouter POE
Click File Download Icon
Ok, now that the firmware is downloaded time to upgrade the EdgeRouter as shown in Figure-4.
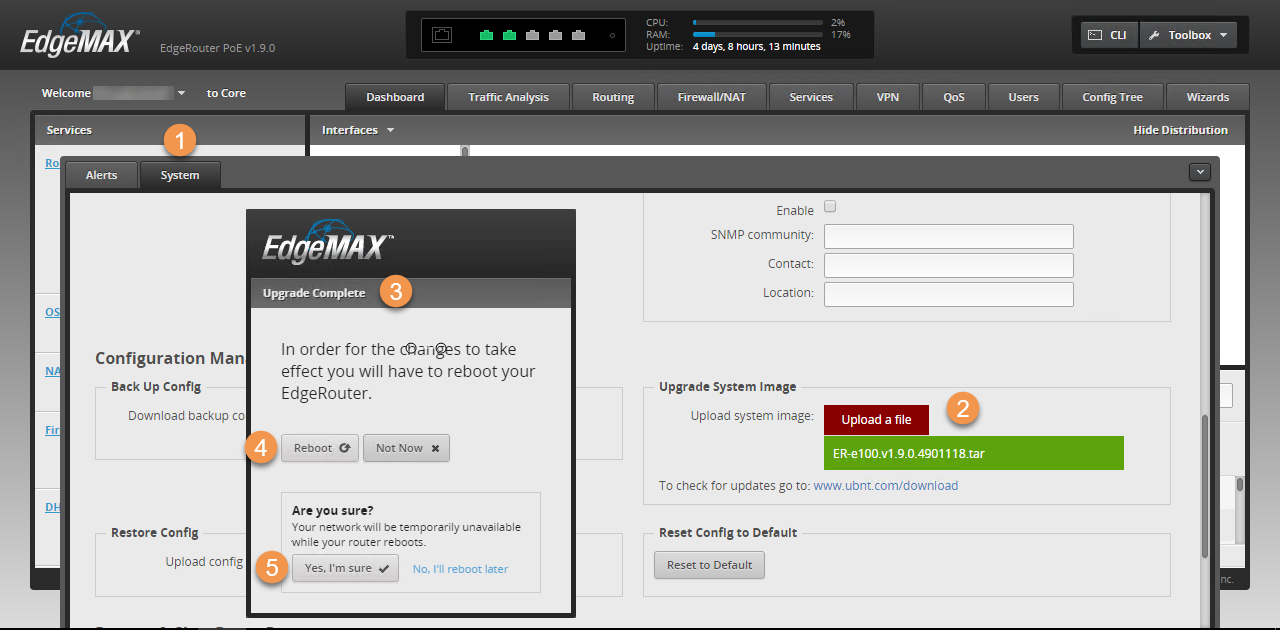
Figure-4
Click System tab
Click Upload a file (browse to file)
Once the update completes you will be presented with Upgrade complete dialog box
Click** Reboot**
Click Yes, I’m sure
Voila, firmware upgraded from v1.2.0 to 1.9.0, as shown on Figure-5, now too configuring the VLANs. Next up is to configure trunking on the SG-300-20.

Figure-5
Trunking VLANs on SG-300-20
In order for the EdgeRouter to provide DHCP to multiple VLANs, all necessary VLANs need to be tagged on the Cisco SG300-20 switch and sub-interfaces created for each VLAN on the EdgeRouter, see Table-1. Using interface eth01 on the EdgeRouter and connecting it to interface GE1 on the SG-300-20.
VLANs & Sub-Interface IP Address:
To join and tag VLANs on the GE1 interface perform the following steps shown in Figure-6:
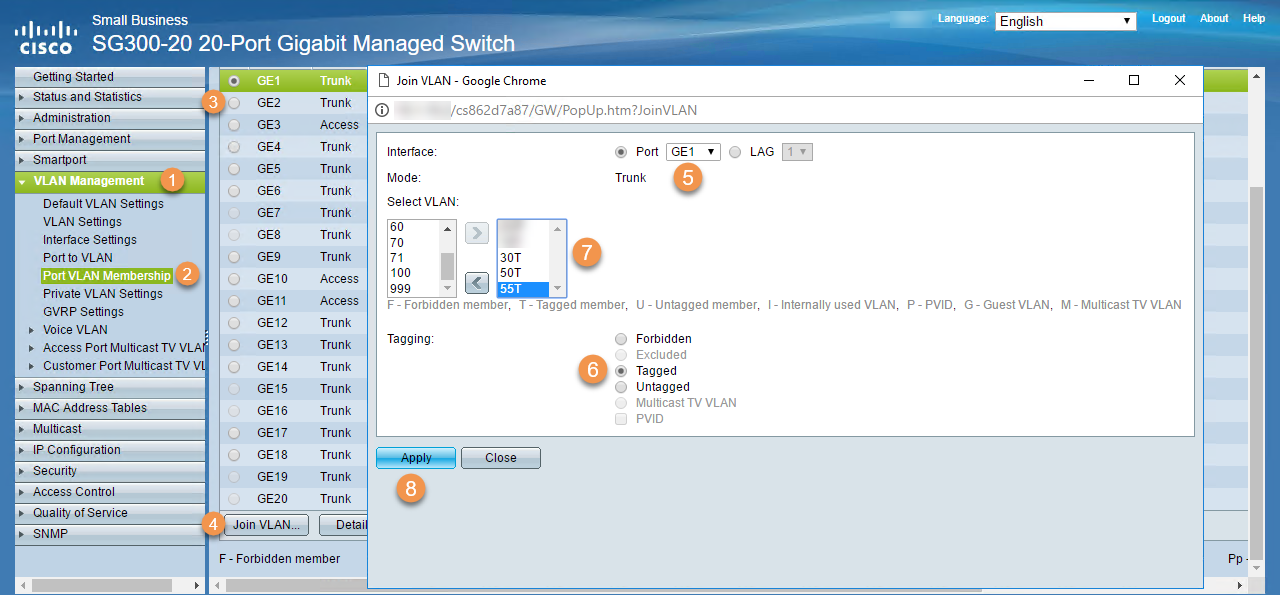
Figure-6
Expand VLAN Management
Select Port VLAN Membership
Select GE1
Click Join VLAN…
Verify GE1 is selected
Ensure Tagged is selected
Select VLANs: 30T, 50T, 55T and using the right arrow move them into the box on the right side
Click Apply
With trunking configure on the SG300-20 time to setup VLANs and sub-interfaces on the EdgeRouter.
Creating VLANs and Sub-Interfaces on the EdgeRouter
Now that the VLANs are tagged from the SG300-20 it’s time to create VLANs on the EdgeRouter with sub-interfaces following the steps outlined below in Figure-7 using the information from Table-1.
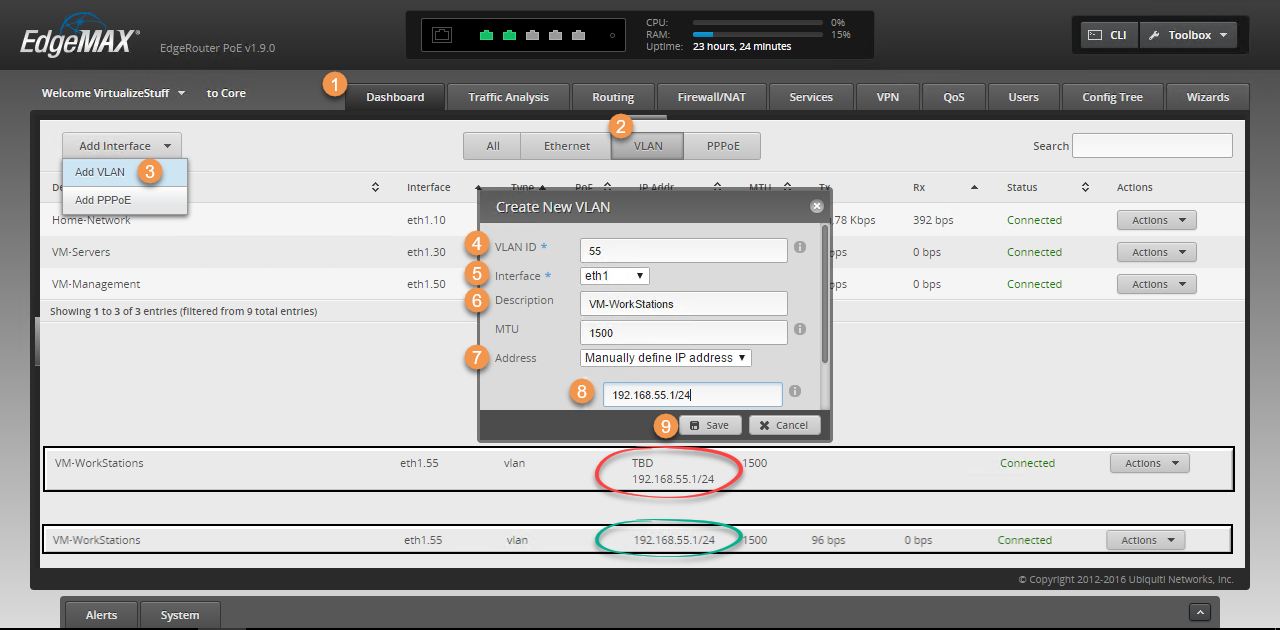
Figure-7
Select Dashboard tab
Click VLAN
Click Add Interface
Select Add VLAN
Provide VLAN ID: 55
Select eth01
Enter Description (optional): VM-WorkStations
Select Manually define IP address: 192.168.55.1/24
Click Save
Note: The newly created vlan enters a TBD state (red circle) above the IP address, as it validates configuration, once done TBD will disappear (green circle).
Lastly, is to move the DHCP server from the Synology to the EdgeRouter.
Relocate DHCP server from Synology NAS to EdgeRouter
The Synology 1813+ is providing DHCP for the home network only and when I need to reboot or perform maintenance for an extended period of time this means the DHCP server won’t be available to the clients. So I decided it would be better to move DHCP Server to the EdgeRouter as this device will rarely be rebooted. Figure-8 shows how to disable DHCP on the Synology while Figure-9 shows the configuration on the EdgeRouter.
Disable DHCP on Synology:
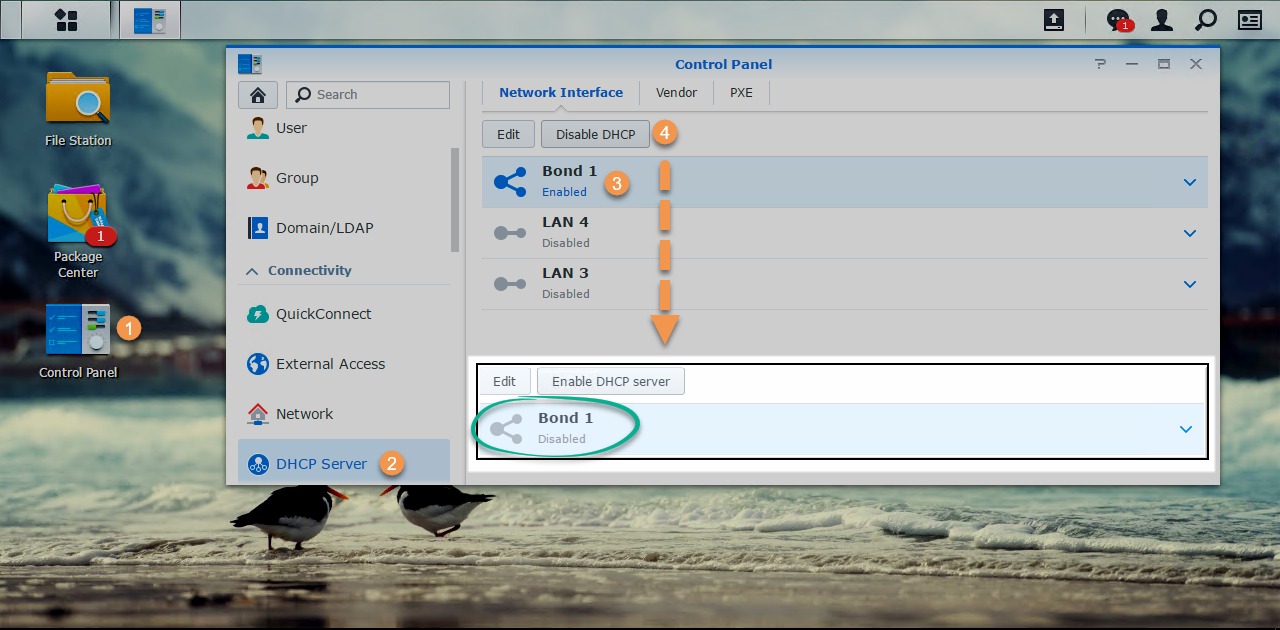
Figure-8
Click Control Panel
Select DHCP Server
Select Interface: Bond1
Click Disable DHCP button
Configure DHCP on Edge Router:
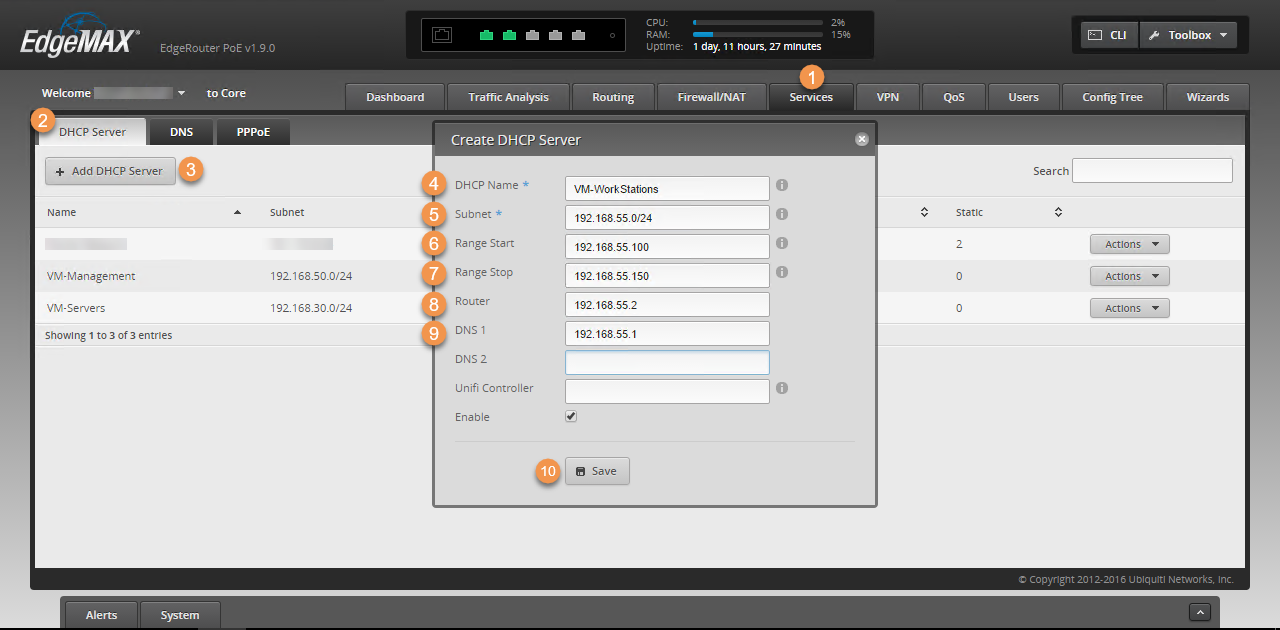
Figure-9
Select Services tab
Select DHCP Server
Click Add DHCP Server
DHCP Name: VM-WorkStations
Subnet: 192.168.55.0/24
Range Start: 192.168.55.100
Range Stop: 192.168.55.150
Router: 192.168.55.2
DNS: 192.168.55.1
Click Save
To ensure its working I disable and re-enable the network card for the VLAN 55 network as shown in Figure-10 and it automagically gets an IP from the EdgeRouter.
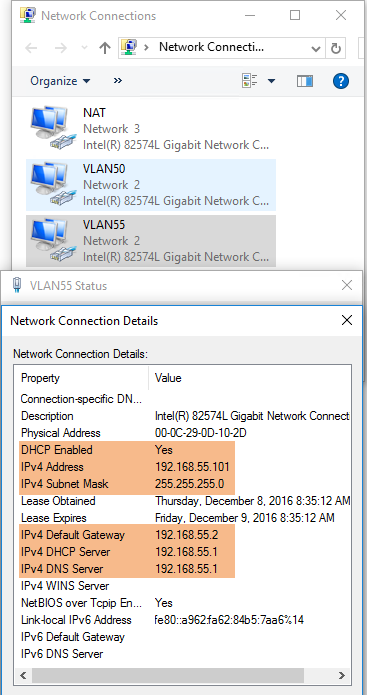
Figure-10
Configure DNS Forwarding:
Oh, almost forgot…in order to successfully surf the internet the sub-interface for VLAN 55 must be added to the DNS Forwarder otherwise internet no-workie. Steps are shown in Figure-11 below:
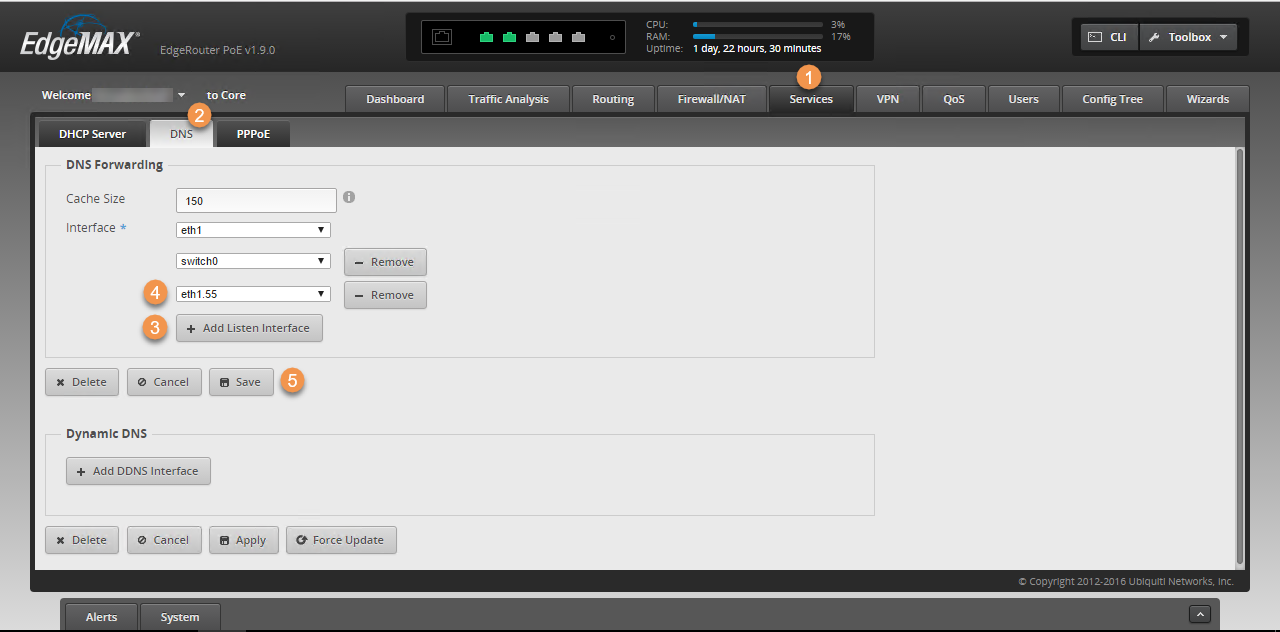
Figure-11
Click Services tab
Select DNS tab
Click Add Listening Interface
Select sub-interface: eth1.55
Click Save
Well that wraps up this post, stay tuned for a future post where I’ll will discuss the Netgear M4300-8X-8F and go over it’s feature set + configuration. Figure-12 provides an overview of the progress made in this post in diagram format.
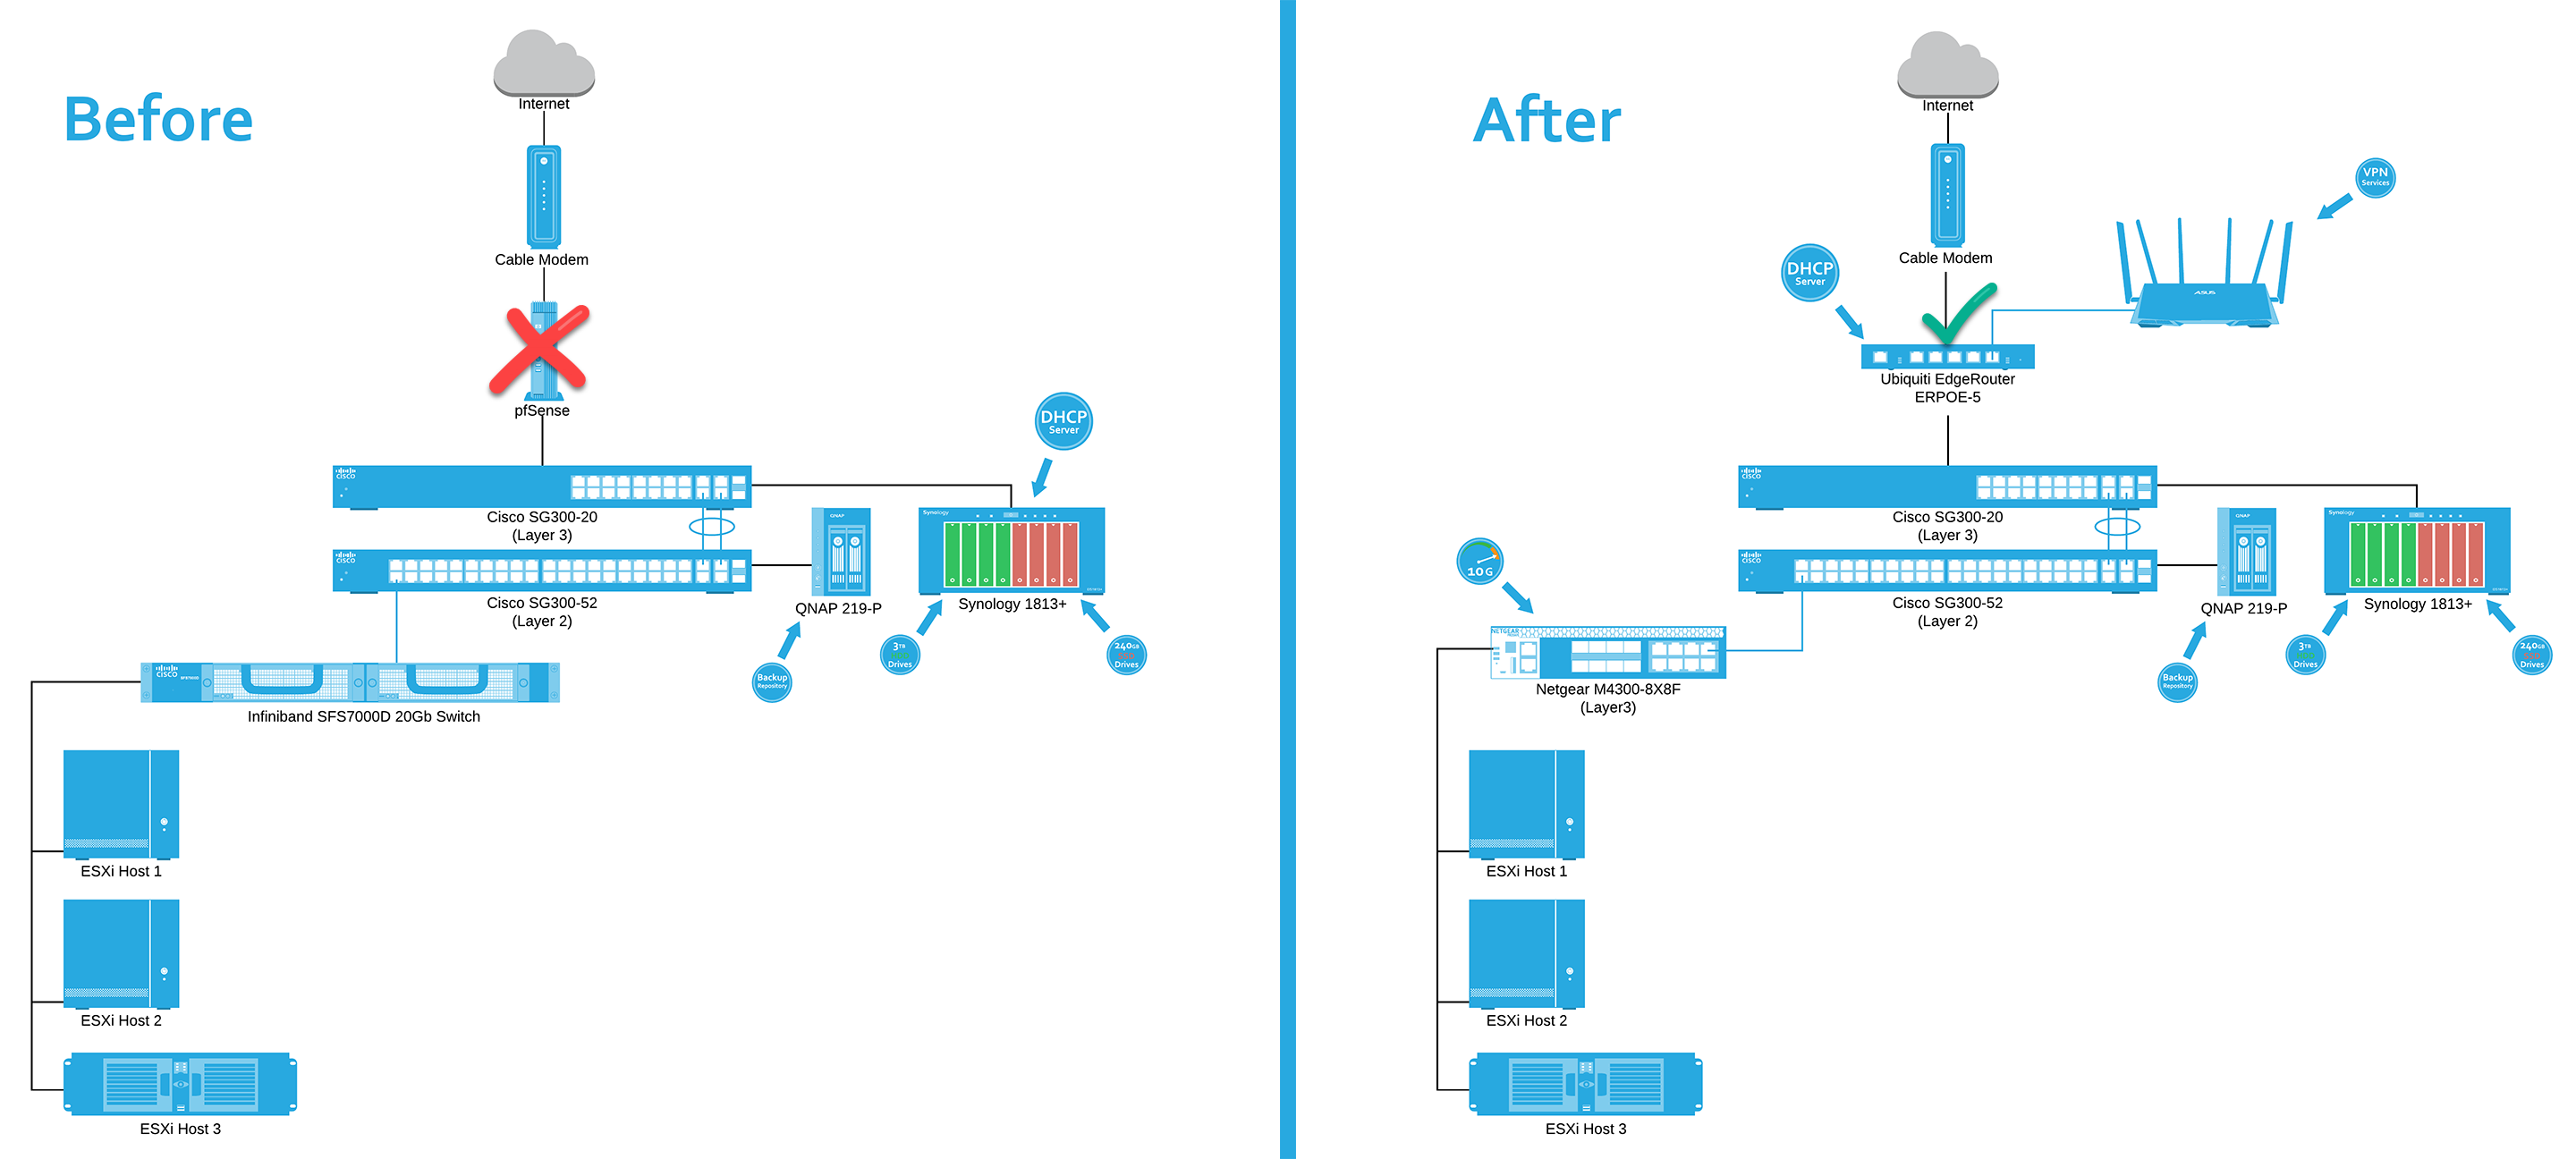
Figure-12
Subscribe to my newsletter
Read articles from Dave Davis directly inside your inbox. Subscribe to the newsletter, and don't miss out.
Written by
