Step by step guide in deploying Windows virtual machine in the Azure portal
 Francis Chukwu
Table of contents
- Sign in to the Azure portal.
- Create virtual machine
- Step 1: Enter virtual machines in the search
- Step 2: Select Create Vm
- Step 3: Subscription
- Step 4: Under Instance details
- Step 5: Under Administrator account
- Step 6: VM Sizes
- Step 7: Confirm and Review
- Step 8: Validation Passed
- Step 9: After Deployment
- Step 10: Connect to virtual machine
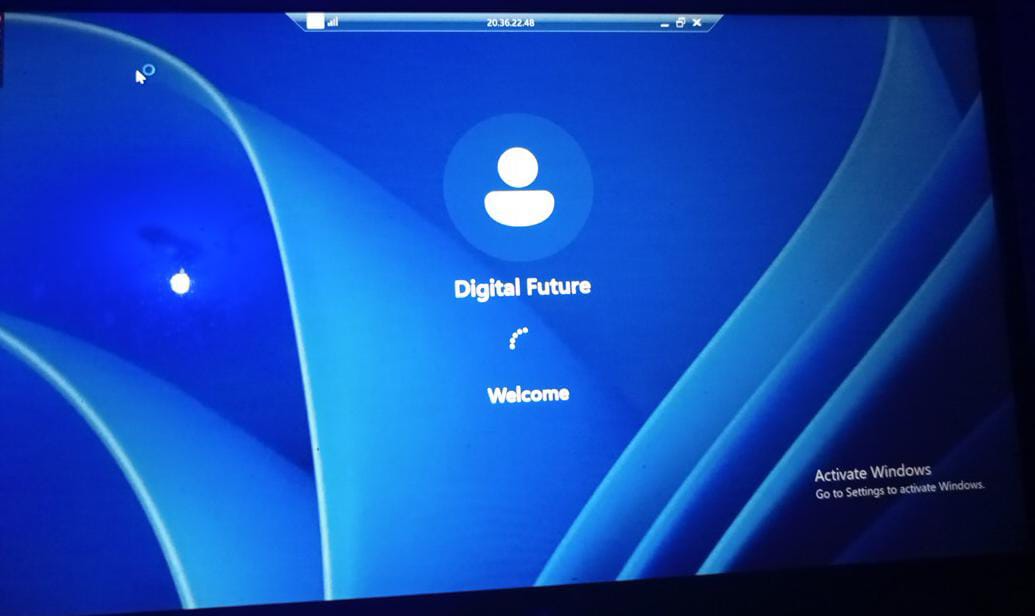
- View the welcome page
Azure Virtual Machines (VMs) are a powerful, on-demand, scalable computing resource offered by Microsoft Azure. They provide the flexibility of virtualization without the need to purchase or maintain physical hardware, allowing users greater control over their computing environment. This article covers the essential step by step guide on creating a VM through the Azure portal, windows 11 was used for illustration.
Sign in to the Azure portal.
Create virtual machine
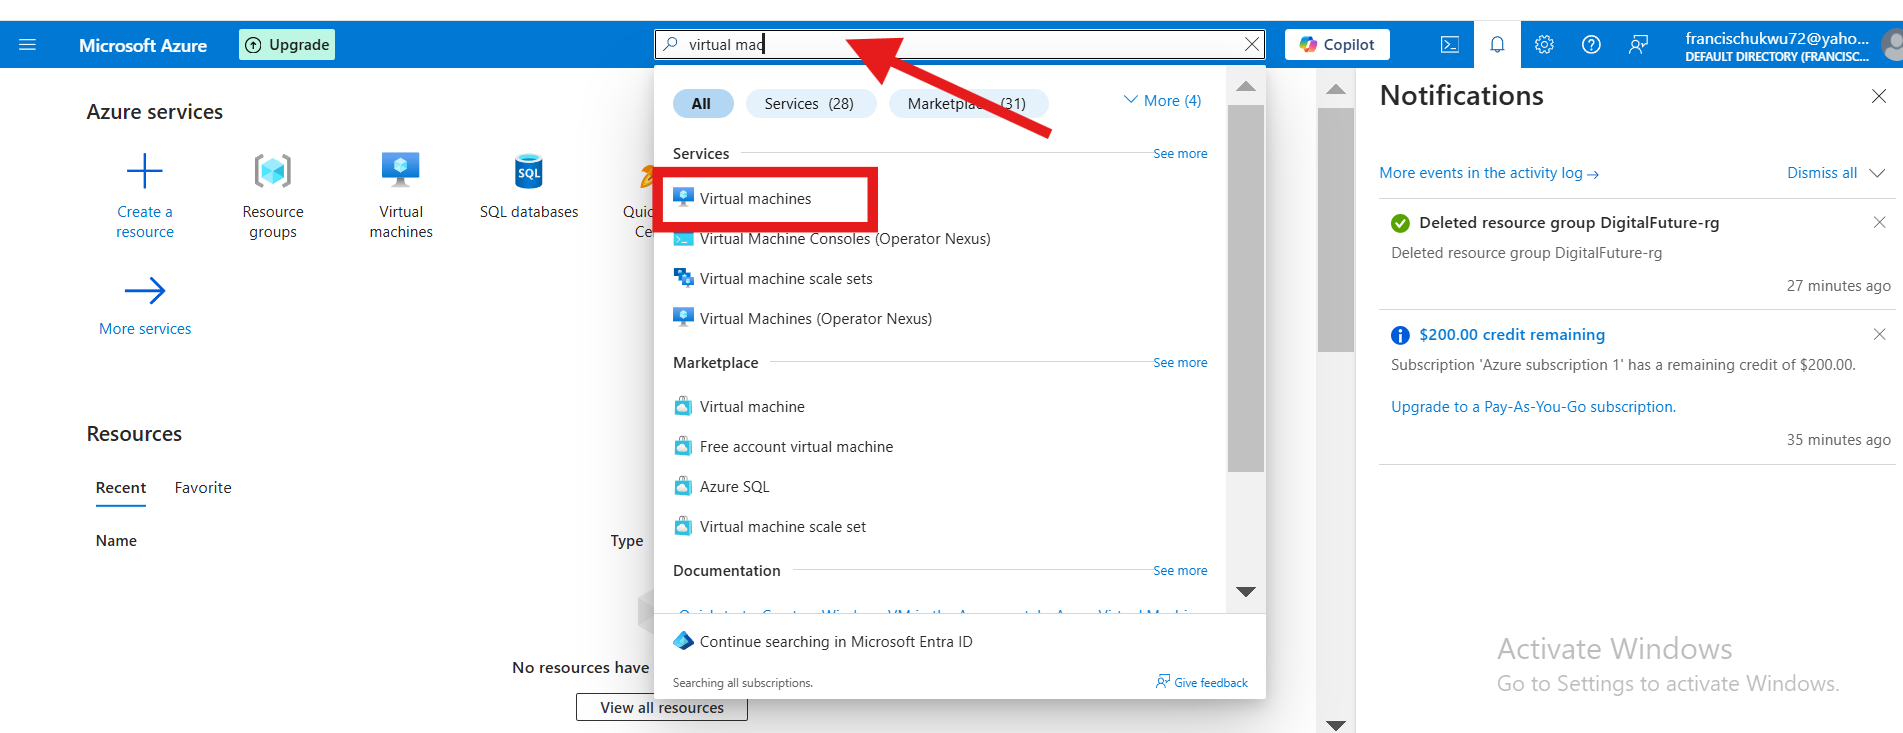
Step 1: Enter virtual machines in the search
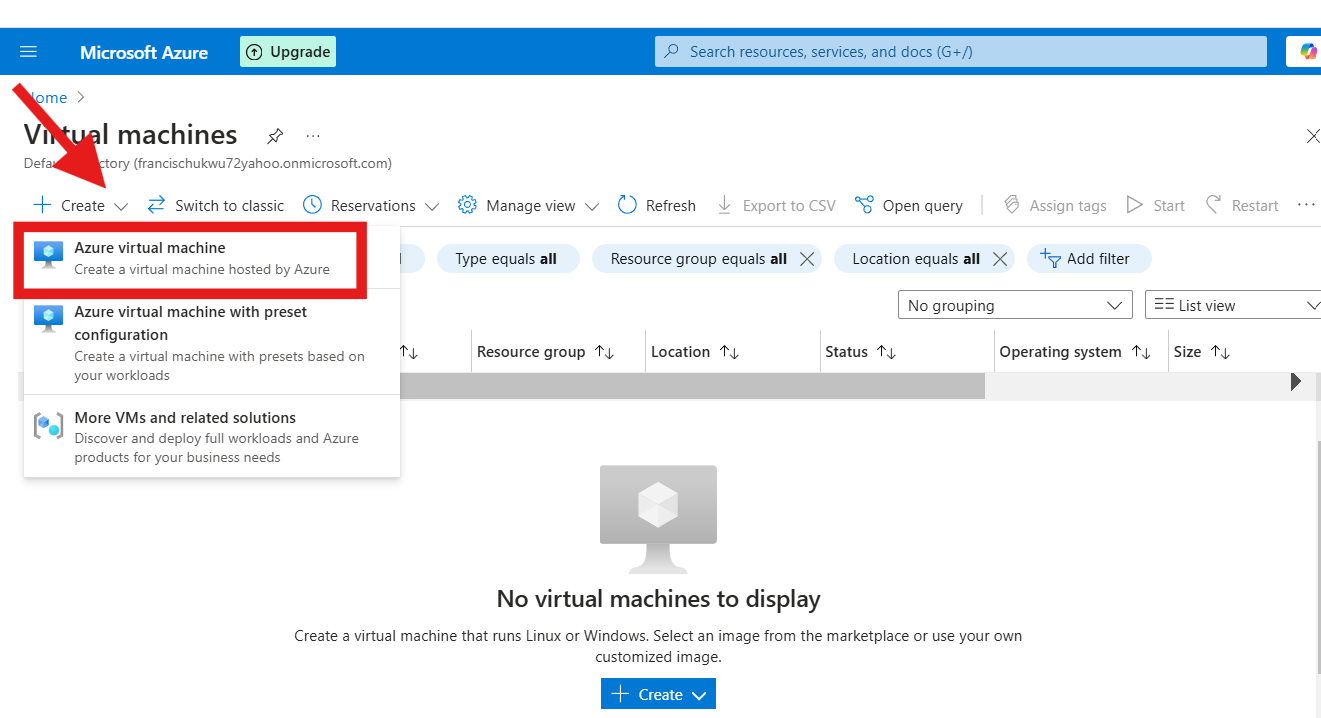
Step 2: Select Create Vm
In the Virtual machines page, select Create and then Azure virtual machine. The Create a virtual machine page opens.
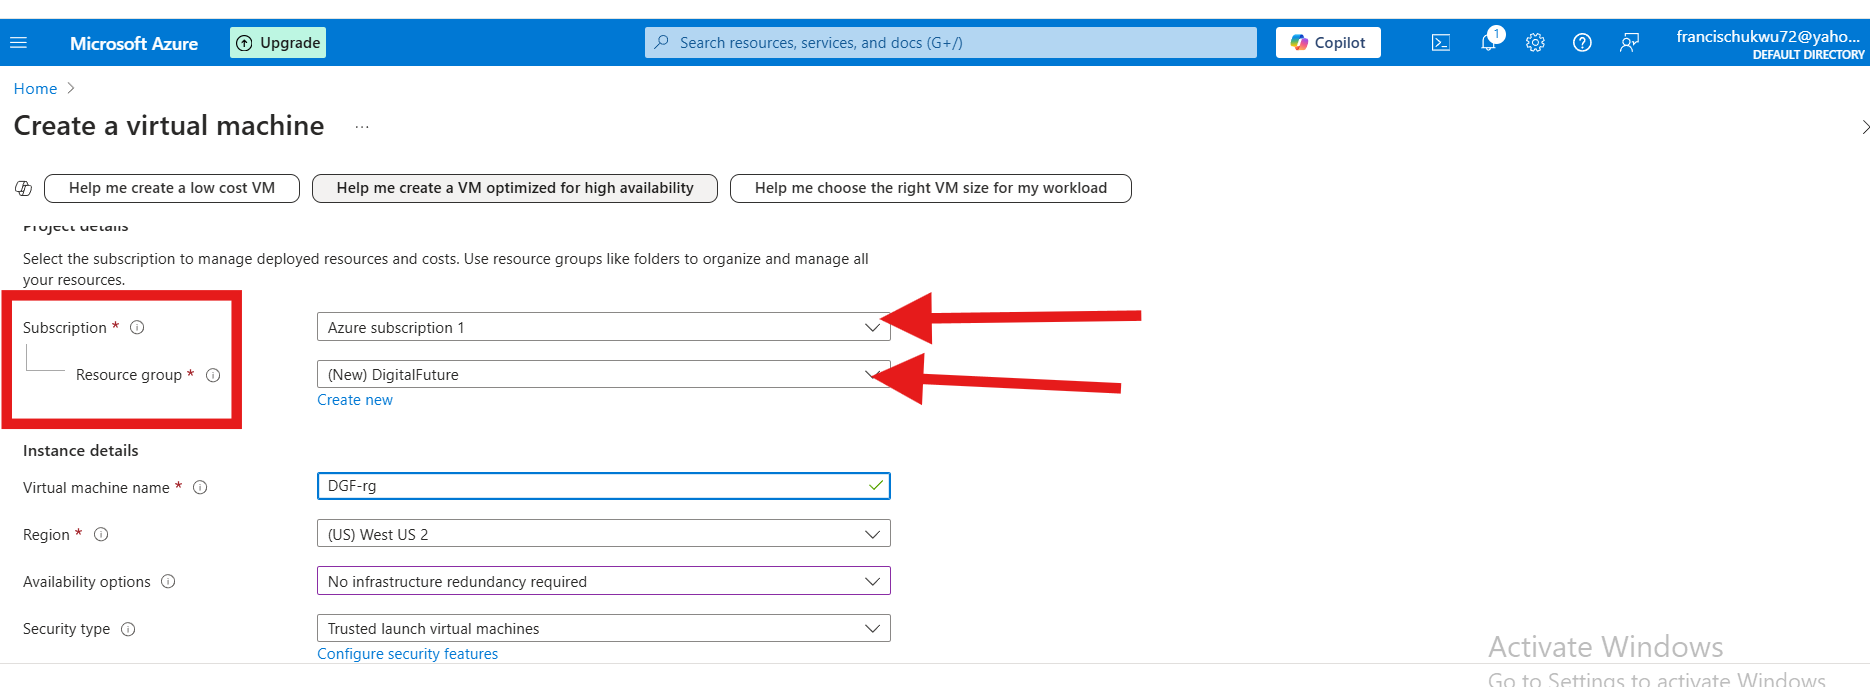
Step 3: Subscription
Subscription: Select your Azure subscription.
Resource Group: Choose an existing resource group or create a new one to organize your resources
Step 4: Under Instance details
Name: Enter a unique name for your VM (e.g.,
MyFirstVM).Region: Choose the Azure region closest to your users to reduce latency.
Availability Options: For high availability, choose between Availability Zones or Availability Set based on your reliability needs.
Image: Select your VM’s OS (e.g., Windows Server or Linux).
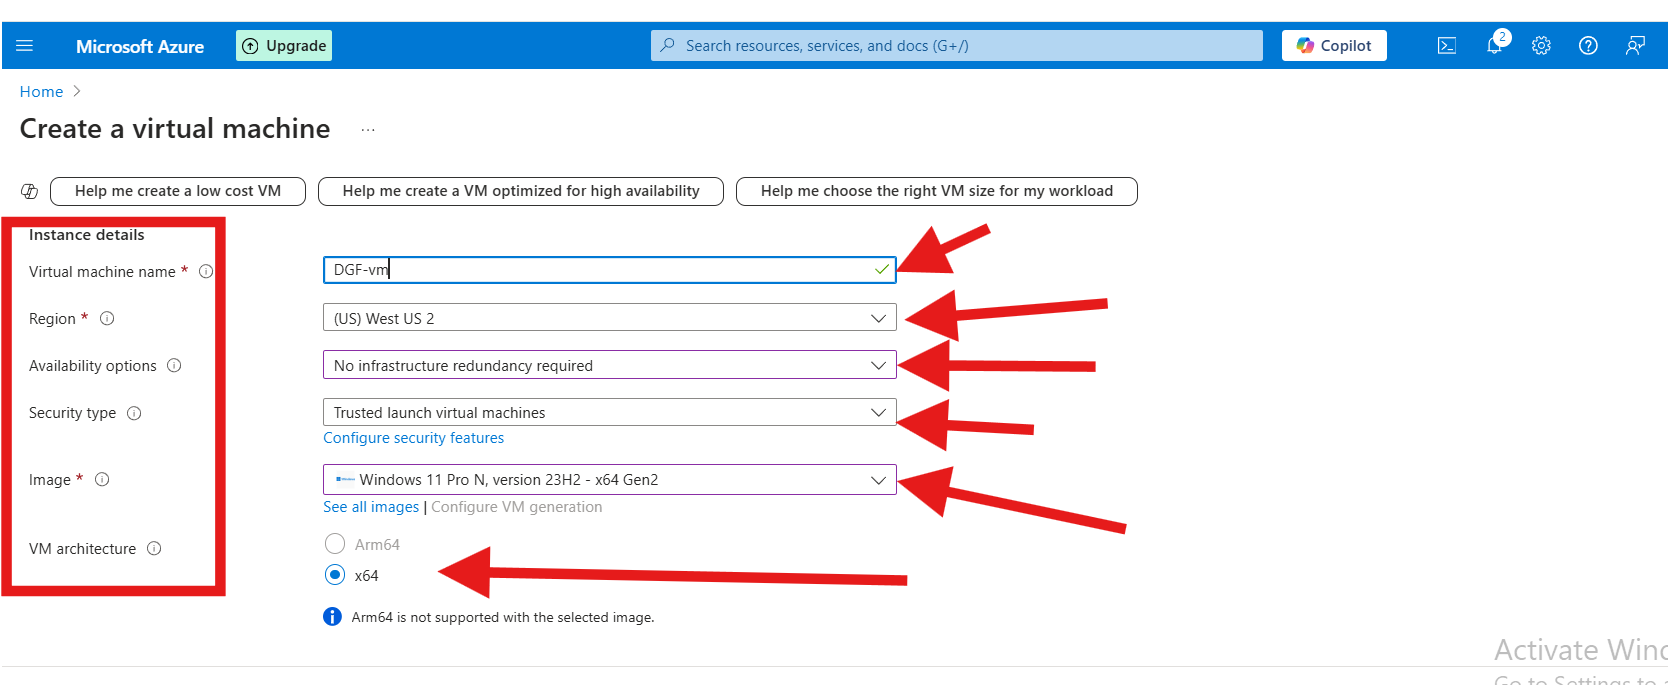
Step 5: Under Administrator account
provide a username, such as azureuser and a password. The password must be at least 12 characters long
Under Inbound port rules, choose Allow selected ports and then select RDP (3389) or HTTP (80) from the drop-down b
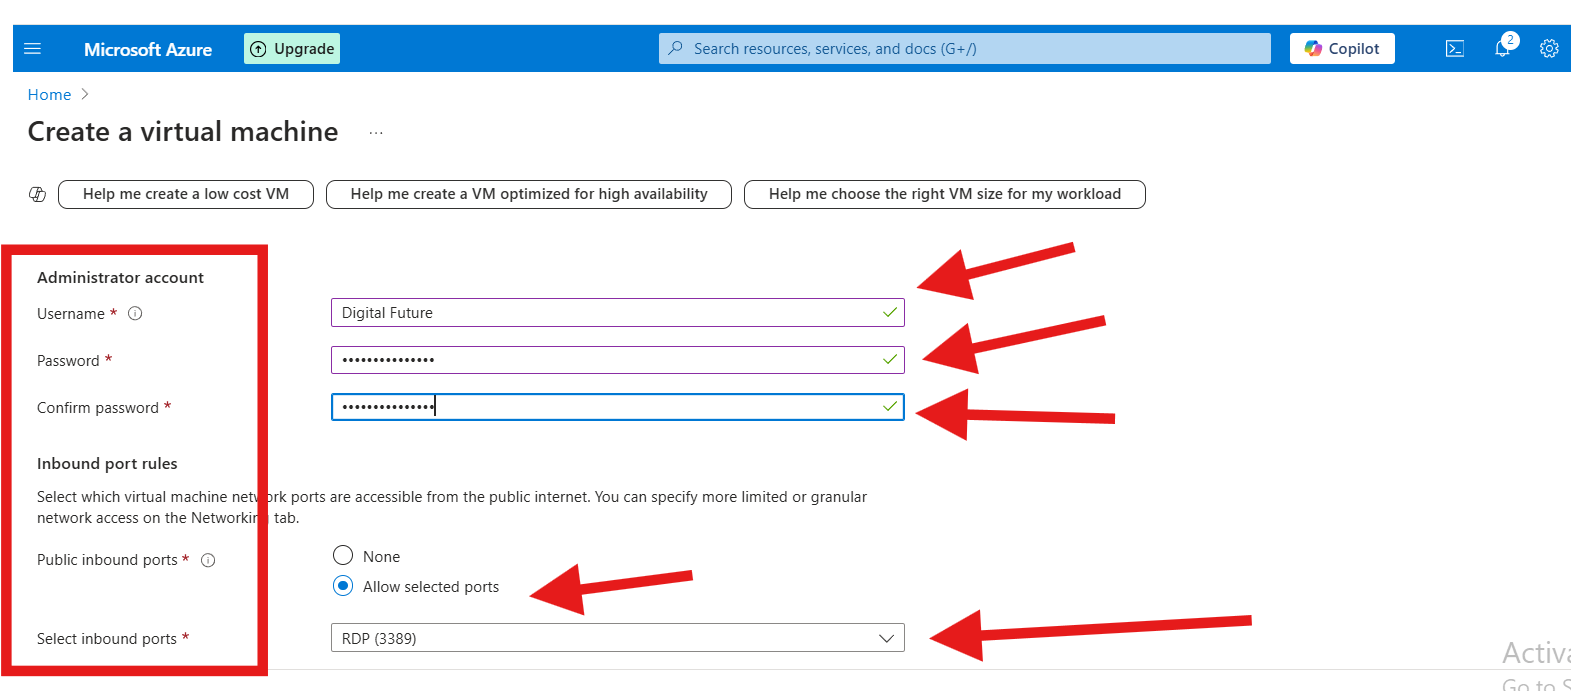
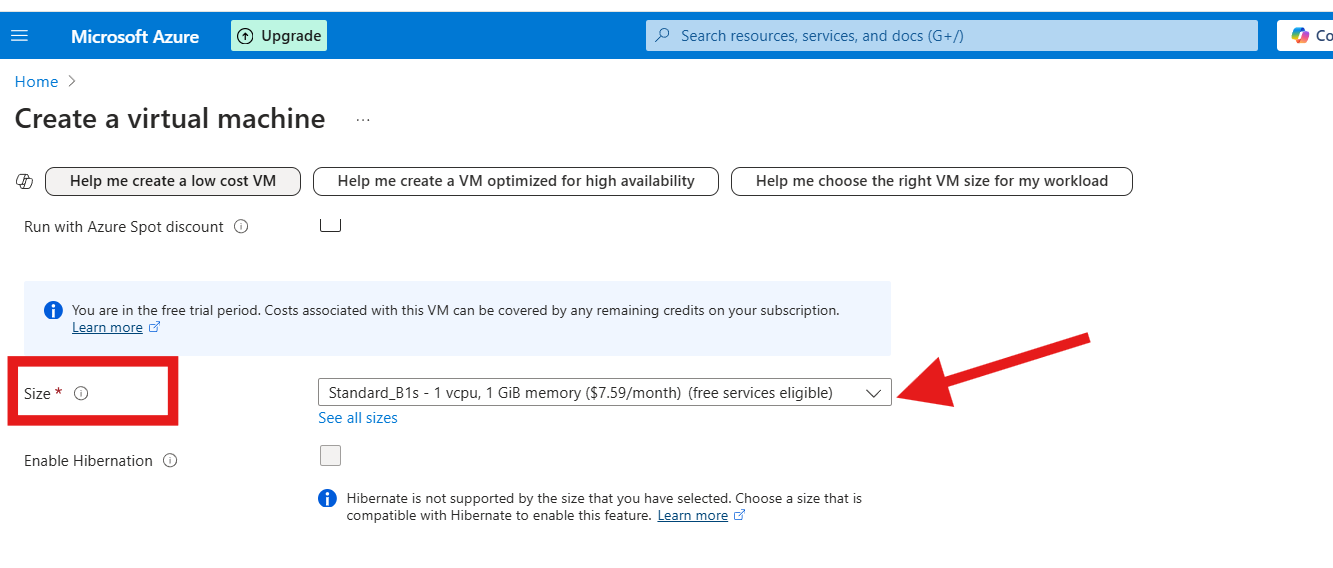
Step 6: VM Sizes
Size: Pick a VM size based on your application’s performance needs. Azure provides recommendations, but you can also view all available sizes by clicking "See all sizes"
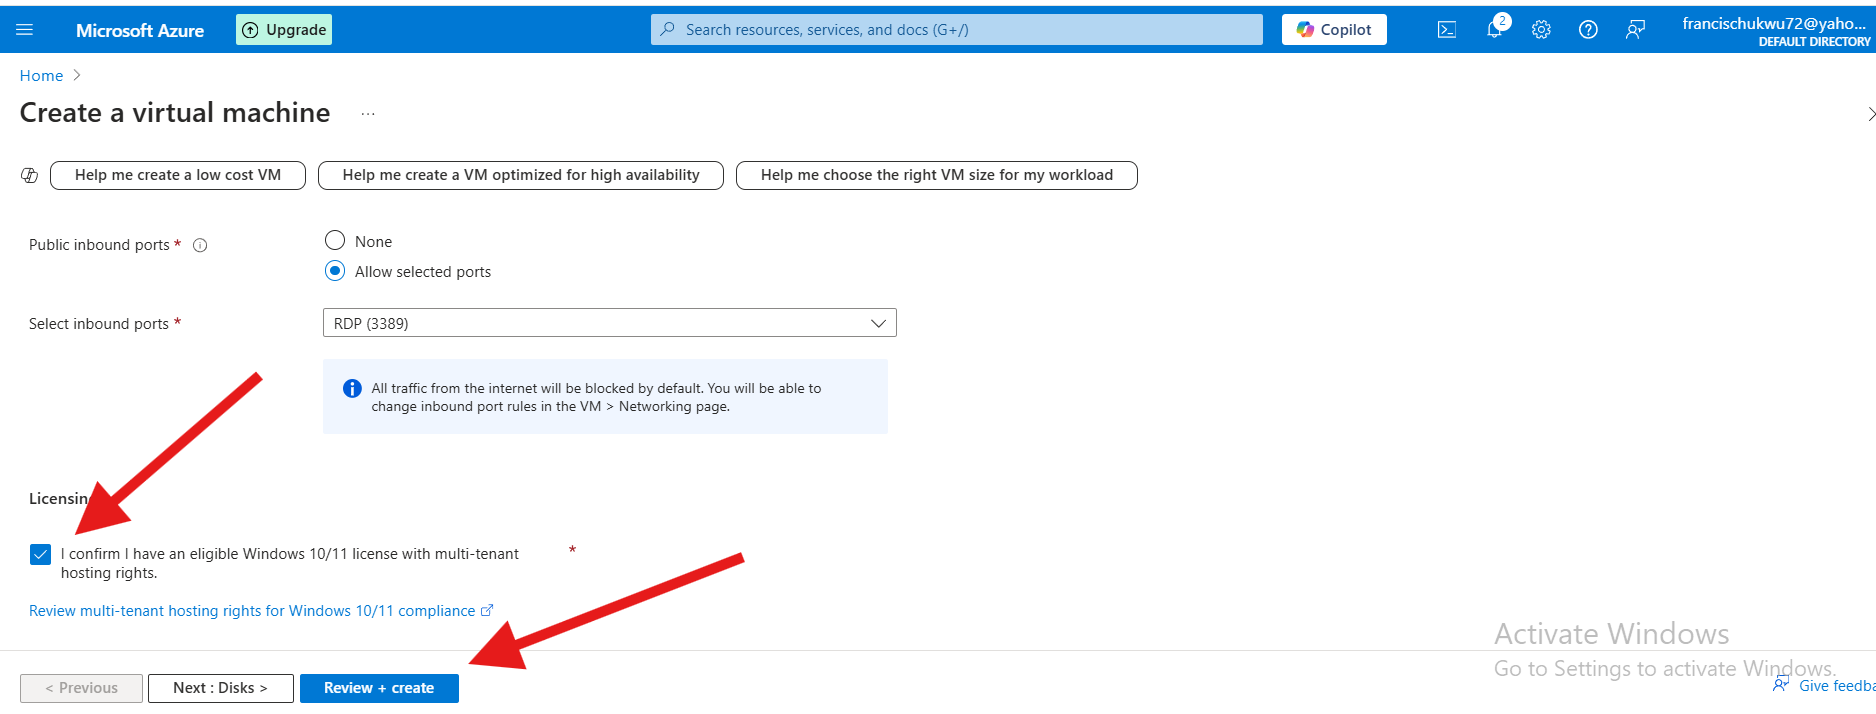
Step 7: Confirm and Review
Leave the remaining defaults and then select the Review + create button at the bottom of the page
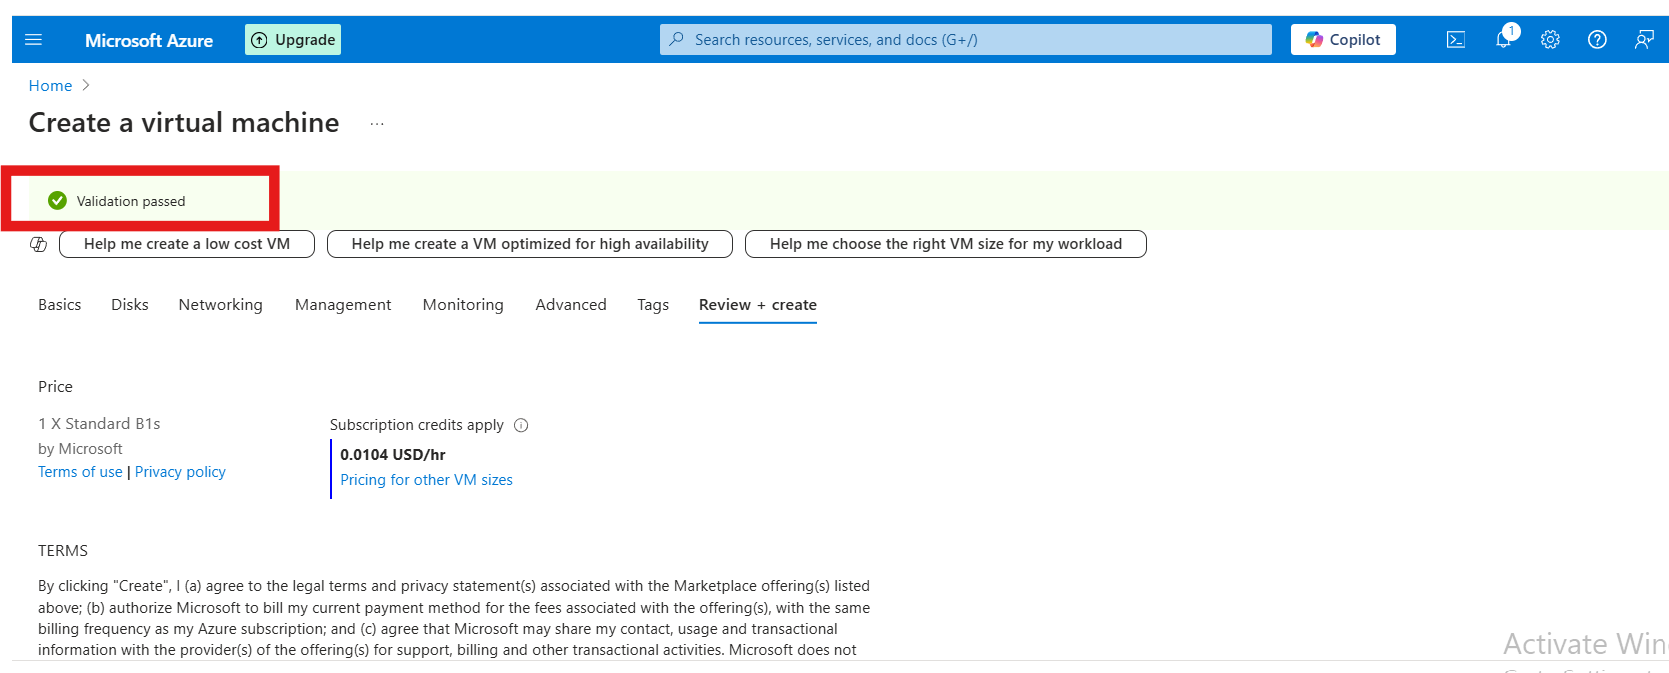
Step 8: Validation Passed
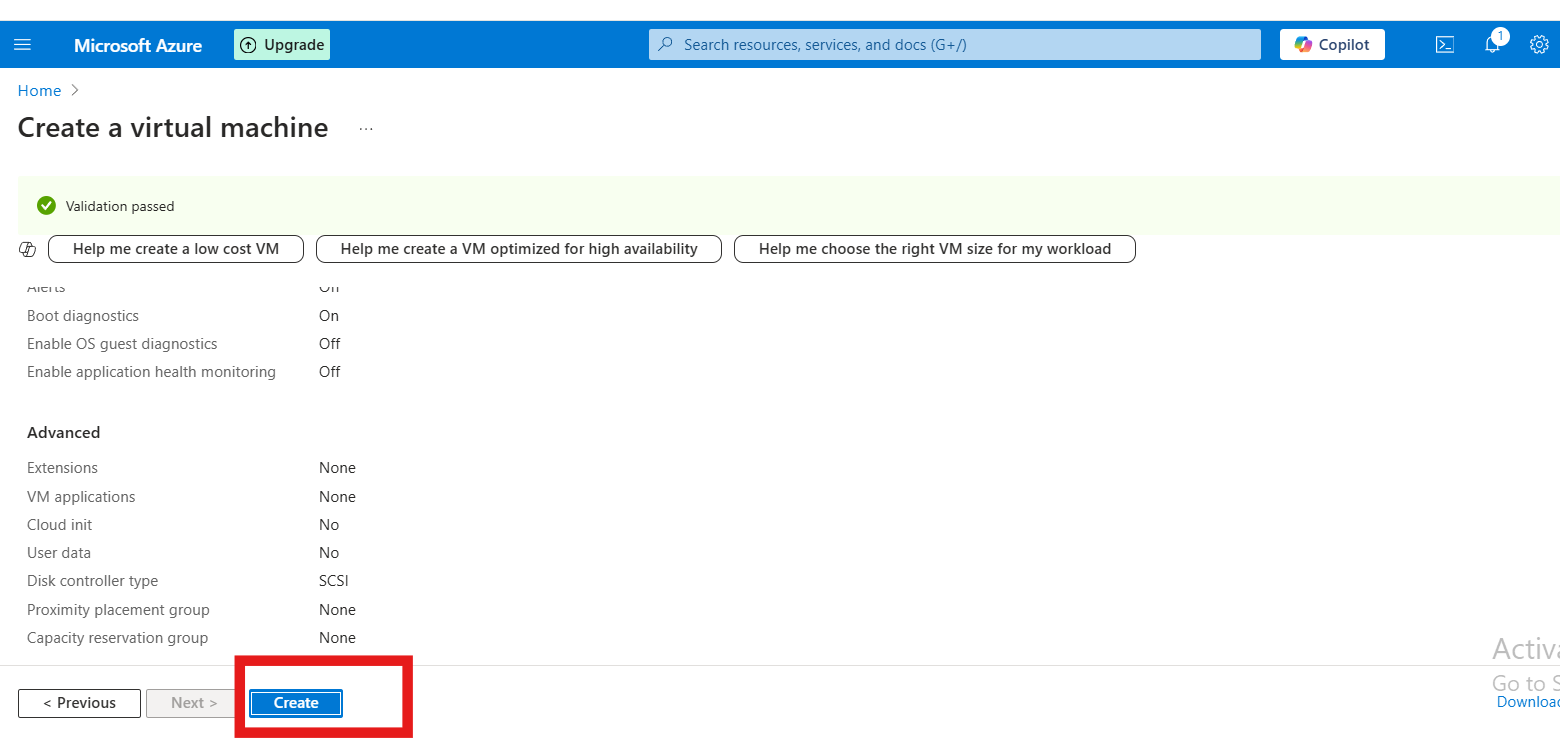
After validation runs, select the Create button at the bottom of the page.
Step 9: After Deployment
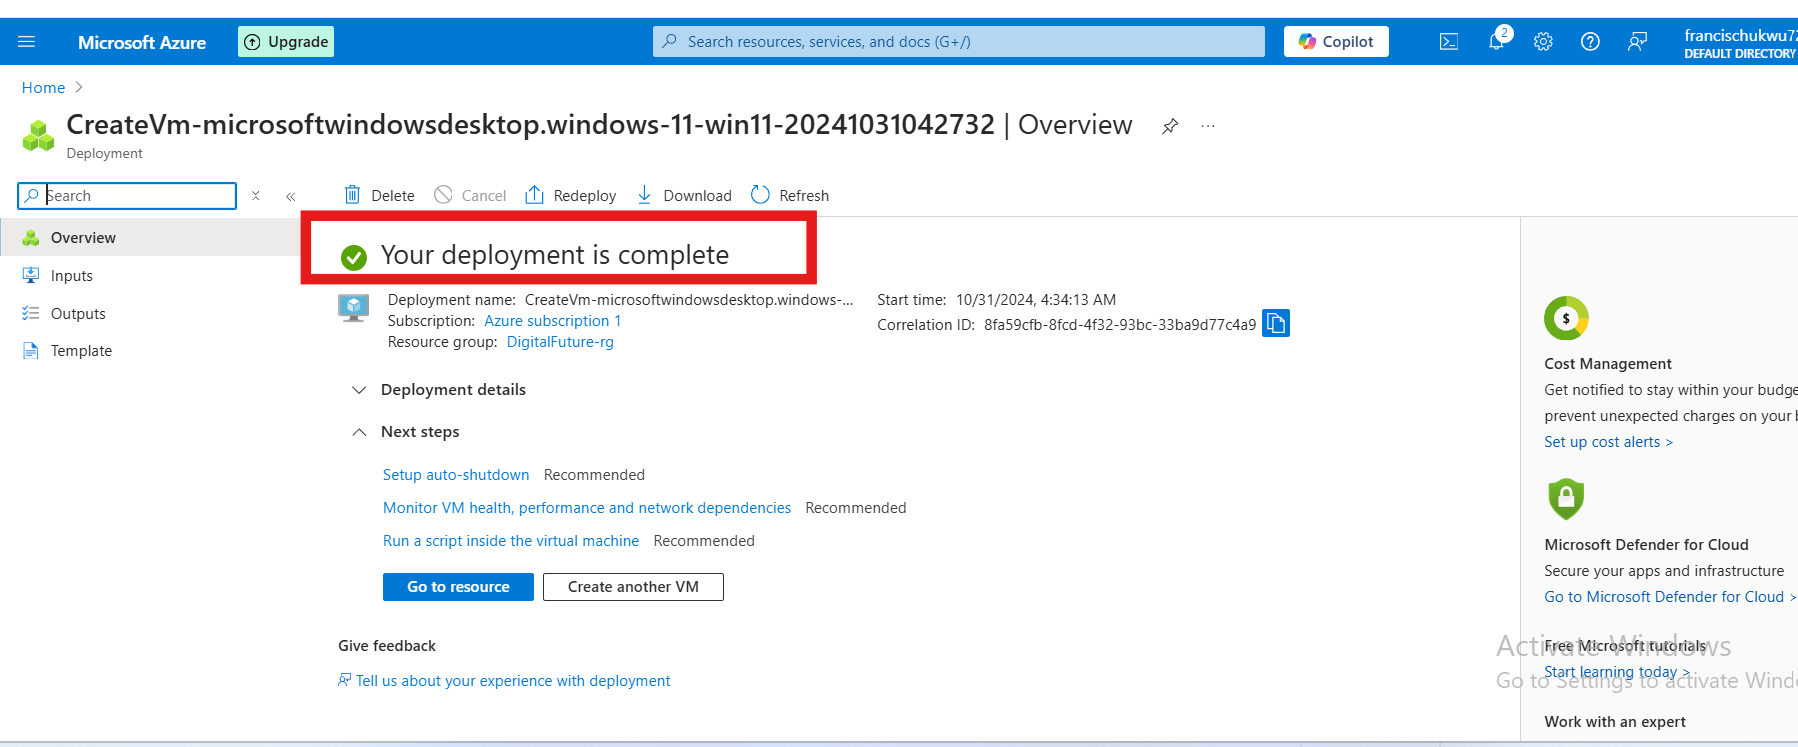
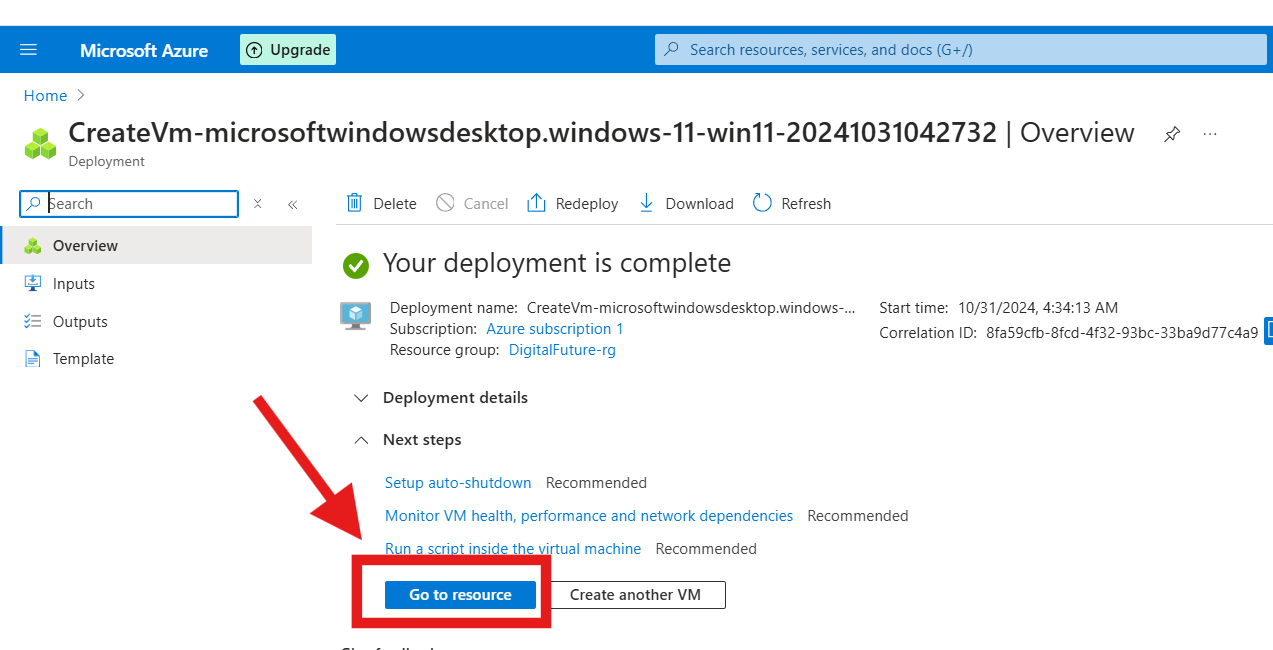
After deployment is complete, select Go to resource
Step 10: Connect to virtual machine
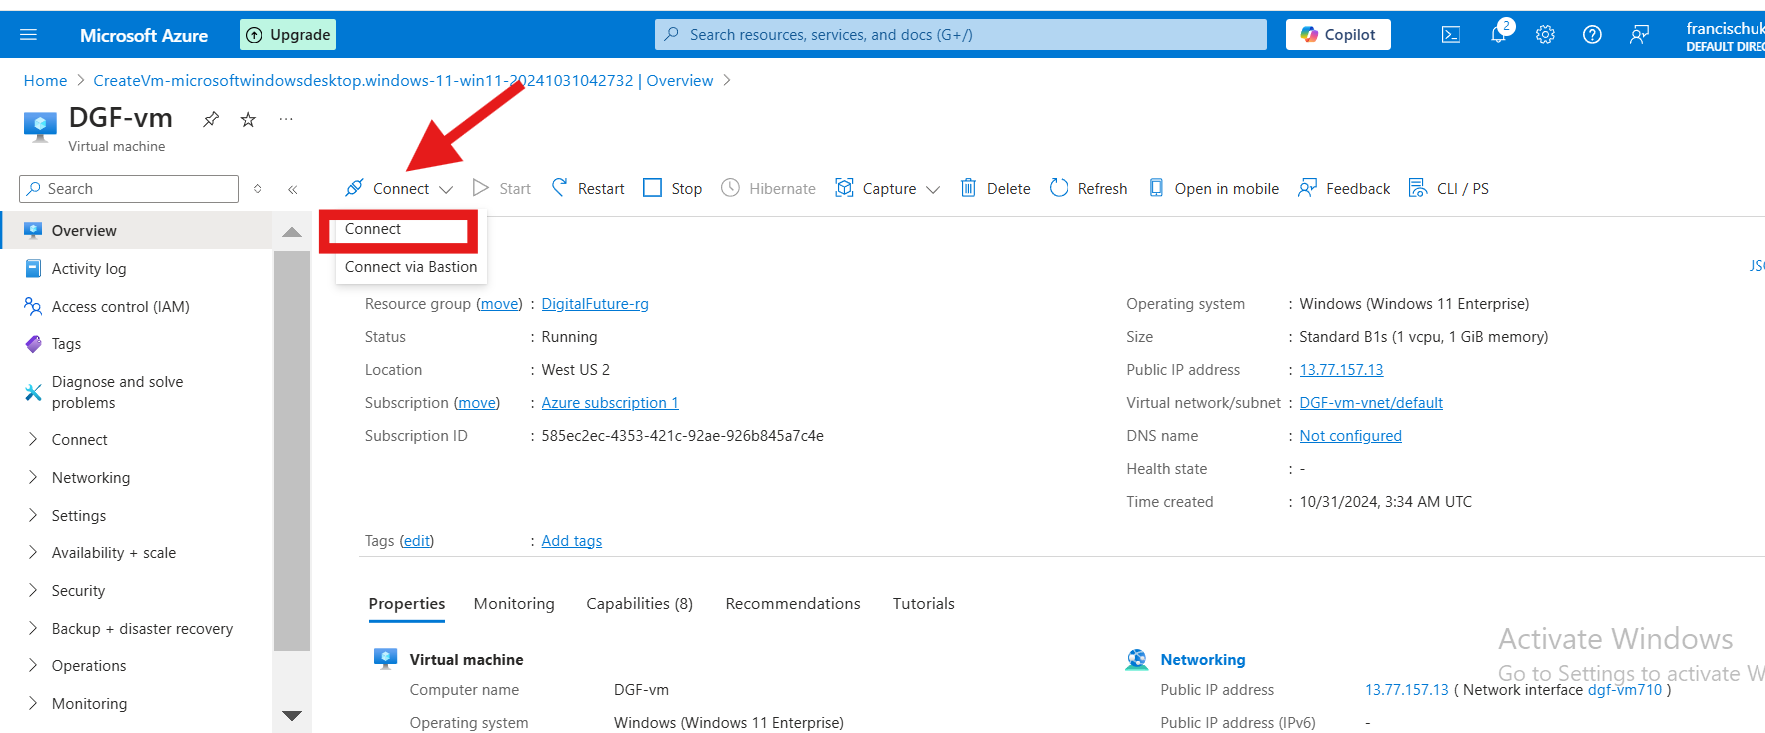
On the overview page for your virtual machine, select the Connect > RDP.
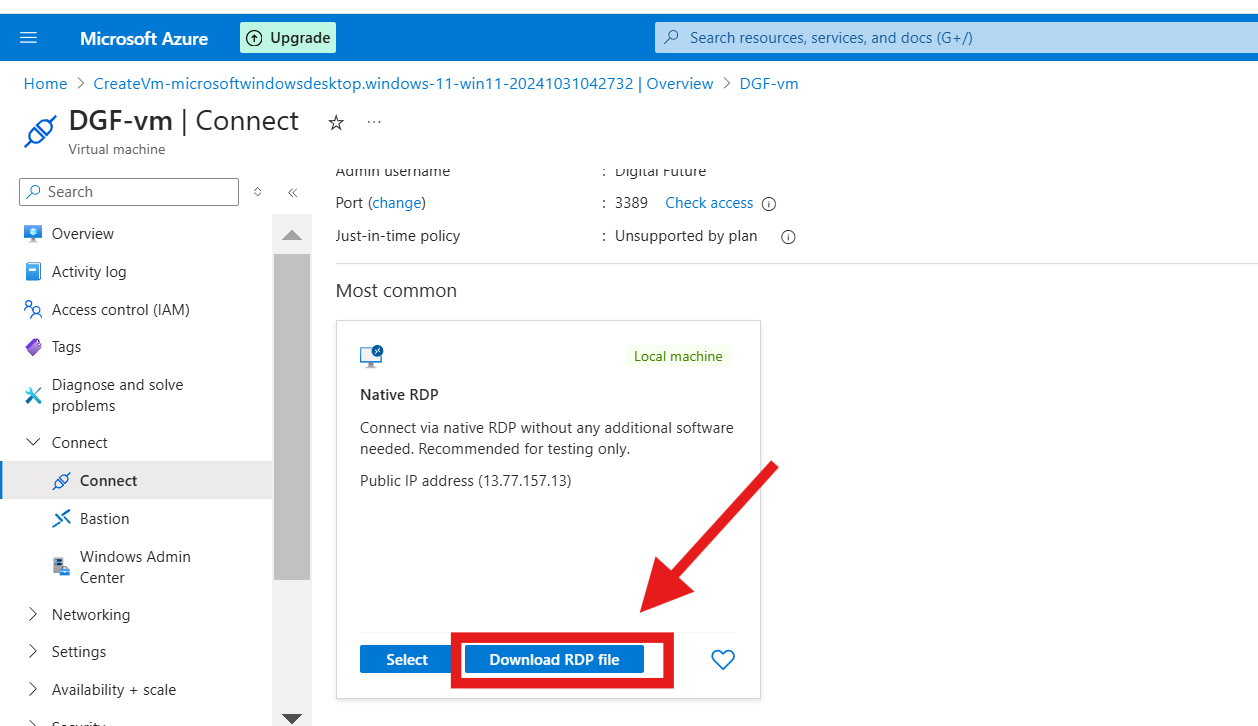
In the Connect with RDP tab, keep the default options to connect by IP address, over port 3389, and click Download RDP file
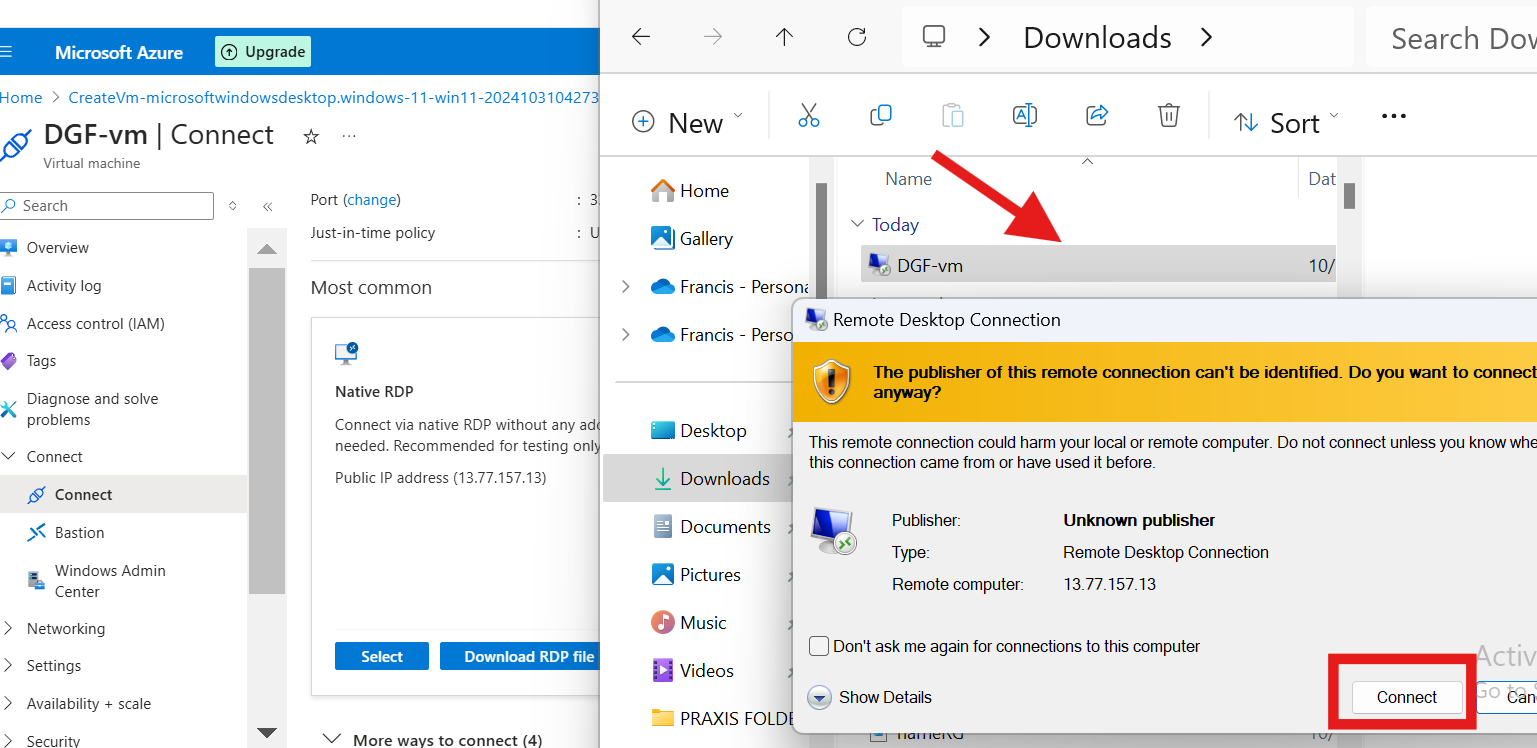
Open the downloaded RDP file and click Connect when prompted
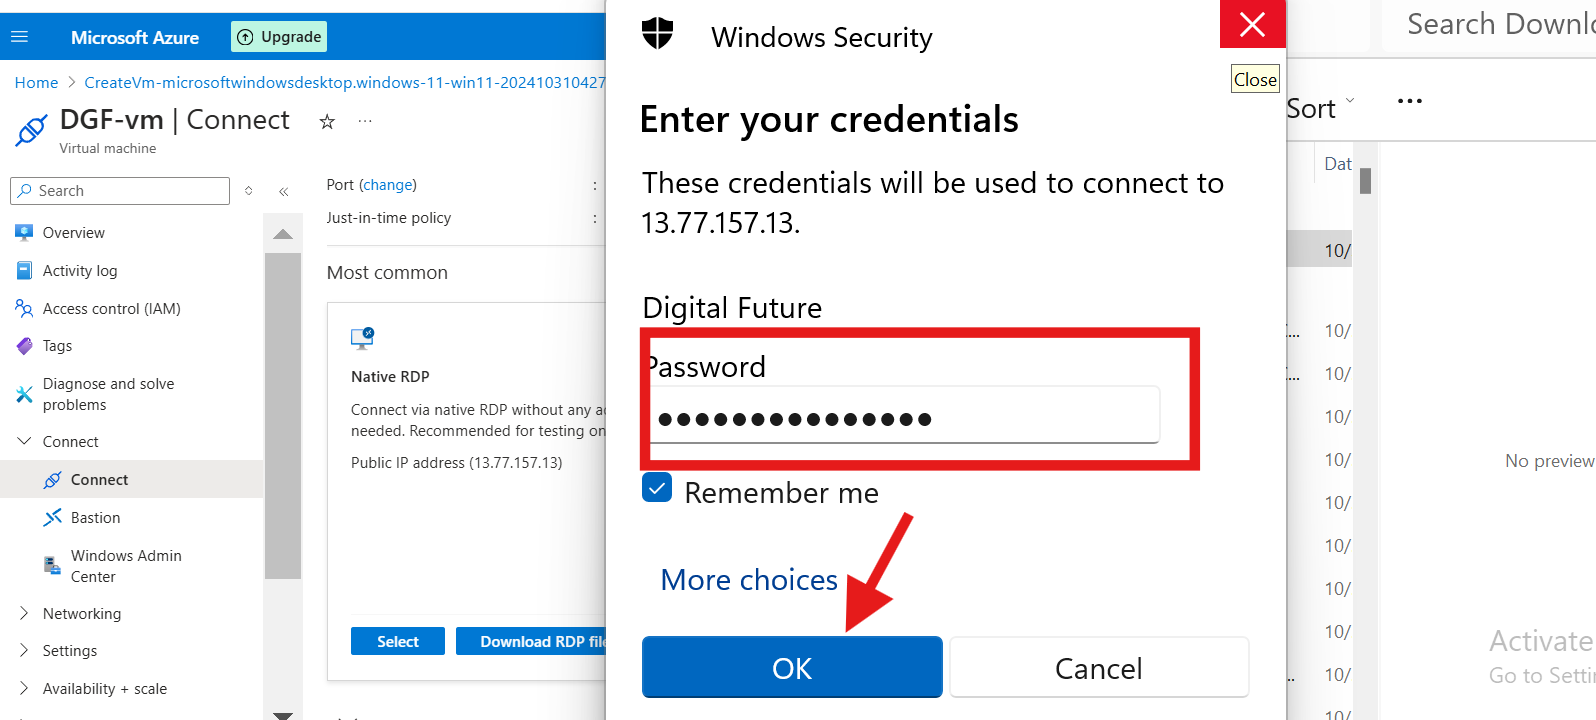
In the Windows Security window, Type the username, enter the password you created for the virtual machine, and then click OK
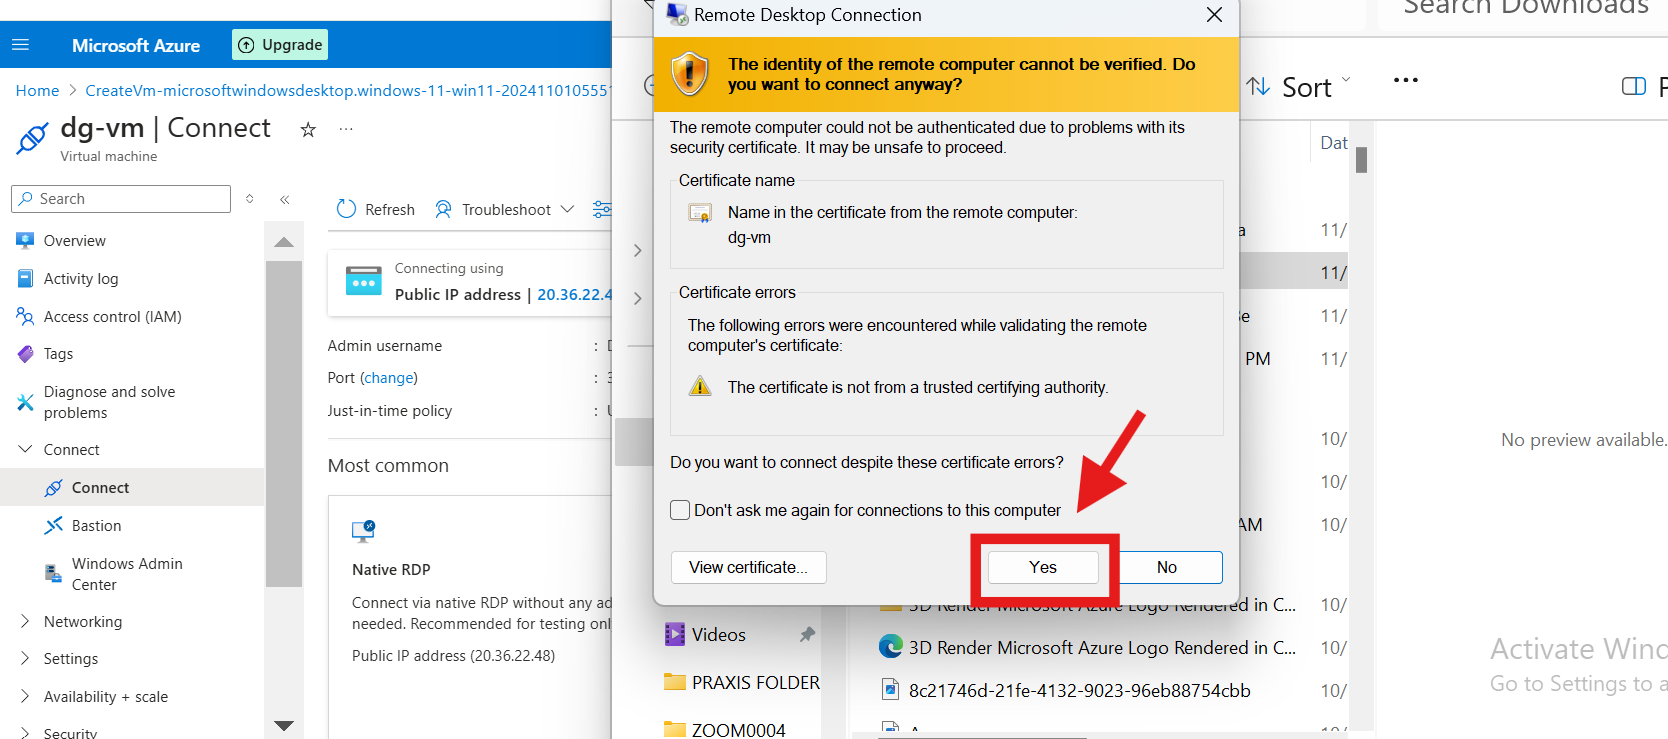
You may receive a certificate warning during the sign-in process. Click Yes or Continue to create the connection
View the welcome page
Step 11: Clean up resources
Delete resources
When no longer needed, you can delete the resource group, virtual machine, and all related resources.
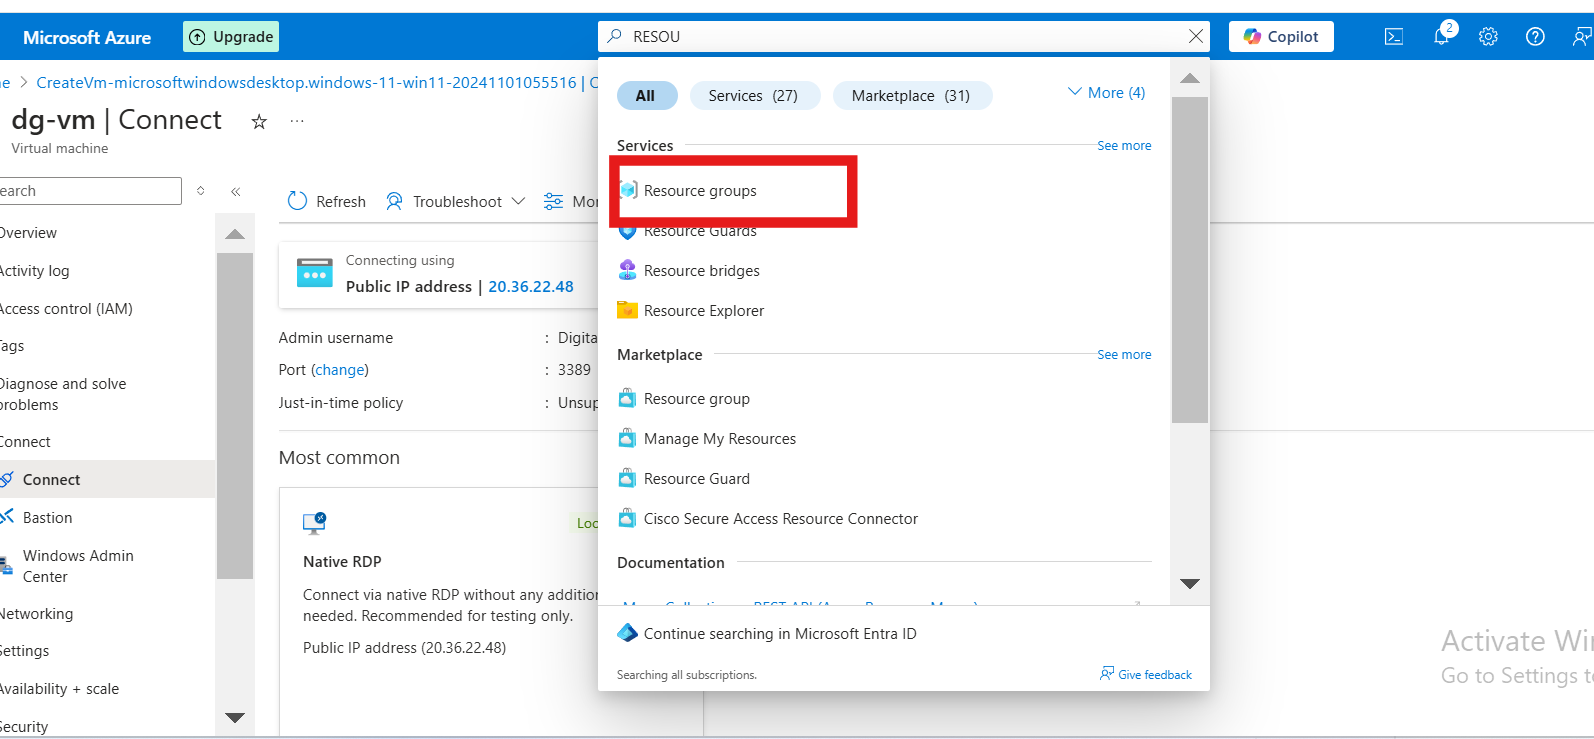
On the Overview page for the VM, select the Resource group link.
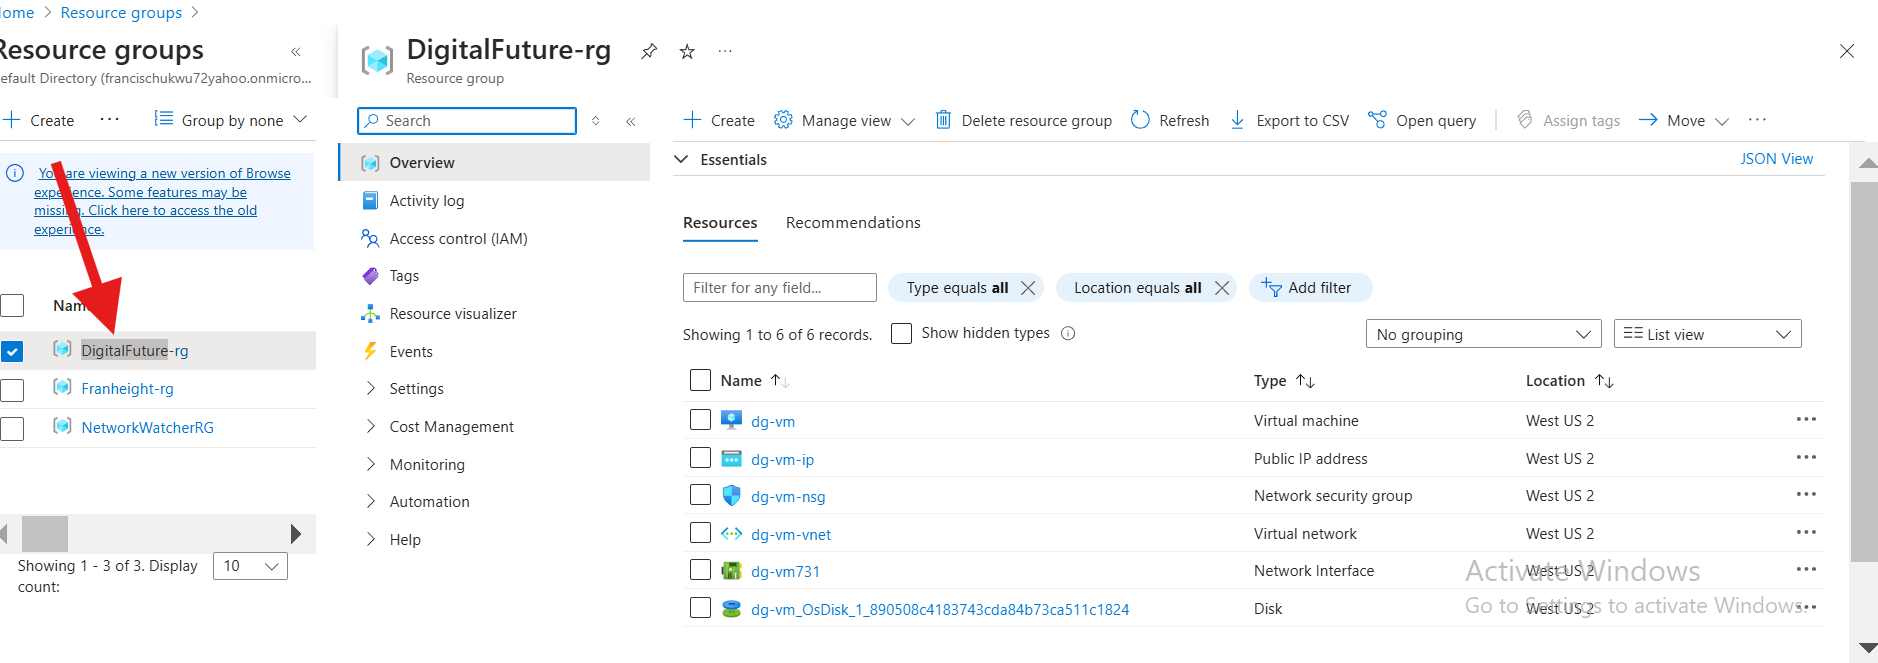
At the top of the page for the resource group, select Delete resource group.
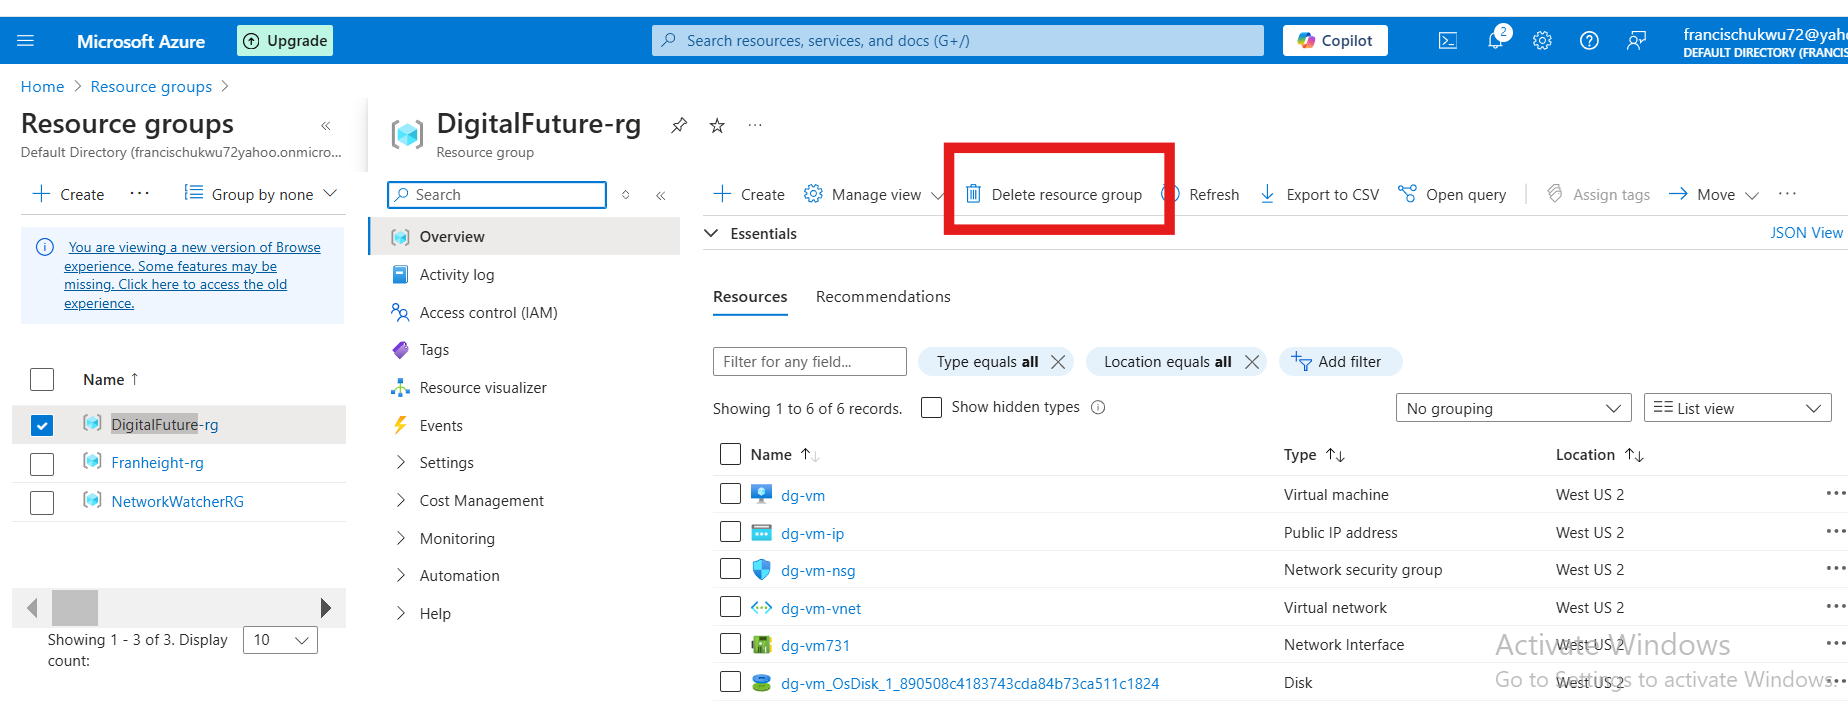
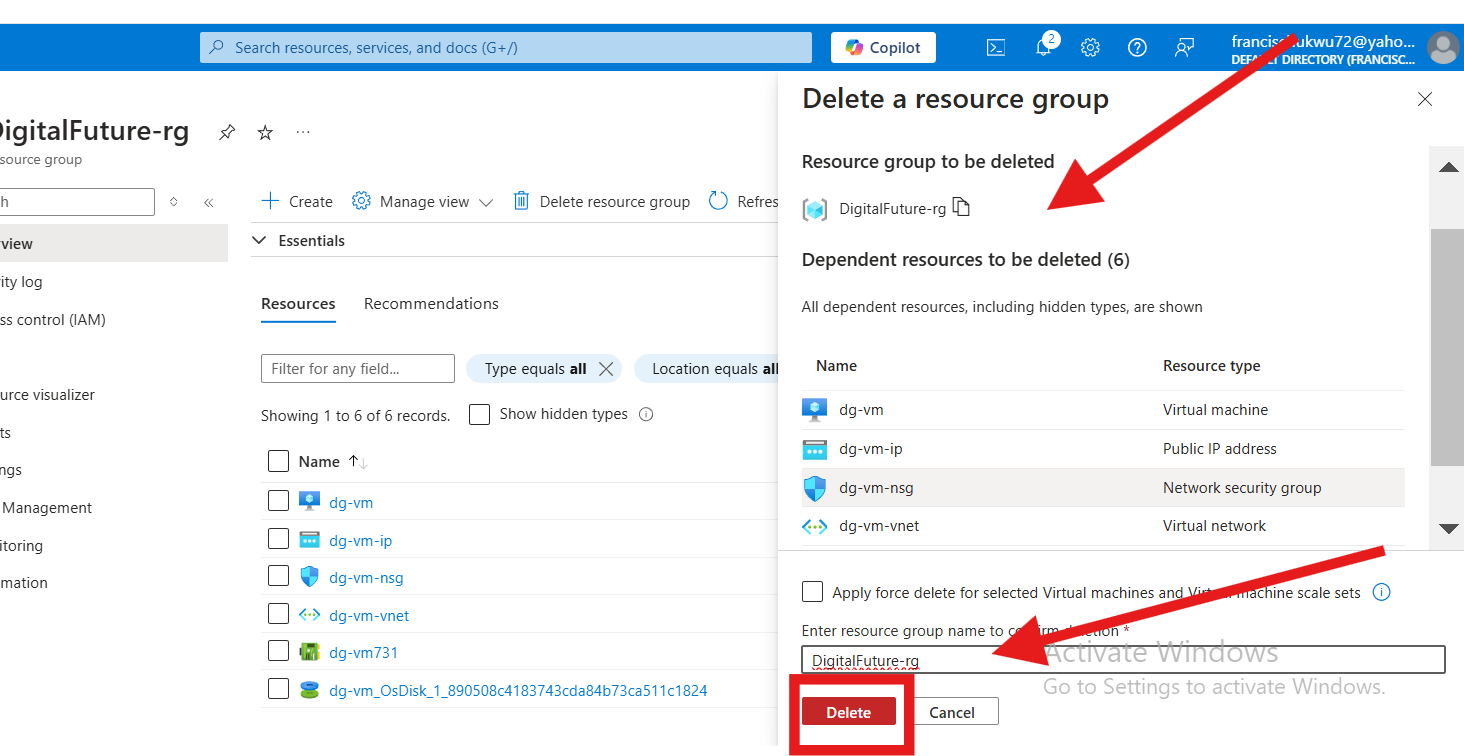
A page will open warning you that you are about to delete resources. Type the name of the resource group and select Delete to finish deleting the resources and the resource group.
Conclusion
Deploying an Azure Virtual Machine provides a robust, flexible foundation for running applications, testing environments, and extending your infrastructure. With Azure's rich selection of VM configurations and easy-to-use management tools, you can create a virtual machine that meets your exact requirements in just a few steps. By following this guide, you now have a VM ready to use and can take advantage of Azure’s monitoring, backup, and scalability features to optimize your resources. Start experimenting with your VM, and feel free to explore additional Azure services that can enhance your application’s performance and resilience.
Subscribe to my newsletter
Read articles from Francis Chukwu directly inside your inbox. Subscribe to the newsletter, and don't miss out.
Written by
