A Beginner’s Guide to Developing a Simple CRUD Application
 Samani Humaira
Application Pre-Requisite:
Before we dive into the development of our CRUD application, make sure you have the following prerequisites:
Basic Understanding of Node.js, Express, and MongoDB.
Node.js and MongoDB Installed on Your Device: Ensure that you have both Node.js and MongoDB installed. You can download them from the official links below:
Node.js: Download Node.js
MongoDB: Download MongoDB
Make sure you have these prerequisites in place before we start building our CRUD application.
Setting Up Project
Now that we have everything installed, let’s set up our project. Follow these steps:
- Create a New Directory
Open your terminal and create a new directory for your project. Navigate into it:
mkdir simple-crud-app
cd simple-crud-app
- Initialize a New Node.js Project
Next, initialize a new Node.js project:
npm init -y
This command creates a package.json file that will manage our project dependencies.
- Install Required Packages
We’ll need to install a few packages to get started. Run the following command:
npm install express mongoose ejs body-parser
Express: A web framework for Node.js.
Mongoose: An ODM (Object Data Modeling) library for MongoDB and Node.js.
EJS: A templating engine for rendering HTML views.
Body-parser: A middleware for parsing request bodies.
Install all the required packages for the application.
Building the Application
Now, let’s jump into building our CRUD application. In this section, we’ll set up the server, create a model to manage our data, define routes for handling user requests, and create the necessary views for our application. By the end of this section, you’ll have a fully functional CRUD application that allows you to create, read, update, and delete student records.
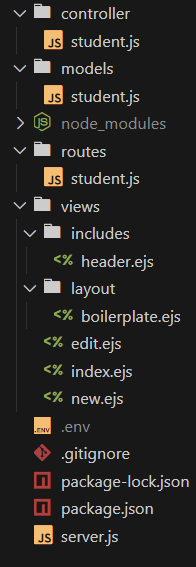
Below is the project structure:

- Setting Up the Server
Create a new file named server.js in your project directory:
// Import required modules
const express = require("express")
const app = express()
const mongoose = require("mongoose")
require('dotenv').config()
const StudentRoute = require("./routes/student.js");
const path = require("path");
const ejsMate = require('ejs-mate');
const methodOverride = require('method-override');

// middlewares
app.set("view engine","ejs");
app.set("views",path.join(__dirname,"views"));
app.use(express.urlencoded({extended:true}));
app.use(methodOverride("_method"));
app.engine("ejs",ejsMate);
app.use(express.static(path.join(__dirname,"/public")));

app.use("/",StudentRoute);

// database connection
mongoose.connect('mongodb://127.0.0.1:27017/CRUD')
  .then(() => console.log('Connected!'));

// Server
app.listen(process.env.PORT,(req,res) => {
    console.log(`app is litening to port ${process.env.PORT}`);
});
In this section, we set up the Express server and establish a connection to the MongoDB database named CRUD. We also configure the body-parser middleware to parse incoming request bodies. Finally, we start the server on port 3000, making it ready to handle incoming requests.
- Creating the Student Model
// Import mongoose for creating the schema
const mongoose = require("mongoose")

// Define the schema for a student document
const studentSchema = new mongoose.Schema({
    name: String,
    studentClass: String,
    rollNo: String,
    gender: String,
    dateOfBirth: String,
    phoneNo: Number,
    email: String,
    createdAt: {
        type: Date,
        default: Date.now
    }
});

// Export the model based on the schema to interact with the "students" collection
module.exports = new mongoose.model("student", studentSchema);
Here, we define a Mongoose schema for our Student model. This schema outlines the structure of a student document in MongoDB, including fields like name, studentClass, and email, along with their data types. By exporting this model, we can easily interact with the students collection in our database.
- Setting Up Routes and controllers.
Our application will be structured into routes and controllers. Let’s take a look at how they work together to manage our student records.
Routes
In the routes/student.js file, we define the routes that will handle requests related to students. Here’s how it looks
// Import required modules
const express = require("express");
const Router = express.Router();
const { index, renderNewForm, newStudent, renderEdit, updateStudent, deleteStudent } = require("../controller/student.js");

// Route to display all students
Router.route("/")
    .get(index);

// Route to render the form and create a new student entry
Router.route("/New")
    .get(renderNewForm)
    .post(newStudent);

// Route to render edit form and update an existing student entry
Router.route("/:id/edit")
    .get(renderEdit)
    .put(updateStudent);

// Route to delete a student by ID
Router.route("/:id/delete")
    .delete(deleteStudent);

module.exports = Router;
Read All Students (
GET /):This route shows us all the students. When we make a
GETrequest to/, it fetches and displays every student entry in the database. So this is our Read part of CRUD.Create New Student (
GET /NewandPOST /New):We have two steps here:
GET /Newbrings up a form where we can add a new student, andPOST /Newtakes that form data and saves a new student to the database. Together, these routes make up the Create part of CRUD.Read and Update Student (
GET /:id/editandPUT /:id/edit):Here, we’re handling both reading and updating a specific student.
GET /:id/editfetches a specific student’s info and displays it in an editable form. Then,PUT /:id/edittakes our edits and updates the student’s info in the database. This covers the Update part of CRUD.Delete Student (
DELETE /:id/delete):Finally, we have the
DELETEroute. This removes a specific student from the database. We just send aDELETErequest to/:id/deleteand it’s gone—so this completes the Delete in CRUD.
Controller Functions
Now, let’s move on to the controller in controller/student.js, where the actual logic happens:
// Import the Student model to interact with the database
const Student = require("../models/student.js");

// Display all students on the main index page
module.exports.index = async (req, res) => {
    try {
        let allStudent = await Student.find({});
        res.render("index.ejs", { allStudent });
    } catch (err) {
        console.error("Error occurred:", err);
    }
}

// Render form to create a new student
module.exports.renderNewForm = (req, res) => {
    try {
        res.render("new.ejs");
    } catch (err) {
        console.error("Error occurred:", err);
    }
}

// Add a new student to the database
module.exports.newStudent = async (req, res) => {
    const newStudent = new Student(req.body.student);

    try {
        await newStudent.save();
        res.redirect("/");
    } catch (err) {
        console.error("Error occurred:", err);
    }
};

// Render form to edit an existing student's details
module.exports.renderEdit = async (req, res) => {
    try {
        const { id } = req.params;
        const StudentData = await Student.findById(id);
        res.render("edit.ejs", { student: StudentData });
    } catch (err) {
        console.error("Error occurred:", err);
    }
}

// Update an existing student's details in the database
module.exports.updateStudent = async (req, res) => {
    try {
        const { id } = req.params;
        await Student.findByIdAndUpdate(id, { ...req.body.student });
        res.redirect("/");
    } catch (err) {
        console.error("Error occurred:", err);
    }
}

// Delete a student from the database
module.exports.deleteStudent = async (req, res) => {
    try {
        const { id } = req.params;
        await Student.findByIdAndDelete(id);
        res.redirect("/");
    } catch (err) {
        console.error("Error occurred:", err);
    }
}
Explanation of Each Route, Controller, and UI Interaction
- Route (Read): Display All Students
// Route to display all students
Router.route("/")
    .get(index);
What does this do?
- This code sets up a GET request to the root URL (
/), linking it to theindexfunction in our controller. This means whenever someone accesses the root URL, theindexfunction is called to handle that request.
Invoking the Index Function
Next, the application will invoke the index function that we defined in the controller (controller/student.js):
// Display all students on the main index page
module.exports.index = async (req, res) => {
    try {
        let allStudent = await Student.find({});
        res.render("index.ejs", { allStudent });
    } catch (err) {
        console.error("Error occurred:", err);
    }
}
What happens here?
The
indexfunction is marked as async, meaning it can perform asynchronous operations, like fetching data from our MongoDB database.Inside the function, we use
await Student.find({});to retrieve all student records stored in the database.Here’s a breakdown:
Student.find({})is a Mongoose method that queries thestudentscollection. The empty curly braces{}signify that we want to fetch all records without any filters.The
awaitkeyword pauses the function execution until the database responds with the requested data. This ensures that we only proceed once we have all the student records.The
res.rendermethod sends back an HTML response to the user’s browser.We are using
index.ejsas the template to be rendered. This file is responsible for the structure and layout of our main page.The
{ allStudent }part passes the fetched student records to the template. This way, we can access theallStudentvariable withinindex.ejsto display each student’s information dynamically.
Before you can see any student data on this page, make sure to add some entries using the /New form! If there are no records in the database, the index page will appear empty.

- Route(create): Create New Student.
Router.route("/New")
    .get(renderNewForm)
    .post(newStudent);
What does this do?
This code defines two operations for the
/NewURL:A GET request that triggers the
renderNewFormfunction, which serves the form to create a new student.A POST request that executes the
newStudentfunction to save the new student’s information once the form is submitted.
Rendering the New Student Form
When users access the /New URL, the GET request is made:
module.exports.renderNewForm = (req, res) => {
    try {
        res.render("new.ejs");
    } catch (err) {
        console.error("Error occurred:", err);
    }
}
What happens here?
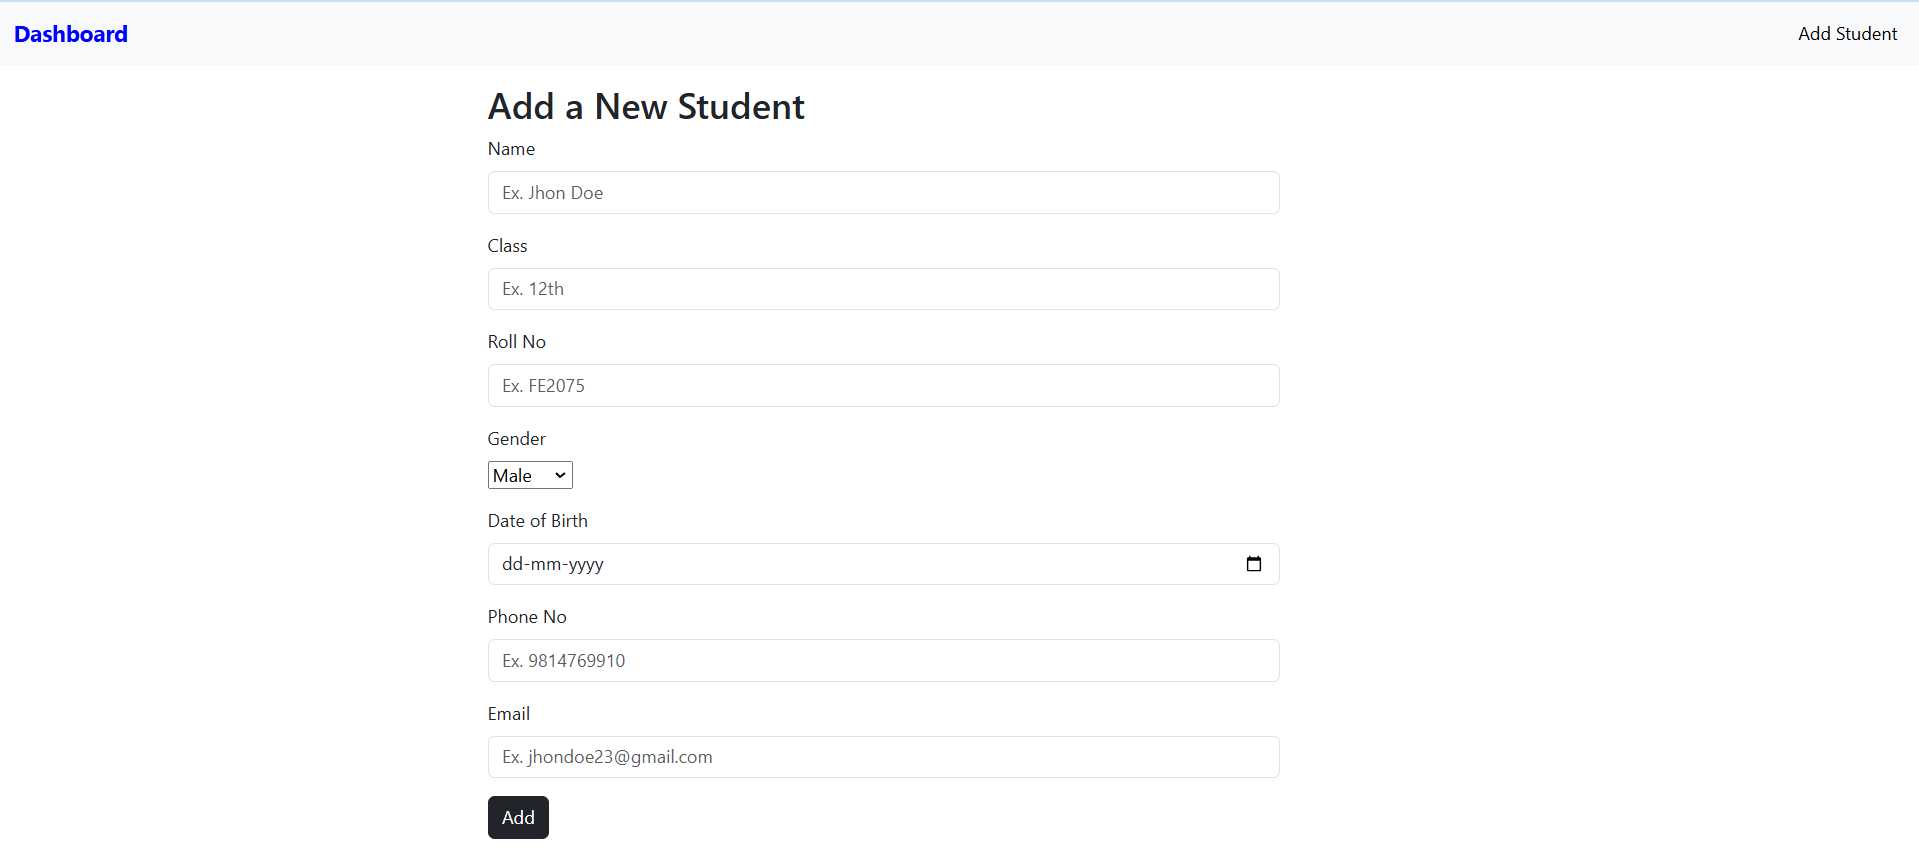
The
renderNewFormfunction is called, which renders thenew.ejstemplate. This template contains the form that users will fill out to add a new student.Here’s what the user sees :

Submitting the New Student Form
Once the user has filled out the form and submits it, a POST request is sent to the server. This triggers the newStudent function:
module.exports.newStudent = async (req, res) => {
    const newStudent = new Student(req.body.student);

    try {
        await newStudent.save();
        res.redirect("/");
    } catch (err) {
        console.error("Error occurred:", err);
    }
};
What does this mean?
The
newStudentfunction begins by creating a new instance of theStudentmodel using the data submitted through the form (req.body.student). Here,req.bodycontains the data sent by the form, which is automatically parsed by Express.The
awaitnewStudent.save();line attempts to save the new student’s details to the database. This is an asynchronous operation that waits until the database confirms that the record has been saved.The
res.redirect("/")method instructs the browser to navigate back to the root URL (/). This effectively refreshes the main page and displays the updated list of students, which now includes the newly added student.If the save operation fails, an error message is logged in the server console, but the user experience remains smooth without crashing the application.
- Route(update) : Edit student data.
Router.route("/:id/edit")
    .get(renderEdit)
    .put(updateStudent);
What does this mean?
This code snippet establishes two operations for the
/:id/editURL:A GET request that triggers the
renderEditfunction, which presents a form pre-filled with the student's current data.A PUT request that executes the
updateStudentfunction to save the edited details back to the database.
Fetching and Rendering the Edit Form
When a user accesses a URL like /123.../edit (where 123… is the student’s ID), a GET request is made:
module.exports.renderEdit = async (req, res) => {
    try {
        const { id } = req.params;
        const studentData = await Student.findById(id);
        res.render("edit.ejs", { student: studentData });
    } catch (err) {
        console.error("Error occurred:", err);
    }
};
What happens here?
The
renderEditfunction is called, which takes the student ID from the URL parameters (req.params.id).It then queries the database for the student using
Student.findById(id). This returns the specific student’s data.The
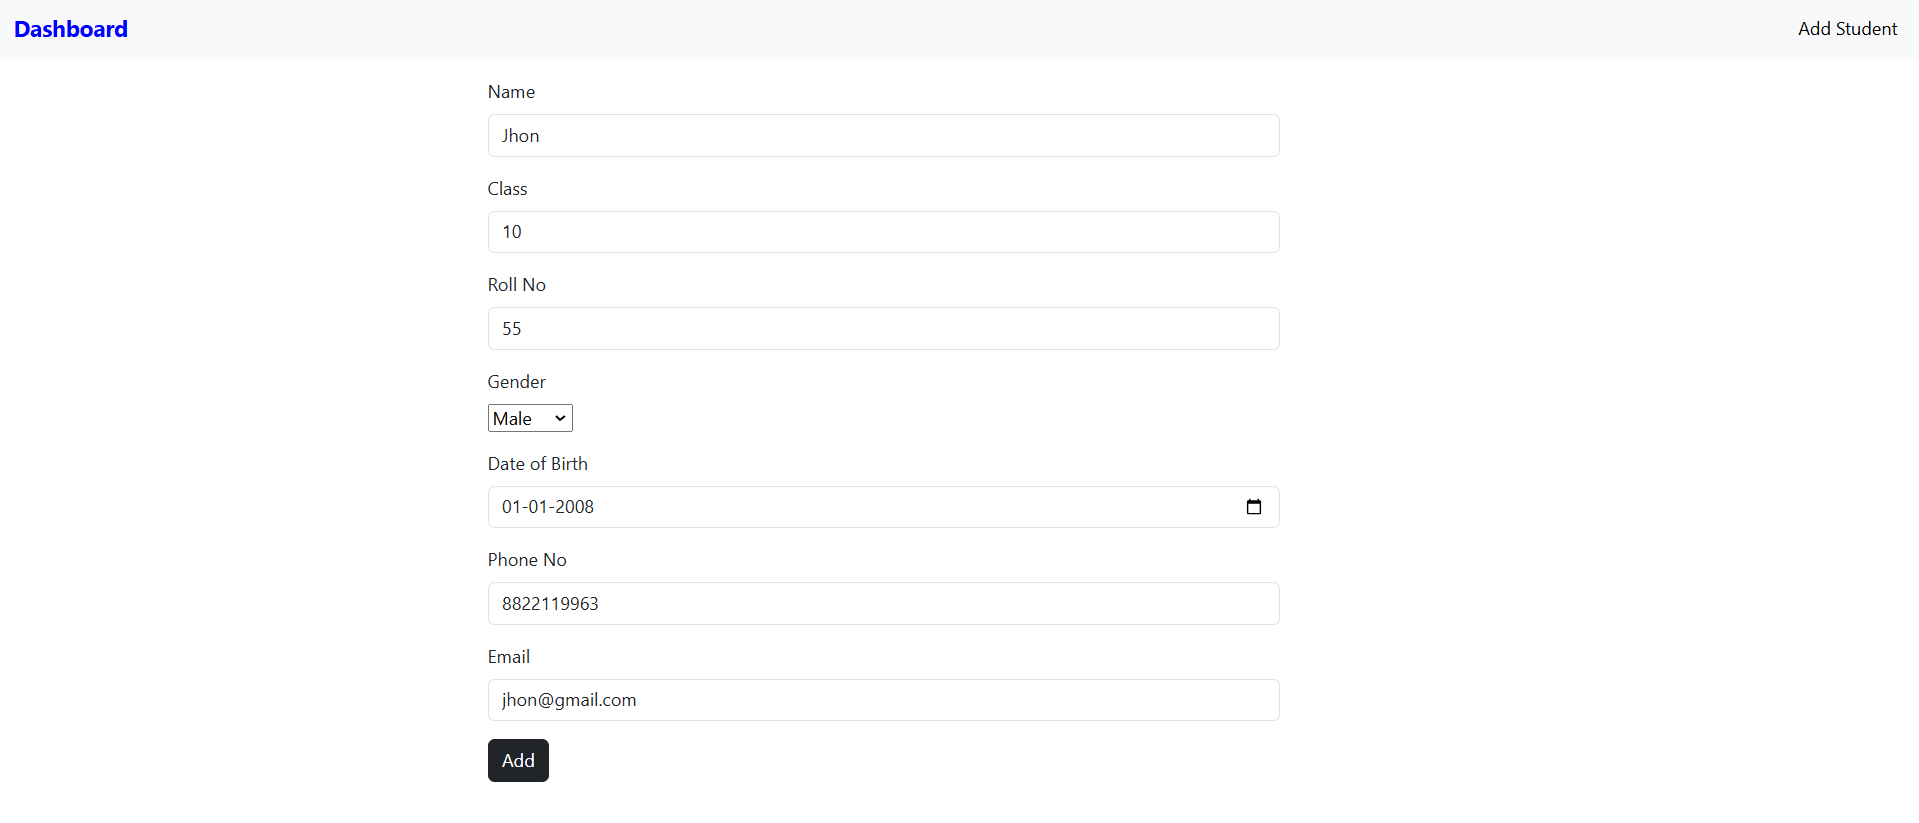
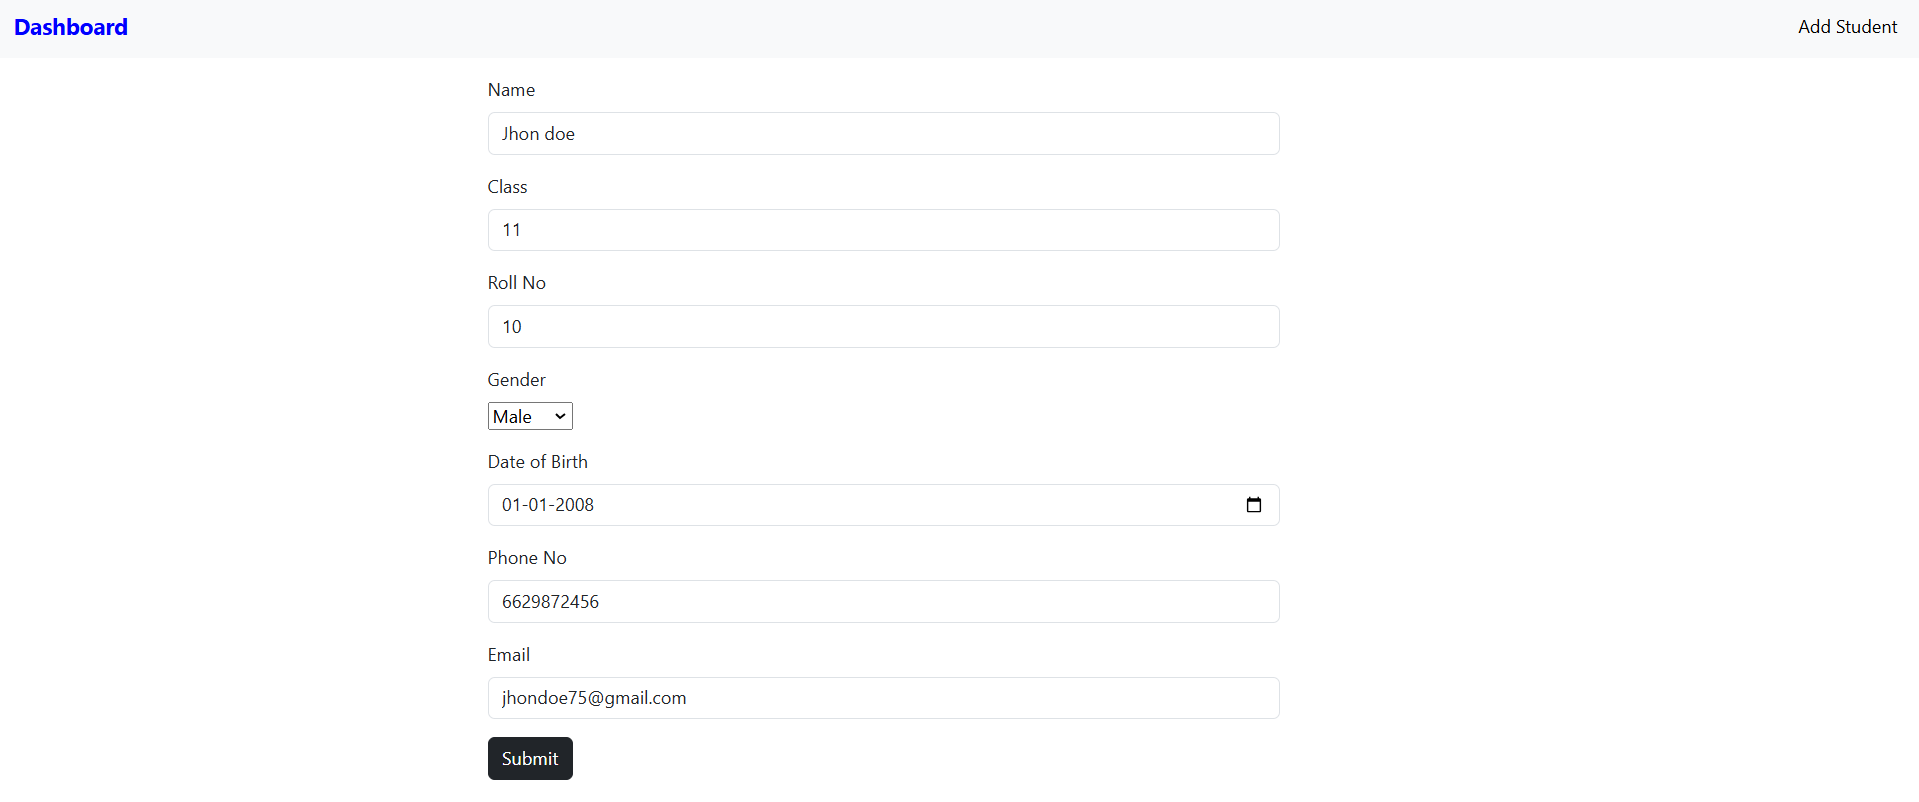
res.render("edit.ejs", { student: studentData });line renders theedit.ejstemplate, passing the retrieved student data so that the form can be pre-filled with this information.If everything is successful, the user will see an edit form populated with the student’s current details (name, class, roll number, etc.).

Submitting the Edit Form
Once the user has made their desired changes and submits the form, a PUT request is triggered:
module.exports.updateStudent = async (req, res) => {
    try {
        const { id } = req.params;
        await Student.findByIdAndUpdate(id, { ...req.body.student });
        res.redirect("/");
    } catch (err) {
        console.error("Error occurred:", err);
    }
};
What does this mean?
The
updateStudentfunction gets executed, which again retrieves the student ID from the URL.It uses
Student.findByIdAndUpdate(id, { ...req.body.student });to find the specific student in the database and update their details with the data provided in the form (req.body.student).
If the update is successful, the user is redirected back to the main page with
res.redirect("/"), where they can see the updated list of students, including the edited details.
- Route(Delete) : Delete student data.
Router.route("/:id/delete")
    .delete(deleteStudent);
What does this mean?
This code snippet establishes a route for
/:id/deletethat listens for DELETE requests.When this route is hit, it triggers the
deleteStudentfunction to handle the deletion process.
Initiating the Delete Action
When the user clicks the delete button, a DELETE request is sent to the server, corresponding to the specific student's ID. This is handled in the controller like so:
module.exports.deleteStudent = async (req, res) => {
    try {
        const { id } = req.params;  // Extracting the student ID from the request parameters
        await Student.findByIdAndDelete(id);  // Deleting the student from the database
        res.redirect("/");  // Redirecting back to the main page
    } catch (err) {
        console.error("Error occurred:", err);  // Logging any errors
    }
};
What happens here?
The
deleteStudentfunction begins by retrieving the student ID from the URL parameters (req.params.id).It then calls
Student.findByIdAndDelete(id);, which searches for the student with the specified ID in the database and removes their record.If the deletion is successful, the user is redirected back to the main page using
res.redirect("/"). This refreshes the view and updates the displayed list of students to reflect that the deleted student is no longer present.
What does the user see?
After clicking the delete button, the student record is swiftly removed from the database.
The user is taken back to the main page, where they can see the updated list of students. The deletion is immediate and effective, providing a seamless experience.

When the delete action is initiated (for example, by clicking the delete button next to John’s name), the application sends a DELETE request to the server. Upon successful execution, the student record for John is removed from the database, and the updated list of students is displayed on the main page, confirming that he is no longer present.

Conclusion
In this blog, we explored the process of building a simple CRUD application for managing student records using Node.js, Express, and MongoDB. We implemented functionalities to create, read, update, and delete student entries, providing a comprehensive overview of the entire development workflow.
I’d love to hear your thoughts and experiences! If you have any questions or feedback, please feel free to share them.
Connect with me on social media Github ,LinkedIn.
Thank you for reading, and happy coding!
Subscribe to my newsletter
Read articles from Samani Humaira directly inside your inbox. Subscribe to the newsletter, and don't miss out.
Written by
