P3 - Testing Our GraphQL API on Postman
 Kush Munot
Pre-requisites
You should have an account on Postman to use their Web Application or Downloadable version on your machines. To do so, hop on to the Postman Website and sign up for free, then follow the steps listed below.
Creating Workspace
You might also use Postman at work for some freelance and personal projects. With this feature, you can segregate your workspaces and keep them separate for better productivity and efficiency.
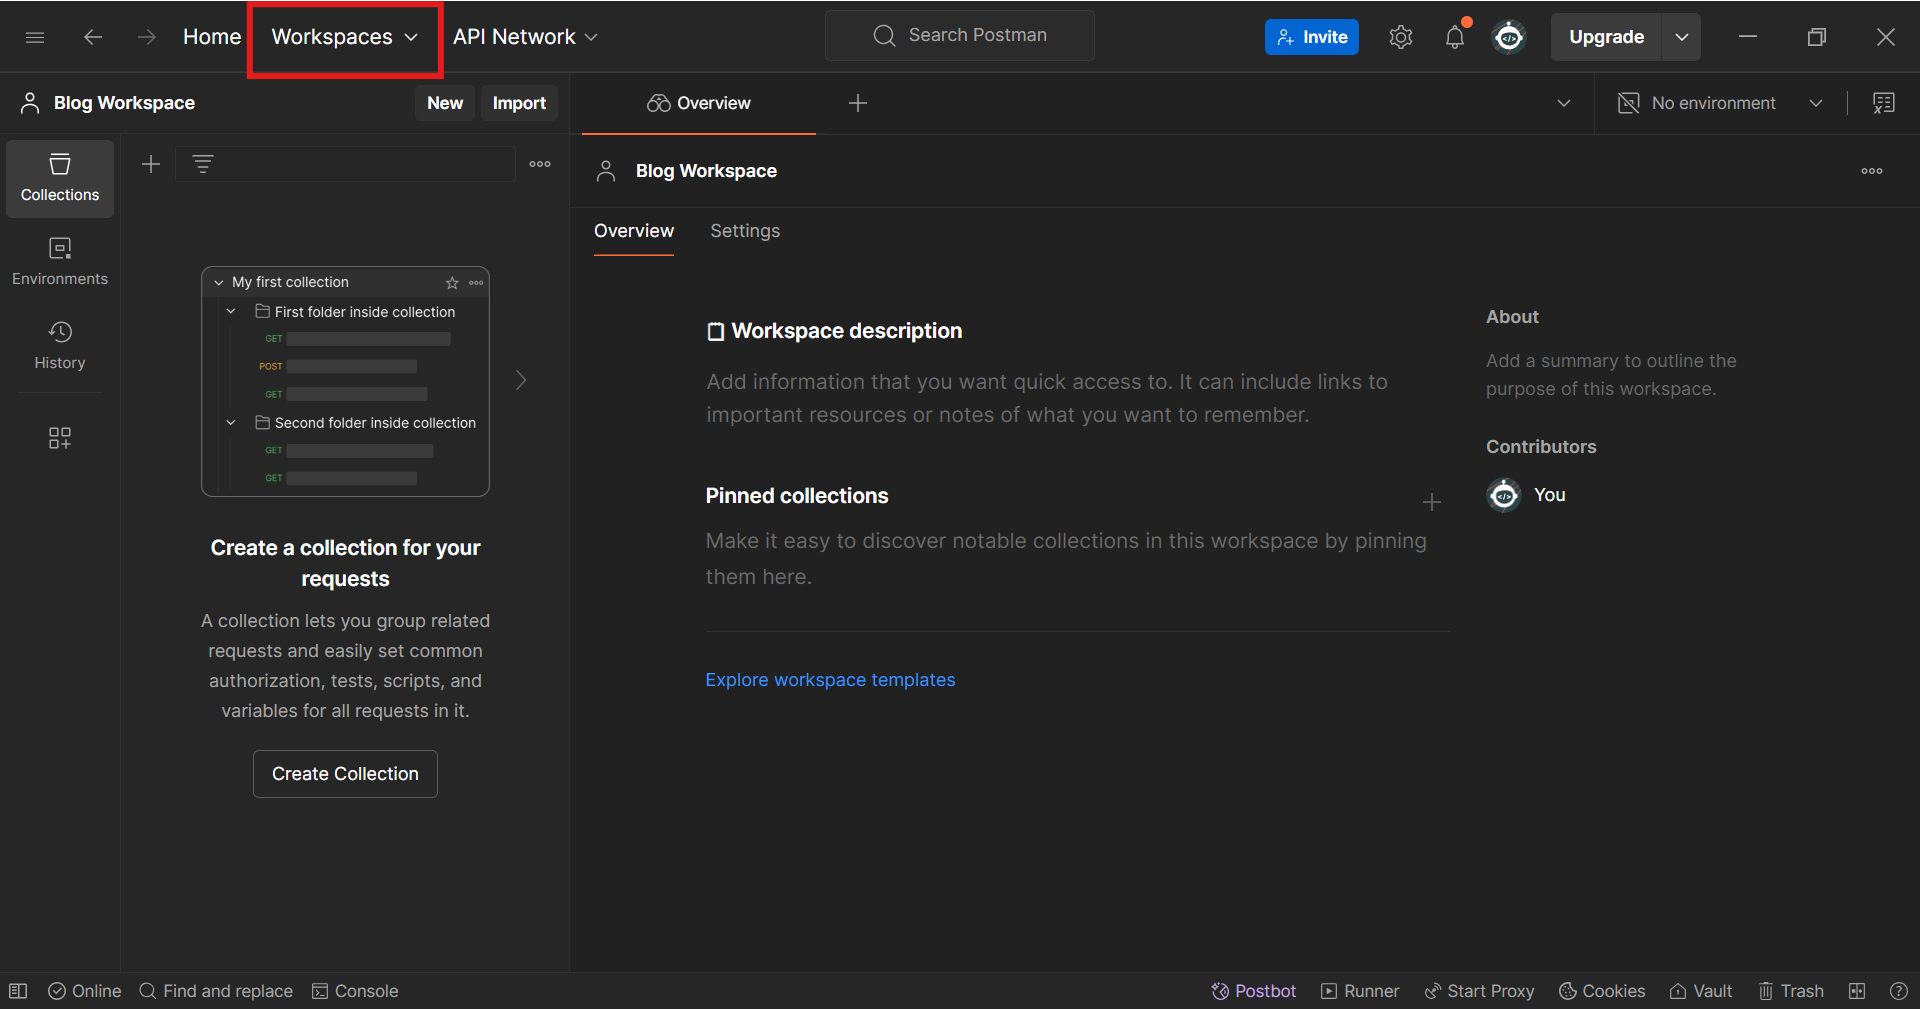
Click on Workspace on the top bar present on your screen
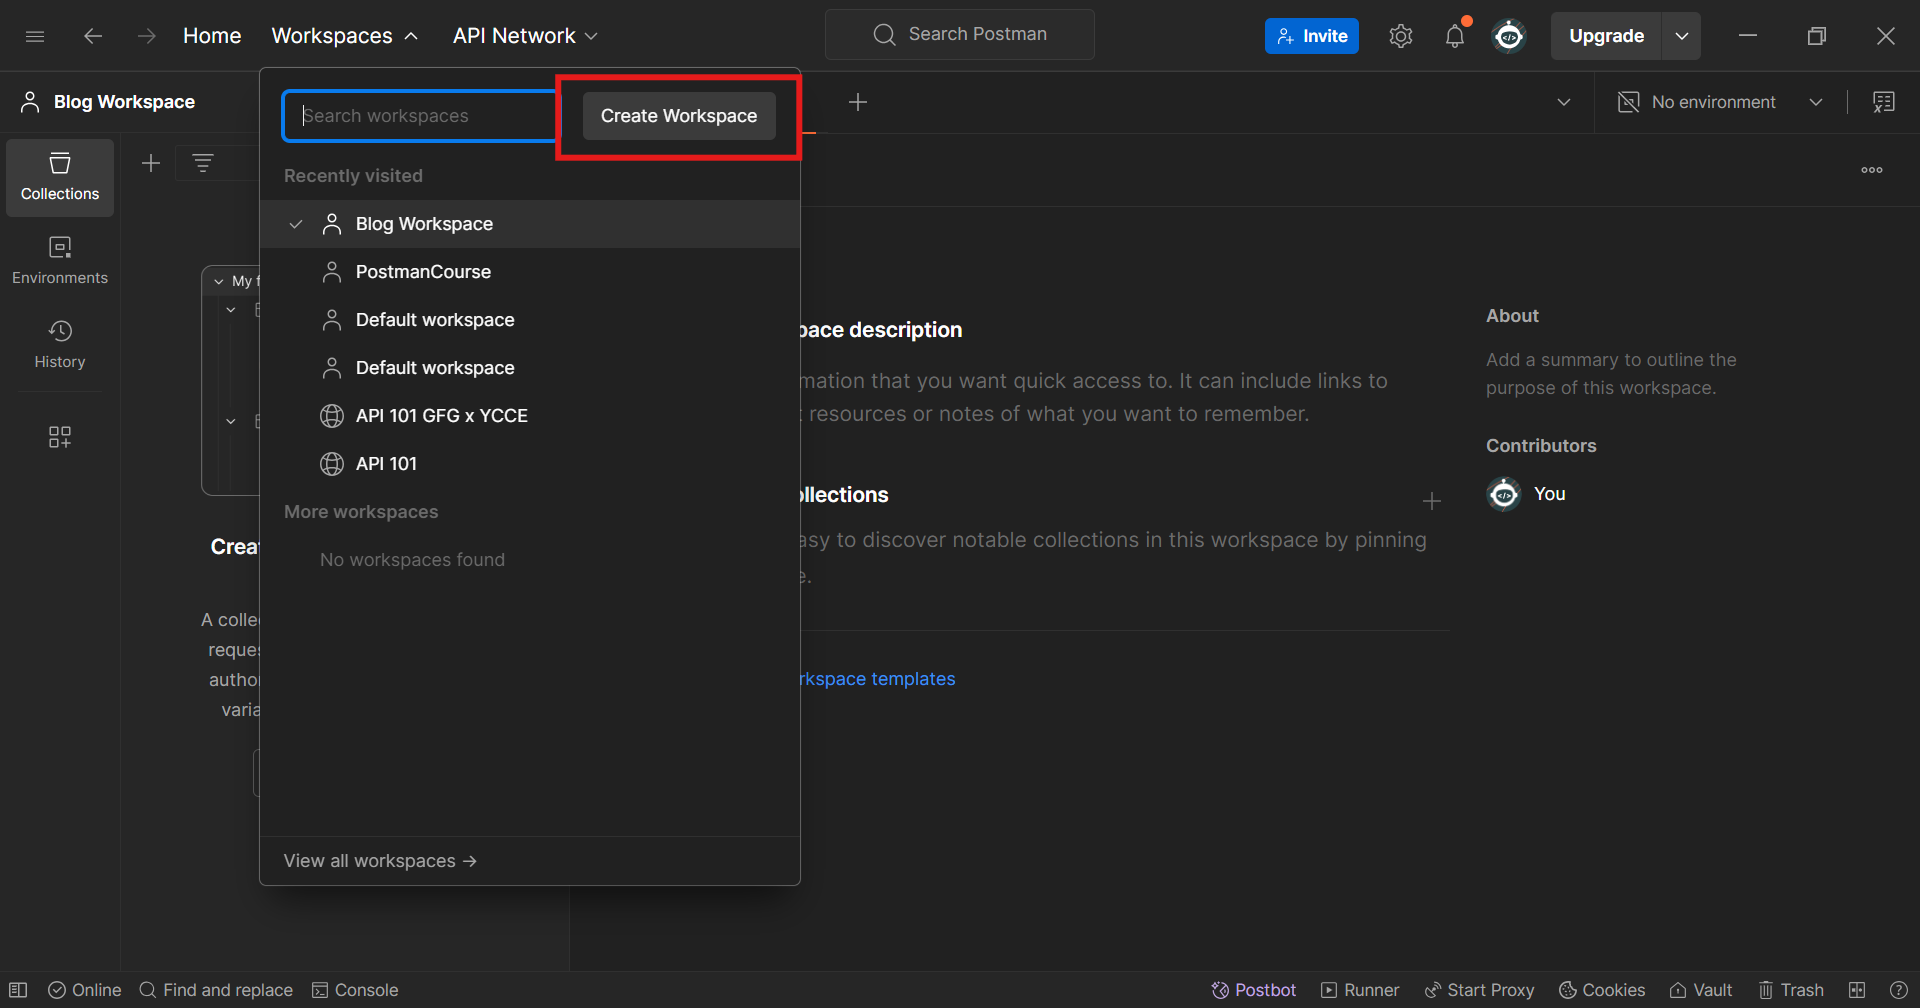
Then Click on Create Workspace and create a Blank Workspace and give it a suitable name.
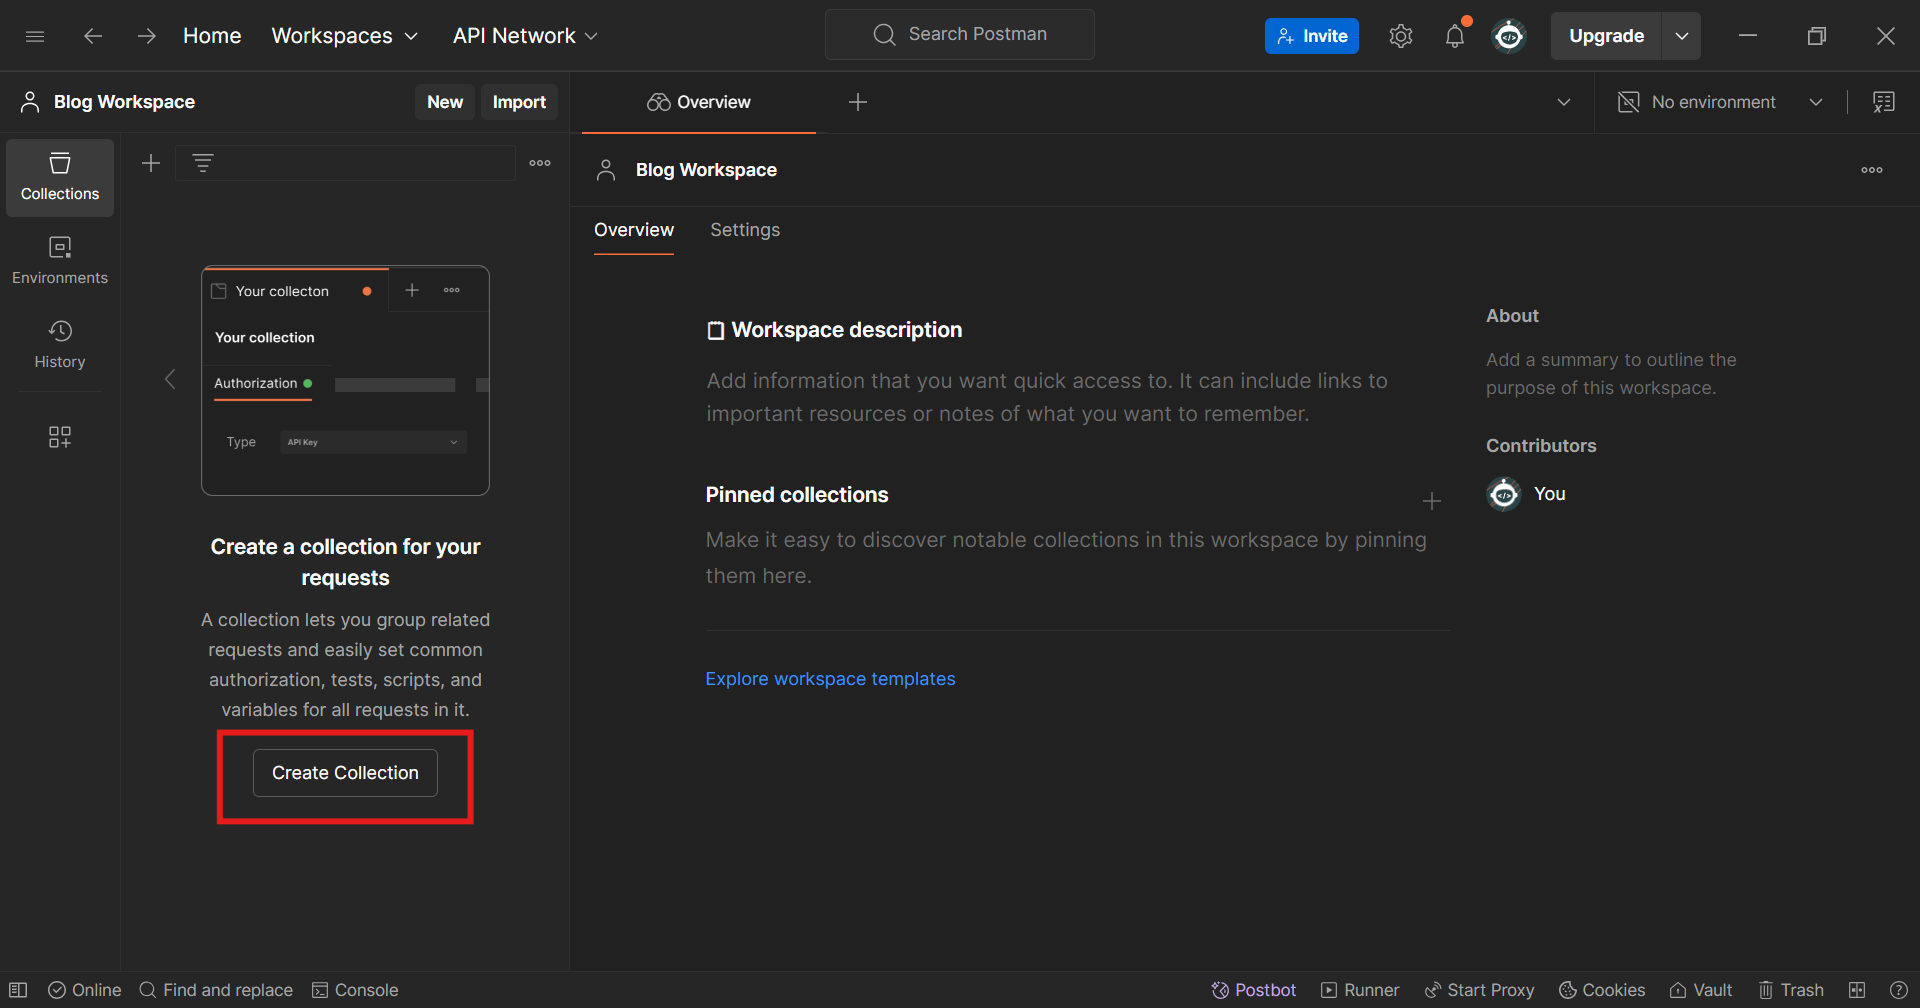
You will land on this screen and You will get an option to create a collection
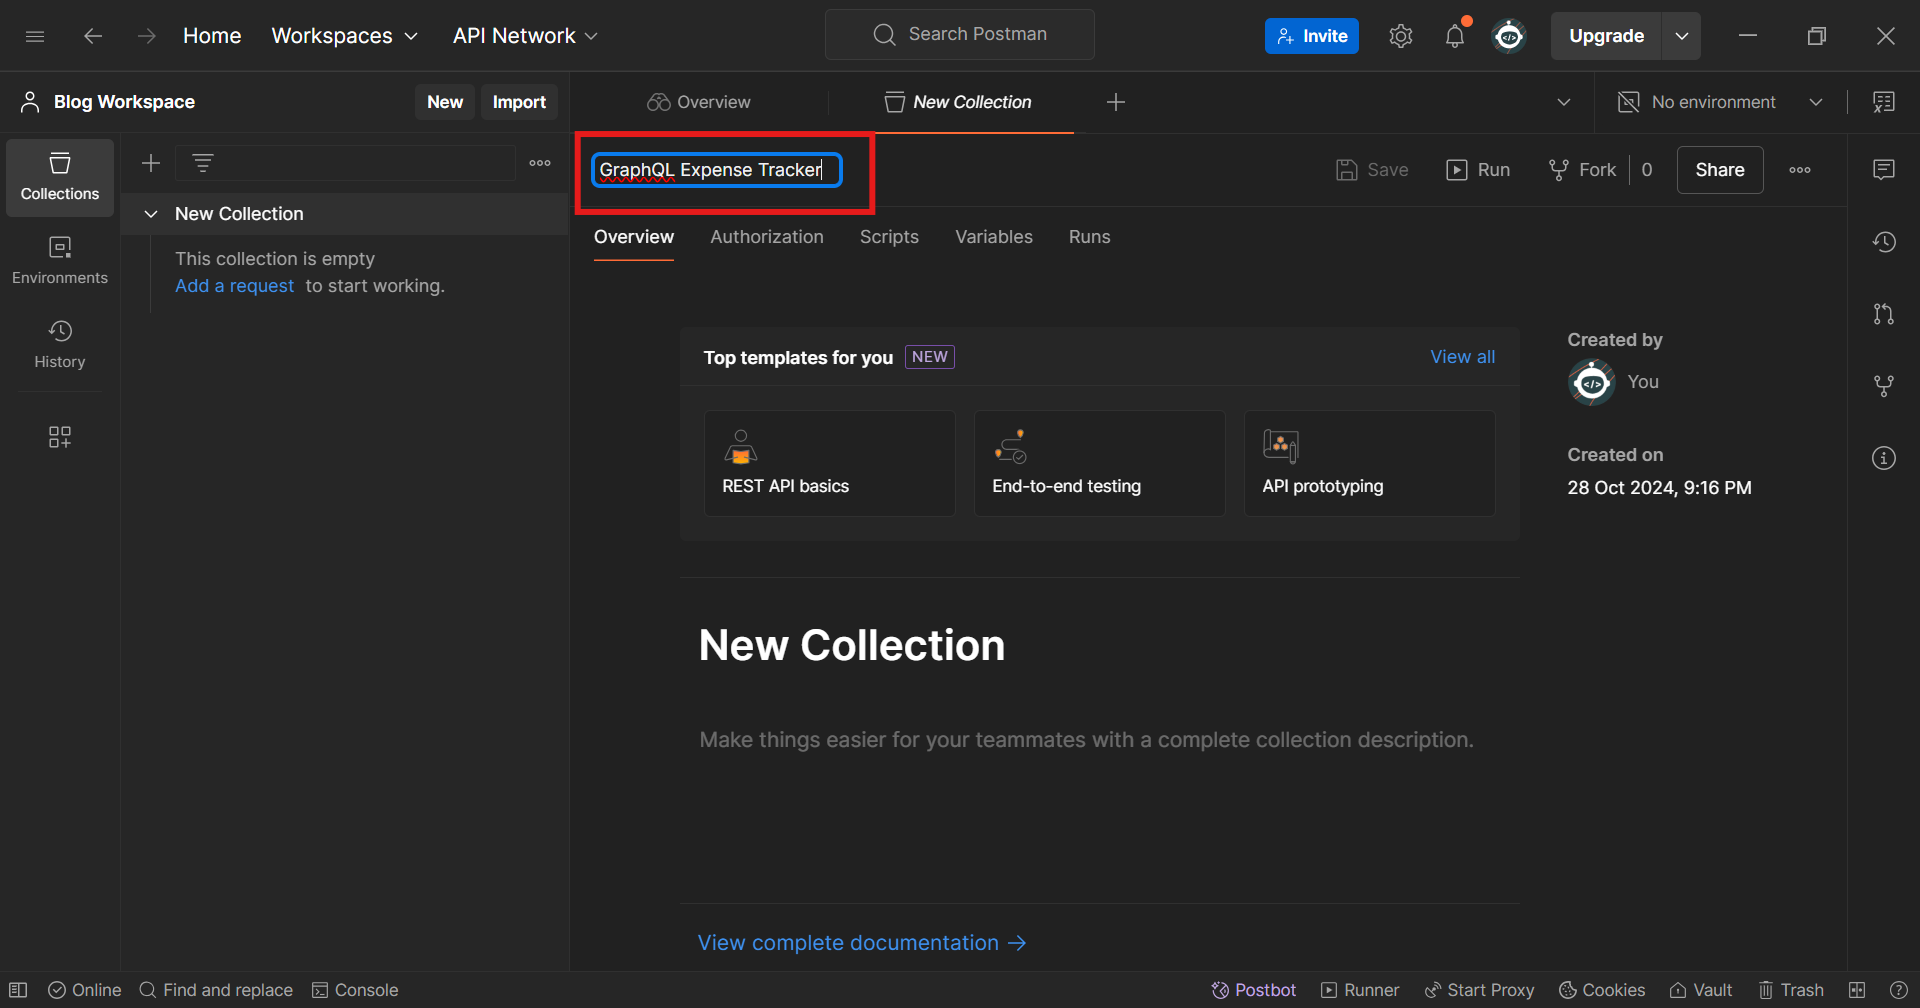
Add the collection name and This Collection will hold all your requests related to one particular project
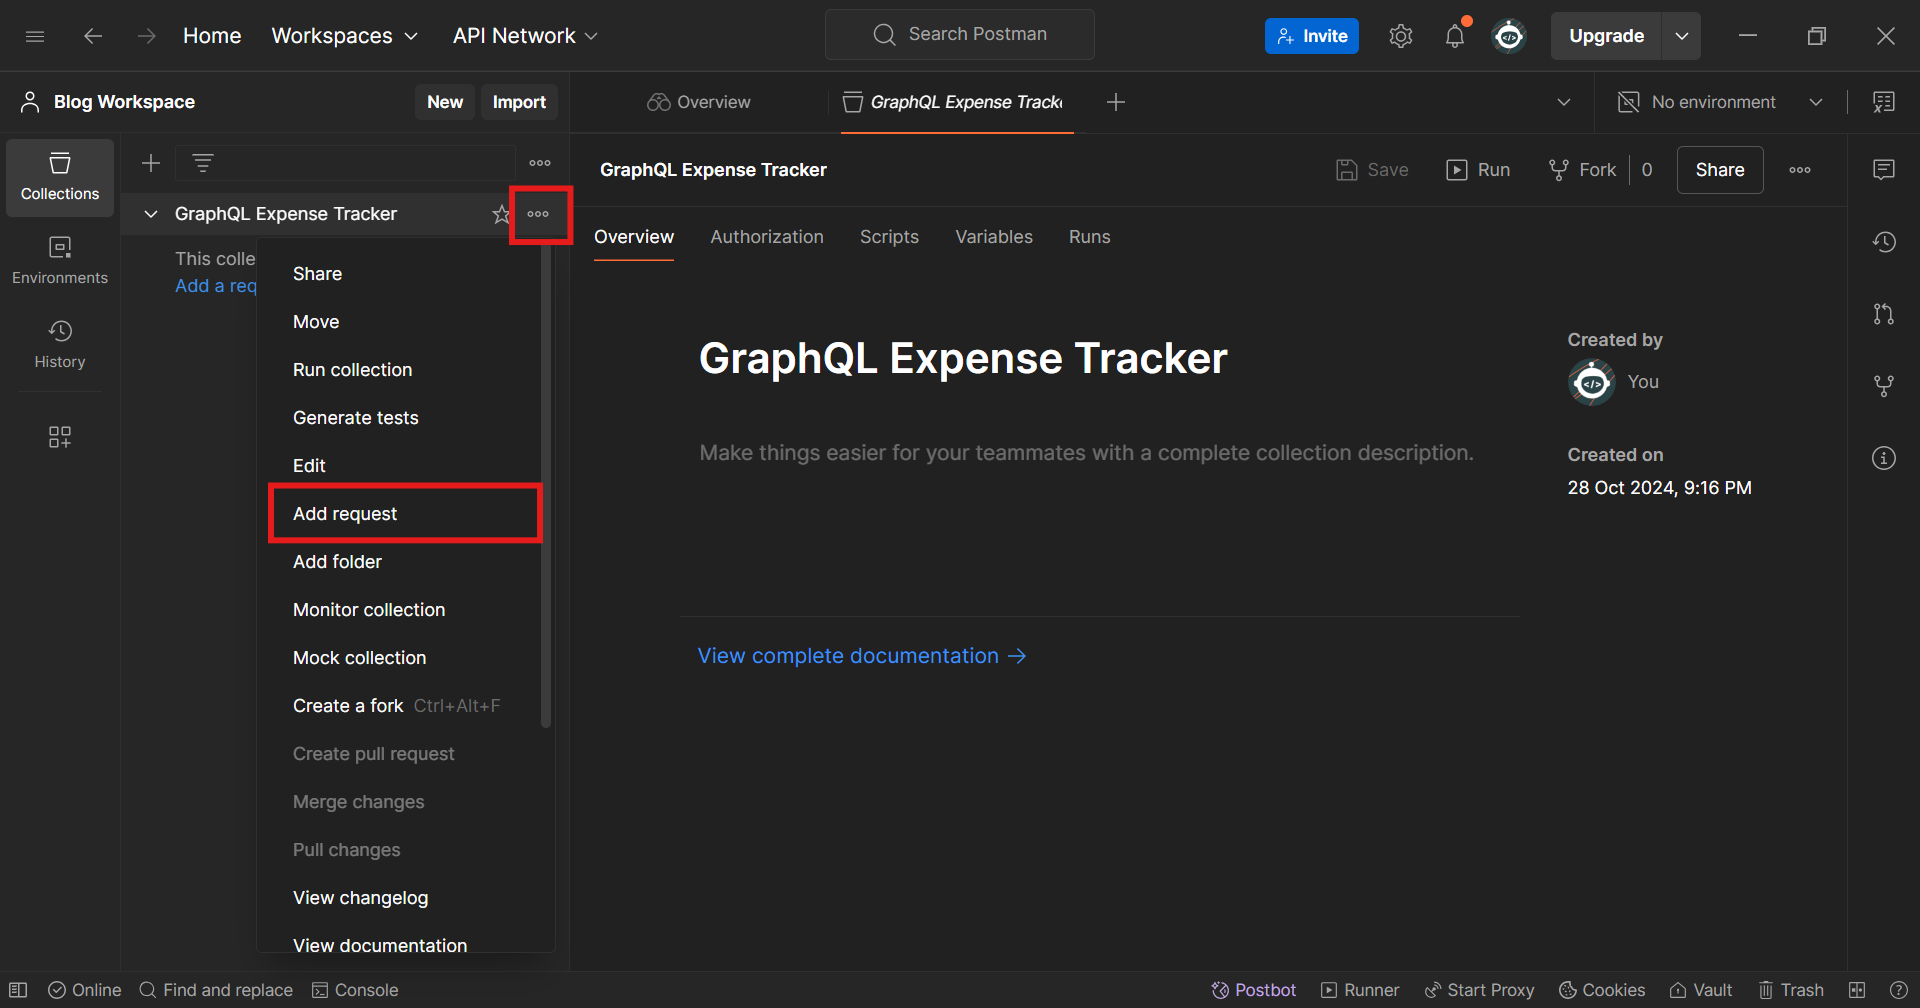
To Add requests, click on the three dots menu marked in below image and select Add Request
By Default it will create a GET Request but since we have 0 records in our DB hence we will have to use a POST Request to add data in our Database
To switch to POST request click on the GET part of the URL, this will open a dropdown where you can select different methods like POST, PUT, DELETE etc. Click on POST and in the URL section type
http://localhost:3000/api/graphql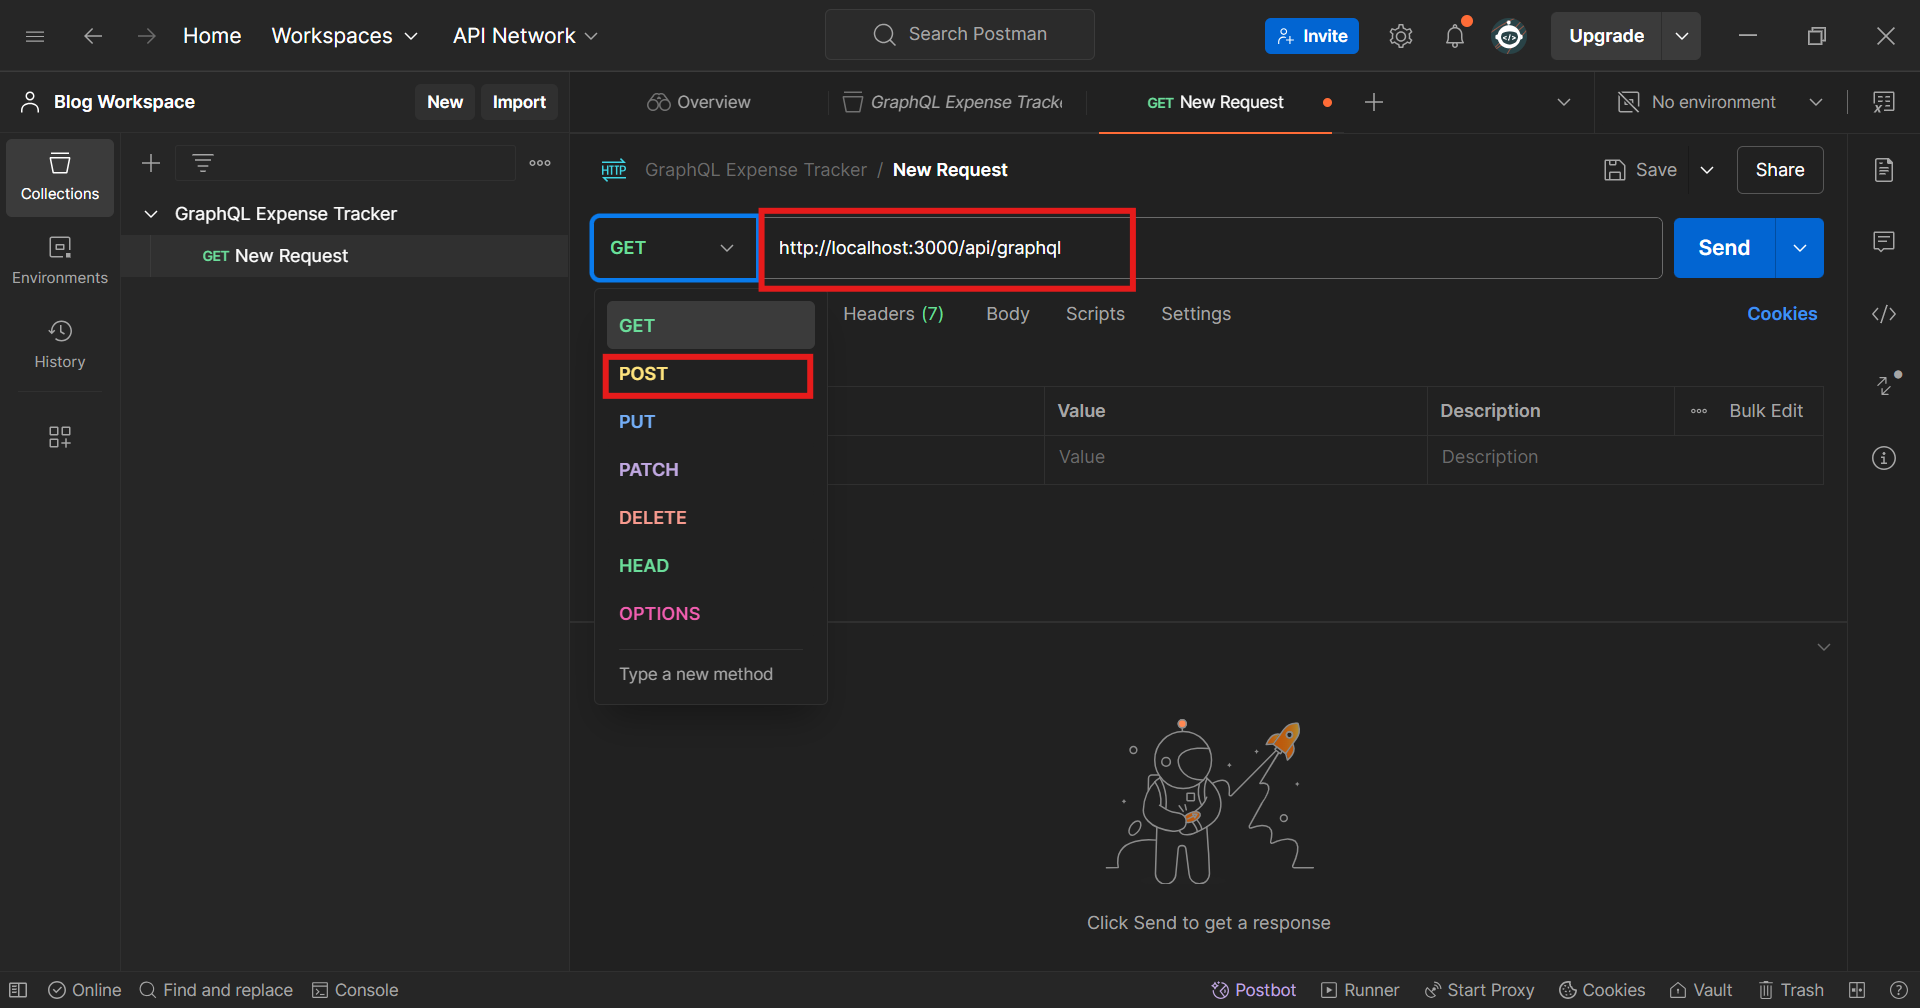
Using GraphQL Queries in Postman
Method 01 - The Long Way
POST Request to Add Expense
After creating a request Name it with proper prefix and suffix like Add Expense which is meaningful.
Click in the Body Section of the request and select GraphQL option. This will open a space to write query. Type the below query there
mutation AddExpense {
    addExpense(
        category: "Shopping"
        modeOfPayment: "Credit Card"
        amount: 123.25
        message: "Udemy Course"
        type: "Expense"
    ) {
        id
        category
        modeOfPayment
        amount
        message
        type
    }
}
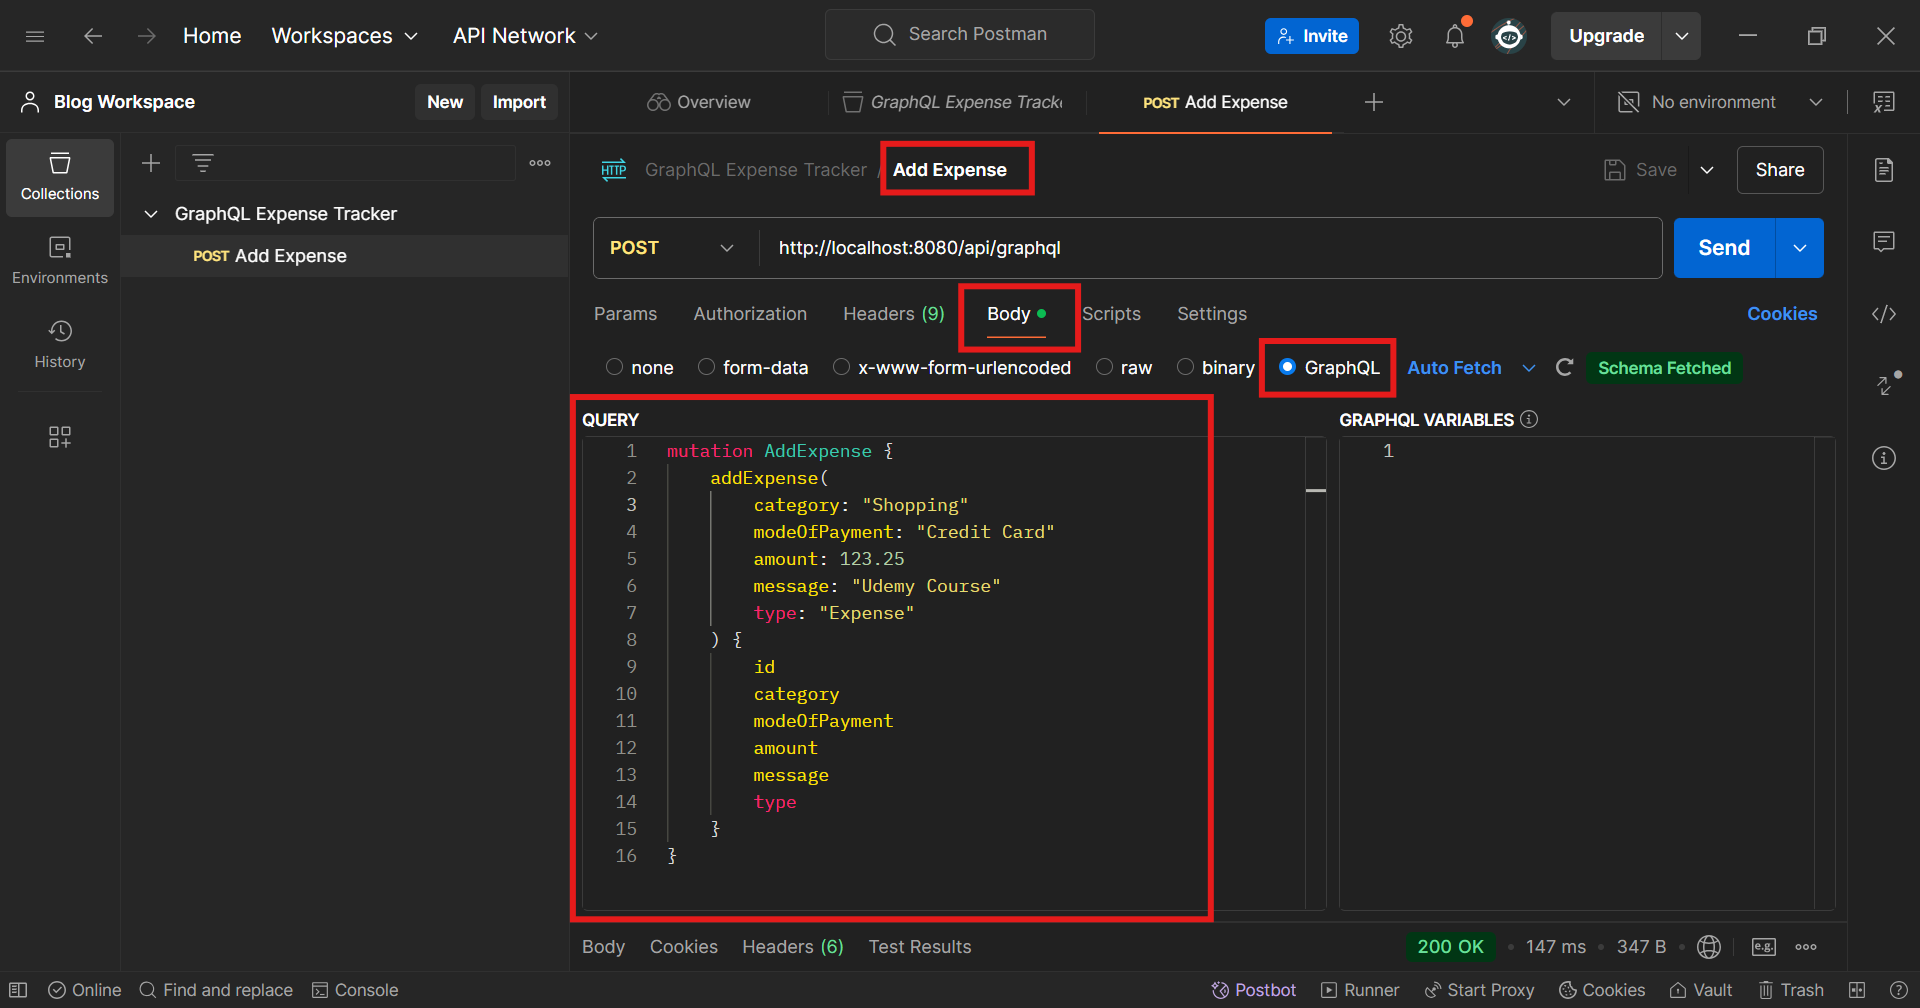
Click on Send and Wolaaaa you just created a new record in your database. You will receive a response for the request in the same configuration as we have made in the type.ts file.
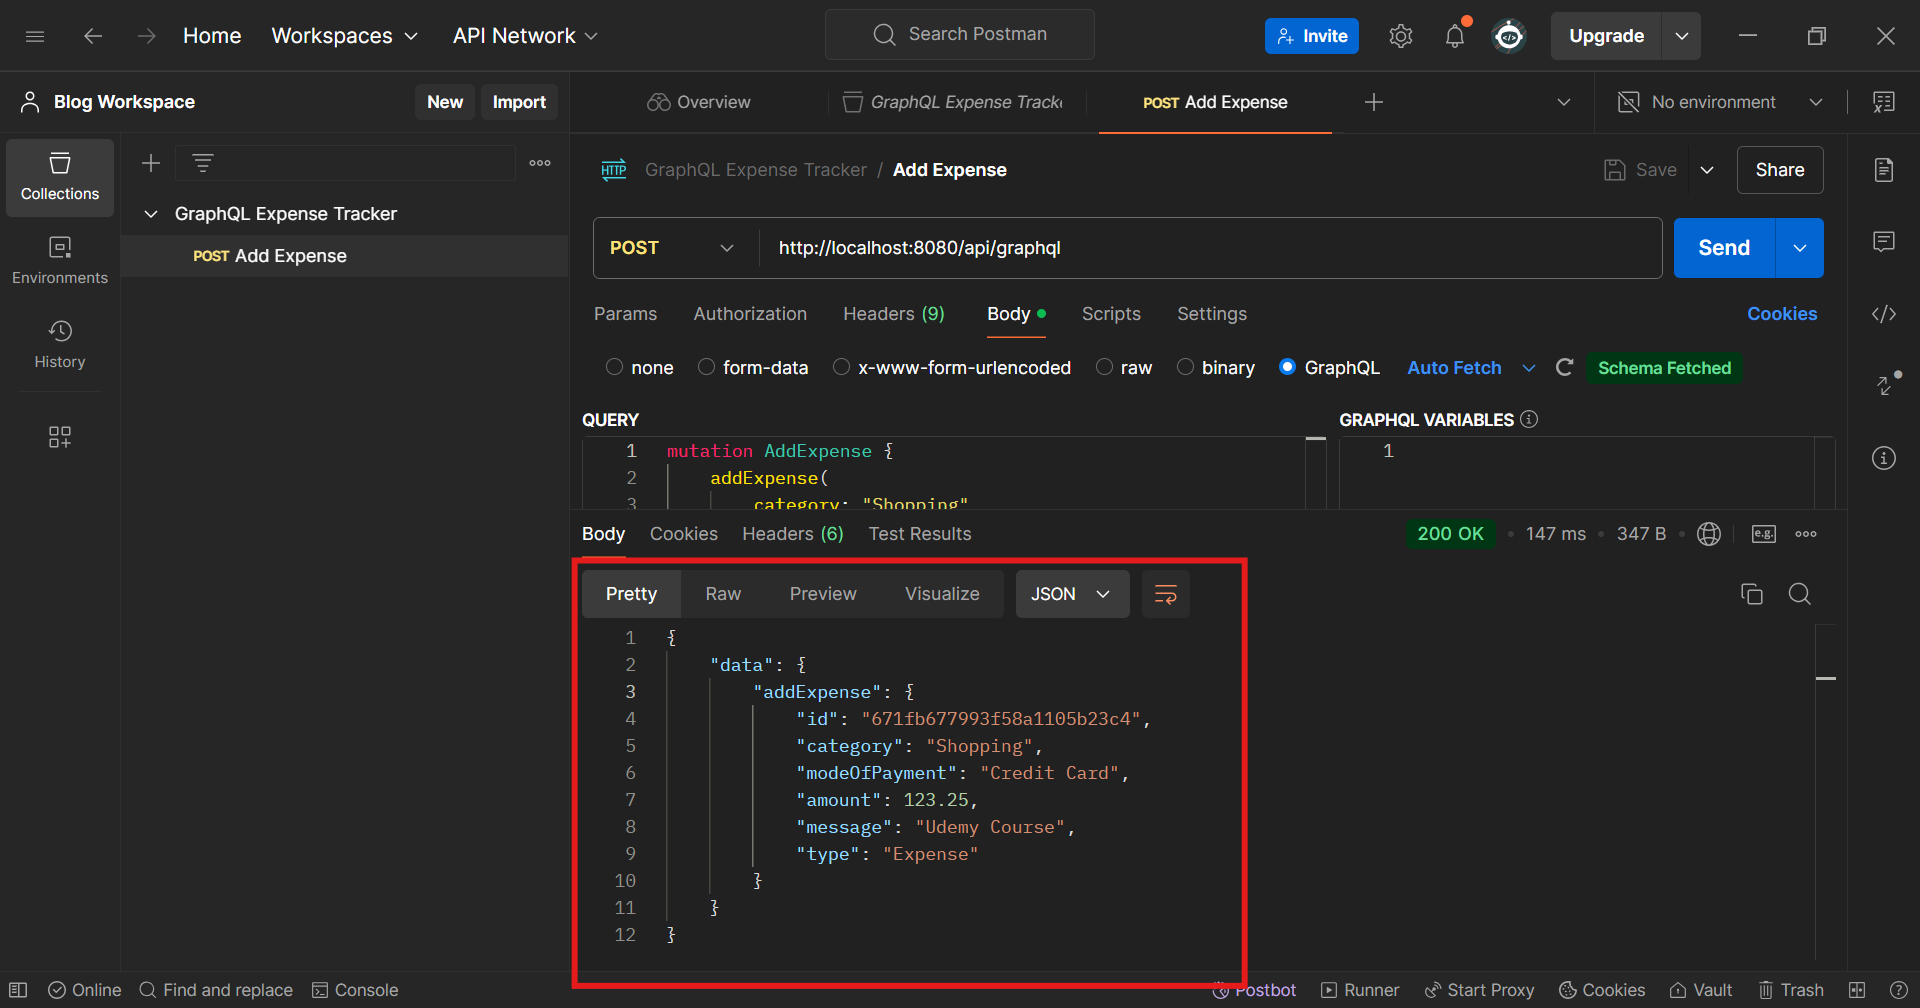
Similarly let’s add some more entries. so that we can test the get Requests also.
Breaking Down a Query
1. Operation Type (mutation)
In GraphQL, there are three primary operation types: query, mutation, and subscription.
Since this is a mutation, it’s intended to modify data on the server (like creating, updating, or deleting data).
mutation AddExpensespecifies that you want to perform a mutation operation namedAddExpense.
2. Fields
Fields represent the specific data that you want to retrieve in a GraphQL query or mutation.
In this mutation, the fields are:
  category
  modeOfPayment
  amount
  message
  type
These are fields returned by the
addExpensemutation after it’s executed successfully, and they correspond to properties in theExpenseobject type.
3. Arguments
Arguments allow you to pass input data to a mutation or query.
In your mutation, the arguments for
addExpenseare:category: "Shopping" modeOfPayment: "Credit Card" amount: 123.25 message: "Udemy Course" type: "Expense"These values tell the server what data to use when creating the new expense entry. Each argument corresponds to a property expected by the
addExpensemutation as per the schema.
4. Alias
Aliases allow you to rename the result of a field in the response.
For example, if you want to call
addExpensesomething else in the response, you can use an alias like this:mutation AddExpense { newExpense: addExpense( category: "Shopping" modeOfPayment: "Credit Card" amount: 123.25 message: "Udemy Course" type: "Expense" ) { id category modeOfPayment amount message type } }Here, the result of
addExpensewill be returned under the aliasnewExpense.
5. Variables
Variables allow you to parameterize queries and mutations so that you can use dynamic values rather than hardcoding them.
To use variables, you’d modify the mutation slightly by defining variable placeholders and passing actual values separately.
Here’s an example of your mutation using variables:
  mutation AddExpense($category: String!, $modeOfPayment: String!, $amount: Float!, $message: String!, $type: String!) {
      addExpense(
          category: $category
          modeOfPayment: $modeOfPayment
          amount: $amount
          message: $message
          type: $type
      ) {
          id
          category
          modeOfPayment
          amount
          message
          type
      }
  }
In this setup, values for
$category,$modeOfPayment,$amount,$message, and$typeare passed in a variables object when executing the mutation.
GET Requests to Fetch Expenses
GET All Expenses
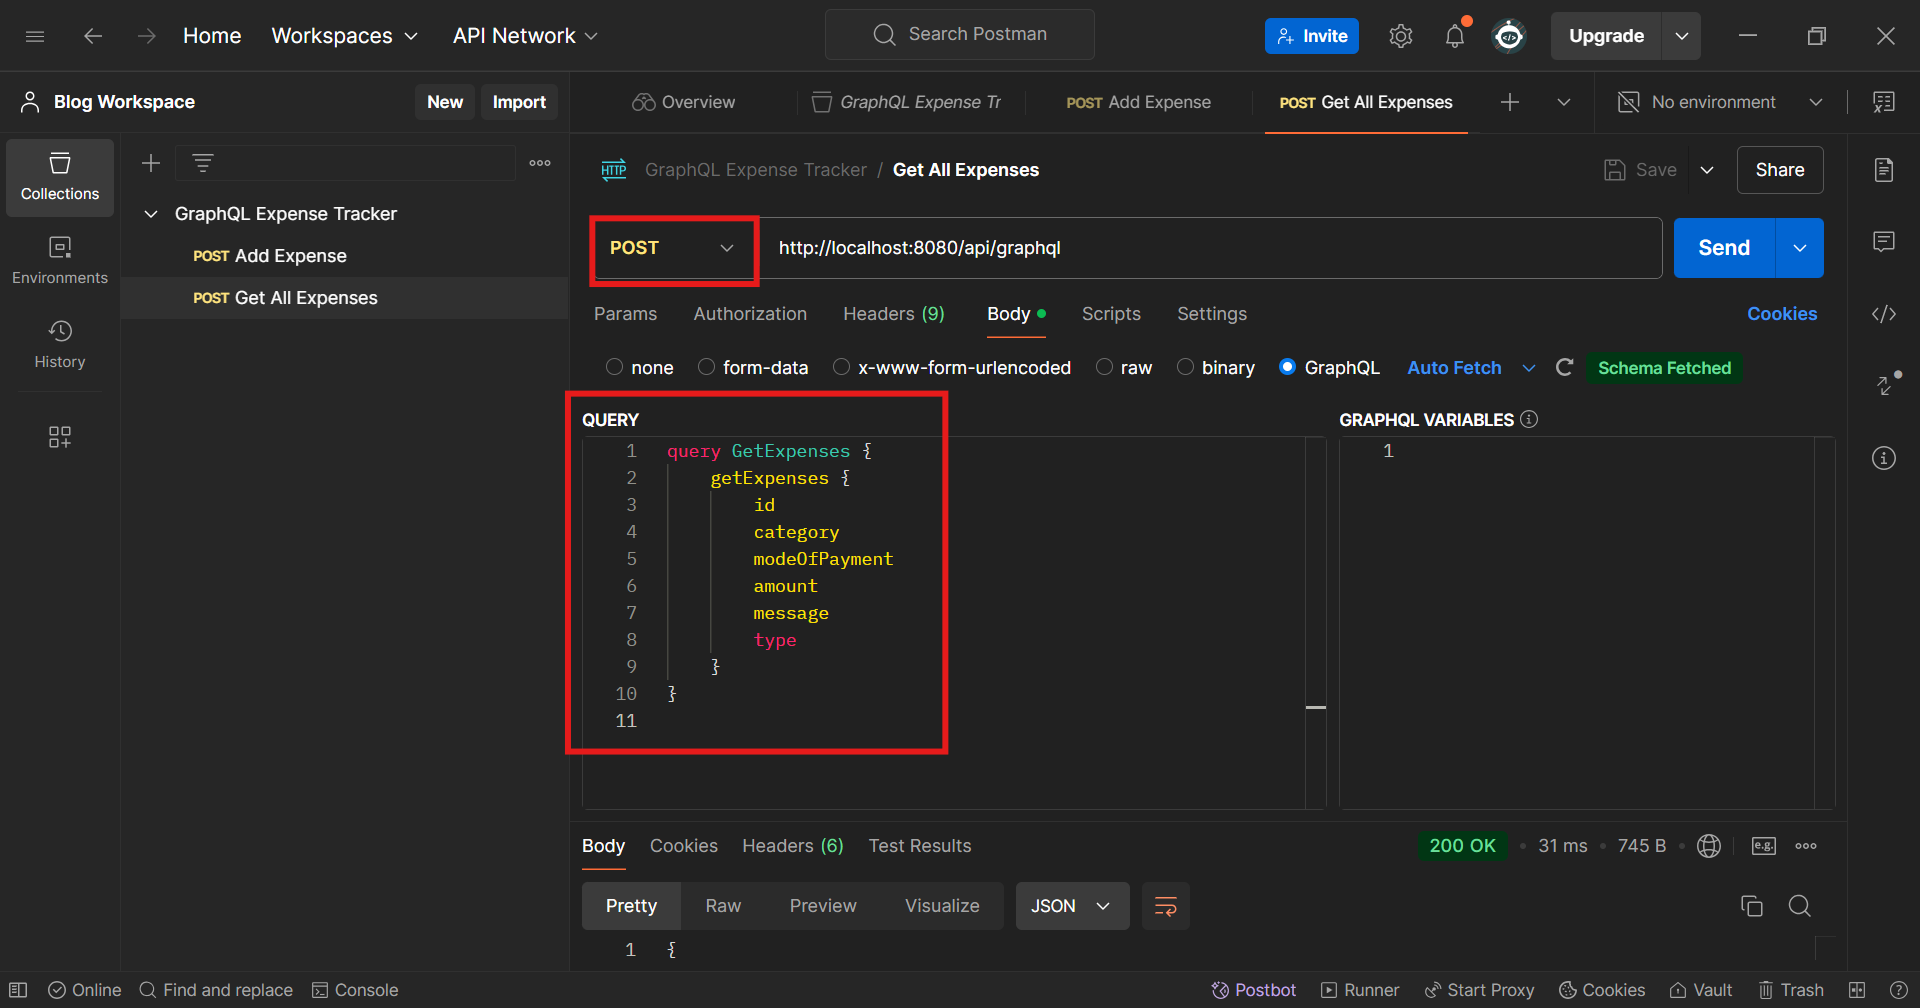
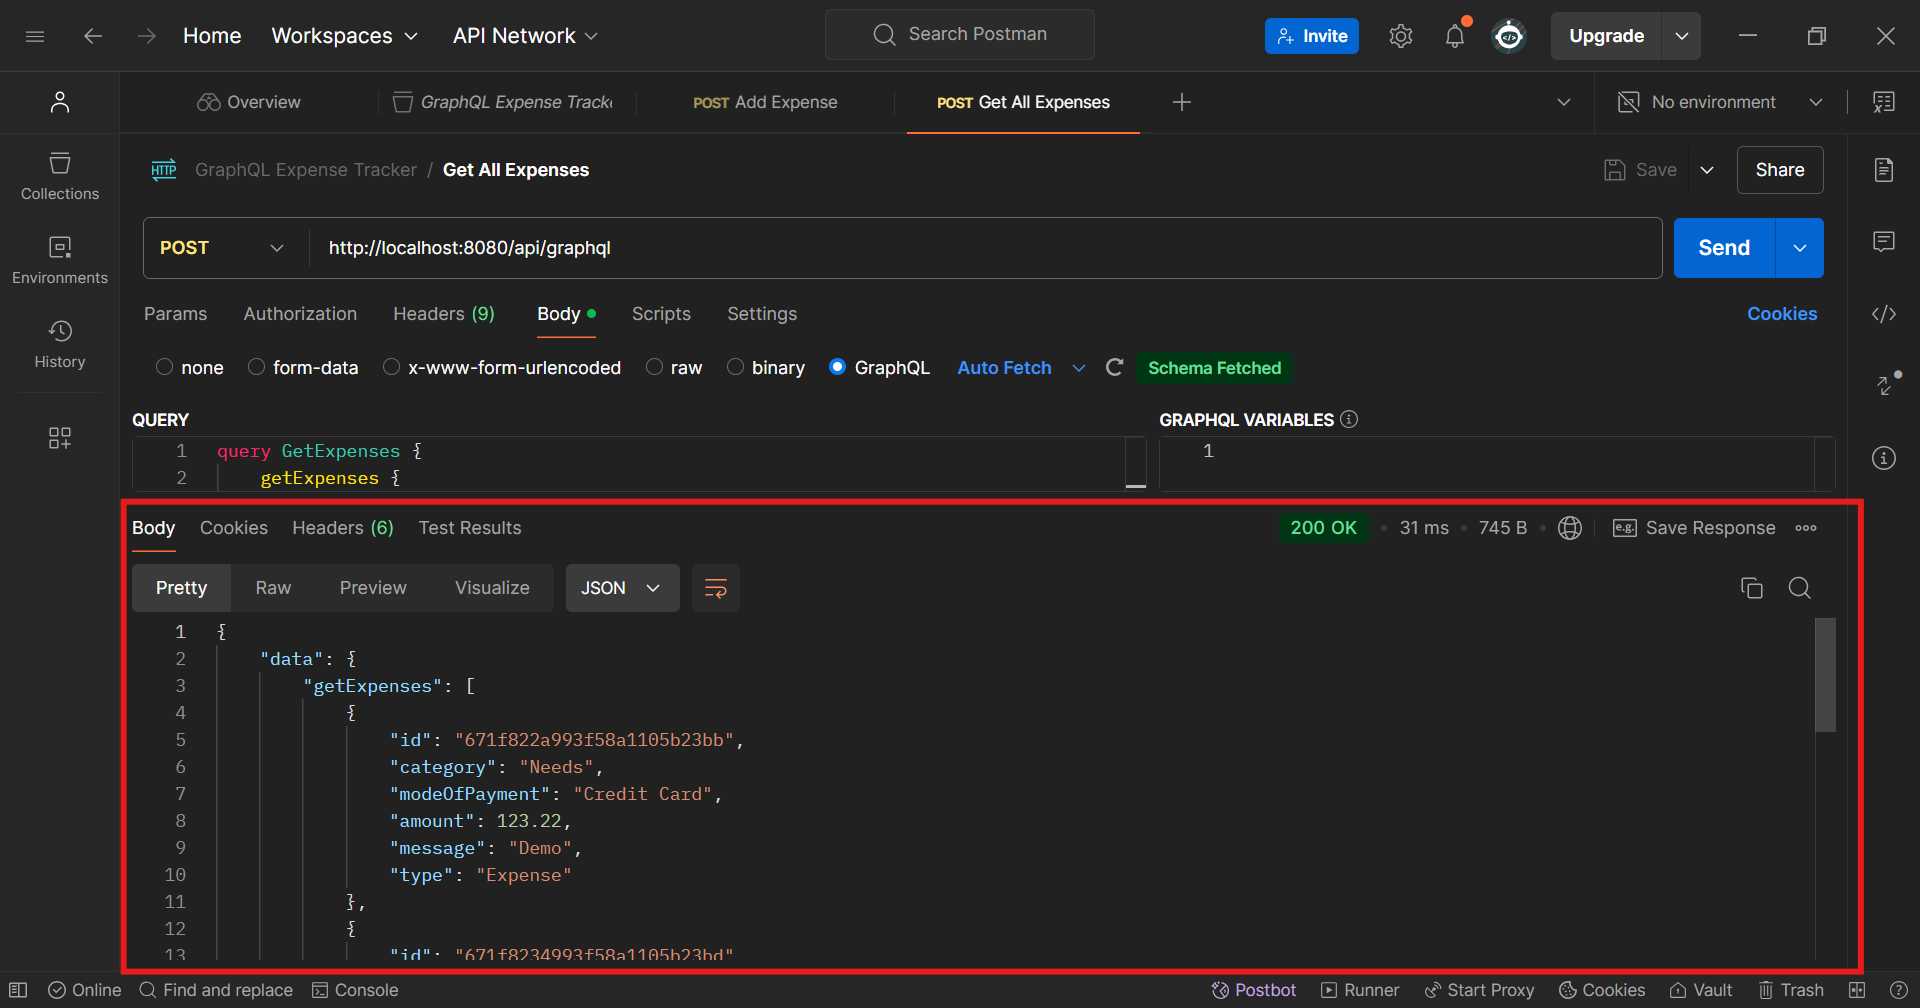
Make a new request as shown in the above steps ( point 04 ) and keep the type as POST. In body select GraphQL and paste the below Query for fetching all Expenses.
query GetExpenses {
    getExpenses {
        id
        category
        modeOfPayment
        amount
        message
        type
    }
}
Get a Particular Expense Record
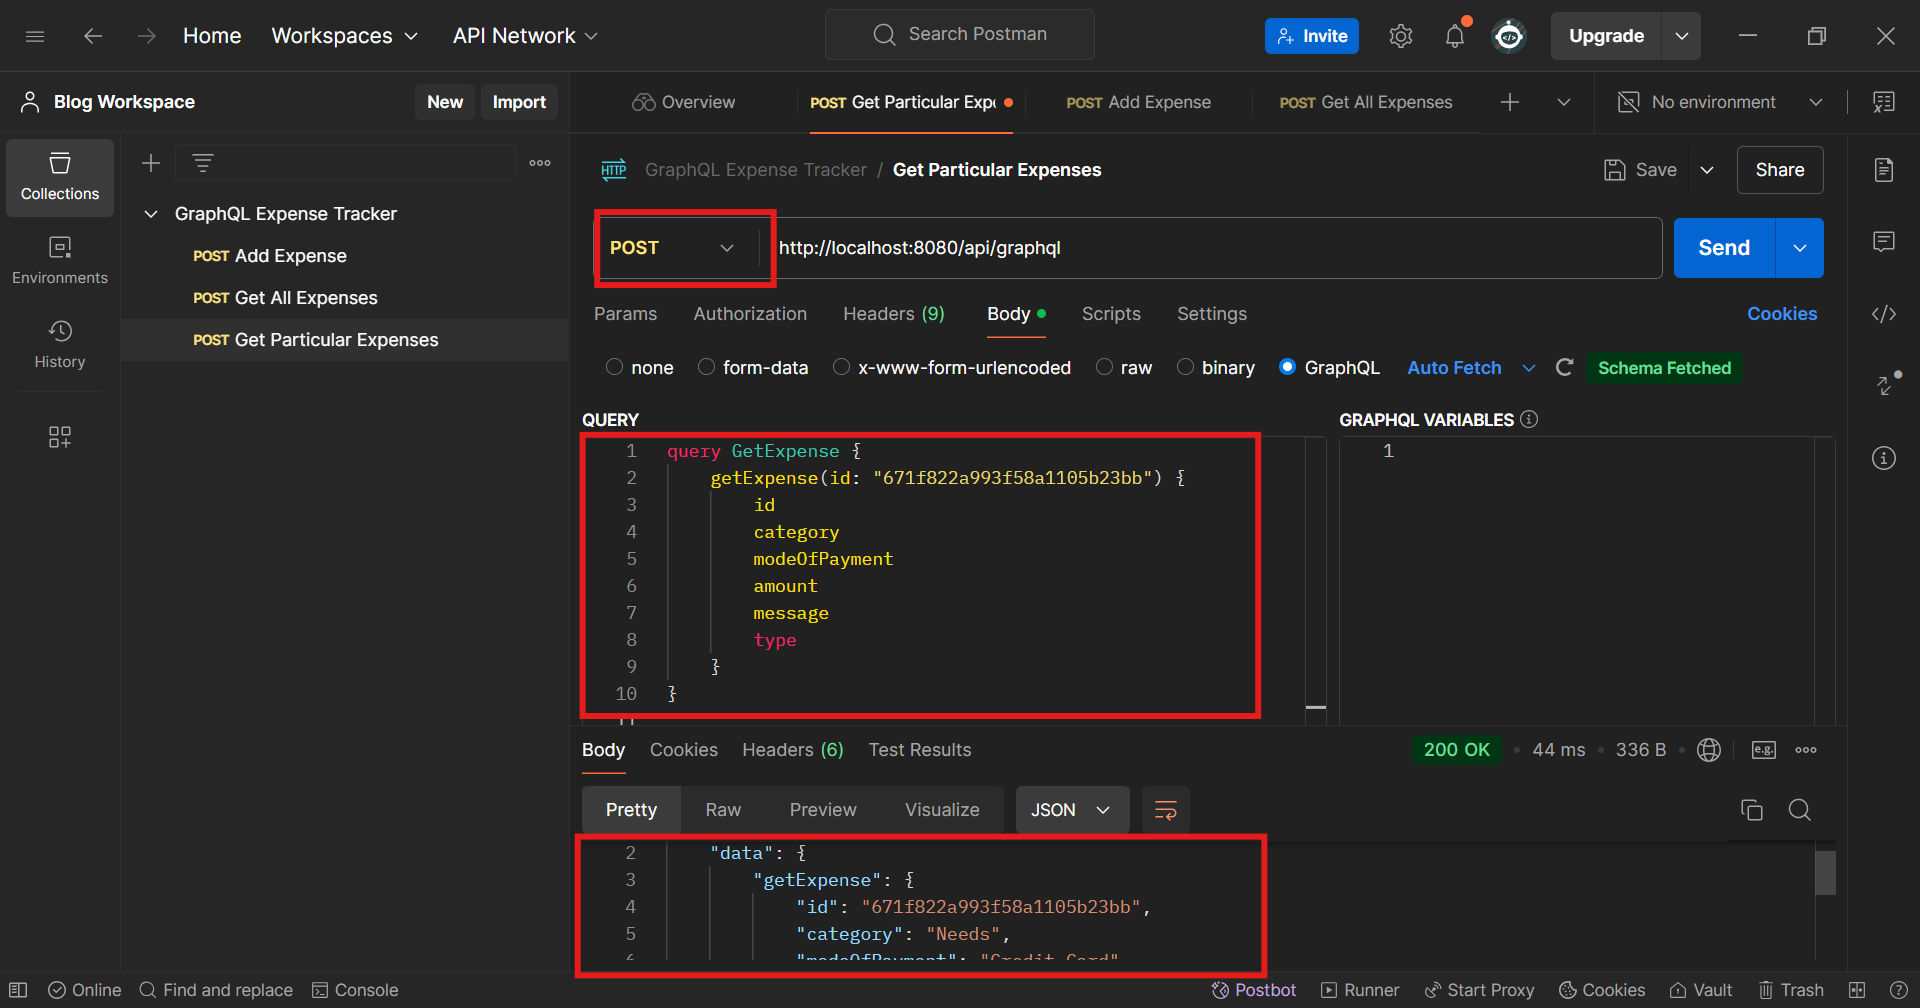
Add a New Request of POST as request parameter, and use the below Query to find a particular Expense. Do Copy the id of any expense record from All Expense Request’s response.
query GetExpense {
    getExpense(id: "671f822a993f58a1105b23bb") {
        id
        category
        modeOfPayment
        amount
        message
        type
    }
}
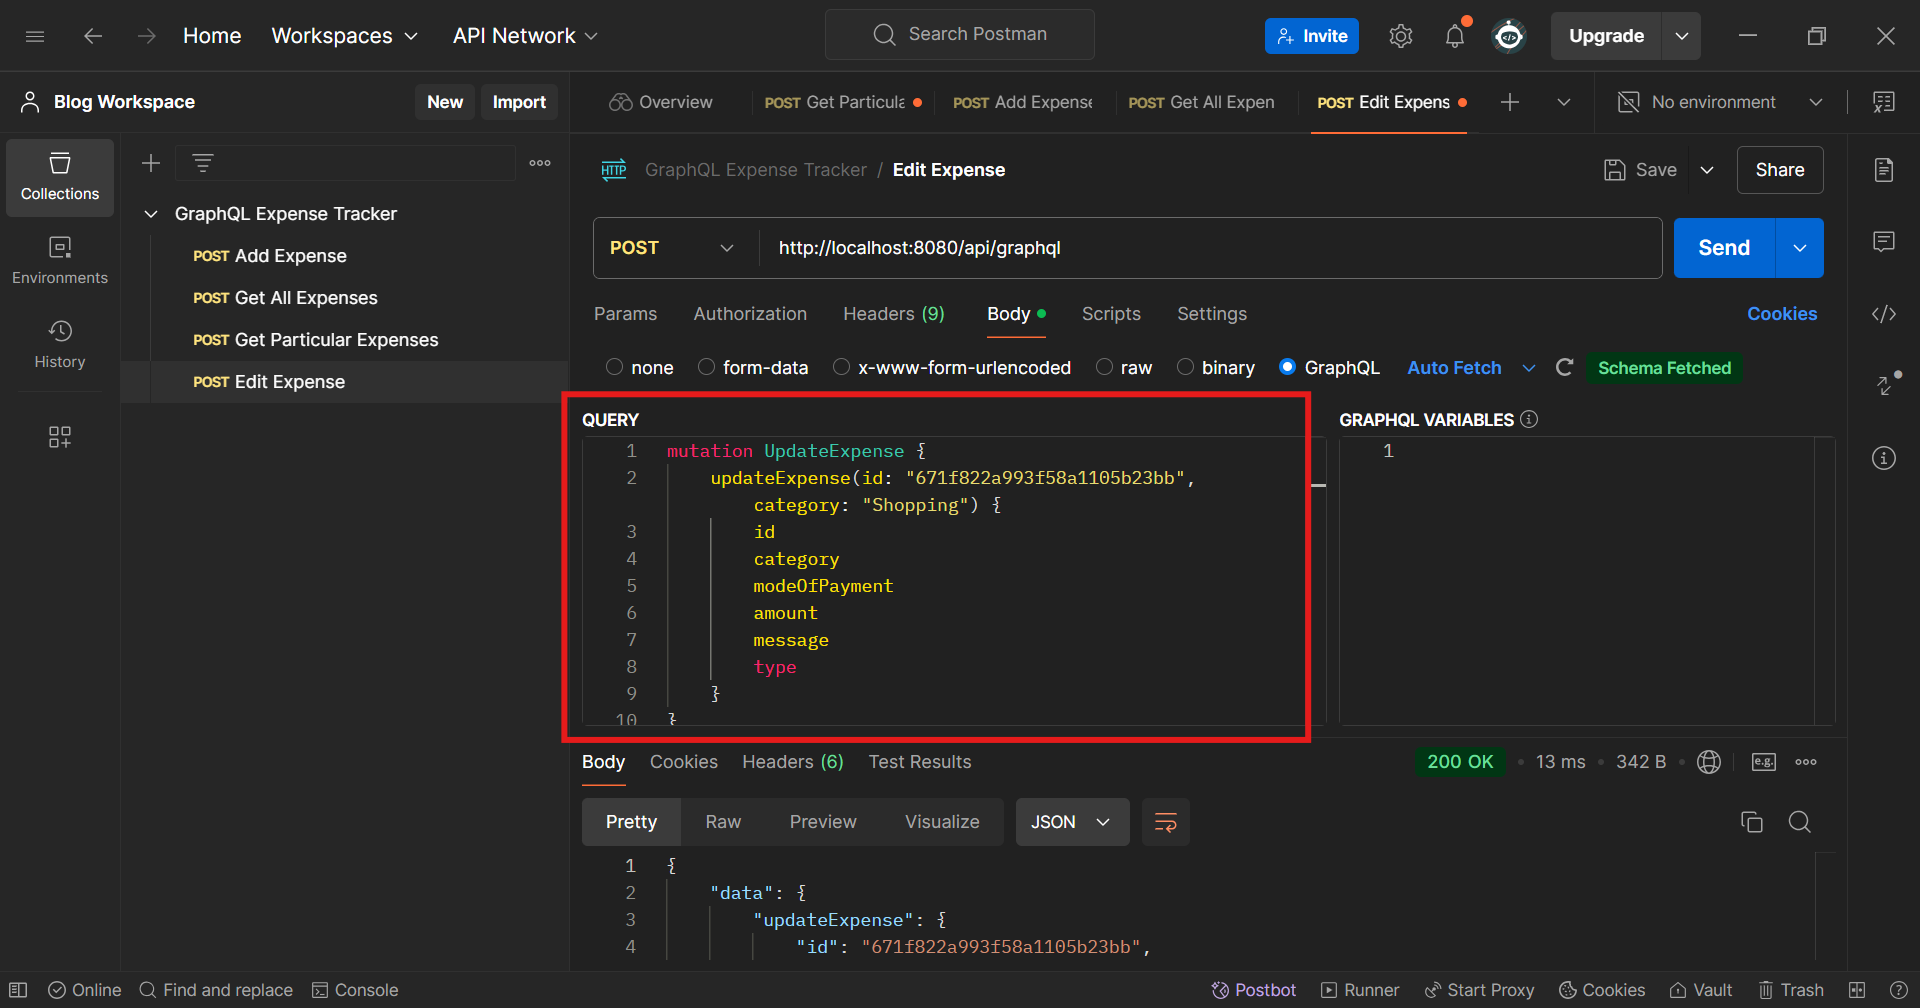
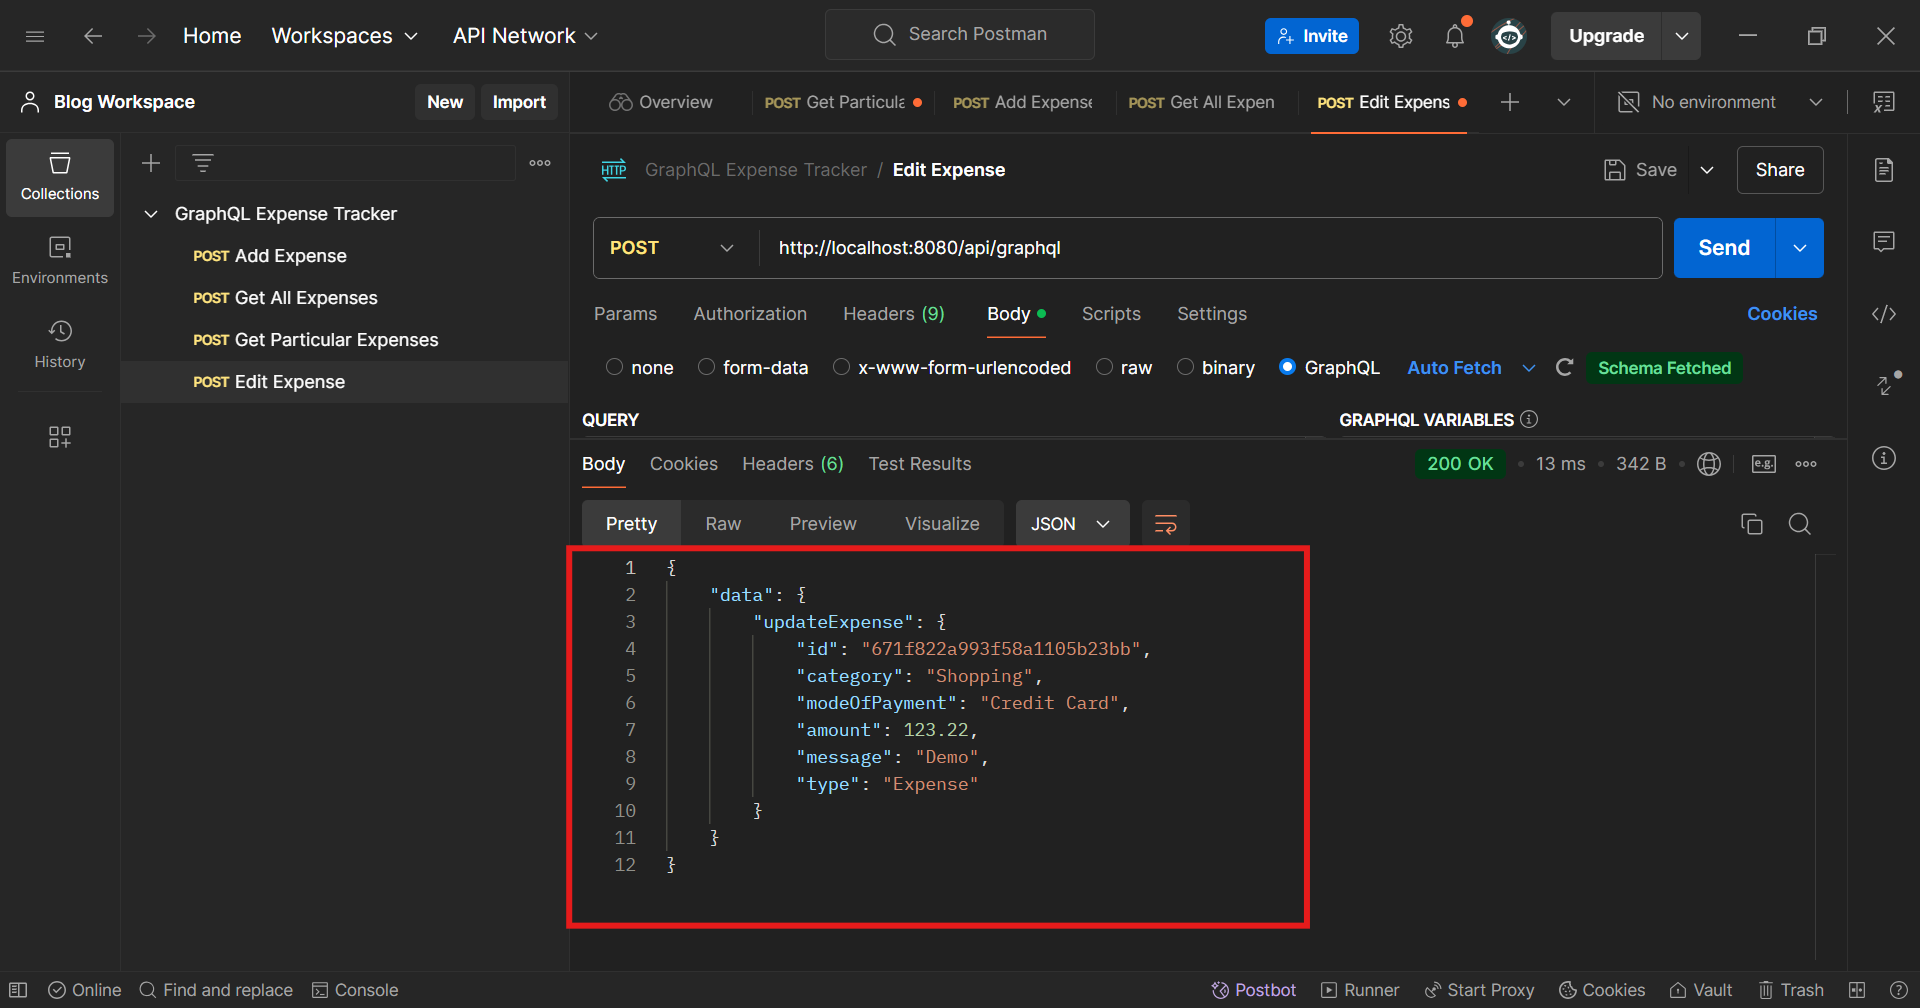
Update Expense
Add a new request and keep the type as POST. Try writing the below Query and see if the category gets updated.
mutation UpdateExpense {
    updateExpense(id: 671f822a993f58a1105b23bb, category:"Shopping") {
        id
        category
        modeOfPayment
        amount
        message
        type
    }
}
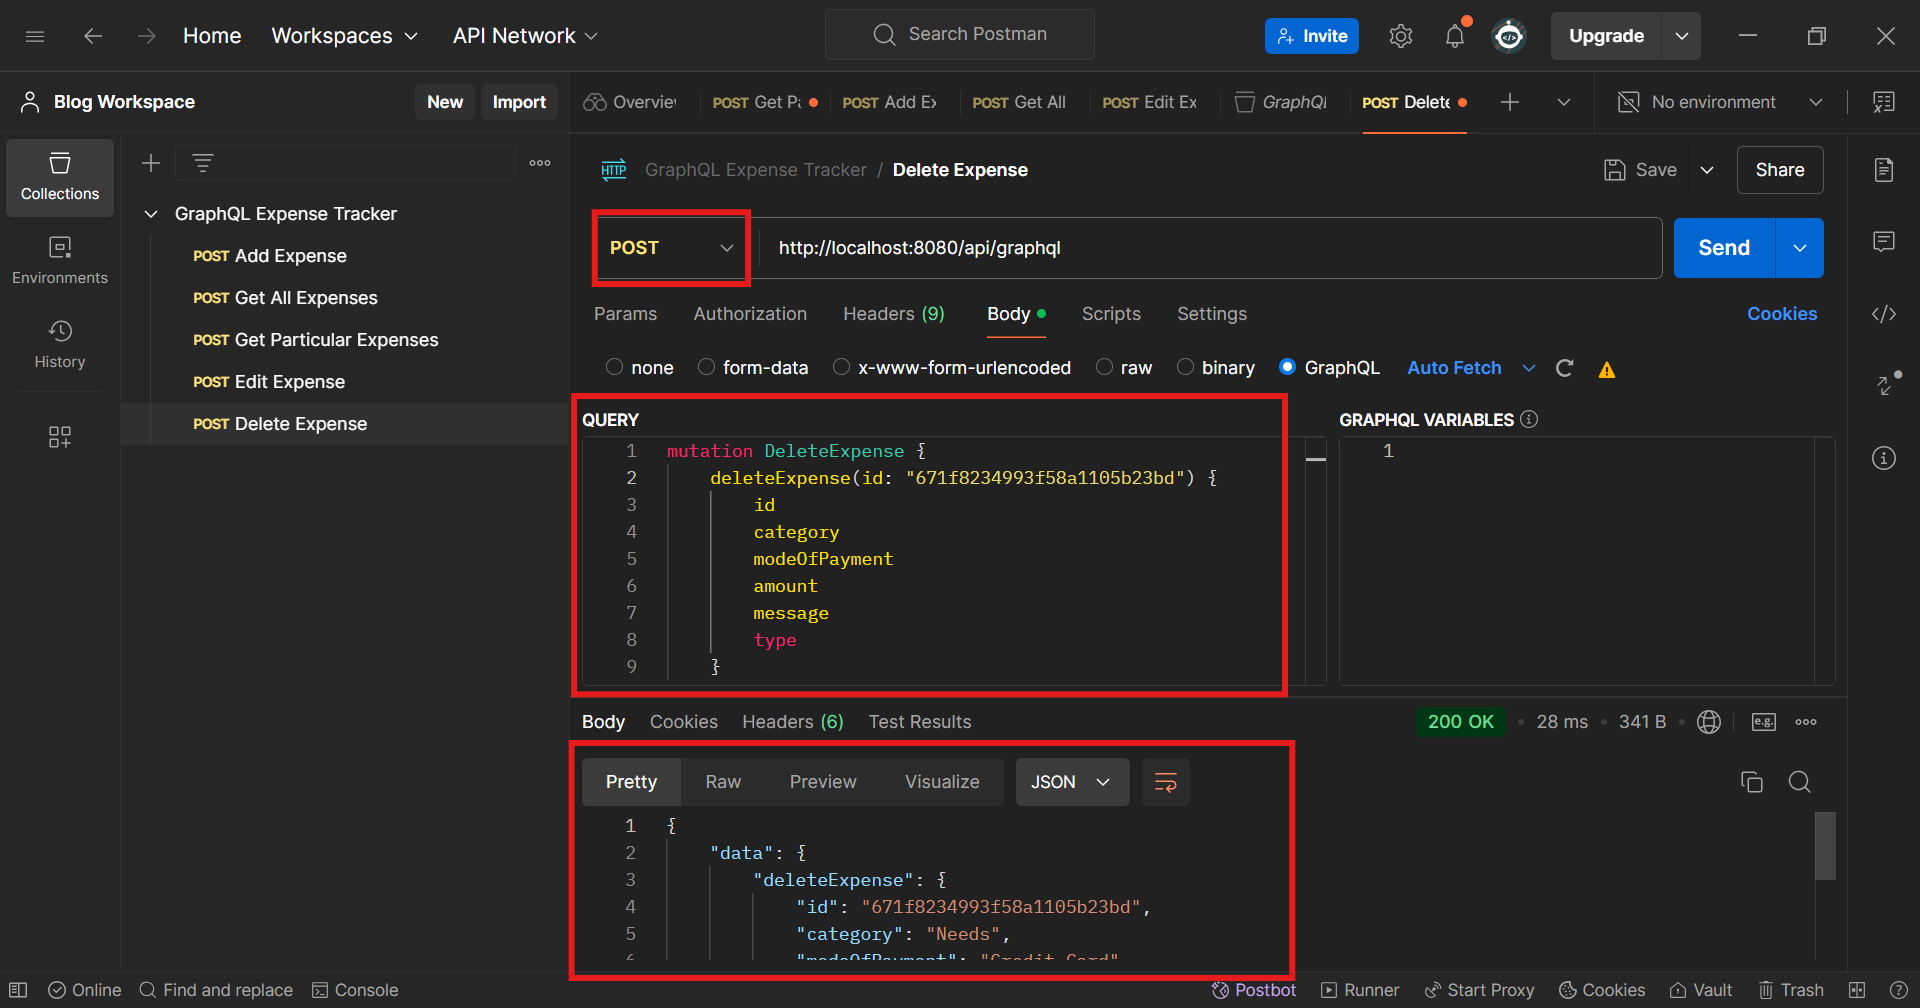
Delete Expense
Add a new request and keep the type as POST. Try writing the below Query and see if the expense gets deleted.
mutation DeleteExpense {
    deleteExpense(id: "671f822a993f58a1105b23bb") {
        id
        category
        modeOfPayment
        amount
        message
        type
    }
}
Method 02 - The Short way
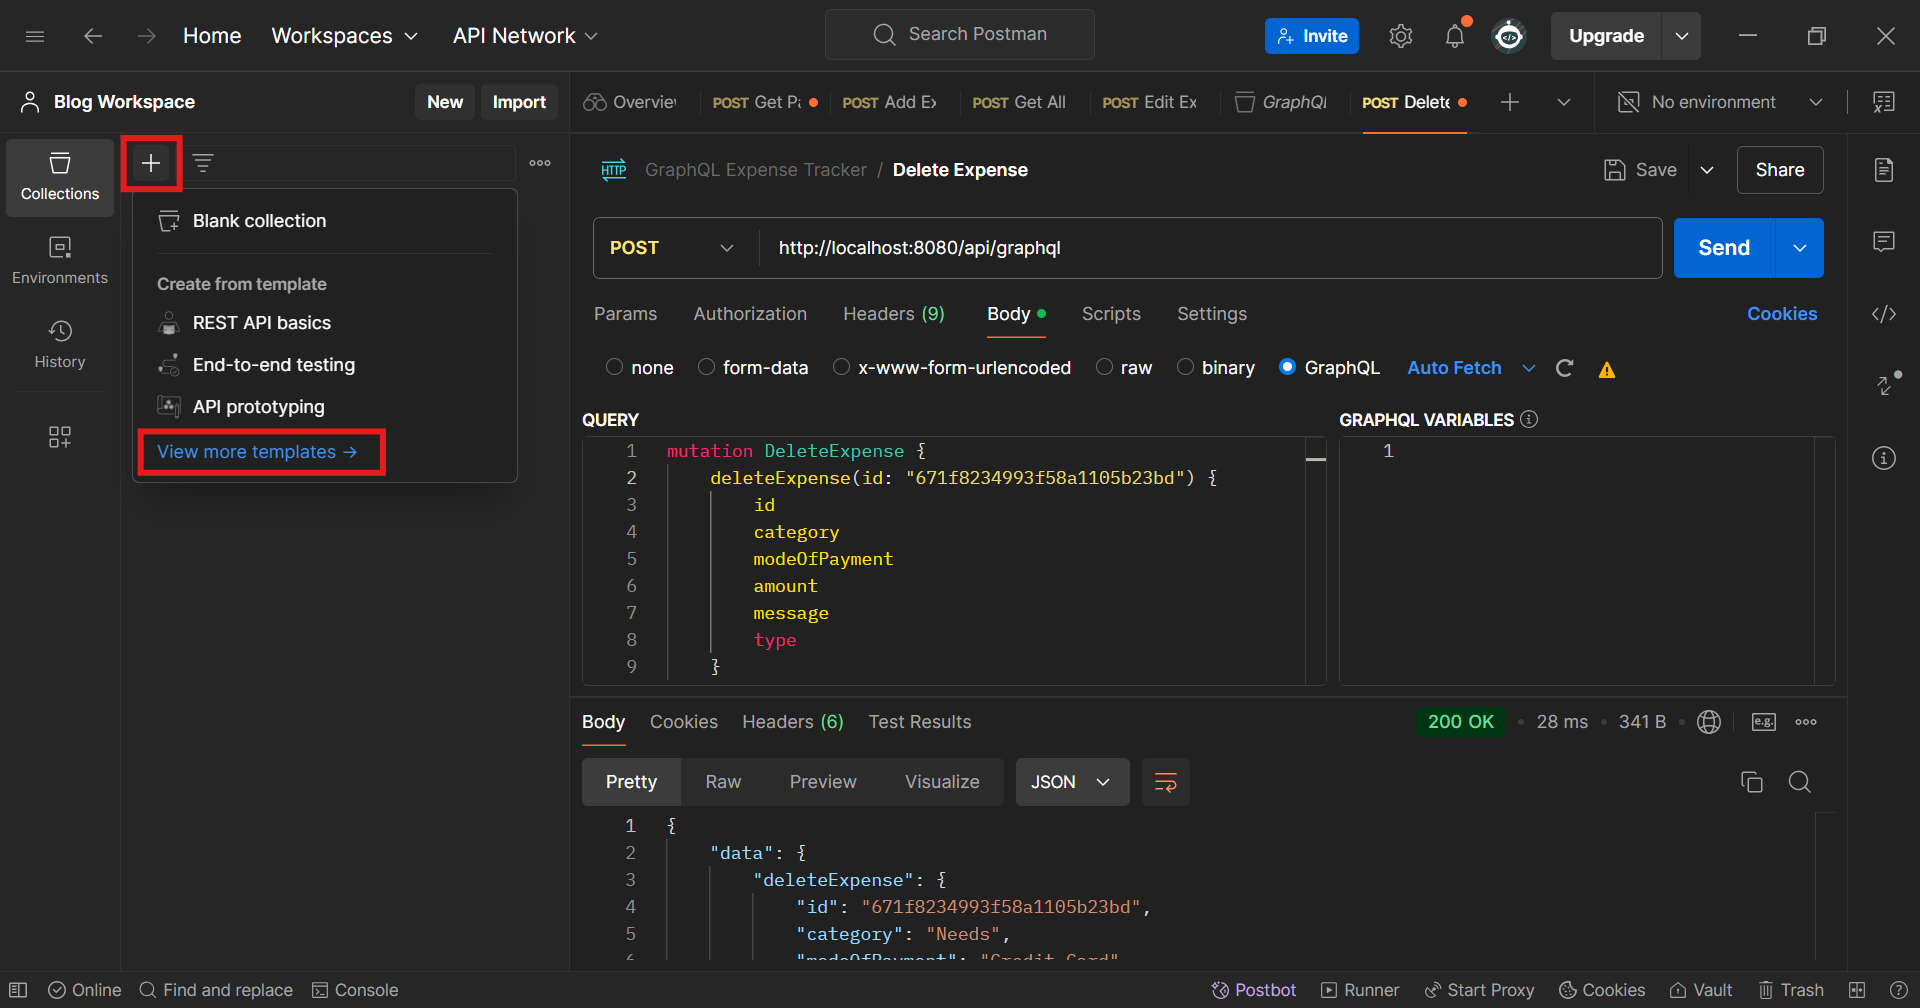
Postman has predefined templates that get hold of all defined Queries and Mutations, so we don’t need to type queries everytime. Follow these steps to create a GraphQL collection.
NOTE** - If you are a newbie in GraphQL then please use the 1st method as it will help you become familiar with the Query Syntax.
Click on the + icon and select View More Templates
Select the GraphQL basics template and then click on Use Template
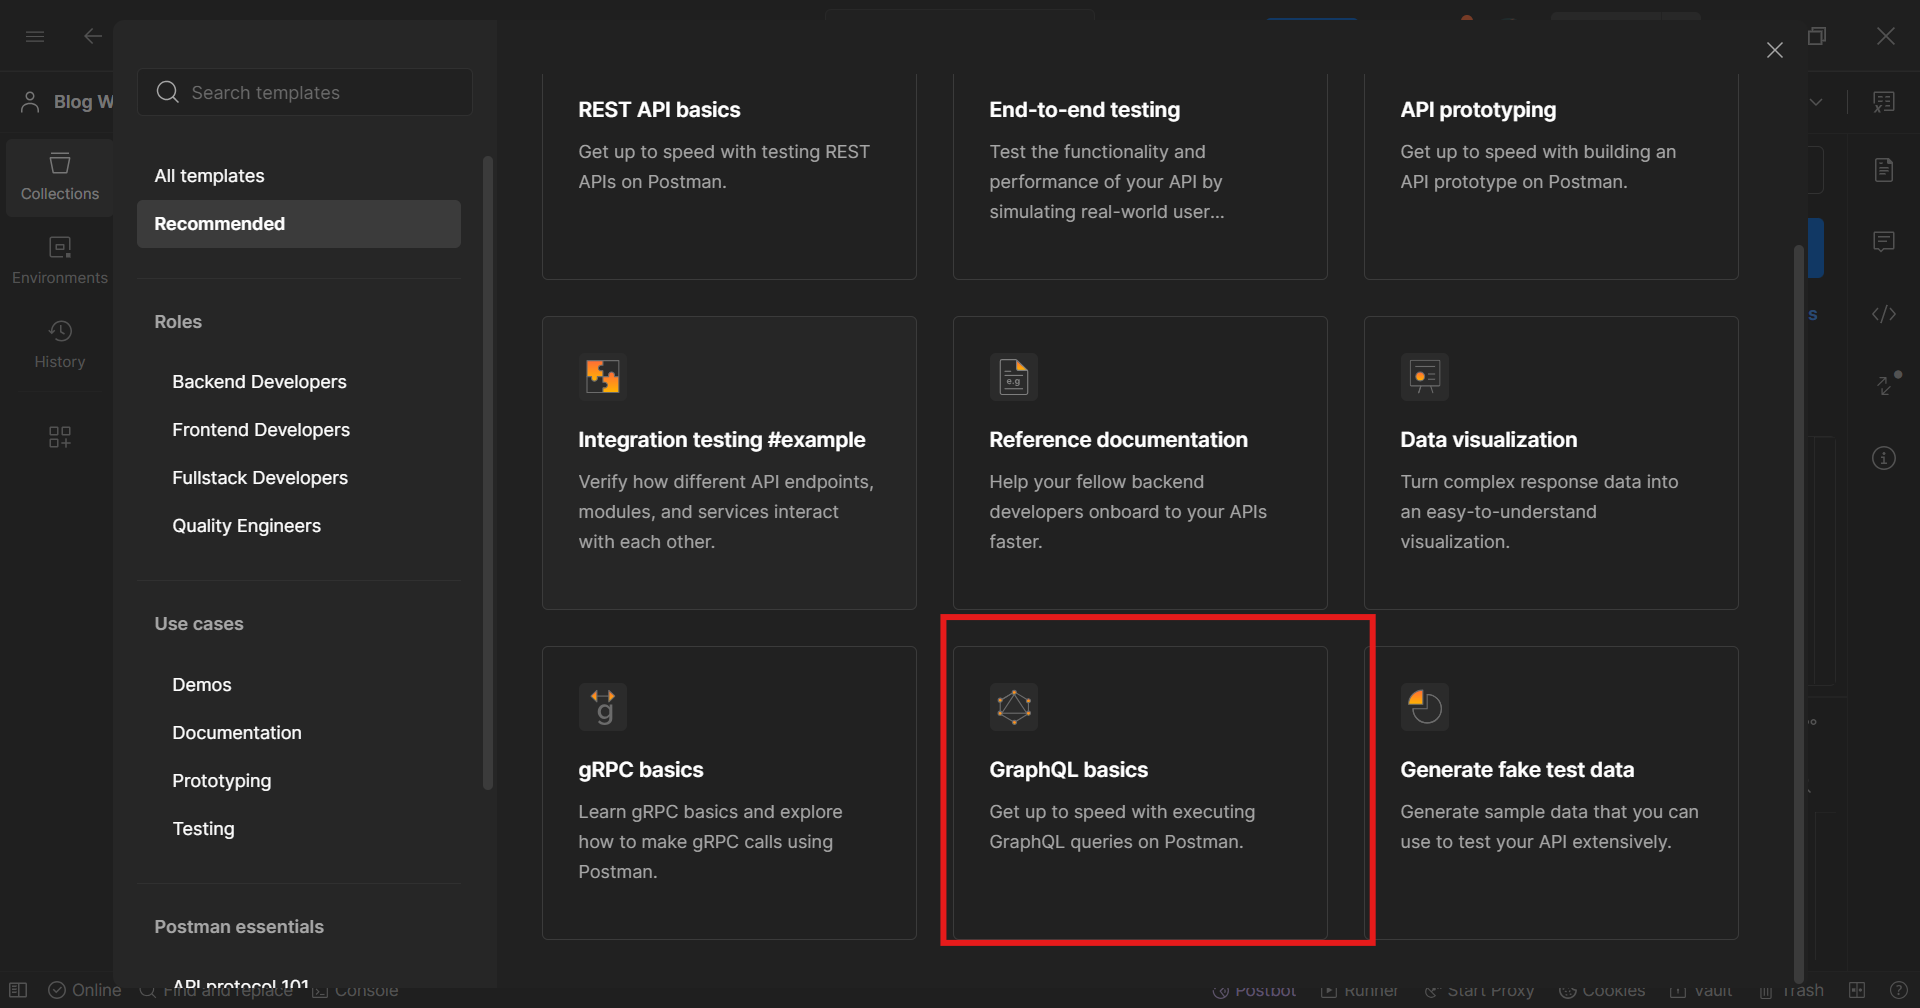
You will see an Overview page being rendered and you can read that page to know more how to use this template. Besides that there will be a variables tab. Click on that and change the base URL to our local host URL till /api route i.e
http://localhost:3000/apiand click on Save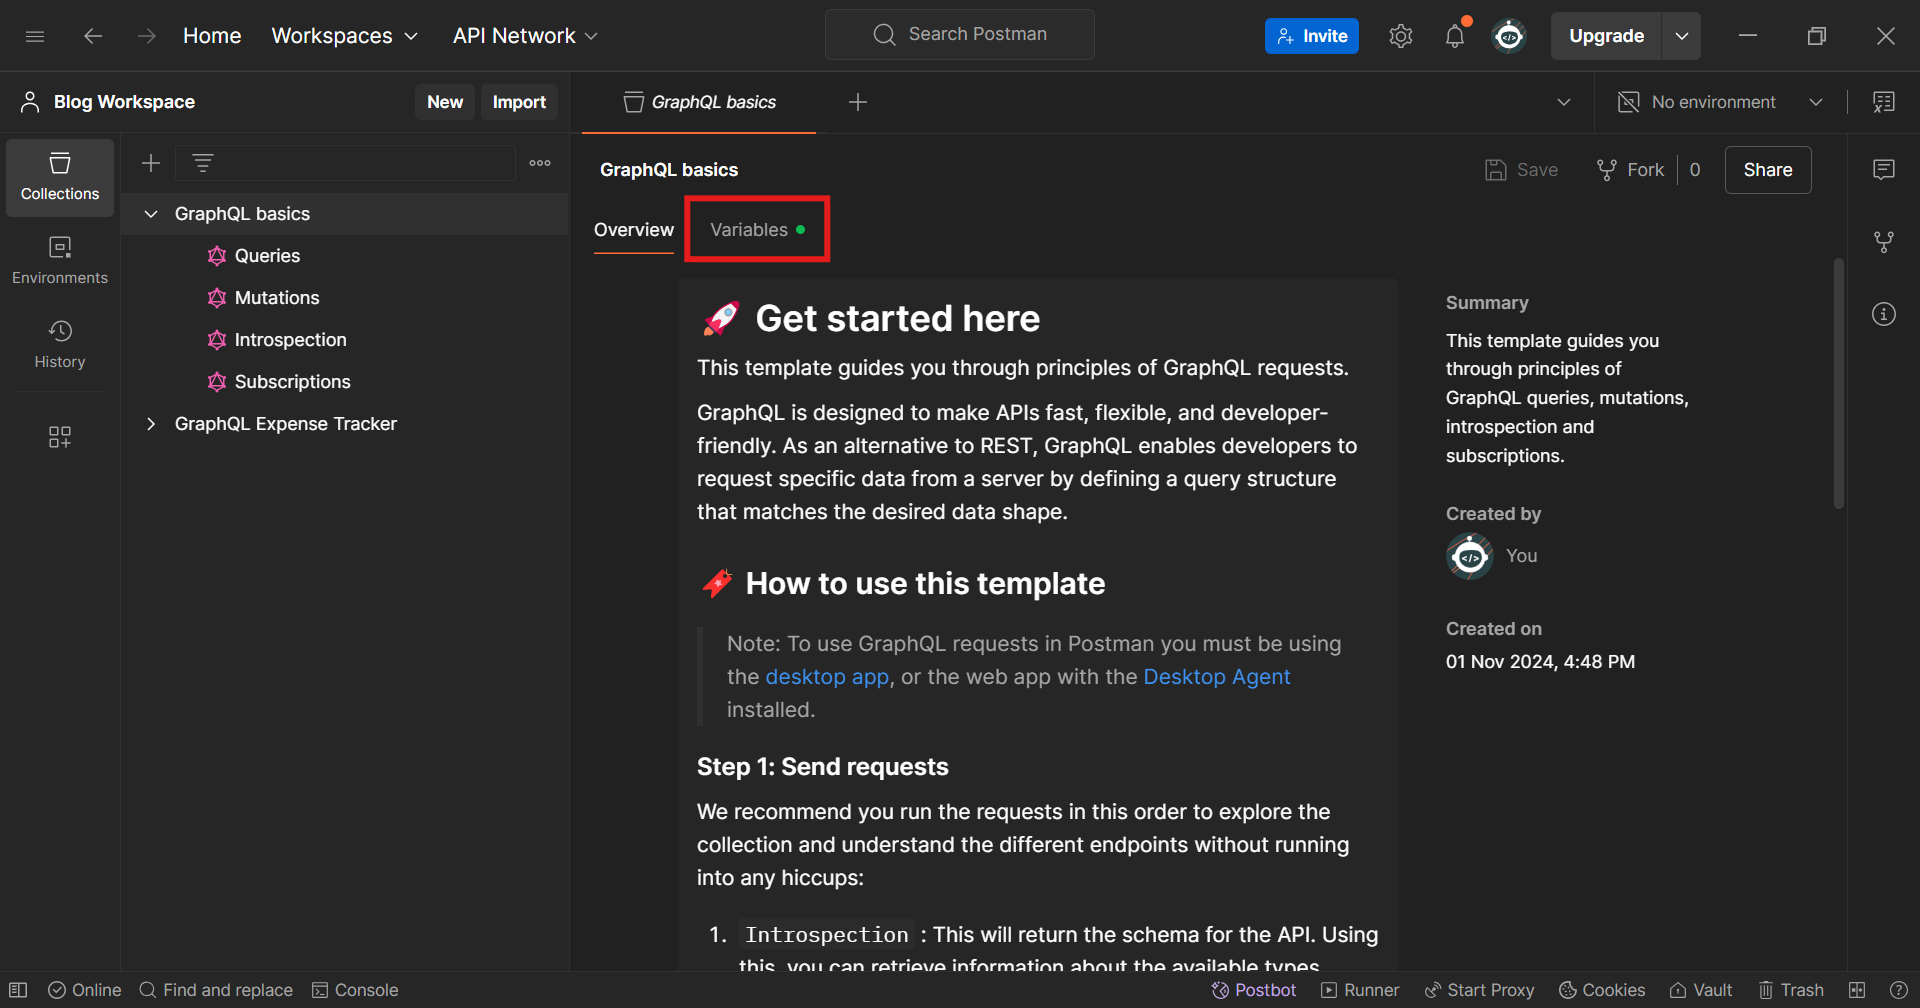
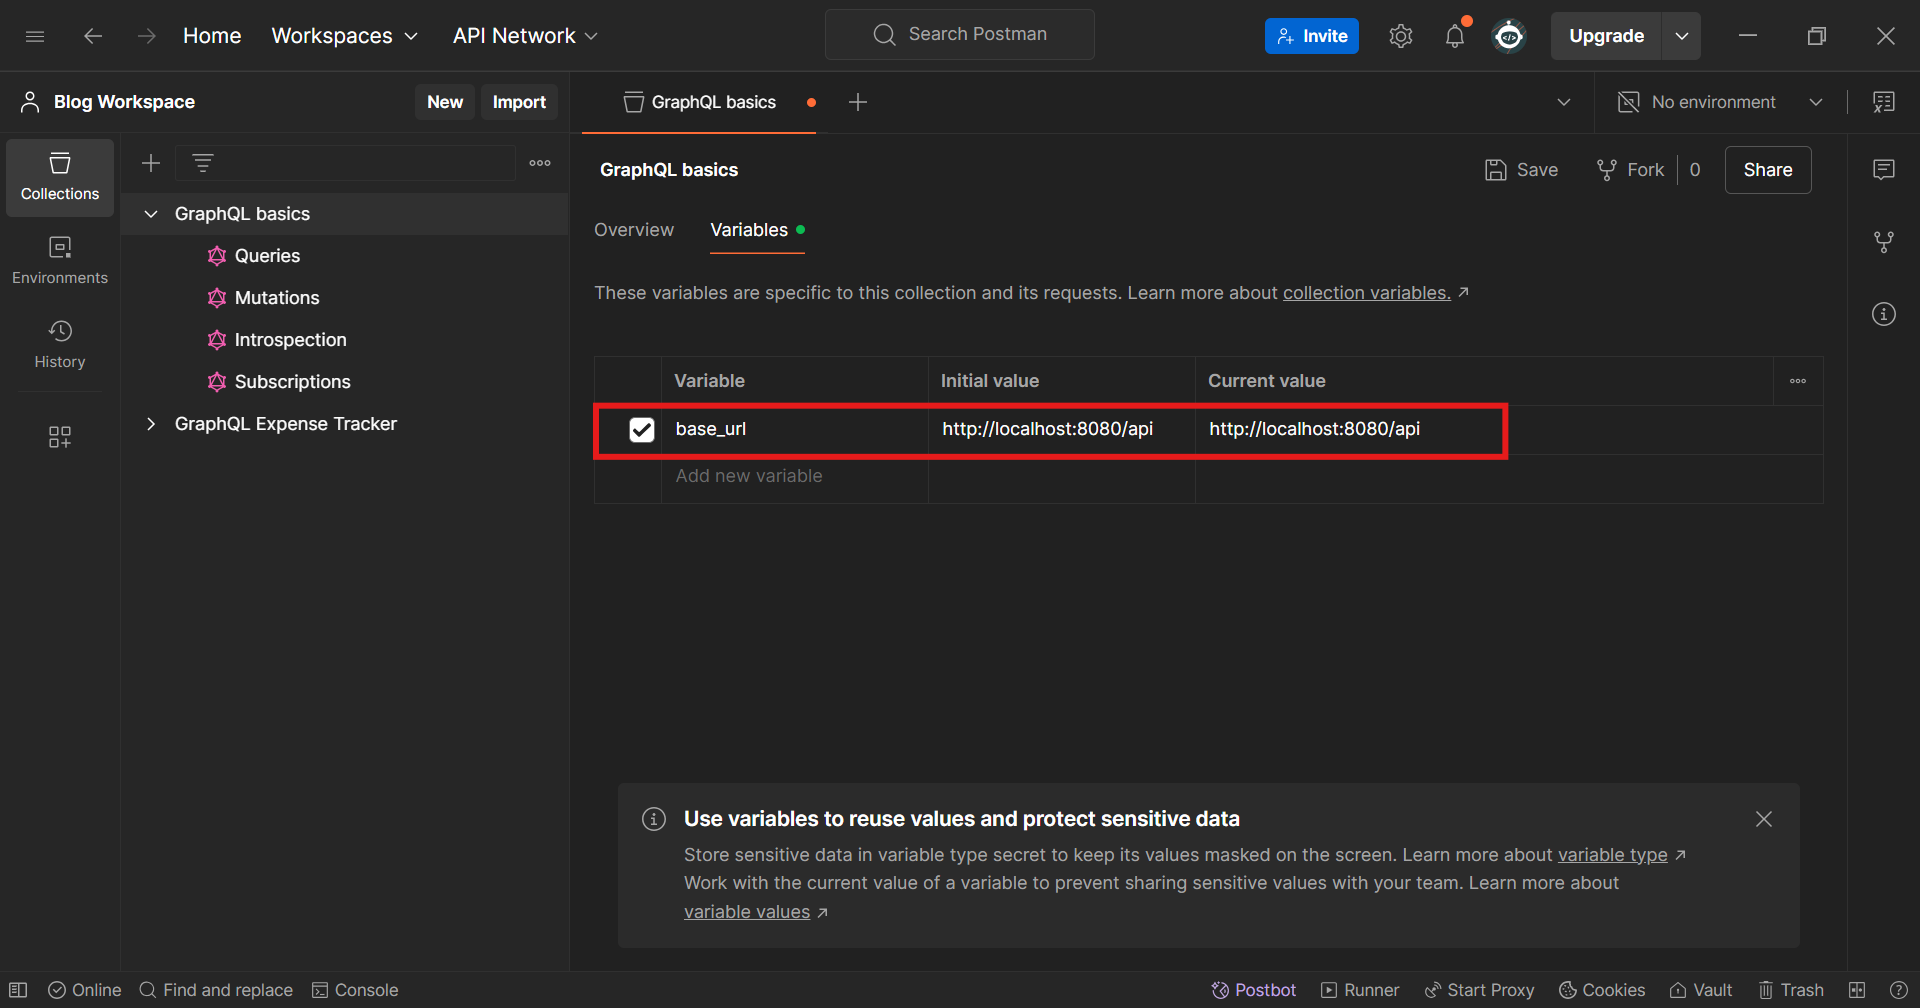
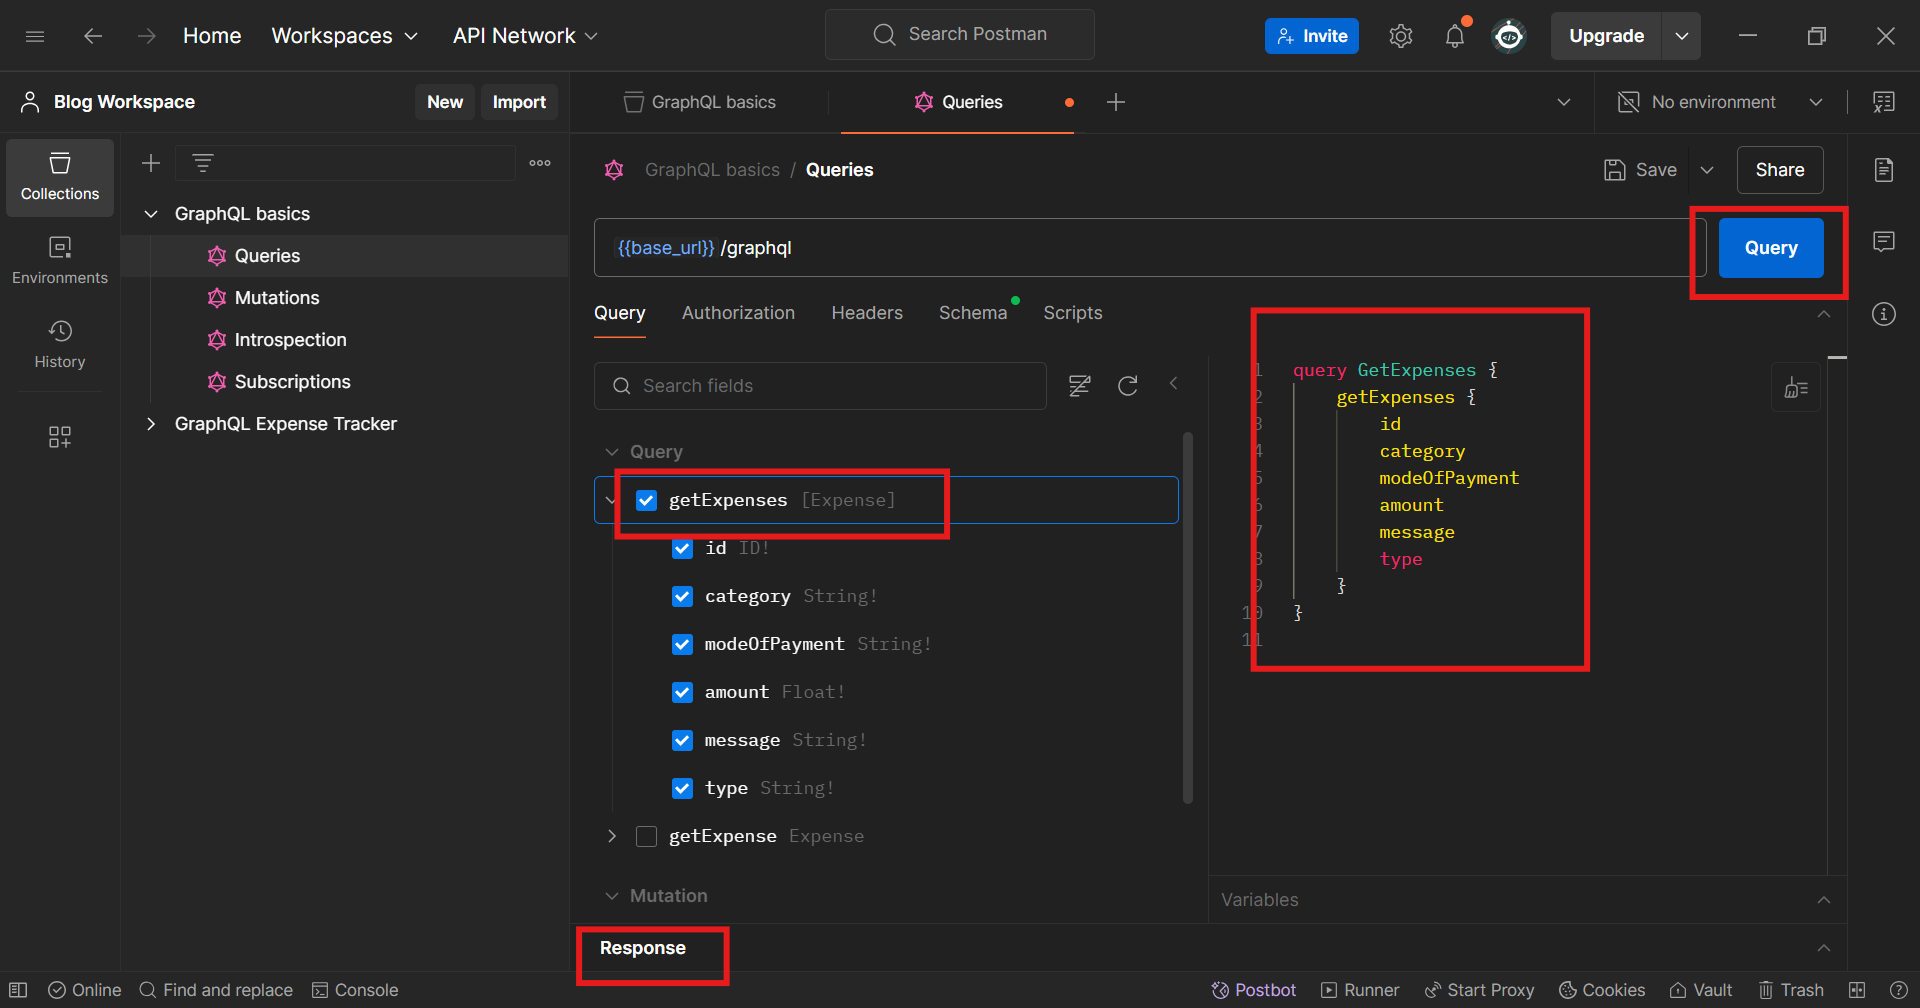
Now switch to Queries tab there you will get a Schema option to refresh and after refreshing you will get your desired queries and mutations available there.
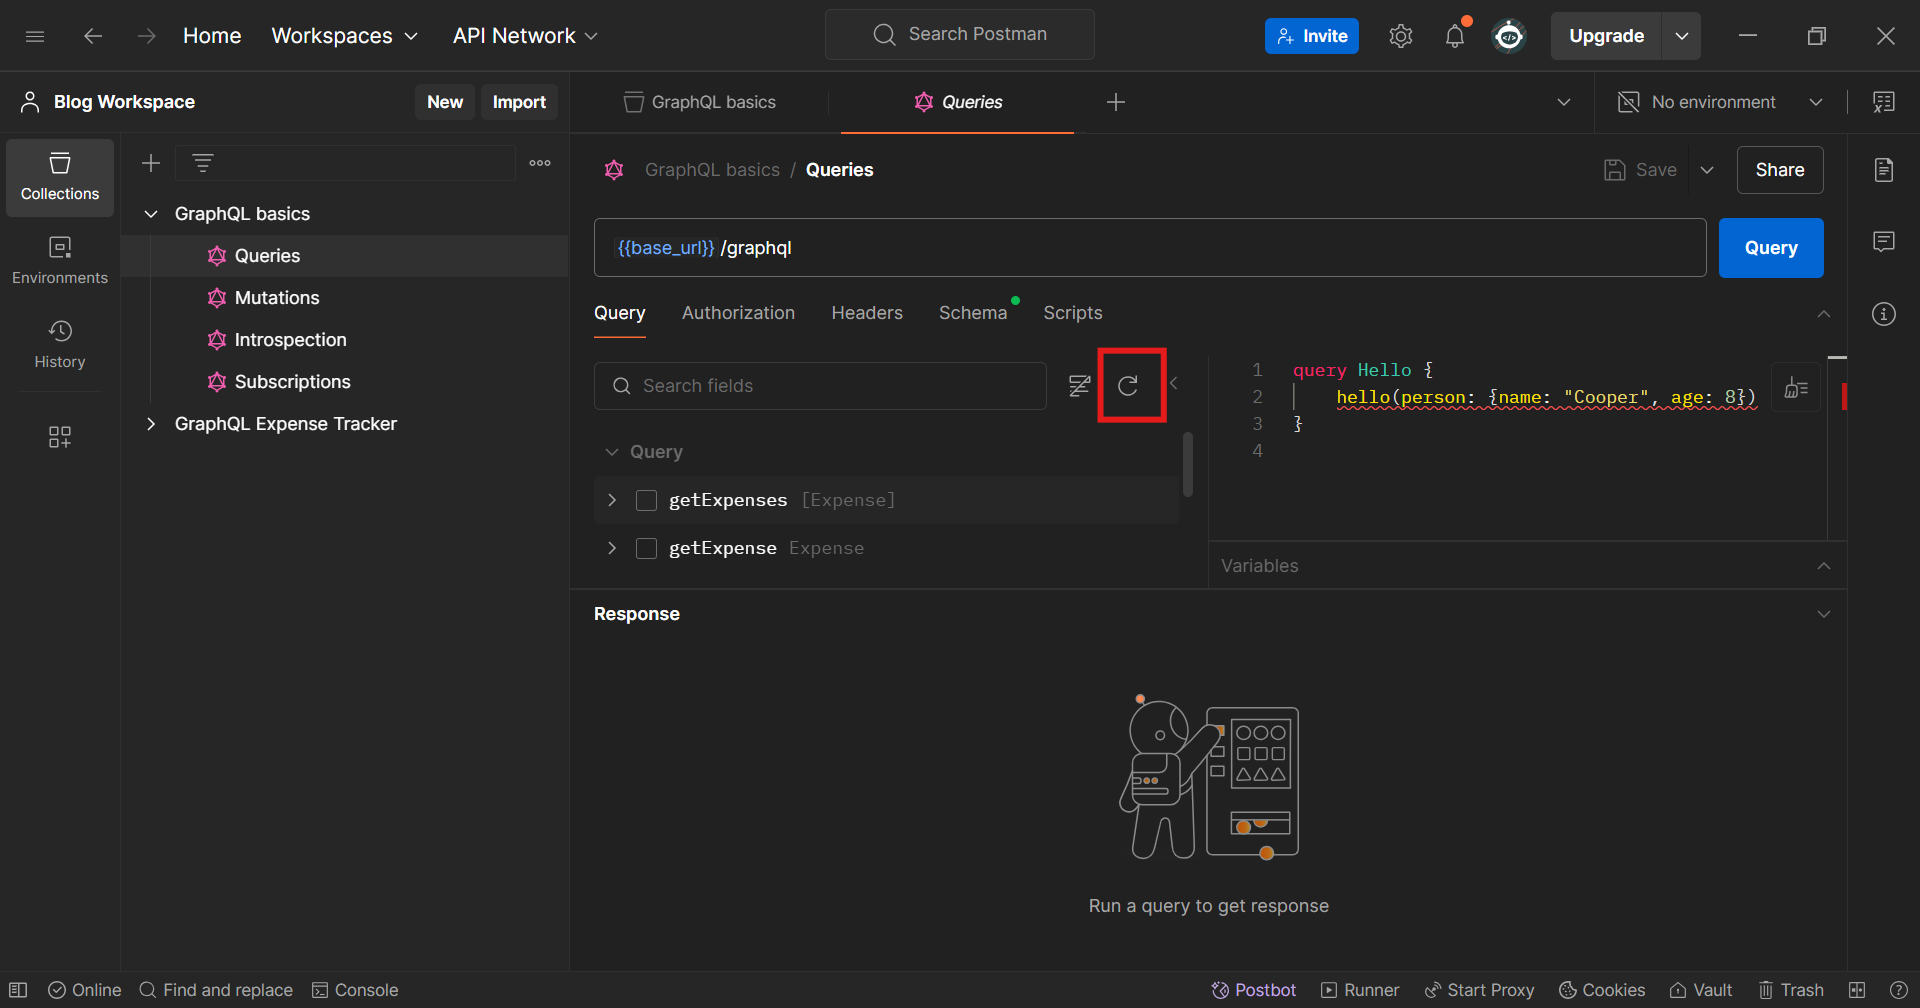
To Run any Query or Mutation just select the same in checkbox and you get the required query in the right side editor. After every query keep in mind to flush this editor by selecting the query and hitting backspace or delete
Up Next ⏭️
We will now make a sleek and minimal UI for Our Expense Tracker and trigger these CRUD Operations from Our UI.
Subscribe to my newsletter
Read articles from Kush Munot directly inside your inbox. Subscribe to the newsletter, and don't miss out.
Written by
