How to deploy smart contracts using Foundry
 Samarth Saxena
Introduction
If you’ve been following this series so far, you already know how to write and compile smart contracts in Foundry. You also know how to use keystores to safely store and use your private keys. Now it is time to learn how you can deploy smart contracts. This article will cover both local and on-chain deployment.
Which way, Solidity dev?
There are two ways you can deploy your contracts using Foundry- the first is by using the forge create command and the second is by using Solidity scripts. Solidity scripting is a way to declaratively deploy contracts using Solidity, instead of using the more limiting and less user friendly forge create. If you are deploying a simple contract which has no constructor arguments and no reliance on other contracts that need to be deployed, it makes sense to just use forge create instead of making a separate script.
If you’re coming from a Hardhat background, think of Solidity scripts as the scripts you write in Hardhat, except they’re in Solidity instead of JavaScript, and they are run on the fast Foundry EVM backend, which provides dry-run capabilities.
We’ll cover both ways in this article.
Initial Setup
If you haven’t created a foundry project, go ahead and create one using this command:
forge init project-name
Open src/Counter.sol and add a constructor function to the contract
constructor (uint _initNumber){
    number= _initNumber;
}
Your final code should look like this:
// SPDX-License-Identifier: UNLICENSED
pragma solidity ^0.8.13;

contract Counter {
    uint256 public number;
    constructor (uint _initNumber){
        number= _initNumber;
    }
    function setNumber(uint256 newNumber) public {
        number = newNumber;
    }

    function increment() public {
        number++;
    }
}
Navigate to your project’s folder using your terminal and compile the contract like so:
cd project-name
forge build
# you can also use forge compile
You should see something like this in your terminal:

We’ll use anvil to start a local blockchain with chainId 31337. Go to your terminal and run:
anvil
You’ll then see a list of accounts and their corresponding private keys which already have a balance of 10000 ETH on chain ID 31337. Copy one of these private keys, make a .env file in the root of your project and paste it there like so:
LOCAL_PRIVATE_KEY=thecopiedkey
We’re not using keystores for local deployments since this is a known private key which everyone sees when using Foundry and is only used locally.
Now enter the URL of a Sepolia RPC endpoint in the .env file. I’m using a public RPC in this example:
SEPOLIA_RPC_URL=https://1rpc.io/sepolia
Now open your foundry.toml file. It should be present in the root of the project. At the end of the file, add:
[rpc_endpoints]
sepolia = "${SEPOLIA_RPC_URL}"
This creates an RPC alias for Sepolia and provides cheatcodes to access the RPC endpoint we added.
Keep your anvil terminal running. Open a new terminal and run:
source .env
This updates your terminal’s environment variables and adds the ones we added in the .env file.
Awesome! Now let’s see how we can deploy our contract
Deploying via forge create
The contract that needs to be deployed is a pretty simple one and it takes one constructor argument. Let’s see how we can deploy it using forge create
Local Deployment
In your terminal, run:
forge create --rpc-url http://localhost:8545 --private-key $LOCAL_PRIVATE_KEY src/Counter.sol:Counter --constructor-args 23
We’ve specified the constructor argument as 23 here, so the value of number in our contract will be set to 23. If the transaction goes through, you’ll see something like this:

Sepolia Deployment
This process is pretty similar to deploying locally. After all, we’re only deploying to a chain which has a different ID. The only things we’ll need are an account which has Sepolia ETH and an RPC URL. For accessing an account which has Sepolia ETH, we’ll use keystores. We already set up one such account in the previous article and named it “dev”. You can read it here.
In your terminal, run this command:
forge create --rpc-url $SEPOLIA_RPC_URL --account dev src/Counter.sol:Counter --constructor-args 23
This time we’re using our keystore, so it will ask you to enter its password. If you enter the right password and the transaction goes through, you’ll see something like this:

Deploying via scripts
Open script/Counter.sol. For the most part, the required code is already written there. Let’s go through it step-by-step
// SPDX-License-Identifier: UNLICENSED
pragma solidity ^0.8.13;

import {Script, console} from "forge-std/Script.sol";
import {Counter} from "../src/Counter.sol";

contract CounterScript is Script {
    Counter public counter;

    function setUp() public {}

    function run() public {
        vm.startBroadcast();

        counter = new Counter();

        vm.stopBroadcast();
    }
}
The import statements get Script and console from the forge standard library, and the Counter contract we modified.
We then specify that the contract in this file inherits the Script contract from the forge standard library. Notice that everything in Foundry is a Solidity smart contract.
Then, we declare a new variable counter of the type Counter (our contract)
setUp is a function that runs every time we run a script. Since we don’t have anything to set up right now, we’ll leave this empty.
By default, scripts are executed by calling the function named run. In run, everything between vm.startBroadcast and vm.stopBroadcast creates transactions that can later be signed and sent on-chain- local, testnet, or mainnet.
If you have the right extensions for Solidity, you might be seeing an error in the line which creates a new instance of Counter.

This is because we now need to specify a value of type uint256 as the argument of our contract’s constructor. Just add a number in the brackets like so:
counter = new Counter(2);
This will set the number to be 2 when the contract is deployed.
Local Deployment
Just run this command in your terminal:
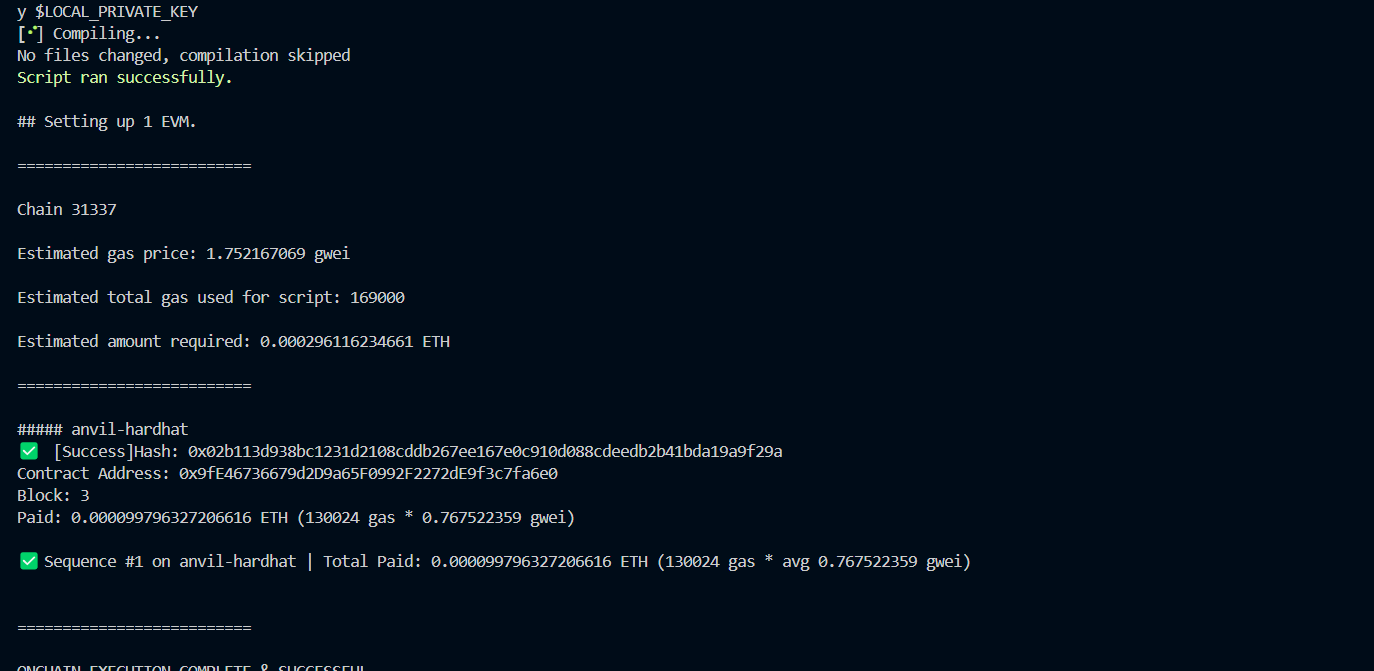
forge script script/Counter.s.sol:CounterScript --fork-url http://localhost:8545 --broadcast --private-key $LOCAL_PRIVATE_KEY
Here http://localhost:8545 is the URL that is used to fetch the state of the local chain (id 31337) and then sending the transaction to it. You should see something like this:

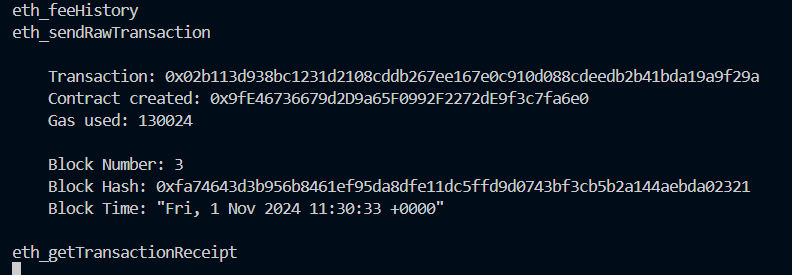
and in the terminal running anvil:

Sepolia Deployment
Again, this process is pretty similar to deploying locally and we only need an account which has Sepolia ETH along with an RPC URL for Ethereum Sepolia. We’ll use keystores for this case too.
Open your terminal and write:
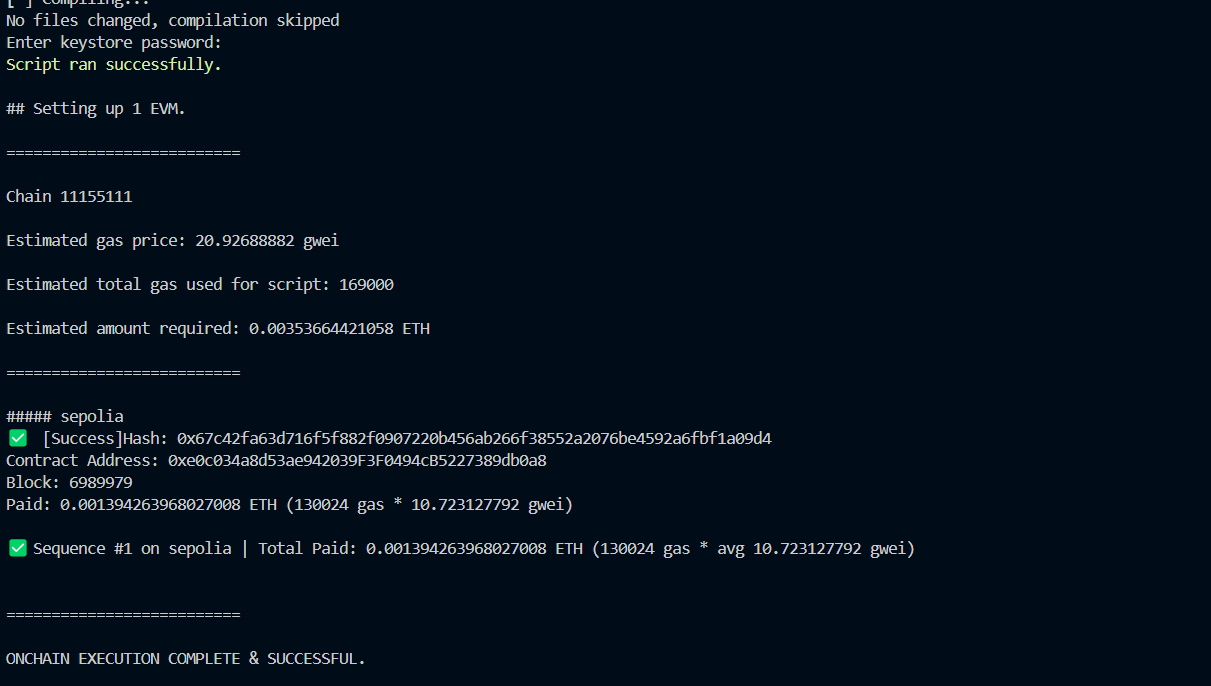
forge script --chain sepolia script/Counter.s.sol:CounterScript --rpc-url $SEPOLIA_RPC_URL --broadcast --account dev
It will ask you to enter the password of the keystore (dev). If you enter the correct password, it attempts to send your transaction using the account corresponding to the keystore. If it succeeds, you’ll get something like this

Conclusion
That’s pretty much it! You now know how you can deploy your contracts locally and on-chain using keystores and environment variables. In the next lesson, we’ll learn how we can fork Ethereum Mainnet to get the entire state of the blockchain locally. Sounds interesting? Well that’s because it is! Stay tuned, see you all soon. Thanks a lot for reading to the end 🫡🫡
Subscribe to my newsletter
Read articles from Samarth Saxena directly inside your inbox. Subscribe to the newsletter, and don't miss out.
Written by

Samarth Saxena
Samarth Saxena
I am a Web3 Developer and Technical Writer from India. I love to write about the things I learn and understand. I believe that being serious is not required as long as one is sincere. I thus tend to have fun in everything that I do.