Setting Up a Multi-Node Kubernetes Cluster
 Ritik Gupta
Kubernetes (K8s) is celebrated for its robust features that ensure applications remain operational. Managed services like Amazon EKS and Azure AKS abstract away the complexities of managing Kubernetes from scratch. In this guide, we'll explore how to set up a multi-node Kubernetes cluster on AWS.
Key Components of Kubernetes
Kube Controller Manager: Monitors the health of nodes, ensuring they are up and running.
Kubelet: A program that must run on every worker node, constantly reporting back to the controller manager to confirm the node's health.
Kube API Server: Acts as the communication hub for user requests (like launching pods) and interacts with the controller manager to schedule resources.
Setting Up a Multi-Node Cluster on AWS
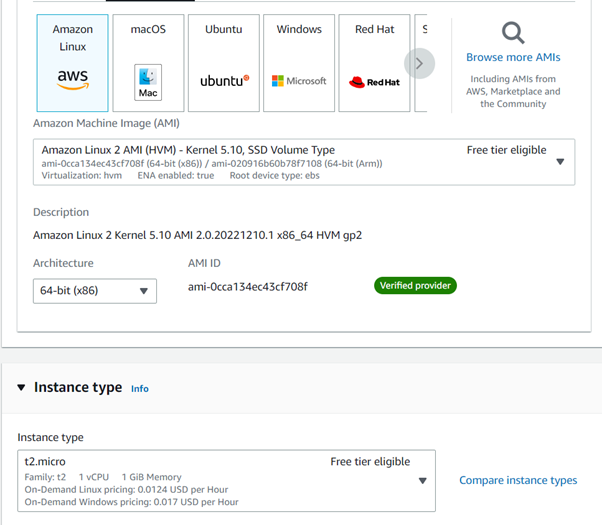
1. Launch EC2 Instances
Start by launching the necessary EC2 instances. You'll typically need one master node and multiple worker nodes.
2. Choose a Container Engine
It's good practice to run each program in a different container. The master node can host the control plane components, while worker nodes will run applications (pods).

3. Install Docker
Install Docker on each node. To ensure Docker services start automatically:

sudo systemctl enable docker
sudo systemctl start docker
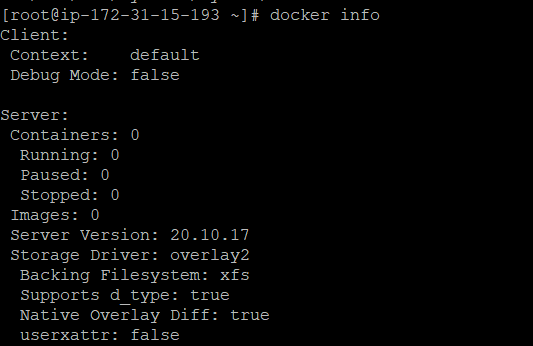
Verify Docker installation:
sudo systemctl status docker

4. Install kubeadm
Kubeadm simplifies the setup of multi-node clusters. Since it might not be available by default, you'll need to configure yum to include Kubernetes packages.


Create a repository file:
sudo vi /etc/yum.repos.d/kubernetes.repo

Add the following content:
[kubernetes]
name=Kubernetes
baseurl=https://packages.cloud.google.com/yum/doc/yum-key.gpg
enabled=1
gpgcheck=1

Update the repository list and install kubeadm:
sudo yum install kubeadm --disableexcludes=kubernetes

5. Install Kubelet
Kubelet needs to be installed on all nodes, including the master. It manages container lifecycles and communicates with the container runtime.
sudo yum install -y kubelet --disableexcludes=kubernetes
sudo systemctl enable kubelet
sudo systemctl start kubelet

6. Pull Required Images
Master node have various program and all need to run inside container. Use kubeadm to pull the necessary container images for the master node:
sudo kubeadm config images pull
It will pull all the images that are required for the master node.

7. Initialize the Cluster
Now we’ve pulled all the required images for the master command. Now we need to run all the containers from all these images. We need this command to initialize the master node cluster.
Run the following command to initialize your master node:
sudo kubeadm init --pod-network-cidr=10.240.0.0/16 --ignore-preflight-errors=NumCPU --ignore-preflight-errors=Mem
7.1 Change the docker driver from cgroupfs to system
Vi /etc/docker/daemon.json
{
"exec-opts": ["native.cgroupdriver=systemd"]
}

7.2 Then restart the docker services
Yum install iproute-tc
8. Configure Docker
Change the Docker storage driver from cgroupfs to systemd. Edit the Docker configuration:

We will set up users and clients in the future. Now, just to test, I’m making the master system the client system. Using the kubectl get pods
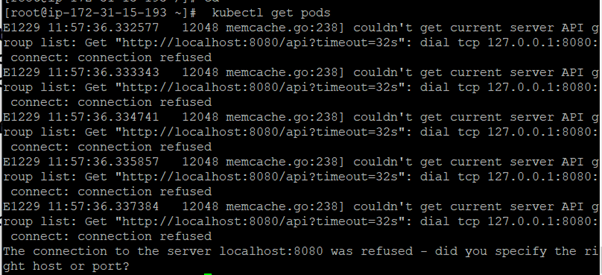
This command failed because Kubectl is the user/client command; they should know where the master is running. he master’s Ip address, and this command always contacts to API program. It should know port no. of the API program.
Now we need to configure the master as user also, To start using your cluster, you need to run the following as a regular user:
mkdir -p $HOME/.kube
sudo cp -i /etc/kubernetes/admin.conf $HOME/.kube/config
sudo chown $(id -u):$(id -g) $HOME/.kube/config
now our master system is configured as a user also


Now we need to configure worker nodes, Same steps as master:
Install docker
Install kubelet
sudo yum install -y kubelet kubeadm kubectl --disableexcludes=kubernetes
now we need to go to the master node and get the token to join
kubeadm token list
master provides the command to join at the time of init
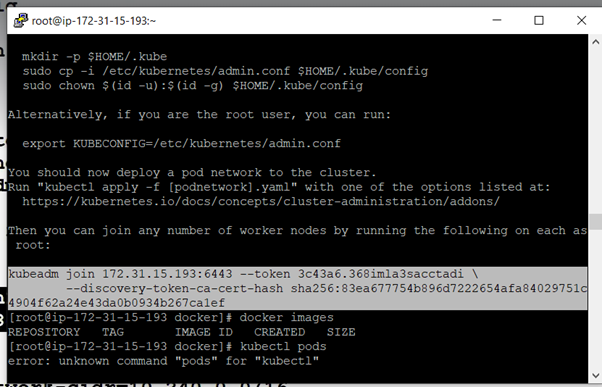
kubeadm join 172.31.15.193:6443 --token 3c43a6.368imla3sacctadi \
        --discovery-token-ca-cert-hash sha256:83ea677754b896d7222654afa84029751c4904f62a24e43da0b0934b267ca1ef
To get the new token, we can use the kubeadm token create –print-join-command

Now to test, we will run one deployment.
Deploying a Network Add-on
To enable pod-to-pod communication, install a network add-on like Flannel:
kubectl apply -f https://raw.githubusercontent.com/coreos/flannel/master/Documentation/kube-flannel.yml

Conclusion
You now have a multi-node Kubernetes cluster running on AWS. This setup allows you to leverage Kubernetes to manage containerized applications effectively. In future posts, we’ll explore more advanced configurations and deployments.
Thanks for reading! I hope you understood these concepts and learned something.
If you have any queries, feel free to reach out to me on LinkedIn.
Subscribe to my newsletter
Read articles from Ritik Gupta directly inside your inbox. Subscribe to the newsletter, and don't miss out.
Written by

Ritik Gupta
Ritik Gupta
Hi there! 👋 I'm Ritik Gupta, a passionate tech enthusiast and lifelong learner dedicated to exploring the vast world of technology. From untangling complex data structures and designing robust system architectures to navigating the dynamic landscape of DevOps, I aim to make challenging concepts easy to understand. With hands-on experience in building scalable solutions and optimizing workflows, I share insights from my journey through coding, problem-solving, and system design. Whether you're here for interview tips, tutorials, or my take on real-world tech challenges, you're in the right place! When I’m not blogging or coding, you can find me contributing to open-source projects, exploring new tools, or sipping on a good cup of coffee ☕. Let’s learn, grow, and innovate together!