How to Host a React Website on AWS S3 and Speed it Up with CloudFront
 Basir Khan
Table of contents
- Why Choose S3 and CloudFront for Hosting?
- Step-by-Step Guide to Host a React Website on AWS S3 and CloudFront
- Step 1: Build Your React App for Production
- Step 1.1 : Build Your React App for Production
- Step 2: Set Up an S3 Bucket for Static Website Hosting
- Step 3: Set Up CloudFront for Global Caching and Lower Latency
- Step 4: Set Up a Custom Domain with CloudFront (Optional)
- Production Best Practices for Hosting on S3 and CloudFront
- Conclusion

In this guide, we'll explore how to host your React application on Amazon S3 and use CloudFront to speed up content delivery to users worldwide. With S3 and CloudFront, you can create a highly available, low-latency website that’s easy to set up and scale.
We’ll also follow production best practices to ensure your app runs securely, efficiently, and delivers optimal performance.
Why Choose S3 and CloudFront for Hosting?
Amazon S3 is an affordable, durable, and secure solution for static website hosting. It’s perfect for hosting files like HTML, CSS, JavaScript, images, and other assets.
Amazon CloudFront is a Content Delivery Network (CDN) that caches your website’s content in multiple geographic locations, reducing loading times for users around the world and minimizing load on your S3 bucket.
With these services together, you can host your site with:
Lower Latency: CloudFront’s edge locations around the globe speed up content delivery.
Improved Performance: Caching and compression enhance performance.
Better Security: Protect your S3 bucket by serving content only through CloudFront.
Step-by-Step Guide to Host a React Website on AWS S3 and CloudFront
Step 1: Build Your React App for Production
Initialize and Build the React App
If you haven’t created your React app yet, start with:
npx create-react-app my-appReplace
my-appwith your project name.Next, navigate to your app folder:
cd my-appBuild your app for production:
npm run buildThis generates a
buildfolder with optimized files ready for deployment.
Verify Your Build
- Check the
buildfolder. It should contain your production-ready HTML, CSS, JavaScript, and other assets.
- Check the
Step 1.1 : Build Your React App for Production
Clone your react app from github
If you donot have an react app please clone it through this url:
git clone https://github.com/BasirKhan418/React-bolierplate-code.gitNext, navigate to your app folder:
cd React-bolierplate-codeInstall Dependencies & Build your app for production:
  npm i
  npm run build
This generates a
buildfolder with optimized files ready for deployment.
Verify Your Build
- Check the
buildor dist folder. It should contain your production-ready HTML, CSS, JavaScript, and other assets.
- Check the
Step 2: Set Up an S3 Bucket for Static Website Hosting
Create an S3 Bucket for Your Website
Open the S3 Console.
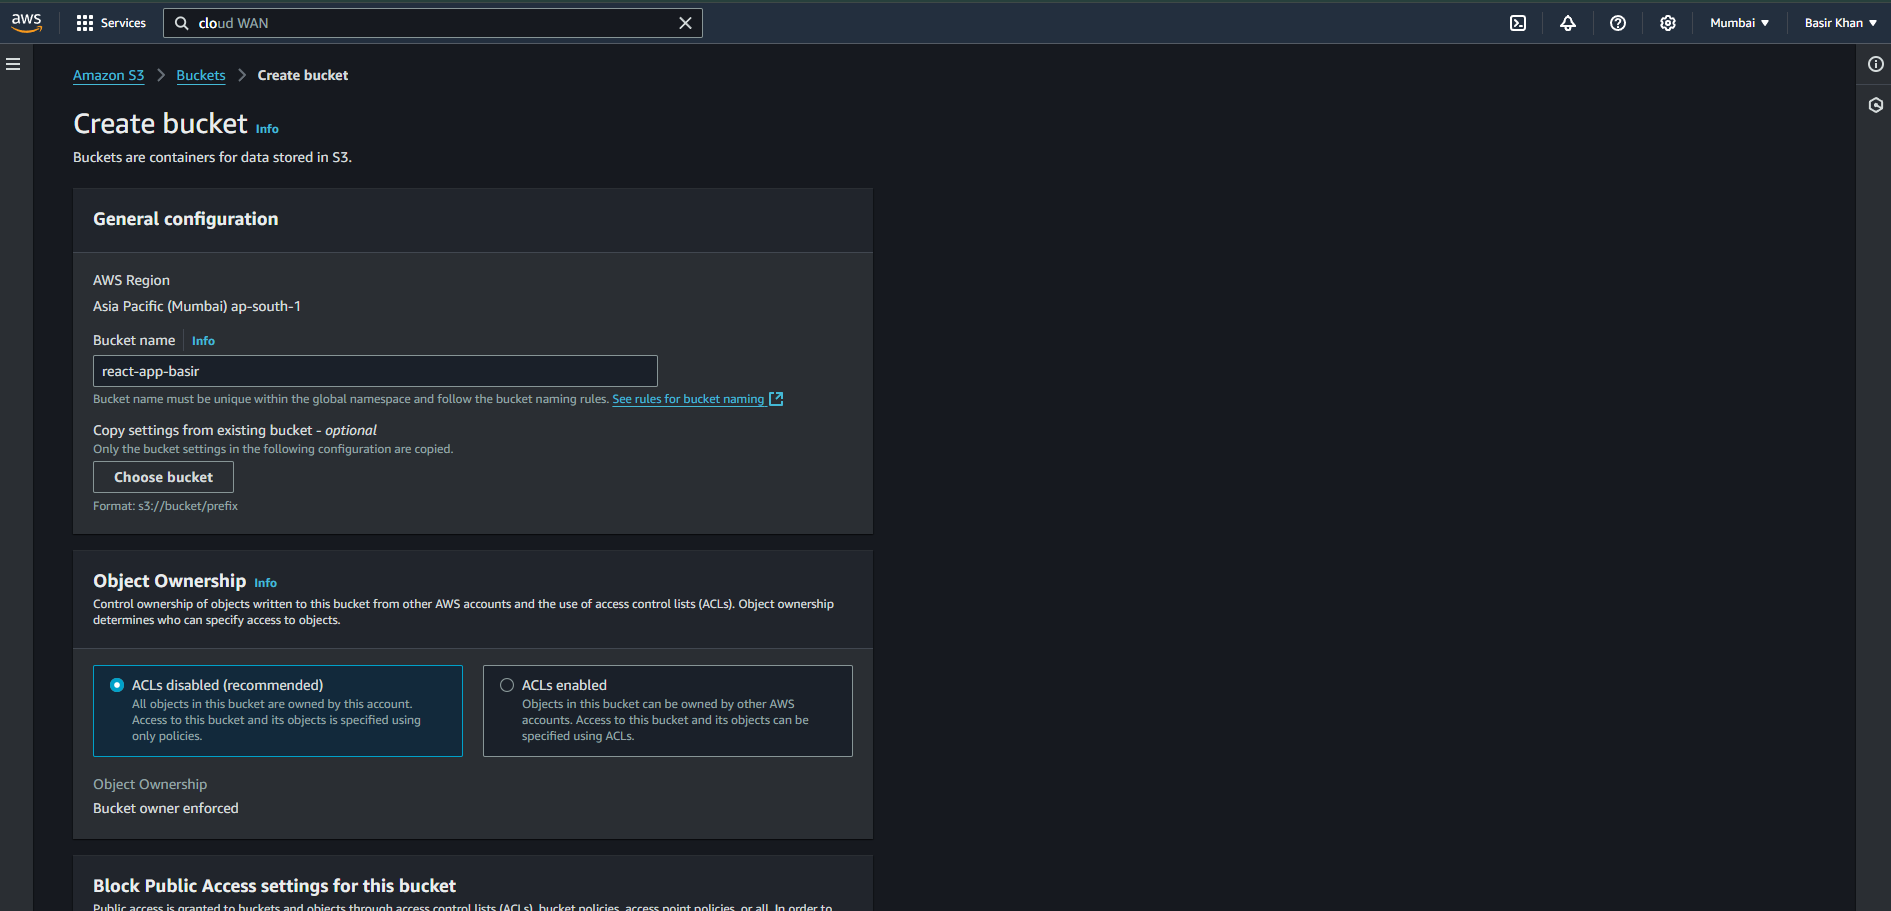
Click Create Bucket.
Enter a unique bucket name and choose a region.
Important: Uncheck Block all public access if you want to make the website accessible to everyone.
Upload Files to S3
In the Objects tab, click Upload and select all files from your
build/dist folder.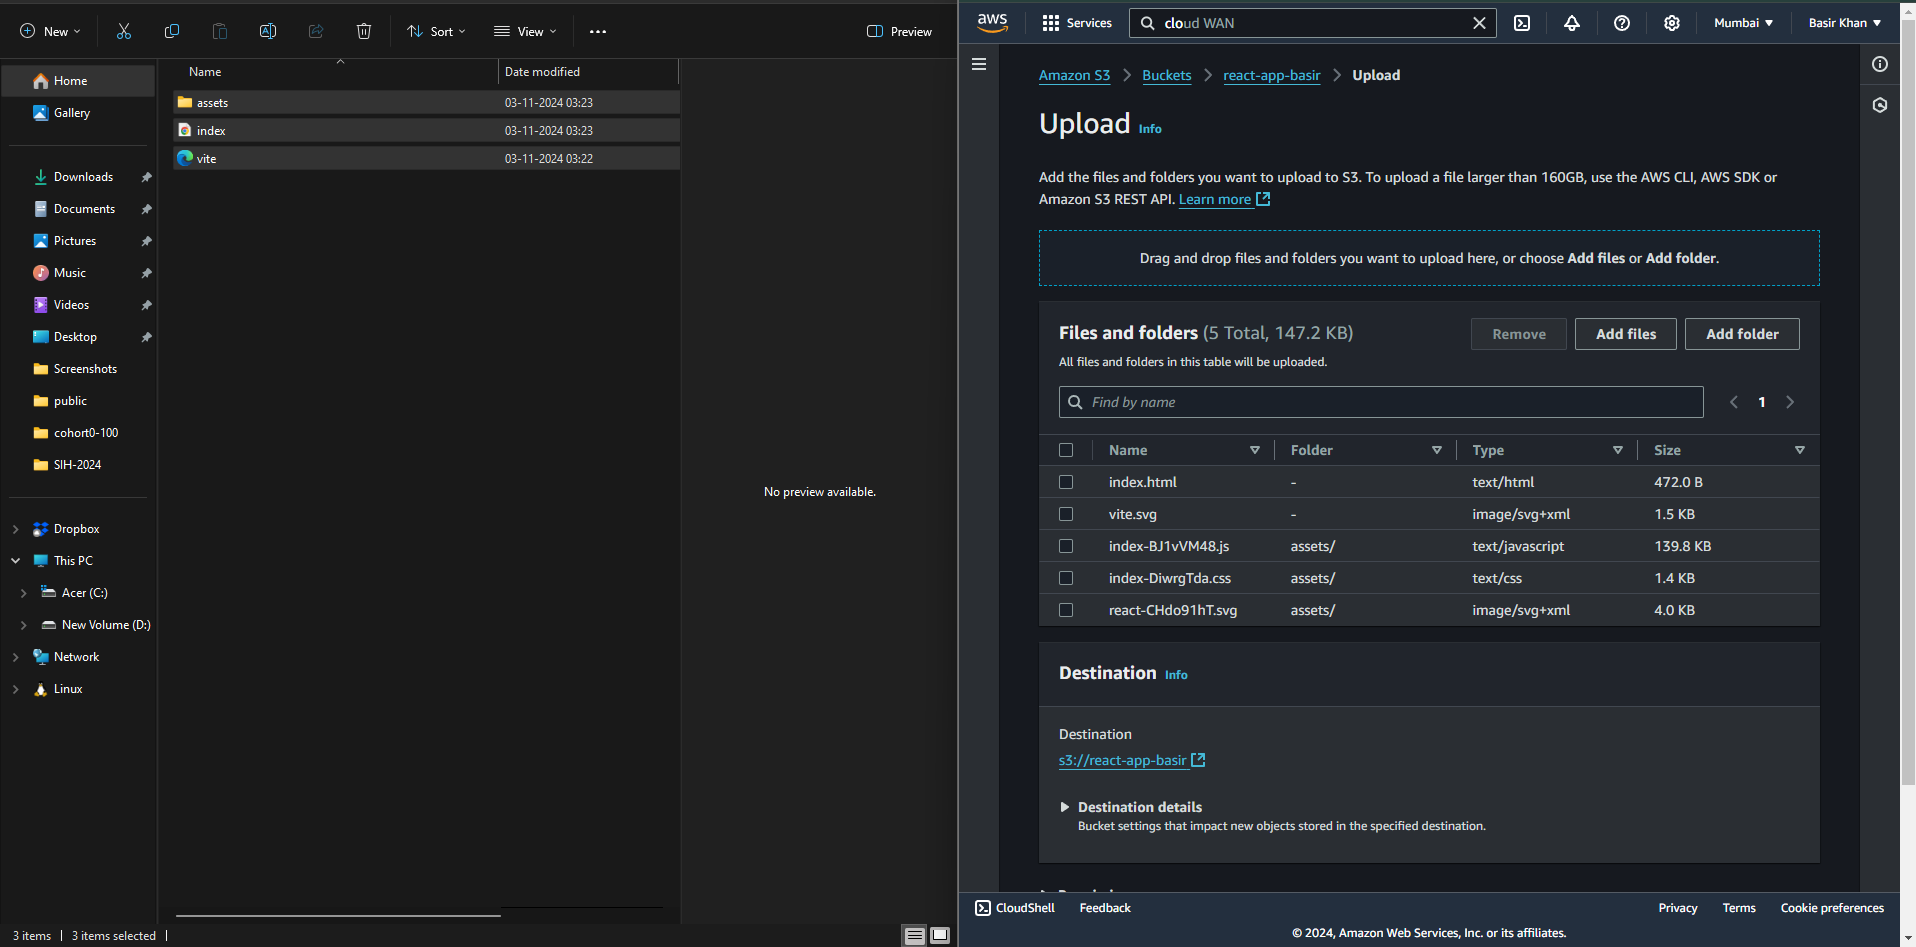
Configure Public Access
Go to the Permissions tab.
Under Bucket Policy, Click on edit bucket policy and paste the content below of it and make sure to add your s3 arn.
  {
      "Version": "2012-10-17",
      "Statement": [
          {
              "Sid": "Statement1",
              "Principal": "*",
              "Effect": "Allow",
              "Action": [
                  "s3:GetObject"
              ],
              "Resource": "your s3 arn/*"
          }
      ]
  }
Enable Static Website Hosting
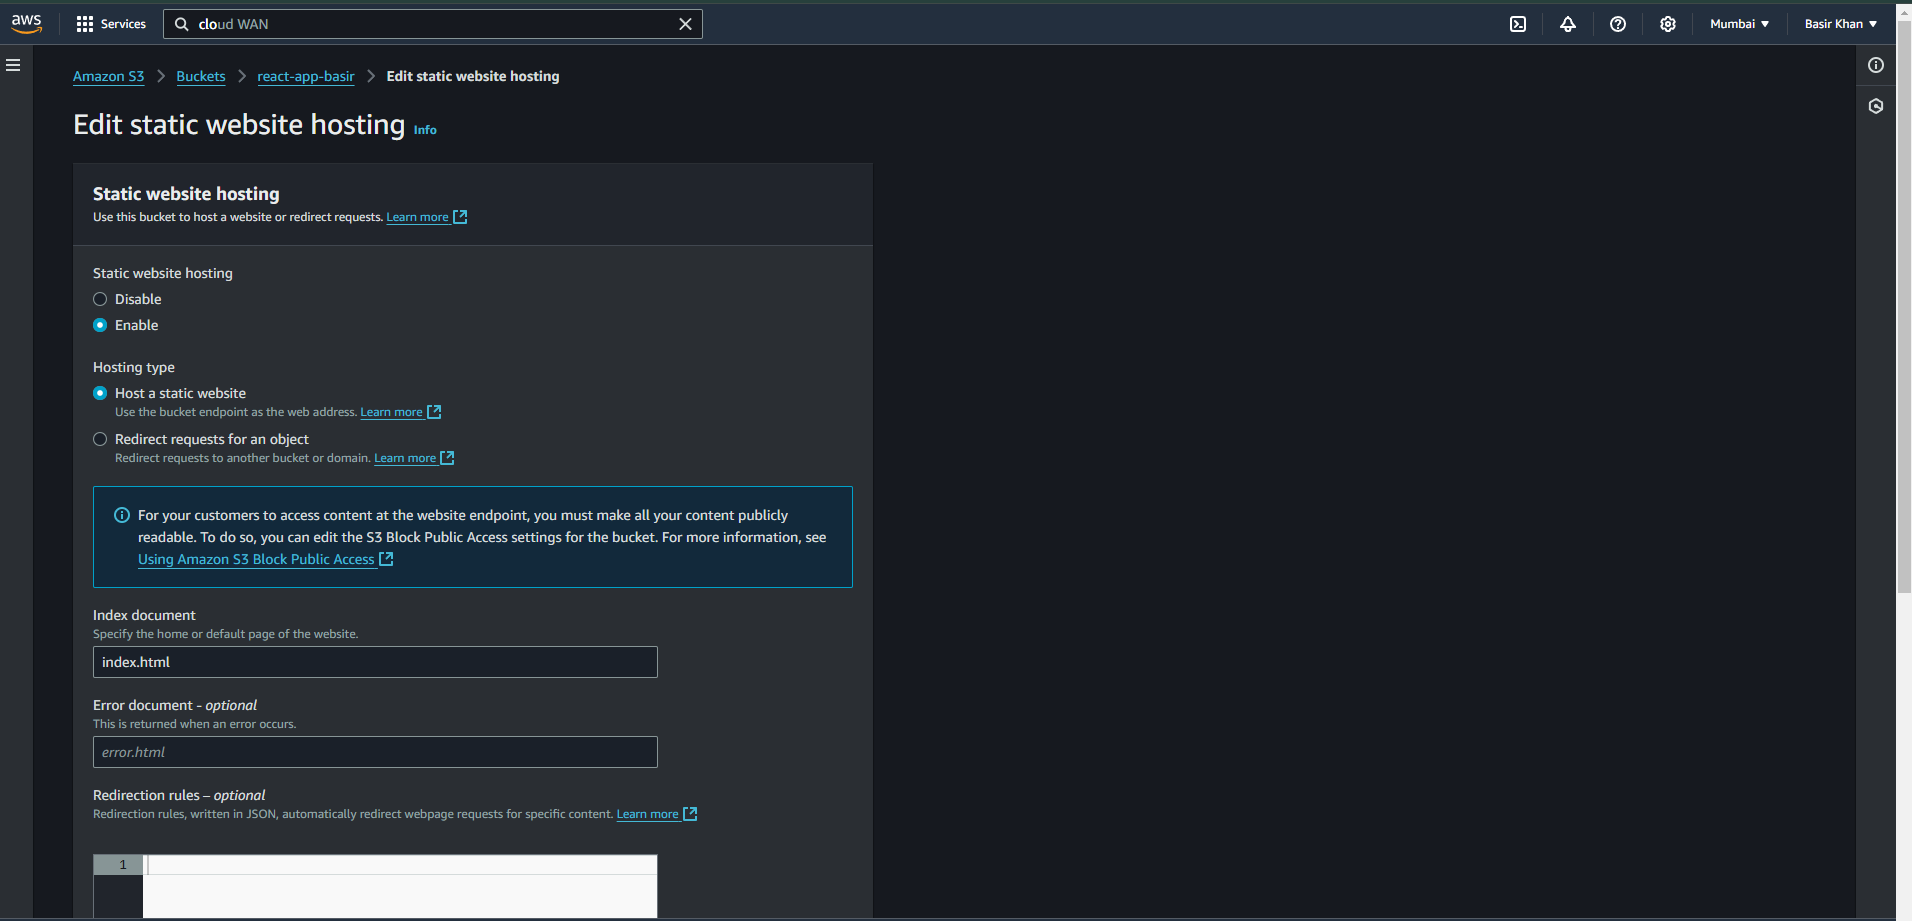
Go to Properties > Static website hosting > Edit.
Enable Static Website Hosting.
For Index Document, enter
index.html.For Error Document, also enter
index.html(useful for single-page apps to handle routes).Save your settings.

Test Your S3 Website
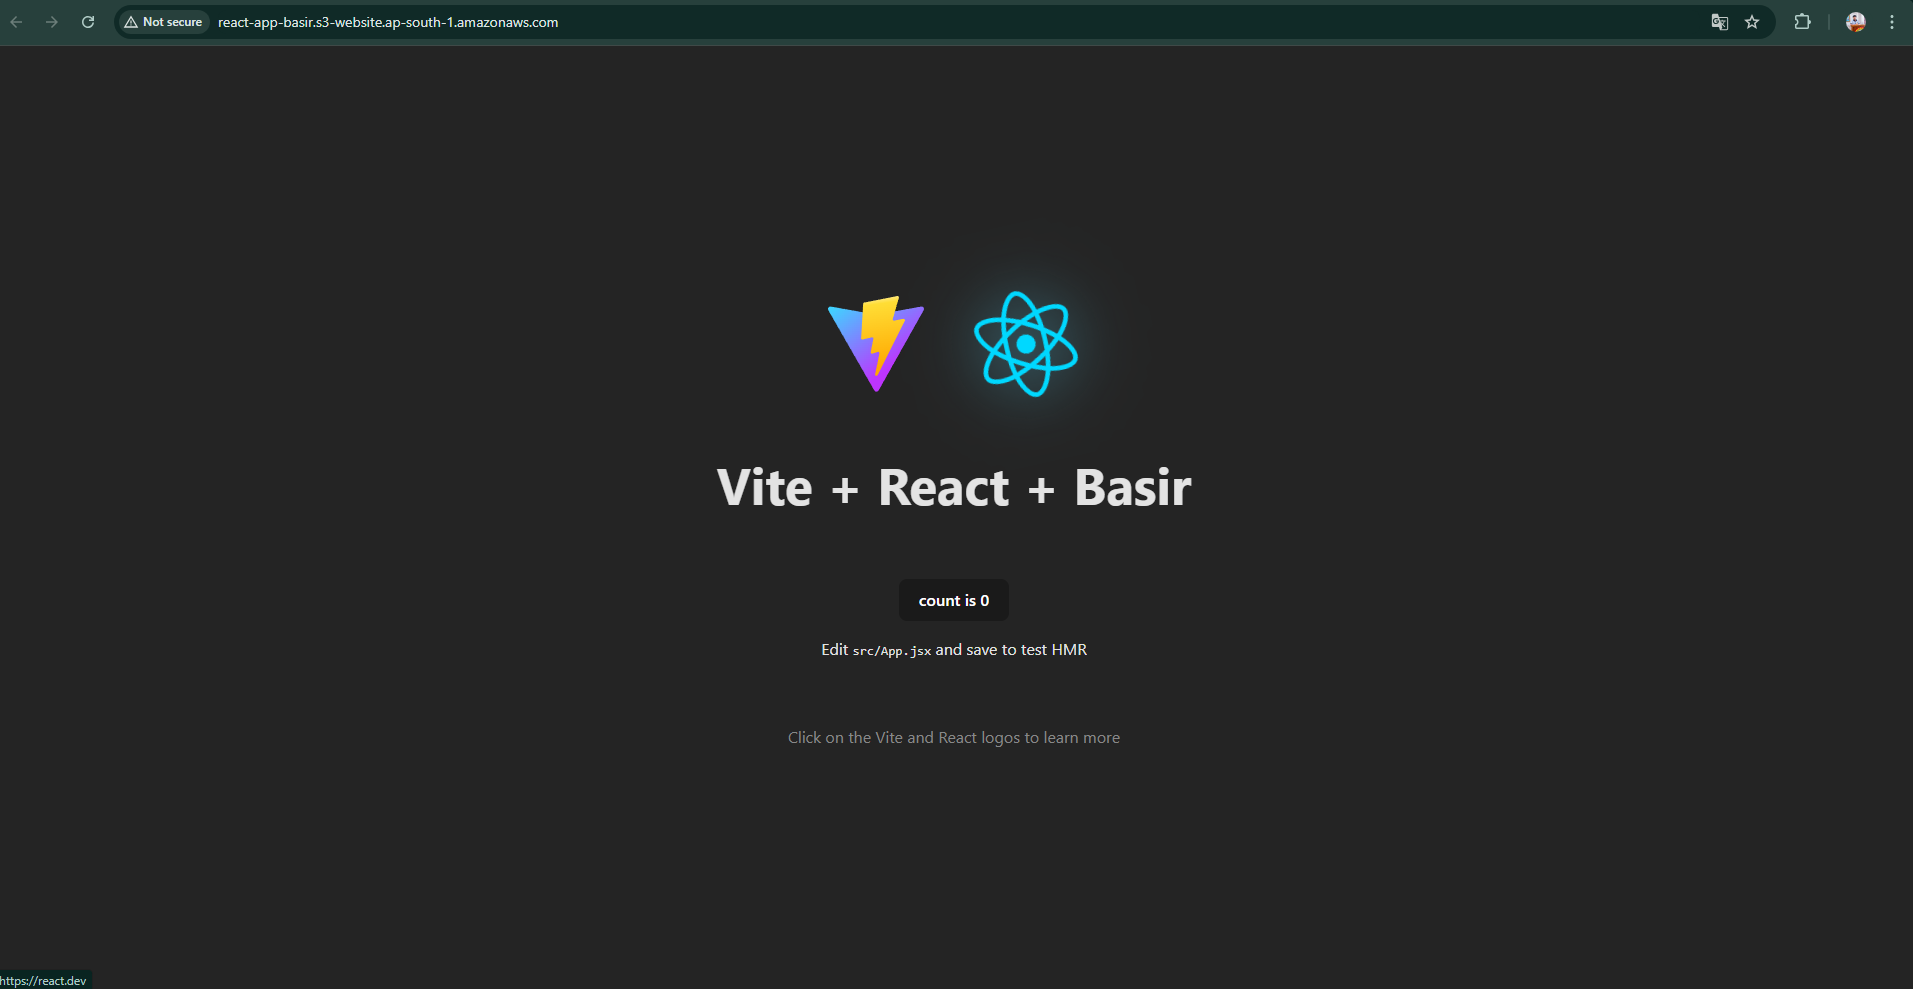
After setting up, open the Bucket website endpoint to check if your React app is accessible.
Step 3: Set Up CloudFront for Global Caching and Lower Latency
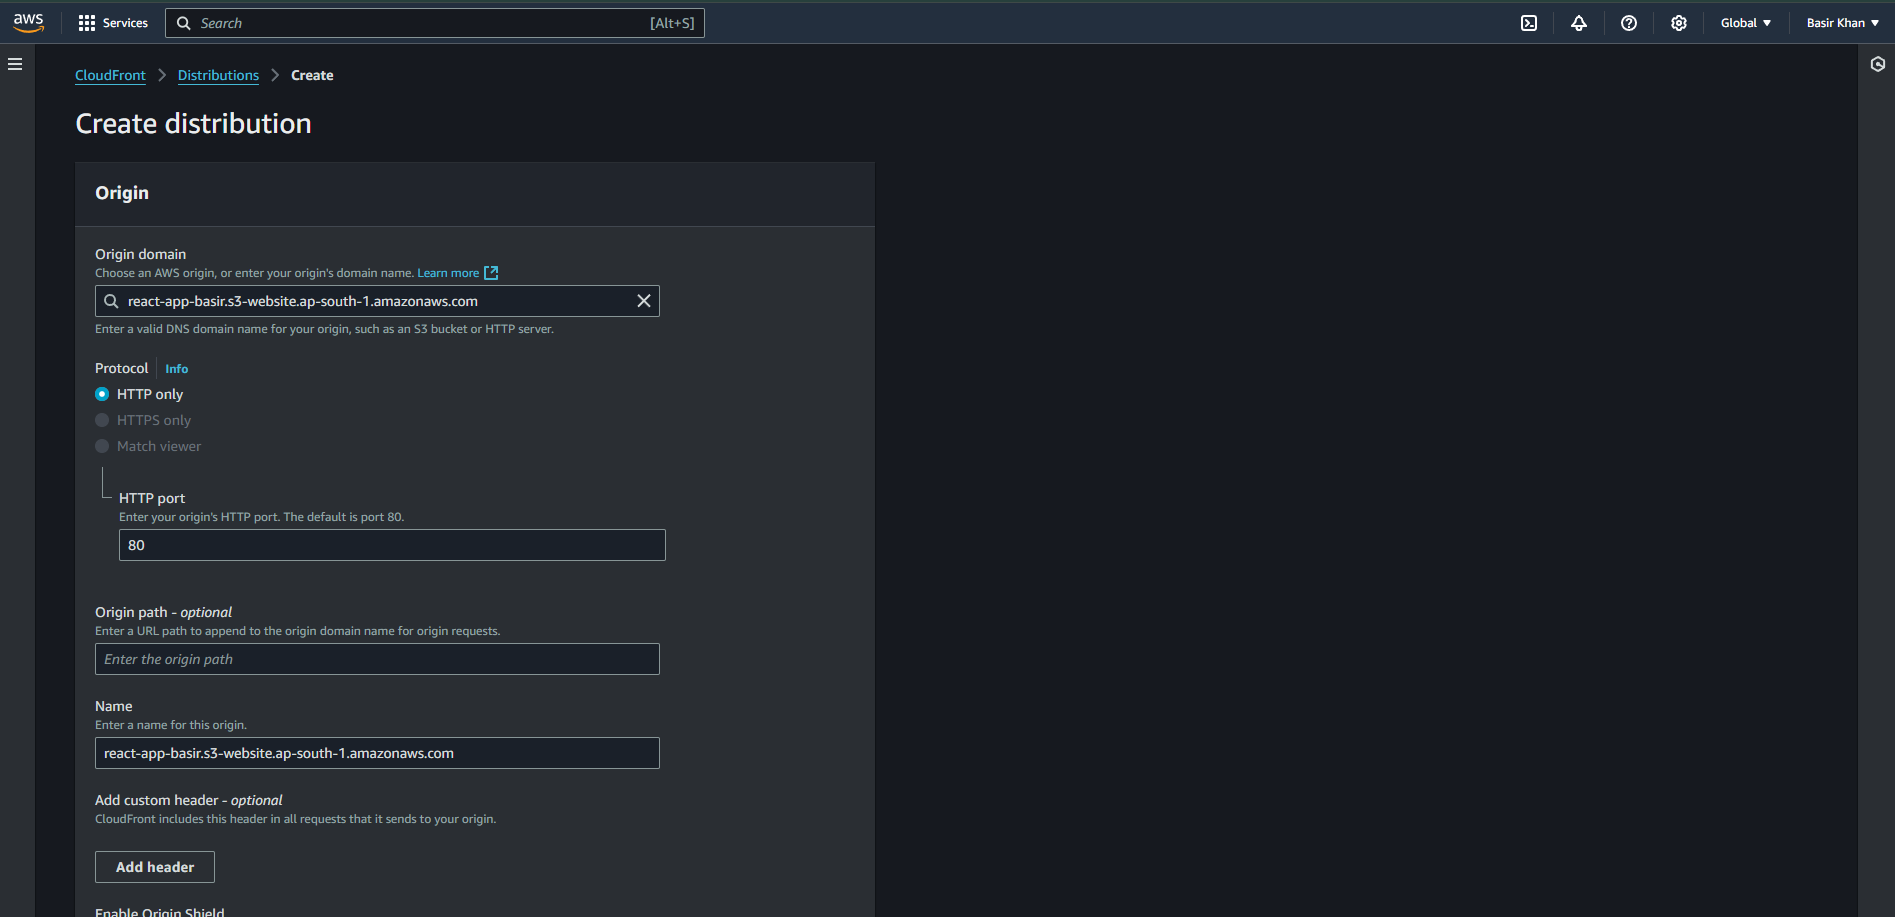
Create a CloudFront Distribution
Go to the CloudFront Console.
Click Create Distribution > Web.
Configure the Origin
Under Origin Domain Name, select your S3 bucket.
Set Viewer Protocol Policy to Redirect HTTP to HTTPS for security.
Configure Allowed HTTP Methods to GET, HEAD only if you don’t need POST requests.
For Origin Shield, enable Use Origin Shield to add an extra caching layer.
Set Cache Behavior Settings
In Cache Behavior Settings, enable Compress Objects Automatically to reduce file sizes.
Choose Cache Based on Selected Request Headers as None for a basic cache, or Whitelist certain headers if you have dynamic content.
Configure Custom Error Pages for Single-Page App (SPA) Routing
- In the Error Pages section, configure a 404 error to redirect to your
index.htmland set the response code to200. This ensures that client-side routes are handled correctly by serving the main app shell.
- In the Error Pages section, configure a 404 error to redirect to your
Restrict S3 Bucket Access to CloudFront Only
To secure your app, configure Origin Access Control (OAC) on CloudFront so only CloudFront can access S3.
In the Permissions tab of your S3 bucket, update the bucket policy to allow CloudFront access only.
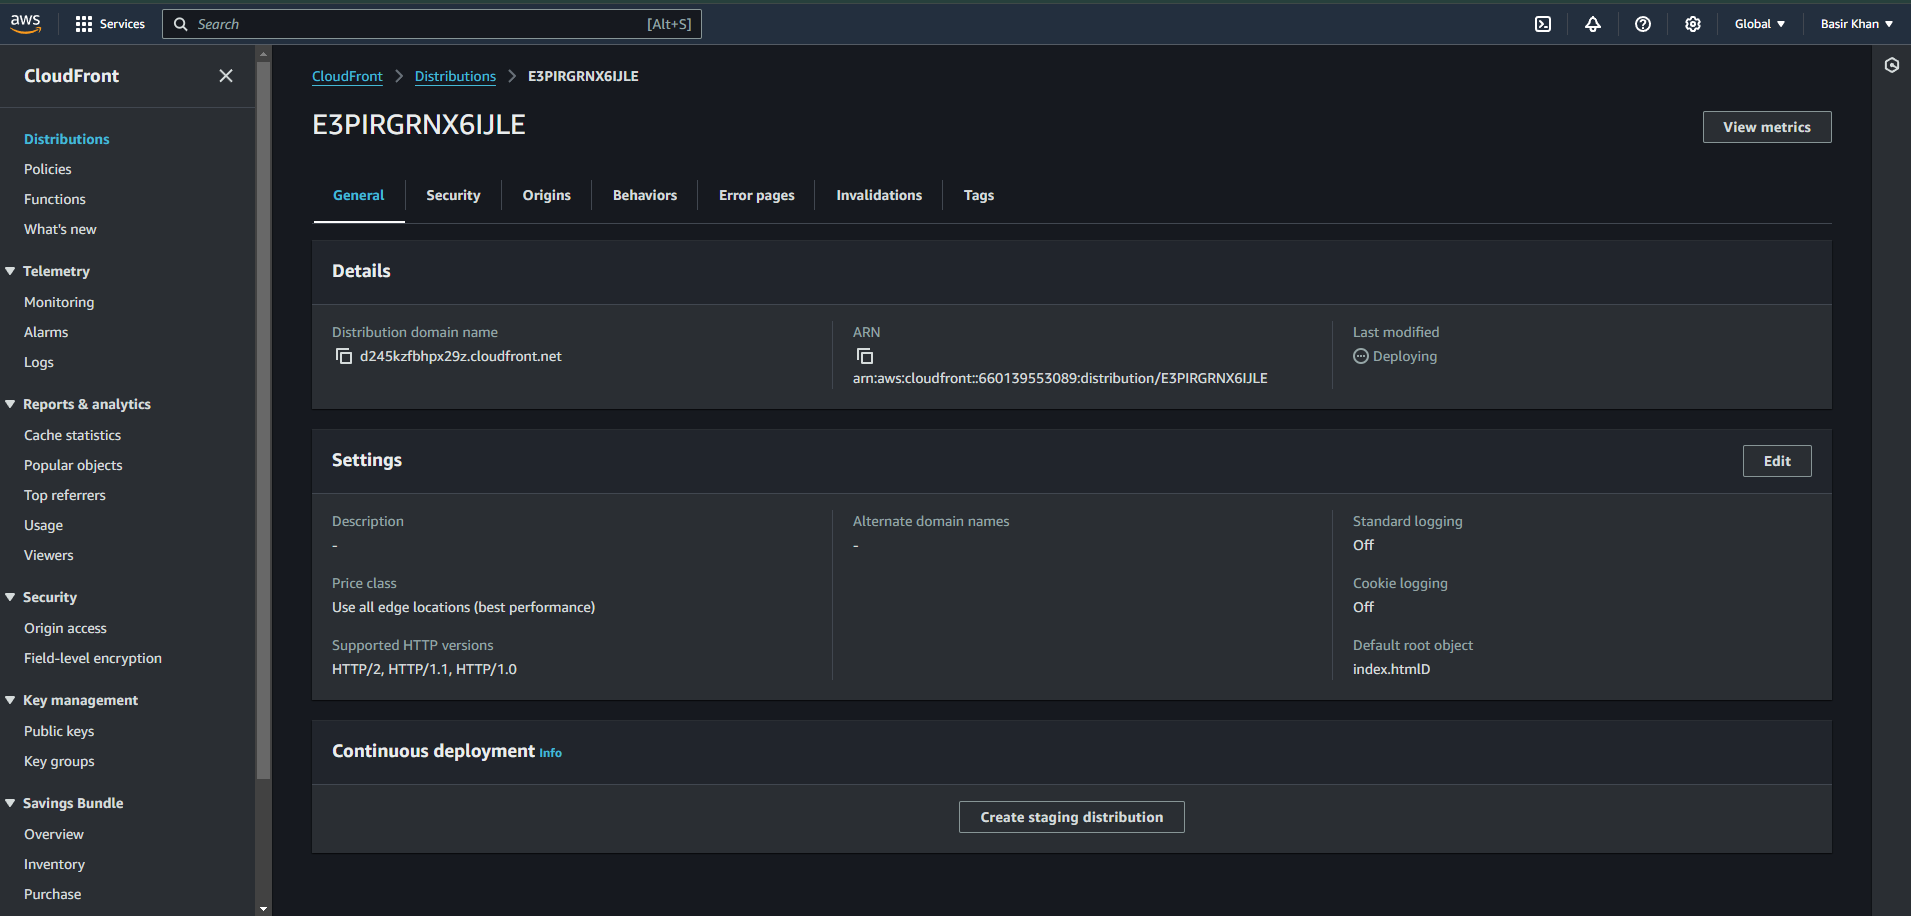
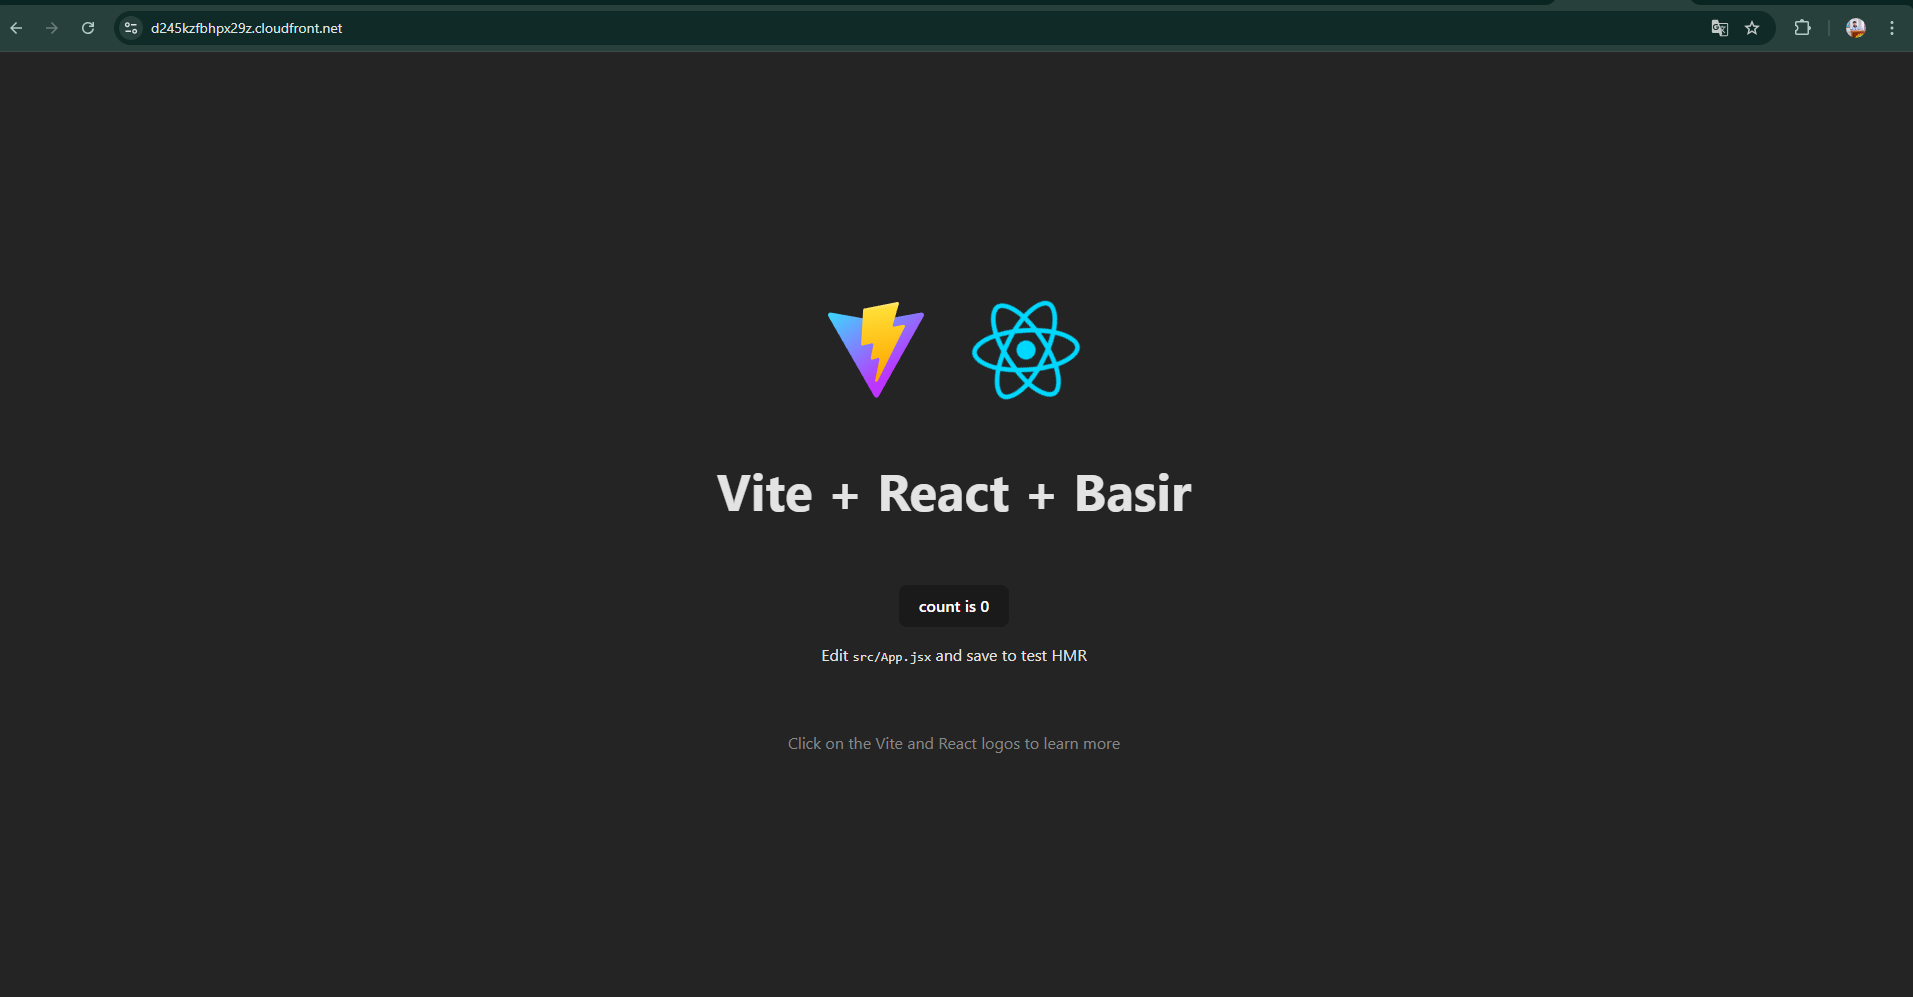
Create the Distribution
- Once configured, click Create Distribution. It may take a few minutes to deploy.
Step 4: Set Up a Custom Domain with CloudFront (Optional)
To add a custom domain:
Add Alternate Domain Names
- In Alternate Domain Names (CNAMEs), add your custom domain (e.g.,
www.yourdomain.com).
- In Alternate Domain Names (CNAMEs), add your custom domain (e.g.,
Configure SSL with ACM
Go to AWS Certificate Manager (ACM), request a certificate for your domain, and validate ownership.
Associate this certificate with your CloudFront distribution.
Update DNS Records
- Use Route 53 or your DNS provider to create a CNAME record pointing to your CloudFront distribution URL.
Production Best Practices for Hosting on S3 and CloudFront
Here are some best practices to optimize performance, security, and scalability:
Enable Compression in CloudFront
- Enable Compress Objects Automatically in your CloudFront distribution to reduce file sizes and improve load times.
Use Cache-Control Headers
- Set Cache-Control headers for static assets in S3 to control how long content is cached. For example, you can use
max-age=31536000to cache files for a year. Remember to update the file name for any new versions to bypass the cache when needed.
- Set Cache-Control headers for static assets in S3 to control how long content is cached. For example, you can use
Enable Logging
Enable CloudFront Standard Logging to monitor performance and access patterns.
Enable S3 Access Logs to review bucket access, which is helpful for troubleshooting and analytics.
Invalidate Cache on Updates
- When updating your website, invalidate the CloudFront cache to ensure that users get the latest version. You can do this by creating an Invalidation request in the CloudFront console for files you’ve updated (e.g.,
/*).
- When updating your website, invalidate the CloudFront cache to ensure that users get the latest version. You can do this by creating an Invalidation request in the CloudFront console for files you’ve updated (e.g.,
Consider Origin Shield for Heavily Accessed Content
- If you anticipate heavy traffic, enable Origin Shield in CloudFront for extra caching between CloudFront and your S3 bucket, which helps reduce origin fetches and can improve cache hit ratio.
Conclusion
Hosting your React website on AWS with S3 and CloudFront is an affordable and scalable solution that boosts your app’s performance globally. Following the above steps and best practices, you’ll achieve a secure, low-latency, and highly available website setup that’s optimized for users worldwide.
By using CloudFront’s caching, compression, and Origin Shield options, along with carefully managed Cache-Control headers, you’ll ensure that your app is fast and responsive.
Subscribe to my newsletter
Read articles from Basir Khan directly inside your inbox. Subscribe to the newsletter, and don't miss out.
Written by

Basir Khan
Basir Khan
Full-Stack Developer | MERN + Next.js | DevOps & Cloud Enthusiast I specialize in building dynamic web applications using the MERN stack and Next.js. Currently exploring DevOps and cloud technologies to streamline workflows, automate deployments, and optimize cloud infrastructure for scalable, efficient solutions.