VPC Network Peering
 Hridhi Kumari
Table of contents
Task 1. Create a custom network in both projects
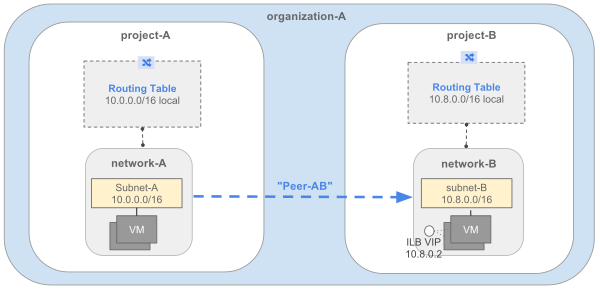
To begin, we’ll create custom VPC networks in each project. Each network should have its own IP address range (CIDR block) to avoid conflicts during peering.
Step 1: Set Up Custom VPC Network in Project A
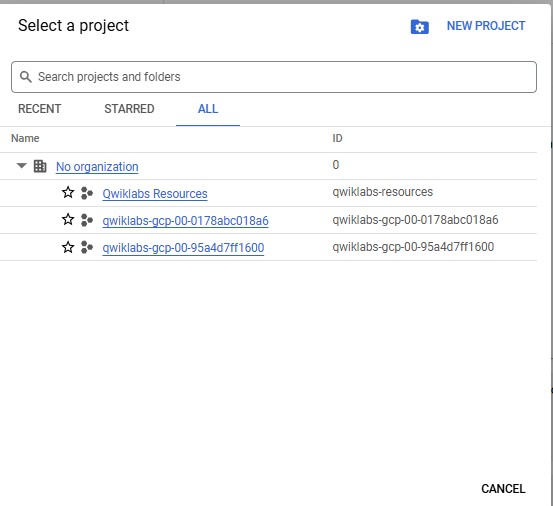
Log in to the Google Cloud Console and switch to Project A.
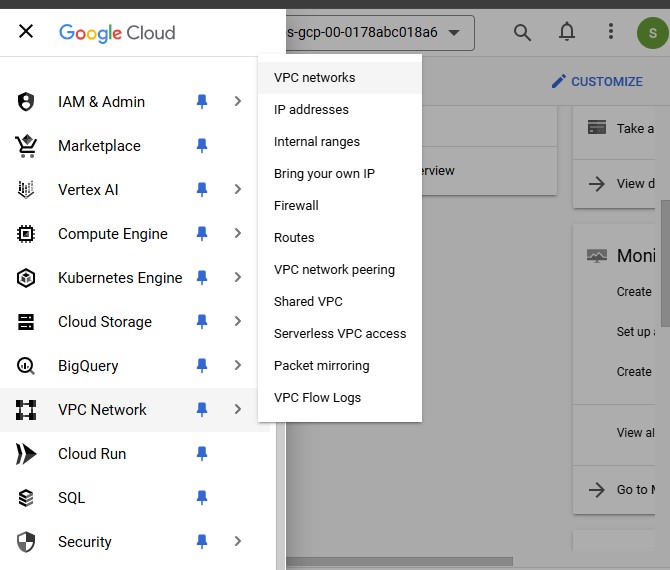
Go to VPC Network > Create VPC Network.
Enter a name for the network, such as network-a.
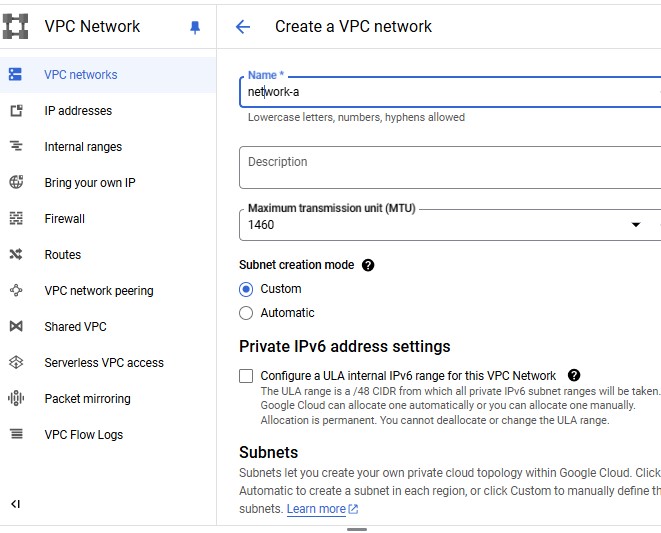
Choose Custom for the subnet creation mode.
Define a subnet:
Subnet name: Name it (e.g., network-a-subnet).
Region: Select a region for the subnet (e.g.,us-central1).
IP range: Use a unique CIDR range, such as 10.0.0.0/16.
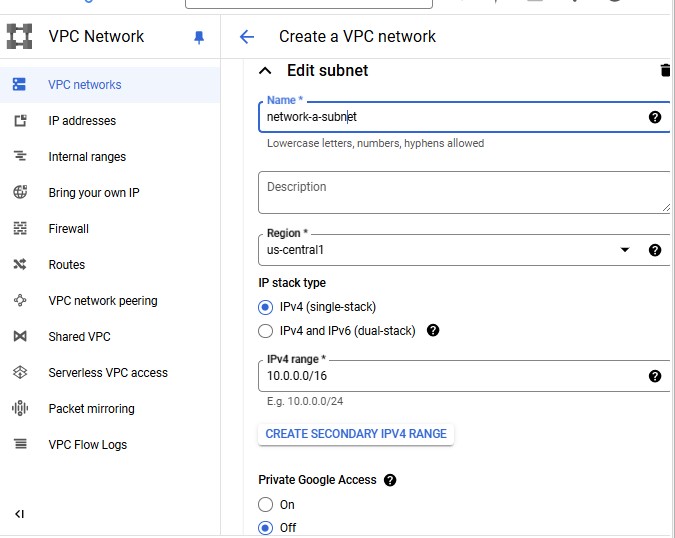
Click Create
Create a Firewall rule and name it network-a-fw.
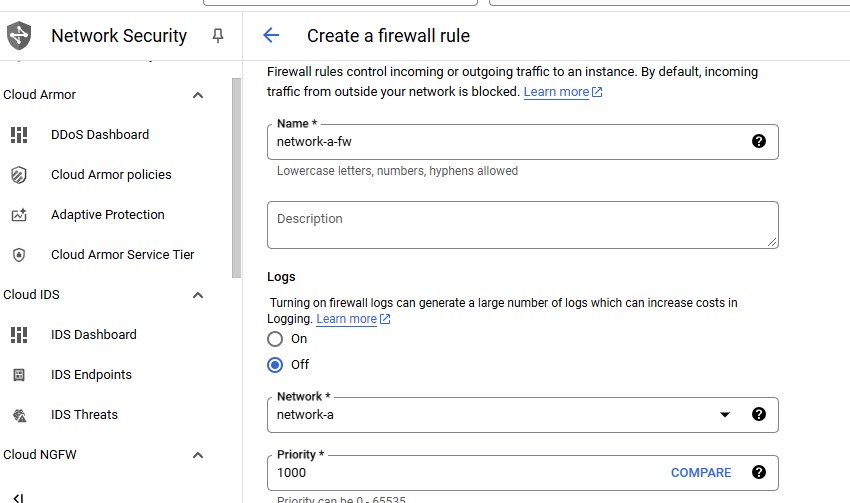
Allow TCP(port 22 to enable SSH) and ICMP.
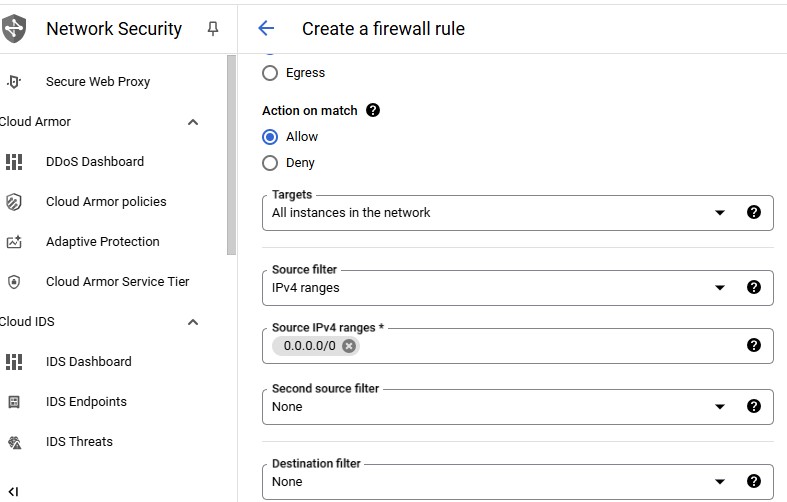
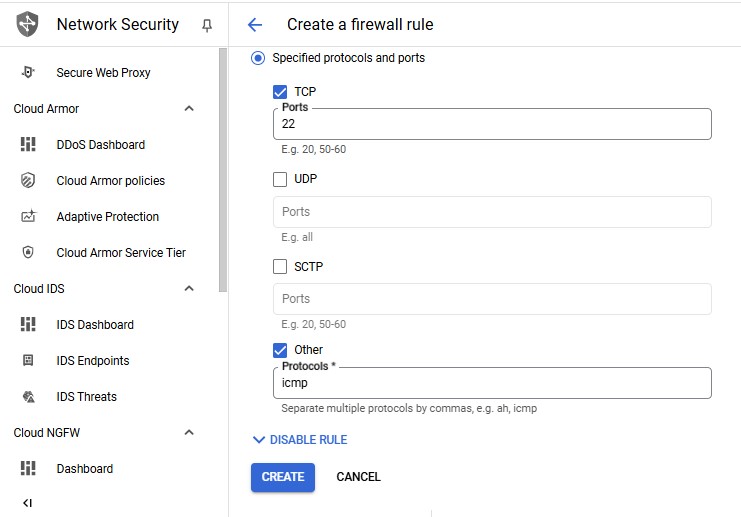
Click Create.
Create a VM Instance.
Go to Compute Engine> VM Instances.
Click Create Instance.
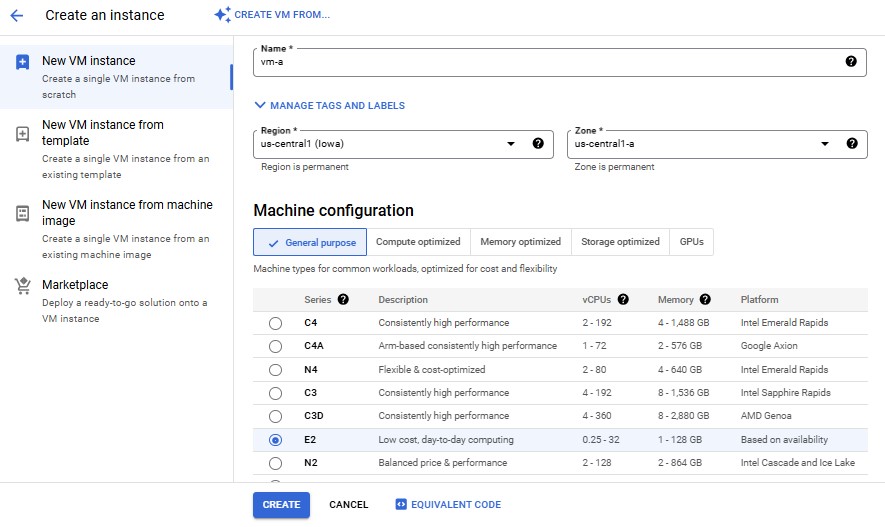
Enter name as vm-a, zone as us-central1-a and machine type as e2-small.
Step 2: Set Up Custom VPC Network in Project B
Switch to Project B in the Google Cloud Console.
Go to VPC Network > Create VPC Network.
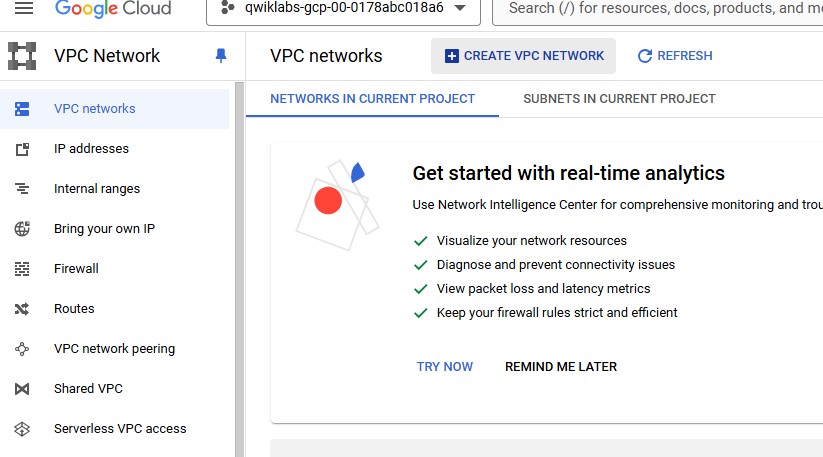
Enter a name for the network, such as network-b.
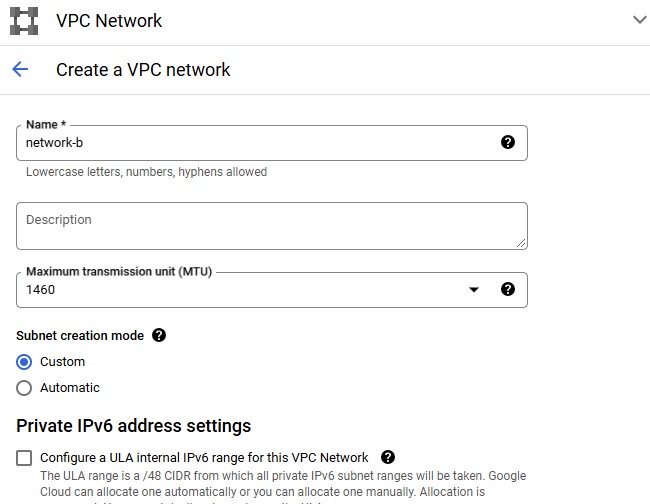
Choose Custom for the subnet creation mode.
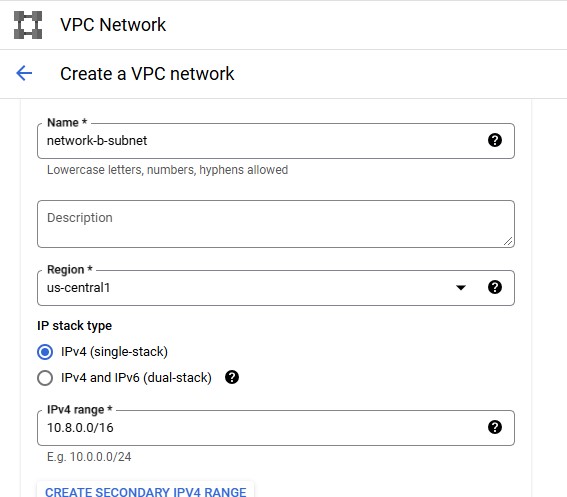
Define a subnet with these settings:
Subnet name: Name it (e.g., network-b-subnet).
Region: Choose a region (can be the same or different from Project A).
IP range: Use a unique CIDR range, such as 10.8.0.0/16 .
Create a Firewall rule and name it network-b-fw.
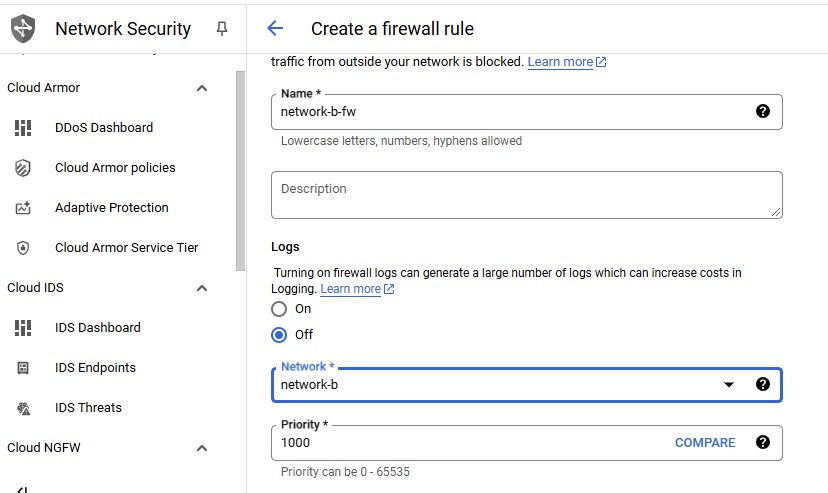
Allow TCP(port 22 to enable SSH) and ICMP.
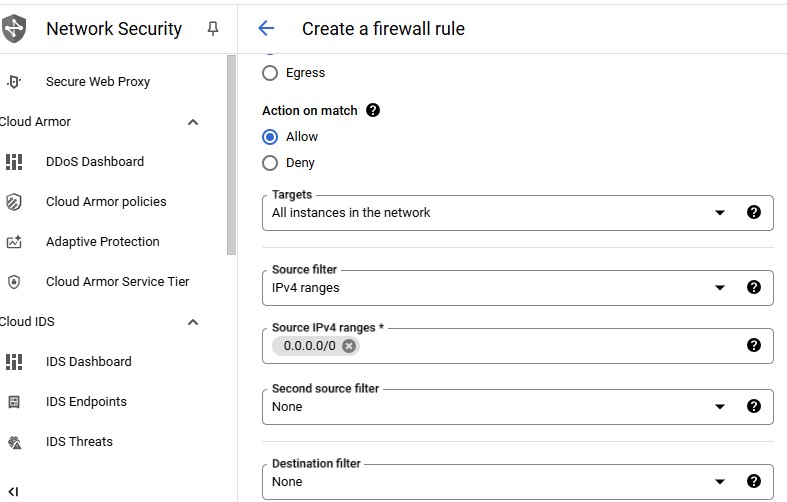
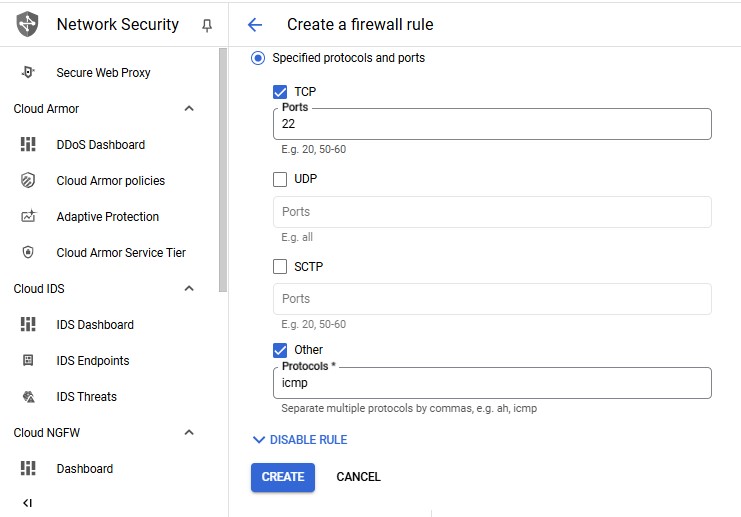
Click Create.
Now, both Project A and Project B have unique VPC networks with non-overlapping IP ranges, which is essential for peering.
Task 2. Set up a VPC network peering session
With the custom VPC networks in place, let’s establish a peering connection between them.
Step 1: Configure Peering from Project A
In Project A, go to VPC Network > VPC network peering.
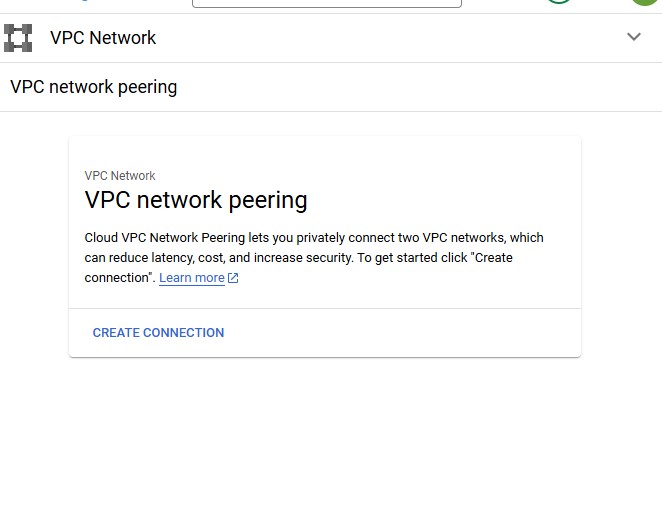
Click Create Connection.
Type "peer-ab" as the Name.
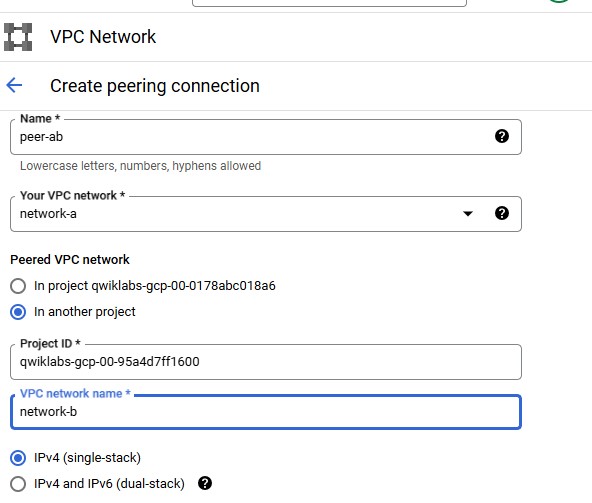
Under Your VPC network, select the network you want to peer (network-a).
Set the Peered VPC network radio buttons to In another project.
Type in the VPC network name of the other network (network-b)
Click Create.
Step 2: Configure Peering from Project B
To complete the peering connection, we need to configure a reciprocal peering request from Project B.
Switch to Project B.
Go to VPC Network > VPC network peering.
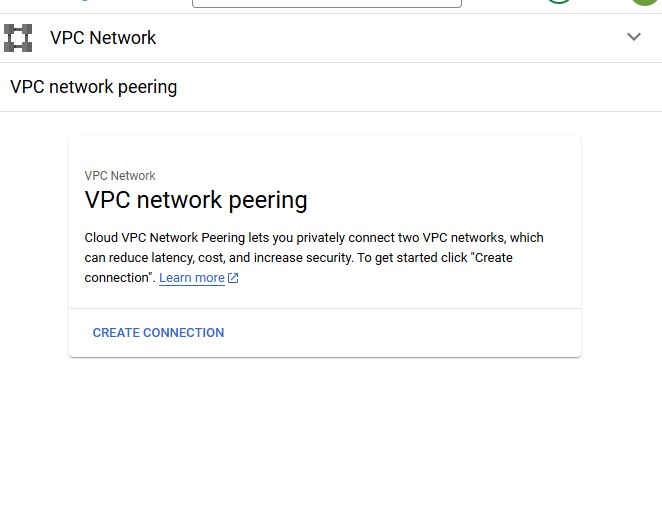
Click Create Connection.
Type "peer-ba" as the Name for this side of the connection.
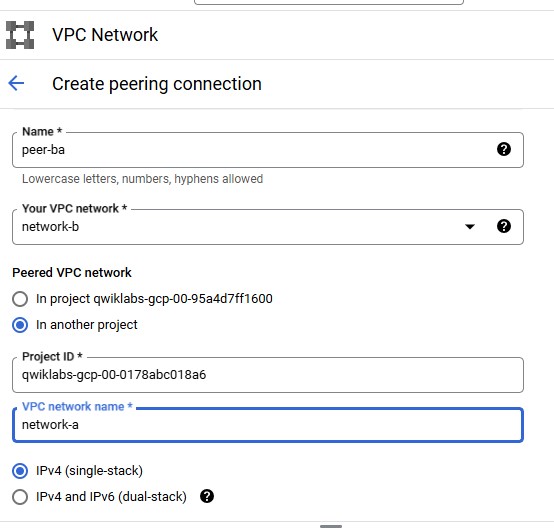
Under Your VPC network, select the network you want to peer (network-b).
Set the Peering VPC network radio buttons to In another project, unless you wish to peer within the same project.
Specify the Project ID of the first project.
Specify VPC network name of the other network (network-a).
Click Create.
After both configurations are completed, GCP will establish the peering connection, and both networks will be able to route traffic to each other according to the IP ranges defined.
Task 3. Test connectivity
With VPC Peering successfully established, let’s create VM instances in each network and test connectivity to confirm that peering is working as expected.
Project A:
Navigate to VM instances console by clicking Navigation Menu > Compute Engine > VM instances.
- Copy the INTERNAL_IP for
vm-a.
- Copy the INTERNAL_IP for
Project B:
Click Navigation Menu > Compute Engine > VM instances.
SSH into
vm-binstance.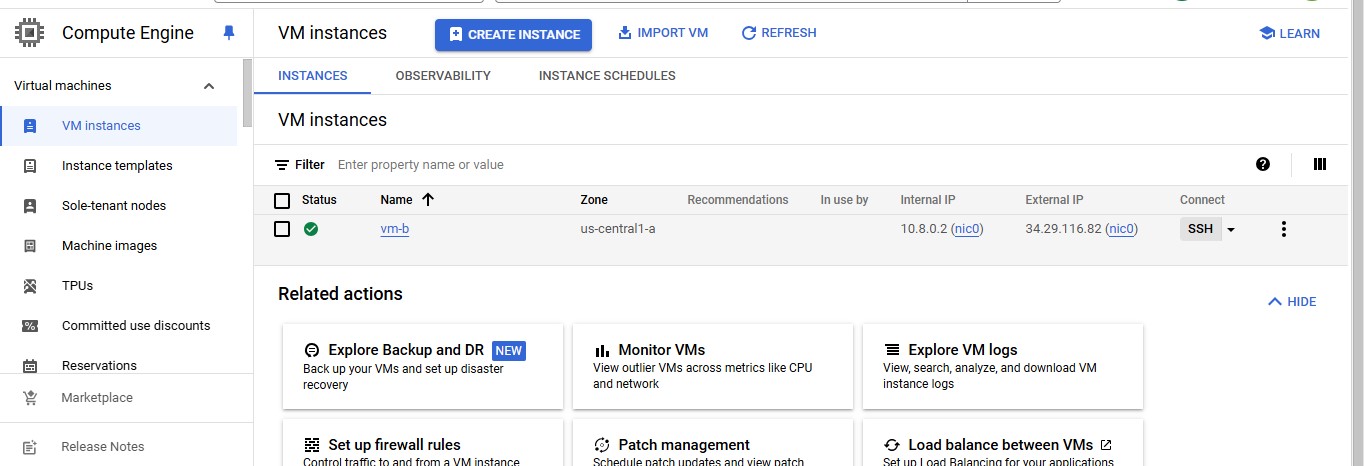
In the SSH shell of
vm-b, run the following command replacing<INTERNAL_IP_OF_VM_A>with the vm-a instance INTERNAL_IP:ping -c 5 <INTERNAL_IP_OF_VM_A>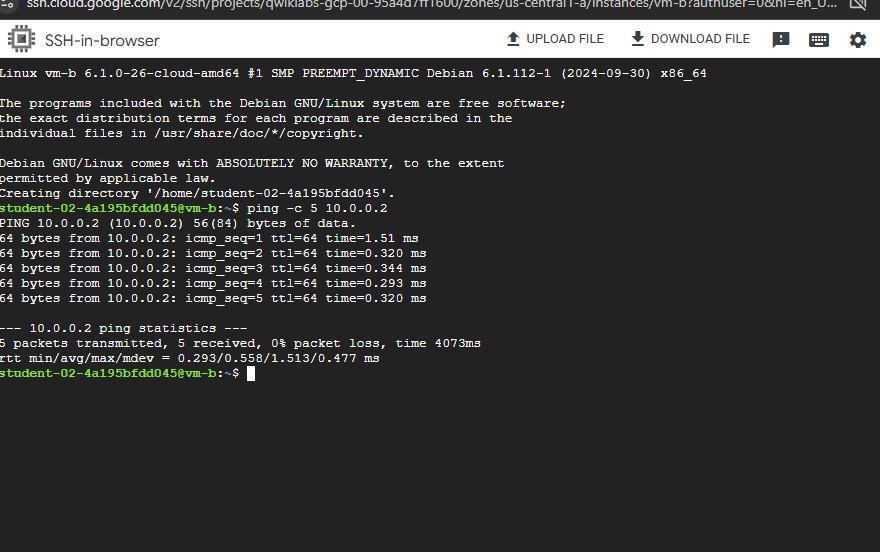
Conclusion
Setting up VPC Network Peering between projects in GCP facilitates secure, private connectivity without the need for VPNs or external IP addresses. By adhering to the steps outlined in this guide, custom networks can be created, peering can be established, and connectivity can be verified to enable seamless communication between resources in separate projects. This configuration is ideal for scenarios requiring isolated project environments that need to interact privately and securely. Mastering VPC peering enhances the flexibility and security of cloud infrastructure, paving the way for scalable and interconnected cloud solutions.
Subscribe to my newsletter
Read articles from Hridhi Kumari directly inside your inbox. Subscribe to the newsletter, and don't miss out.
Written by
