Deploying Your Website on AWS S3 with Terraform
 Amit Maurya
In the previous article, we learnt about the creation of EC2 instance and Security Group with Terraform Modules. In this article, we are going to host static website on AWS S3 by following best practices of Terraform with the help of modules.
Overview of AWS S3 (Simple Storage Service)
Amazon Web Services (AWS) offers a variety of services in fields like AI/ML and Data Analytics, with almost 200 services available. For storage, AWS provides S3 (Simple Storage Service) buckets where we can store media files, photos, videos, and more. With S3, we can host a static website close to a nearby data center, which reduces costs and decreases latency when accessing the website.
As we have seen lot of articles on hosting a website on S3 by AWS Management Console (GUI), but we will do this with Terraform by automating all the stuffs from creating bucket on S3 to hosting the static website.
Prerequisites
AWS Account
Understanding of Terraform and AWS
Setting Up Project Structure
Let’s create the IAM (Identity and Access Management) User first to get the Access Key and Secret Key to interact with AWS Services from Terraform.
Navigate to Search Bar of AWS Console and search IAM (Identity Access and Management)

- Click on IAM, in left side go to Users section and click on Create User.


- After naming the user “terraform“, assign permissions for now Administrator Access.

- Now, click on terraform user go to Security Credentials and scroll down for Access Key.

As we can see there is no Access Keys so let’s create access key, choose CLI for usecase and click on Next provide Description and then Next you will get Access and Secret Key.


- Download the CSV file and now copy the Secret and Access Key for usage in terraform.

Terraform Code for S3 Bucket Creation
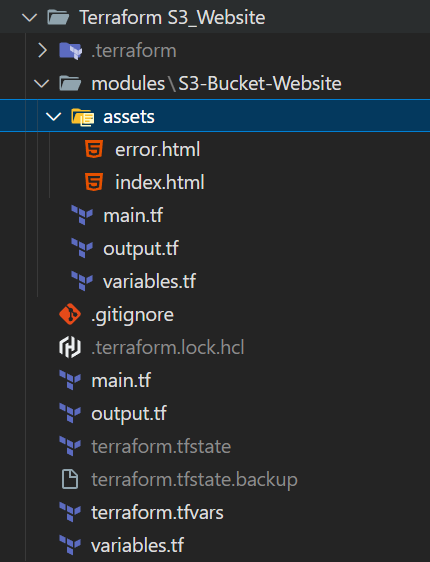
Before heading into the creation of Bucket on S3 let’s first understand the directory structure of Terraform in which there is module folder for S3 bucket that contains main.tf, variables.tf, output.tf file and the parent folder contains main.tf in which the S3 module is called and variables.tf for declaring the variables and output.tf file and at last terraform.tfvars file is there that contain the values (access key, secret key) which is included in .gitignore file.
First, create index.html and error.html page to host static website on S3.
index.html:
 <!DOCTYPE html>
 <html lang="en">
 <head>
     <meta charset="UTF-8">
     <meta name="viewport" content="width=device-width, initial-scale=1.0">
     <title>Welcome to My Static Website</title>
     <style>
         /* Reset some default styles */
         * {
             margin: 0;
             padding: 0;
             box-sizing: border-box;
             font-family: Arial, sans-serif;
         }

         /* Style for the entire page */
         body {
             display: flex;
             align-items: center;
             justify-content: center;
             height: 100vh;
             background: linear-gradient(135deg, #6a11cb 0%, #2575fc 100%);
             color: #ffffff;
         }

         /* Main container styling */
         .container {
             text-align: center;
             max-width: 600px;
             padding: 20px;
             background: rgba(255, 255, 255, 0.1);
             border-radius: 10px;
             box-shadow: 0px 4px 10px rgba(0, 0, 0, 0.3);
         }

         /* Title styling */
         h1 {
             font-size: 2.5em;
             margin-bottom: 10px;
         }

         /* Paragraph styling */
         p {
             font-size: 1.2em;
             margin-bottom: 20px;
             line-height: 1.6;
         }

         /* Button styling */
         .cta-button {
             display: inline-block;
             padding: 10px 20px;
             font-size: 1em;
             color: #2575fc;
             background-color: #ffffff;
             border: none;
             border-radius: 25px;
             text-decoration: none;
             transition: background 0.3s, color 0.3s;
             cursor: pointer;
         }

         .cta-button:hover {
             background-color: #6a11cb;
             color: #ffffff;
         }
     </style>
 </head>
 <body>
     <div class="container">
         <h1>Welcome to My Static Website!</h1>
         <p>This is a simple, stylish static website hosted on Amazon S3, provisioned and managed with Terraform.</p>
         <a href="https://github.com" class="cta-button">Visit My GitHub</a>
     </div>
 </body>
 </html>
error.html:
 <!DOCTYPE html>
 <html lang="en">
 <head>
     <meta charset="UTF-8">
     <meta name="viewport" content="width=device-width, initial-scale=1.0">
     <title>Page Not Found</title>
 </head>
 <body>
     <h1>404 - Page Not Found</h1>
     <p>Oops! The page you're looking for doesn't exist.</p>
     <a href="index.html">Go back to the homepage</a>
 </body>
 </html>
Now let’s create the bucket on S3 with name
terraform-s3in region ap-south-1 (Mumbai)Terraform S3_Website\modules\S3-Bucket-Website\main.tf:resource "aws_s3_bucket" "terraform-s3" { bucket = "${var.name}-${random_id.suffix.hex}" tags = { Name = var.name } } resource "random_id" "suffix" { byte_length = 3 } resource "aws_s3_bucket_public_access_block" "public" { bucket = aws_s3_bucket.terraform-s3.id block_public_acls = false block_public_policy = false ignore_public_acls = false restrict_public_buckets = false } resource "aws_s3_bucket_policy" "public_access" { bucket = aws_s3_bucket.terraform-s3.id policy = jsonencode({ Version = "2012-10-17" Statement = [ { Effect = "Allow" Principal = "*" Action = "s3:GetObject" Resource = "${aws_s3_bucket.terraform-s3.arn}/*" } ] }) } resource "aws_s3_object" "upload" { bucket = aws_s3_bucket.terraform-s3.id source = "./modules/S3-Bucket-Website/assets/index.html" key = "index.html" content_type = "text/html" etag = filemd5("./modules/S3-Bucket-Website/assets/index.html") } resource "aws_s3_object" "upload_error" { bucket = aws_s3_bucket.terraform-s3.id source = "./modules/S3-Bucket-Website/assets/error.html" key = "error.html" content_type = "text/html" etag = filemd5("./modules/S3-Bucket-Website/assets/error.html") } resource "aws_s3_bucket_website_configuration" "static-website" { bucket = aws_s3_bucket.terraform-s3.id index_document { suffix = "index.html" } error_document { key = "error.html" } }Okay, let’s breakdown the main.tf to understand properly what each block is doing and performing.
First, create the bucket on S3 that contains bucket name and another resource block that will generate the random_id. We are generating the random id because in S3 we have to name the bucket which is globally unique across all AWS accounts and regions.
resource "aws_s3_bucket" "terraform-s3" { bucket = "${var.name}-${random_id.suffix.hex}" tags = { Name = var.name } } resource "random_id" "suffix" { byte_length = 3 }"${var.name}-${random_id.suffix.hex}"In this var.name is taking value from input combining with random id that is generated. Example: If I had given the input s3-website it would be like
s3-website-47363c
 resource "aws_s3_bucket_public_access_block" "public" {
   bucket = aws_s3_bucket.terraform-s3.id

   block_public_acls       = false
   block_public_policy     = false
   ignore_public_acls      = false
   restrict_public_buckets = false
 }
In this resource block we had blocked the Public ACL’s, when we click on the bucket in AWS Console then we will see Permissions. Under that we need to allow all the Public Access to the bucket through enabling ACL’s that’s why we kept false.

 resource "aws_s3_bucket_policy" "public_access" {
   bucket = aws_s3_bucket.terraform-s3.id

   policy = jsonencode({
     Version = "2012-10-17"
     Statement = [
       {
         Effect = "Allow"
         Principal = "*"
         Action = "s3:GetObject"
         Resource = "${aws_s3_bucket.terraform-s3.arn}/*"
       }
     ]
   })
 }
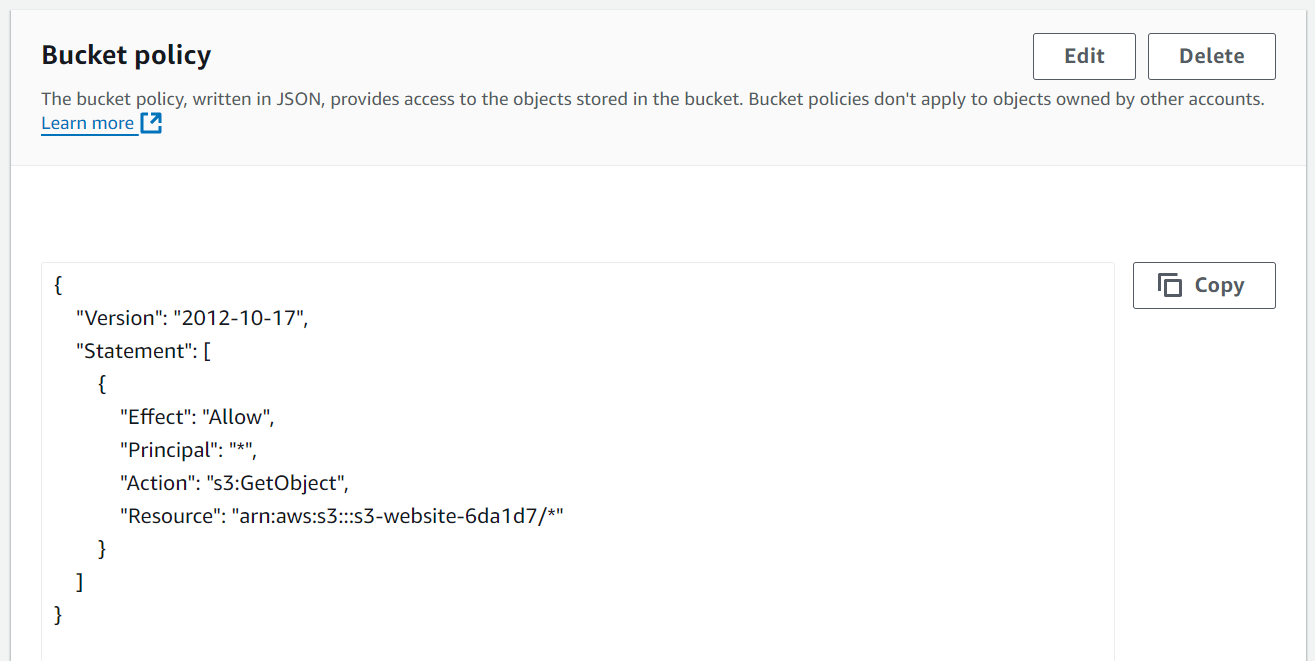
In this resource block we are creating bucket policy in which anyone can access the contents of buckets, this is done in static website hosting where public access is needed.
The Resource value is basically the ARN of the bucket in which this /* indicates the action applies all objects to the bucket
 resource "aws_s3_object" "upload" {
   bucket = aws_s3_bucket.terraform-s3.id
   source = "./modules/S3-Bucket-Website/assets/index.html"
   key = "index.html"
   content_type = "text/html"
   etag = filemd5("./modules/S3-Bucket-Website/assets/index.html")
 }

 resource "aws_s3_object" "upload_error" {
   bucket = aws_s3_bucket.terraform-s3.id
   source = "./modules/S3-Bucket-Website/assets/error.html"
   key = "error.html"
   content_type = "text/html"
   etag = filemd5("./modules/S3-Bucket-Website/assets/error.html")
 }
There are 2 resource blocks that is uploading the files
index.htmlanderror.htmlto the bucket. Here source is picks the index.html file from local and same with error.html, key is the path in the bucket where the file has been stored in this it is stored in root directory of S3.Purpose of
etag: By usingetag = filemd5(...), Terraform checks if the local MD5 hash matches theetagof the object on S3 to see if the file has changed. If the file is different, Terraform notices the change and updates the S3 object.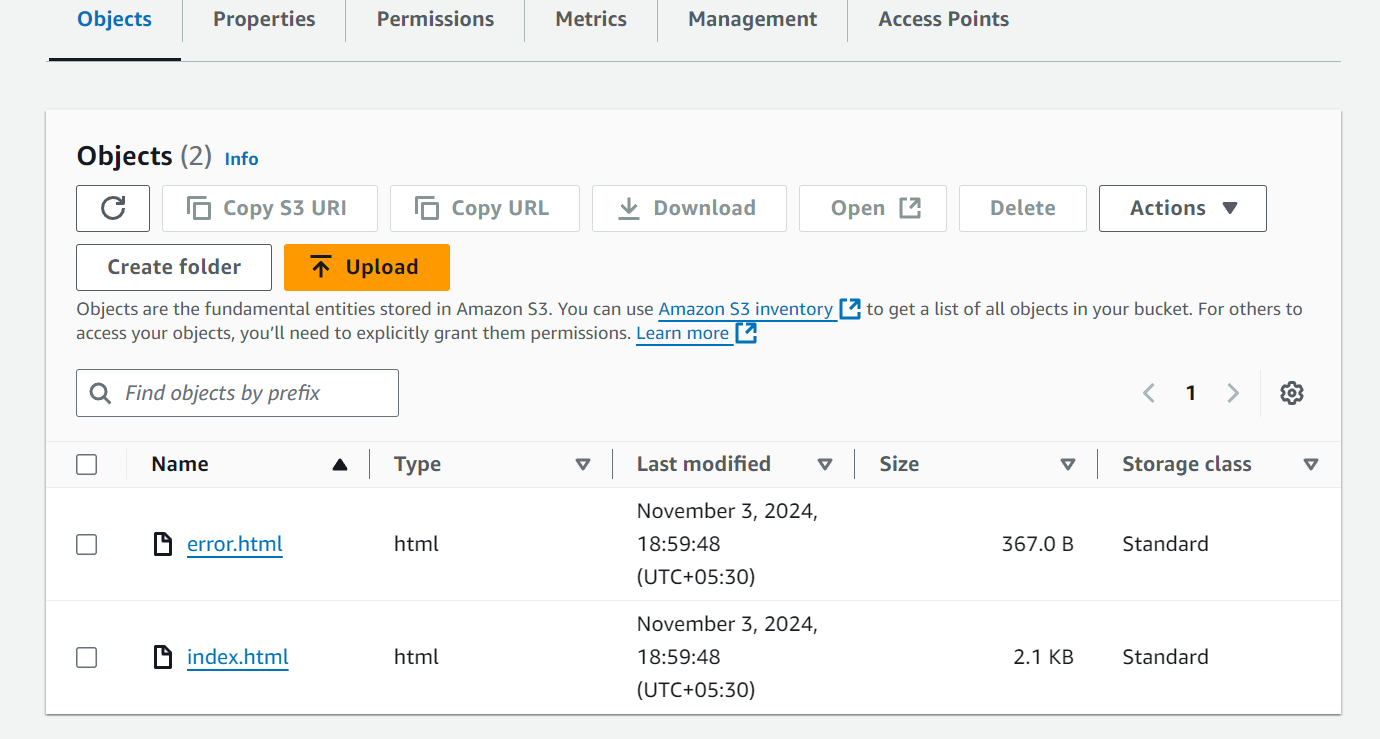
 resource "aws_s3_bucket_website_configuration" "static-website" {
   bucket = aws_s3_bucket.terraform-s3.id

   index_document {
     suffix = "index.html"
   }

   error_document {
     key = "error.html"
   }
 }
In last, we had done the configuration for static website that is being enabled and use index.html and error.html
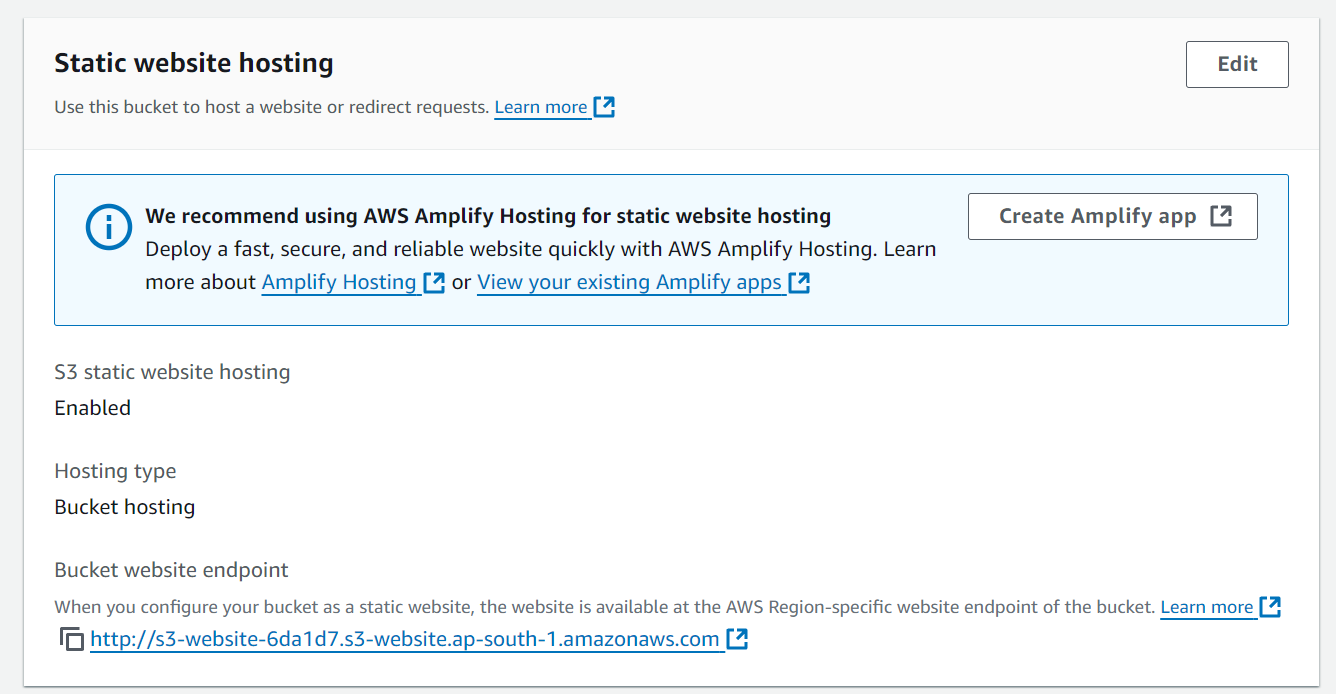
After this we will do init and apply to see that the terraform configuration is working well or not. Let’s do that
terraform initThis will download the AWS plugin which is defined in the provider block of parent main.tf which will store in the .terraform directory and modules folder will also be created in the .terraform directory.
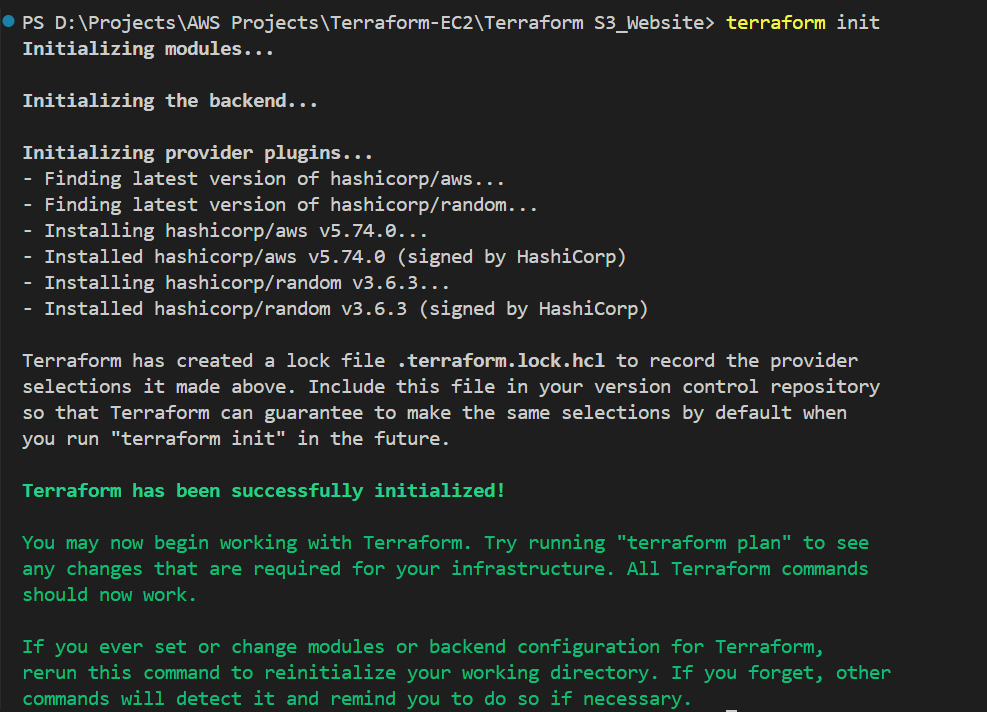
Now do the Plan command to check everything is good or not which we want.
terraform plan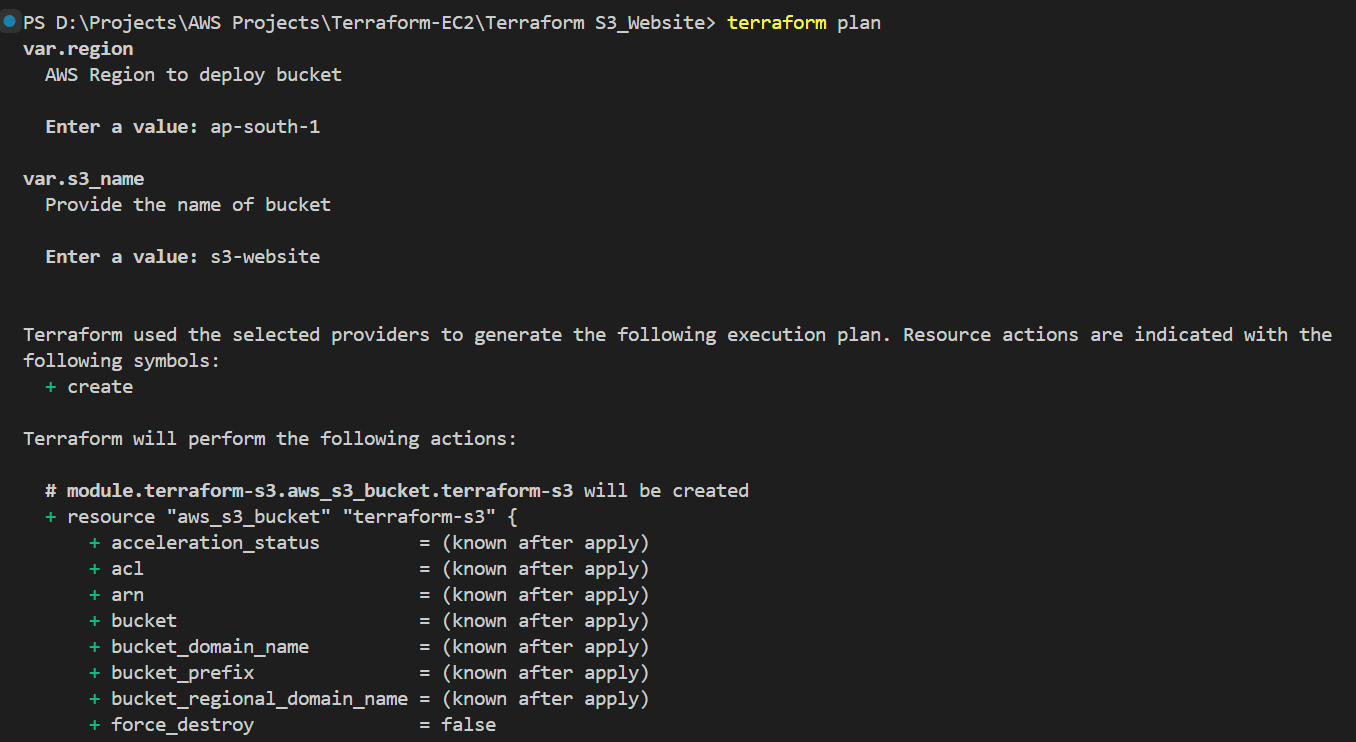
By executing
terraform plancommand we entered the region in which we want to create the S3 bucket and S3 bucket name which we want.Now, the final let’s execute the Apply command and see my website is deployed or not.
terrafom apply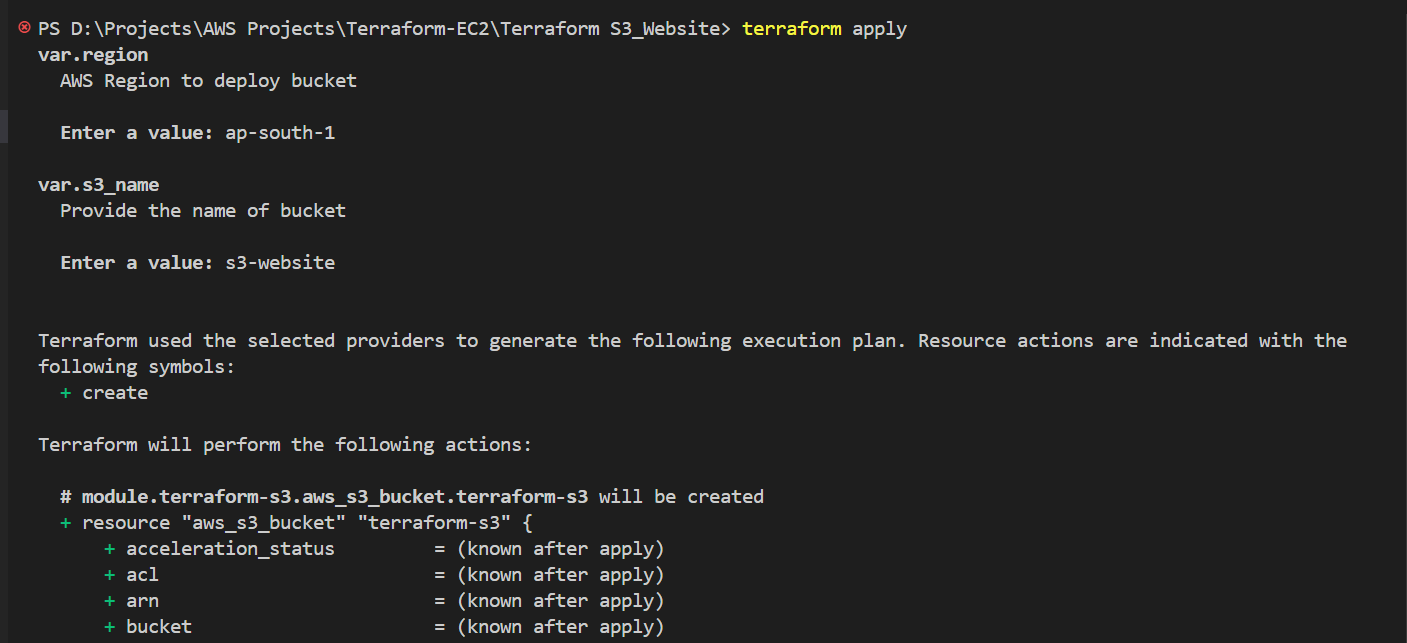
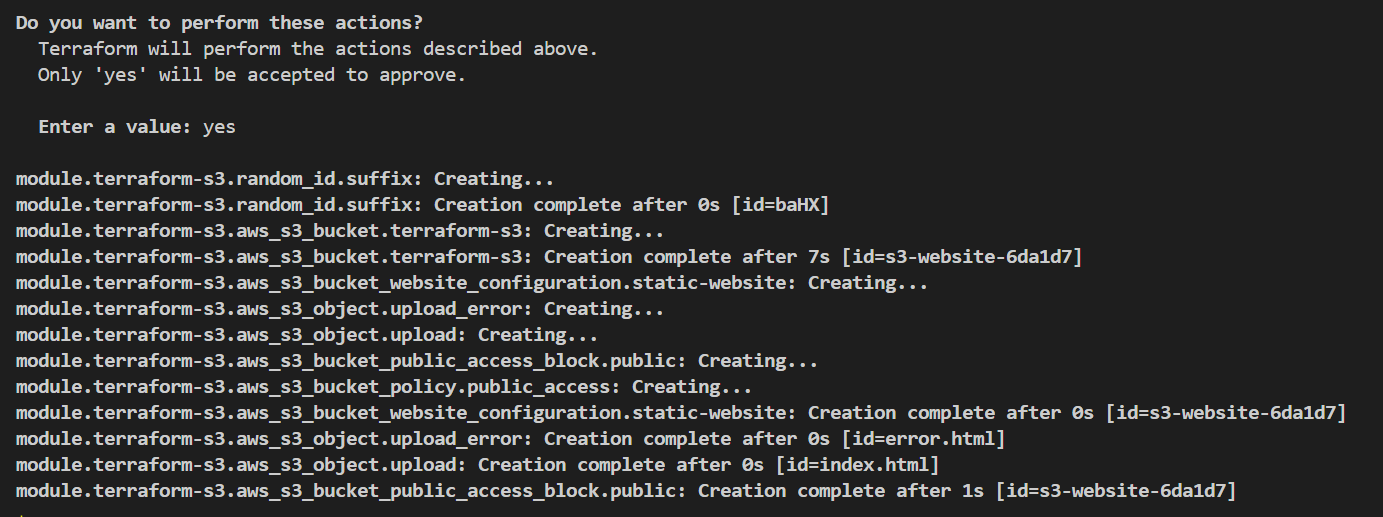
As you can see a random id is generate and associated
module.terraform-s3.aws_s3_bucket.terraform-s3: Creation complete after 7s [id=s3-website-6da1d7]with S3 bucket. And, at last we will get the bucket domain and website to access the index.html, here I have used the interpolation addedhttp://
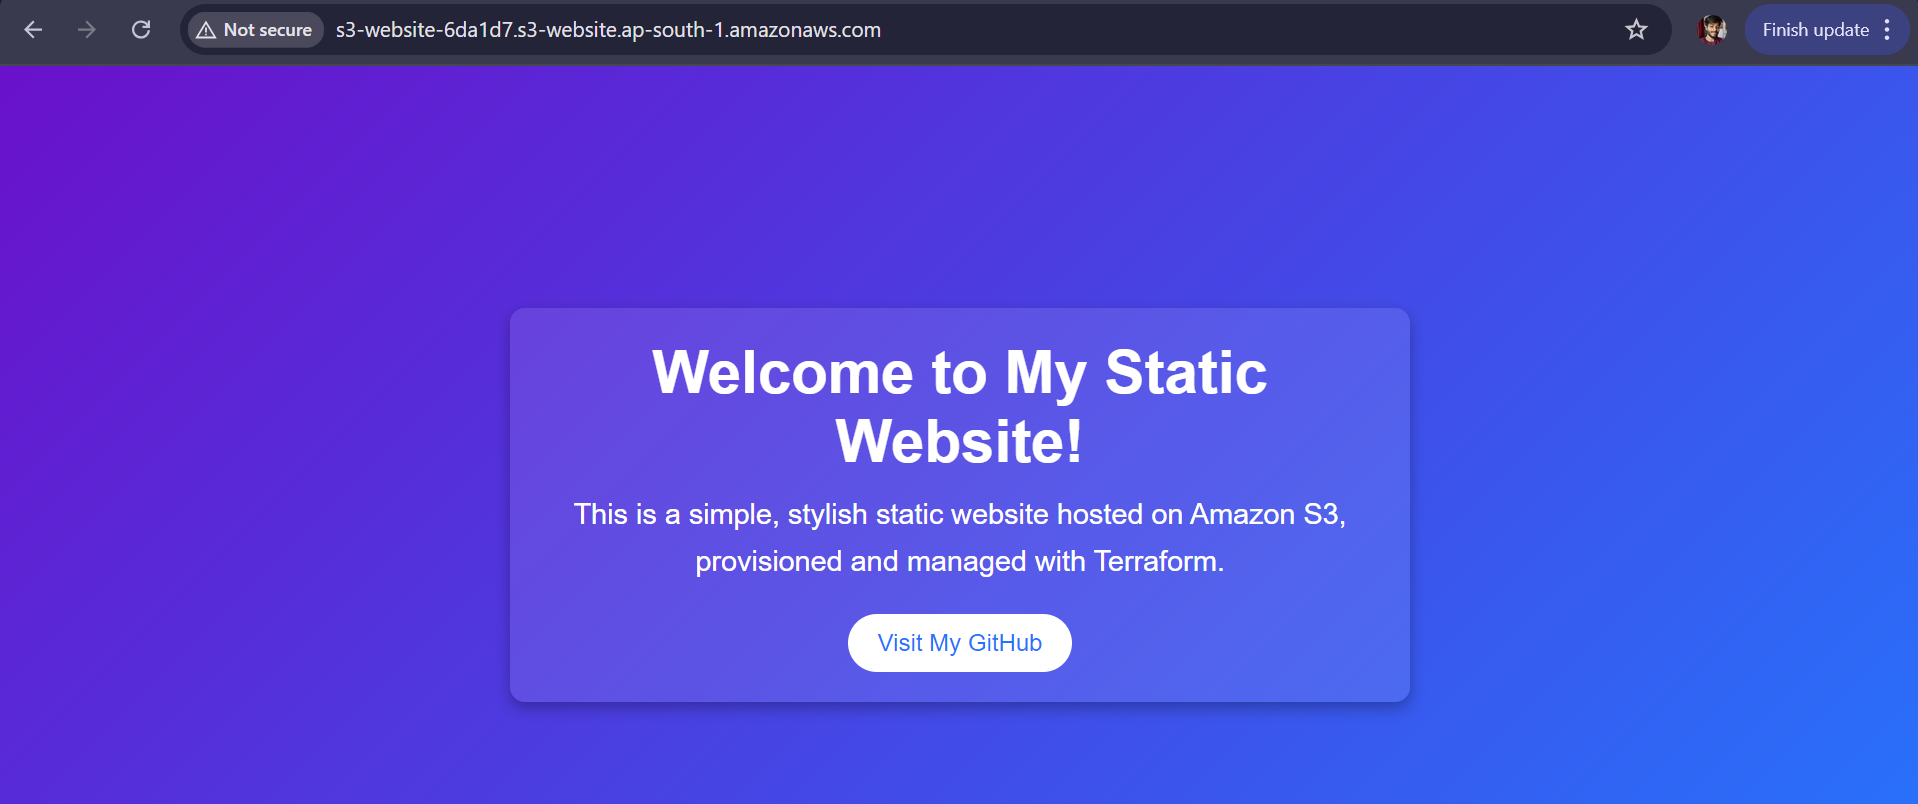
And yessss !!! We deployed successfully the Static Website on S3 (Simple Storage service)
At last, don’t forget to destroy all the resources on AWS by executing the command.
terraform destroy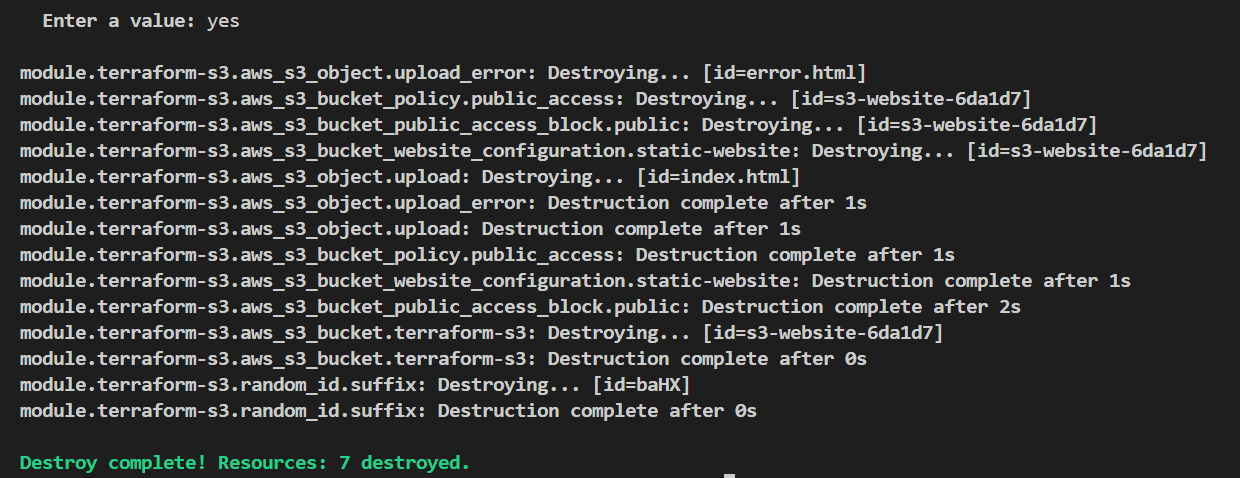
Conclusion
In this article, we had learnt how to host Static Website on S3 with Terraform Modules. Meanwhile in the upcoming blogs you will see a lot of AWS Services creation and automating it with terraform. Stay tuned for the next blog !!!
GitHub Code : https://github.com/amitmaurya07/AWS-Terraform/tree/master
Twitter : x.com/amitmau07
LinkedIn : linkedin.com/in/amit-maurya07
If you have any queries you can drop the message on LinkedIn and Twitter.
Subscribe to my newsletter
Read articles from Amit Maurya directly inside your inbox. Subscribe to the newsletter, and don't miss out.
Written by

Amit Maurya
Amit Maurya
DevOps Enthusiast, Learning Linux