Unpacking Webpack For Frontend Developers (Part 2): Advanced Webpack Features
 mideseniordev
Introduction
In the first part of Unpacking Webpack For Frontend Developers, we covered Webpack's core concepts, focusing on setting up a configuration file, defining entry and output points, and using loaders to handle different file types such as CSS, fonts, and images.
In this second part, we will explore advanced Webpack features to boost application performance and optimize build processes. We'll discuss techniques such as code splitting, lazy loading, and tree shaking, and set up the Webpack Dev Server for live reloading and hot module replacement. These tools will help frontend developers improve user experience by reducing load times, efficiently splitting code, and addressing development issues. This hands-on article will guide you through building each feature.
Advanced Webpack Features
Now we’re getting into the good stuff: Advanced Webpack Features. This is where Webpack really starts to flex its muscles.
When building larger apps, optimizing performance is key. You don’t want users downloading a massive bundle of code all at once—it can slow everything down and hurt the overall experience. With webpack, we have a bunch of techniques we can use to make our apps faster, more efficient, and even easier to manage.
Code Splitting

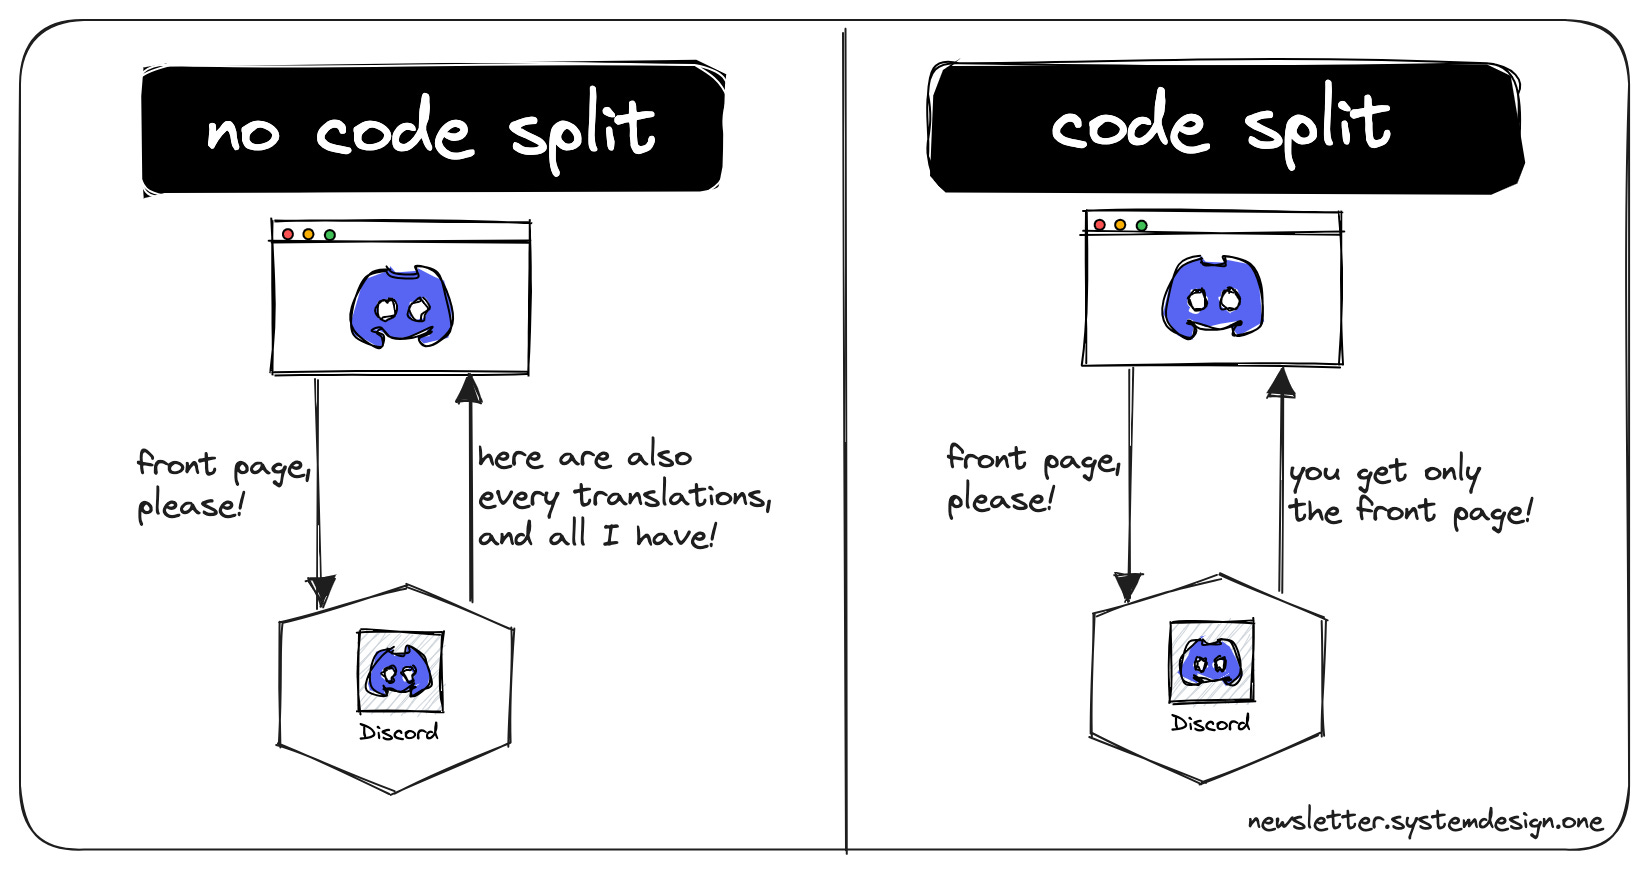
Code splitting is one of webpack’s most compelling features, breaking your app's code into smaller chunks, allowing you to load only what’s necessary at any given time. Instead of delivering the entire JavaScript bundle all at once, webpack separates it into smaller, more manageable pieces that can be loaded on-demand.
There are three approaches to code splitting in webpack available:
Entry Points: You can manually split code by specifying multiple entry points in the Webpack configuration. Each entry will generate its own bundle.
Prevent Duplication: Webpack provides the
SplitChunksPluginto automatically split dependencies shared between different bundles. This is great for avoiding duplication and ensuring shared libraries and modules are only loaded once.Dynamic Imports: With dynamic imports, you can split code at the function level, loading modules on-demand. It allows you to fetch specific code when needed.
Entry Points
Let’s look at how to implement this with webpack. First, we add another module to our application ./src/dashboard.js
const app = document.getElementById("app");

const dashboard = document.createElement("div");
dashboard.className = "dashboard";
app.appendChild(dashboard);

const header = document.createElement("div");
header.className = "header";
header.innerHTML = "<h1>Dashboard</h1>";

dashboard.appendChild(header);
Update the webpack.config.js
module.exports = {
    //...
    entry: {
        index: "./src/index.js",
        dashboard: "./src/dashboard.js"
    },
    //...
};
This method is not flexible and can’t be used to dynamically split code. It also allows duplicate modules to be included in both bundles.
Dynamic Imports
To get started with dynamic imports, let’s install a package called lodash. Run pnpm add lodash. Now let’s update our index.js file.
//...
async function getComponent() {
  try {
    const { default: _ } = await import("lodash");
    const MyComponent = document.createElement("div");
    MyComponent.innerHTML = _.join(["This", "is my", "component"]);
    return MyComponent;
  } catch (error) {
    return "An error occurred while loading the component";
  }
}

getComponent().then((component) => {
  document.body.appendChild(component);
});
Dynamic imports allow you to fetch specific code using the import() function when needed.
Lazy Loading

Lazy loading in Webpack is a powerful technique that loads JavaScript modules only when needed, rather than all at once. This can significantly improve the performance of large applications by reducing the initial load time, especially when you have large libraries or sections of your app that aren’t immediately required.
How to Implement Lazy Loading in Webpack
Lazy loading is achieved through dynamic imports. When using dynamic imports, Webpack treats the imported module as a separate chunk, which will only load when the module is needed.
Add a print.js file to the project ./src/print.js
console.log(
  'The print.js module has loaded! See the network tab in dev tools...'
);

export default () => {
  console.log('Button Clicked: Here\'s "some text"!');
};
Now let us import print.js in our index.js file using lazy loading.
//...
function lazyLoadComponent() {
  const element = document.createElement("div");
  const button = document.createElement("button");
  const br = document.createElement("br");

  button.innerHTML = "Click me and look at the console!";
  element.innerHTML = "Hello Webpack!";
  element.appendChild(br);
  element.appendChild(button);

  button.onclick = (e) =>
    import(/* webpackChunkName: "print" */ "./print").then((module) => {
      const print = module.default;
      print();
    });
  return element;
}

document.body.appendChild(lazyLoadComponent());
The comment webpackChunkName: "print" is a special webpack syntax that tells webpack to name the bundle print which can be useful for debugging.
Tree Shaking

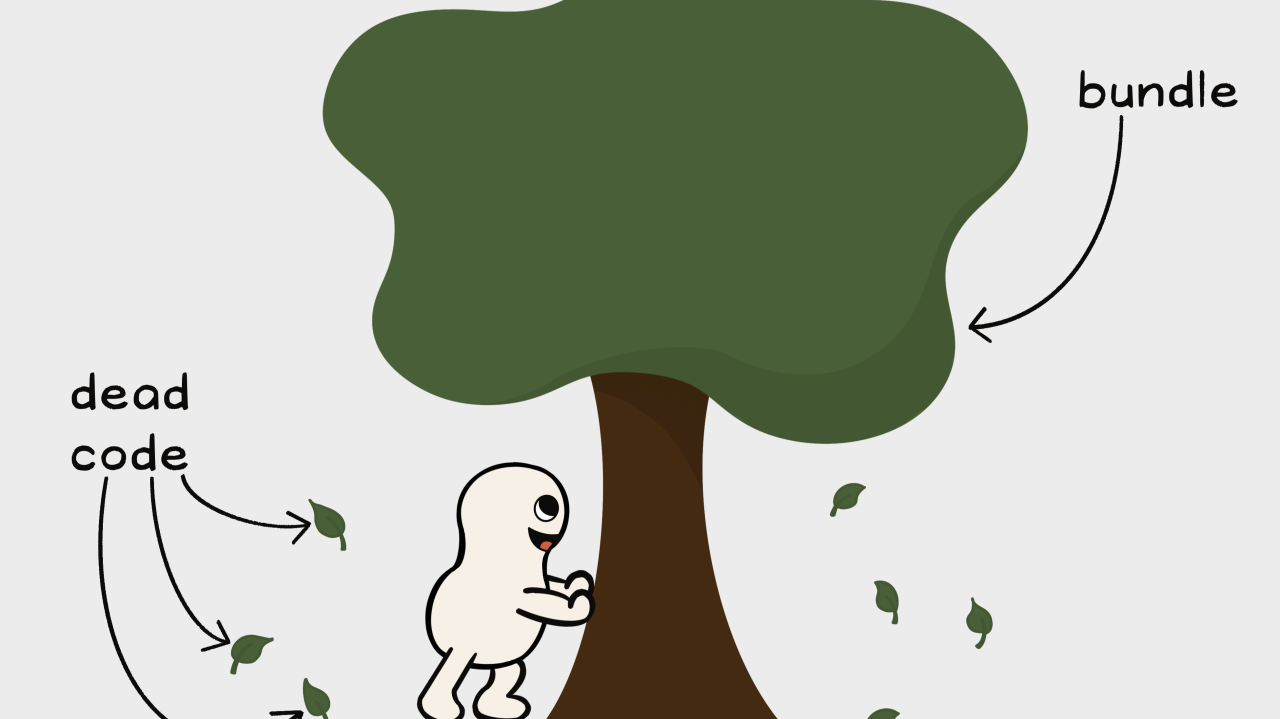
Tree shaking in Webpack is an optimization technique that eliminates unused code from your final bundle. In production mode, webpack uses the optimization properties usedExports and sideEffects which are enabled by default.
Setting up tree shaking in Webpack
For our project setup, we need to ensure that our webpack configuration is in development mode to make sure that the bundle is not minified.
// webpack.config.js
module.exports = {
    mode: "development"
    //...
}
usedExports
The useExports feature is used in webpack to mark which exports are actually used in your application.
For example:
// utils.js
export function add(a, b) {return a + b;}
export function subtract(a, b) {return a - b;}
export function multiply(a, b) {return a * b;}
If in another file you only use add, webpack through usedExports, will not include subtract and multiply in the final build.
Now let’s enable usedExports in our webpack.config.js
module.exports = {
    mode: "development"
    optimization: {
        usedExports: true, // Optional if already in production mode
    },
}
sideEffects
Side effects occur when code within a module use global variables or data from outside its scope. For example, a function that can return different output for the same input or a function that changes global variables like the window object or uses data from HTTP calls, file system, DOM, etc.
In webpack, the sideEffects property is another layer of optimization that works alongside usedExports. While usedExports identifies which exports are unused, sideEffects tells Webpack which files have no side effects and can therefore be excluded from the final build.
The sideEffects property is typically set in the package.json file:
If your project’s files have no side effects, you can set side
”sideEffects”: falseto exclude all unused exports across all modules.If only specific files have side effects, you can specify them in an array instead:
// package.json
{
    //...
    "sideEffects": ["./src/index.js", "*.css"]
    //...
}
Webpack Dev Server
In part 1 of this article, we installed the webpack-dev-server package, a local server that serves our app from memory instead of generating static files on our system
In our webpack.config.js file, configure the devServer options:
const path = require("path");

module.exports = {
    //...
    devServer: {
        static: {
            directory: path.join(__dirname, "dist")
        },
        port: 8080,    // Specify port
        open: true,    // Opens the browser on server start
    }
    //...
}
Hot Module Replacement (HMR)
HMR is a feature of webpack that updates only the modified part of your code in the browser. It keeps the current state of your app. It allows all kinds of modules to be updated at runtime without the need for a full refresh.
Let’s update our webpack.config.js file to enable webpack’s HMR
//..
devServer: {
    static: {
        directory: path.join(__dirname, "dist")
    },
    port: 8080,   // Specify port
    open: true,   // Opens the browser on server start
    hot: true,    // Enables Hot Module Replacement
}
//..
Now changes to our file will be applied instantly without reloading the page.
Optimizing Webpack Configuration

As your project grows, optimizing Webpack’s configuration becomes crucial for maintaining low build times, managing bundle sizes, and ensuring fast load times in production. We’ll talk about three techniques in this section: minimizing build time, parallelism and caching.
Minimizing build time
Configuring webpack to minimize build time is essential for maintaining a smooth development experience. To reduce build time, you can limit the files webpack processes by using include and exclude in loaders to avoid processing unnecessary files.
For example:
// webpack.config.js
module.exports = {
  module: {
    rules: [
      {
        test: /\.js$/,
        use: 'babel-loader',
        exclude: /node_modules/, // Ignore dependencies
        include: path.resolve(__dirname, 'src'), // Only process source files
      },
      // Other rules
    ],
  },
};
When we restrict loaders to specific directories, webpack spends less time processing files that don’t need transformation, resulting in a faster build.
Parallelism for Loaders and Plugins
Tools like thread-loader can add parallelism to loaders, such as Babel, to optimize processing time for JavaScript. This can speed up webpack build process by running multiple tasks simultaneously. Let’s install the package with pnpm add thread-loader —save-dev. Update our webpack.config.js file:
//..
module: {
    rules: [
      {
        test: /\.css$/,
        use: [
            "style-loader",
            "css-loader",
            "thread-loader",    // Runs tasks in parallel
        ],
      },
      // other rules
    ],
  },
//..
Using thread-loader allows Webpack to split file processing across multiple threads, speeding up tasks that would otherwise be CPU-intensive.
Caching
Caching is essential for speeding up rebuilds and reloads, especially in a development environment. Webpack caching allows you to store previous build information, so unchanged files don’t need to be reprocessed on every build.
Webpack supports two types of caching: memory caching (ideal for small to medium-sized projects) and filesystem caching (better for larger projects).
Enabling Filesystem Caching: To enable filesystem caching, add the
cacheproperty to your Webpack configuration.module.exports = { cache: { type: 'filesystem', buildDependencies: { config: [__filename], // Cache based on config changes } } };With
filesystemcaching, Webpack will store cache data in.cache/(or you can customize this location), speeding up builds by only reprocessing files that have changed.Configuring Cache Settings: Webpack provides more options for customizing cache behavior, including setting a directory and compression.
 module.exports = {
   cache: {
     type: 'filesystem',
     cacheDirectory: path.resolve(__dirname, '.webpack_cache'), // Custom cache directory
     compression: 'brotli', // Use Brotli compression for cached files
   }
 };
Benefits of Caching with Parallelism: When combined with parallelism, caching can further reduce build times by using previously processed files and running parallel tasks to handle
Summary of Advanced Topics Discussed
In this article, we dove into a range of advanced Webpack features designed to optimize your application's performance and streamline the development workflow. Here's a quick recap of the major topics we covered:
Code Splitting: We explored how code splitting divides your application into smaller bundles, allowing for more efficient loading and improved user experience.
Lazy Loading: By loading specific modules only when they are needed, lazy loading reduces initial load time, leading to faster initial render times and a better user experience.
Tree Shaking: This process removes unused code from the final bundle, helping to reduce the size of your JavaScript and resulting in faster load times.
Hot Module Replacement (HMR): By allowing updates to be pushed in real-time without a full page reload, HMR makes the development process smoother and more efficient.
Webpack Dev Server: A tool that provides a local development server with live reloading, which simplifies the process of testing changes instantly as you build.
Optimization Techniques: We discussed several methods for optimizing build performance, including minification, parallelism, caching, and best practices for managing bundle size.
Together, these tools and techniques enable you to configure Webpack to enhance both development and production performance, ensuring that your application is responsive, optimized, and scalable.
Final Thoughts
Mastering Webpack’s advanced features gives you more control over your application's performance and the efficiency of your build process. From improving load times to simplifying complex configurations, the power of Webpack lies in its flexibility and scalability. By taking advantage of techniques like lazy loading, code splitting, and efficient caching, you can provide users with a smoother, faster experience and maintain a more manageable development workflow.
Webpack is a powerful ally for frontend developers, especially as applications grow in complexity. While setting up advanced features may require additional configuration, the payoff is worth it: faster builds, better user experiences, and a development process that scales with your application.
References
You can get the complete code for this webpack article on my github. Also follow me on X 😊
Subscribe to my newsletter
Read articles from mideseniordev directly inside your inbox. Subscribe to the newsletter, and don't miss out.
Written by
