Create an Internal Load Balancer
 Hridhi Kumari
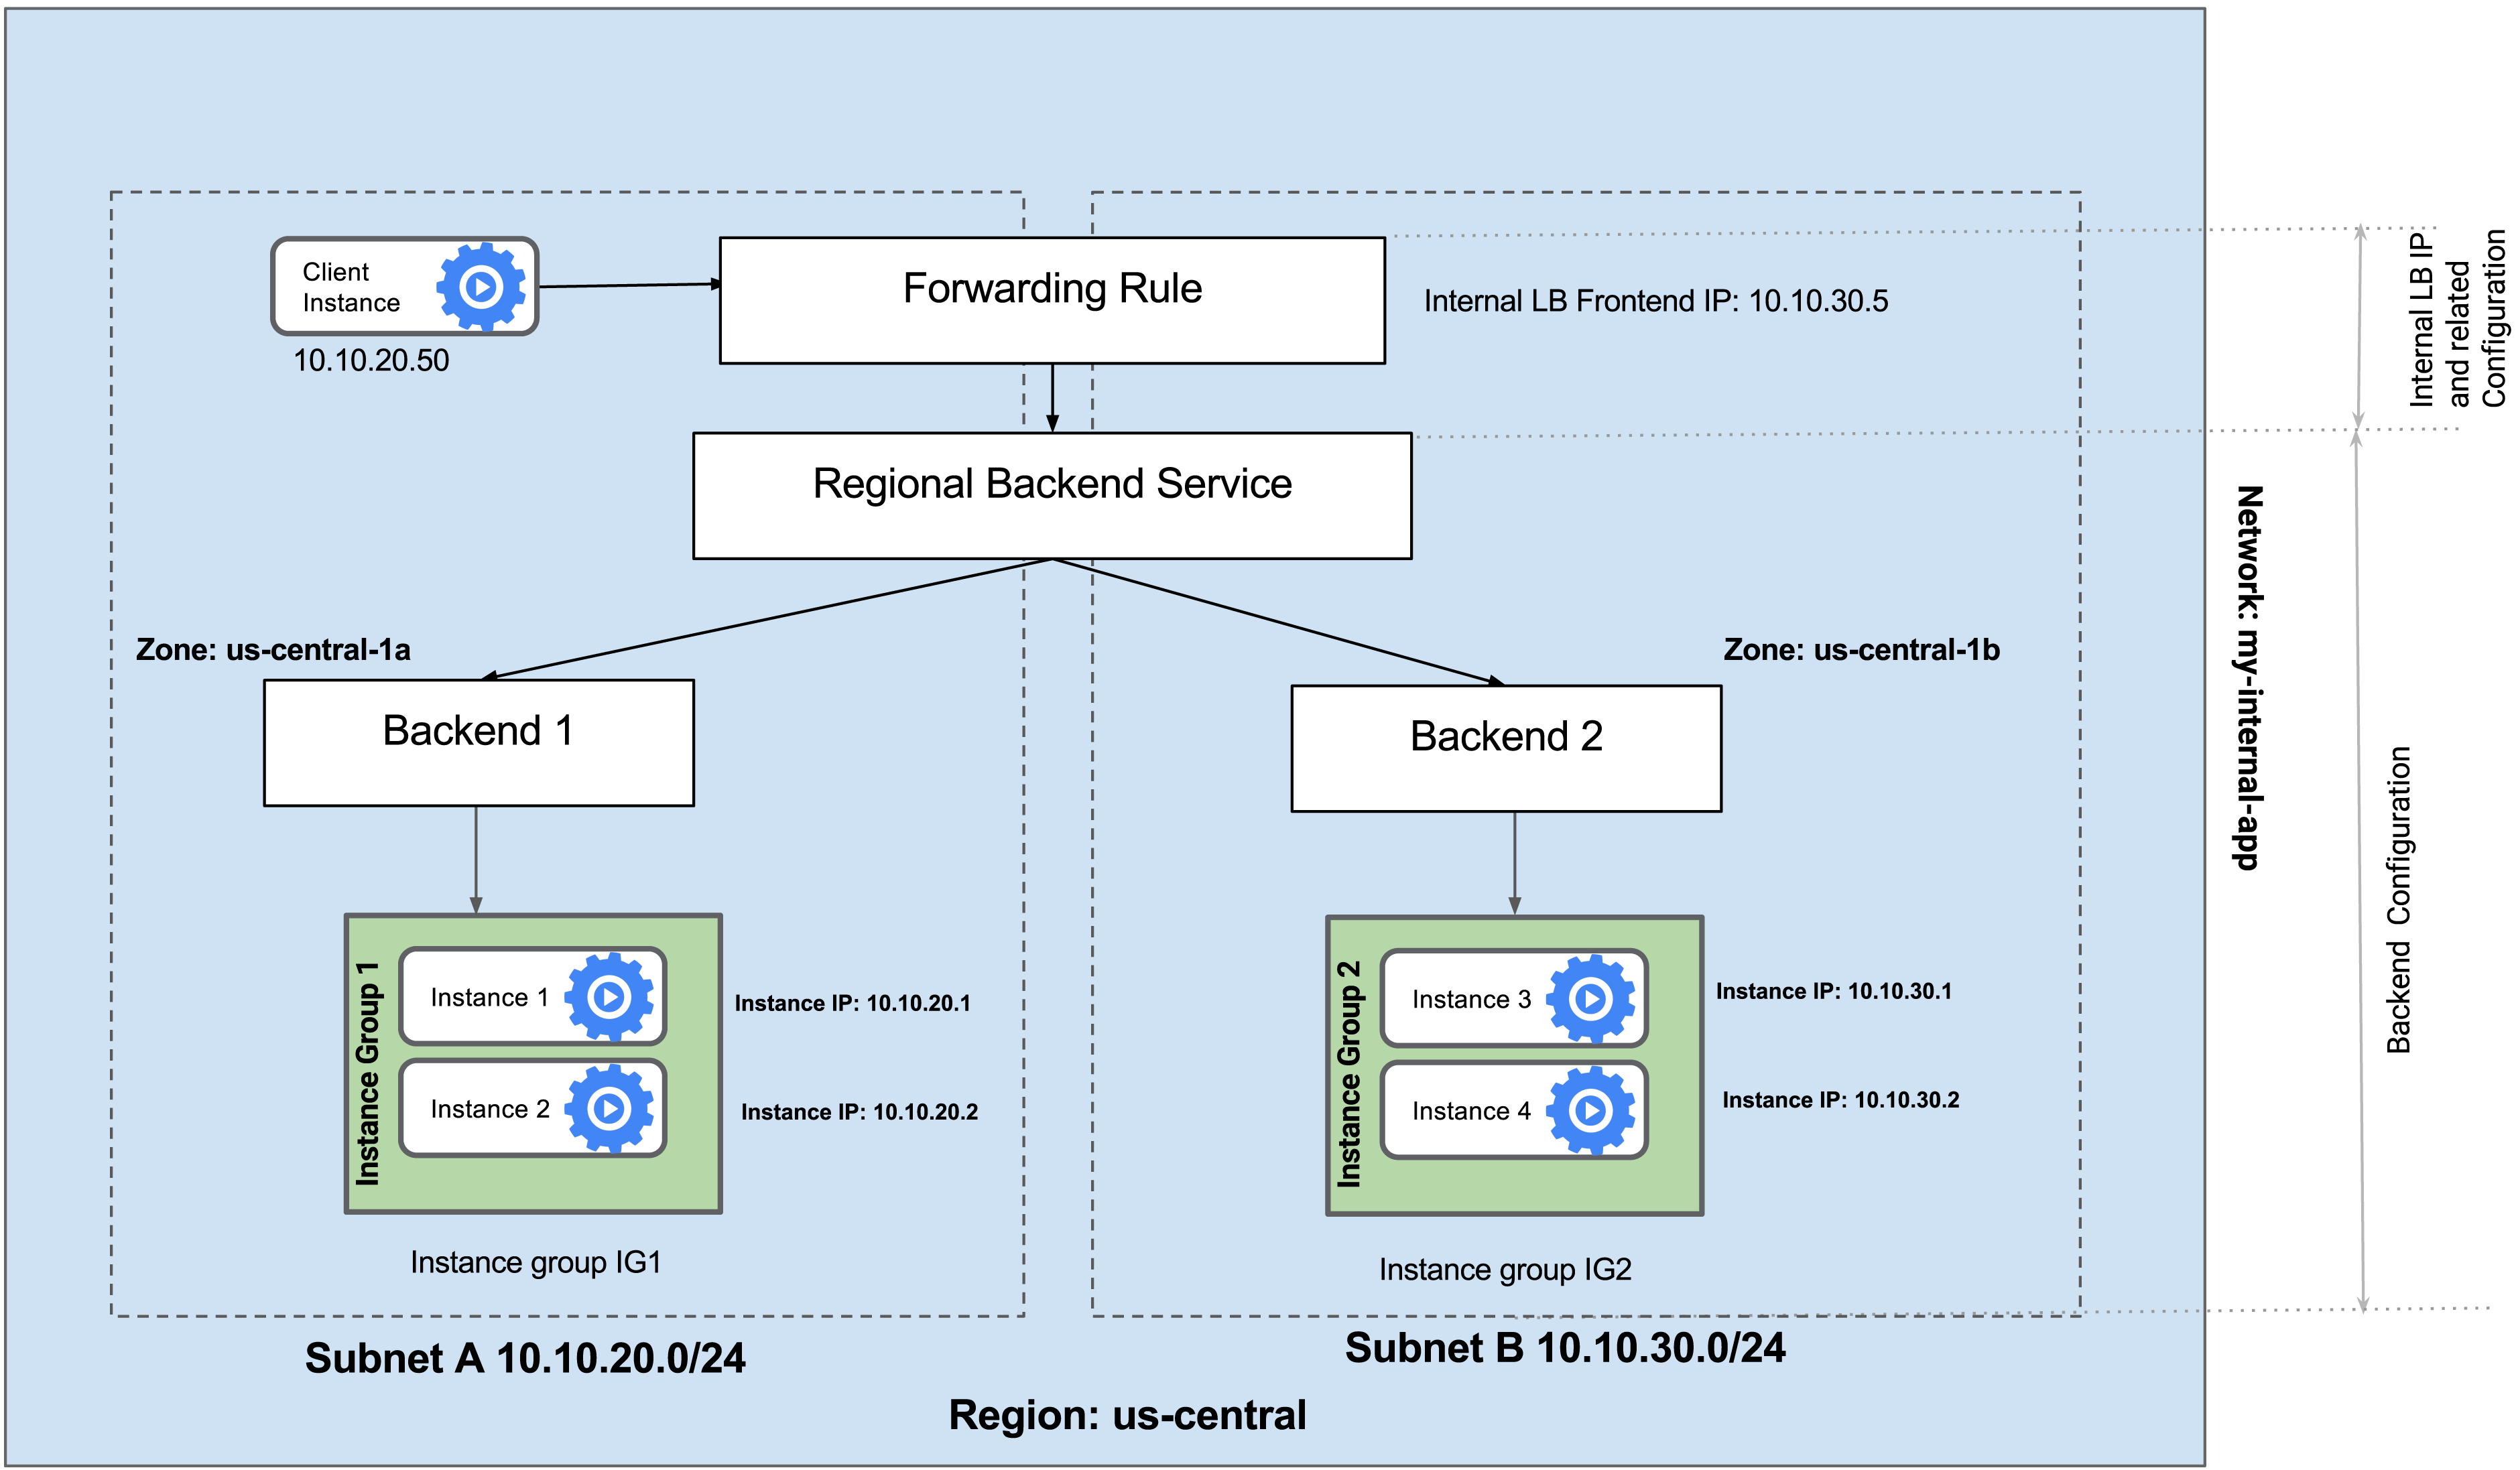
Task 1. Configure HTTP and health check firewall rules
Configure firewall rules to allow HTTP traffic to the backends and TCP traffic from the Google Cloud health checker.
Explore the my-internal-app network
The network
my-internal-appwith subnet-a and subnet-b along with firewall rules for RDP, SSH, and ICMP traffic have been configured for you.In the console, navigate to Navigation menu > VPC network > VPC networks.
Scroll down and notice the my-internal-app network with its subnets: subnet-a and subnet-b.
Create the HTTP firewall rule
Create a firewall rule to allow HTTP traffic to the backends from the Load Balancer and the internet (to install Apache on the backends).
Click + Create Firewall Rule.
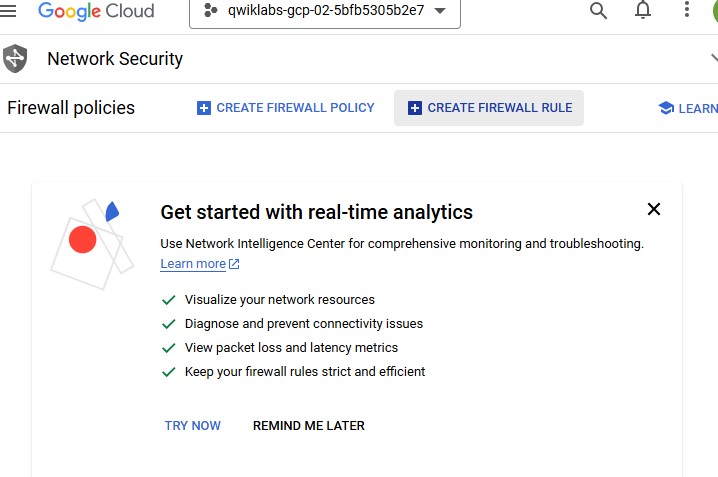
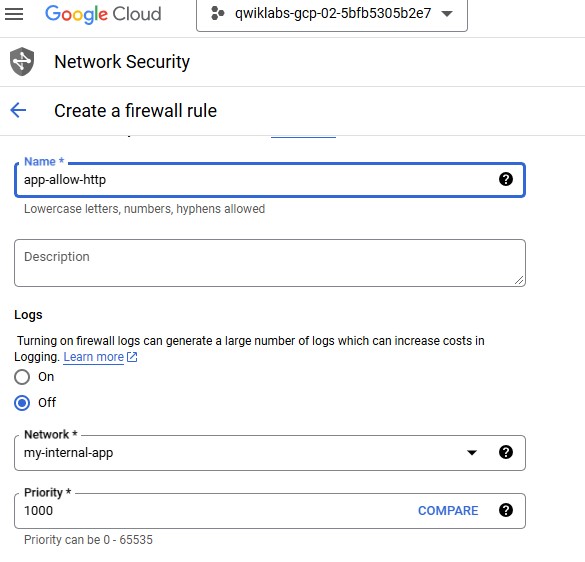
Set the following values, leave all other values at their defaults:
| Property | Value (type value or select option as specified) | | --- | --- | | Name | app-allow-http | | Network | my-internal-app | | Targets | Specified target tags | | Target tags | lb-backend | | Source filter | IPv4 Ranges | | Source IPv4 ranges | 10.10.0.0/16 | | Protocols and ports | Specified protocols and ports, and then check tcp, type: 80 |
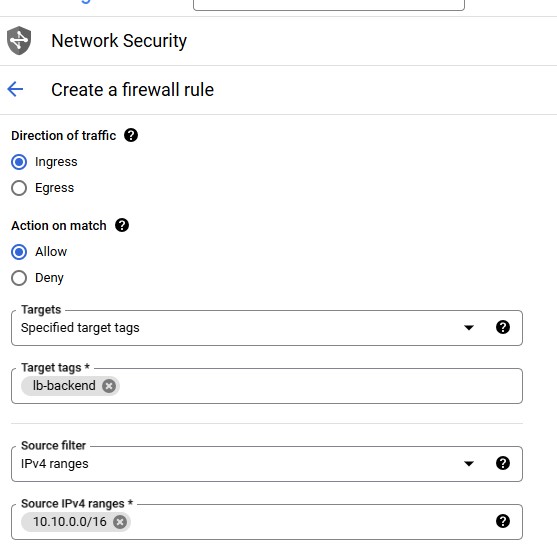
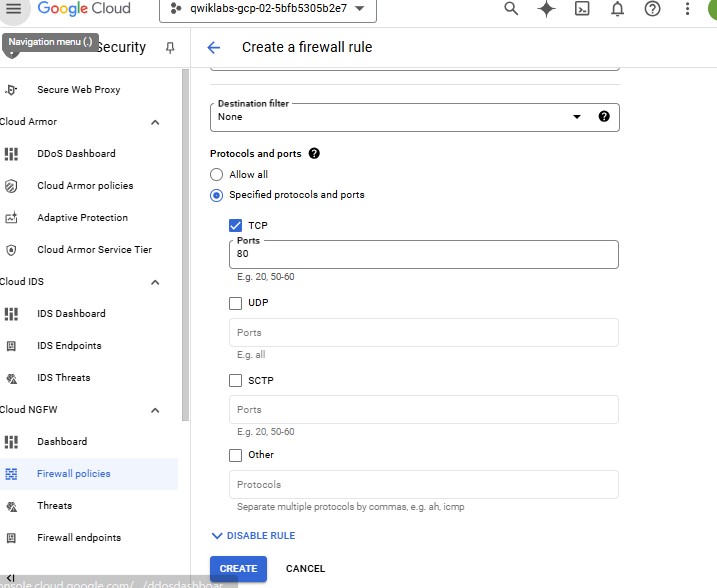
Click Create.
Create the health check firewall rules
Health checks determine which instances of a Load Balancer can receive new connections.
In the Firewall rules page, click + Create Firewall Rule.
Set the following values, leave all other values at their defaults:
| Property | Value (type value or select option as specified) | | --- | --- | | Name | app-allow-health-check | | Network | my-internal-app | | Targets | Specified target tags | | Target tags | lb-backend | | Source filter | IPv4 Ranges | | Source IPv4 ranges | 130.211.0.0/22 and 35.191.0.0/16 | | Protocols and ports | Specified protocols and ports, and then check tcp |
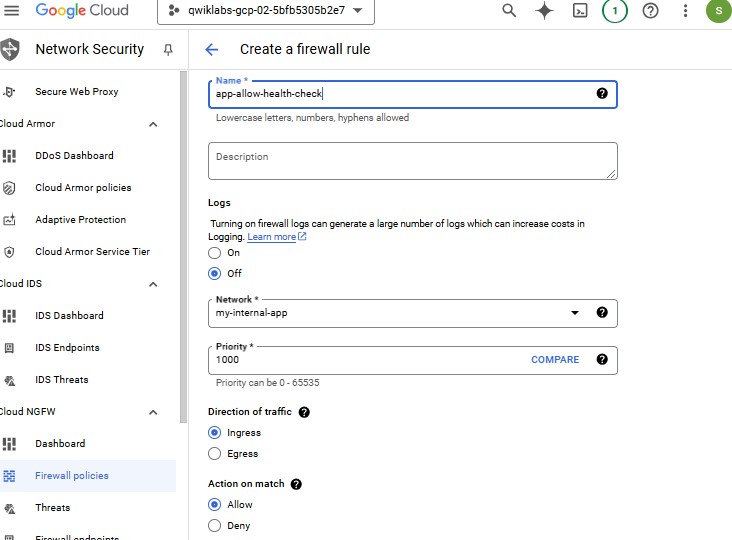
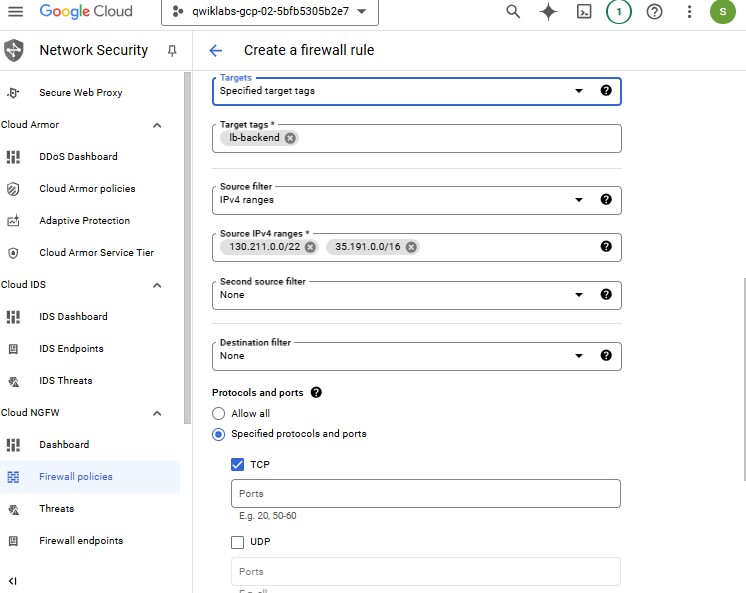
Click Create.
Task 2. Configure instance templates and create instance groups
Configure the instance templates
In the Console, navigate to Navigation menu > Compute Engine > Instance templates.
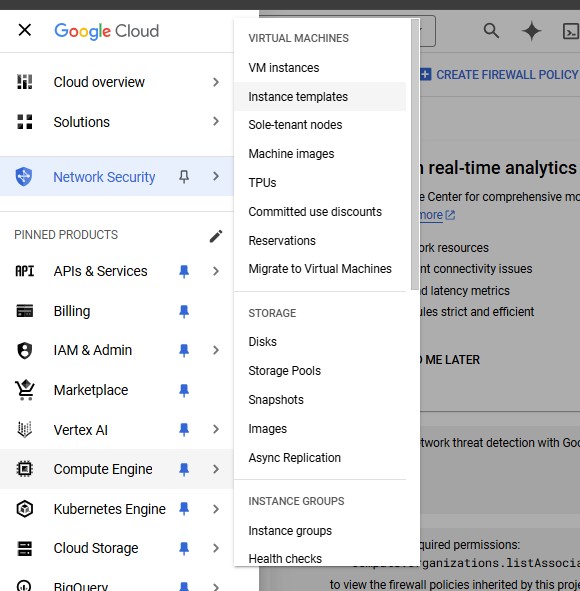
Click Create instance template.
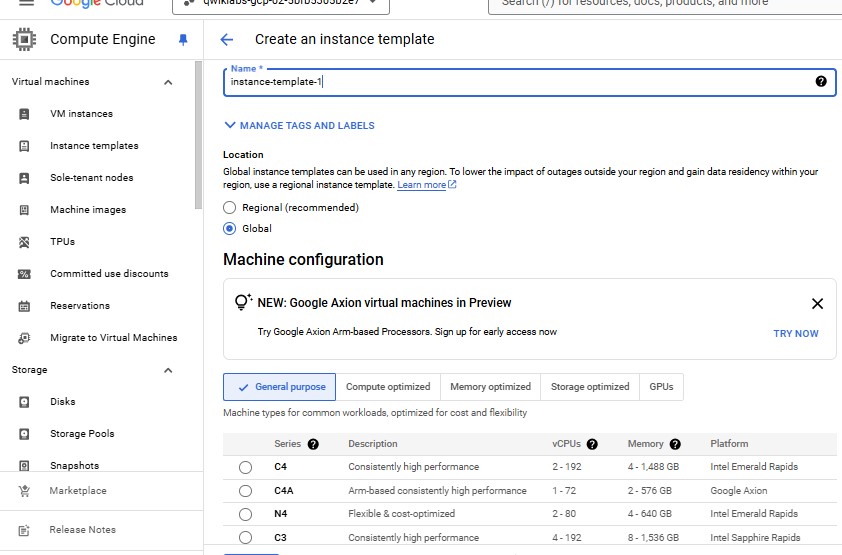
For Name, type instance-template-1.
For Location, Select Global.
For Series, select E2.
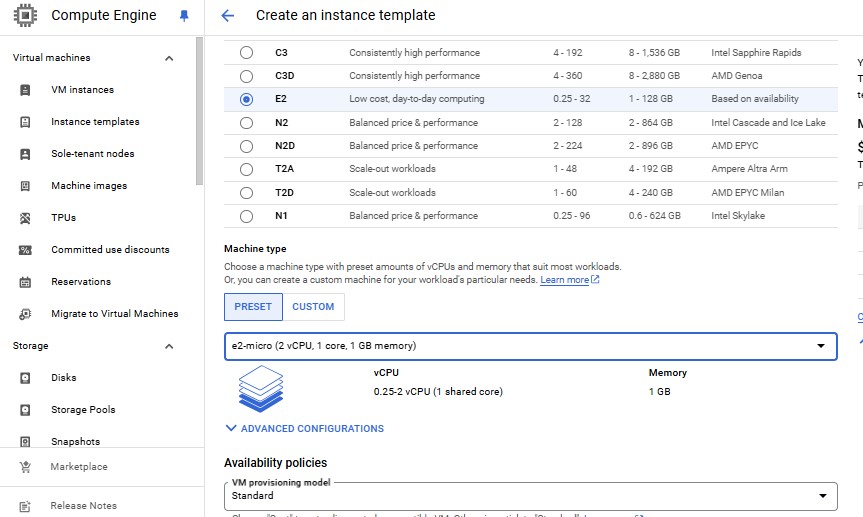
For Machine type, select Shared-core > e2-micro.
Click Advanced options.
Click Networking.
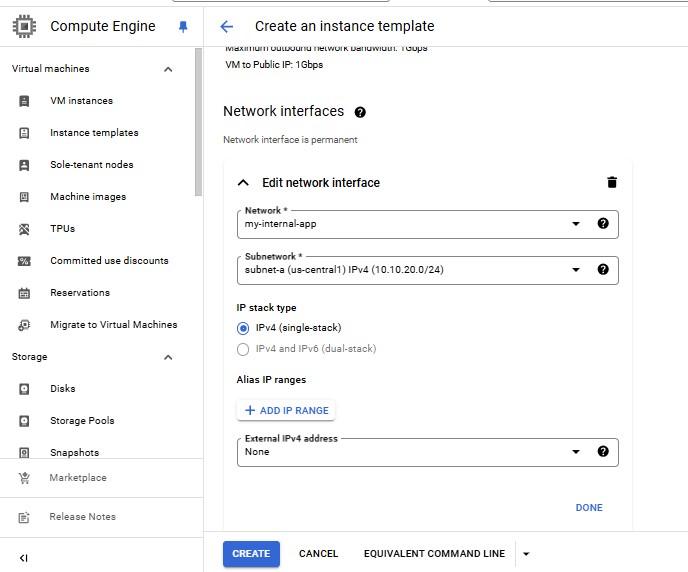
For Network tags, specify lb-backend.
For Network interfaces, click the dropdown icon to edit.
Set Network, Subnetwork and External IPv4 Address.
Click Done.
Click Management.
Under Metadata, click Add item and specify:
Key 1: startup-script-url
Value 1: gs://cloud-training/gcpnet/ilb/startup.sh
Click Create.
Configure the next instance template
In Instance templates, check the box next to instance-template-1, then click Copy. Make sure to update the name as instance-template-2.
Click Advanced options.
Click the Networking tab.
For Network interfaces, click the dropdown icon to edit.
Select subnet-b as the Subnetwork.
Click Done and then click Create.
Create the managed instance groups
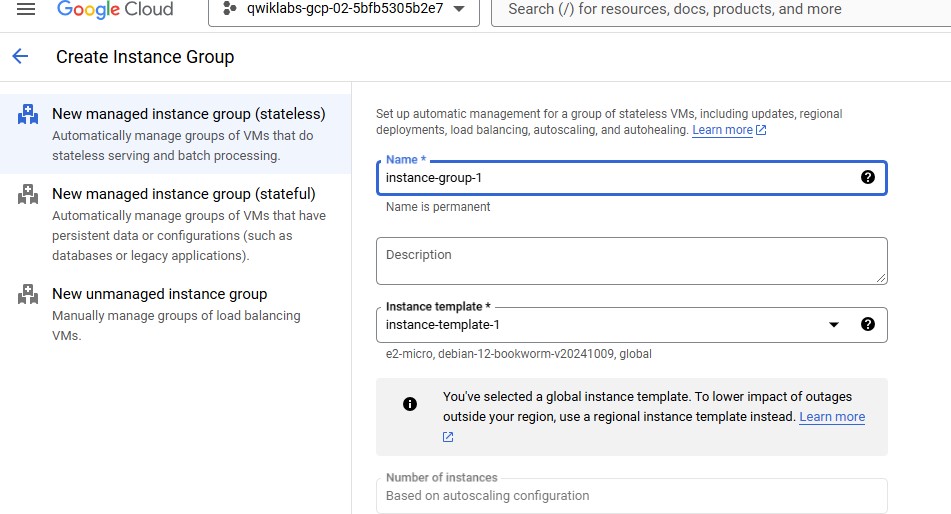
In Compute Engine, in the left pane click Instance groups, and then click Create Instance group.
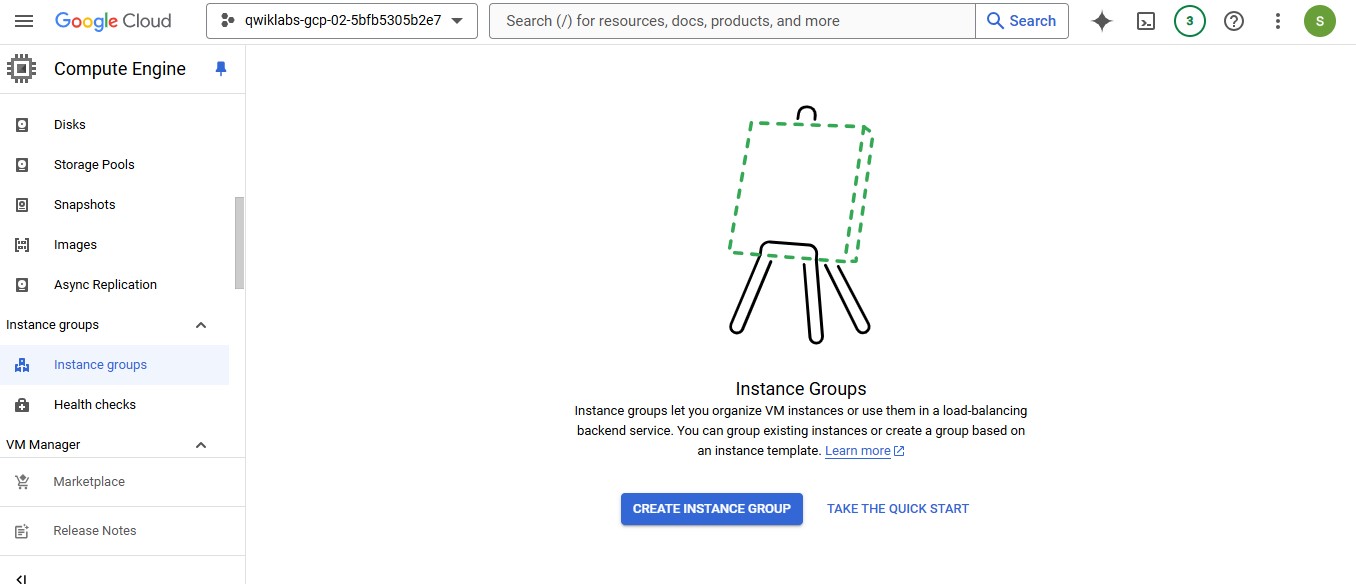
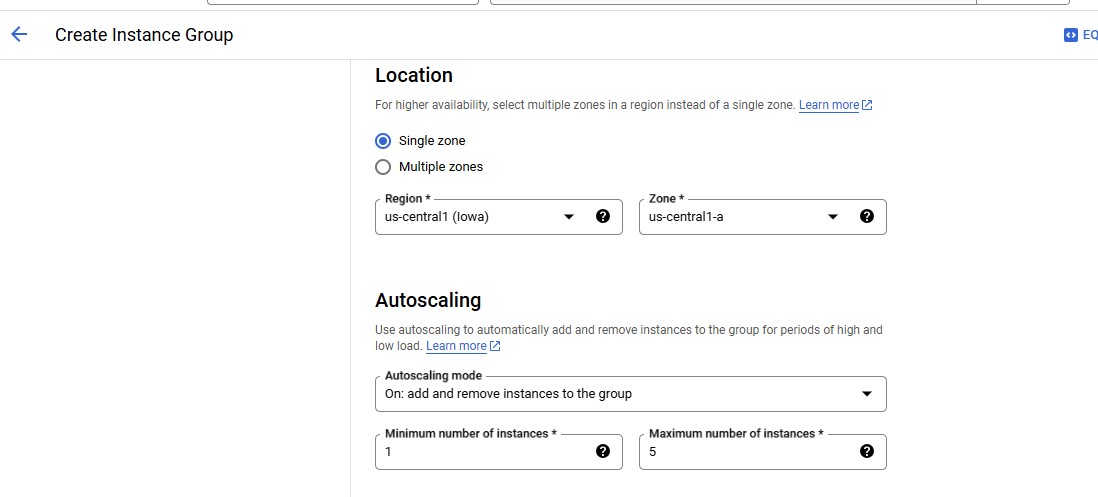
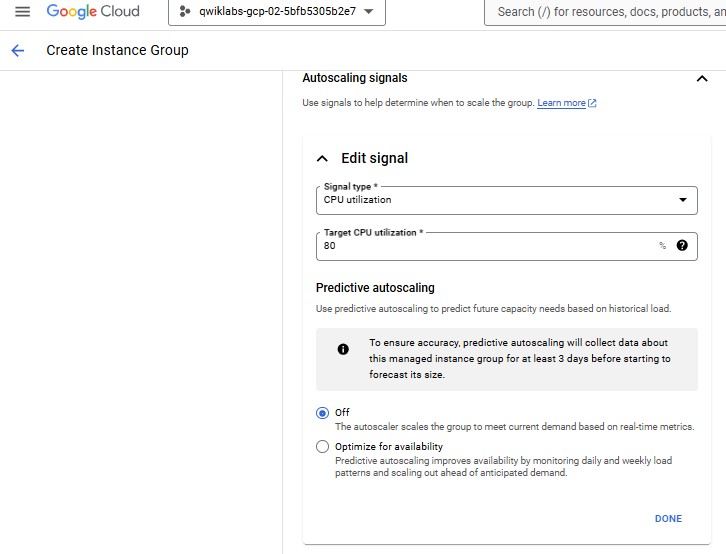
Set the following values, leave all other values at their defaults:
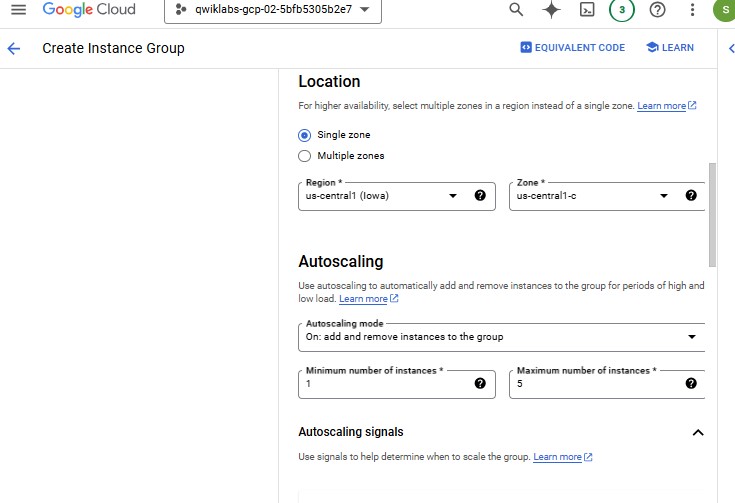
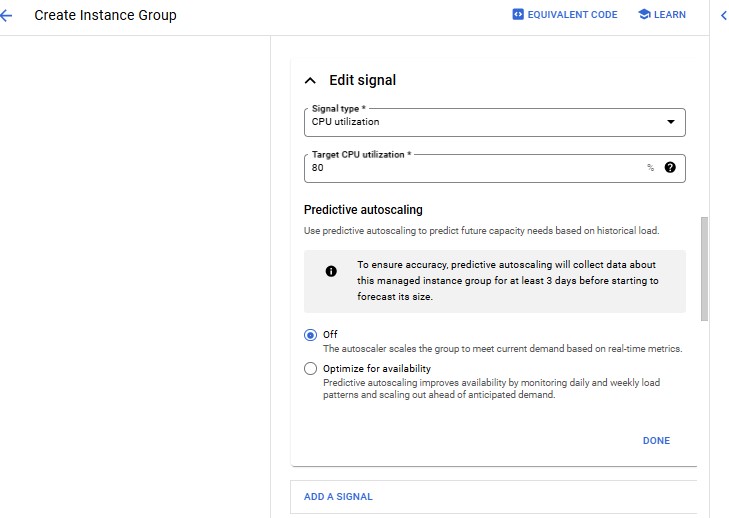
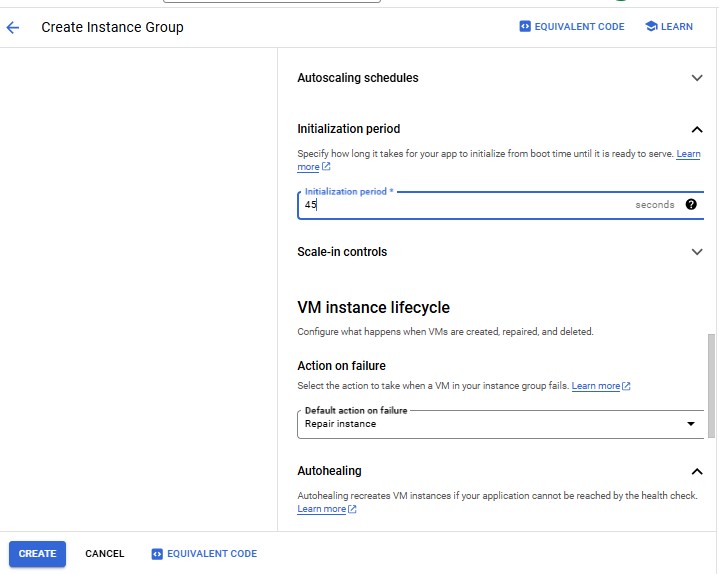
| Property | Value (type value or select option as specified) | | --- | --- | | Name | instance-group-1 | | Instance template | instance-template-1 | | Location | Single-zone | | Region | us-central1 | | Zone | us-central1-a | | Autoscaling > Minimum number of instances | 1 | | Autoscaling > Maximum number of instances | 5 | | Autoscaling > Autoscaling signals (click the dropdown icon to edit) > Signal type | CPU utilization | | Target CPU utilization | 80 | | Initialization period | 45 |
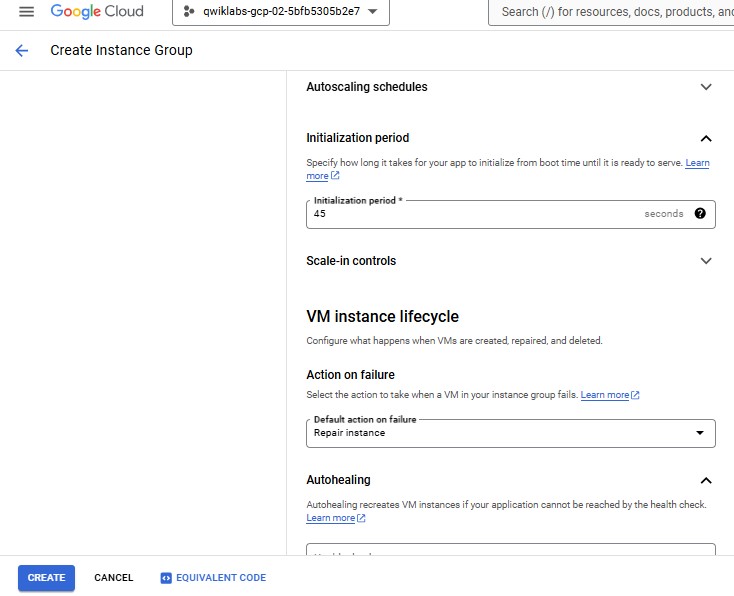
Click Create.
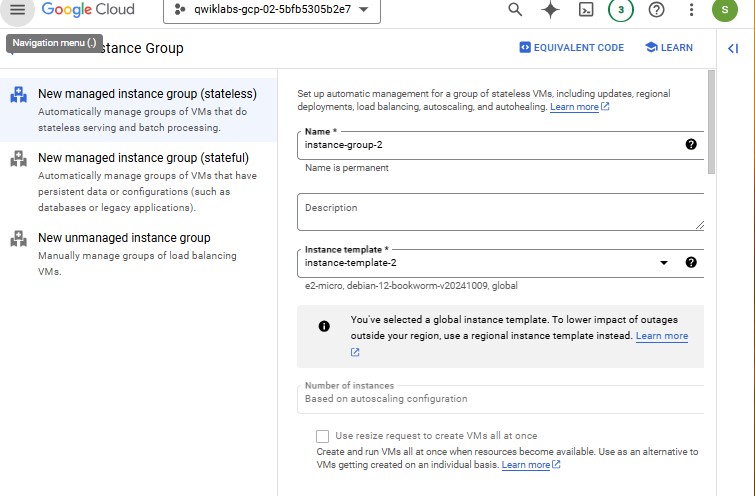
Repeat the same procedure for instance-group-2 in the different zone of same region as subnet-a:Click Create Instance group.
Set the following values, leave all other values at their defaults:
| Property | Value (type value or select option as specified) | | --- | --- | | Name | instance-group-2 | | Instance template | instance-template-2 | | Location | Single-zone | | Region | us-central1 | | Zone | Zone (Use the different zone in same region as subnet-a) | | Autoscaling > Minimum number of instances | 1 | | Autoscaling > Maximum number of instances | 5 | | Autoscaling > Autoscaling signals (click the dropdown icon to edit) > Signal type | CPU utilization | | Target CPU utilization | 80 | | Initialization period | 45 |
Click Create.

Verify the backends
In Compute Engine, click VM instances.
Click Create instance.
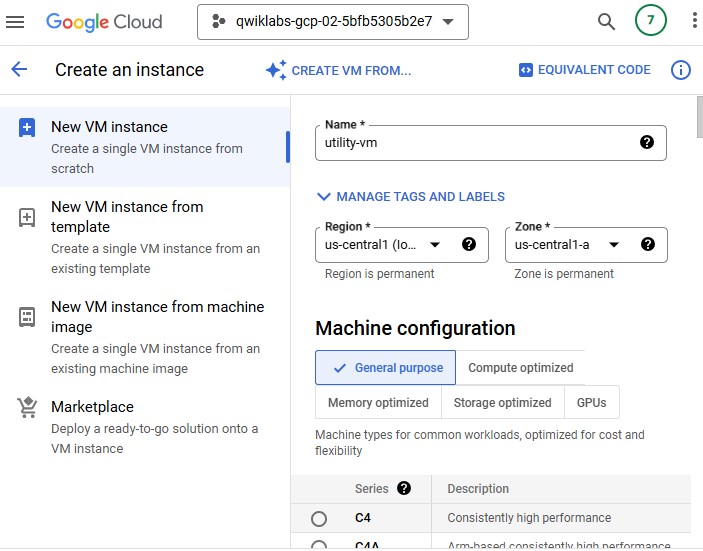
Set the following values, leave all other values at their defaults:
| Property | Value (type value or select option as specified) | | --- | --- | | Name | utility-vm | | Region | us-central1 | | Zone | us-central1-a | | Series | E2 | | Machine type | Shared-core > e2-micro (1 shared vCPU) |
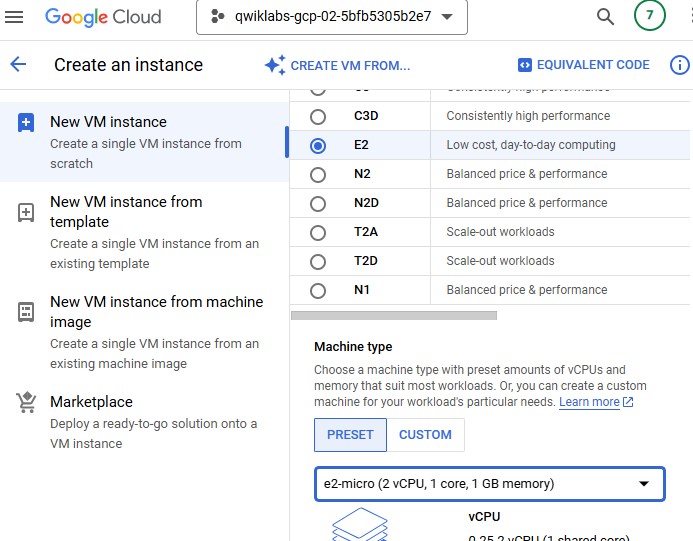
Click Advanced options.
Click Networking.
For Network interfaces, click the dropdown icon to edit.
Set the following values, leave all other values at their defaults:
| Property | Value (type value or select option as specified) | | --- | --- | | Network | my-internal-app | | Subnetwork | subnet-a | | Primary internal IPv4 address | Ephemeral (Custom) | | Custom ephemeral IP address | 10.10.20.50 |
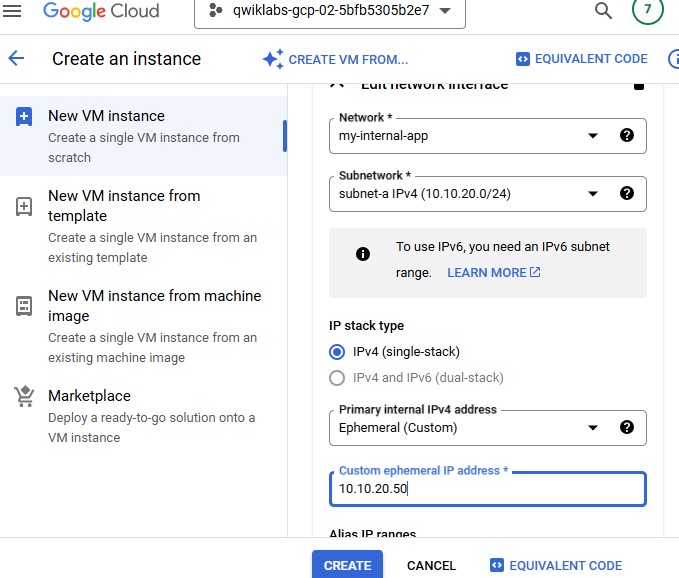
Click Done and then click Create.
For utility-vm, click SSH to launch a terminal and connect.
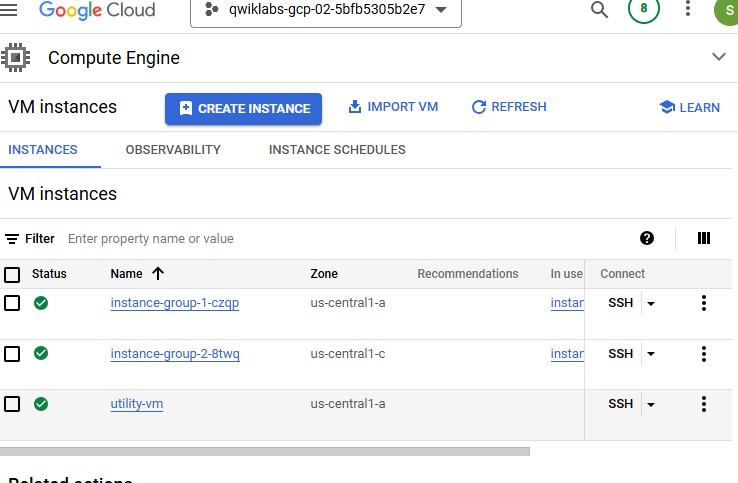
To verify the welcome page for
instance-group-1-xxxx, run the following command:curl 10.10.20.2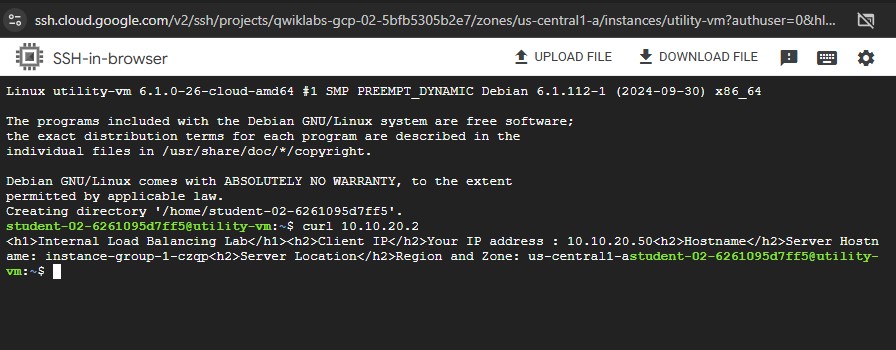
To verify the welcome page for
instance-group-2-xxxx, run the following command:curl 10.10.30.2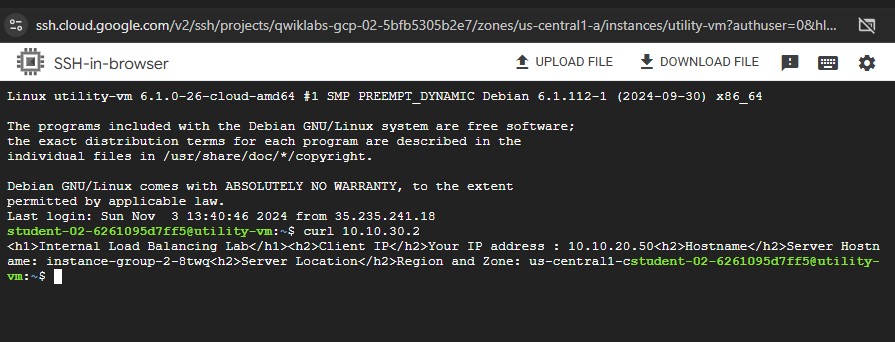
Close the SSH terminal to utility-vm:
exit
Task 3. Configure the Internal Load Balancer
Start the configuration
Search the Load balancing page. Click Create load balancer.
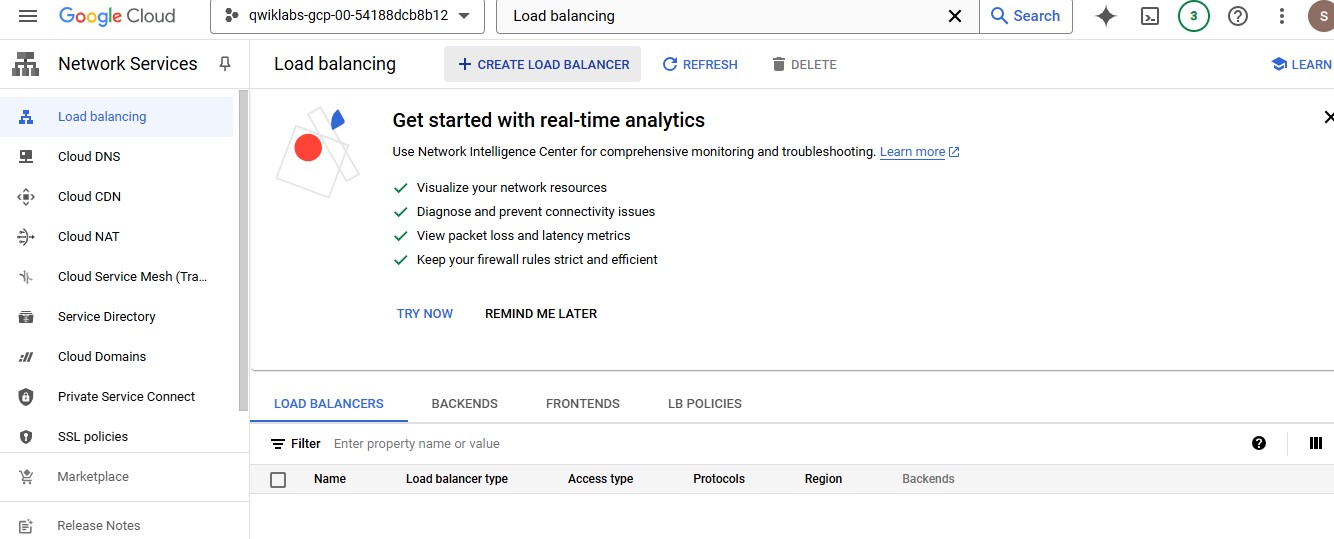
For Type of load balancer, select Network Load Balancer (TCP/UDP/SSL).
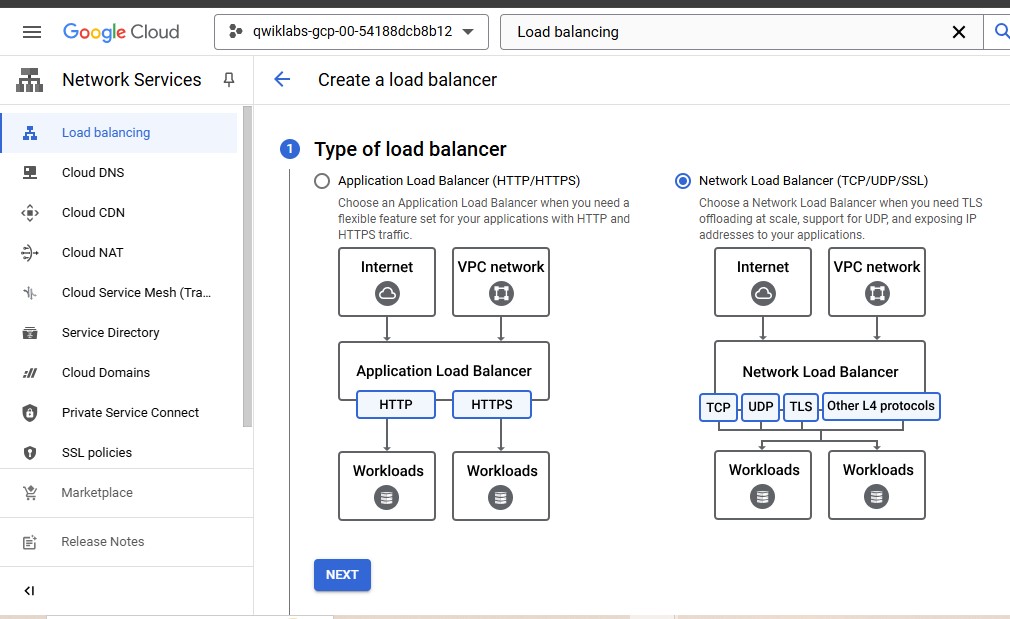
For Proxy or passthrough, select Passthrough load balancer.
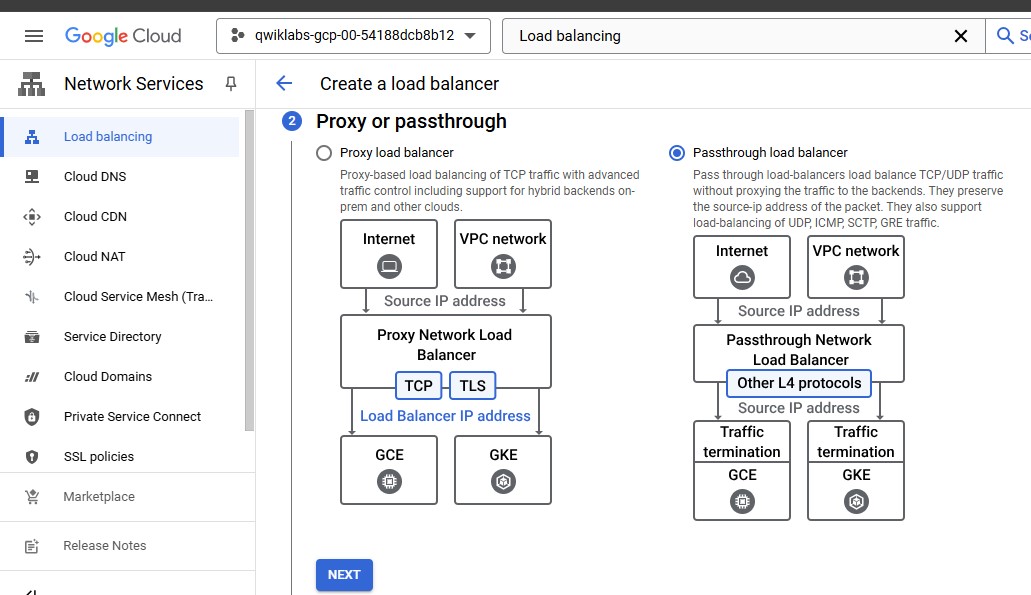
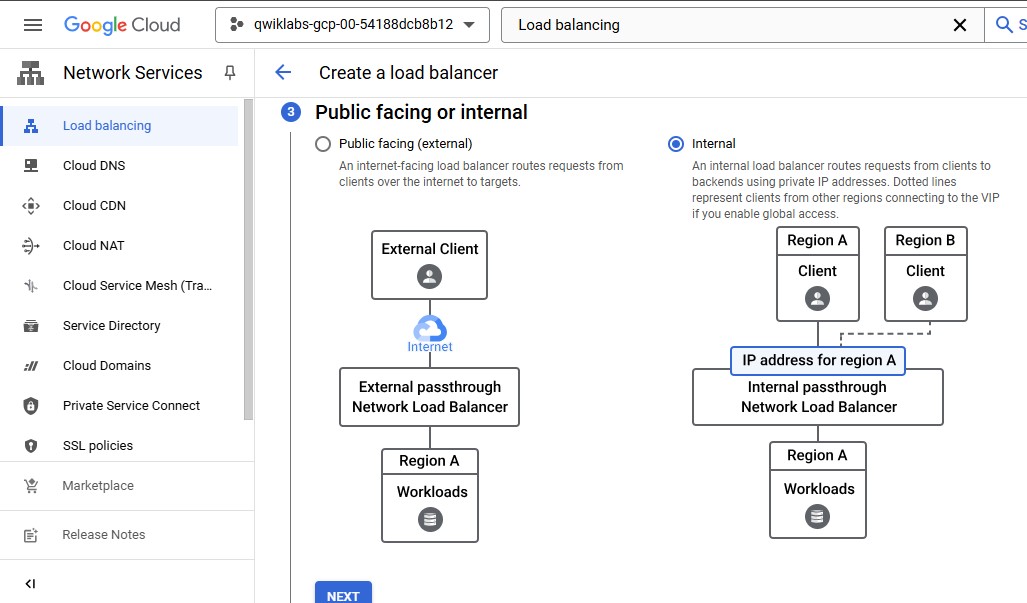
For Public facing or internal, select Internal.
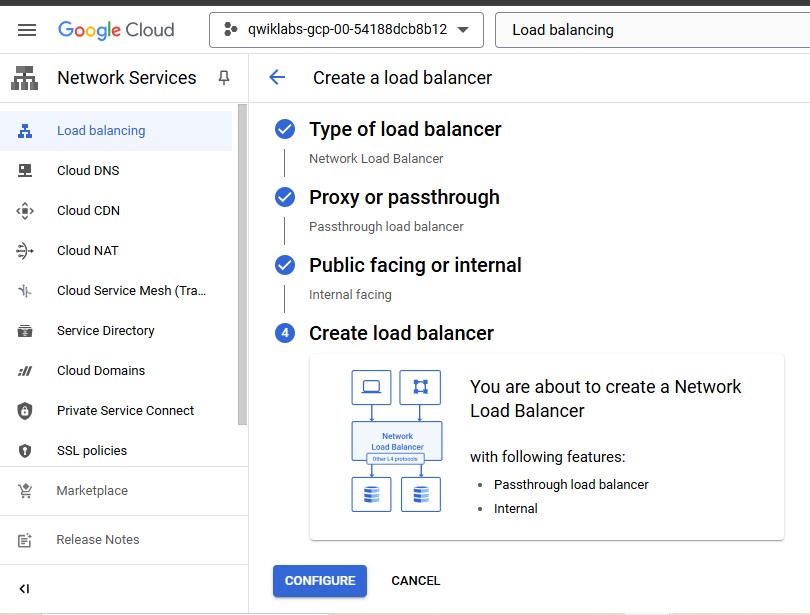
Click CONFIGURE.
For Name, type
my-ilb.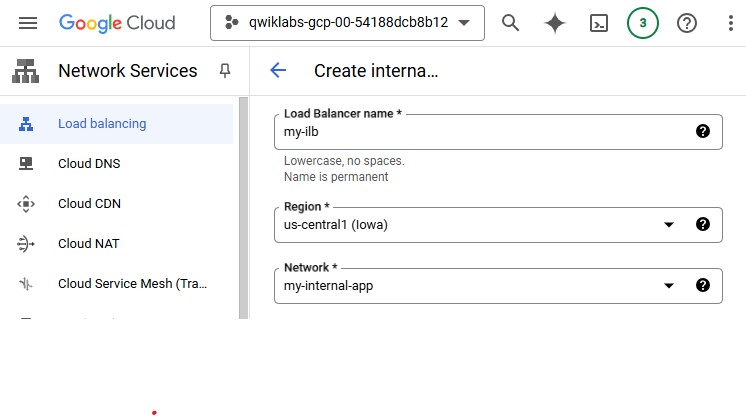
For Region, select
REGION.For Network, select my-internal-app.
Configure the regional backend service
Click on Backend configuration.
Set Instance group as instance-group-1.
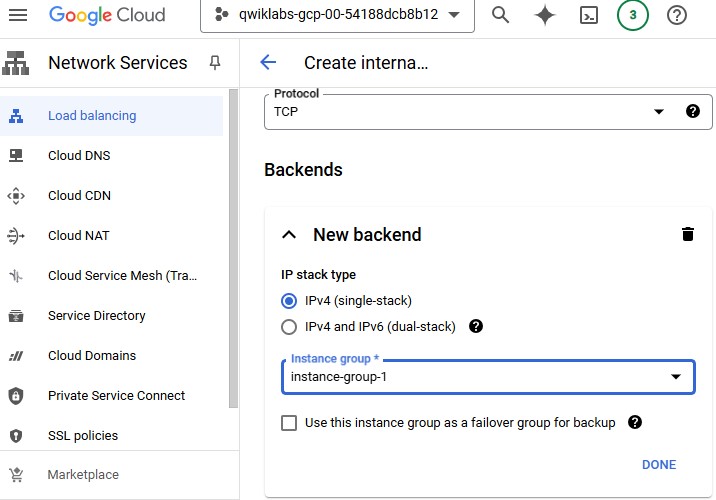
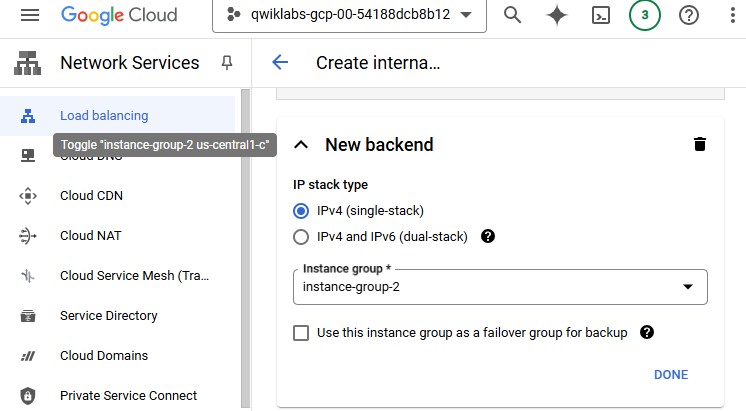
Click Add a backend.
For Instance group, select instance-group-2.
For Health Check, select Create a health check.
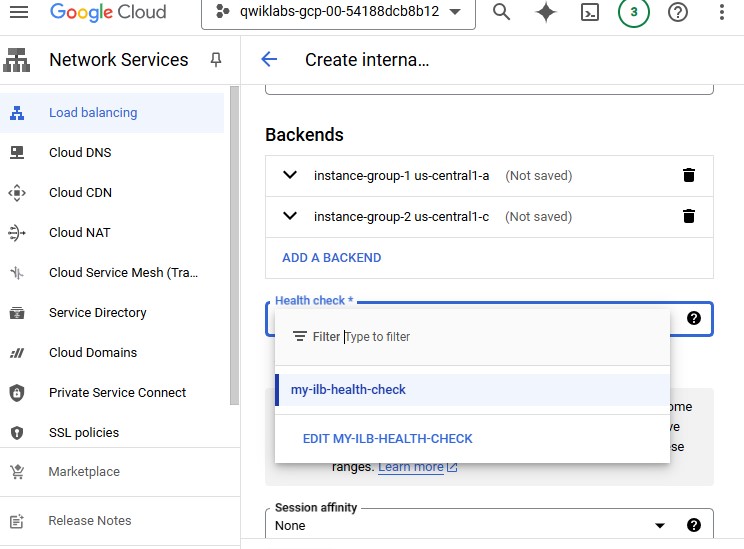
Add Name, Protocol and Port.
Click Save.
Configure the frontend
Click on Frontend configuration.
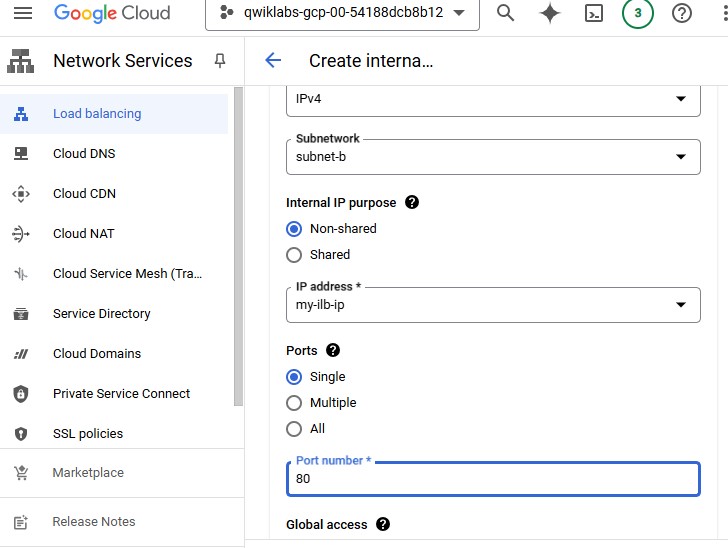
Add Subnetwork and Internal IP.
Specify Name, Static IP address and Custom IP address.
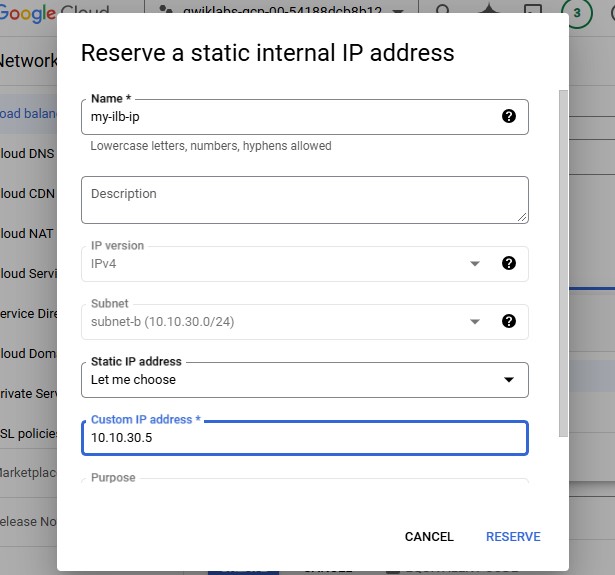
Click Reserve.
In Port number, type
80.
Click Done.
Review and create the Internal Load Balancer
Click on Review and finalize.
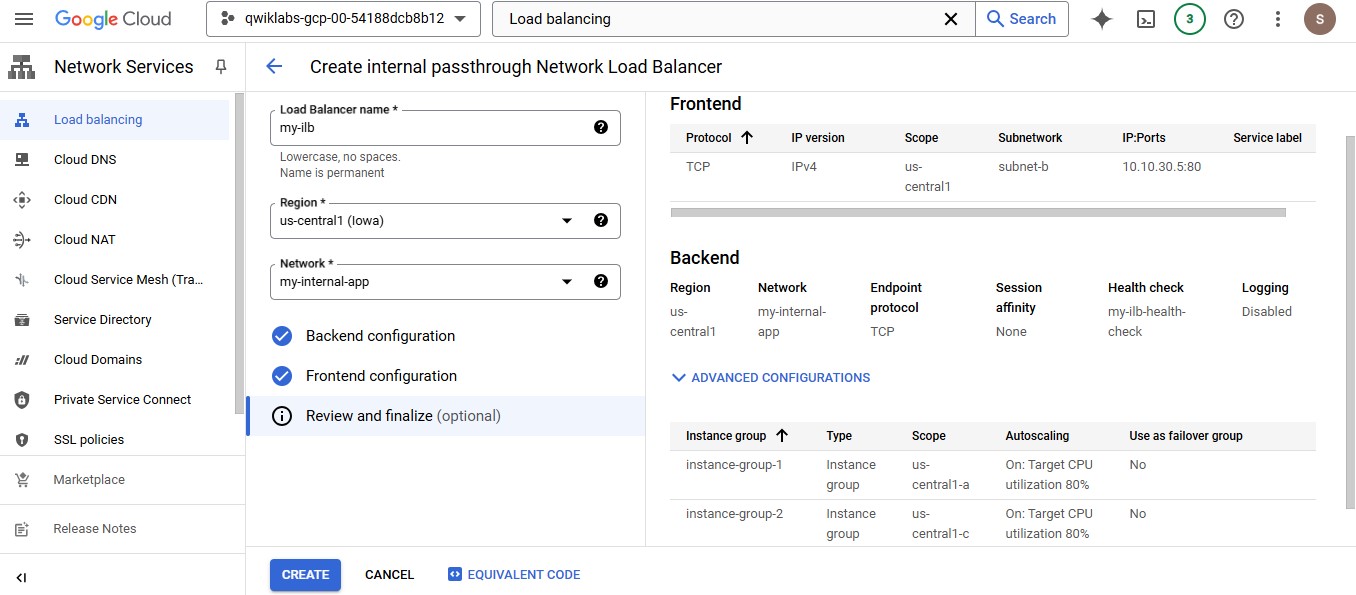
Review the Backend and Frontend.
Click on Create.
Task 4. Test the Internal Load Balancer
Verify that the my-ilb IP address forwards traffic to instance-group-1 and instance-group-2.
Access the Internal Load Balancer
In the Cloud Console, navigate to Navigation menu > Compute Engine > VM instances.
For utility-vm, click SSH to launch a terminal and connect.

To verify that the Internal Load Balancer forwards traffic, run the following command:
curl 10.10.30.5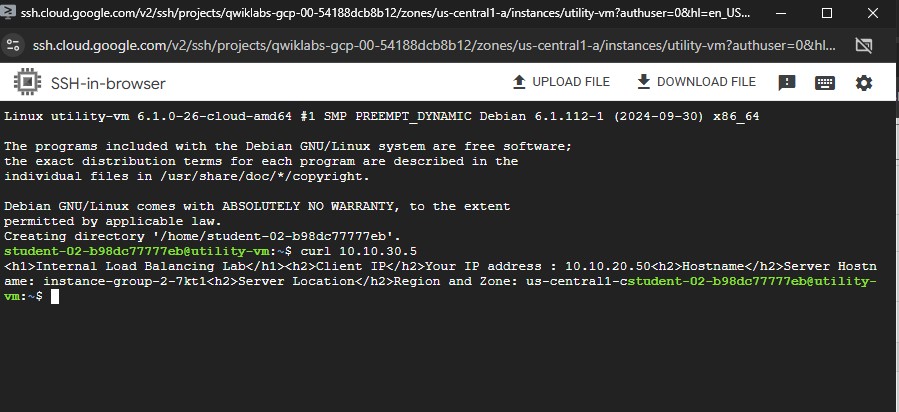
Note: As expected, traffic is forwarded from the Internal Load Balancer (10.10.30.5) to the backend.
Run the same command a couple more times.
In the output, you should be able to see responses from instance-group-1 in us-central1-a and instance-group-2 in the different zone of same region.
Subscribe to my newsletter
Read articles from Hridhi Kumari directly inside your inbox. Subscribe to the newsletter, and don't miss out.
Written by
