Feature Engineering with SageMaker Processing
 Anshul Garg
Introduction
In machine learning, pre-processing large datasets efficiently is a critical task. AWS SageMaker Processing offers a scalable, manageable way to run pre-processing, post-processing, and model evaluation on powerful managed clusters, freeing up resources on your notebook instance.
SageMaker Processing is often used by data scientists and ML engineers who want to run Python scripts or custom containers for processing large datasets. It utilizes Amazon SageMaker's Python SDK to define and execute a processing job, leveraging SageMaker's pre-built containers or custom containers to meet specific processing needs.
Why Use SageMaker Processing?
SageMaker Processing can handle large-scale processing tasks on clusters independent of the notebook instance, allowing:
Scalability: Process terabytes of data in a managed, scalable environment.
Flexibility: Run custom processing scripts within SageMaker’s environment, with control over the instance type and number of instances.
Efficiency: Keep the notebook instance running on a smaller, less expensive configuration while utilizing powerful SageMaker resources for processing.
Hands-On Guide: Feature Engineering with SageMaker Processing
We’re running the code below in a Jupyter Notebook created in SageMaker Studio. You can skip these steps and use our Jupyter Notebook directly from here if you prefer.
Load the data to S3 bucket. Ensure that the
bank-additional-full.csvfile is uploaded using the Jupyter Notebook upload feature.# Upload to S3 Bucket from sagemaker import Session import sagemaker bucket=sagemaker.Session().default_bucket() prefix = 'mlops/sagemaker-processing-activity' sess = Session() input_source = sess.upload_data('./bank-additional-full.csv', bucket=bucket, key_prefix=f'{prefix}/input_data') input_sourceDefine the IAM Role.
 # Define IAM role
 import boto3
 import re
 from sagemaker import get_execution_role

 role = get_execution_role()
Run the Processing Job
We'll use a custom Python script for feature engineering, which will:Load data from an S3 bucket.
Perform necessary transformations.
Save the processed data back to the S3 bucket.
We’ll use a pre-built Scikit-learn container in this example, which includes essential libraries for data manipulation.
    # Fetch Preprocessing Script
    !wget --no-check-certificate https://raw.githubusercontent.com/garganshulgarg/learn-mlops-with-sagemaker/refs/heads/main/applications/feature-engineering/feature-engg-script.py

    train_path = f"s3://{bucket}/{prefix}/train"
    validation_path = f"s3://{bucket}/{prefix}/validation"
    test_path = f"s3://{bucket}/{prefix}/test"
    from sagemaker.sklearn.processing import SKLearnProcessor
    from sagemaker.processing import ProcessingInput, ProcessingOutput
    from sagemaker import get_execution_role


    sklearn_processor = SKLearnProcessor(
        framework_version="0.23-1",
        role=get_execution_role(),
        instance_type="ml.m5.large",
        instance_count=1,
        base_job_name='mlops-sklearnprocessing'
    )

    sklearn_processor.run(
        code='feature-engg-script.py',
        # arguments = ['arg1', 'arg2'],
        inputs=[
            ProcessingInput(
                source=input_source,
                destination="/opt/ml/processing/input",
                s3_input_mode="File",
                s3_data_distribution_type="ShardedByS3Key"
            )
        ],
        outputs=[
            ProcessingOutput(
                output_name="train_data",
                source="/opt/ml/processing/output/train",
                destination=train_path,
            ),
            ProcessingOutput(output_name="validation_data", source="/opt/ml/processing/output/validation", destination=validation_path),
            ProcessingOutput(output_name="test_data", source="/opt/ml/processing/output/test", destination=test_path),
        ]
    )
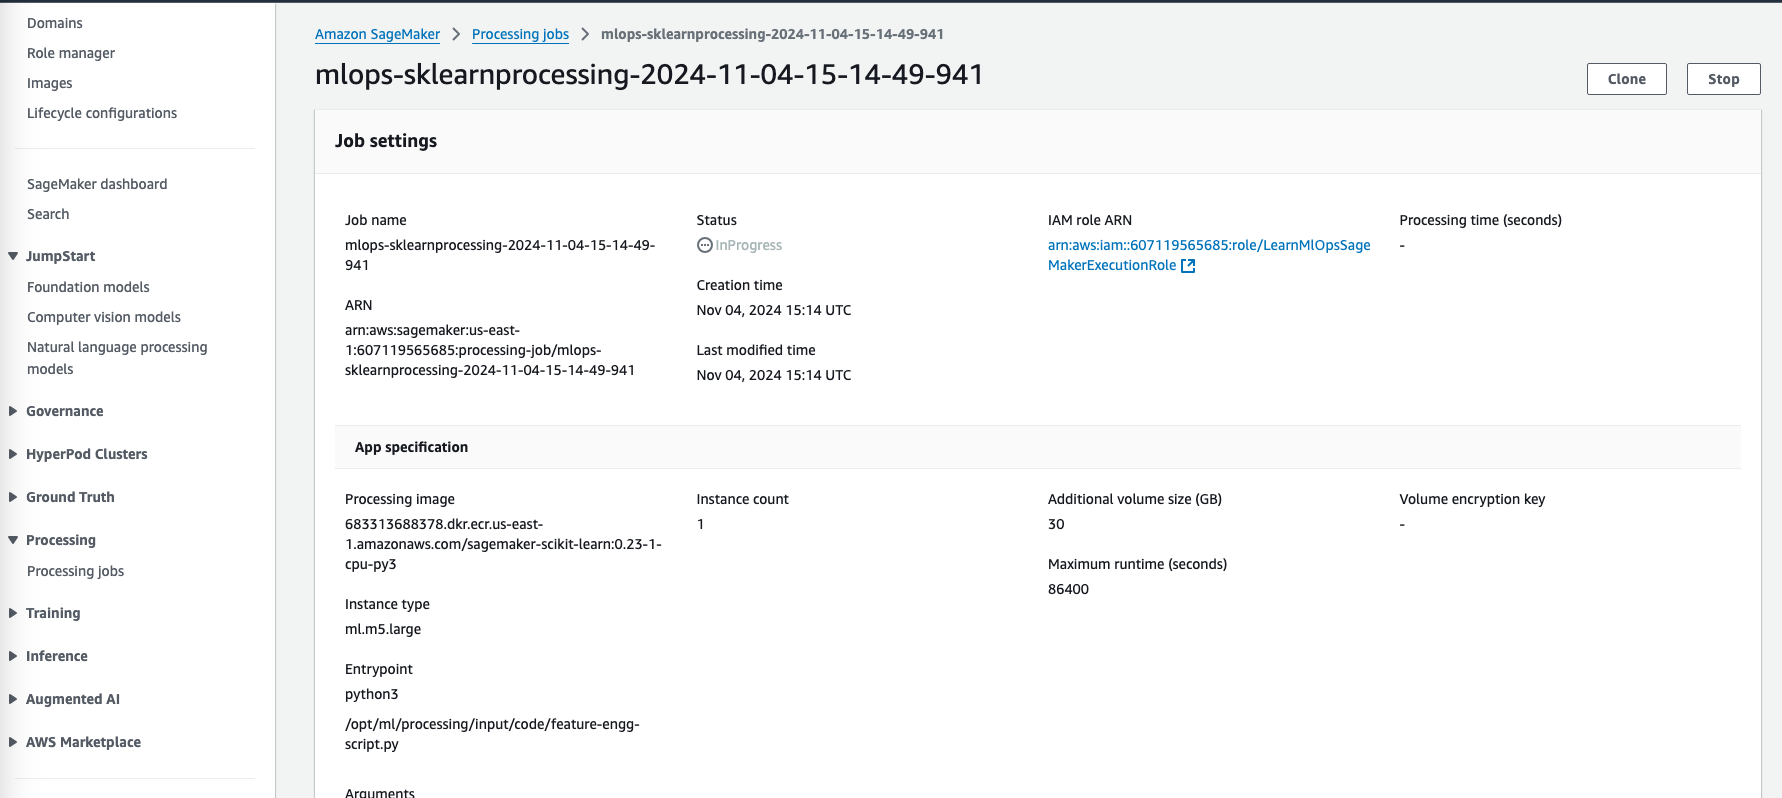
Monitor the Job
Track the job status through the SageMaker Processing Jobs console. Once completed, verify the output data in the specified S3 paths.

Validate the processed data
 !aws s3 ls $train_path/
 !aws s3 ls $test_path/
Conclusion
Using SageMaker Processing with custom Python scripts for feature engineering allows flexibility and scalability in pre-processing datasets for machine learning tasks. By separating the processing workload from the notebook environment, we can use powerful instances only when needed, reducing costs and enhancing performance.
You can find the complete code and Jupyter notebook for this example on my GitHub repository.
This post includes an overview and hands-on guide to feature engineering with SageMaker Processing.
Subscribe to my newsletter
Read articles from Anshul Garg directly inside your inbox. Subscribe to the newsletter, and don't miss out.
Written by
