Cloud DevOps - Deploy an App with CodeDeploy
 yyounos shaik
DIFFICULTY : MID-LEVEL TIME : 120 mins COST : 0$
WHAT YOU’LL NEED:
An AWS account - Create one here!
part-1 : Building an WebApp and IDE in AWS.
Part-4 : Pakcage an App with AWS CodeBuild.
AWS SERVICES :
CodeDeploy
CloudFormation
Summary
You've come this far and are almost ready to create a full-fledged CI/CD Pipeline, so give yourself a pat on the back!
This project will continue with the steps related to this part only because the blog is getting lengthy and requires focus. If you started from the beginning of the series, follow the previous parts to continue. So, let's move on with this part of the series. Let's go!
In this part of the series let’s get ready to :
Create an EC2 instance and VPC with AWS CloudFormation.
Create deployment scripts in your project to automate deployment commands.
Direct CodeDeploy with a new appspec.yml file.
Build and deploy your CodeDeploy application!
Let’s Get Started…
Step 1 : Set up your EC2 Instance
Let's use AWS CloudFormation to provision a VPC and an EC2 instance to deploy our application!
Before that, let’s ask ourselves why are we creating an EC2 instance and VPC?
This EC2 instance will be used to host our java application. Its more like a computer in the cloud that will keep our app running and available for users to access.
The VPC (virtual private cloud) is another AWS service that helps us control who on the internet or other networks can get access to our web app is discoverable on the internet.
Like didn’t we create an EC2 instance when we started this project to set up the web application?
Yes, we did! We set up an EC2 instance to use as a development environment for creating and editing code for our web app.
This new instance is specially made for running our application in a live production environment, which is what users will see. By having a separate EC2 instance for deploying our application, we can safely test code changes or new features without affecting the live production environment that users interact with.
So, do we really need a VPC for a web app? We didn't need one to host a static website, right?
- Well, web apps need a VPC because they have more complex needs, like connecting with multiple resources that talk to each other, such as databases and EC2 instances. A VPC helps keep everything secure and controls network traffic. But when it comes to hosting static websites on S3, a VPC isn't really needed. These sites are just collections of files like HTML and JavaScript, and S3 takes care of storing and serving these files directly to the internet.
Search for CloudFormation in your AWS console.

What is CloudFormation?
- AWS CloudFormation is a handy service that lets you create or update resources in your account using templates you've written. Instead of clicking through your AWS Management Console to set up each resource one by one, CloudFormation allows you to list all the resources you need for your application, like EC2 instances, databases, and more, in a simple text file. Once you give this file to CloudFormation, it will quickly set up everything you've listed in just a few seconds!
In the CloudFormation Console, Click on Create Stack on the top right corner.
What is a CloudFormation Stack?
Just like a stack of papers on your table, a CloudFormation stack is a group of resources organized together. Every time you provide a template to CloudFormation, it creates and groups the resources into a stack. Stacks are very useful because when you update or delete a stack, it automatically updates or deletes all the resources in that stack. This means you don't have to visit each resource's console page to delete them manually, saving you a lot of time and effort.
Select with new resources (standard).
Select upload a template file.
Copy the script into a file below :
  ---
  AWSTemplateFormatVersion: 2010-09-09
  Parameters:
    AmazonLinuxAMIID:
      Type: AWS::SSM::Parameter::Value<AWS::EC2::Image::Id>
      Default: /aws/service/ami-amazon-linux-latest/amzn2-ami-hvm-x86_64-gp2
    MyIP:
      Type: String
      Description: My IP address e.g. 1.2.3.4/32 for Security Group HTTP access rule. Get your IP from http://checkip.amazonaws.com/.
      AllowedPattern: (\d{1,3})\.(\d{1,3})\.(\d{1,3})\.(\d{1,3})/32
      ConstraintDescription: must be a valid IP address of the form x.x.x.x/32

  Resources:
    VPC:
      Type: AWS::EC2::VPC
      Properties:
        CidrBlock: 10.11.0.0/16
        EnableDnsHostnames: true
        EnableDnsSupport: true
        Tags:
          - Key: 'Name'
            Value: !Join ['', [!Ref 'AWS::StackName', '::VPC'] ]

    InternetGateway:
      Type: AWS::EC2::InternetGateway
      Properties:
        Tags:
          - Key: 'Name'
            Value: !Join ['', [!Ref 'AWS::StackName', '::InternetGateway'] ]

    VPCGatewayAttachment:
      Type: AWS::EC2::VPCGatewayAttachment
      Properties:
        VpcId: !Ref VPC
        InternetGatewayId: !Ref InternetGateway

    PublicSubnetA:
      Type: AWS::EC2::Subnet
      Properties:
        AvailabilityZone: !Select
          - 0
          - Fn::GetAZs: !Ref 'AWS::Region'
        VpcId: !Ref VPC
        CidrBlock: 10.11.0.0/20
        MapPublicIpOnLaunch: true
        Tags:
          - Key: 'Name'
            Value: !Join ['', [!Ref 'AWS::StackName', '::PublicSubnetA'] ]

    PublicRouteTable:
      Type: AWS::EC2::RouteTable
      Properties:
        VpcId: !Ref VPC
        Tags:
          - Key: 'Name'
            Value: !Join ['', [!Ref 'AWS::StackName', '::PublicRouteTable'] ]

    PublicInternetRoute:
      Type: AWS::EC2::Route
      DependsOn: VPCGatewayAttachment
      Properties:
        DestinationCidrBlock: 0.0.0.0/0
        GatewayId: !Ref InternetGateway
        RouteTableId: !Ref PublicRouteTable

    PublicSubnetARouteTableAssociation:
      Type: AWS::EC2::SubnetRouteTableAssociation
      Properties:
        RouteTableId: !Ref PublicRouteTable
        SubnetId: !Ref PublicSubnetA

    PublicSecurityGroup:
      Type: AWS::EC2::SecurityGroup
      Properties:
        VpcId:
          Ref: VPC
        GroupDescription: Access to our Web server
        SecurityGroupIngress:
        - Description: Enable HTTP access via port 80 IPv4
          IpProtocol: tcp
          FromPort: '80'
          ToPort: '80'
          CidrIp: !Ref MyIP
        SecurityGroupEgress:
        - Description: Allow all traffic egress
          IpProtocol: -1
          CidrIp: 0.0.0.0/0
        Tags:
          - Key: 'Name'
            Value: !Join ['', [!Ref 'AWS::StackName', '::PublicSecurityGroup'] ]

    ServerRole:
      Type: AWS::IAM::Role
      Properties:
        AssumeRolePolicyDocument:
          Version: "2012-10-17"
          Statement:
            -
              Effect: "Allow"
              Principal:
                Service:
                  - "ec2.amazonaws.com"
              Action:
                - "sts:AssumeRole"
        Path: "/"
        ManagedPolicyArns:
          - "arn:aws:iam::aws:policy/AmazonSSMManagedInstanceCore"
          - "arn:aws:iam::aws:policy/AmazonS3ReadOnlyAccess"

    DeployRoleProfile:
      Type: AWS::IAM::InstanceProfile
      Properties:
        Path: "/"
        Roles:
          -
            Ref: ServerRole

    WebServer:
      Type: AWS::EC2::Instance
      Properties:
        ImageId: !Ref AmazonLinuxAMIID
        InstanceType: t2.micro
        IamInstanceProfile: !Ref DeployRoleProfile
        NetworkInterfaces:
          - AssociatePublicIpAddress: true
            DeviceIndex: 0
            GroupSet:
              - Ref: PublicSecurityGroup
            SubnetId:
              Ref: PublicSubnetA
        Tags:
          - Key: 'Name'
            Value: !Join ['', [!Ref 'AWS::StackName', '::WebServer'] ]
          - Key: 'role'
            Value: 'webserver'

  Outputs:
    URL:
      Value:
        Fn::Join:
        - ''
        - - http://
          - Fn::GetAtt:
            - WebServer
            - PublicIp
      Description: NextWork web server
Save the file as webapp-cloudformation.yml file into your pc and not in your EC2 instance.
Select choose file and click on the yml file which you created in your pc.
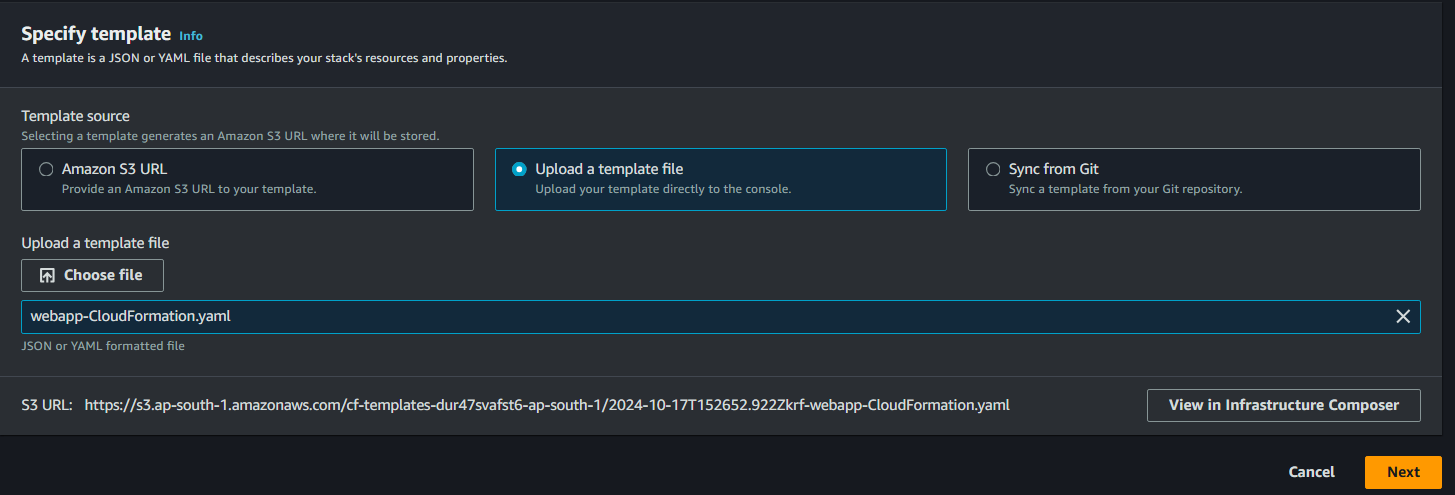
Click Next.
name the stack YournameEC2VPCStack.
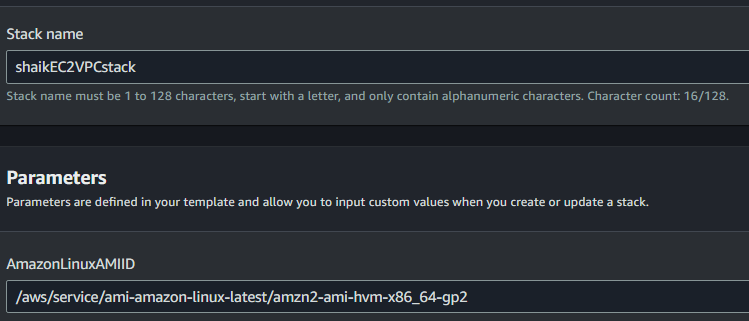
Under Parameters, we need to provide our IP address to enter into the MYIP filed! Let’s head to : https://checkip.amazonaws.com/

Copy your IP address and paste it into MyOp field. Add “/32“ to the end.
Why did we need to add /32?
- /32 is a way to specify that only your specific IP address your specific computer can access the resource you are configuring .
Click through next, accepting all the remaining defaults.
Acknowledge the IAM resources checkbox at the bottom of the last page.
Click Create stack.
Wait for the stack to complete. This should take no longer than 5 minutes. Keep clicking the refresh button to see live updates in the Events tab!
Wait until the Events page says Create_Complete.

Once you see Create_Complete, search for EC2 from your AWS Console's search bar.
Click on Instances (running).
You should see once instance named YournameEC2VPCStack::WebServer.
Success! Your EC2 instance has been successfully created with AWS CloudFormation.

Step 2 : Create scripts to run the application
Head to the EC2 instance connected to your VS code.
In the left hand file explorer, right click on yourname-web-project and select New Folder.
Name your folder scripts.
What are scripts? and What are sripts used for?
Scripts are like little helpers that automate tasks on your computer's terminal. Imagine you have a bunch of commands to run, like installing software or starting a program. Instead of typing each command by hand every time in your EC2 terminal, you can write them all down in a script. Then, when you run the script, it takes care of all those steps for you in order. This makes repetitive tasks quicker and easier!
So, we’re going to set up three different scripts which we'll write up in a minute. CodeDeploy will run these scripts to set up and deploy your web app application on the target EC2 instance created using cloudformation.
What is a script folder used for?
- A script folder is a dedicated space in your project where you store all the scripts needed for various tasks. By organizing all three of your scripts on one place, CodeDeploy can easily find and run them to set up, start and stop web app on our second EC2 instance.
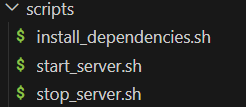
Right click on the scripts folder and create a file install_dependencies.sh.

Add the following lines to install_dependencies.sh:
  #!/bin/bash
  sudo yum install tomcat -y
  sudo yum -y install httpd
  sudo cat << EOF > /etc/httpd/conf.d/tomcat_manager.conf
  <VirtualHost *:80>
    ServerAdmin root@localhost
    ServerName app.nextwork.com
    DefaultType text/html
    ProxyRequests off
    ProxyPreserveHost On
    ProxyPass / http://localhost:8080/yourname-web-project/
    ProxyPassReverse / http://localhost:8080/yourname-web-project/
  </VirtualHost>
  EOF
Why are we creating install_dependencies.sh?
This script installs all the necessary software that our application needs to run. In this case, it sets up Apache Tomcat and HTTPD on our EC2 instance. By automating this setup, we can ensure that every time we deploy our application. it has a consistent and ready environment to run in.
well you might be familiar with dependencies right? we have used dependencies to store in CodeArtifact for our application code to function correctly! well the system dependencies are slighly different, they are software that need to be setup on the web servers ( tomcat and HTTPD).
If theses web server dependencies are not installed, your web app might not start at all or it could miss essential functions.
What are Apache Tomcat and HTTPD?
Apache Tomcat is a web server that specifically handles java applications.
HTTPD (Technically Apache HTTP Server) is more versatile web server that can serve static content and dynamic content.
We need both in our web app because tomcat will handle the java parts of our application, while HTTPD can manage other web contents and functionalities. This combinaton ensures that all aspects of our web app work.
Create a start_server.sh file in the scripts folder and add the following lines:
  #!/bin/bash
  sudo systemctl start tomcat.service
  sudo systemctl enable tomcat.service
  sudo systemctl start httpd.service
  sudo systemctl enable httpd.service
The start_server.sh script is responsible for starting Tomcat and HTTPD services on our EC2 instance. This script will make sure that all the necessary services are automatically set up and running so our web app can function properly everytime.
Create a stop_server.sh file inthe scripts folder and add the following likes :
  #!/bin/bash
  isExistApp="$(pgrep httpd)"
  if [[ -n $isExistApp ]]; then
  sudo systemctl stop httpd.service
  fi
  isExistApp="$(pgrep tomcat)"
  if [[ -n $isExistApp ]]; then
  sudo systemctl stop tomcat.service
  fi
The stop_server.sh is used to stop the Tomcat and HTTPD services on our EC2 Instance
Check if the sripts are in a folder?
Now Let’s create appspec.yml.
What is appspec.yml and how its different from buildspec.yml?
The appspec.yml file directs CodeDeploy on the steps and files needed for a deployment. It tells CodeDeploy what to do at different stages of the deployment process, such as which scripts to run and where to place files.
buildspec.yml is specific to AWS CodeBuild and defines the build commands and settings for your application. It gives instructions on how the web app should be built, tested, and packaged, which all happen before deployment.
Right click on the yourname-web-project folder and select New File.
Create a new file called appspec.yml. Add the following lines to your new file:
  version: 0.0
  os: linux
  files:
    - source: /target/yourname-web-project.war
      destination: /usr/share/tomcat/webapps/
  hooks:
    BeforeInstall:
      - location: scripts/install_dependencies.sh
        timeout: 300
        runas: root
    ApplicationStart:
      - location: scripts/start_server.sh
        timeout: 300
        runas: root
    ApplicationStop:
      - location: scripts/stop_server.sh
        timeout: 300
        runas: root
Let’s modify the artifacts section in buildspec.yml. Double click on buildpsec.yml in your left hand navigation bar in EC2 .
Add these two lines to your buildspec.yml file, This is were you should place them :
  artifacts: files:
   - target/yourname-web-project.war
   - appspec.yml
   - scripts/**/* discard-paths: no
We modified the artifacts section in the buildspec.yml to add the newly added scripts folder and appspec.yml file to the WAR file that codebuild will create in the build process. This will make sure that CodeDeploy has all the necessary file to successfully deploy our application.
Now commit all the changes ro CodeCommit by running these commands in the EC2 terminal :
  git add .
  git commit -m "adding files to the repository"
  git push -u origin main
Go tho CodeBuild Console and click on start build.
Huh? Why are we running our build again?
- Running the build process once more ensures that all the new files and changes are in the zip file. - otherwise, our newly created scripts files and appspec.yml are not added to the WAR file CodeBuild passes to CodeDeploy to run. Now CodeDeploy has access to everything it needs for a successful deployment.
Step 3 : Create the CodeDeploy service IAM role
Log into the AWS Console and open the IAM console.
Choose Roles.
Click Create role.
Why are we creating a service role?
We’re creating a service role so that CodeDeploy can deploy to an EC2 instance! Right now, CodeDeploy does not have access to EC2 so we’re going to grant access using the AWS managed AWSCodeDeployRole Policy.
Choose CodeDeploy as the service.
Select CodeDeploy for the use case.
Click Next.
You'll notice the AWSCodeDeployRole default policy is suggested already - nice! That's all we need.
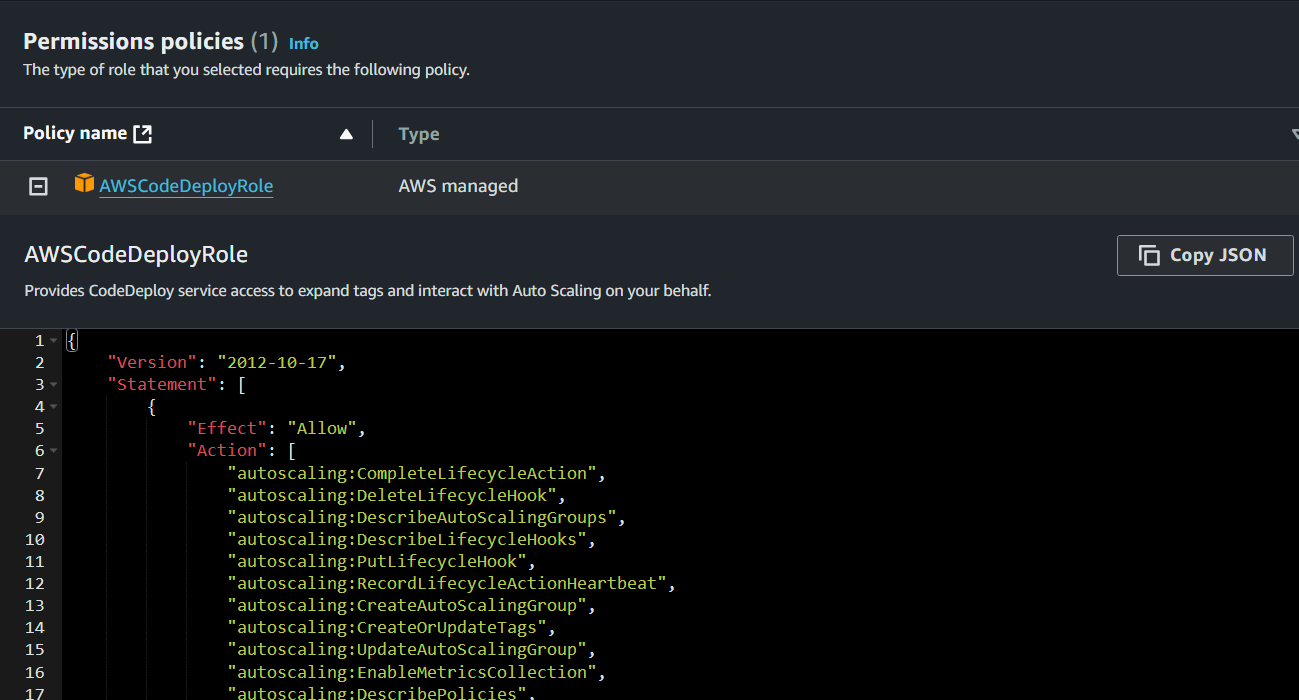
Click on the plus button to take a look at the permissions this grants. There are many actions that we're allowing in this default policy! Phew, saves us the time from defining these ourselves.
Click Next and name the role: CodeDeployRole.
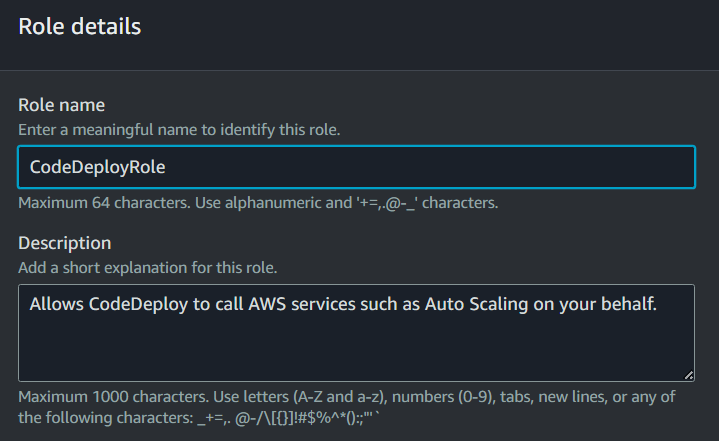
Click Create role to finish.
Step 4 : Create a CodeDeploy application
What is CodeDeploy application?
- A CodeDeploy application works like a folder that holds all the settings it needs for a deployment. Think of this as setting up a template for deploying a web app, so you won't need to configure all the settings from scratch every time!
Head to your CodeDeploy console.
Click on Applications on the left-hand menu.
Select Create application.
Name the application yourname-web-deploy.
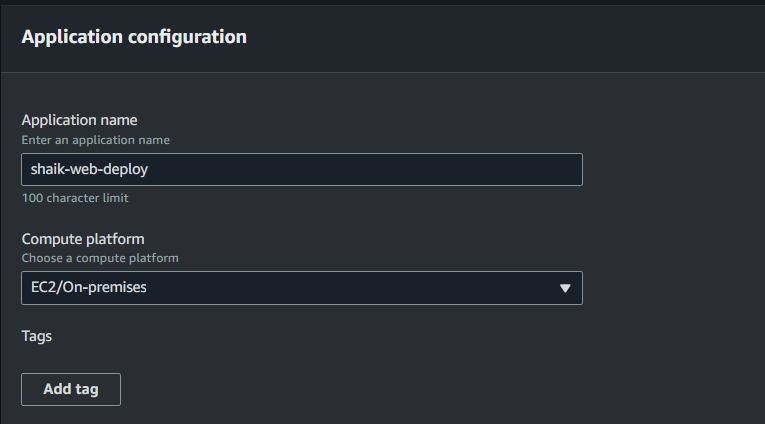
Select EC2/On-premises as the Compute platform.
Click Create application.
Step 5 : Create a deployment group
What is deployment group? Why are we creating one?
- You might remember that we previously said a CodeDeploy application is a like a template for your web app's deployment. If your CodeDeploy application is the main project folder for all the settings and configurations for deploying your software, think of the deployment group as the specific instructions for one particular deployment scenario. It defines which servers to use, how to deploy, and what settings to apply for that specific deployment.
Click into your new yourname-web-deploy application.
in ths deployment groups tab, click create deployment group.
Configure the following options:
Name: yourname-web-deploy-group.
Service role: arn:aws:iam:::role/NextWorkCodeDeployRole.
Deployment type: In-place
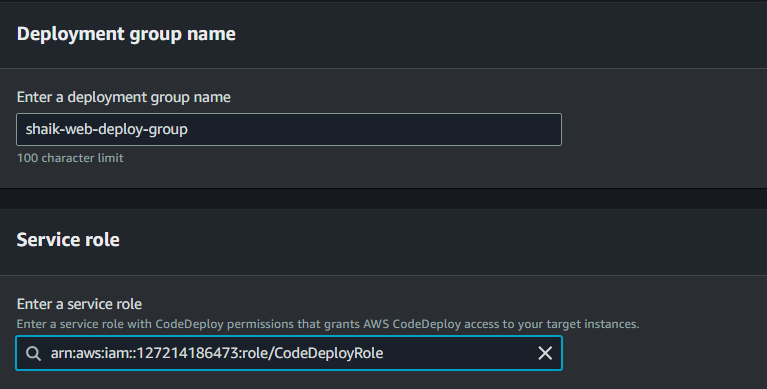
What is a service role?
- A service role is a tool from AWS IAM that will give CodeDeploy access permissions to use and manage different AWS resources during deployment. For example, CodeDeploy might need to access your EC2 instances, interact with S3 buckets to get your WAR file, or use CloudWatch to log the deployment process.
What is deployment type?
The deployment type is the mode that CodeDeploy will use to carry out your web app's deployment. In-place means the application will be updated on the existing EC2 instances.
Environment configuration: Amazon EC2 instances.
Tag group:
Key: role
Value: webserver
Install AWS CodeDeploy Agent: Now and schedule updates (14 days).
What is environment configuration?
- The environment configuration tells CodeDeploy what kind of servers you want to use for your application. In this Part its EC2 instances!
What is CodeDeploy Agent?
- The CodeDeploy Agent is like a helper installed on your servers (EC2 instances) that communicates with CodeDeploy to get the instructions for deploying your application. It ensures that the servers know what to do when a new version of your application needs to be deployed.
Deployment settings: CodeDeployDefault.AllAtOnce.
Load balancer: Uncheck Enable load balancing.
Click Create deployment group.
Step 6 : Create your deployment
After creating our deployment group, i.e. defining the resources that we want to deploy, we can now create a deployment!.
In your newly created yourname-web-deploy-group, click Create deployment.
For the Revision location, head back to your S3 console and click into your S3-build-artifacts-yourname bucket.
Click into your zip file, and copy its S3 URI.
Paste that S3 URI into the Revision location field.
Make sure .zip is still selected as the Revision file type.
What is a revision location? Why did we use our WAR/zip file? What is Target Instance?
- The revision location is the place where CodeDeploy looks to find your application's build artifacts, like a zip file or WAR file, stored in an S3 bucket. We're using the S3 bucket that's storing our WAR bucket so CodeDeploy knows where to find the latest version of our web app it's deploying to the target instances.
- A target instance is the specific server or machine where your application will be deployed.
Leave the other settings as default and click Create deployment.
The deployment will now begin. This should take around 30 seconds!
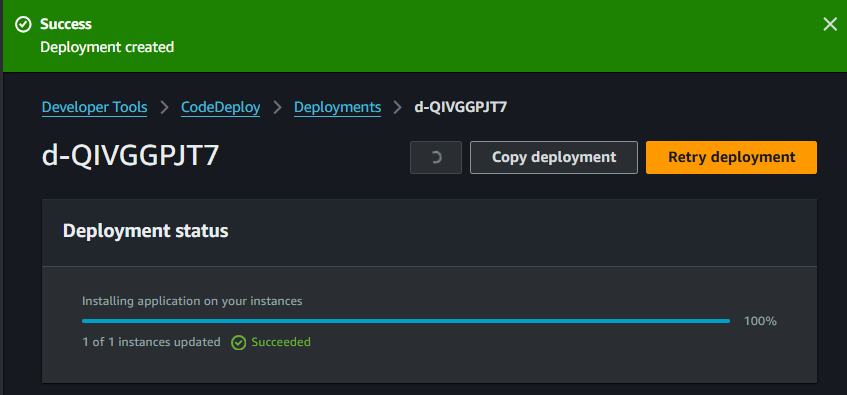
If you encounter an error while deploying, ensure that your S3 URL is entered correctly, as an incorrect URL might cause this error to appear.

Let's head back to your EC2 console. Select your WebServer EC2 instance, and click on open address.
When you click the open address link, a new tab will default to using https:// at the start of your link. Manually change that to http:// and try again.
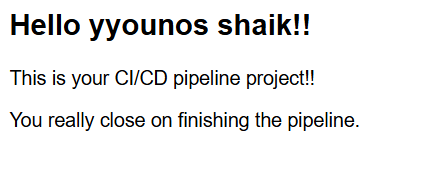
Seeing an error when opening the website?
Make sure you are accessing the address using http and not https and check if your own IP has not changed.
If your IP has changed. you’ll have to modift security group of the EC2 instance to allow from your new IP address. You can check your IP address again here: http://checkip.amazonaws.com/. If your IP has changed, you'll have to modify the Security Group of the EC2 instance to allow traffic from your new IP address.
Nice Work!!
You have just completed the project and set up your very own deployment with AWS CodeDeploy. High Five!!!
Well, let’s continue with this series in the next project, until then stay tuned
Subscribe to my newsletter
Read articles from yyounos shaik directly inside your inbox. Subscribe to the newsletter, and don't miss out.
Written by

yyounos shaik
yyounos shaik
An Aspring Cloud Engineer