Create and publish your Android Open-Source Library in Minutes
 Sagar Malhotra
Creating and publishing an Android Open-Source Library is much easier than you think. I am going to demonstrate a step-by-step guide to creating and publishing your first Android Jetpack Compose Library with Github and Jitpack.
Prerequisites:
Android Studio
An Idea for your Open-Source Library
A GitHub Account
Steps:
- Create a new library module:
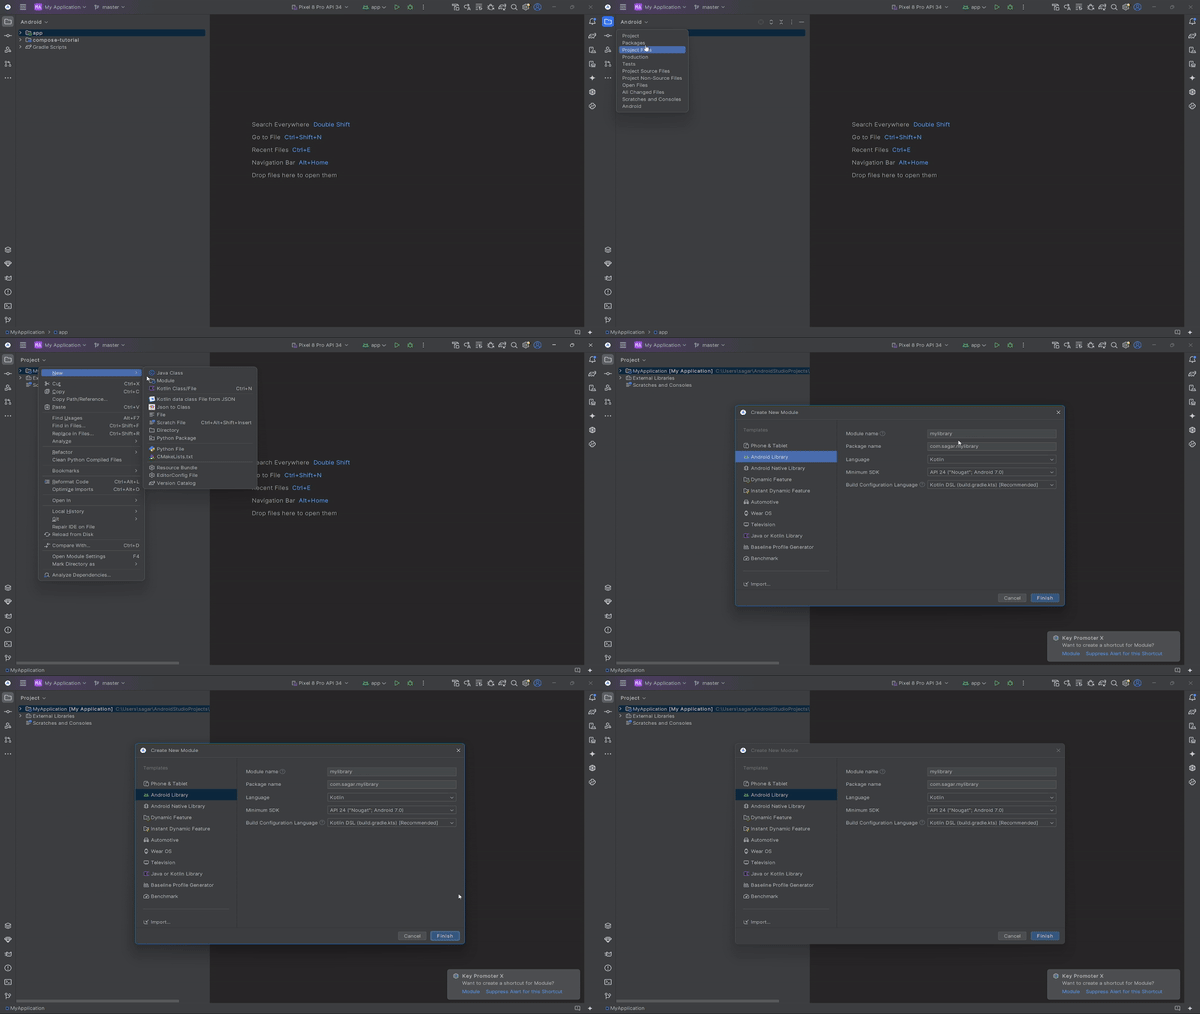
Either create a new Project OR use an existing project(not recommended btw).
Go to Project View from the Left Panel.
Right-Click and Create a new Android Library module.

2. Write your library code:
Make sure to remove any unnecessary dependencies from your library module build.gradle file and add only what you need.
In your library module, create composable functions or classes that you want to include in your library.
3. Configure your library module:
Make sure the
com.android.libraryplugin is there in your library module'sbuild.gradlefile.Configure the publishing settings by adding the
maven-publishplugin.
// build.gradle of library
plugins {
    alias(libs.plugins.android.library)
    alias(libs.plugins.kotlin.android)
    id("maven-publish")
}
4. Optionally configure the Library publishing config:
// At the End fo build.gradle in library
publishing {
    publications {
        register<MavenPublication>("release") {
            afterEvaluate {
                from(components["release"])
                groupId = "com.github.sagar"
                artifactId = "neopop-compose"
                version = "1.0.0"
            }
        }
    }
}
5. Configure the Jitack Deployment:
- Go to Project’s top level and add a “jitpack.yml” file that looks like this:
jdk:
  - openjdk17 // Your JDK version
before_install:
  - sdk install java 17.0.7-open // Your JDK version
  - sdk use java 17.0.7-open // Your JDK version
The above step is important for a successful build in Jitpack.
6. Share your Project on Github:
I am expecting you are already familiar with this step, either use CLI or Android studio for pushing your project to your Github.
Make sure you are only adding the required files and not unwanted app module or Test files.
7. Create a Github Release:
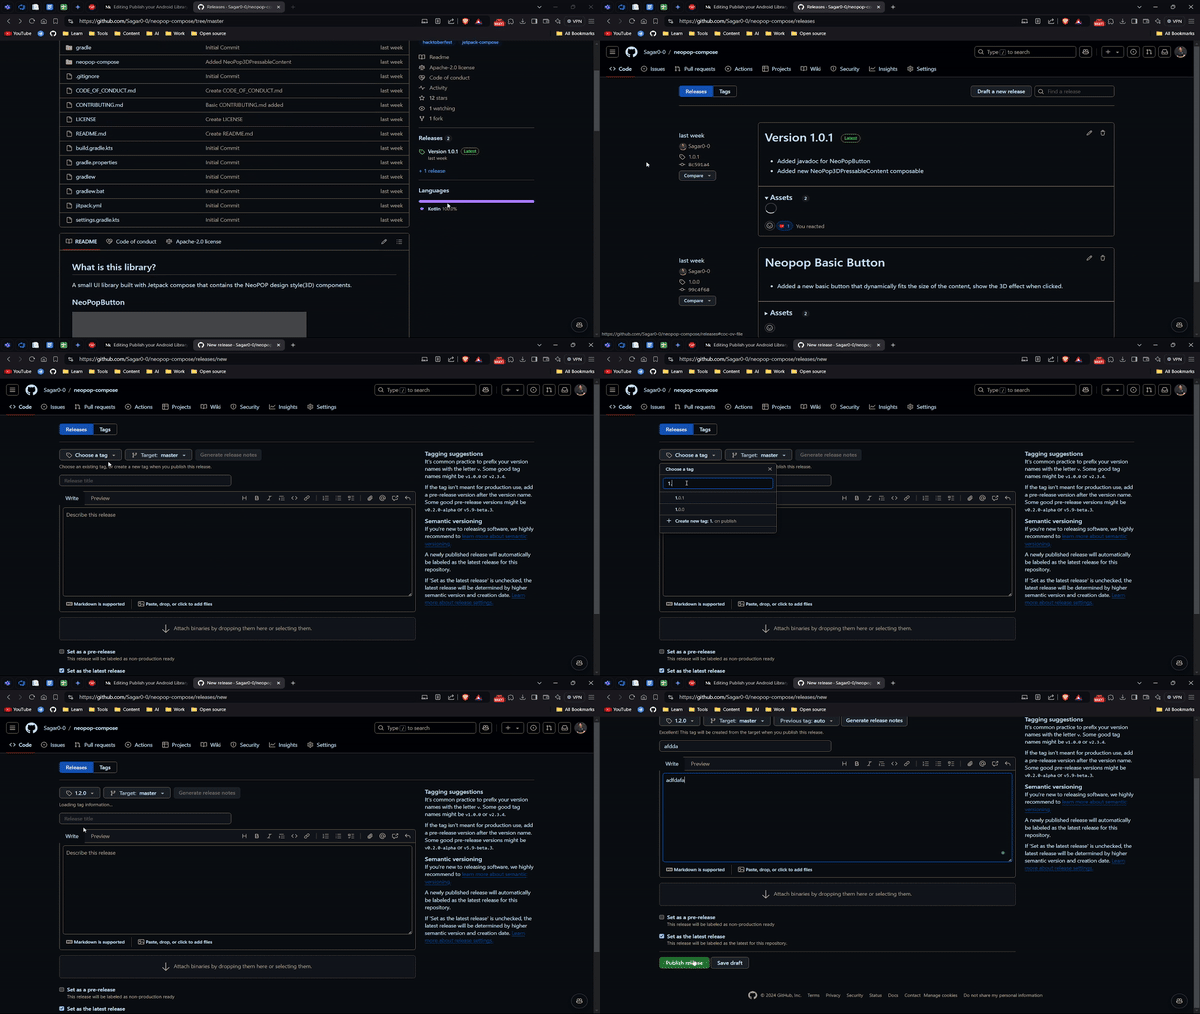
Select “Create a release” on the right-side in your repository home page.
Add a new Tag/Version of your library, Title, Notes, etc.
Create a release.

8. Get your Jitpack release:
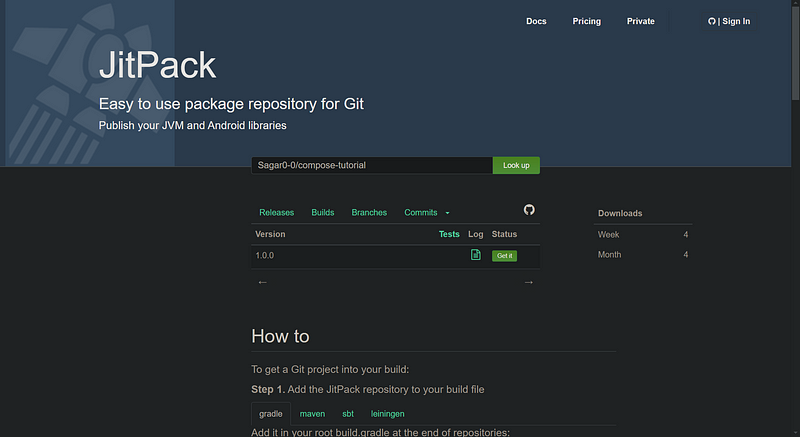
Go to “Jitpack.io”
Paste your library repo link and look up.
You’ll see all your Versions in the List, if you’re not getting make sure to add the proper config in app.
Wait for Log to be successful(it will turn into green paper icon).
If it is red, then you library have some build issue, first check if everything works locally. And check your Jitpack.yml file too.
In case of an erorr, you can see the logs for debugging the issue by clicking on the red sheet icon.

9. Steps for using the library:
- Go to settings.gradle of the project where you want to use your library and paste this:
dependencyResolutionManagement {
    repositoriesMode.set(RepositoriesMode.FAIL_ON_PROJECT_REPOS)
    repositories {
        mavenCentral()
        maven { url 'https://jitpack.io' } // this line
    }
}
- Go to build.gradle of the app where you want to use your library and paste this:
dependencies {
      implementation 'com.github.Sagar0-0:compose-tutorial:1.0.0' // Your library dependency, you can get from Jitpack.io
}
All Set!
If you want to learn this from a video, don’t worry I got you!
I was inspired by my recently published library “neopop-compose” for writing this article. Make sure to check it out and give a star.
Also, if this article was easy to understand make sure to give a follow, it motivates me to invest my time and energy in publishing more content like this.
Subscribe to my newsletter
Read articles from Sagar Malhotra directly inside your inbox. Subscribe to the newsletter, and don't miss out.
Written by
