Stepper Motor
 Neel Patel
What is stepper motor
- A stepper motor is a type of electric motor designed to move in precise, fixed steps rather than rotating continuously like a standard motor. Each step represents a fixed degree of rotation, allowing for accurate control of the motor's position and speed.
Why stepper motor
Precision: Can achieve accurate positioning without needing complex feedback mechanisms.
Reliability: When used correctly, they offer consistent performance and repeatable motion.
Torque at Low Speeds: Provides good torque even at low speeds, which is helpful for precise applications.
Components
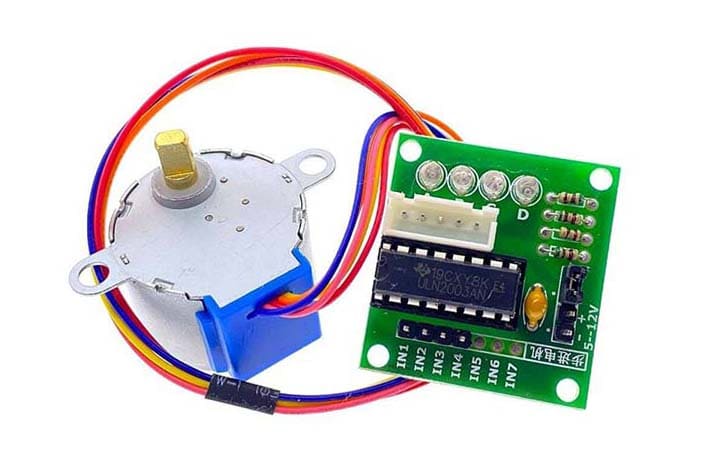
Requirement : Jumper wires(5 Male to Male, 4 Male to Female), Stepper motor, Arduino Microcontroller, ULN2003 Motor driver, power supply(5V will be enough ), Arduino software
Arduino Microcontroller
Function: Acts as the brain of the operation, controlling the logic and sequencing of commands to the stepper motor based on the code provided.
Example Models: Arduino Uno, Mega, Nano, etc.
Stepper Motor
Function: Converts electrical pulses into precise mechanical movement. It can rotate a specific angle for each pulse received, allowing for accurate positioning.
Types: Common types include bipolar and unipolar stepper motors.
Stepper Motor Driver (e.g., ULN2003)
Function: Interfaces between the Arduino and the stepper motor, amplifying the control signals from the Arduino so that the motor can be driven with enough current. It typically contains transistors or relays to switch the motor coils on and off.
Connection: The driver connects to the Arduino pins and to the stepper motor wires.
Power Supply
Function: Provides the necessary power to the stepper motor, as motors typically require more current than what an Arduino can supply directly.
Requirement: Voltage and current ratings depend on the specifications of the motor used.
Tip: If you just want to test the function of motor and want to play with it better to use Arduino 5 V power.
Setup Circuit
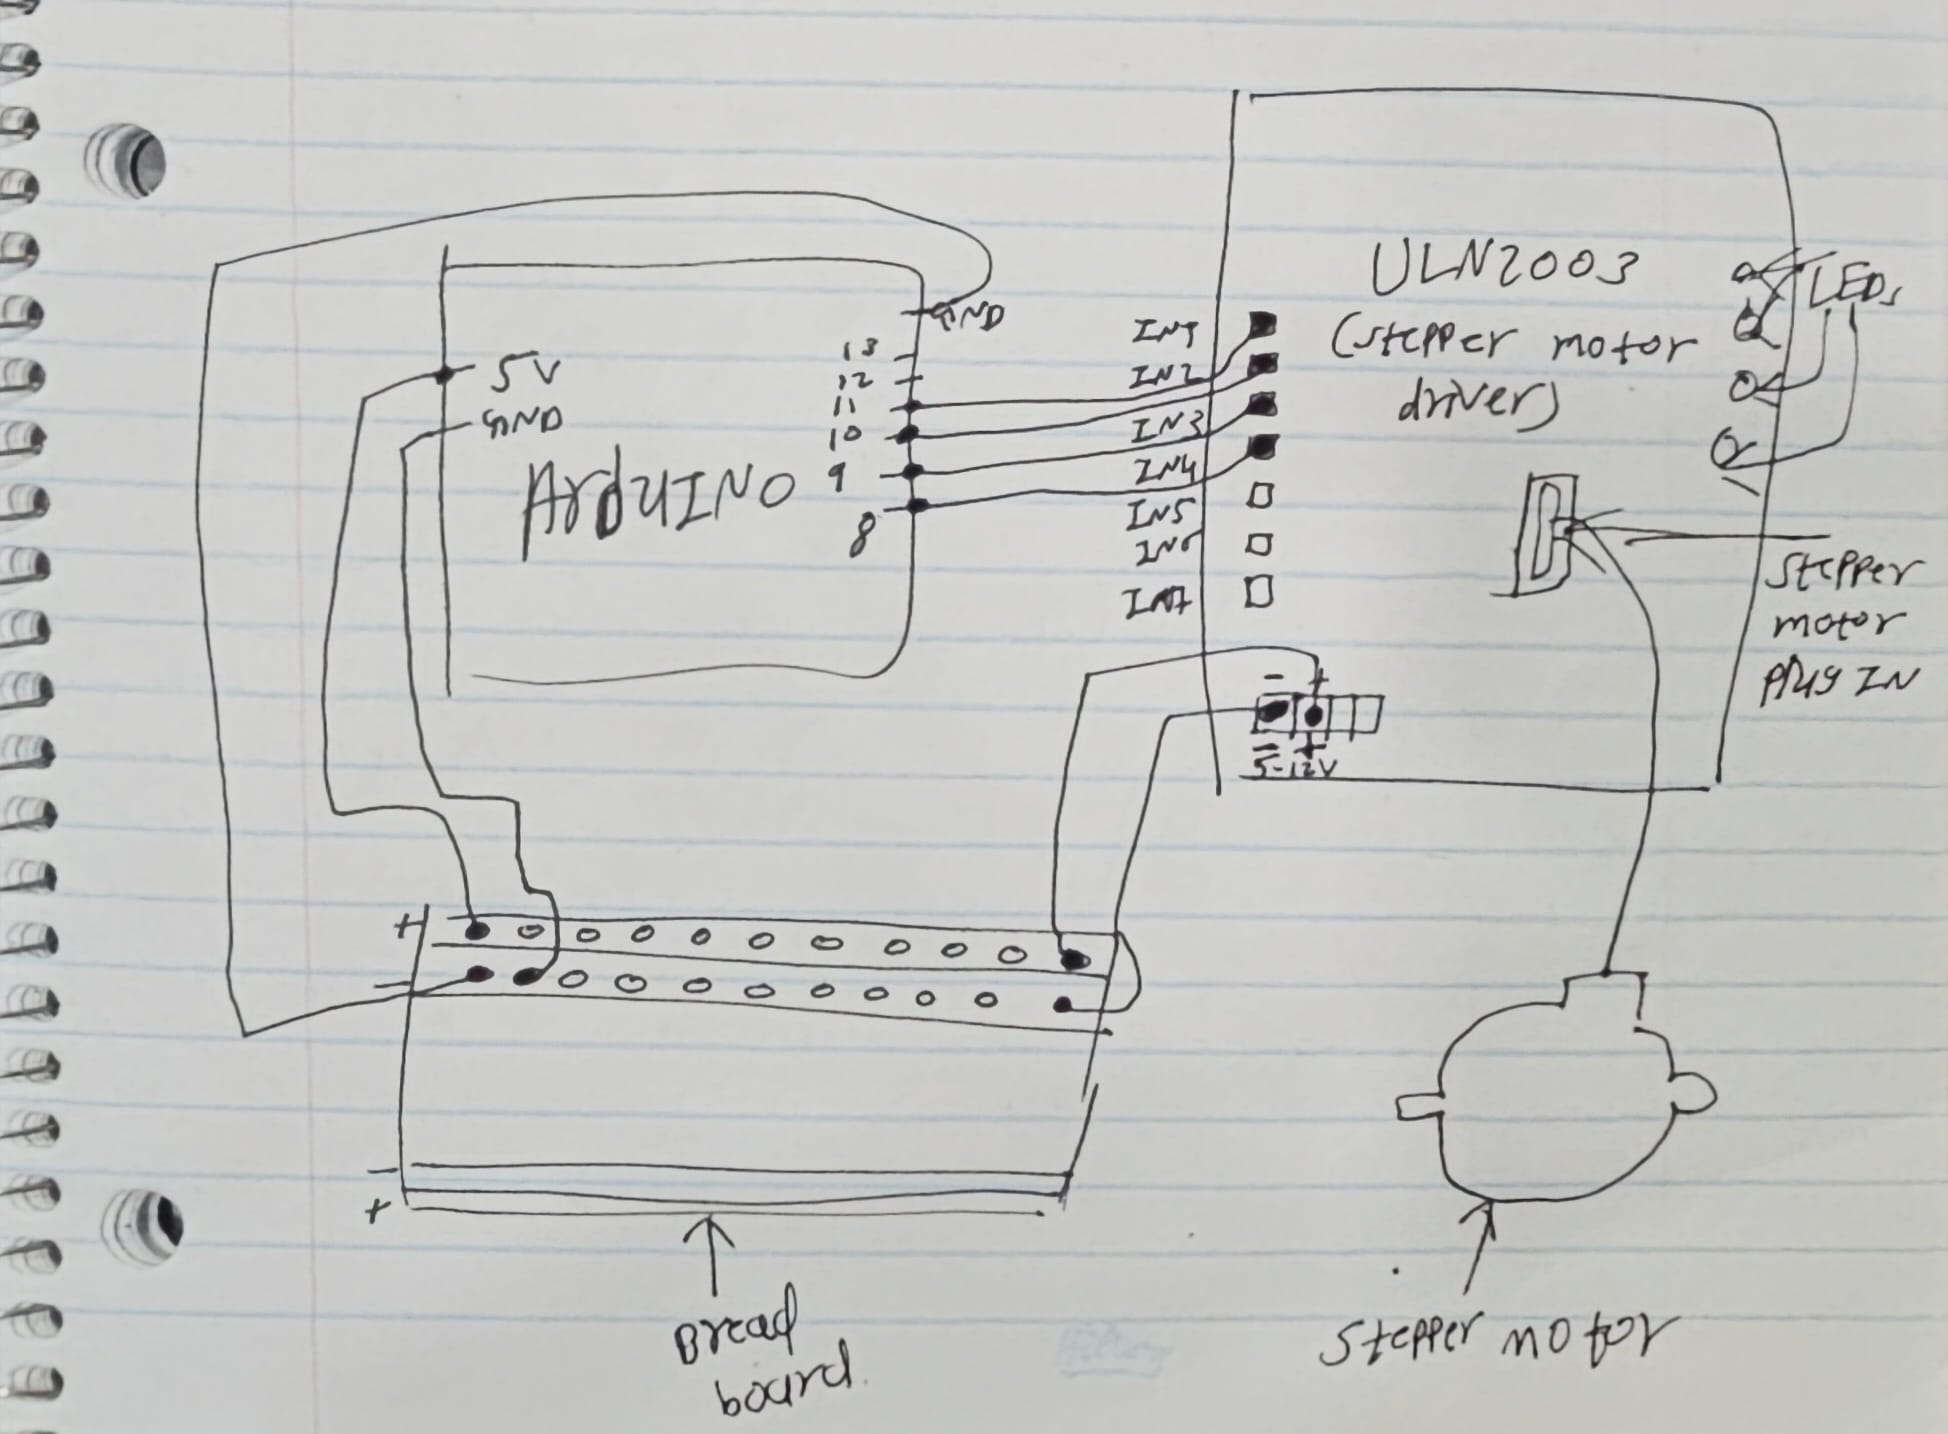
First make your circuit as given below

Then paste this following code in Arduino Software
Meaning of code:
Pin Definitions
cppCopy codeint Pin0 = 11; int Pin1 = 10; int Pin2 = 9; int Pin3 = 8;- Purpose: These lines define the digital pins on the Arduino that will be used to control the motor driver.
Setup Function
cppCopy codevoid setup() { pinMode(Pin0, OUTPUT); pinMode(Pin1, OUTPUT); pinMode(Pin2, OUTPUT); pinMode(Pin3, OUTPUT); }- Purpose: The
setup()function is called once when the program starts. It initializes the defined pins as output pins, allowing the Arduino to send signals to the motor driver.
- Purpose: The
Loop Function
cppCopy codevoid loop() { Speed(15); // Set speed to fast Step(512); // Rotate forward delay(2000); // Wait for 2 seconds Speed(1); // Set speed to slow Step(-512); // Rotate backward delay(2000); // Wait for 2 seconds }- Purpose: The
loop()function runs continuously after the setup. It adjusts the motor speed, commands the motor to move a certain number of steps in one direction, waits for a specified time, and then reverses the motor's direction.
- Purpose: The
Speed Function
cppCopy codevoid Speed(int stepperspeed) { _speed = 15 - stepperspeed; if(_speed < 1) { _speed = 1; } if(_speed > 15) { _speed = 15; } }- Purpose: This function takes a speed value (1 to 15) and calculates the delay for each step based on that speed. A lower speed value results in a longer delay, allowing the motor to move slower.
Step Function
cppCopy codevoid Step(int _step) { if (_step >= 0) { // Forward movement for (int i = 0; i < _step; i++) { // Sequence of steps for forward motion } } else { // Backward movement for (int i = _step; i < 0; i++) { // Sequence of steps for backward motion } } }- Purpose: This function commands the motor to rotate either forward or backward based on the number of steps specified. It uses loops to send a series of signals to the driver, activating the coils in the correct order.
setStep Function
cppCopy codevoid setStep(int a, int b, int c, int d) { digitalWrite(Pin0, a); digitalWrite(Pin1, b); digitalWrite(Pin2, c); digitalWrite(Pin3, d); }- Purpose: This function sets the state (HIGH or LOW) of each of the four control pins, effectively activating the coils of the stepper motor. The sequence of calls to
setStep()determines the direction and steps taken by the motor.
- Purpose: This function sets the state (HIGH or LOW) of each of the four control pins, effectively activating the coils of the stepper motor. The sequence of calls to
Application
- Robotics
Movement Control: Stepper motors are often used in robotic arms or mobile robots to control precise movements. The code can help in positioning a robotic arm to pick and place objects or navigate a robot in a defined path.
Wheel Drive: In wheeled robots, stepper motors can be used to drive wheels, enabling precise control over speed and direction.
- 3D Printers
- Axis Movement: 3D printers commonly use stepper motors to move the print head and the build platform along the X, Y, and Z axes. This code can be adapted to control the movement of these axes for layer-by-layer printing.
- CNC Machines
- Cutting and Milling: CNC (Computer Numerical Control) machines use stepper motors to move cutting tools precisely along specified paths. This code can be used for basic CNC machine operations.
* There are many other application to it, these are the top 3 of them.
Subscribe to my newsletter
Read articles from Neel Patel directly inside your inbox. Subscribe to the newsletter, and don't miss out.
Written by
