[UNSAFE] A Simple Node.js Script to Move your cUSD Using a Mnemonic Phrase
 Andrew Kim Joseph
Recently, I attended a Code Jam session by the Celo Africa DAO, where I learned about Celo’s ContractKit. Here's what the kit is about, according to their docs:
ContractKit is a library to help developers and validators to interact with the Celo blockchain and is well suited to developers looking for an easy way to integrate Celo Smart Contracts within their applications.
The developer leading the session showed us how to use ContractKit, especially how to pay fees with a different currency instead of the native token (CELO). He wrote a Node.js script that fascinated me all afternoon. It was great to learn!
So, I decided to practice and write my own, and here it is - LIBERTY!
[WARNING] Expose Your Mnemonic Phrase at Your Own Risk
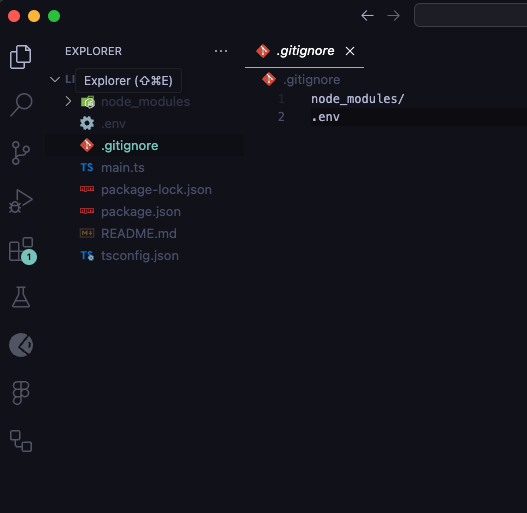
This project and code sample expects you to reveal your mnemonic phrase (or secret phrase), which is highly risky. If, for instance, you push your .env file, your phrase will be publicly available, and you run the risk of losing all your assets. Be sure to add your .env file to your .gitignore file in the root of your project, as shown below.

Liberty: A Node.js Script
My task was to use ContractKit along with other web3 libraries to create a solution that uses mnemonic phrases. That's how Liberty came to be. Basically, Liberty uses Celo’s ContractKit, web3, and viem libraries to:
Create a
Web3client account using a mnemonic phrase.Get the private key from the client and pass it to Celo’s ContractKit.
Use Celo’s ContractKit to handle the fees.
Transfer the ERC-20 token to a recipient.
Here is the GitHub repo:
https://github.com/andrewkimjoseph/liberty
Here is a gist of the main.ts file:
And here is an explanation of how it works. I’ve tried to dumb it down as much as I could!
Set your environment variables
After the imports, you need to fetch your environment variables.
const recipientWalletAddress = process.env.RECIPIENT_WALLET_ADDRESS;
const amountIncUSD = process.env.AMOUNT_IN_CUSD;
const infuraAPIKey = process.env.INFURA_API_KEY;
const mnemonicPhrase = process.env.MNEMONIC_PHRASE_MAIN;
The first two environment variables are straightforward: the wallet address you want to send to and the amount. For example, the wallet address could be "0x5E20682be95cD9319B0557d905384Bb356932116" and the amount could be "1", meaning the address will receive 1 cUSD.
For the Infura API key, you can create one at https://www.infura.io/. Once you have it, set it up for both Mainnet and Alfajores (testnet).

At the time of this writing, the RPC URL endpoints are:
Mainnet: https://celo-mainnet.infura.io/v3/{YOUR_API_KEY}
Testnet: https://celo-alfajores.infura.io/v3/{YOUR_API_KEY}
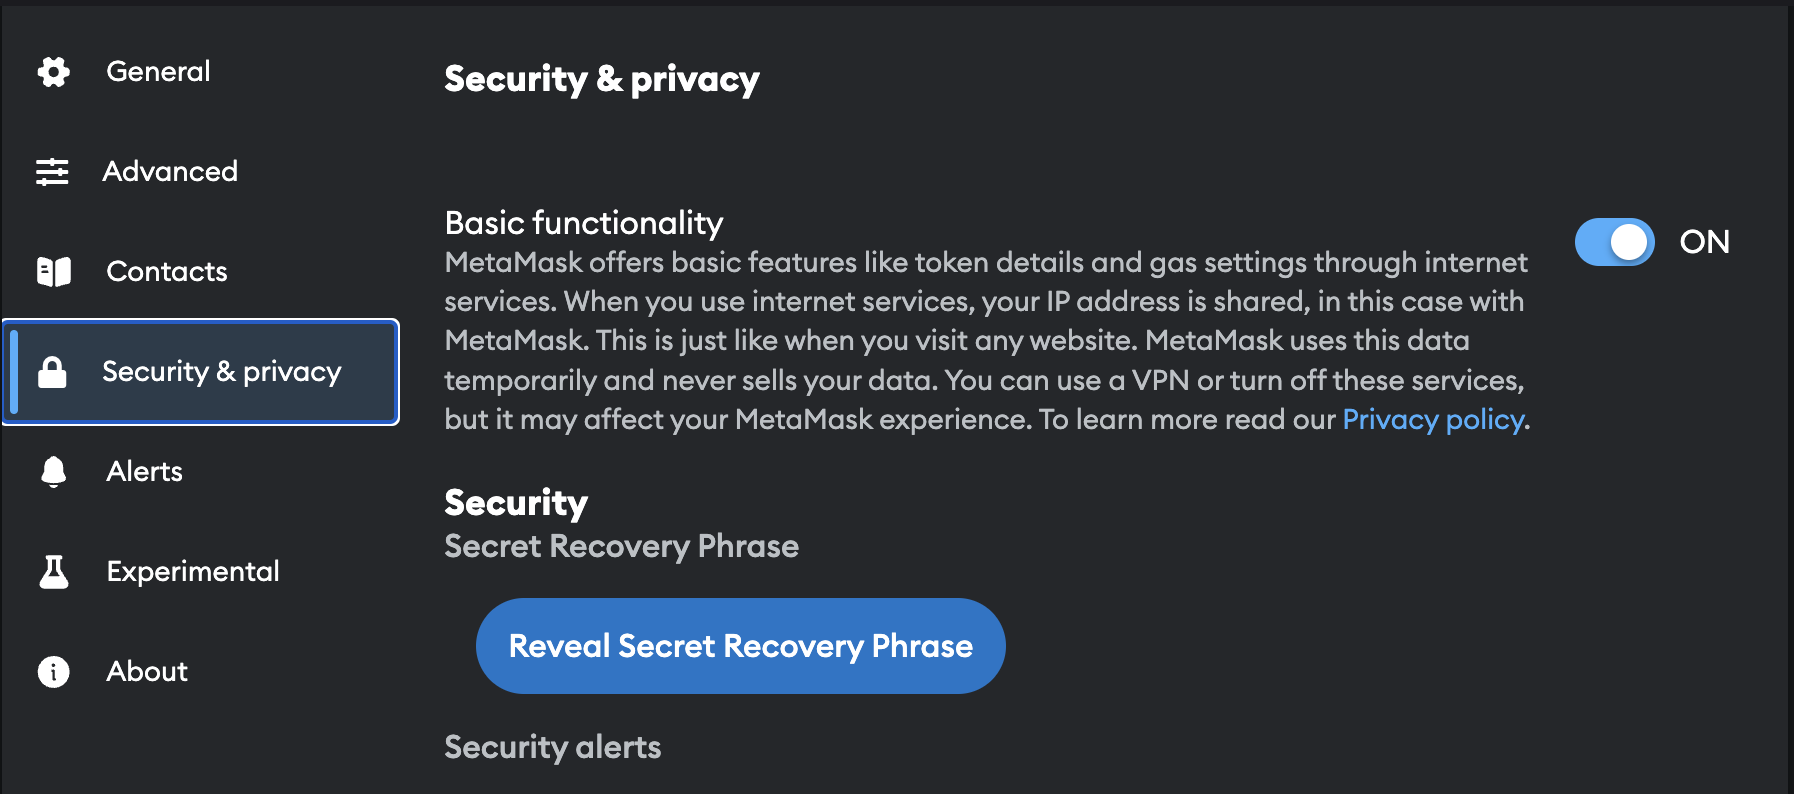
For the mnemonic phrase, it depends on the wallet you use. For this example, you can find your phrase in MetaMask under the "Security and Privacy" section, as shown in the screenshot below.

Start off with the script
Once you've cloned the repo, run npm i to install the dependencies.
Let's check out the key parts of the script:
const web3 = new Web3(`https://celo-mainnet.infura.io/v3/${infuraAPIKey}`);

const kit = newKitFromWeb3(web3);
To use ContractKit, you need a kit instance and a network to connect to. Use the RPC URL from Infura with your API key to make a Web3 instance, then pass it to the newKitFromWeb3 method. Now you have a valid kit instance.
To create an account with a mnemonic phrase, use viem’s mnemonicToAccount method and provide the phrase.
const mnemonicAccount = mnemonicToAccount(mnemonicPhrase);
Use the transferCUSD Method
The kit instance you made has the contract for the token you want to transfer, which is the Celo Dollar (cUSD):
let cUSDcontract = await kit.contracts.getStableToken();
Now, you can add the private key from the mnemonic account to the addAccount method of the kit instance.
kit.addAccount(toHex(mnemonicAccount.getHdKey().privateKey as Uint8Array));
The mnemonicAccount you created has a method called getHdKey, which holds the private key we need. The private key is in Uint8Array format, so we use the toHex method to change it into a valid private key format.
Now, you can make the account you added the default account:
let accounts = await kit.web3.eth.getAccounts();
kit.defaultAccount = accounts[0] as `0x${string}`;
Utilize Fee Abstraction - one of Celo’s superpowers
Once that's done, set the fee currency to the token (cUSD). This is what makes Celo a powerful blockchain because wallets built on it don't need users to have a specific token, usually the native one, to pay for gas. You can read more about Celo’s Fee Abstraction here.
kit.setFeeCurrency(cUSDcontract.address);
At this point, you’re ready to send the cUSD:
const txnResult = await cUSDcontract.transfer(
recipientWalletAddress as string,
parseEther(amountIncUSD as string).toString()
).send({ feeCurrency: cUSDcontract.address });
And that’s pretty much it, you have liberty over your tokens.
If you found this helpful, be sure to follow this blog, and follow me on my social channels. Let us build for Web 3 together!
Subscribe to my newsletter
Read articles from Andrew Kim Joseph directly inside your inbox. Subscribe to the newsletter, and don't miss out.
Written by

Andrew Kim Joseph
Andrew Kim Joseph
project manager at @thecanvassing, winner of the BwC hackathons 5 through 7, serial web3 hacker