Smooth Navigation in Android Studio : Using Serializable
 Sagnik Mukherjee
In mobile app development, it’s rare to have an application with just a single screen. As our apps grow, so does the need for effective navigation between multiple screens. Understanding how to navigate through different screens is essential for creating a seamless user experience.
Historically, navigating between screens and passing arguments could be quite complex. However, with the introduction of Serializable navigation, this process has become significantly simpler.
Setting Up Dependencies
Before diving into the implementation, we need to import the necessary dependencies for our project. Open your App Level build.gradle file and add the following:
// Compose Navigation
val nav_version = "latest_nav_version"
implementation("androidx.navigation:navigation-compose:$nav_version")

// Serialization
val ser_version = "latest_serialization_version"
implementation("org.jetbrains.kotlinx:kotlinx-serialization-json:$ser_version")
It's important to note that you should be using Kotlin version 2.0 or higher. If you encounter any issues, refer to the guide on How to Migrate to Kotlin 2.0 or Later.
Folder Structure
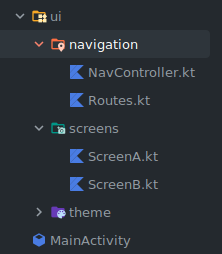
Next, we will create two new packages in our project: navigation and screens. The folder structure will look like this:

I. Navigation Setup
- Let's start with the
NavController.ktfile, which will handle navigation within our main activity:
//NavController.kt

@Composable
fun AppNavigation() {
    val navController = rememberNavController()
    NavHost(navController = navController, startDestination = ScreenA){
        composable<ScreenA> { ScreenAUI(navController) }
        composable<ScreenB> { ScreenBUI(navController) }
    }
}
Next, we have
Routes.kt, where we will define our navigation routes using the@Serializableannotation://Routes.kt @Serializable object ScreenA @Serializable object ScreenBII. Screen Implementations
In the screens package, we will create our Composable functions for the user interface of each screen.
- ScreenAUI & ScreenBUI:
    @Composable
    fun ScreenAUI(navController: NavController) {
        Column(
            modifier = Modifier.fillMaxSize(),
            verticalArrangement = Arrangement.Center,
            horizontalAlignment = Alignment.CenterHorizontally
        ) {
            Text("Screen A")
            Spacer(modifier = Modifier.height(16.dp))
            Button(onClick = { navController.navigate(ScreenB) }) {
                Text("Go to Screen B")
            }
        }
    }
    @Composable
    fun ScreenBUI(navController: NavController) {
        Column(
            modifier = Modifier.fillMaxSize(),
            verticalArrangement = Arrangement.Center,
            horizontalAlignment = Alignment.CenterHorizontally
        ) {
            Text("Screen B")
            Spacer(modifier = Modifier.height(16.dp))
            Button(onClick = { navController.navigate(ScreenA) }) {
                Text("Go to Screen A")
            }
        }
    }
Understanding the Architecture
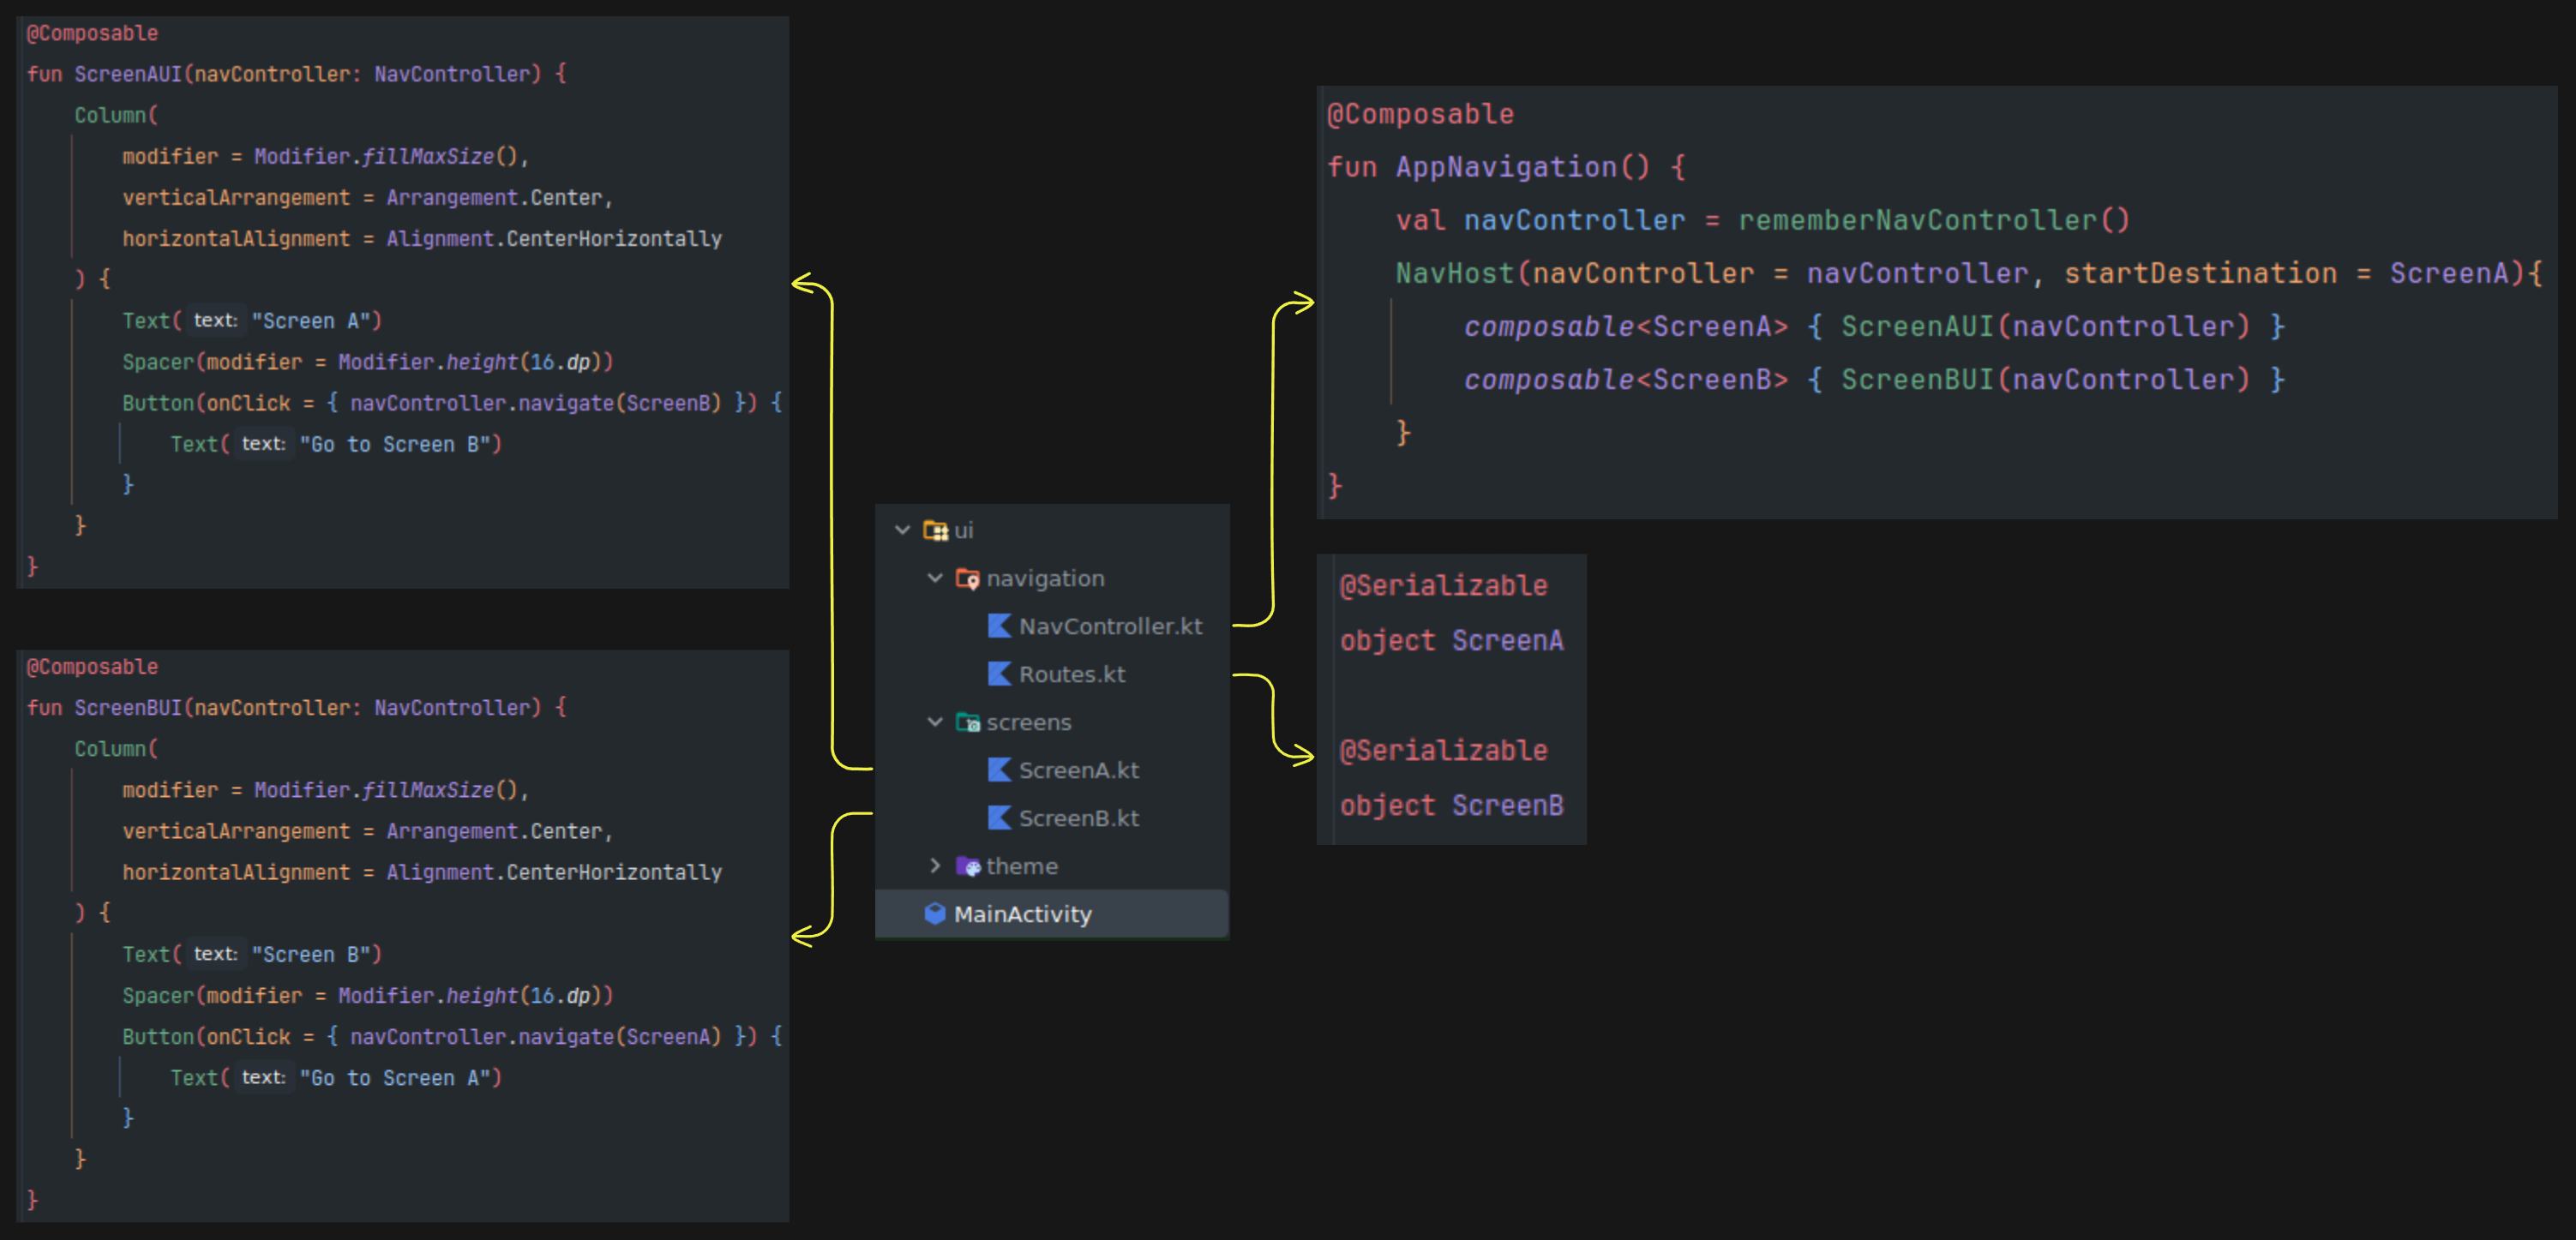
To better visualize how our navigation flows, consider the following flow chart, which outlines the architecture of our app.

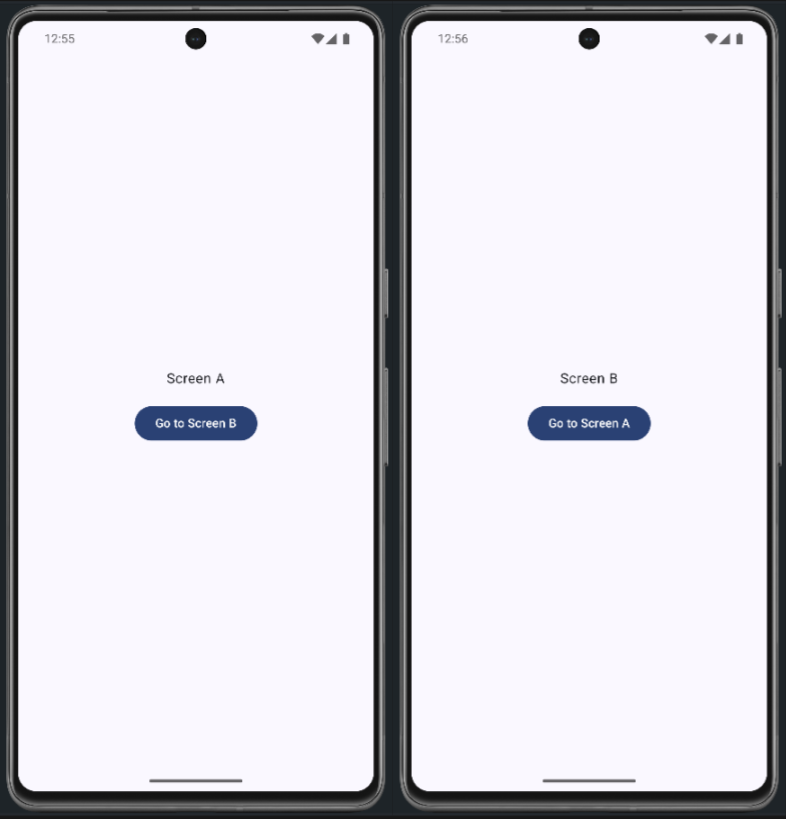
Once everything is set up, you should see a screen like this, allowing for smooth navigation between your defined screens.

Now if you want to pass data from one screen to another you need to go through this article “Passing Data with Serializable“
Feel free to modify any section further to match your tone or style!
Subscribe to my newsletter
Read articles from Sagnik Mukherjee directly inside your inbox. Subscribe to the newsletter, and don't miss out.
Written by

Sagnik Mukherjee
Sagnik Mukherjee
Native Android Developer and content creator