Shopify CLI: Setting Up Your Local Environment Made Simple
 Younis Ahmed
This tutorial explores using Shopify CLI to safely customize Shopify themes in a local development environment without impacting the live store.
What You'll Learn
Setup Your Local Development Environment
Clone Shopify Store’s Theme
Preview Changes Made To Your Local Code
Prerequisites
Before you start, ensure you have the following:
Node.js: Shopify CLI requires Node.js. You can download it from the official website.
Git: If you don't have Git installed, download it from here.
A Shopify Partner Account: You need a Shopify Partner account to create and manage development stores. Sign up here.
npm install -g @shopify/cli @shopify/theme
Why Set Up a Local Environment?
Setting up a local environment for Shopify theme development is important for several reasons:
Improved Workflow Efficiency: Developing locally allows for quicker iterations and smoother collaboration among team members. Changes can be tested and implemented swiftly without the delays of live deployment.
Reduced Risks and Errors: A local setup provides a safe space to experiment with new features and designs, minimizing the risk of introducing bugs into the live store and enhancing overall platform stability.
Better Theme Customization: Developers can customize themes more flexibly and accurately. This setup supports thorough testing of design elements and functionality, ensuring a top-notch user experience on the live store.
Setup Your Local Development Environment
Let's walk through the steps to set up your local development environment for Shopify theme development using the Shopify CLI.
To setup a local environment you’ll need to setup your shopify partners account first.
Head to shopify partners and login to your account.
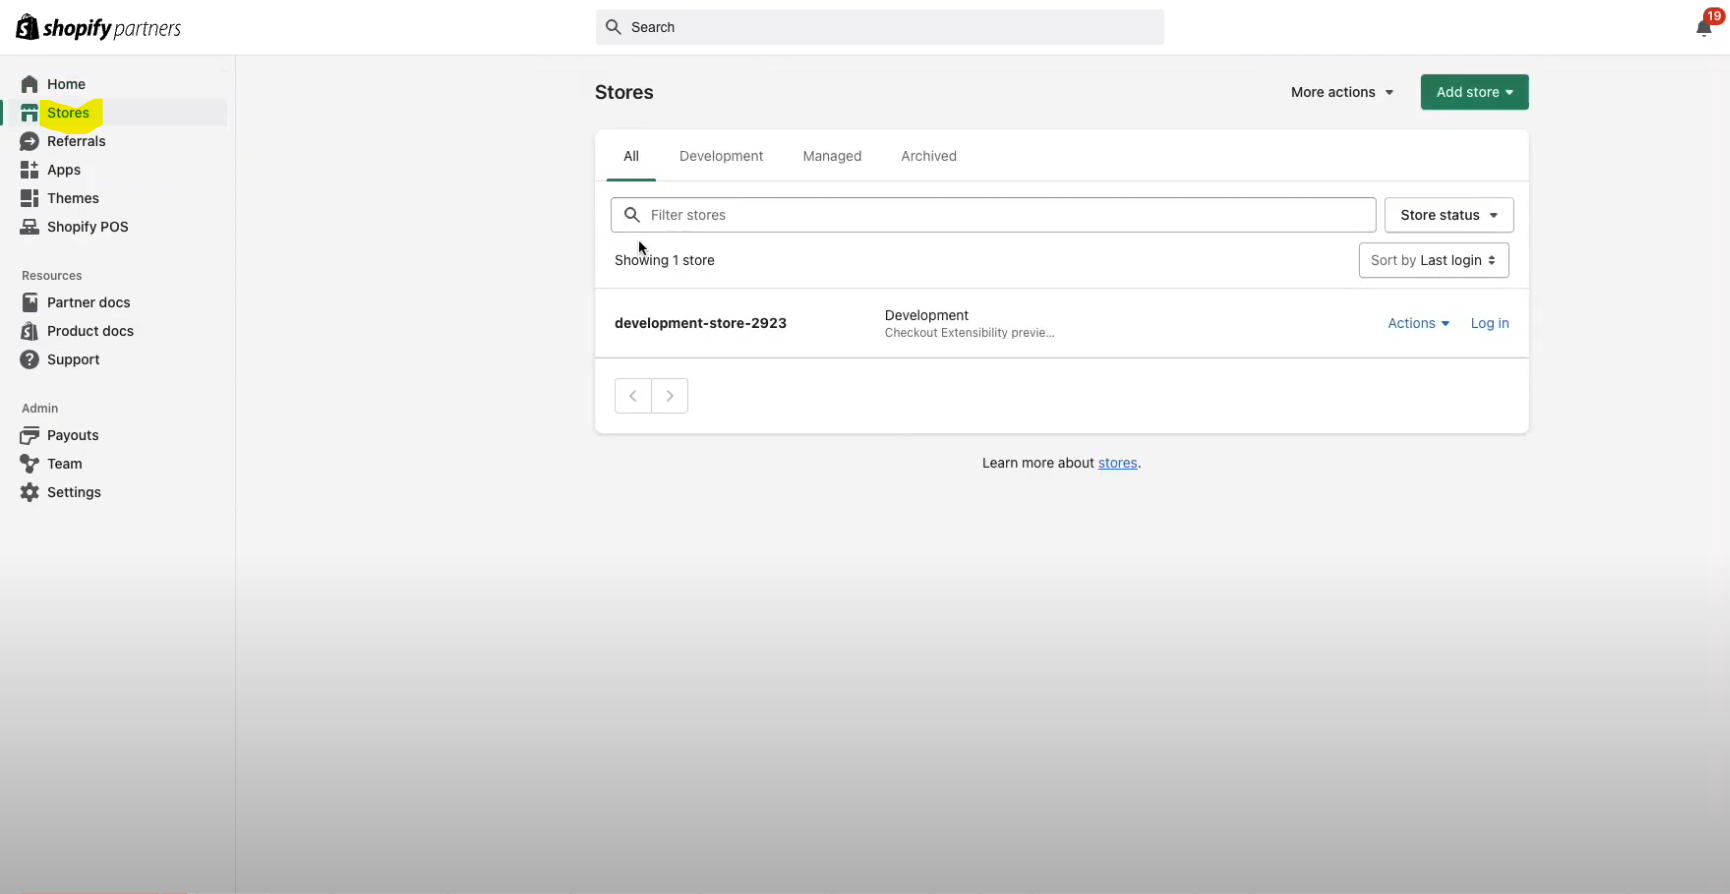
Click on the Stores from the right panel
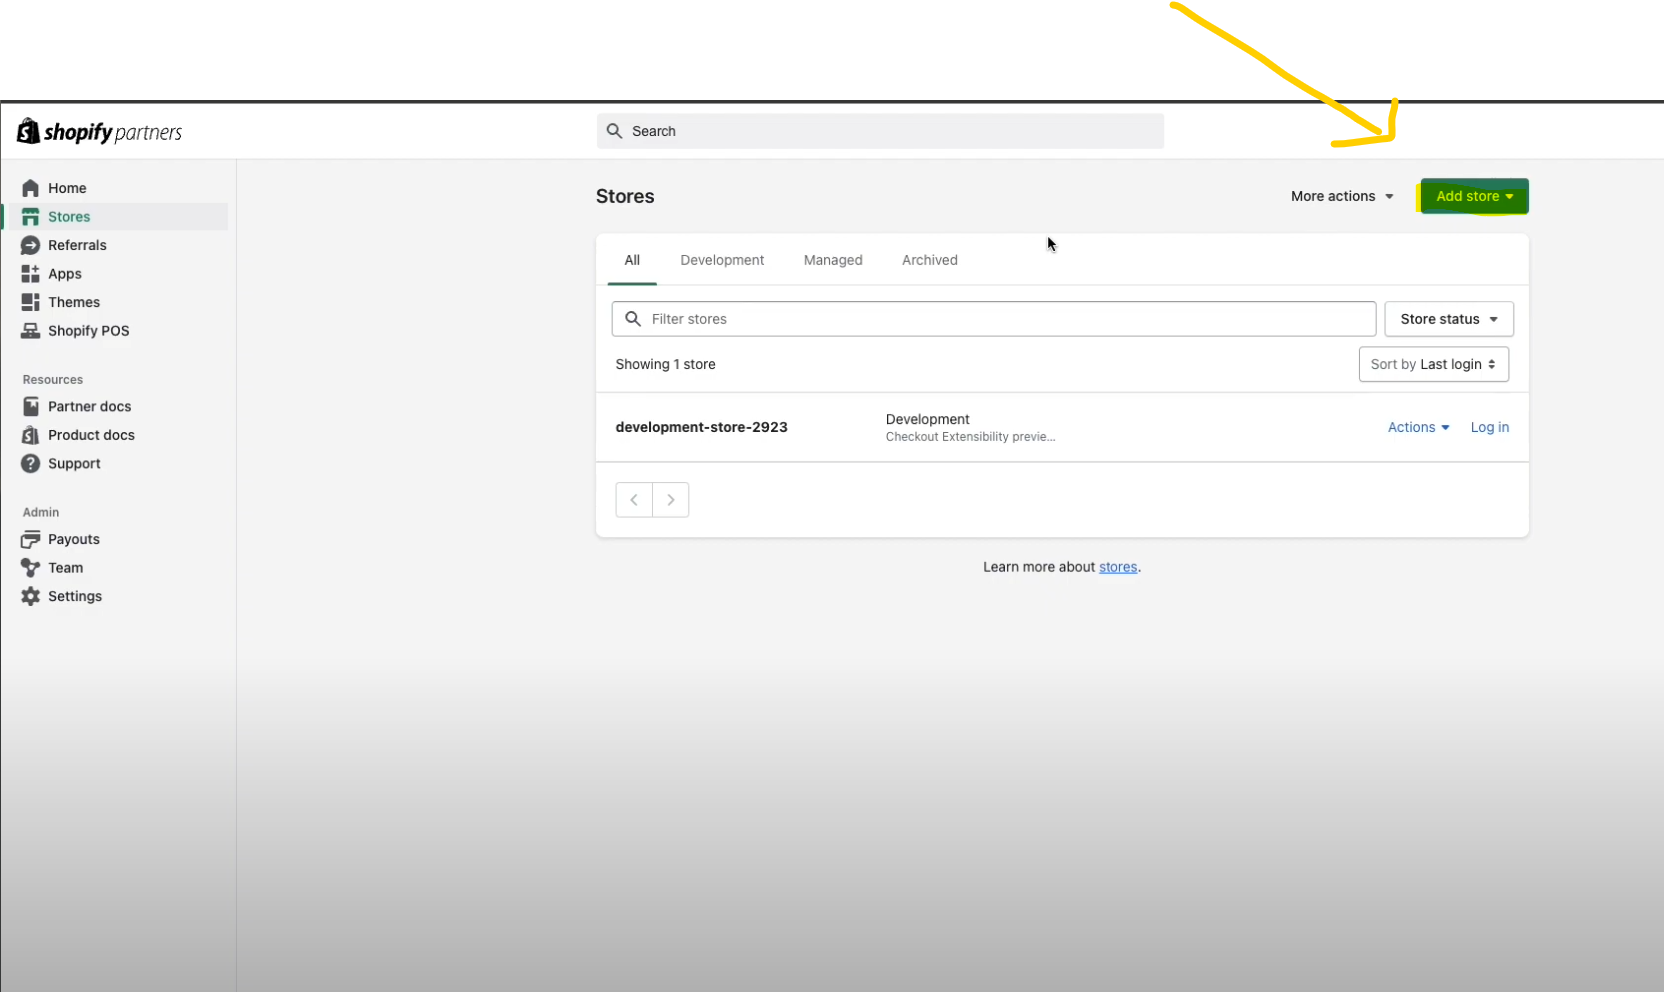
Create a new Developer store by clicking on the green button New Store
After setup the store, You can choose a theme and publish
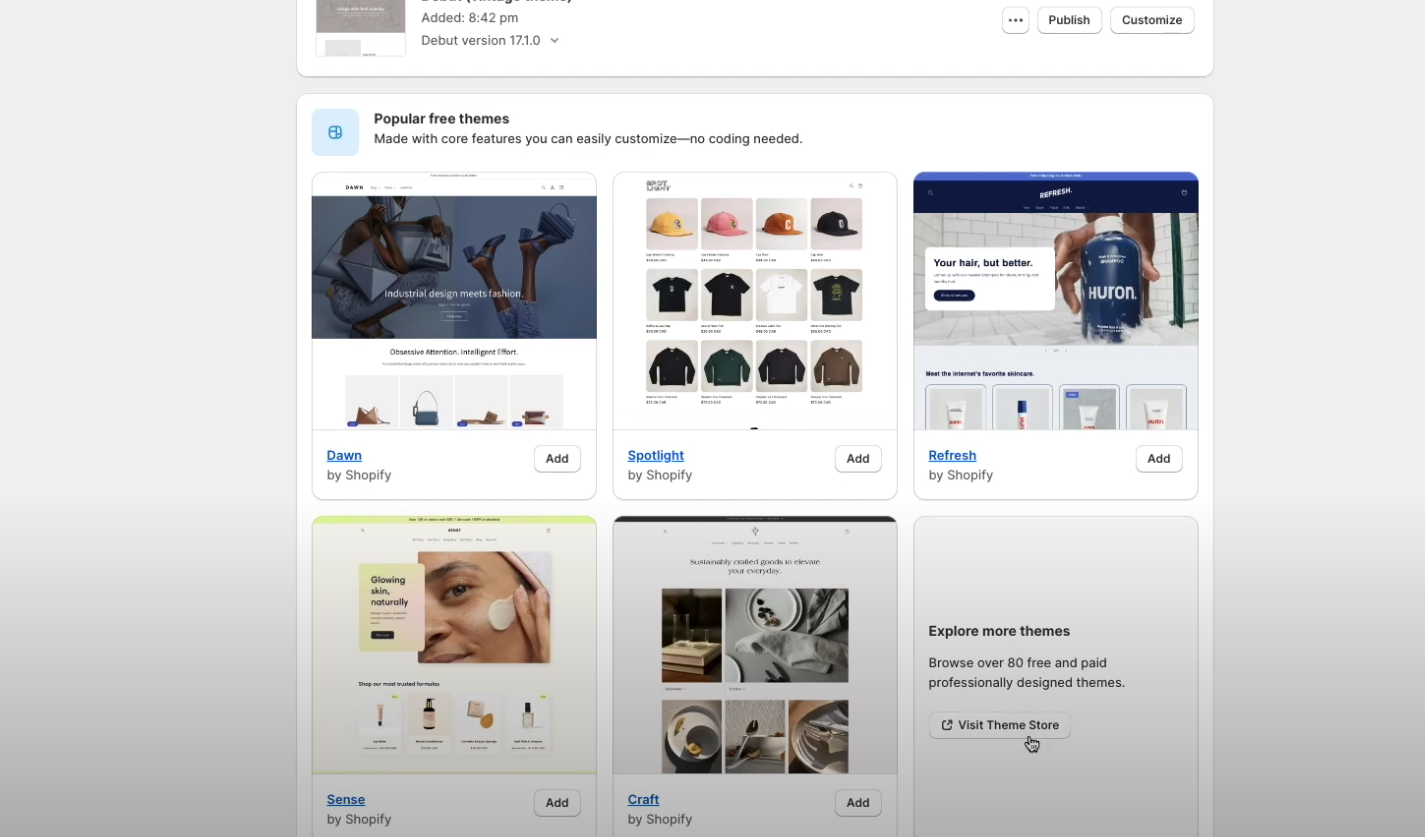
- Note: You can choose not to publish, it’s just makes it easier to find the store on your CLI as we will see later on. You can draft the theme if you are not ready to publish.
Local Environment
Create your directory and make sure Shopify CLI and themes are installed
pnpm install -g @shopify/cli @shopify/theme && shopify versionCreate a file
shopify.theme.tomltouch shopify.theme.tomlWrite your development variable
 [environments.development]
 store="<storefront_URL>"
Pull your theme files into local
shopify theme pull -e developmentNote: You will be asked to authenticate if this is your first time.
Go to the link and enter your credentials
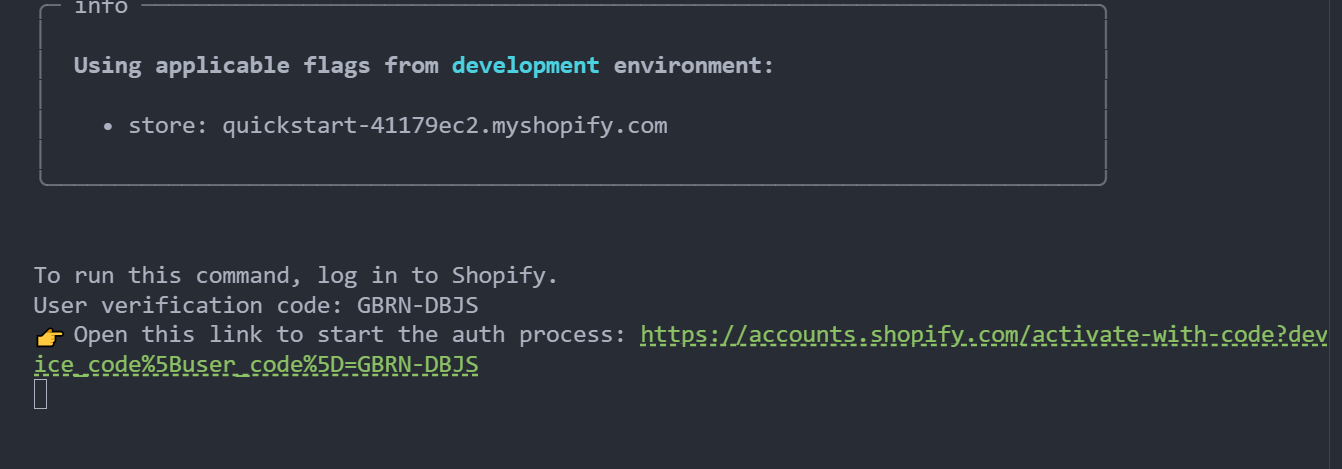
After logging in, the interactive prompts will ask you a couple of questions about which theme to use. It will automatically detect if the directory is a theme directory and ask you to proceed. Choose Yes (y).
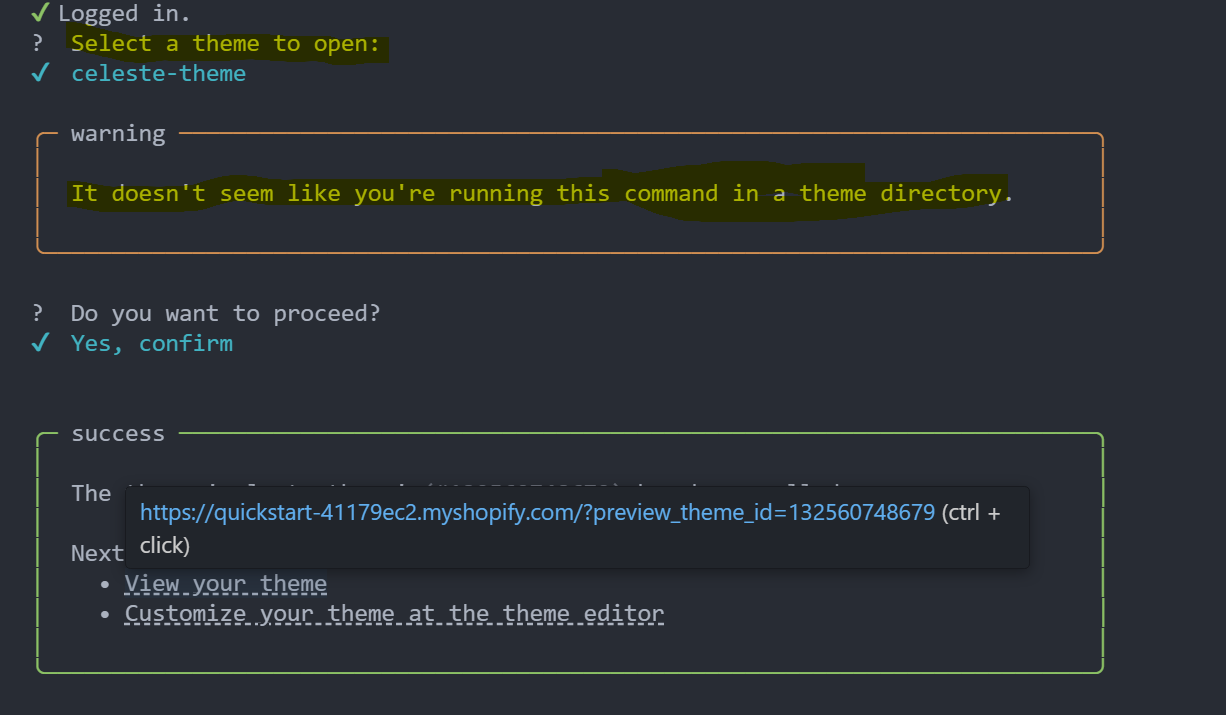
You’ve successfully pull your theme and ready hack away ✨
Running hot reload server within Local Environment
Hot reload is a great feature in development that lets developers see code changes instantly without restarting the app. This speeds up development by reducing downtime and boosting productivity. With hot reload, developers can make changes in real-time, try out new ideas, and quickly fix problems, leading to more efficient development cycles. It improves the development experience by giving immediate feedback and reducing the hassle of recompiling and redeploying apps.
You can run a local hot reload server within your environment to start developing the theme.
shopify theme dev -e developmentNote: You will be asked to provide a password, Can be found on the bottom of Sales channels -> Online Store -> Preferences on shopify admin panel
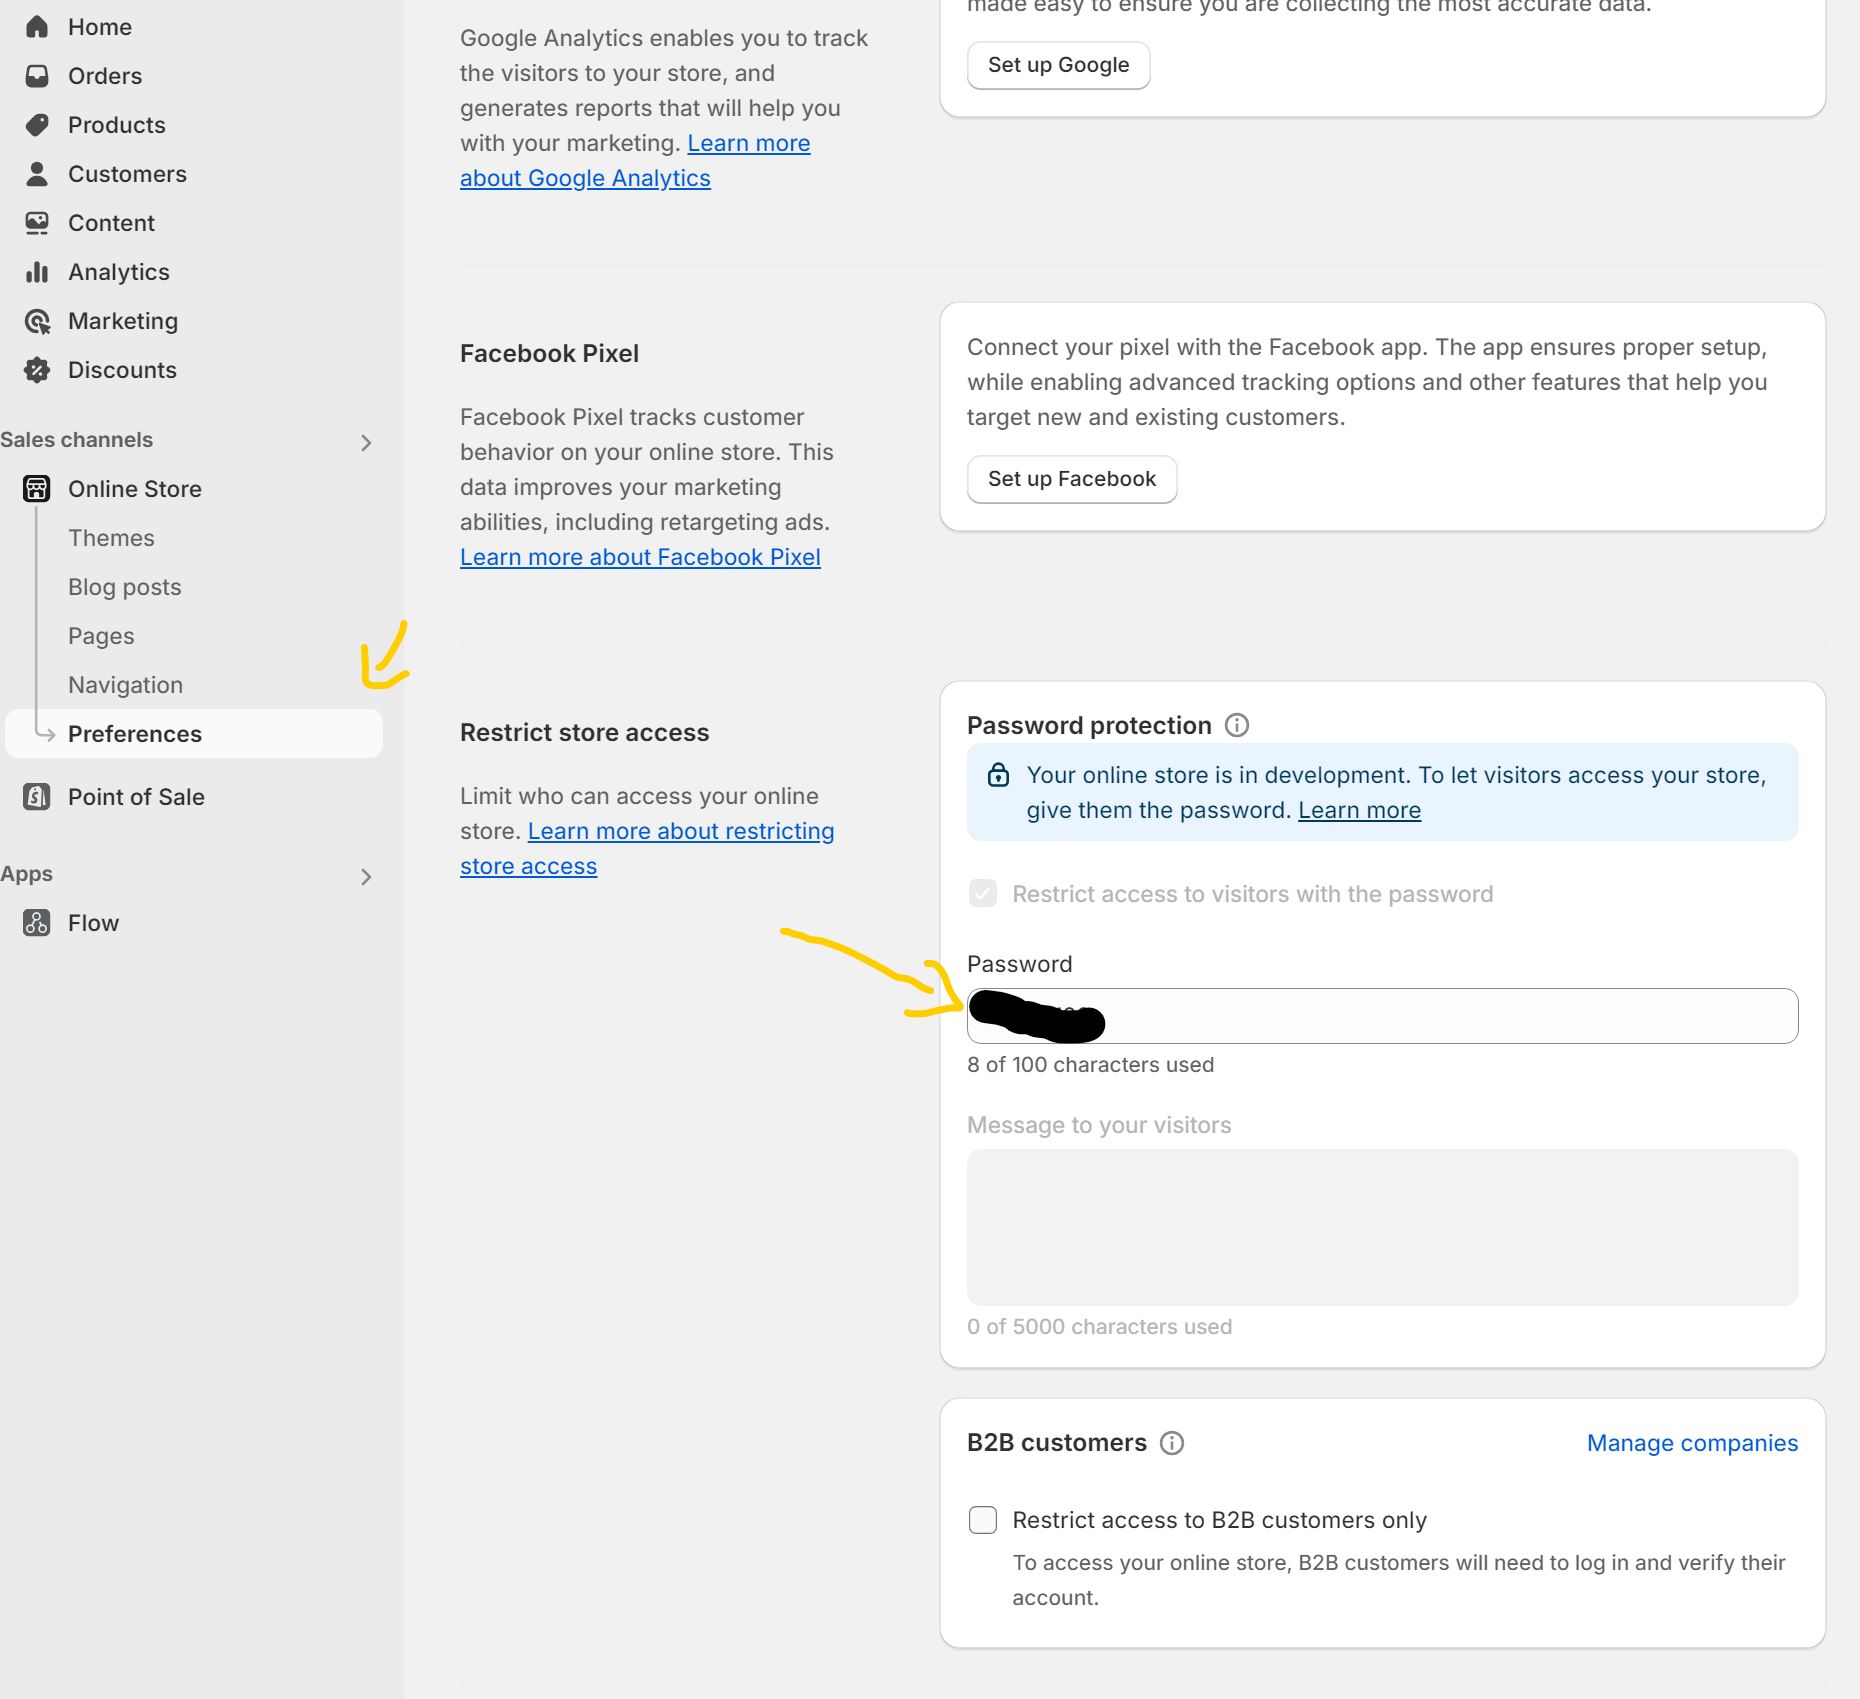
Now you can view your shopify theme locally 👍
Other useful features of Shopify CLI server
Sharing your preview with team members or clients without pushing code is incredibly helpful. You don't need an external service or to push code to get feedback on your work.
Spin up the no-code theme editor locally

Push local changes to shopify
shopify theme push -e development
Integrating GitHub with shopify theme
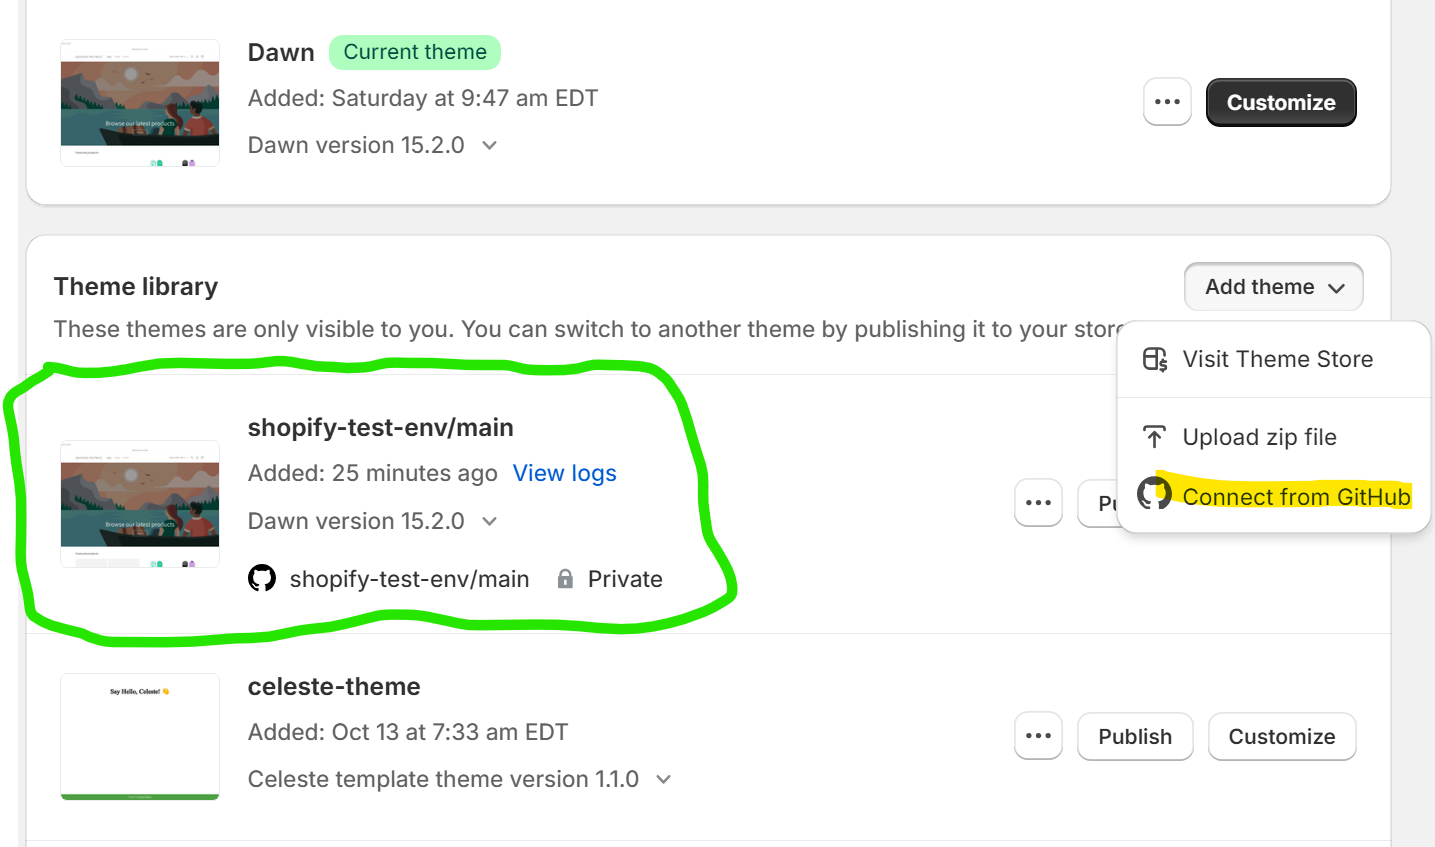
Integrating GitHub with shopify will assist you in streamline the process of collaborating in theme development, Any changes made using shopify theme editor will be updated to the repository.
Navigate to Add Theme --> Connect from Github
Go through OAuth portal to connect with github
Choose the repository and branch to add your theme to shopify admin panel
Conclusion
In conclusion, setting up a local development environment using Shopify CLI is a crucial step for developers looking to customize Shopify themes efficiently and safely. By working locally, developers can enhance their workflow, reduce risks, and ensure better theme customization. The process involves setting up a Shopify Partner account, creating a development store, and using Shopify CLI to manage and preview theme changes. Additionally, integrating GitHub with Shopify streamlines collaboration and version control, making it easier to manage theme development projects. With these tools and practices, developers can create high-quality, customized Shopify themes that enhance the user experience on live stores.
Subscribe to my newsletter
Read articles from Younis Ahmed directly inside your inbox. Subscribe to the newsletter, and don't miss out.
Written by

Younis Ahmed
Younis Ahmed
Hey there! 👋 Developer by day, Graphic Designer by night, and Software Engineer Student in between. 🌟 Join me on this journey as I explore the world of coding, design, and everything tech-related. 🖥️✨ #DeveloperLife #GraphicDesignPassion #TechJourney